Hama 00062768 Bedienungsanleitung
- Kategorie
- Router
- Typ
- Bedienungsanleitung
Dieses Handbuch eignet sich auch für

Muster
Wireless LAN PCI Card
108 Mbps
00062768 V2
w ww.hama.com
H ama GmbH & Co KG
Postfach 80
86651 Monheim/Germany
Tel. +49 (0)9091/502-0
Fax +49 (0)9091/502-274
www.hama.com
00062768 V2-09.06

2
l
3
Bedienungsanleitung Wireless LAN PCI Card 108Mbps
Inhaltsverzeichnis:
1. Einbau der Wireless LAN PCI Karte ............................................................................................................Seite 02
2. Installation von Treiber und Konfi gurations-Programm ...........................................................................Seite 02
3. Schnell-Konfi guration .................................................................................................................................... Seite 04
4. Das Konfi gurations-Programm – Einführung und Bedienung.................................................................Seite 05
4.1 Ein neues Profi l anlegen ................................................................................................................................Seite 07
4.1.1 Infrastruktur Modus ..............................................................................................................................Seite 08
4.1.2 Ad-Hoc Modus .......................................................................................................................................Seite 09
4.2 Wireless LAN Verschlüsselung einstellen .................................................................................................Seite 10
4.2.1 WEP Verschlüsselung ..........................................................................................................................Seite 11
4.2.2 WPA/WPA2 Verschlüsselung ..............................................................................................................Seite 12
5. Konfi guration von Software und Computer................................................................................................Seite 13
6. Deinstallation von Treiber und Konfi gurations-Programm ......................................................................Seite 14
7. Support- und Kontaktinformationen ............................................................................................................Seite 14
Packungsinhalt:
1x Wireless LAN PCI Card 108 Mbps
1x Antenne (aufschraubbar)
1x Treiber CD-Rom
1x gedruckte Bedienungsanleitung
Systemvoraussetzung:
• PC mit verfügbarem PCI Port
• Betriebssystem Windows® 2000/XP
Sicherheitshinweise:
Betreiben Sie das Gerät weder in feuchter, noch in extrem staubiger Umgebung. Schützen Sie das Gerät vor
Druck- und Stoßeinwirkung. Das Gerät darf während des Betriebes nicht geöffnet oder bewegt werden.
Betreiben Sie das Gerät nicht ohne einer aufgeschraubten Antenne.
1. Einbau der Wireless LAN PCI Karte
Schalten Sie den Computer aus und ziehen Sie den Netzstecker aus der Steckdose, sodass der PC vom
Stromnetz getrennt ist. Öffnen Sie das Gehäuse Ihres PC´s. Wählen Sie einen freien PCI Steckplatz und entfer-
nen Sie dort das Slotblech. Stecken Sie nun die Wireless LAN PCI Karte in den gewählten PCI Steckplatz und
fi xieren diese mit einer Schraube am Gehäuse. Sie können jetzt das PC-Gehäuse wieder schließen. Als letzten
Schritt schrauben Sie jetzt noch die mitgelieferte Antenne auf die Antennenbuchse auf. Der Einbau ist somit
abgeschlossen. Stecken Sie den Netzstecker wieder in die Steckdose und starten Sie den PC.
2. Installation von Treiber und Konfi gurations-Programm
Nach dem Start des Betriebssystems erscheint der Windows®-Dialog Assistent für das Suchen neuer Hard-
ware. Beenden Sie diesen mit Abbrechen!
Legen Sie nun die beigelegte CD-ROM ein. Diese startet in den meisten Fällen automatisch. Wenn das Menü
nicht automatisch gestartet wird, doppelklicken Sie im Arbeitsplatz auf das entsprechende Symbol des CD-
Laufwerks. Nach dem Start zeigt sich folgendes Fenster:
Wählen Sie die gewünschte Sprache!
Nach Auswahl der Sprache wird folgendes Fenster angezeigt.
Um die Installation jetzt fortzusetzen, klicken Sie auf Installieren
(2000/XP 32 Bit), falls Sie Windows® 2000 oder XP als Betriebs-
system verwenden. Ein eingeschränkter Betrieb ist auch mit den
Betriebssystemen Win 98/ME möglich. Hierbei ist die Extended
Range (XR)TM Funktion nicht verfügbar und die Software ist
ausschließlich in Englisch vorhanden. Klicken Sie auf Installieren
(Win 98/ME) falls Sie Windows® 98 oder Windows® ME
verwenden. Möchten Sie die Bedienungsanleitung anzeigen
lassen, klicken Sie auf Anleitung anzeigen. Zum Anzeigen der
PDF-Dateien ist der Acrobat Reader erforderlich. Sollten Sie
bisher noch keine Version des Acrobat Reader installiert haben, fi nden Sie eine kostenlose Version auf der
beigelegten Treiber-CD. Um aktualisierte Treiber von der Hama Webseite herunterzuladen, klicken Sie auf
Treiber-Download. Wählen Sie Zurück, um zur Sprachauswahl zurückzukehren.
Ist das von Ihnen verwendete Betriebssystem nicht aufgeführt, sollten Sie anderweitig eine Verbindung zum
Internet aufbauen (oder die CD auf einem Computer mit bestehender Verbindung verwenden) und auf Treiber-
Download klicken. Im Browser werden Ihnen dann die passenden Downloads für diesen Artikel angezeigt.
Sie können hier prüfen, ob für das bislang nicht unterstützte System zwischenzeitlich Treiber entwickelt
wurden.
Nach der Auswahl Installieren wird der InstallShield Wizard geladen. Dies kann unter Umständen einige
Sekunden dauern. Bitte warten Sie, bis der InstallShield Wizard gestartet wird!
Es folgt der Hinweis, dass Treiber und Hilfsprogramme installiert werden. Klicken Sie zum Fortfahren auf
Weiter. Lesen Sie die Lizenzvereinbarungen und markieren Sie, falls Sie diese akzeptieren, Ich bin mit den
Bedingungen der Lizenzvereinbarung einverstanden. Setzen Sie die Installation durch Klick auf Weiter fort.
Nun können Sie festlegen, ob nur der Treiber oder auch das
Hilfsprogramm installiert werden soll. Für spezielle Anwen-
dungsfälle ist auch die Erstellung von Installationsdisketten
möglich. In den meisten Fällen ist es am besten, das Client-
hilfsprogramm mit zu installieren. Die nachfolgende Beschrei-
bung der Installation und Konfi guration bezieht sich daher
hierauf. Möchten Sie ein anderes Konfi gurationsprogramm
verwenden, wie zum Beispiel das in Windows® XP integrierte,
wählen Sie Nur Treiber installieren.
Markieren Sie Clienthilfsprogramme und Treiber installieren
und bestätigen dann mit Weiter.
Es folgt der Hinweis, dass das System am Ende des Vorgangs neu gestartet werden muss. Bestätigen Sie dies
mit Ja.

4
5
Nun lässt sich der Zielordner festlegen. Normalerweise sind hier keine Änderungen nötig. Wollen Sie aus
wichtigen Gründen den Ordner ändern, klicken Sie auf Durchsuchen und wählen dann das gewünschte
Verzeichnis. Fahren Sie dann fort mit Weiter.
Es wird jetzt abgefragt, in welchen Programmordner (im Startmenü) die Verknüpfungen erstellt werden sollen.
Auch hier sind gewöhnlich keine Änderungen erforderlich, aber möglich. Bestätigen Sie mit Weiter.
Nur für Windows® XP
Die nachfolgende Information betrifft die Auswahl des Konfi gurationshilfsprogramms. Es kann das
mitgelieferte oder das von Windows® verwendet werden. Wir raten, das mitgelieferte Programm zu
verwenden. Klicken Sie auf Weiter und wählen dann Atheros-Clienthilfsprogramm... und
bestätigen mit Weiter.
Es folgt der Hinweis, dass der Treiber automatisch installiert wird:
Bestätigen Sie dies mit OK.
Möglicherweise erscheint während der Treiberinstallation, dass die Software den Windows®-Logo-Test nicht
bestanden hat:
Diese Meldung bedeutet lediglich, dass der Test noch nicht
durchgeführt wurde. Die Stabilität und Funktion der Treiber
wurde vor Auslieferung ausführlich getestet. Die Qualifi zierung
der Treiber durch Hama ermöglicht es, neue Versionen schon
viel früher zu verwenden und nicht auf den Windows®-Logo-
Test warten zu müssen. Bestätigen Sie die Meldung daher bitte
mit Installation fortsetzen.
Zum Schluss erscheint die Meldung „InstallShield Wizard abgeschlossen“. Nehmen Sie jetzt die CD-ROM
aus dem Laufwerk und starten den Computer neu, indem Sie „Ja, Computer jetzt neu starten“ markieren und
dann mit Fertigstellen bestätigen.
Nach dem Neustart können Sie den WLAN-Adapter konfi gurieren.
3. Schnell-Konfi guration
Haben Sie bereits ein wenig Erfahrung mit der Konfi guration von Wireless LAN Geräten, sollte diese kurze
Anleitung zur Inbetriebnahme des Gerätes genügen. Sollten Sie keine Erfahrungen im Bereich Wireless LAN
haben, lesen Sie bitte die ausführliche Anleitung ab Seite 5.
1. Öffnen Sie das Wireless LAN Konfi gurations-Utility durch Ausführen der Verknüpfung
Atheros-Clienthilfsprogramm auf dem Desktop oder unter Start/Programme/
Atheros/Atheros-Clienthilfsprogramm.
2. Wechseln Sie zur Registerkarte Profi lverwaltung und klicken Sie auf Scannen!
3. Markieren Sie das gewünschte Netzwerk in der Liste und klicken Sie auf Aktivieren!
4. Vergeben Sie im folgenden Fenster einen Namen für das Profi l. Wechseln Sie danach zur
Registerkarte Sicherheit!
5. Wählen Sie die im Zielnetzwerk verwendete Verschlüsselung aus und klicken Sie danach auf
Konfi gurieren. Wird im Zielnetzwerk keine Verschlüsselung verwendet, wechseln Sie zur
Registerkarte Erweitert und ignorieren Sie Punkt 6.
6. Geben Sie im folgenden Fenster den erforderlichen Schlüssel für das Zielnetzwerk ein.
Wechseln Sie danach zur Registerkarte Erweitert.
7. Möchten Sie sich mit einem Accesspoint oder Router verbinden, wird empfohlen alle Einstellungen auf
dieser Seite so zu belassen wie sie sind. Möchten Sie sich mit einem anderen Wireless LAN Clientgerät
verbinden, zum Beispiel USB-Stick oder CardBus, dann wählen Sie unter Netzwerktyp Ad-Hoc und unter
Kanal, den gleichen Kanal, den das andere Clientgerät verwendet.
8. Bestätigen Sie ihre Eingaben mit Ok. Wechseln Sie zur Registerkarte Aktueller Status. Hier werden jetzt
die aktuellen Informationen zu ihrem Profi l angezeigt. Ein grüner Balken für die Empfangsstärke zeigt
ihnen, dass Sie mit dem Zielnetzwerk verbunden sind.
Wird keine Verbindung angezeigt, oder möchten Sie eine ausführliche Anleitung, lesen Sie anschließend
unten „Das Konfi gurations-Programm – Einführung und Bedienung“.
4. Das Konfi gurations-Programm – Einführung und Bedienung
Öffnen Sie das Wireless LAN Konfi gurations-Utility durch Ausführen der Verknüpfung Atheros-Clienthilfspro-
gramm auf dem Desktop oder unter Start/Programme/Atheros/Atheros-Clienthilfsprogramm.
In dieser Ansicht erhalten Sie Informationen über ver-
schiedene Einstellungen ihres Wireless LAN. Sollte das
Zielnetzwerk, mit dem Sie sich verbinden möchten ohne
Verschlüsselung betrieben werden, ist es möglich, dass sich
das WLAN Gerät bereits automatisch mit einem verfügbarem
Netzwerk verbunden hat. In diesem Fall wird in der unteren
Fensterhälfte bereits eine Empfangsstärke angezeigt.
Wechseln Sie zur Registerkarte Profi lverwaltung.
Für die Konfi guration ist es hilfreich ein Profi l anzulegen. Ein
Profi l dient dazu, verschiedene Einstellungen für eine Verbin-
dung unter einem bestimmten Namen abzuspeichern. Möch-
ten Sie sich z.B. abwechselnd mit verschiedenen drahtlosen
Netzwerken verbinden, so können Sie die Einstellungen für
die Netzwerke in Profi len speichern, wodurch ein schneller
Wechsel der Konfi guration möglich ist.

6
7
Im Fenster werden alle gespeicherten Profi le angezeigt. Zu Beginn befi ndet sich hier nur das Standard-Profi l.
Unter dieser Liste werden Details zum ausgewählten Profi l angezeigt. Im rechten Fensterbereich gibt es
verschiedene Buttons für die Profi lbearbeitung.
Mit dem Button Profi le sortieren haben Sie die Möglichkeit, angelegte Profi le zu einer Liste Automatisch
ausgewählte Profi le hinzuzufügen.
Markieren Sie das gewünschte Profi l in der Liste der Ver-
fügbaren Profi le. Klicken Sie anschließend auf Hinzufügen.
Das Profi l, das markiert wurde, erscheint jetzt in der Liste
der Automatisch ausgewählte Profi le. Das bedeutet, dass
dieses Profi l, zum Beispiel nach einem Neustart, automatisch
ausgeführt wird. Befi nden sich mehrere Profi le in dieser Liste
können Sie die gewünschte Reihenfolge mit den Buttons
Nach oben verschieben und Nach unten verschieben festle-
gen. Mit dem Button Entfernen können Sie ein Profi l aus der
Liste löschen.
Klicken Sie auf OK, um die Einstellungen abzuschließen.
Klicken Sie den Button Ändern, um ein markiertes Profi l aus der Liste zu bearbeiten. Mit dem Button Entfernen
können Sie ein nicht mehr benötigtes Profi l aus der Liste löschen. Um ein Profi l aus der angezeigten Liste zu
aktivieren, markieren Sie es zuerst und klicken Sie dann auf den Button Aktivieren.
Klicken Sie auf den Button Scannen um nach verfügbaren drahtlosen Netzwerken zu suchen.
Alle in ihrem Empfangsbereich verfügbaren drahtlosen Netzwerke werden mit folgenden Informationen
angezeigt:
• SSID Netzwerkname/Netzwerk ID
• Bei Verwendung einer Funkverschlüsselung wird dies durch
ein Schlüsselsymbol angezeigt.
• Verwendung von Super G ™
• Verwendung von eXtended Range (XR) ™
• Empfangsstärke
• WLAN Kanal (In Europa stehen die Kanäle 1-13 zur
Verfügung)
• Funkmodus entweder 108Mbps, 54Mbps oder 11Mbps
- Super G ™ ist ein Verfahren zur Steigerung der maximalen Datenrate auf 108 Mbps,
durch die Nutzung von zwei Kanälen mit jeweils 54 Mbps.
- eXtended Range (XR) ™ ist eine spezielle Technologie zur Vergrößerung der Reich-
weite, durch das auf bis zu 0,25 Mbps erweiterbare Fallback der Standarddatenrate.
Um die Ansicht zu Aktualisieren klicken Sie bitte auf den gleichnamigen Button. Mit einem Klick auf OK wird
das Fenster wieder geschlossen.
Klicken Sie auf den Button Aktivieren, nachdem Sie ein verfügbares Netzwerk aus der Liste ausgewählt
haben. So können Sie dieses in ein neues Profi l aufnehmen. Sie gelangen dadurch in den gleichen Dialog, wie
beim Anlegen eines neuen Profi ls
4.1 Ein neues Profi l anlegen
Um ein neues Profi l anlegen zu können, benötigen Sie verschiedene Informationen über das Zielnetzwerk.
Zum einen ist die SSID des Zielnetzwerkes erforderlich, zum anderen müssen Sie wissen ob, und wenn ja wel-
che Verschlüsselung im Zielnetzwerk verwendet wird. Ausserdem können Sie zwischen zwei verschiedenen
Netzwerktypen wählen. Das Gerät unterstützt die Netzwerktypen Infrastruktur und Ad-Hoc.
Infrastruktur: Wählen Sie diesen Typ, falls Sie mit diesem Wireless LAN Gerät eine Verbindung zu einem
Wireless LAN Router oder Accesspoint aufbauen möchten.
Ad-Hoc: Wählen Sie diesen Typ, falls Sie eine Direktverbindung zu einem anderen Wireless LAN Client Gerät,
wie zum Beispiel ein USB Stick oder eine WLAN PCI Einbaukarte, ohne Wireless LAN Router oder Acces-
spoint aufbauen möchten. Für diese Verbindungsart sind zwei WLAN-Client-Geräte notwendig.
Es gibt grundsätzlich zwei Möglichkeiten ein Profi l anzulegen, entweder über den Button Neu auf der Regi-
sterkarte Profi lverwaltung oder durch direkte Auswahl eines Netzwerkes nach dem Scannen.
Variante 1 Wechseln Sie zur Registerkarte Profi lverwaltung und klicken Sie dann auf Neu!
oder
Variante 2 Wechseln Sie zur Registerkarte Profi lverwaltung und klicken Sie dort auf Scannen! Es
wird jetzt nach vorhandenen Netzwerken gesucht, die anschließend in Listenform
dargestellt werden. Markieren Sie das gewünschte Netzwerk und klicken Sie auf Aktivieren!
Nur für versteckte Netzwerke:
Ist das Feld für die SSID leer, wurde am Router oder Accesspoint eingestellt, dass diese
versteckt werden soll. Eine automatische Übernahme der SSID ist daher nicht möglich.
Der Bildschirm zeigt in beiden Fällen folgendes Fenster an:

4.1.1 Betrieb im Infrastrukture-Modus
Geben Sie als Erstes einen Profi lnamen ein, zum Beispiel „Mein_Profi l“. Im Feld Clientname wird automatisch
der Name ihres PC eingetragen.
Haben Sie sich für Variante 1 entschieden, müssen Sie nun im Feld SSID1 die SSID des Zielnetzwerkes ein-
tragen. Diese können Sie in ihrem Router bzw. Accesspoint in den Wireless LAN Einstellungen fi nden oder bei
einer verantwortlichen Person erfragen. Haben Sie sich für die Variante 2 entschieden, wurde die SSID schon
automatisch aus der gescannten Liste übernommen.
Wechseln Sie jetzt zur Registerkarte Erweitert.
Grundsätzlich sind hier alle Werte so eingestellt, dass sie so
belassen werden können. Im folgenden werden die einzelnen
Punkte kurz beschrieben.
Netzwerktyp:
Wählen Sie hier Infrastruktur. Dieser Modus ermöglicht die
Verbindung zu einem Wireless LAN Router oder Accesspoint.
Leistungspegel übertragen:
Sie haben die Möglichkeit den Leistungspegel zu reduzieren. Dies kann sinnvoll sein, wenn ihre WLAN Geräte
nicht sehr weit auseinander stehen.
Funkmodus:
2,4 Ghz 54 Mbit/s: Aktivieren Sie diese Option, um Geräte nach dem Standard 802.11g mit 54 Mbps zu
unterstützen (empfohlen)
2,4 Ghz 11 Mbit/s: Aktivieren Sie diese Option, um die Kompatibilität mit 11 Mbps Geräten
zu gewährleisten (empfohlen)
Super G™: Empfohlen, wenn der Router/Accesspoint oder andere teilnehmende Geräte diesen
Modus unterstützen.
eXtended Range (XR)™: Empfohlen, wenn der Router/Accesspoint oder andere teilnehmende Geräte diesen
Modus unterstützen.
QoS: Unterstützung von Bandbreitenreservierung (selten erforderlich)
Energiesparmodus:
Aus: Schnellster Modus, sinnvoll für Computer die per Steckdose betrieben werden
Maximal: Für bestmögliche Akkulaufzeit bei Notebooks
Normal: Erhöhung der Akkulaufzeit; schneller als Betriebsart „Maximal“
802.11b-Präambel:
Wir empfehlen Ihnen, die Einstellung auf Kurz & Lang zu belassen.
Funkmodus beim Starten des Ad-Hoc-Netzwerks:
Diese Einstellung ist für den Infrastruktur-Modus nicht wichtig.
802.11-Authentifi zierungsmodus
Verwenden Sie die WEP Verschlüsselung, können Sie hier wählen zwischen Auto, Offen oder Installiert.
Bevorzugte Zugriffspunkte
Klicken Sie auf diesen Button, um in der folgenden Maske MAC-Adressen Ihrer bevorzugten Wireless LAN
Zugriffspunkte einzugeben.
Sollte in ihrem Netzwerk eine Verschlüsselung verwendet werden, wechseln Sie zur Registerkarte Sicherheit
und setzen Sie die Konfi guration auf Seite 10
unter Wireless LAN Verschlüsselung einstellen fort.
Betreiben Sie ihr Netzwerk ohne Verschlüsselung, übernehmen Sie ihre Einstellungen mit OK! Auf der Regi-
sterkarte Profi lverwaltung können Sie nun ihr angelegtes Profi l markieren und mit einem Klick auf den Button
Aktivieren auswählen.
4.1.2 Betrieb im Ad-Hoc-Modus
Geben Sie als Erstes einen Profi lnamen ein, zum Beispiel „Mein_Profi l“. Im Feld Clientname wird automatisch
der Name ihres PC eingetragen.
Haben Sie sich für Variante 1 entschieden, müssen Sie nun im Feld SSID1 die SSID des Zielnetzwerkes ein-
tragen. Diese können Sie in ihrem Router bzw. Accesspoint in den Wireless LAN Einstellungen fi nden oder bei
einer verantwortlichen Person erfragen. Haben Sie sich für die Variante 2 entschieden, wurde die SSID schon
automatisch aus der gescannten Liste übernommen.
Wechseln Sie jetzt zur Registerkarte Erweitert.
Netzwerktyp:
Wählen Sie hier Ad-Hoc. Dieser Modus ermöglicht die
Verbindung zu anderen Wireless LAN Clientgeräten, wie zum
Beispiel USB Sticks, PCI-Karten oder CardBus.
Funkmodus beim Starten des Ad-Hoc-Netzwerks:
Wählen Sie aus, ob Sie im Ad-Hoc-Modus mit 11 Mbps oder
54 Mbps starten möchten. Dies ist natürlich auch davon ab-
hängig, welche Übertragungsrate die anderen teilnehmenden
Geräte unterstützen. Wählen Sie als nächstes den Kanal,
der für ihr Ad-Hoc Netzwerk verwendet werden soll. Dieser
Kanal muss auch bei den anderen teilnehmenden Geräten
eingestellt sein.
Alle anderen Werte sind hier grundsätzlich so eingestellt, dass sie so belassen werden können. Im folgenden
werden die einzelnen Punkte kurz beschrieben.
Leistungspegel übertragen:
Sie haben die Möglichkeit den Leistungspegel zu reduzieren. Das kann sinnvoll sein, wenn ihre WLAN Geräte
nicht sehr weit auseinander stehen.
8
9

Funkmodus:
2,4 Ghz 54 Mbit/s: Aktivieren Sie diese Option, um Geräte nach dem Standard 802.11g mit 54 Mbps zu
unterstützen (empfohlen)
2,4 Ghz 11 Mbit/s: Aktivieren Sie diese Option, um die Kompatibilität mit 11 Mbps Geräten
zu gewährleisten (empfohlen)
Super G™: Empfohlen, wenn der Router/Accesspoint oder andere teilnehmende Geräte diesen
Modus unterstützen.
eXtended Range (XR)™: Empfohlen, wenn der Router/Accesspoint oder andere teilnehmende Geräte diesen
Modus unterstützen.
QoS: Unterstützung von Bandbreitenreservierung (selten erforderlich)
Energiesparmodus:
Diese Einstellung ist für den Ad-Hoc-Modus nicht wichtig. Der Energiesparmodus ist
deaktiviert.
802.11b-Präambel:
Wir empfehlen Ihnen die Einstellung auf Nur Lang zu belassen.
Sollte in ihrem Netzwerk eine Verschlüsselung verwendet werden, wechseln Sie zur Registerkarte Sicherheit
und setzen Sie die Konfi guration unter Wireless LAN Verschlüsselung einstellen fort.
Betreiben Sie ihr Netzwerk ohne Verschlüsselung, übernehmen Sie ihre Einstellungen mit OK! Auf der Regi-
sterkarte Profi lverwaltung können Sie nun ihr angelegtes Profi l markieren und mit einem Klick auf den Button
Aktivieren auswählen.
4.2 Wireless LAN Verschlüsselung einstellen
Hinweis!!! Standardmäßig ist die Verschlüsselung deaktiviert. Wir empfehlen Ihnen aber aus Sicherheits-
gründen immer eine Verschlüsselung zu verwenden.
Als erstes ist es wichtig verschiedene Begriffe zu unterscheiden. Dazu eine kurze Erklärung der wichtigsten
hier verwendeten Begriffe:
Authentifi zierung: Die Authentifi zierung ist ein Vorgang, bei dem die Identität, zum Beispiel einer Person, an
Hand eines bestimmten Merkmals festgestellt wird. Dies kann zum Beispiel mit einem Fingerabdruck, einem
Passwort oder einem beliebigen anderen Berechtigungsnachweis geschehen.
Verschlüsselung: Die Verschlüsselung ist ein Vorgang, bei dem ein „Klartext“ mit Hilfe eines Verschlüsse-
lungsverfahrens (Algorithmus) in einen „Geheimtext“ umgewandelt wird. Hierzu können einer oder auch
mehrere Schlüssel verwendet werden.
Weiterhin ist zu erwähnen, dass jedes einzelne Verschlüsselungsverfahren eine oder mehrere Möglichkeiten
der Authentifi zierung bietet.
Wählen Sie das gewünschte Profi l in der Profi lverwaltung aus, und klicken Sie auf Ändern. Wechseln Sie nun
zur Registerkarte Sicherheit!
Grundsätzlich stehen ihnen mit diesem Gerät folgende Ver-
schlüsselungsarten zur Verfügung:
WEP-Verschlüsselung mit 64 Bit, 128 Bit und 152 Bit
WPA und WPA2 Verschlüsselung
Wir empfehlen ihnen eine Verschlüsselung mit
WPA/WPA 2 und Kennwort-Authentifi zierung. Sollten
die anderen, im Netzwerk vorhandenen Geräte,
kein WPA understützen wählen Sie WEP.
4.2.1 WEP Verschlüsselung
Wired Equivalent Privacy (WEP) ist ein Standard-Verschlüsselungsalgorithmus für WLAN. Er soll sowohl den
Zugang zum Netz regeln, als auch die Integrität der Daten sicherstellen. Aufgrund verschiedener Schwach-
stellen wird das Verfahren als unsicher angesehen. Die Authentifi zierung wird in diesem Fall nach der Shared
Key Methode (geteilter Schlüssel) realisiert.
Möchten Sie die WEP Verschlüsselung nutzen, wählen Sie Vorinstallierter Schlüssel (statisches WEP) aus!
Klicken Sie anschließend auf Konfi gurieren.
Die Angaben, die Sie an dieser Stelle machen, müssen
exakt mit den verwendeten Verschlüssellungsdaten im
Zielnetzwerk, also am Wireless LAN Router/Accesspoint im
Infrastructure Modus und bei allen Client WLAN Geräten im
Ad-Hoc Modus, übereinstimmen.
Im oberen Bereich des Fensters legen Sie fest, welche
Zeichen für die Schlüssel verwendet werden dürfen. Hexa-
dezimal erlaubt Zeichen von 0-9 und a-f, ASCII erlaubt jedes
beliebige Zeichen außer Leerzeichen. Diese Einstellung
und die Wahl zwischen 64, 128 und 152 Bit Verschlüsselung
bestimmt die Länge des einzugebenden Schlüsssels.
WEP 64 bit ASCII erfordert 5 Zeichen
WEP 64 bit HEX erfordert 10 Zeichen
WEP 128 bit ASCII erfordert 13 Zeichen
WEP 128 bit HEX erfordert 26 Zeichen
WEP 152 bit ASCII erfordert 16 Zeichen
WEP 152 bit HEX erfordert 32 Zeichen
Im unteren Bereich können Sie 4 Schlüssel hinterlegen, wobei aber nur einer verwendet wird. Sie haben so
die Möglichkeit, falls die anderen Wireless LAN Geräte dies auch unterstützen, den Schlüssel in regelmä-
ßigen Abständen zu wechseln. Sie haben aber auch die Möglichkeit, nur einen Schlüssel einzugeben und
diesen dauerhaft zu verwenden.
10
11

Es wird immer der Schlüssel übertragen, der unter Schlüssel übertragen markiert ist.
Beispiele für Schlüssel:
64 bit Hex (10 Zeichen) = 231074a6ef
64 bit ASCII (5 Zeichen) = j31n!
128 bit Hex (26 Zeichen) = 231074a6b9773ce43f91a5bef3
128 bit ASCII (13 Zeichen) = urlaub2006!+0
Übernehmen Sie ihre Einstellungen mit OK.
4.2.2 WPA/WPA2 Verschlüsselung
Wi-Fi Protected Access (WPA) ist eine Verschlüsselungsmethode für WLAN. WPA enthält die Architektur
von WEP, bietet jedoch zusätzlichen Schutz durch dynamische Schlüssel, die auf dem Temporal Key Integrity
Protocol (TKIP) basieren, und bietet außerdem zur Authentifi zierung von Nutzern PSK (Pre-Shared-Keys) oder
Extensible Authentication Protocol (EAP) wofür jedoch ein Radius Server erforderlich ist. WPA2 ist die Wei-
terentwicklung von WPA und nutzt einen anderen Verschlüsselungsalgorithmus AES (Advanced Encryption
Standard).
Authentifi zierung über Pre-Shared-Key
Wählen Sie WPA/WPA2-Kennwort und klicken Sie anschließend auf Konfi gurieren.
Geben Sie hier den Schlüssel im erforderlichen Format ein.
ASCII = mindestens 8 und höchstens 63 beliebigen Zeichen, wobei Buchstaben (A-Z),
Zahlen und Satzzeichen erlaubt sind oder
Hex = für einen Schlüssel mit einer Länge von 64 Zeichen, wobei nur Zeichen von 0-9 und
a-f verwendet werden dürfen.
Bestätigen Sie ihre Eingabe mit OK. Auf der Registerkarte Profi lverwaltung können Sie nun ihr angelegtes
Profi l markieren und mit einem Klick auf den Button Aktivieren auswählen.
- Authentifi zierung über spezielle Authentifi zierungsprotokolle und Zertifi kate
Sie haben weiterhin die Möglichkeit, sich über spezielle Authentifi zierungsprotokolle,
die allerdings einen Authentifi zierungsserver voraussetzen, zu authentifi zieren. Wählen
Sie hierzu WPA/WPA2 oder 802.1x aus.
Die hier angebotenen Authentifi zierungsprotokolle sind Abwandlungen des EAP
(Extensible Authentication Protocol) die einen Authentifi zierungsserver (RADIUS-Server)
oder Zertifi kate voraussetzen. Die Angaben, die sie zur Konfi guration dieser
Authentifi zierungsmethode benötigen, erhalten Sie von ihrem Administrator.
Die Konfi guration ist nun soweit abgeschlossen. Wechseln Sie noch einmal zur Registerkarte Aktueller
Status.
Hier sollte jetzt eine Empfangsstärke und die ent-
sprechenden Informationen über ihre Konfi guration
angezeigt werden. Sie können das Konfi gurationstool
nun schließen. Das aktivierte Profi l wird nach einem
Neustart automatisch wieder ausgeführt.
5. Konfi guration von Software und Computer
Nach der erfolgreichen Installation des Netzwerkgerätes muss unter anderem noch ein zu verwendendes
Protokoll installiert bzw. konfi guriert werden. Über dieses tauschen die Computer eines Netzwerkes Daten
aus. Am häufi gsten wird TCP/IP verwendet. Bei diesem muss für jeden Computer eine eigene Adresse verge-
ben werden. Die automatische Adressenvergabe funktioniert nur zuverlässig, wenn im Netzwerk ein DHCP-
Server vorhanden ist, also zum Beispiel ein Router oder Accesspoint. Sollten Sie über ein solches Gerät mit
DHCP Funktion verfügen, sollten Sie die Einstellung auf automatisch beziehen belassen.
Um die Einstellungen an ihrem PC zu überprüfen gehen Sie folgendermaßen vor:
Start => Einstellungen => Systemsteuerung => Netzwerkverbindungen
Wählen Sie hier die Verbindung (Netzwerkadapter) aus, über die ihr PC mit dem Router verbunden ist, zum
Beispiel „LAN Verbindung“. Nach einem Rechtsklick auf die entsprechende Verbindung erhalten Sie ein
Menü, in dem Sie Eigenschaften auswählen. Markieren Sie in der Liste den Eintrag Internetprotokoll (TCP/IP)
und klicken Sie anschließend auf Eigenschaften.
Wählen Sie IP-Adresse automatisch beziehen und DNS-Serveradresse automatisch beziehen aus, falls sich
ein DHCP Server in ihrem Netzwerk befi ndet! Bestätigen Sie anschließend mit OK und im folgenden Fenster
ebenfalls mit OK! Ihr PC ist nun so konfi guriert, dass er seine IP-Adresse automatisch vom Router bezieht.
12
13

Verfügen Sie nicht über ein solches Gerät müssen Sie die IP-Adressen manuell vergeben. Das nachfolgende
Beispiel beschreibt die grundlegende Einrichtung per manueller Adressvergabe. Für lokale Netzwerke sind
hierfür spezielle Adressbereiche vorgesehen, die im Internet nicht weitergeleitet werden. Ein Bereich, den Sie
für Ihr Netzwerk verwenden können, ist z.B. 192.168.1.1 bis 192.168.1.254. Der erste PC erhält dann die Adresse
192.168.1.1, der zweite 192.168.1.2, der dritte 192.168.1.3 usw.
Wählen Sie folgende IP-Adresse verwenden aus und geben Sie ihre IP-Adresse nach dem vorgegebenen
Muster ein.
1.PC = IP-Adresse 192.168.1.1 Subnetmaske 255.255.255.0
2.PC = IP-Adresse 192.168.1.2 Subnetmaske 255.255.255.0
Bestätigen Sie ihre Eingaben mit OK!
6. Deinstallation von Treiber und Konfi gurations-Programm
Schalten Sie Ihren PC aus und ziehen Sie den Netzstecker aus der Steckdose. Öffnen Sie das Gehäuse Ihres
PC´s. Entnehmen Sie die Wireless LAN PCI Karte aus dem PC und schließen Sie das PC-Gehäuse wieder.
Stecken Sie den Netzstecker in die Steckdose und starten Sie den PC.
Wählen Sie Start => Einstellungen => Systemsteuerung => Software
Wählen Sie Atheros Client Installation Programm aus und klicken Sie Entfernen! Markieren Sie in der
anschließenden Abfrage Vorherige Installation deinstallieren und klicken Sie danach auf Weiter. Bestätigen
Sie die Deinstallation mit OK. Das Programm fragt Sie anschließend, ob Sie Treiber und Profi le entfernen wol-
len. Bestätigen Sie hier mit Ja, wenn Sie sich sicher sind, dass Sie das Netzwerkgerät von ihrem Computer
deinstallieren wollen. Nach der Deinstallation ist ein Neustart des Systems notwendig. Speichern Sie alle
offenen Arbeiten und schließen Sie alle Programme. Klicken Sie anschließend auf OK, um den Computer neu
zu starten.
Die Deinstallation ist nach dem Neustart des Computers abgeschlossen.
7. Support- und Kontaktinformationen
Bei defekten Produkten:
Bitte wenden Sie sich bei Produktreklamationen an Ihren Händler oder an die Hama Produktberatung.
Internet/World Wide Web
Produktunterstützung, neue Treiber oder Produktinformationen bekommen Sie unter www.hama.com
Support Hotline – Hama Produktberatung:
Tel. +49 (0) 9091 / 502-115
Fax +49 (0) 9091 / 502-272
e-mail: [email protected]
Anmerkung:
Dieses Produkt darf nur in Deutschland, Österreich, Schweiz, England, Frankreich, Belgien, Spanien,
Niederlande, Dänemark, Ungarn, Polen, Schweden, Luxemburg, Irland, Griechenland, Tschechische Republik,
Slowakische Republik und Finnland betrieben werden!
Die Konformitätserklärung nach der R&TTE-Richtlinie 99/5/EG fi nden Sie unter www.hama.com
Contents
1. Installing the wireless LAN PCI card ......................................................................................................Page 15
2. Installing the driver and confi guration program ......................................................................................Page 15
3. Quick confi guration .......................................................................................................................................Page 17
4. The confi guration program – introduction and operation ......................................................................Page 18
4.1 Creating a profi le ........................................................................................................................................... Page 20
4.1.1 Infrastructure mode .............................................................................................................................Page 21
4.1.2 Ad-hoc mode ..........................................................................................................................................Page 22
4.2 Setting the wireless LAN encryption .........................................................................................................Page 23
4.2.1 WEP encryption .....................................................................................................................................Page 24
4.2.2 WPA/WPA2 encryption ........................................................................................................................Page 25
5. Confi guring the software and the computer .............................................................................................Page 26
6. Uninstalling the driver and confi guration program ..................................................................................Page 27
7. Support and contact information .................................................................................................................Page 27
Package contents:
1x Wireless LAN PCI Card 108 Mbps
1x Antenna (screw-on)
1x driver CD-ROM
1x printed operating instructions
System requirements:
• PC with free PCI port
• Windows® 2000/XP operating system
Safety instructions:
Do not use the device in moist or extremely dusty areas, on radiators or in the vicinity of heat sources.
Protect the device from pressure and impact. The device may not be opened or moved during operation.
Do not operate the device without a screwed-on antenna.
1. Installing the wireless LAN PCI card
Switch off the computer and pull the mains plug from the socket so that the PC is disconnected from
the electricity mains. Open the PC case. Select a free PCI slot and remove the slot cover plate. Insert
the wireless LAN PCI card into the selected PCI slot and secure it to the case with a screw. You can
now close the PC case again. As a last step, screw the enclosed antenna to the antenna socket. This
completes installation. Insert the mains plug into the socket and start the PC.
2. Installing the driver and confi guration program
After you start the operating system, the Windows® New Hardware Wizard dialogue box opens.
Click Cancel to close it!
Insert the CD-ROM provided in the drive. Usually, the CD starts automatically. If the menu does not start auto-
matically, double-click the corresponding CD-ROM drive icon in My Computer.
The following window opens after the program starts:
L
Operating instructions Wireless LAN PCI Card 108 Mbps
14
15

Select the required language.
The following window is displayed when you select the language.
To continue installation, click Install (2000/XP 32 bit) if you use
Windows® 2000 or XP as an operating system. Also be used with
restricted functions for the Win 98/ME operating systems. With
these operating systems, the Extended Range (XR)TM function is
not available and the software is in English only. Click Install (Win
98/ME) if you use Windows® 98 or Windows® ME.
Click Users Guide to open the operating instructions. Acrobat
Reader is required to display PDF fi les. If you have not yet installed
Acrobat Reader, you will fi nd a free version on the enclosed driver
CD. Click Download driver to download the latest driver from the
Hama website. Click Back to return to language selection.
If your operating system is not listed, establish a connection to the internet (or use the CD on a computer with an
established connection) and click Download driver. The downloads for this item are then displayed in the browser.
This allows you to check whether drivers have now been developed for previously unsupported systems.
When you select Install, the InstallShield Wizard is loaded. This can take a few seconds. Please wait until the
InstallShield Wizard starts!
A message appears informing you that driver and auxiliary programs are being installed. Click Next to
continue. Read the license agreements and select “I accept the terms of the license agreement” if you do not
object to them. Click Next to continue installation.
You can now specify whether only the driver is to be installed, or if
the auxiliary programs are also to be installed. For special applica-
tions, installation disks can also be created.
In most cases, it is best to also install the client software. For this
reason, the description of installation and confi guration below
refers to it. If you want to use a different confi guration program,
such as that which is integrated in Windows® XP, select Install
drivers only.
Select Install client utilites and drivers and click Next to confi rm.
You are then reminded that the system must be restarted at the end of the process. Confi rm your entries with Yes.
The target folder can now be specifi ed. As a rule, no changes must be made here. If you have a good reason
to change the folder, click Browse and select the directory required. Click Next to continue.
A prompt asks you in which program folder (in the Start menu) the links are to be created. Generally, no
changes are required, but again the default can be changed. Click Next to confi rm.
For Windows® /XP only
The following information confi rms the selection of the confi guration assistant. The software provided
or the Windows ® software can be used. We recommend that you use the enclosed program.
Click Next and select Atheros Client Utility and click Next to confi rm.
A message appears informing you that the driver is being installed automatically:
Click OK to confi rm.
The message that the software has not passed the Windows® logo test may appear while the driver is being
installed:
This only means that the test has not been performed. The sta-
bility and function of the driver was tested thoroughly before
delivery. The qualifi cation of the drivers by Hama means that
new versions can be used far earlier and do not have to wait
for the Windows® logo test. Click Continue Anyway to confi rm
the message.
After installation, “InstallShield Wizard complete” is displayed. Now remove the CD-ROM from the drive and
restart the computer by selecting „Yes, I want to restart my computer now” and clicking Finish.
After the restart, you can confi gure the WLAN adapter.
3. Quick confi guration
If you are already somewhat familiar with the confi guration of wireless LAN devices, this quick guide should
be enough to prepare the device. If you have no experience with wireless LAN devices, please read the
comprehensive instructions from page 18.
1. Open the wireless LAN confi guration utility by clicking the Atheros Client Utility on the
Desktop or under Start/Programs/Atheros/Atheros Client Utility.
2. Change to the Profi le management tab and click Scan!
3. Select the required network in the list and click Activate!
4. Name the profi le in the next window. Switch to the Security tab.
5. Select the encryption mode used in the target network and then click Confi gure. If no encryption is used
in the target network, switch to the Advanced tab and ignore item 6.
16
17

6. Enter the code required for the target network in the subsequent window. Switch to the Advanced tab.
7. If you want to connect to an access point or router, we recommend that you leave all settings on this
page as they are. If you want to connect to another wireless LAN client device, e.g. a USB stick or card
bus, select Ad-hoc as the Network type and the same channel used by the client device under Channel.
8. Click Ok to confi rm your entries. Switch to the Current status tab. All current information on your profi le
is displayed here. A green bar for the Signal strength shows that you are connected to the target
network.
If no connection is displayed, or if you want comprehensive instructions, please read on under “The confi gu-
ration program – introduction and operation”.
4. The confi guration program – introduction and operation
Open the wireless LAN confi guration utility by clicking the Atheros Client Utility link on the Desktop or under
Start/Programs/Atheros/Atheros Client Utility.
This view gives you information on various settings of your
wireless LAN. If the target network to be connected is not
encrypted, the WLAN device may already have automati-
cally connected to an available network. If this is the case,
the signal strength display at the bottom of the screen
shows a signal.
Change to the Profi le management tab.
When confi guring it is useful to create a profi le. A profi le
serves to save various settings for a connection under
a certain name. For example, if you want to connect to
various wireless networks, you can save the settings for
the networks in profi les, which allows you to change the
confi guration quickly.
All profi les saved are shown in the window at the top left. Initially, only the standard profi le is saved here.
Details on the selected profi le are displayed in this list. The right part of the window there are various buttons
for editing profi les.
The Order profi les button allows you to add created profi les to a list of Auto selected profi les.
Select the required profi le in the list of the Available pro-
fi les. Click Add. The profi le select is then displayed in the
list of Auto selected profi les. That means that this profi le is
run automatically, e.g. after a restart. If there is more than
one profi le in this list, you can set the required sequence
with the Move up and Move down buttons. The Remove
button allows you to delete a profi le from the list.
Click OK to complete the confi guration.
Click the Modify button to edit a selected profi le from the list. The Remove button allows you to delete a
profi le which is no longer required from the list. To activate a profi le from the list, fi rst select it and then click
the Activate button.
Click the Scan button to search for available wireless networks.
All wireless networks available in your reception range are shown with the following information:
• SSID network name/network ID
• If wireless encryption is used, this is indicated by a key
symbol.
• Use of Super G ™
• Use of eXtended Range (XR) ™
• Signal strength
• WLAN channel (in Europe, channels 1-13 are available)
• Wireless mode, either 108Mbps, 54Mbps or 11Mbps
- Super G ™ is a method of increasing the maximum data rate to 108 Mbps by using two channels with
54 Mbps each.
- eXtended Range (XR) ™ is a special technology to increase the range via the fallback of the standard
data rate which can be expanded to up to 0.25 Mbps.
Click the Refresh button to refresh the view. Click OK to close the window again.
Click the Activate button after you have selected an available network from the list. You can record it in a
new profi le If you do so, the dialogue box for creating a new profi le opens. For more information on this, see
Creating a new profi le.
18
19

4.1 Creating a new profi le
You need certain information on the target network to create a new profi le.
For one, the SSID of the target network is required. You must also know whether encryption is used in the
target network, and if so, which type. You can also choose one of two different network types. The device
supports the infrastructure and ad-hoc network types.
Infrastructure: Select this type if you want to connect this wireless LAN device to a wireless LAN router or
access point.
Ad-hoc station: Select this type if you want to connect directly to another wireless LAN client device, e.g.
another USB stick or a WLAN PCI card without a wireless LAN router or access point. Two WLAN client
devices are required for this.
There are two ways of creating a profi le, either using the New button in the Profi le management tab, or by
selecting a network directly after a Scan.
Version 1 Change to the Profi le management tab and click New.
or
Version 2 Change to the Profi le management tab and click Scan. The device scans for existing networks
which are then displayed as a list. Select the required network and click Activate.
For hidden networks only:
If the SSID fi eld is empty, the router or access point is set to hide the network. The SSID cannot
therefore be copied automatically.
In both cases, the following window is displayed on the screen:
4.1.1 Operation in infrastructure mode
First enter a profi le name, e.g. “My_profi le”. In the client name fi eld, the name of your PC is entered
automatically.
If you have selected version 1, you must now enter the SSID of the target network in the SSID1 fi eld. This is
in the wireless LAN settings in your router or access point or you can ask the person in charge. If you have
selected version 2, the SSID has already been copied automatically from the scanned list.
Switch to the Advanced tab.
In general all values here can be left at the default settings.
The individual items are described briefl y below.
Network type:
Select Infrastructure. This mode facilitates connection to a
wireless LAN router or access point.
Transmit power level:
You can reduce the power level. This may be practical if your WLAN devices are quite close to one another.
Wireless mode:
2.4 Ghz 54 Mbit/s: Activate this option to support 802.11g standard devices at 54 Mbps (recommended)
2.4 Ghz 11 Mbit/s: Activate this option to guarantee compatibility to 11 Mbps devices (recommended)
Super G ™ : Recommended if the router/access point or other devices in the network
support this mode.
eXtended Range (XR) ™: Recommended if the router/access point or other devices in the network
support this mode.
QoS: Support for bandwidth reservation (seldom required)
Power save mode:
Off: Fastest mode, ideal for computers which are connected to the mains.
Maximum: For optimal battery life for notebooks
Normal: Increased battery life; faster than “maximum mode
802.11b preamble:
We recommend that you leave this set to Short & long.
Wireless mode when starting the ad-hoc network:
This setting is not important for the infrastructure mode
802.11 Authentication mode
If you use WEP encryption, you can select either auto, open or installed.
20
21

Preferred access points
Click this button to enter the MAC addresses of your preferred wireless LAN in the subsequent screen.
If your network uses encryption, switch to the Security tab and continue confi guration on page 23 under
Setting wireless LAN encryption.
If your network is not encrypted, click OK to accept the settings! In the Profi le management tab, you can now
select your profi le and activate it by clicking the button.
4.1.2 Operation in ad-hoc mode
First enter a profi le name, e.g. “My_profi le”. In the client name fi eld, the name of your PC is entered automatically.
If you have selected version 1, you must now enter the SSID of the target network in the SSID1 fi eld. This is
in the wireless LAN settings in your router or access point or you can ask the person in charge. If you have
selected version 2, the SSID has already been copied automatically from the scanned list.
Switch to the Advanced tab.
Network type:
Select Ad-Hoc. This mode allows you to connect to other
wireless LAN client devices, e.g. USB sticks, PCI cards or
card bus.
Wireless mode when starting the ad-hoc network:
Select whether you want to start ad-hoc mode at 11 Mbps
or 54 Mbps. Of course, this depends on the transfer rate
supported by the other devices in the network. Next, select
the channel to be used for your ad-hoc network. This chan-
nel must also be set for other devices in the network.
In general, all other values here can be left at the default settings. The individual items are described briefl y
below.
Transmit power level:
You can reduce the power level. This may be practical if your WLAN devices are quite close to one another.
Wireless mode:
2.4 Ghz 54 Mbit/s: Activate this option to support 802.11g standard devices at 54 Mbps (recommended)
2.4 Ghz 11 Mbit/s: Activate this option to guarantee compatibility to 11 Mbps devices (recommended)
Super G ™ : Recommended if the router/access point or other devices in the network support
this mode.
eXtended Range (XR) ™: Recommended if the router/access point or other devices in the network support
this mode.
QoS: Support for bandwidth reservation (seldom required)
Power save mode:
This setting is not important for the ad-hoc mode. Power saving mode is deactivated.
802.11b preamble:
We recommend that you leave this set to Long only.
If your network uses encryption, switch to the Security tab and continue confi guration under Setting wireless
LAN encryption.
If your network is not encrypted, click OK to accept the settings! In the Profi le management tab, you can now
select your profi le and activate it by clicking the button.
4.2 Setting the wireless LAN encryption
Note!!! Encryption is deactivated by default. However, for security reasons, we recommend that you always
use encryption.
First, it is important to understand a range of terms. The next section will explain the main terms used here:
Authentication: Authentication is a process in which the identity, e.g. of a person is determined based on a
certain characteristic. This can be done by fi ngerprint, password or any other proof of authorisation.
Encryption: Encryption is a process in which a plain text is transformed into a coded text via an encryption
process (algorithm). One or more codes can be used for this.
It must also be mentioned that each individual encryption process offers one or more authentication options.
Select the required profi le in profi le management, and click Modify. Now switch to the Security tab.
This device can be used with the following
encryption types:
64, 128 and 152 bit WEP encryption
WPA and WPA2 encryption
We recommend that you use WPA/WPA 2 encryption
with password authentication. If the other devices in the
network do not support WPA, select WEP.
22
23

4.2.1 WEP encryption
Wired Equivalent Privacy (WEP) is a standard encryption algorithm for WLAN. It both controls the access to
the network and guarantees the integrity of the data. This method is considered vulnerable due to a range of
weaknesses. Authentication is implemented using the shared key method.
If you use WEP encryption, select Pre-Shared key (static WEP).
Click Confi gure.
The entries you make here must be exactly the same as the
encryption data in the target network, i.e. in the wireless
LAN router/access point in infrastructure mode and as all
client WLAN devices in ad-hoc mode.
In the upper area of the window you can set the characters
which can be used for the code. Hexadecimal allows
characters from 0-9 and a-f. ASCII allows any characters
except spaces to be used. The setting and the selection of
either 64, 128 and 152 bit encryption determines the length
of the code to be entered.
WEP 64 bit ASCII requires 5 characters
WEP 64 bit HEX requires 10 characters
WEP 128 bit ASCII requires 13 characters
WEP 128 bit HEX requires 26 characters
WEP 152 bit ASCII requires 16 characters
WEP 152 bit HEX requires 32 characters
In the lower area, you can save 4 codes of which only one is used. This allows you to change the code
regularly if the other wireless LAN devices also support this. You can also enter just one code and use it all
the time.
The code selected under Transmit code is always transferred.
Sample codes:
64 bit Hex (10 characters) = 231074a6ef
64 bit ASCII (5 characters) = j31n!
128 bit Hex (26 characters) = 231074a6b9773ce43f91a5bef3
128 bit ASCII (13 characters) = urlaub2006!+0
Click OK to save your settings.
4.2.2 WPA/WPA2 encryption
Wi-Fi Protected Access (WPA) is an encryption method for WLAN. WPA contains the WEP architecture,
but offers additional protection via dynamic codes, which are based on the Temporal Key Integrity Protocol
(TKIP), and also offers pre-shared keys (PSK) or extensible authentication protocol (EAP) for user authen-
tication. However, a radius server is required for this. WPA2 is a development of WPA and uses a different
encryption algorithm, advanced encryption standard (AES).
Authentication via pre-shared key
Select WPA/WPA2 Passphrase and then click Confi gure.
Enter the code in the required format.
ASCII = at least 8 and no more than 63 random characters. Letters (A-Z), numbers and punctuation marks
are allowed or
Hex = For a code with a length of 64 characters, whereby only characters from 0-9 and a-f can be used.
Click OK to confi rm your entries. In the Profi le management tab, you can now select your profi le and Activate
it by clicking the button.
- Authentication via special authentication protocols and certifi cates
You can also authenticate yourself via special authentication protocols, which however require an
authentication server. Select either WPA/WPA2 or 802.1x.
The authentication protocols available here are variations of EAP (Extensible Authentication Protocol)
which require an authentication server (RADIUS server) or certifi cates. Your administrator can give you
the information you require to confi gure this authentication method.
The confi guration process is now complete. Switch to the Current status tab again.
The signal strength and corresponding information on
your confi guration should now be displayed here. You
can now close the confi guration tool The activated
profi le is run automatically after a restart.
24
25

5. Confi guring the software and the computer
After you have successfully installed the network adapter, you still have to install or confi gure a protocol. This
protocol governs the data exchange between the computer and the network. TCP/IP is most common. Each
computer has to be assigned its own address for the protocol. Automatic address assignment is only reliable
if a DHCP server exists in the network, e.g. a router or access point. If you have one of these devices with a
DHCP function, you should leave the setting on “Get automatically”.
Proceed as follows to check the settings on your PC:
Start => Settings => Control Panel => Network connections
Select the connection (network adapter) via which your PC is connected to the router, e.g. “LAN connection”.
When you right-click the corresponding connection, a menu is displayed in which you select Properties.
Select the Internet Protocol (TCP/IP) entry in the list and click Properties.
Select Obtain an IP address automatically and Obtain DNS server address automatically, if there is a DHCP
server in your network! Confi rm by clicking OK, and again in the subsequent window.
Your PC is now confi gured such that the router assigns the IP address automatically.
If you do not have one of these devices, you must assign the IP addresses manually. The following example
describes basic setup using manual address assignment. For local networks, special address ranges are pro-
vided which are not transmitted over the internet. As an example, a range that you can use for your network
is 192.168.1.1 to 192.168.1.254. The fi rst PC is assigned the address 192.168.1.1, the second 192.168.1.2, the third
192.168.1.3, etc.
Select Use the following IP address and enter your IP address in accordance with the sample.
1.PC = IP address 192.168.1.1 Subnet mask 255.255.255.0
2.PC = IP address 192.168.1.2 Subnet mask 255.255.255.0
Click Ok to confi rm your entries.
6. Uninstalling the driver and confi guration program
Switch off your PC and unplug the mains plug from the socket. Open the PC case. Remove the wireless
LAN PCI card from the PC and close the PC case again. Insert the mains plug in the socket again and start
the PC.
Select Start => Settings => Control Panel => Software
Select Atheros Client Installation Program and click Delete! At the subsequent prompt, select Uninstall
previous installation, then click Next. Click OK to confi rm the uninstall.
The program then asks whether you want to delete the driver and profi les. Confi rm with Yes, if you are sure
that you want to remove the network device from your computer.
After the software is removed, the system must be restarted. Save all open documents and close all pro-
grams. Then click OK to restart the computer.
The uninstall process is complete when the computer restarts.
7. Support and contact information
If products are defective:
Please contact your dealer or Hama Product Consulting if you have any product claims.
Internet / World Wide Web:
Product support, new drivers or product information can be found at www.hama.com
Support Hotline – Hama Product Consulting:
Tel. +49 (0) 9091 / 502-115
Fax +49 (0) 9091 / 502-272
E-mail: [email protected]
Note:
This product may only be used in Germany, Austria, Switzerland, France, England, Belgium, Spain, Holland,
Denmark, Hungary, Poland, Sweden, Luxemburg, Ireland, Greece, the Czech Republic, Slovakia and Finland.
See www.hama.com for the declaration of conformity with R&TTE Directive 99/5/EC.
26
27

Sommaire
1. Installation de la carte PCI pour réseau local sans fi l ......................................................................... page 28
2. Installation du pilote et du programme de confi guration ........................................................................ page 28
3. Confi guration rapide ...................................................................................................................................... page 30
4. Programme de confi guration – Introduction et commande ................................................................... page 31
4.1 Création d’un nouveau profi l ........................................................................................................................ page 33
4.1.1 Mode infrastructure ............................................................................................................................. page 34
4.1.2 Mode ad-hoc ......................................................................................................................................... page 35
4.2 Confi guration du chiffrement du réseau local sans fi l ............................................................................ page 36
4.2.1 Chiffrement WEP ................................................................................................................................... page 37
4.2.2 Chiffrement WPA/WPA2 ...................................................................................................................... page 38
5. Confi guration du logiciel et de l’ordinateur ............................................................................................... page 39
6. Désinstallation du pilote et du programme de confi guration ................................................................. page 40
7. Support technique et contact ...................................................................................................................... page 40
Contenu de l‘emballage :
1x carte PCI pour réseau local sans fi l 108 Mbit/s
1x antenne (à visser)
1x pilote sur CD-ROM
1x mode d‘emploi imprimé
Exigences minimales du système :
• Ordinateur de bureau avec un port NCV libre
• Systèmes d‘exploitation Windows® 2000/XP
Consignes de sécurité :
N‘utilisez pas l’appareil dans des environnements poussiéreux ou humides ainsi qu’à proximité de radiateurs
ou de sources de chaleur. Protégez l’appareil de pression et des chocs. L‘appareil ne doit être ni ouvert, ni
transporté pendant son fonctionnement. Utilisez l‘appareil seulement avec une antenne vissée.
1. Installation de la carte PCI pour réseau local sans fi l
Mettez votre ordinateur hors tension, puis retirez la prise du secteur afi n de séparer totalement votre
ordinateur du secteur. Ouvrez le boîtier de votre ordinateur. Sélectionnez un emplacement PCI et retirez
le couvercle de protection de cet emplacement. Insérez la carte PCI pour réseau local sans fi l dans
l’emplacement, puis fi xez la carte au boîtier à l’aide d’une vis. Vous pouvez refermer le boîtier de votre
ordinateur. Vissez en dernier lieu l’antenne fournie sur la prise d’antenne. L’installation est terminée.
Insérez la prise d’alimentation de votre ordinateur dans une prise secteur, puis démarrez votre ordinateur.
2. Installation du pilote et du programme de confi guration
« L’assistant de recherche de nouveau périphérique » de Windows® est exécuté dès que votre système
d’exploitation est démarré. Quittez ce dernier en cliquant sur annuler.
Insérez le CD-ROM fourni dans votre lecteur. Le pilote démarre automatiquement dans la plupart des cas.
Dans le cas où le menu ne s’ouvre pas automatiquement, double-cliquez sur l’icône de votre lecteur dans
votre poste de travail. La fenêtre suivante apparaît après le démarrage du disque :
Sélectionnez la langue désirée.
La fenêtre suivante apparaît dès que vous avez sélectionné la
langue désirée :
Cliquez sur Installer (2000/XP 32 Bit), afi n de lancer l’installation
dans le cas où vous utilisez Windows® 2000 ou XP comme
système d’exploitation. Une utilisation restreinte de l’appareil est
également possible avec les systèmes Win 98/ME. La fonction
« Extended Range (XR)TM » ne sera par exemple pas disponi-
ble et le logiciel ne sera disponible qu’en anglais. Cliquez sur
Installer (Win 98/ME) dans le cas où vous utilisez Windows® 98
ou Windows® ME.
Cliquez sur Affi cher le mode d’emploi le cas échéant. Acrobat
Reader est nécessaire pour visualiser les fi chiers PDF. Si vous
n´avez pas encore installé de version du Acrobat Reader, vous
trouverez une version gratuite sur le CD-pilote ci-joint. Cliquez sur Téléchargement dans le cas où vous dési-
rez mettre le pilote à jour. Sélectionnez Précédent afi n de retourner à la fenêtre de sélection de la langue.
Dans le cas où votre système d’exploitation n’est pas proposé, vous devriez tenter d’établir une connexion à
internet d’une autre manière (ou utiliser le CD-ROM sur un ordinateur disposant d’une connexion) et cliquer
sur Téléchargement. Les pilotes correspondant à l’appareil vous seront alors proposés par le navigateur.
Vous pouvez vérifi er à ce stade si un pilote adapté à votre système a été développé entre temps.
InstallShield Wizard sera chargé dès que vous cliquez sur Installer. Ce processus peut durer plusieurs
secondes. Veuillez patienter jusqu’à ce que InstallShield Wizard démarre.
Un message vous annonçant que le pilote et le logiciel sont installés apparaît. Cliquez sur Suivant afi n de
continuer l’installation. Lisez le contrat de licence, puis sélectionnez « J’accepte les termes du contrat de
licence » le cas échéant. Cliquez sur Suivant afi n de continuer l‘installation.
Vous pouvez alors décider d’installer uniquement le pilote ou
d’installer le pilote et le logiciel. Il est possible de créer des
disquettes d’installation pour certaines applications.
Dans la plupart des cas, nous recommandons d’installer
également l’utilitaire client. La description d’installation et de
confi guration suivante se réfère donc à ce type d’installation.
Sélectionnez Installer uniquement le pilote dans le cas où vous
désirez utiliser un autre programme de confi guration, comme
celui intégré à Windows® XP.
Sélectionnez Installer l’utilitaire client et le pilote, puis cliquez sur Suivant.
Une remarque signifi ant que le système devra être redémarré à la fi n de la procédure apparaît à l’écran.
Confi rmez ensuite par Oui.
¬
Mode d’emploi carte PCI pour réseau local sans fi l 108 Mbit/s
28
29

Vous pourrez alors déterminer le dossier cible. En général, aucune modifi cation n’est nécessaire. Dans le cas
où vous désirez modifi er le dossier, cliquez sur Parcourir, puis sélectionnez le répertoire désiré. Continuez en
cliquant sur Suivant.
Le système vous demande alors dans quel dossier de programme (menu de démarrage) les liens doivent être
créés. Là non plus, aucune modifi cation n’est en général nécessaire. Confi rmez en cliquant sur Suivant.
Uniquement pour Windows® XP
Les informations suivantes concernent la sélection de l’utilitaire de confi guration. Il est possible d’utiliser
l’utilitaire livré ou celui de Windows®. Nous vous conseillons d’utiliser le programme fourni.
Cliquez sur Suivant et sélectionnez Utilitaire client WiFi (WLAN) 802.11g USB 2.0, puis confi rmez en
cliquant sur Suivant.
Un message vous annonçant que le pilote est automatiquement installé apparaît à l’écran :
Cliquez sur OK.
Lors de l’installation du pilote, il est possible qu’un message apparaisse vous annonçant que le pilote ne
satisfait pas au test Windows® Logo.
Ce message signifi e uniquement que le test n’a pas encore été
réalisé par Windows®. La stabilité et le fonctionnement du pilote
ont été néanmoins amplement testés avant sa mise sur la mar-
ché. L’homologation effectuée par Hama vous permet d’utiliser
des nouvelles versions du pilote dès à présent sans avoir à
attendre les résultats du test Windows® Logo. Confi rmez donc
ce message et cliquez sur Continuer.
Le message « InstallShield Wizard terminé » apparaît à l’écran en dernier lieu. Retirez le CD-ROM du lecteur
et redémarrez votre ordinateur en répondant « Oui, je veux redémarrer mon ordinateur maintenant », puis en
cliquant sur Terminer.
Vous pouvez confi gurer votre adaptateur WiFi dès que votre ordinateur a redémarré.
3. Confi guration rapide
Cette notice devrait être suffi sante pour mettre votre appareil en service pour autant que vous avez déjà
confi guré d’autres appareils WiFi dans le passé. Veuillez vous référer au mode d’emploi complet à partir de la
page 31 dans le cas où vous n’avez aucune expérience en matière de WiFi.
1. Ouvrez l’utilitaire de confi guration WiFi (Wireless LAN) en exécutant le lien Utilitaire client WiFi (WLAN)
Atheros sur le poste de travail ou en cliquant sur Démarrer / Programmes / Atheros / Utilitaire client
WiFi (WLAN) Atheros.
2. Commutez vers l’onglet Gestion de profi ls et cliquez sur Analyser.
3. Cochez le réseau correspondant dans la liste et cliquez sur Activer.
4. Donnez un nom à votre profi l dans la fenêtre suivante. Commutez ensuite vers l’onglet Sécurité.
5. Sélectionnez le chiffrement utilisé dans le réseau cible, puis cliquez sur Confi gurer. Dans le cas où
aucun chiffrement n’est utilisé dans le réseau cible, commutez vers l’onglet Options et ignorez le point
6. Dans la fenêtre suivante, saisissez la clé d’encodage nécessaire pour le réseau cible. Commutez ensuite
vers l’onglet avancées.
7. Dans le cas où vous désirez vous connecter à l’aide d’un point d’accès (accesspoint) ou d’un routeur,
nous vous conseillons de conserver telles quelles toutes les confi gurations de cette page. Sélectionnez
ad-hoc sous Type de réseau et le même canal que celui utilisé par l’autre appareil client sous Canal si
vous désirez vous connecter à un autre appareil client WiFi (Wireless LAN), par exemple une clé USB ou
CardBus.
8. Confi rmez votre saisie en cliquant sur OK. Commutez vers l’onglet Etat actuel. Les État actuel
relatives à votre profi l sont affi chées dans cette fenêtre. La barre verte vous indique l’intensité de
réception de votre connexion au réseau cible.
Veuillez continuer à lire le mode d’emploi complet à partir du point « Programme de confi guration – Introduc-
tion et commande » dans le cas où aucune connexion n’est affi chée ou pour de plus amples renseignements.
4. Programme de confi guration – Introduction et commande
Ouvrez l’utilitaire de confi guration WiFi (Wireless LAN) en exécutant le lien Utilitaire client WiFi (WLAN)
802.11g sur le poste de travail ou en cliquant sur Programmes / Atheros / Utilitaire client WiFi (WLAN)
Atheros.
Des informations relatives aux différentes confi gurations de
votre WiFi (Wireless LAN) sont affi chées dans cette fenêtre.
Il est possible que l’appareil WiFi se soit déjà connecté auto-
matiquement à un réseau disponible dans le cas où le réseau
cible auquel vous désirez vous connecter n’exige pas de
chiffrement. L’intensité de réception est dans ce cas immédi-
atement affi chée dans la partie inférieure de la fenêtre.
Commutez vers l’onglet Gestion du profi ls.
Il est utile de créer un profi l afi n de confi gurer. Un profi l sert
à sauvegarder différentes confi gurations de connexion sous
une certaine dénomination. Il est ainsi possible de sauve-
garder les confi gurations de différents réseaux dans des
profi ls, ce qui vous permettra de commuter facilement entre
plusieurs réseaux sans fi l.
30
31

33
Tous les profi ls sauvegardés seront affi chés dans la partie supérieure gauche de la fenêtre. Le premier profi l
est le profi l Standard. Les détails du profi l sélectionné sont affi chés dans cette liste. Plusieurs boutons de
traitement du profi l sont placés dans la partie droite de la fenêtre.
Le bouton Ordre des profi ls vous permet d’ajouter des profi ls déjà créés à une liste intitulée Profi ls
sélectionnés automatiquement.
Sélectionnez le profi l désiré dans la liste des profi ls disponi-
bles. Cliquez ensuite sur Ajouter. Le profi l contrasté apparaît
alors dans la liste des profi ls sélectionnés automatiquement.
C’est ainsi que ce profi l sera, par exemple, automatiquement
sélectionné lors du démarrage de votre l’ordinateur. Vous
pouvez organiser l’ordre d’apparence de ces profi ls à l’aide
des boutons Monter et Descendre, dans le cas où cette liste
contient plusieurs profi ls. Vous pouvez effacer un profi l de la
liste à l’aide du bouton Supprimer.
Cliquez sur OK afi n de conclure le processus de confi guration.
Cliquez sur le bouton Modifi er afi n de traiter un profi l sélectionné dans la liste. Vous pouvez effacer un profi l
de la liste dont vous n’avez plus besoin à l’aide du bouton Supprimer. Sélectionnez un profi l de la liste que
vous désirez activer, puis cliquez sur le bouton Activer.
Cliquez sur le bouton Analyser afi n de rechercher les réseaux sans fi l disponibles.
Tous les réseaux sans fi l disponibles dans votre zone de réception sont affi chés avec les informations
suivantes :
• Nom du réseau/ID du réseau SSID
• Un icône de clé est affi ché lorsqu’un chiffrement radio
est utilisé.
• Utilisation de Super G ™
• Utilisation de eXtended Range (XR) ™
• Puissance du signal
• Canal WiFi (WLAN) (les canaux 1-13 sont disponibles
en Europe)
• Mode Sans fi l, soit 108 Mbit/s, 54 Mbit/s ou 11 Mbit/s
- Super G ™ est un procédé d’augmentation du taux de transfert vers 108 Mbit/s grâce à l’utilisation de
deux canaux de 54 Mbit/s chacun.
- eXtended Range (XR) ™ est une technologie spéciale d’augmentation de la portée grâce à l’extension du
fallback du taux de transfert standard vers une valeur pouvant atteindre 0,25 Mbit/s.
Cliquez sur le bouton Actualiser afi n d’actualiser l’affi chage. Cliquez sur OK afi n de refermer la fenêtre.
Cliquez sur le bouton Activer dès que vous avez sélectionné un réseau disponible dans la liste. Vous pouvez
ainsi l’enregistrer dans un nouveau profi l. Vous ouvrirez ainsi le même dialogue que celui affi ché lors de la
création d’un nouveau profi l. Pour de plus amples informations, consultez Création d’un nouveau profi l.
4.1 Création d’un nouveau profi l
Vous aurez besoin de différentes informations concernant le réseau cible afi n de créer un nouveau profi l.
Vous devrez, entre autres, connaître le SSID du réseau cible et vous devrez savoir si un chiffrement est utilisé
pour le réseau cible ; dans l’affi rmative, vous devrez connaître le type de chiffrement du réseau cible. Vous
pouvez en outre choisir entre deux types de réseaux différents. L’appareil supporte les types de réseaux
infrastructure et ad-hoc.
Infrastructure : Sélectionnez ce type dans le cas où vous désirez utiliser votre appareil Wireless LAN pour
établir une connexion à un routeur ou à un point d’accès Wireless LAN.
Ad-hoc : Sélectionnez ce type dans le cas où vous désirez établir une connexion directe à un autre appareil
client Wireless LAN comme une autre clé USB ou une carte PCI WiFi sans routeur ou point d’accès Wireless
LAN. Deux appareils client WiFi sont requis pour ce type de connexion.
Il existe deux possibilités de base pour créer un profi l : soit en utilisant le bouton Nouveau de l’onglet Gestion
de profi ls ou par sélection directe d’un réseau après un Analyser.
Variante 1 Commutez vers l’onglet Gestion de profi ls, puis cliquez sur Nouveau
ou
Variante 2 Commutez vers l’onglet Gestion de profi ls, puis cliquez sur Analyser. Le système recherche les
réseaux disponibles qui seront ensuite affi chés dans une liste. Sélectionnez le réseau désiré et
cliquez sur Activer.
Uniquement pour réseaux cachés :
Dans le cas où le champ SSID est vide, le routeur ou le point d’accès ont été réglés de telle sorte que
ces réseaux restent cachés. Il n’est donc pas possible de prendre automatiquement ce SSID en charge.
L’écran affi che dans les deux cas la fenêtre suivante :
32

34
35
4.1.1 Fonctionnement en mode infrastructure
Saisissez premièrement un Nom de profi l, par exemple « mon_profi l ». Le nom de votre ordinateur est
automatiquement affi ché dans le champ Nom de client.
Vous devez saisir l’identifi ant SSID du réseau cible dans le camp SSID1 dans le cas où vous avez choisi la
Variante 1. Vous pouvez trouver cette variante dans les confi gurations de votre routeur ou votre point d’accès
Wireless LAN ou encore vous la procurer en demandant à un administrateur. L’identifi ant SSID est automa-
tiquement transmis à partir de la liste scannée dans le cas où vous avez choisi la Variante 2.
Commutez ensuite vers l’onglet Options avancées.
Les réglages de base sont faits de telle sorte que vous pou-
vez tous les conserver. Les différents points sont brièvement
décrits ci-dessous :
Type de réseau :
Sélectionnez pour cela l’infrastructure. Ce mode vous per-
met de vous connecter à un routeur ou à un point d’accès
Wireless LAN.
Niveau de puissance de la transmission :
Il existe deux possibilités pour diminuer le niveau de puissance. Ce réglage peut être utile lorsque vos ap-
pareils WiFi (WLAN) ne sont pas très éloignés l’un de l’autre.
Mode sans fi l :
2,4 Ghz 54 Mbit/s : Activez cette option pour supporter des appareils selon le standard 802.11g avec
54 Mbit/s (conseillé)
2,4 Ghz 11 Mbit/s : Activez cette option afi n de garantir la comptabilité d’appareils 11 Mbit/s (conseillé)
Super G ™ : Conseillé lorsque le routeur / le point d’accès ou d’autres appareils connectés
supportent ce mode.
eXtended Range (XR) ™ : Conseillé lorsque le routeur / le point d’accès ou d’autres appareils connectés
supportent ce mode.
QoS : Permet la réservation de largeur de bande (rarement requis)
Mode économique d´énergie :
Arrêt : Mode le plus rapide, utile pour les ordinateurs alimentés par prise secteur.
Maximal : Pour l’optimisation des temps d’utilisation de la batterie d’ordinateurs portables
Normal : Augmentation du temps de la batterie ; plus rapide que le mode de fonctionnement « Maximal »
Préambule 802.11b :
Nous vous conseillons de conserver le paramètre court & long.
Mode sans fi l lors du démarrage du réseau ad-hoc :
Ce réglage n’est pas important pour le mode infrastructure
Mode d‘authentifi cation 802.11
Vous pouvez sélectionner Auto, Ouvert ou Installé dans le cas où vous utilisez un chiffrement WEP.
Point d’accès par défaut
Cliquez sur ce bouton afi n de saisir dans un masque les adresses MAC de vos points d’accès Wireless LAN
préférés.
Commutez vers l’onglet Sécurité et continuez la confi guration à la page 36 sous Confi guration du chiffrement
du réseau local sans fi l dans le cas où votre réseau utilise un chiffrement.
Confi rmez vos réglages avec OK dans le cas où votre réseau fonctionne sans chiffrement. Vous pouvez
sélectionner le profi l que vous avez créé et cliquer sur le bouton Activer mis en évidence dans l’écran illustré
plus bas à partir de l’onglet Gestion de profi ls.
4.1.2 Fonctionnement en mode ad-hoc
Saisissez premièrement un Nom de profi l, par exemple « mon_profi l ». Le nom de votre ordinateur est
automatiquement affi ché dans le champ Nom de client.
Vous devez saisir l’identifi ant SSID du réseau cible dans le champ SSID1 dans le cas où vous avez choisi la
Variante 1. Vous pouvez trouver cette variante dans les confi gurations de votre routeur ou votre point d’accès
Wireless LAN ou encore vous la procurer en demandant à un administrateur. L’identifi ant SSID est
automatiquement transmis à partir de la liste scannée dans le cas où vous avez choisi la Variante 2.
Commutez ensuite vers l’onglet Options avancées.
Type de réseau :
Sélectionnez pour cela Ad-hoc. Ce mode vous permet de vous
connecter à d’autres appareils client Wireless LAN comme
des clés USB, des cartes PCI ou CardBus.
Mode sans fi l lors du démarrage du réseau ad-hoc :
Déterminez si vous désirez démarrer en mode ad-hoc avec 11
Mbit/s ou 54 Mbit/s. Ce réglage dépend bien sûr également du
taux de transfert supporté par les autres appareils. Choisissez
ensuite le Canal devant être utilisé pour votre réseau ad-hoc.
Ce canal doit être également sélectionné par les autres
appareils connectés.
Tous les autres réglages sont faits de telle sorte que vous pouvez tous les conserver. Les différents points
sont brièvement décrits ci-dessous :
Niveau de puissance de la transmission :
Il existe deux possibilités pour diminuer le niveau de puissance. Ce réglage peut être utile lorsque vos ap-
pareils WiFi (WLAN) ne sont pas très éloignés l’un de l’autre.

36
37
Mode sans fi l :
2,4 Ghz 54 Mbit/s : Activez cette option pour supporter des appareils selon le standard 802.11g avec
54 Mbit/s (conseillé)
2,4 Ghz 11 Mbit/s : Activez cette option afi n de garantir la comptabilité d’appareils 11 Mbit/s (conseillé)
Super G ™ : Conseillé lorsque le routeur / le point d’accès ou d’autres appareils connectés
supportent ce mode.
eXtended Range (XR) ™ : Conseillé lorsque le routeur / le point d’accès ou d’autres appareils connectés
supportent ce mode.
QoS : Permet la réservation de largeur de bande (rarement requis)
Mode économique :
Ce réglage n’est pas important pour le mode ad-hoc. Le mode économique est désactivé.
Préambule 802.11b :
Nous vous conseillons de conserver le paramètre Uniquement long.
Commutez vers l’onglet Sécurité et continuez la confi guration sous Confi guration du chiffrement du réseau
local sans fi l dans le cas où votre réseau utilise un chiffrement.
Confi rmez vos réglages avec OK dans le cas où votre réseau fonctionne sans chiffrement. Vous pouvez sélec-
tionner le profi l que vous avez créé et cliquer sur le bouton Activer mis en évidence dans l’écran illustré plus
bas à partir de l’onglet Gestion de profi ls.
4.2 Confi guration du chiffrement du réseau local sans fi l
Remarque !!! Le chiffrement est désactivé par défaut. Par mesure de sécurité, nous vous conseillons cepen-
dant d’utiliser un chiffrement en permanence.
Dans un premier temps, il importe de distinguer les différentes notions. Petit glossaire des termes les plus
importants utilisés ici :
Authentifi cation : L’authentifi cation est une procédure au cours de laquelle l’identité, d’une personne par
exemple, est déterminée à l’aide d’une caractéristique particulière. Cette caractéristique peut être une em-
preinte digitale, un mot de passe ou tout autre justifi catif.
Chiffrement : Le chiffrement est une procédure au cours de laquelle un « texte en langage clair » est transfor-
mé en « texte codé » à l’aide d’un processus de chiffrement (algorithme). Une ou plusieurs clés peuvent être
utilisées à cet effet.
Il convient également de relever que chaque procédé d’encodage offre une ou plusieurs possibilités
d’authentifi cation.
Sélectionnez le profi l désiré dans la gestion de profi ls, puis cliquez sur Modifi er. Commutez ensuite vers
l’onglet Sécurité.
De manière générale, plusieurs types de codage sont dispo-
nibles pour votre appareil :
Chiffrement WEP 64 bits, 128 bits et 152 bits
Chiffrement WPA et WPA2
Nous vous conseillons d’utiliser un chiffrement WPA/WPA 2
et une authentifi cation du mot de passe. Sélectionnez WEP
dans le cas où les autres appareils connectés dans le réseau
ne supportent pas de clé WPA.
4.2.1 Chiffrement WEP
Le standard WEP (Wired Equivalent Privacy) est un algorithme de chiffrement standard pour WiFi. Il est censé
régler l’accès au réseau aussi bien que garantir l’intégrité des données. Ce procédé est considéré comme
peu sûr en raison de différents maillons faibles. L’authentifi cation est dans ce cas réalisée sur la base de la
méthode de la Clé partagée (shared key).
Sélectionnez Clé prépartagée (WEP statique) dans le cas où vous désirez utiliser le chiffrement WEP.
Cliquez ensuite sur Confi gurer.
Les informations que vous saisissez dans ce masque doivent
correspondre exactement aux données de chiffrement
utilisées dans le réseau cible, donc pour le routeur / point
d’accès Wireless LAN en mode infrastructure et pour tous
les appareils client WiFi en mode ad-hoc.
Vous pouvez déterminer dans la partie supérieure de la
fenêtre quels caractères doivent être utilisés pour la clé. La
méthode hexadécimale permet les caractères 0-9 et a-f ;
ASCII permet tous les caractères, à l’exception des espaces.
Cette confi guration et la sélection d’un chiffrement 64 bits,
128 bits ou 152 bits déterminent la longueur de la clé à saisir.
WEP 64 bits ASCII exige 5 caractères
WEP 64 bits HEX exige 10 caractères
WEP 128 bits ASCII exige 13 caractères
WEP 128 bits HEX exige 26 caractères
WEP 152 bits ASCII exige 16 caractères
WEP 152 bits HEX exige 32 caractères
Vous pouvez défi nir 4 clés dans la partie inférieure de la fenêtre dont une seule sera utilisée. Au cas où les
autres appareils Wireless LAN supportent également cette procédure, vous pouvez changer de clé à inter-
valles réguliers. Vous pouvez également saisir uniquement une clé et l’utiliser en permanence.

38
39
Uniquement la clé défi nie comme Clé de transmission.
Exemples de clés :
64 bits Hex (10 caractères) = 231074a6ef
64 bits ASCII (5 caractères) = j31n!
128 bit Hex (26 caractères) = 231074a6b9773ce43f91a5bef3
128 bits ASCII (13 caractères) = conges2006!+0
Confi rmez vos paramètres en cliquant sur OK.
4.2.2 Chiffrement WPA/WPA2
L’accès protégé WiFi WPA (WiFi Protected Access) est une méthode de chiffrement pour WiFi (WLAN). WPA
comprend l’architecture de WEP mais offre une protection supplémentaire grâce à un encodage dynamique
basé sur le protocole Temporal Key Integrity Protocol (TKIP) qui offre en outre des « clés pré-partagées »
(PSK Pre-Shared-Keys) ou un « protocole d’authentifi cation extensible » (EAP Extensible Authentication
Protocol EAP) pour lequel cependant un serveur radius est nécessaire. WPA2 est un post-développement de
WPA et utilise AES (Advanced Encryption Standard), un autre algorithme de chiffrement.
Authentifi cation par clé pré-partagée
Sélectionnez Phrase secréte WPA/WPA2, puis cliquez sur Confi gurer.
Saisissez la clé dans le format requis.
ASCII = 8 caractères au minimum et 63 au maximum ; (A-Z) lettres, les chiffres et signes de ponctuation sont
admissibles ou
Hex = pour une clé d’une longueur de 64 caractères ; seuls les caractères 0-9 et a-f peuvent être utilisés.
Confi rmez votre saisie en en cliquant sur OK. Vous pouvez sélectionner le profi l que vous avez créé et cliquer
sur le bouton Activer mis en évidence dans l’écran ci-dessous à partir de l’onglet Gestion de profi ls.
- Authentifi cation via des protocoles d’authentifi cation et des certifi cats spéciaux
Vous pouvez, en plus, vous authentifi er via des protocoles d’authentifi cation spéciaux nécessitant
cependant un serveur d’authentifi cation. Sélectionnez WPA/WPA2 ou 802.1x.
Les protocoles d’authentifi cation proposés ici sont des variations du protocole EAP (Extensible
Authentication Protocol) nécessitant un serveur d’authentifi cation (serveur RADIUS) ou des certifi cats
spécifi ques. Vous pouvez vous procurer les informations requises pour la confi guration de cette méthode
de d’authentifi cation chez votre administrateur.
La confi guration est ainsi terminée. Commutez encore une fois vers l’onglet Etat actuel.
Les indications relatives à l’intensité de réception et
les informations correspondant à votre confi guration
devraient y être affi chées. Vous pouvez alors refermer
l’outil de confi guration. Le profi l actif sera automa-
tiquement sélectionné lors du démarrage de votre
l’ordinateur.
5. Confi guration du logiciel et de l´ordinateur
Une fois l’installation de l’appareil réseau réussie, vous devez installer et confi gurer entre autres un pro-
tocole. Il permet aux ordinateurs d’un réseau d’échanger des données. Le protocole TCP/IP est utilisé le
plus fréquemment. Il est nécessaire d’octroyer une adresse à chaque ordinateur. L’affectation automatique
des adresses fonctionne correctement uniquement lorsqu’un serveur DHCP est disponible, par exemple un
routeur ou un point d’accès. Vous devriez pouvoir vous procurer automatiquement les paramètres dans le cas
où vous disposez d’un appareil à fonction DHCP.
Procédez comme suit afi n de vérifi er les paramètres de votre ordinateur :
Démarrer => Paramètres => Panneau de confi guration => Connexions réseau
Sélectionnez la connexion (adaptateur de réseau) par laquelle votre ordinateur est connecté au routeur,
« Connexion LAN » par exemple. Vous pouvez ouvrir un menu contenant les propriétés de la connexion en
cliquant avec le bouton droit de votre souris sur la connexion correspondante.
Sélectionnez l’entrée Protocole internet (TCP/IP) dans la liste, puis cliquez sur Propriétés.
Sélectionnez Obtenir une adresse IP automatiquement et Obtenir les adresse des serveurs DNS automa-
tiquement dans le cas où un serveur DHCP est intégré dans votre réseau. Confi rmez votre saisie en cliquant
sur OK, puis de nouveau sur OK dans la fenêtre suivante.
Votre ordinateur est alors confi guré afi n d’être capable d’obtenir automatiquement son adresse IP à partir du
serveur.
Seite wird geladen ...
Seite wird geladen ...
Seite wird geladen ...
Seite wird geladen ...
Seite wird geladen ...
Seite wird geladen ...
Seite wird geladen ...
Seite wird geladen ...
-
 1
1
-
 2
2
-
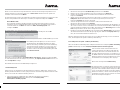 3
3
-
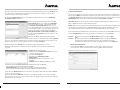 4
4
-
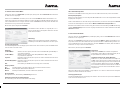 5
5
-
 6
6
-
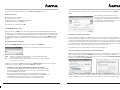 7
7
-
 8
8
-
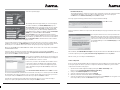 9
9
-
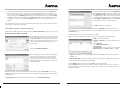 10
10
-
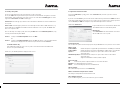 11
11
-
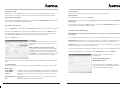 12
12
-
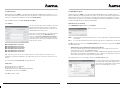 13
13
-
 14
14
-
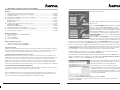 15
15
-
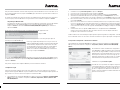 16
16
-
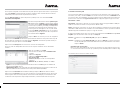 17
17
-
 18
18
-
 19
19
-
 20
20
-
 21
21
-
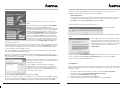 22
22
-
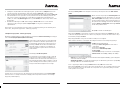 23
23
-
 24
24
-
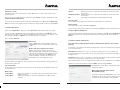 25
25
-
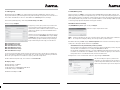 26
26
-
 27
27
-
 28
28


Hama 00062768 Bedienungsanleitung
- Kategorie
- Router
- Typ
- Bedienungsanleitung
- Dieses Handbuch eignet sich auch für
in anderen Sprachen
- English: Hama 00062768 Owner's manual
- français: Hama 00062768 Le manuel du propriétaire
- dansk: Hama 00062768 Brugervejledning
Verwandte Artikel
-
Hama 00062732 Bedienungsanleitung
-
-
-
-
-
Hama 00053302 Bedienungsanleitung
-
-
Hama 00053305 Bedienungsanleitung
-
-