
HAGOR Products GmbH | Oberbecksener Straße 97 | D-32547 Bad Oeynhausen | Telefon: +49(0)57 31-7 55 07-0 | Mail: info@hagor.de
Installationsanleitung
VWH-4 | Art.-Nr.: 1625
DE Installationsanleitung
ES Guía de instalación
GB Installation manual
FR Guide d‘installation
SE Installationsanvisning
TR Yükleme Rehberi
RU инструкция по установке
NL Installatievoorschrift
CN 安装指南
TNATROPMI TNATROPMI
SELOH DER ESU OT ELBISSOP TON SI FI ESU SELOH NEERG S ELOH DER ESU OT ELBISSOP TON SI FI ESU SELOH NEERG
552
5.13
003 003
245
31
162
973
003
984
624
31
973
552
162
051
5.13
003
99
051 051
9
984
245
5.13
624
9
552
5.13
051
245
984
162
624
973
5.13 624
5.13
552
245
5.13
31
5.13
051
31
973
05 01 51
162
051
984
615 615 615 615
XAM
niM
GNINEPO
TNEMTSUJDA
niM TNEMTSUJDA
XAM GNINEPO
)2x( tekcarb gnikooH
gk 08 DAOL XAM THGIEW gk 08 DAOL XAM THGIEW
)2x( t
ekcarb gnikooH
ROTINOM SIXA ROTINOM SIXA
5.412 5.412
5.022
044
5.022 5.022
044 044
5.412
044
5.022
5.412
NEERCS
SIXA SIXA
FOFO
NEERCS
245
552
984
245
755
8
∅
245
892 - 682
ASEV
491 491
194
401
892 - 682
984
004 XAM -002 NIM
051
ASEV
245
004 XAM -002 NIM 29
225
5x52 PETS 5x52 PETS
194
004
002 002
02
552
29
194
002
755
5x52 PETS
491
2121
984
401
225 225
02
755
051
491
21
8
∅
245
004 XAM -002 NIM
004
02
245
002
892 - 682
984
29
051
ASEV
21
02
245 245
ASEV 401
004 XAM -002 NI
M
8
∅
401
29
8
∅
051
004
225
755
5x52 PETS
004
194
892 - 682
552 552

HAGOR Products GmbH | Oberbecksener Straße 97 | D-32547 Bad Oeynhausen | Telefon: +49(0)57 31-7 55 07-0 | Mail: info@hagor.de
DE
GB
Achtung!
Technische Geräte stellen einen beträchtlichen Wert dar. Sie sollten daher bei
der Installation vorsichtig mit den Komponenten umgehen und diese bei Bedarf
schützen.
Auch sollte, falls nötig, der Installtionsbereich abgesichert werden. Herabfallen-
de Teile können zu Verletzungen und Materialschäden führen.
Die im Lieferumfang enthaltenen Materialien sind unter Umständen nicht für die
speziellen Gegebenheiten am Installationsort geeignet. Bitte prüfen Sie dies
vorab und ersetzen Sie diese bei Bedarf durch geeignete Materialien.
Falls Sie Bezüglich der Installation des Produkts unsicher sind oder noch Fra-
gen haben wenden Sie sich an uns oder anderes ausgebildetes Fachpersonal.
Caution!
Technical devices are of considerable value. You should therefore handle the
components carefully during installation and protect them if necessary.
If necessary, the installation area should also be secured. Falling parts can cause
injuries and material damage.
The materials included in the scope of delivery may not be suitable for the spe-
cial conditions at the installation site. Please check this in advance and replace it
with suitable materials if necessary.
If you are unsure about the installation of the product or have any questions,
please contact us or other trained specialists.

HAGOR Products GmbH | Oberbecksener Straße 97 | D-32547 Bad Oeynhausen | Telefon: +49(0)57 31-7 55 07-0 | Mail: info@hagor.de
Lieferumfang | Scope of delivery
Befestigungspunkte | Wall xing points
252
252
Halterung | Mount
1x
Verwenden Sie für die Montage möglichst die rot markierten Bohrlöcher.
Die grünen Bohrlöcher bitte nur verwenden, wenn die roten Bohrlöcher nicht verwendet werden können.
If possible, use the red drill holes for assembly.
Please only use the green drill holes if the red drill holes cannot be used.
Adapter
2x
M6x16 4x M8x14 4x

252
252
HAGOR Products GmbH | Oberbecksener Straße 97 | D-32547 Bad Oeynhausen | Telefon: +49(0)57 31-7 55 07-0 | Mail: info@hagor.de
252
1
2.1
2.2
2.3
D
C
F
F
A
SSchrauben Sie die VESA-Arme (S) auf
der Rückseite des TV fest. Lösen Sie die
Sicherungsschrauben (D) vollständig.
Screw the VESA arms (S) on the back
of the TV. Loose the security screws (D)
completely.
Montieren Sie die Halterung vollkommen
waagerecht. Verwenden sie die Löcher (F)
mit geeigneten Dübeln oder einer anderen
Art von Befestigung, welche sich für die
Wand eignet. Vergewissern Sie sich, dass
die Befestigung die Last tragen kann.
Fix the mount perfectly horizontal by using
the holes (F) with suitable anchor or other
kind of x for your type of wall. Be sure that
the xing will support the applied load.
Bestimmen Sie die Mitte des ersten
Monitors unten links.
Determine the center of the rst
monitor on bottom left.
Markieren Sie 252 mm oberhalb von (C)
das Zentrierungsloch (A).
Mark 252 mm up from (C) the centering
hole (A).
252

HAGOR Products GmbH | Oberbecksener Straße 97 | D-32547 Bad Oeynhausen | Telefon: +49(0)57 31-7 55 07-0 | Mail: info@hagor.de
3.1
3.2
3.3
Nachdem Sie die erste Halterung wie zuvor
beschrieben montiert haben, zeichnen Sie
eine perfekt horizontale Linie (die Verwen-
dung einer Laserwaage kann dabei helfen).
After you have mounted the rst bracket as
descibed before, draw a perfectly horizontal
line (the use of a laser level may help).
Montieren Sie die zweite Halterung mit Hil-
fe des Abstandshaltersatzes (siehe 4) und
achten Sie darauf, dass sie mit der zuvor ge-
zeichneten horizontalen Linie übereinstimmt.
Using the mounting spacer kit (see 4) mount
the second bracket taking care to align with
the previously drawn horizontal line.
Bevor Sie alle Halterungen befestigen, mon-
tieren Sie zumindest die ersten 3 Schirme,
wie in der Abbildung gezeigt, und überprüfen
Sie den richtigen Abstand zwischen ihnen.
Before xing all the brackets, mount at least
the rst 3 screens, as shown in the gure and
check the proper distance between them.
Montieren Sie die erste Halterung der nächs-
ten Reihe mit Hilfe des Abstandshaltersatzes
genau im rechten Winkel. Ziehen Sie wieder
eine perfekt horizontale Linie.
Fahren Sie mit der Montage der nächsten
Halterungen fort.
Using the mounting spacer kit, mount the rst
bracket of the next row perfectly in square.
Draw a perfectly horizontal line again.
Proceed with the mounting of the next bra-
ckets.

HAGOR Products GmbH | Oberbecksener Straße 97 | D-32547 Bad Oeynhausen | Telefon: +49(0)57 31-7 55 07-0 | Mail: info@hagor.de
4
Beispiel horizontal | Example horizontal
Optional erhältlich | Optionally available
Beispiel vertikal | Example vertical
Für eine schnelle Installation der kompletten Videowal ist
es ratsam, dieses Kit zu verwenden (auf Anfrage erhältlich).
Für jedes Monitormodell ist ein anderes Abstandshalter-Kit
erforderlich!
For a quick installation of the complete videowal it‘s advised
to use this Kit (supplied upon request). For each monitor
model a dierent type of spacer kit is required.
Monitorbreite + 1 mm
Monitor width + 1 mm
Monitorbreite + 1 mm
Monitor width + 1 mm
Monitorhöhe + 1 mm
Monitor height + 1 mm
Monitorhöhe + 1 mm
Monitor height + 1 mm

HAGOR Products GmbH | Oberbecksener Straße 97 | D-32547 Bad Oeynhausen | Telefon: +49(0)57 31-7 55 07-0 | Mail: info@hagor.de
5Ausrichtung der Monitore | Monitor alignment
Z-Achse | Z axis
Y-Achse | Y axisY-Achse | Y axis
X-Achse | X axis
Wasserwaage
Level
Senkblei
plump bob

HAGOR Products GmbH | Oberbecksener Straße 97 | D-32547 Bad Oeynhausen | Telefon: +49(0)57 31-7 55 07-0 | Mail: info@hagor.de
Hängen Sie den ersten Monitor unten links ein.
Achten Sie darauf, dass die Knöpfe (X) zwischen den Halterungen (S) bleiben.
Stellen Sie sicher, dass die horizontale Mitte des Monitors mit der
horizontalen Mitte der Halterung übereinstimmt.
Richten Sie den Monitor mit Hilfe einer Wasserwaage parallel zum Boden aus,
indem Sie den Einstellknopf für die Z-Achse verwenden.
Verwenden Sie den Einstellknopf für die Y-Achse, um sicherzustellen,
dass jede Ecke des Monitors den gleichen Abstand zur Wand hat.
Richten Sie die erste Monitorsäule mit einem Lot so aus,
dass zwischen den Monitoren ein Abstand von mindestens 1 mm besteht.
Hängen Sie die übrigen Monitore mit einem Abstand von mindestens 1 mm ein.
Wenn die Positionierung des Monitors abgeschlossen ist,
ziehen Sie gegebenenfalls die zuvor gelösten Sicherheitsschrauben fest.
Hook rst bottom left monitor. Be careful to keep the knobs (X) between the brackets (S).
Check that the horizontal center of the monitor is aligned with the
horizontal center of the bracket.
Useing a level allign the monitor parallel to the oor by using Z axel adjustment knob.
Use the Y axis regulation knob to ensure that every corner of the monitor is equidistant
from the wall.
Use a plumb to allign the rst column of monitors leaving at least 1mm between them.
Hook the remaining monitors leaving at least 1 mm between them.
When the position!adjustment of the monitor is nished if necessary
tight the safety screws previously loosed.
5.1
5.1
5.2
5.2
5.3
5.3
5.4
5.4
5.5
5.5
5.6
5.6
5.7
5.7

HAGOR Products GmbH | Oberbecksener Straße 97 | D-32547 Bad Oeynhausen | Telefon: +49(0)57 31-7 55 07-0 | Mail: info@hagor.de
6 Montage der Adapter (optional) | Installation of adapters (optionally)
AD1 (600 x 400 mm) | AD 2 (800 x 400 mm) | Landscape
AD1 (400 x 600 mm) | AD 2 (400 x 800 mm) | Portrait
Rechte Bohrung verwenden.
Mount on the right side hole.
Linke Bohrung verwenden.
Mount on the left side hole.

HAGOR Products GmbH | Oberbecksener Straße 97 | D-32547 Bad Oeynhausen | Telefon: +49(0)57 31-7 55 07-0 | Mail: info@hagor.de
Warnung! Befestigen Sie alle Kabel, um Schäden zu vermeiden.
Warning! Fix all cables to prevent damage.
252
7 Kabelmanagement | Cable management

HAGOR Products GmbH | Oberbecksener Straße 97 | D-32547 Bad Oeynhausen | Telefon: +49(0)57 31-7 55 07-0 | Mail: info@hagor.de
Abmessungen | Dimensions
TNATROPMI TNATROPMI
SELOH DER ESU OT ELBISSOP TON SI FI ESU SELOH NEERG S ELOH DER ESU OT ELBISSOP TON SI FI ESU SELOH NEERG
552
5.13
003 003
245
31
162
973
003
984
624
31
973
552
162
051
5.13
003
99
051 051
9
984
245
5.13
624
9
552
5.13
051
245
984
162
624
973
5.13 624
5.13
552
245
5.13
31
5.13
051
31
973
05 01 51
162
051
984
615 615 615 615
XAM
niM
GNINEPO
TNEMTSUJDA
niM TNEMTSUJDA
XAM GNINEPO
)2x( tekcarb gnikooH
gk 08 DAOL XAM THGIEW gk 08 DAOL XAM THGIEW
)2x( t
ekcarb gnikooH
ROTINOM SIXA ROTINOM SIXA
5.412 5.412
5.022
044
5.022 5.022
044 044
5.412
044
5.022
5.412
NEERCS
SIXA SIXA
FOFO
NEERCS
245
552
984
245
755
8
∅
245
892 - 682
ASEV
491 491
194
401
892 - 682
984
004 XAM -002 NIM
051
ASEV
245
004 XAM -002 NIM 29
225
5x52 PETS 5x52 PETS
194
004
002 002
02
552
29
194
002
755
5x52 PETS
491
2121
984
401
225 225
02
755
051
491
21
8
∅
245
004 XAM -002 NIM
004
02
245
002
892 - 682
984
29
051
ASEV
21
02
245 245
ASEV 401
004 XAM -002 NI
M
8
∅
401
29
8
∅
051
004
225
755
5x52 PETS
004
194
892 - 682
552 552

HAGOR Products GmbH | Oberbecksener Straße 97 | D-32547 Bad Oeynhausen | Telefon: +49(0)57 31-7 55 07-0 | Mail: info@hagor.de
-
 1
1
-
 2
2
-
 3
3
-
 4
4
-
 5
5
-
 6
6
-
 7
7
-
 8
8
-
 9
9
-
 10
10
-
 11
11
-
 12
12


in anderen Sprachen
- English: Hagor 1625 Owner's manual
Verwandte Artikel
-
 Hagor 2876 Bedienungsanleitung
-
 Hagor 8267 Bedienungsanleitung
-
 Hagor 2815 Bedienungsanleitung
-
 Hagor 3344 Bedienungsanleitung
-
 Hagor 3343 Bedienungsanleitung
-
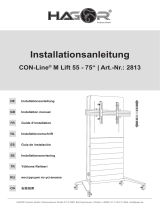 Hagor 2813 Bedienungsanleitung
-
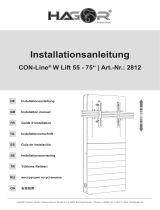 Hagor 2812 Bedienungsanleitung
-
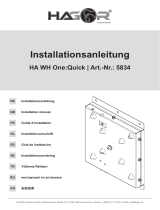 Hagor 5834 Bedienungsanleitung
-
 Hagor 5868 Bedienungsanleitung
-
 Hagor 5805 Bedienungsanleitung


