Thermo Fisher Scientific Locator and Locator Plus Benutzerhandbuch
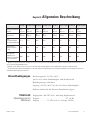
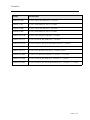
- Kategorie
- Komfortbeleuchtung
- Typ
- Benutzerhandbuch

Visit us online to register your warranty
www.thermoscientific.com/labwarranty
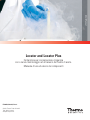
User Manual
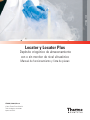
Locator and Locator Plus
Cryogenic Storage Vessel with or without
Ultrasonic Level Monitor
Operation Manual and Parts List LT509X9 (7018141) Rev. 6

Thermo Scientific
Preface
Cryogenic Storage Vessel i
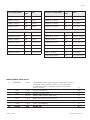
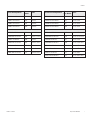
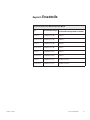
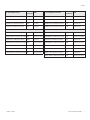
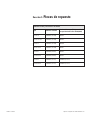
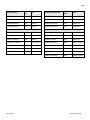
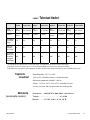
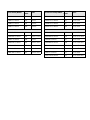
Locator Catalog Number Locator
Model Name
CY50925 w/o Monitor 8141 Locator Jr
CY50935 w/o Monitor 8143 Locator 4
CY50985 w/o Monitor 8197 Locator 6
CY50945 w/o Monitor 8145 Locator 8
CY509105 w/ Monitor 8201 Locator Jr.
CY509105CN w/ Monitor 8202 Locator Jr. China
CY509107 w/ Monitor 8246 Locator 4
CY509107CN w/ Monitor 8247 Locator 4 China
CY509113 w/ Monitor 8198 Locator 6
CY509110 w/ Monitor 8211 Locator 8
CY509110CN w/ Monitor 8212 Locator 8 China
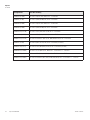
Locator Plus Catalog Number Locator Plus
Model Name
CY50925-70 w/o Monitor 8142 Locator Jr Plus
CY50935-70 w/o Monitor 8144 Locator 4 Plus
CY50985-70 w/o Monitor 8147 Locator 6 Plus
CY50945-70 w/o Monitor 8146 Locator 8 Plus
CY509106 w/ Monitor 8237 Locator Jr Plus
CY509106CN w/ Monitor 8238 Locator Jr Plus China
CY509108 w/ Monitor 8207 Locator 4 Plus
CY509108CN w/ Monitor 8208 Locator 4 Plus China
CY509109 w/ Monitor 8209 Locator 6 Plus
CY509109CN w/ Monitor 8210 Locator 6 Plus China
CY509111 w/ Monitor 8213 Locator 8 Plus
CY509111CN w/ Monitor 8214 Locator 8 Plus China
MANUAL NUMBER LT509X9 (7018141)
6 ECNM-000831 03/16/21 Removed Warranty caution from preface page ii, added Safety Precautions in
Preface page iii, page 1-2, WEEE Compliance in page 9-1 and removed
EUT statements in page 2-1. Updated Specifications for Environmental
Conditions in page 2-1. TFI
5 41864 11/07/17 Removed CE mark and info bpg
4 40578 2/23/16 Clarified Do Not Roll warning ccs
3 -- 10/27/15 Updated symbols and labels, added cautions ccs
2 31623 5/15/15 Added caution for moving vessel in Section 3 ccs
1 31528 9/15/14 Updated conformity specs and declaration ccs
0 27564 1/31/14 Original - new PCBA design ccs
REV ECR/ECN DATE DESCRIPTION By

Thermo Scientificii Cryogenic Storage Vessel
Preface
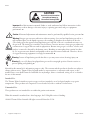
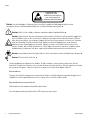
Contains Parts and Assemblies
Susceptible to Damage by
Electrostatic Discharge (ESD)
CAUTION
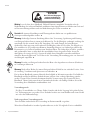
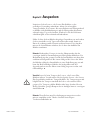
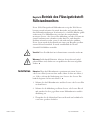
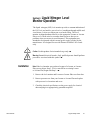
Important Read this instruction manual. Failure to read, understand and follow instructions in this
manual may result in damage to the unit, injury to operating personnel, and poor equipment
performance. s
Caution All internal adjustments and maintenance must be performed by qualified service personnel. s
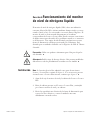
Warning Nitrogen gas can cause suffocation without warning. Store and use liquid nitrogen only in a
well-ventilated place. As the liquid evaporates, the resulting gas displaces the normal air in the area.
(The cloudy vapor that appears when liquid nitrogen is exposed to the air is condensed moisture, not
the gas itself. The issuing gas is invisible.) In closed areas, excessive amounts of nitrogen gas reduces the
concentration of oxygen and can result in asphyxiation. Because nitrogen gas is colorless, odorless, and
tasteless, it cannot be detected by the human senses. Breathing an atmosphere that contains less than
19.5% oxygen can cause dizziness and quickly result in unconsciousness and death. Therefore, the use
of oxygen monitoring equipment is strongly recommended. s
Warning Contact of liquid nitrogen with the skin or eyes may cause serious (freezing) injury. s
Warning Do not roll. Always keep liquid nitrogen vessel in an upright position. Exercise caution to
prevent spilling and splashing. s
Material in this manual is for information purposes only. The contents and the product it describes are subject to
change without notice. Thermo Fisher Scientific makes no representations or warranties with respect to this
manual. In no event shall Thermo be held liable for any damages, direct or incidental, arising out of or related to
the use of this manual.
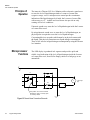
Intended Use:
The Thermo Fisher Scientific cryogenic storage vessels are intended to store biological samples at cryogenic
temperatures. These products are comprised of a vessel and a lid, with or without a level monitor.
Unintended Use:
These products are not intended for use within the patient environment.
When this manual is translated into other languages, the US English version is binding.
© 2021 Thermo Fisher Scientific. All rights reserved. Printed in U.S.A.

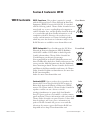
Thermo Scientific Cryogenic Storage Vessel iii
Preface
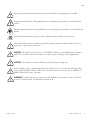
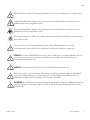
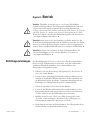
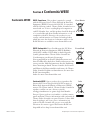
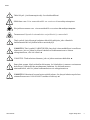
Important operating and/or maintenance instructions. Read the accompanying text carefully.
Potential electrical hazards. Only qualified persons should perform procedures associated with this
symbol.
Extreme temperature hazards. Only qualified persons should perform procedures associated with this
symbol.
Potential biological hazards. Proper protective equipment and procedures must be used.
This symbol when used alone indicates important operating instructions which reduce the risk of
injury or poor performance of the unit.
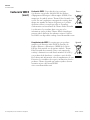
CAUTION: This symbol, in the context of a CAUTION, indicates a potentially hazardous situation
which if not avoided could result in minor to moderate injury or damage to the equipment. s
CAUTION: This indicates a situation which may result in property damage. s
Before installing, using or maintaining this product, please be sure to read the manual and product
warning labels carefully. Failure to follow these instructions may cause the product to malfunction,
which could result in injury or damage.
WARNING: Unauthorized repair of your freezer will invalidate your warranty. Contact Technical
Service at 1-800-438-4851 for additional information. s

Thermo Scientificiv Cryogenic Storage Vessel
Preface
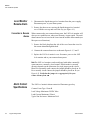
Do You Need Information or Assistance on
Thermo Scientific Products?
If you do, please contact us 8:00 a.m. to 6:00 p.m. (Eastern Time) at:
1-740-373-4763 Direct
1-800-438-4851 Toll Free, U.S. and Canada
1-877-213-8051 FAX
http://www.thermofisher.com Internet Worldwide Web Home Page
service.led.marietta@thermofisher.com Tech Support Email Address
Certified Service Web Pagewww.unitylabservices.com
Our staff can provide information on pricing and give you quotations. We canSales Support
take your order and provide delivery information on major equipment items or make
arrangements to have your local sales representative contact you. Our products are listed on the
Internet and we can be contacted through our Internet home page.
Our staff can supply technical information about proper setup, operation orService Support
troubleshooting of your equipment. We can fill your needs for spare or replacement parts or
provide you with on-site service. We can also provide you with a quotation on our Extended
Warranty for your Thermo Scientific products.
Whatever Thermo Scientific products you need or use, we will be happy to discuss your
applications. If you are experiencing technical problems, working together, we will help you
locate the problem and, chances are, correct it yourself...over the telephone without a service
call.
When more extensive service is necessary, we will assist you with direct factory trained
technicians or a qualified service organization for on-the-spot repair. If your service need is
covered by the warranty, we will arrange for the unit to be repaired at our expense and to your
satisfaction.
Regardless of your needs, our professional telephone technicians are available to assist you
Monday through Friday from 8:00 a.m. to 6:00 p.m. Eastern Time. Please contact us by
telephone or fax. If you wish to write, our mailing address is:
Thermo Fisher Scientific (Asheville) LLC
401 Millcreek Road, Box 649
Marietta, OH 45750
International customers, please contact your local Thermo Scientific distributor.

Cryogenic Storage Vessel vThermo Scientific
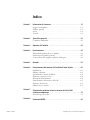
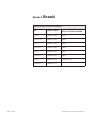
Table of Contents
Safety Information . . . . . . . . . . . . . . . . . . . . . . . . . . . . . . . . . . . . . . . . . . . .1-1
Please Read . . . . . . . . . . . . . . . . . . . . . . . . . . . . . . . . . . . . . . . . . . . .1-1
General Usage . . . . . . . . . . . . . . . . . . . . . . . . . . . . . . . . . . . . . . . . . .1-1
Warnings . . . . . . . . . . . . . . . . . . . . . . . . . . . . . . . . . . . . . . . . . . . . . .1-2
Cautions . . . . . . . . . . . . . . . . . . . . . . . . . . . . . . . . . . . . . . . . . . . . . . .1-2
General Specifications . . . . . . . . . . . . . . . . . . . . . . . . . . . . . . . . . . . . . . .2-1
Environmental Conditions . . . . . . . . . . . . . . . . . . . . . . . . . . . . . . . . .2-1
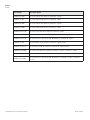
Unpacking . . . . . . . . . . . . . . . . . . . . . . . . . . . . . . . . . . . . . . . . . . . . . . . . . . .3-1
Operation . . . . . . . . . . . . . . . . . . . . . . . . . . . . . . . . . . . . . . . . . . . . . . . . . . . .4-1
Filling Instructions . . . . . . . . . . . . . . . . . . . . . . . . . . . . . . . . . . . . . . .4-1
Measuring Liquid Nitrogen Quantity . . . . . . . . . . . . . . . . . . . . . . . .4-2
Storing Samples in Vapor Phase . . . . . . . . . . . . . . . . . . . . . . . . . . . . .4-2
General Cleaning Instructions . . . . . . . . . . . . . . . . . . . . . . . . . . . . . .4-2
Replacement Parts . . . . . . . . . . . . . . . . . . . . . . . . . . . . . . . . . . . . . . . . . . .5-1
Liquid Nitrogen Level Monitor Operation . . . . . . . . . . . . . . . . . . . . . . . .6-1
Installation . . . . . . . . . . . . . . . . . . . . . . . . . . . . . . . . . . . . . . . . . . . . .6-1
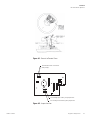
Remote Alarm . . . . . . . . . . . . . . . . . . . . . . . . . . . . . . . . . . . . . . . . . .6-2
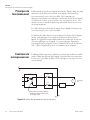
Alarm Contact Specifications . . . . . . . . . . . . . . . . . . . . . . . . . . . . . . .6-2
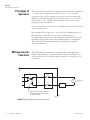
Microprocessor Functions . . . . . . . . . . . . . . . . . . . . . . . . . . . . . . . . .6-4
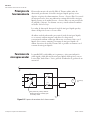
Principles of Operation . . . . . . . . . . . . . . . . . . . . . . . . . . . . . . . . . . .6-4
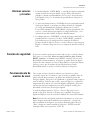
Level Monitor Operation . . . . . . . . . . . . . . . . . . . . . . . . . . . . . . . . . .6-5
Safety Feature . . . . . . . . . . . . . . . . . . . . . . . . . . . . . . . . . . . . . . . . . . .6-5
Audible and Visual Alarms . . . . . . . . . . . . . . . . . . . . . . . . . . . . . . . . .6-5
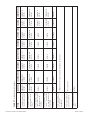
LN2 Level Monitor Troubleshooting and Parts List . . . . . . . . . . . . . . .7-1
Ordering Procedures . . . . . . . . . . . . . . . . . . . . . . . . . . . . . . . . . . . . .7-2
Warranty Information . . . . . . . . . . . . . . . . . . . . . . . . . . . . . . . . . . . .8-1
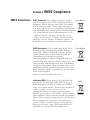
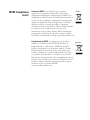
WEEE Compliance . . . . . . . . . . . . . . . . . . . . . . . . . . . . . . . . . . . . . . .9-1
Section 1
Section 2
Section 3
Section 4
Section 5
Section 6
Section 7
Section 8
Section 9

vi Cryogenic Storage Vessel Thermo Scientific
Table of Contents

Cryogenic Storage Vessel 1-1Thermo Scientific
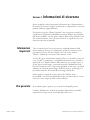
Please Read
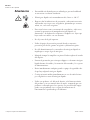
Section 1 Safety Information
This manual contains important operating and safety information.
The user must carefully read and understand the contents of this manual
prior to the use of this equipment.
Your Thermo Scientific cryogenic vessel has been designed with function,
reliability, and safety in mind. It is the user’s responsibility to install it in
conformance with local electrical codes. For safe operation, please pay
attention to the warnings and cautions throughout the manual.
All cryopreservation vessels, regardless of who manufactures them, use a
vacuum to provide the super insulative properties needed to keep nitrogen
in a liquid form. They are very similar, in fact, to the Thermos® vessels you
may have used to store coffee, soup or milk.
Remember how fragile they were? Since no vacuum is perfect or will last
forever, we suggest that you monitor the consumption of liquid nitrogen
used by your vessel on a regular basis, i.e. every 1-2 days. By monitoring,
you may be able to anticipate subtle changes in consumption and possibly
react to problems before they arise. You may opt to use a level monitor for
this purpose (see page 6-1 for level monitor operation.).
Also, if your samples are super critical, one-of-a-kind, or irreplaceable,
consider allocating your samples to 2 separate vessels. Remember the old
adage about placing all your eggs into one basket….
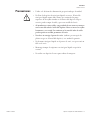
Do not use this product for anything other than its intended usage.
Use of the equipment in a manner not specified by the manufacturer may
impair the protection provided by the equipment.
General Usage

1-2 Cryogenic Storage Vessel Thermo Scientific
Section 1
Safety Information
• This unit is intended to be used by trained personnel in a
well-ventilated environment.
• Liquid nitrogen is extremely cold; it boils at -196°C.
• Follow all necessary precautions and warnings relevant to applicable
hazards such as frostbite, contact burn, asphyxiation, etc. in cryogenic
area.
• To avoid injury due to frostbite or ruptured vials, use extreme care
whenever handling liquid nitrogen, liquid nitrogen storage or transfer
vessels, or any objects which have come in contact with liquid
nitrogen.
• Leave no areas of skin exposed.
• Wear appropriate PPE where necessary; face shield, cryogenic gloves,
cryogenic apron.
• Do not tightly seal liquid nitrogen containers or prevent nitrogen gas
from escaping.
• Always handle ampules with tongs. They may explode when removed
from the vessel.
• Use extreme care to prevent spilling and splashing liquid nitrogen
during transfer and removal of storage contents and holders.
• Immediately remove any clothing or safety attire on which liquid
nitrogen has been spilled or splashed.
• Get immediate medical attention for any frostbite injuries due to
liquid nitrogen.
Use this product only in the way described in the product literature•
and in this manual. Before using it, verify that this product is suitable
for its intended use. If the equipment is used in a manner not
specified by the manufacturer, the protection provided by the
equipment may be impaired.
Warnings

• Only use the power supply provided by the unit.
• Never overfill liquid nitrogen vessels. Liquid nitrogen level should
never be above the tops of the racks inside the vessel. The excess
weight may crack the neck and result in vacuum failure.
• When inserting or removing racks, be careful not to come in contact
with the neck tube area of the vessel. Remove or insert racks slowly
in a vertical manner. Scratches on the neck tube area can cause
premature vacuum failure.
• Do not tamper with or remove vacuum port (covered by a black
plastic cap on side of vessel); this will void warranty.
• Do not spill liquid nitrogen on vacuum port - this can cause vacuum
failure.
• Always keep liquid nitrogen vessel in an upright position.
• Do not use this Locator vessel for transport.
Cryogenic Storage Vessel 1-3Thermo Scientific
Section 1
Safety Information
Cautions

1-4 Cryogenic Storage Vessel Thermo Scientific
Section 1
Safety Information

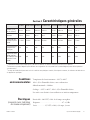
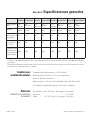
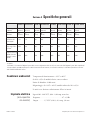
Cryogenic Storage Vessel 2-1Thermo Scientific
Operating temperature: -29°C to +60°C
10% to 95% relative humidity, non-condensing.
Altitude limit: 2,000 meters.
Storage: -29°C to +60°C; 10% to 95% relative humidity.
Intended for indoor use only.
Inputs 100-240 VDC, 0.08 - 0.04 amps, single phase
Frequency . . . . . . . . . . . . . . . . . . . . . . .47 - 63 Hz
Output . . . . . .15 VDC (±10%), 0.2 amps, 3.0 watts
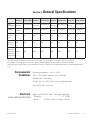
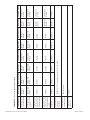
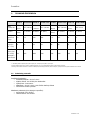
Locator 4 Locator 4 Plus Locator 6 Locator 6 Plus Locator 8 Locator 8 Plus Locator JR Locator JR Plus
Height
(including lid)1
37.5”
(95.2 cm) 39.5” (100.3 cm) 39.5”
(100.3 cm) 39.5” (100.3 cm) 37.5”
(95.2 cm) 39.5” (100.3 cm) 26.5”
(67.3 cm) 28.9” (73.4 cm)
Diameter 22”
(55.9 cm) 22” (55.9 cm) 26” (66 cm) 26” (66 cm) 22”
(55.9 cm) 22” (55.9 cm) 22” (55.9 cm) 22” (55.9 cm)
LN2 Capacity,
Liquid Phase
Storage
111 L 121 L 184 L 184 L 111 L 121 L 60 L 71 L
Static LN2
Evaporation
rate - L/Day3
0.99 0.99 0.99 0.99 0.60 0.60 0.85 0.85
Liquid Phase
Capacity (2mL
Vial2actually
submerged in
liquid nitrogen)
3600 4000 6000 6000 1800 2000 1600 2000
1The liquid nitrogen level monitor will add 1 inch to these heights. The transportation cart will add 4 inches to these heights.
2 Using Nalgene System 100 cryoboxes with a 10 x 10 vial configuration (Nalgene System 100 vial or equivalent are needed).
3Actual working time may vary due to current atmospheric conditions, container history, manufacturing tolerances, and any individual patterns
of use.
Environmental
Conditions
Electrical
(cover with monitors only)
Section 2 General Specifications

2-2 Cryogenic Storage Vessel Thermo Scientific
Section 2
General Specifications

Cryogenic Storage Vessel 3-1Thermo Scientific
Section 3 Unpacking
Before using your new Locator or Locator Plus vessel, carefully inspect the
vessel prior to use. Check for signs of damage which may have occurred in
shipment. It is advisable to fill (see filling instructions) all new units with
liquid nitrogen and watch liquid nitrogen loss rate for a few days. If there
are any problems, call Customer Service as soon as possible.
The warranty registration card enclosed with the vessel must be completed
and returned to the factory within 30 days to make warranty effective.
This information must include the serial number, which is located on the
label on the vessel.
Note The most prevalent cause of failure of liquid nitrogen storage vessels
is mechanical. The vessel necktube supports the full weight of the inner
shell and all the liquid nitrogen it contains. A side blow to the vessel causes
the inner shell to swing in a pendulum-like motion causing the necktube
to be damaged. Any storage vessel which has been in an accident, has been
dropped, or lowered to hit on its side, will tend to fail more rapidly than
one that has not.
Caution Exercise caution when moving your Locator or Locator Plus
vessel. Locator and Locator Plus cryobiological storage systems are not
transportation vessels. Transport carts are designed for mobility within the
lab, or lab to lab only. Moving full vessels long distances, over cracks in
floor, thresholds, on inclined ramps or in elevators can cause premature
vacuum failure. Avoid using excessive force when moving vessel; this can
cause tipping, resulting in damage and/or spilling of liquid nitrogen. s
Note If samples must be transported under cryogenic conditions, consider
Arctic Express line of Dry Shippers available from Thermo Scientific.

3-2 Cryogenic Storage Vessel Thermo Scientific
Section 3
Unpacking

Cryogenic Storage Vessel 4-1Thermo Scientific
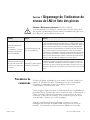
Section 4 Operation
Caution Never overfill your Locator or Locator Plus vessel with liquid
nitrogen. The liquid nitrogen level in your tank (with racks inserted)
should never be above 20 inches (50 cm) for Locator 4 and Locator 8, 10
inches (25 cm) for Locator Jr., 22 inches (55.8 cm) for Locator 4, 6, and 8
Plus and 12 inches for Locator Jr. Plus. Filling the tank up to or above the
bottom of the necktube may cause immediate or premature vacuum failure
to occur. s
Caution When inserting or removing racks, be careful not to come in
contact with the necktube area of the vessel. Remove or insert racks slowly
in a vertical manner. Scratches on the necktube area can cause premature
vacuum failure. s
Caution Do not spill liquid nitrogen on vacuum port (covered by a black
plastic cap on side of vessel). This can cause vacuum failure. s
To avoid damage to your Locator or Locator Plus cryogenic storage vessel
which may result in premature vacuum loss, it is important that the
following procedure be used when adding liquid nitrogen to a warm vessel.
1. Add only a small amount of liquid nitrogen (5-10 liters) to a new or
warm vessel.
2. Allow this small amount of liquid nitrogen to sit in the covered vessel
for a minimum of 2 hours. This will limit stress caused by the sudden
temperature change associated with adding liquid nitrogen to a warm
vessel.
3. Add an additional 15 liters of liquid nitrogen to the vessel.
4. Allow vessel to sit for 48 hours and monitor liquid nitrogen
consumption with a wooden yarsdstick, optional dip measurer (part
#180143) or Level Monitor.
5. Fill Locator or Locator Plus as indicated (see Caution in this section).
Allow for displacement of liquid nitrogen when racks and boxes are
inserted.
6. Insert and remove racks slowly. Allow liquid nitrogen to run out of
boxes and off racks.
Filling Instructions

4-2 Cryogenic Storage Vessel Thermo Scientific
Section 4
Operation
1. Use a wooden yardstick or optional dip measurer (part #180143) to
measure liquid nitrogen level. NEVER use a hollow tube or plastic
dipstick to measure the liquid nitrogen level.
2. Level will be indicated by the frostline which develops when dipstick is
removed.
3. Level Monitor can be used for constant measurements. See Section 6.
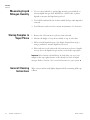
1. Remove the 2 bottom-most cryoboxes from each rack.
2. Measure the height of 2 cryoboxes stacked on top of each other.
3. Fill vessel with liquid nitrogen to the height obtained from Step 2,
using a yardstick to measure liquid level in vessel.
4. Place racks into vessel without the 2 bottom-most cryoboxes. Samples
are now above the liquid nitrogen and are stored in the vapor phase.
Important A level monitor should always be used when you store your
samples in the vapor phase because of the already low levels of liquid
nitrogen. Refer to Section 5 for correct level monitor for your system. s
Wipe exterior surfaces with lightly dampened cloth containing mild soap
solution.
Storing Samples in
Vapor Phase
General Cleaning
Instructions
Measuring Liquid
Nitrogen Quantity

Cryogenic Storage Vessel 5-1Thermo Scientific
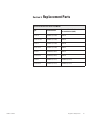
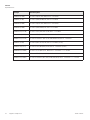
Section 5 Replacement Parts
Locator and Locator Plus Covers w/o Monitor
Type Standard Covers Covers and Rack Kits (for units with
lids made before 3/2010)
Locator Jr. CV509X51 (321746) 1950514
Locator Jr. Plus CV509X51 (321746) 1950515
Locator 4 CV509X51 (321746) 1950516
Locator 4 Plus CV509X51 (321746) 1950517
Locator 6 CV509X50 (321651) 1950513
Locator 6 Plus CV509X50 (321651) 1950513
Locator 8 CV509X23 (317227) CV509X23 (317227)
Locator 8 Plus CV509X23 (317227) CV509X23 (317227)

5-2 Cryogenic Storage Vessel Thermo Scientific
Section 5
Replacement Parts
Catalog # Rack Description
HR509X15A (317050) For Locator Jr (8141, 8201, 8202) with 4 - 2 inch boxes
HR509X2A (317161) For Locator 4 (8143, 8246, 8247) with 9 - 2 inch boxes
HR509X19A (315903) For Locator Jr (8141, 8201, 8202) with 2 - 4 inch boxes
HR509X20A (315905) For Locator 4 (8143, 8246, 8247) with 5 - 4 inch boxes
HR509X15A-70 (317148) For Locator Jr Plus (8142, 8237, 8238) with 5 - 2 inch boxes
HR509X2A-70 (317175) For Locator 4 Plus (8144, 8207, 8208) with 10 - 2 inch boxes
HR509X31A-70 (317192) For Locator 6 and 6 Plus (8147, 8197, 8198, 8209, 8210) with 10 - 2 inch boxes
HR509X1A (317205) For Locator 8 (8211, 8212, 8145) with 9 - 2 inch boxes (25 cell)
HR509X1A-70 (317217) For Locator 8 Plus (8146, 8213, 8214) with 10 - 2 inch boxes (25 cell)
HR509X19A-70 (315904) For Locator Jr. Plus (8142, 8237, 8238) with 2 - 4 inch boxes + 1 - 2 inch box
HR509X20A-70 (315906) For Locator 4 Plus (8144, 8207, 8208) with 5 - 4 inch boxes + 1 - 2 inch box
HR509X32A-70 (315907) For Locator 6 and 6 Plus (8147, 8197, 8198, 8209, 8210) with 5 - 4 inch boxes + 1 - 2 inch box

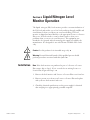
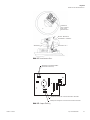
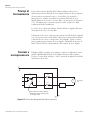
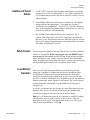
Section 6 Liquid Nitrogen Level
Monitor Operation
The liquid nitrogen (LN2) level monitor provides a constant indication of
the LN2level and notifies you to low level conditions through audible and
visual alarms. It alerts you when your vessel needs filling. The level
monitor is shipped mounted directly to the appropriate Locator or Locator
Plus cover. It can be wired to a remote alarm system to alert you to
problems when you are not in your laboratory. This equipment was
intended to be operated with an external power supply provided by the
manufacturer. It is designed for use with Thermo Scientific LN2vessels
only.
Caution Use this product for its intended usage only. s
Warning Potential electrical hazards. Only qualified persons should
perform procedures associated with this symbol. s
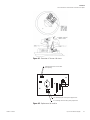
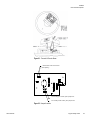
Note If the level monitor was purchased as part of a Locator or Locator
Plus system, skip to Step 3. If it is a retrofit for an existing Locator or
Locator Plus, begin with Step 1. s
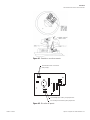
1. Remove the level monitor and Locator or Locator Plus cover from box.
2. Remove present cover from your Locator or Locator Plus and replace
with your new level monitor and cover.
3. Check the electrical specifications on the power supply for electrical
data and plug in to appropriately grounded receptacle.
Cryogenic Storage Vessel 6-1Thermo Scientific
Installation
Seite wird geladen ...
Seite wird geladen ...
Seite wird geladen ...
Seite wird geladen ...
Seite wird geladen ...
Seite wird geladen ...
Seite wird geladen ...
Seite wird geladen ...
Seite wird geladen ...
Seite wird geladen ...
Seite wird geladen ...
Seite wird geladen ...
Seite wird geladen ...
Seite wird geladen ...
Seite wird geladen ...
Seite wird geladen ...
Seite wird geladen ...
Seite wird geladen ...
Seite wird geladen ...
Seite wird geladen ...
Seite wird geladen ...
Seite wird geladen ...
Seite wird geladen ...
Seite wird geladen ...
Seite wird geladen ...
Seite wird geladen ...
Seite wird geladen ...
Seite wird geladen ...
Seite wird geladen ...
Seite wird geladen ...
Seite wird geladen ...
Seite wird geladen ...
Seite wird geladen ...
Seite wird geladen ...
Seite wird geladen ...
Seite wird geladen ...
Seite wird geladen ...
Seite wird geladen ...
Seite wird geladen ...
Seite wird geladen ...
Seite wird geladen ...
Seite wird geladen ...
Seite wird geladen ...
Seite wird geladen ...
Seite wird geladen ...
Seite wird geladen ...
Seite wird geladen ...
Seite wird geladen ...
Seite wird geladen ...
Seite wird geladen ...
Seite wird geladen ...
Seite wird geladen ...
Seite wird geladen ...
Seite wird geladen ...
Seite wird geladen ...
Seite wird geladen ...
Seite wird geladen ...
Seite wird geladen ...
Seite wird geladen ...
Seite wird geladen ...
Seite wird geladen ...
Seite wird geladen ...
Seite wird geladen ...
Seite wird geladen ...
Seite wird geladen ...
Seite wird geladen ...
Seite wird geladen ...
Seite wird geladen ...
Seite wird geladen ...
Seite wird geladen ...
Seite wird geladen ...
Seite wird geladen ...
Seite wird geladen ...
Seite wird geladen ...
Seite wird geladen ...
Seite wird geladen ...
Seite wird geladen ...
Seite wird geladen ...
Seite wird geladen ...
Seite wird geladen ...
Seite wird geladen ...
Seite wird geladen ...
Seite wird geladen ...
Seite wird geladen ...
Seite wird geladen ...
Seite wird geladen ...
Seite wird geladen ...
Seite wird geladen ...
Seite wird geladen ...
Seite wird geladen ...
Seite wird geladen ...
Seite wird geladen ...
Seite wird geladen ...
Seite wird geladen ...
Seite wird geladen ...
Seite wird geladen ...
Seite wird geladen ...
Seite wird geladen ...
Seite wird geladen ...
Seite wird geladen ...
Seite wird geladen ...
Seite wird geladen ...
Seite wird geladen ...
Seite wird geladen ...
Seite wird geladen ...
Seite wird geladen ...
Seite wird geladen ...
Seite wird geladen ...
Seite wird geladen ...
Seite wird geladen ...
Seite wird geladen ...
Seite wird geladen ...
Seite wird geladen ...
Seite wird geladen ...
Seite wird geladen ...
Seite wird geladen ...
Seite wird geladen ...
Seite wird geladen ...
Seite wird geladen ...
Seite wird geladen ...
Seite wird geladen ...
Seite wird geladen ...
Seite wird geladen ...
Seite wird geladen ...
Seite wird geladen ...
Seite wird geladen ...
Seite wird geladen ...
Seite wird geladen ...
Seite wird geladen ...
Seite wird geladen ...
Seite wird geladen ...
Seite wird geladen ...
Seite wird geladen ...
Seite wird geladen ...
Seite wird geladen ...
Seite wird geladen ...
Seite wird geladen ...
Seite wird geladen ...
Seite wird geladen ...
Seite wird geladen ...
Seite wird geladen ...
Seite wird geladen ...
Seite wird geladen ...
Seite wird geladen ...
Seite wird geladen ...
Seite wird geladen ...
Seite wird geladen ...
Seite wird geladen ...
Seite wird geladen ...
Seite wird geladen ...
Seite wird geladen ...
-
 1
1
-
 2
2
-
 3
3
-
 4
4
-
 5
5
-
 6
6
-
 7
7
-
 8
8
-
 9
9
-
 10
10
-
 11
11
-
 12
12
-
 13
13
-
 14
14
-
 15
15
-
 16
16
-
 17
17
-
 18
18
-
 19
19
-
 20
20
-
 21
21
-
 22
22
-
 23
23
-
 24
24
-
 25
25
-
 26
26
-
 27
27
-
 28
28
-
 29
29
-
 30
30
-
 31
31
-
 32
32
-
 33
33
-
 34
34
-
 35
35
-
 36
36
-
 37
37
-
 38
38
-
 39
39
-
 40
40
-
 41
41
-
 42
42
-
 43
43
-
 44
44
-
 45
45
-
 46
46
-
 47
47
-
 48
48
-
 49
49
-
 50
50
-
 51
51
-
 52
52
-
 53
53
-
 54
54
-
 55
55
-
 56
56
-
 57
57
-
 58
58
-
 59
59
-
 60
60
-
 61
61
-
 62
62
-
 63
63
-
 64
64
-
 65
65
-
 66
66
-
 67
67
-
 68
68
-
 69
69
-
 70
70
-
 71
71
-
 72
72
-
 73
73
-
 74
74
-
 75
75
-
 76
76
-
 77
77
-
 78
78
-
 79
79
-
 80
80
-
 81
81
-
 82
82
-
 83
83
-
 84
84
-
 85
85
-
 86
86
-
 87
87
-
 88
88
-
 89
89
-
 90
90
-
 91
91
-
 92
92
-
 93
93
-
 94
94
-
 95
95
-
 96
96
-
 97
97
-
 98
98
-
 99
99
-
 100
100
-
 101
101
-
 102
102
-
 103
103
-
 104
104
-
 105
105
-
 106
106
-
 107
107
-
 108
108
-
 109
109
-
 110
110
-
 111
111
-
 112
112
-
 113
113
-
 114
114
-
 115
115
-
 116
116
-
 117
117
-
 118
118
-
 119
119
-
 120
120
-
 121
121
-
 122
122
-
 123
123
-
 124
124
-
 125
125
-
 126
126
-
 127
127
-
 128
128
-
 129
129
-
 130
130
-
 131
131
-
 132
132
-
 133
133
-
 134
134
-
 135
135
-
 136
136
-
 137
137
-
 138
138
-
 139
139
-
 140
140
-
 141
141
-
 142
142
-
 143
143
-
 144
144
-
 145
145
-
 146
146
-
 147
147
-
 148
148
-
 149
149
-
 150
150
-
 151
151
-
 152
152
-
 153
153
-
 154
154
-
 155
155
-
 156
156
-
 157
157
-
 158
158
-
 159
159
-
 160
160
-
 161
161
-
 162
162
-
 163
163
-
 164
164
-
 165
165
-
 166
166
-
 167
167
-
 168
168
-
 169
169
-
 170
170
-
 171
171


Thermo Fisher Scientific Locator and Locator Plus Benutzerhandbuch
- Kategorie
- Komfortbeleuchtung
- Typ
- Benutzerhandbuch
in anderen Sprachen
- English: Thermo Fisher Scientific Locator and Locator Plus User manual
- français: Thermo Fisher Scientific Locator and Locator Plus Manuel utilisateur
- español: Thermo Fisher Scientific Locator and Locator Plus Manual de usuario
- italiano: Thermo Fisher Scientific Locator and Locator Plus Manuale utente
Verwandte Artikel
-
 Thermo Fisher Scientific Thermo Benutzerhandbuch
-
 Thermo Fisher Scientific CryoExtra Series Benutzerhandbuch
-
 Thermo Fisher Scientific Thermo Sci TSC Benutzerhandbuch
-
 Thermo Fisher Scientific Surveyor Plus Bedienungsanleitung
-
 Thermo Fisher Scientific Environmental Chamber 3906 and 3943 Bedienungsanleitung
-
 Thermo Fisher Scientific Chloramphenicol Selective Supplements Bedienungsanleitung


Andere Dokumente
-
 Brooks CryoPod Schnellstartanleitung
-
Buhler GAS 222.31 Ex2 Installation And Operation Instructions Manual
-
 Reflex SL 180 Bedienungsanleitung
-
Alpha innotec expansion vessels Bedienungsanleitung
-
Buhler GAS 222.21 AMEX Installation And Operation Instructions Manual
-
Waeco ASC 1000, ASC 2000, ASC 2000 RPA, ASC 3000 Bedienungsanleitung
-
Omni Bead Ruptor 96 Benutzerhandbuch
-
Varian 948 Operation And Service Manual
-
Yamaha DM2000 Bedienungsanleitung
-
Peavey Q 431FX 31-Band Graphic Equalizer Benutzerhandbuch

