Quick Start Guide
LMP Master Mouse WMS-1657C (Bluetooth)
Optical 2-button Bluetooth mouse for macOS and iOS devices with scroll wheel & aluminum housing
LED Indication
LED (Green) Power on – LED still on for 2 seconds and turn o (1st time to power on mouse).
LED (Green) Pairing – LED ashing slowly until pairing with Bluetooth host has been completed.
LED (Green) Power on – LED ashing 3 times or more until connecting to pre-set Bluetooth host
has been re-established.
LED (Red) Charging – Solid red LED while charging and will go o when battery is fully charged.
LED (Green) Low Power – LED ashing fast (function only in active mode).
Getting Started
Fully charging the LMP Master Mouse Bluetooth before initial use is highly recommended
1. Use the USB-C cable to charge the Master Mouse. You can charge it via your host‘s USB-C or USB-A port
(with adapter) or by using a USB power supply with 5V output. When fully charged, the LED will be o.
2. Turn on the mouse using the power switch (to «On» position).
3. Start the pairing process with any Bluetooth enabled host. Follow the steps below.
4. To preserve battery power, it is highly suggested to turn o the Master Mouse when not in use for a longer
period of time (e.g. at night or over the weekend)
FCC Statement
This device has been tested and found to comply with the limits for a Class B digital device, pursuant to part 15 of the FCC rules. These limits are designed to provide reasonable
protection against harmful interference in a residential installation. This device generates, users and can radiate radio frequency energy and, if not installed and used in accordan-
ce with the instructions, may cause harmful interference to radio communications. However, there is no guarantee that interference will not occur in a particular installation. If this
device does cause harmful interference to radio or television reception, which can be determined by turning the device o and on, the user is encouraged to try to correct the
interference by one of more of the following measures
• Reorient or relocate the receiving antenna.
• Increase the separation between the device and receiver.
• Connect the device into an outlet on a circuit dierent from that to which the receiver is connected.
• Consult the dealer or an experienced radio/TV technician for help.
To assure continued compliance, any changes or modications not expressly approved by the part responsible for compliance could void the user’s authority to operate this
device. (Example: use only shielded interface cable when connecting to computer or peripheral device).
This device complies with Part 15 of the FCC Rules. Operation is subject to the following two conditions:
(1) This device may not cause harmful interference, and
(2) This device must accept any interference received, including interference that may cause undesired operation.
This equipment complies with FCC RF radiation exposure limits set forth for an uncontrolled environment. This equipment should be installed and operated with a minimum
distance of 0.5 centimeters between the radiator and your body.
This transmitter must not be co-located or operating in conjunction with any other antenna or transmitter.
The antennas used for this transmitter must be installed to provide a separation distance of at least 0.5 cm from all persons and must not be co-located or operating in conjunc-
tion with any other antenna or transmitter.
Caution!
The manufacturer is not responsible for any radio or TV interference caused by unauthorized modications to this device. Such modications could void the user authority to
operate the device.
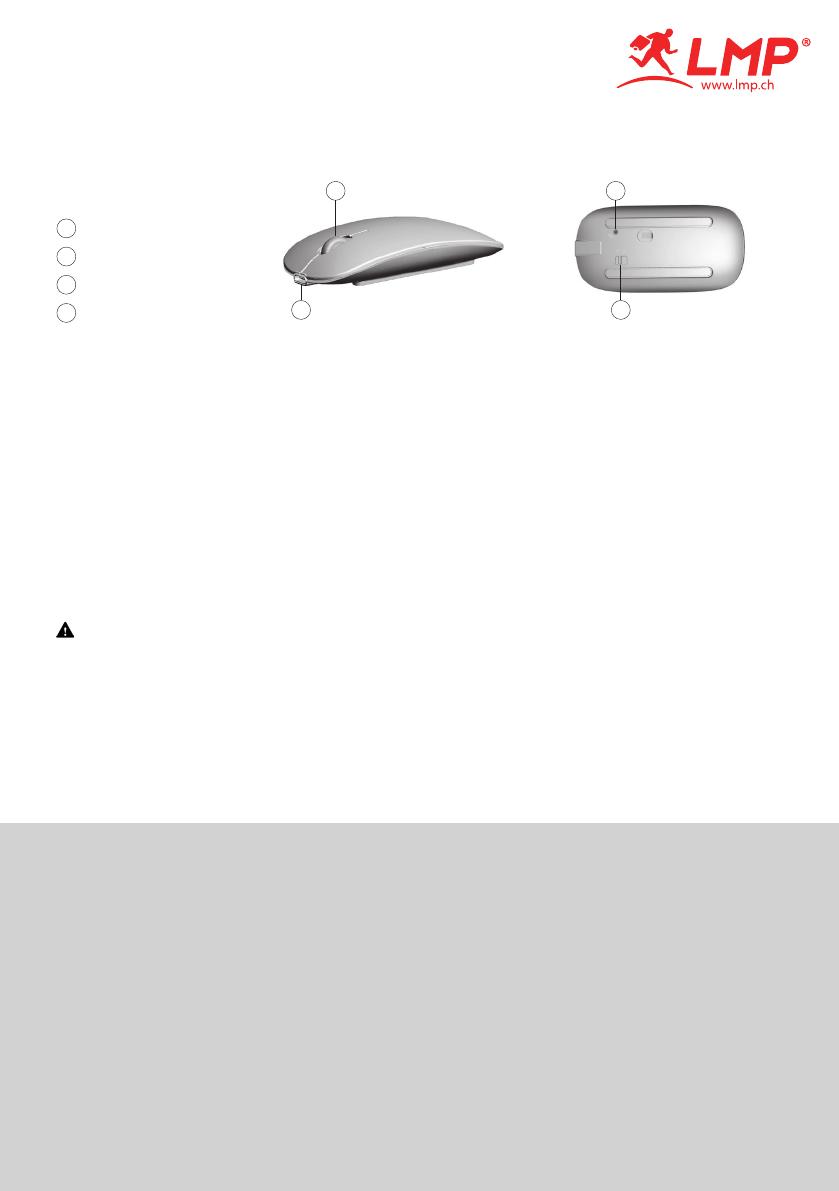
Overview
1 LED Indicator
2 Power Switch
3 Pairing button
4 USB-C charging port
1
4 2
3


