Parkside IAN 75636 Bedienungsanleitung
- Kategorie
- Akku-Kombibohrer
- Typ
- Bedienungsanleitung
Dieses Handbuch eignet sich auch für

IAN 75636
CORDLESS DRILL PABS 18-Li B2
AKKU-BOHRSCHRA UBER
Bedienungs- und Sicherheitshinweise
Originalbetriebsanleitung
AKU ODVIJAČ
Upute za posluživanje i za Vašu sigurnost
Prijevod originalnih uputa za uporabu
MAȘINĂ DE ÎNȘURUBAT CU
A CUMULATOR
Instrucţiuni de utilizare şi de siguranţă
Traducerea instrucţiunilor de utilizare originale
CORDLESS DRILL
Operation and Safety Notes
Translation of original operation manual

GB Operation and Safety Notes Page 5
HR Upute za posluživanje i za Vašu sigurnost Stranica 17
RO Instrucţiuni de utilizare şi de siguranţă Pagina 27
DE / AT / CH Bedienungs- und Sicherheitshinweise Seite 39
Before reading, unfold the page containing the illustrations and familiarise yourself with all functions of the
device.
Prije nego što pročitate tekst, otvorite stranicu sa slikama i upoznajte se na osnovu toga sa svim funkcijama
uređaja.
Înainte de a citi instrucţiunile, priviţi imaginile şi familiarizaţi-vă cu toate funcţiile aparatului.
Klappen Sie vor dem Lesen die Seite mit den Abbildungen aus und machen Sie sich anschließend mit allen
Funktionen des Gerätes vertraut.

A B
12
5
C
1
2
3
1413
6
7
11
10
9
8
15
6
1617
7
4


5 GB
Table of contents
Introduction
Intended purpose ................................................................................................................................ Page 6
Equipment Components ......................................................................................................................Page 6
Scope of delivery ................................................................................................................................Page 7
Technical Data ....................................................................................................................................Page 7
General safety advice for electrical power tools
1. Workplace safety ...........................................................................................................................Page 8
2. Electrical safety ............................................................................................................................... Page 8
3. Personal safety ................................................................................................................................Page 8
4. Careful handling and use of electrical power tools .....................................................................Page 9
5. Use and handling of the cordless electrical power tool ..............................................................Page 9
6. Service .............................................................................................................................................Page 10
Safety advice relating to cordless drill drivers ..................................................................................Page 10
Attention - Service lines! ......................................................................................................................Page 10
Original ancillaries / accessories .......................................................................................................Page 10
Before first use
Charging the battery pack .................................................................................................................Page 10
Insertion / removal of a battery pack into the appliance ..................................................................Page 11
Checking battery status ......................................................................................................................Page 11
Changing tools .................................................................................................................................... Page 11
Torque pre-selection ............................................................................................................................Page 11
2 Gear Drive .......................................................................................................................................Page 12
Preparing the tool for use
Switching On / Off .............................................................................................................................. Page 12
Switching the LED light on and off .....................................................................................................Page 12
Adjusting the speed ............................................................................................................................Page 12
Switching direction of rotation ...........................................................................................................Page 12
Tips and Tricks ..................................................................................................................................... Page 12
Cleaning and Maintenance ..............................................................................................Page 13
Service ...............................................................................................................................................Page 13
Warranty .........................................................................................................................................Page 13
Disposal ............................................................................................................................................Page 14
Conformity Declaration / Manufacturer ................................................................Page 15

6 GB
Introduction
Introduction / General safety advice for electrical power tools
Cordless drill PABS 18-Li B2
Q
Introduction
We congratulate you on the purchase of
your new device. You have chosen a
high
quality product. The instructions for use
are part of the product. They contain important in-
formation concerning safety, use and disposal. Be-
fore using the product, please familiarise yourself
with all of the safety information and instructions
for use. Only use the unit as described and for the
specified applications. If you pass the product on
to anyone else, please ensure that you also pass
on all the documentation with it.
Q
Intended purpose
This appliance is designed for drilling and screwing
into wood, plastic and metal. Use the appliance only
as described and only for the purposes indicated.
Any other uses, and modifications to the appliance,
are deemed to be improper usage and may result
in serious physical injury. The manufacturer accepts
no responsibility for damage(s) resulting from
improper usage. The appliance is not intended for
commercial use.
Q
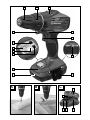
Equipment Components
1
Gear selector switch
2
Direction of rotation switch / lock
3
ON / OFF Switch / R.P.M. regulator
4
Bit holder
5
Belt clip
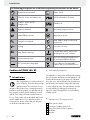
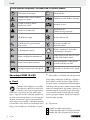
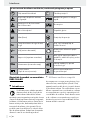
The following pictograms are used in these operating instructions / on the device:
Read instruction manual! Safety class II
Observe caution and safety notes! Drill chuck, Made In Germany
Caution – electric shock!
Danger to life!
Spindle lock
Explosive material! Drill setting (torque preselect)
W
Watts (Effective power) Wear ear protection.
n
0
Design no-load speed
Keep children away from electrical
power tools!
V
~
Voltage For indoor use only!
Ah
Amp (Battery capacity)
Check that the device, mains lead
and plug are in good condition!
Nm
Newton metre (torque)
Dispose packaging and appliance in
an environmentally-friendly way!
DC (current and voltage type)
Do not dispose of rechargeable
batteries with your household refuse!

7 GB
Introduction
6
Rechargeable battery pack
7
Battery pack release button
8
LED light button
9
LED light
10
Rechargeable battery display LED
11
Rechargeable battery charge state button
12
LED working light
13
Drill chuck
14
Torque pre-selector
15
Fast charger
16
Red charge-control LED
17
Green charge-control LED
Q
Scope of delivery
1 Cordless drill with rechargeable battery pack
1 Bit PH2 50 mm
1 Fast charger
1 Carry case
1 Directions for use
Q
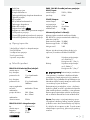
Technical Data
PABS 18-Li B2 Cordless drill:
Nominal voltage: 18 V
Idle-running speed: 1st gear: max. 400 min
-1
Idle-running speed: 2nd gear: max. 1400 min
-1
Drill chuck
clamping range: max. 10 mm
Maximum
drill diameter: Steel: 10 mm,
Wood: 30 mm
Max. torque: 35 Nm
PABS 18-Li B2-1 Battery Pack:
Type: LITHIUM-ION
Nominal voltage: 18 V
Capacity: 1.5 Ah
Energy content: 27 Wh
PABS 18-Li B2-2 Fast Charger:
INPUT
Nominal voltage: 230 V∼, 50 Hz
Power input: 55 W
OUTPUT
Nominal voltage: 18 V
Charging current 2 A
Charging time: approx. 60 min
Protection class: II /
Noise and vibration data:
Measured values for noise are determined in accor-
dance with EN 60745. The A-weighted noise level
of the electrical power tool are typically:
Sound pressure level: 76 dB(A)
Sound power level: 87 dB(A)
Uncertainty K: 3 dB
Total vibration (vector sum of three directions) is
calculated in accordance with EN 60745:
Screwing: Vibration emission value
a
h,D
= 0.865 m / s
2
,
uncertainty K = 1.5 m / s
2
,
Drilling: Vibration emission value
a
h
= 2.546 m / s
2
,
uncertainty K = 1.5 m / s
2
.
The vibration level specified in
these instructions was measured in accordance with
an EN 60745 standardised measurement process
and can be used to compare equipment. The vibra-
tion emission value specified can also serve as a
preliminary assessment of the exposure.
The vibration level will change according to the ap-
plication of the electrical tool an in some cases may
exceed the value specified in these instructions. Re-
gularly using the electric tool in such a way may
make it easy to underestimate the vibration.
Note: If you wish to make an accurate assessment
of the vibration loads experienced during a particular
period of working, you should also take into account
the intervening periods of time when the device is
switched off or is running but is not actually in use.
This can result in a much lower vibration load over
the whole of the period of working.
Introduction / General safety advice for electrical power tools

8 GB
General safety advice for
electrical power tools
Read all the safety advice
and instructions! Failure to observe the safety
advice and instructions may result in electric shock,
fire and / or serious injury.
Keep all the safety advice and instructions
in a safe place for future reference!
The term “electrical tool” used in the safety advice
refers to electrical tools powered by mains electrici-
ty (by means of a mains lead) and electrical tools
powered by rechargeable batteries (without a
mains lead).
1.
Workplace safety
a) Keep your working area clean and
well lit. Untidy or poorly lit working areas
can lead to accidents.
b)
Do not work with the device
in potentially explosive envi-
ronments in which there are
inflammable liquids, gases or dusts.
Electrical power tools create sparks, which can
ignite dusts or fumes.
c)
Keep children and other
people away while you are
operating the electrical tool.
Distractions can cause you to lose control of
the device.
2.
Electrical safety
a)
The mains plug on the device must match
the mains socket. The plug must not
be modified in any way. Do not use
an adapter plug with devices fitted
with a protective earth. Unmodified
plugs and matching sockets reduce the risk of
electric shock.
b) Avoid touching earthed surfaces such
as pipes, radiators, ovens and refrig-
erators with any part of your body.
There is an increased risk of electric shock if
your body is earthed
.
c) Keep the device away from rain or
moisture. Water entering an electrical device
increases the risk of electric shock.
d)
Do not use the mains lead for
any purpose for which it was
not intended, e.g. to carry the
device, to hang up the device or to pull
the mains plug out of the mains socket.
Keep the mains lead away from heat,
oil, sharp edges or moving parts of the
device. Damaged or tangled mains leads
increase the risk of electric shock.
e) When working outdoors with an
electrical power tool always use ex-
tension cables that are also approved
for use outdoors. The use of an extension
cable suitable for outdoor use reduces the risk
of electric shock.
f) Use a residual current device (RCD)
for protection if operating the electri-
cal power tool in a moist environment
is unavoidable. The use of an RCD reduces
the risk of electric shock.
3. Personal safety
a) Remain alert at all times, watch what
you are doing and always proceed
with caution. Do not use the device if
you are tired or under the influence of
drugs, alcohol or medication. One mo
ment
of carelessness when using the device can lead
to serious injury.
b) Wear personal protective equipment
and always wear safety glasses. The
wearing of personal protective equipment such
as dust masks, non-slip safety shoes, safety
helmets or ear protectors, appropriate to the
type of electrical power tool used and work
undertaken, reduces the risk of injury.
c) Avoid unintentional operation of the
device. Check that the electrical power
tool is switched off before you connect
it to the mains, pick it up or carry it.
Accidents can happen if you carry the device
General safety advice for electrical power tools

9 GB
with your finger on the ON / OFF switch or with
the device switched on.
d) Remove any setting tools or spanners
before you switch the device on. A tool
or spanner left attached to a rotating part of a
device can lead to injury.
e) Avoid placing your body in an unnat-
ural position. Keep proper footing
and balance at all times. By doing this
you will be in a better position to control the
device in unforeseen circumstances.
f) Wear suitable clothing. Do not wear
loose clothing or jewellery. Keep your
hair, clothing and gloves clear of mov-
ing parts. Loose clothing, jewellery or long
hair can become trapped in moving parts.
g) If vacuum dust extraction and collection
devices are fitted do not forget to
check
that they are properly connected and
correctly used. The use of these devices
reduces the hazard presented by dust.
4.
Careful handling and use
of electrical power tools
a) Do not overload the device. Always
use an electrical power tool that is
intended for the task you are under-
taking. By using the right electrical power
tool for the job you will work more safely and
achieve a better result.
b) Do not use an electrical power tool if
its switch is defective. An electrical power
tool that can no longer be switched on and off
is dangerous and must be repaired.
c) Pull the mains plug out of the socket
and / or remove the rechargeable bat-
tery before you make any adjustments
to the device, change accessories or
when the device is put away. This pre-
caution is intended to prevent the device from
unintentionally starting.
d) When not in use always ensure that
electrical power tools are kept out of
reach of children. Do not let anyone use
the device if he or she is not familiar
with it or has not read the instructions
and advice. Electrical power tools are dan-
gerous when they are used by inexperienced
people.
e) Look after the device carefully. Check
that moving parts are working prop-
erly and move freely. Check for any
parts that are broken or damaged
enough to detrimentally affect the
functioning of the device. Have dam-
aged parts repaired before you use
the device. Many accidents have their origins
in poorly maintained electrical power tools.
f) Keep cutting tools clean and sharp.
Carefully maintained cutting tools with sharp
cutting edges are less likely to jam and are
easier to control.
g) Use the electrical power tool, accesso-
ries, inserted tools etc. in accordance
with these instructions and advice, and
the stipulations drawn up for this par-
ticular type of device. In doing this, take
into account the working conditions
and the task in hand. The use of electrical
power tools for purposes other than those in-
tended can lead to dangerous situations.
5. Use and handling of the cord-
less electrical power tool
a) Charge a rechargeable battery unit
using only the charger recommended
by the manufacturer. Chargers are often
designed for a particular type of rechargeable
battery unit. There is the danger of fire if other
types of rechargeable battery units are used.
b)
Only the rechargeable battery units su
p-
plied are to be used with an electrical
power tool. The use of other rechargeable bat-
t
ery units may lead to the danger of injury or fire.
c) When they are not being used, store
rechargeable battery units away from
paperclips, coins, keys. nails, screws
or other small metal objects that could
cause the contacts to be bridged. Short-
circuiting the contacts of a rechargeable battery
unit may result in heat damage or fire.
General safety advice for electrical power tools
General safety advice for electrical power tools

10 GB
d)
Fluids may leak out of rechargeable
battery units if they are misused. If
this happens, avoid contact with the
fluid. If contact occurs, flush the affect-
ed area with water. Seek additional
medical help if any of the fluid gets
into your eyes. Escaping battery fluid may
cause skin irritation or burns.
CAUTION! DANGER OF EX-
PLOSION! The batteries must
never be recharged!
6. Service
a) Have your device repaired at the ser-
vice centre or by qualified specialist
personnel using original manufacturer
parts only. This will ensure that your device
remains safe to use.
Safety advice relating
to cordless drill drivers
Hold the device by the
insulated handle surfaces when you
are undertaking work where there is
the danger of the screw striking hidden
electricity cables or the device’s mains
lead. Contact of the screw with a live wire could
cause metal parts of the device to become live
and lead to electric shock.
Children or persons who lack the knowledge or
experience to use the device or whose physical,
sensory or intellectual capacities are limited
must never be allowed to use the device without
supervision or instruction by a person responsi-
ble for their safety. Children must never be
allowed to play with the device.
Securely support the workpiece. A workpiece
held in a clamp or vice is kept more securely in
place than one held by your hand.
POISONOUS DUSTS!
Harmful / noxious dusts generated from your
work represent a risk to the health of the person
operating the device and to anyone near the
work area. Wear safety glasses and a dust mask!
Do not drill any material containing
asbestos. Asbestos is a known carcinogen.
Hold the electrical power tool firmly.
High reaction torques may occur momentarily
during tightening or loosening of screws.
If the inserted tool jams, switch off the
electrical power tool immediately. Be
prepared for high reaction torques as they may
cause kickback. The inserted tool may jam if
the electrical power tool is overloaded or is
held at an angle to the workpiece.
Before you carry out any tasks on the
device, transport or store it, make sure
that the direction of rotation switch is
in the middle position (lock). To prevent
the device from starting up unintentionally.
Q
Attention - Service lines!
DANGER! Take steps to ensure that
you do not hit upon any service lines
(electricity, gas, water) when work-
ing with electrical appliances. Check, if
need be with a service line detector, before
you start to cut or bore into a surface.
Q
Original ancillaries /
accessories
Use only the ancillaries and accessories
that are detailed in the operating
instructions. The use of ancillaries and ac-
cessories other than those recommended in the
operating instructions could lead to an increased
risk of personal injury for you.
Q
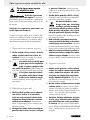
Before first use
Q
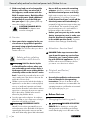
Charging the battery pack
DANGER OF ELECTRIC
SHOCK! Before cleaning or servicing the
charging station or the battery pack always
ensure that the plug is not in the mains socket.
Before first use
General safety advice for electrical power tools / Before first use

11 GB
Note! A new battery pack, or one that has not
been in use for an extended period, must be charged
up before the first / renewed usage.
The battery pack attains its full capacity after ca.
3–5 charging cycles.
CAUTION! Always ensure the plug is removed
from the mains socket before inserting a battery pack
into, or removing one from, the charging station.
Never charge the battery pack if the ambient
temperature is less than 10 °C or greater than
40 °C.
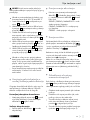
1. Insert the battery pack
6
into the quick-
charger
15
(see Fig. C).
2. Insert the mains plug into the mains socket. The
flashing green charge indicator LED
17
shows
that charging is in progress.
3. The charging process is completed when the
green charge indicator LED
17
light up and the
accumulator pack
6
is ready for operation.
4. If the red charge indicator LED
16
lights up, the
quick battery charger
15
is in standby mode;
the accumulator pack
6
is not connected.
5. If the red charge indicator LED
16
starts flas-
hing, this means that the accumulator pack
6
has become too hot; no charging process.
Never charge the battery pack for a second time
immediately after a fast charging process has
been completed. This can give rise to the battery
pack becoming overcharged and to a reduced
service life of the battery and charging station.
Switch the charger off for at least 15 minutes
between two successive charging procedures.
Remove the power plug from the wall socket.
Q
Insertion / removal of a battery
pack into the appliance
Ensure that the appliance is switched off before in-
serting the battery. The insertion of a battery into an
electrical appliance that is switched on can lead to
accidents.
Inserting the rechargeable battery pack:
Move the rotation switch
2
into the middle
position (lock) and push the rechargeable bat-
tery pack
6
into the handle until it engages.
Removing the rechargeable battery pack:
Press the release button
7
and remove the
rechargeable battery pack
Q
Checking battery status
To check the battery status, press the battery
LED button
11
(refer to main diagram). The
status or residual capacity will be indicated in
the battery LED
10
as follows:
GREEN / RED / ORANGE = maximum charge /
capacity
RED / ORANGE = medium charge / capacity
RED = weak charge – recharge battery
Q
Changing tools
Your cordless electric drill / screwdriver has a fully
automatic spindle lock
and is fitted with an
enclosed keyless chuck incorporating the latest
technology from
”Made in Germany”.
Once the motor has come to a halt, the drive shaft
is automatically locked, so that the chuck
13
can
be opened simply by turning it
.
After you have inserted the required bit and fixed it
in place by turning the chuck
, you can immedi-
ately continue working. The spindle lock releases
itself automatically when the motor is started (by
operation of the ON / OFF switch
3
).
Q
Torque pre-selection
You can adjust the torque by using
14
torque pre-
selection. The torque levels regulate a range of up
to ca. 35 Nm.
Select a low setting for small screws, soft work
material.
Before first use
General safety advice for electrical power tools / Before first use

12 GB
Select a high setting for large screws, hard
work materials and for the extraction of screws.
For drilling, push the selector to the setting for
drilling, in that you adjust the torque pre-selector
to the position
.
For drilling tasks, also push the gear selector
switch
1
to the front (Position: 2).
Q
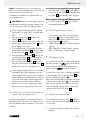
2 Gear Drive
CAUTION! Move the gear selector switch
1
only after the device has come to a standstill.
Failure to observe this advice may result in damage
to the device.
In the first gear (Gear selector switch
1
in Position: 1)
A speed of up to approx. 400 rpm can be achieved
and a high torque. This setting is intended for use w
ith
all screwing tasks and for accessories (see example
Fig. B).
In the second gear (Gear selector switch
1
in Position: 2)
It achieves a speed of up to approx. 1400 rpm, for
the carrying out of drilling tasks (see example Fig. A).
Q
Preparing the tool for use
Q
Switching ON /OFF
Switching on:
To start the appliance squeeze on the ON /
OFF switch
3
and then keep it pressed down.
The LED working light
12
comes on with a slightly
or fully pressed ON /OFF switch
3
and illumi-
nates the working area in poor lighting conditio
ns.
Switching off:
To stop the appliance, release the ON / OFF
switch
3
.
Switching the LED light on and off
Switching on:
Press the LED light button
8
to switch on the
LED light
9
.
Switching off:
Press the LED light button
8
again to switch
off the LED light
9
.
Q
Adjusting the speed
The ON / OFF switch
3
has a variable speed con-
trol device. Slight pressure on the ON / OFF switch
3
will cause the rotation speed to slow down. With
increased pressure, the rotational speed will increase.
Note: The integrated engine brake means that the
device will come to a fast standstill.
Q
Switching direction of rotation
To switch the direction of rotation, push the
direction of rotation switch
2
to either the
right or to the left.
Q
Tips and Tricks
Before you use the appliance, check to see
that the screw or drill bit is properly fitted, i.e.
located centrally in the chuck.
Screw bits are designated with their dimensions
and their shape. If you are unsure, always try
the particular screw bit out to see whether it sits
in the screw head without any free play.
Torque:
Smaller screws and bits in particular can be
easily damaged if you adjust the appliance
with too high a torque and/or rotation speed.
Hard screwdriving conditions (into metal):
Particularly high torques can occur, for example
with metal screws tightened by socket tool bits.
Select a lower rotation speed.
Before first use / Preparing the tool for use

13 GB
Preparing the tool for use / Cleaning and Maintenance / Service / Warranty
Soft screwdriving conditions (e.g. into
soft wood):
You should also select a low speed in order not to
damage the wood workpiece surface through con-
tact with the metal screw head. Use a countersinker.
When drilling into wood, metal and other
materials, take note of the following advice:
With small diameter drill bits use a high drill
speed. For large diameter drill bits, use a low
drill speed.
For hard materials, select a low drill speed.
For soft materials, select a high drill speed.
Secure or fix down the workpiece (if possible)
in a clamp or vice.
Mark the intended position of the hole with a
centre punch or a nail and select a low drill speed
for drilling.
Take the rotating drill bit out of the hole frequently
so that swarf or drill dust can be re-moved and
the hole and tool is ventilated.
Drilling in metal:
Use a metal drill bit (HSS). For the best results,
you should cool the bit with oil. Metal drill bits
can also be used to drill into plastic.
Drilling in stone:
Use a circular shafted masonry drill bit with a
hardened metal tip.
Drilling in wood:
Normally you should use a wood drill with a
centring point. For deep holes, use an auger type
bit. For large diameter holes, use a forstner bit.
You can screw small screws into soft wood
without the need for pre-drilling.
Q
Cleaning and Maintenance
CAUTION! Place the direction of rotation
switch
2
into the middle position before carry-
ing out any tasks on the device, e.g. changing
tools or maintenance, or before transporting or
storing the device. Inadvertent operation of the
ON / OFF switch
3
may result in injury.
Pull the mains lead out of the mains socket eve-
ry time and remove the battery before you clean
or maintain the device.
The Cordless drill is maintenance-free.
Always keep the device clean, dry and free of
oil or grease.
Clean the device immediately after you have
finished using it.
Do not allow any liquids to enter the device.
Use a cloth to clean the housing. Never use
petrol, solvents or cleaning agents that might
attack plastic.
Q
Service
Have your device repaired
at the service centre or by qualified
specialist personnel using original
manufacturer parts only. This will ensure
that your device remains safe to use.
If the plug or lead needs
to be replaced, always have the
replacement carried out by the manu-
facturer or its service centre. This will
ensure that your device remains safe to use.
Q
Warranty
The warranty for this appliance is for 3
years from the date of purchase. The ap-
pliance has been manufactured with care
and meticulously examined before deliv-
ery. Please retain your receipt as proof
of purchase. In the event of a warranty
claim, please make contact by telephone
with our Service Department. Only in this
way can a post-free despatch for your
goods be assured.
The warranty covers only claims for material and
maufacturing defects, but not for transport damage,
for wearing parts or for damage to fragile compo-
nents, e.g. buttons or batteries. This product is for pri-
vate use only and is not intended for commercial use.
Before first use / Preparing the tool for use

14 GB
Warranty / Disposal
The warranty is void in the case of abusive and im-
proper handling, use of force and internal tamper-
ing not carried out by our authorized service branch.
Your statutory rights are not restricted in any way
by this warranty.
The warranty period will not be extended by repairs
made unter warranty. This applies also to replaced
and repaired parts. Any damage and defects extant
on purchase must be reported immediately after
unpacking the appliance, at the latest, two days after
the purchase date. Repairs made after the expiration
of the warranty period are subject to payment.
GB
Service Great Britain
Tel.: 0871 5000 720
(0,10 GBP/Min.)
e-mail: k[email protected]
IAN 75636
Q
Disposal
The packaging comprises exclusively en-
vironmentally-friendly material. Dispose
of it in your local recycling containers.
Do not dispose of electrical
appliances with your domestic
waste!
According to the European Directive 2002 / 96 / EC,
concerning used electrical and electronic appliances
and its implementation in national law, superannu-
ated electrical appliances must be collected and
disposed of via an environmentally suitable recy-
cling facility.
Do not dispose of rechargeable
batteries with your household
refuse!
Defective or worn out rechargeable batteries must
be recycled according to Directive 2006 / 66 / EC.
Dispose of batteries and appliances over the existing
collection facilities.
Your local communal or municipal authorities can
provide information on how to dispose of the worn
out appliance.

15 GB
Conformity Declaration / Manufacturer
Q
Conformity Declaration /
Manufacturer
We, Kompernaß GmbH, the person responsible for
documents: Mr Semi Uguzlu, Burgstr. 21, D-44867
Bochum, Germany, hereby declare that this product
complies with the following standards, normative
documents and EU directives:
Machinery Directive
(2006 / 42 / EC)
EC Low Voltage Directive
(2006 / 95 / EC)
Electromagnetic compatibility
(2004 / 108 / EC)
Applicable harmonized standards
EN 60745-1:2009+A11
EN 60745-2-1:2010, EN 60745-2-2:2010
EN 55014-1:2006+A1+A2
EN 55014-2:1997+A1+A2
EN 61000-3-2:2006+A1+A2
EN 61000-3-3:2008
EN 60335-1:2002+A1+A11+A12+A2+A13+A14
EN 60335-2-29:2004
EN 62233:2008
Type / Appliance Designation:
Cordless drill PABS 18-Li B2
Date of manufacture (DOM): 07–2012
Serial number: IAN 75636
Bochum, 31.07.2012
Semi Uguzlu
- Quality Manager -
We reserve the right to make technical modifications
in the course of further development.
Warranty / Disposal

16

17 HR
Popis sadržaja
Uvod
Uporaba u skladu sa namjenom .................................................................................................. Stranica 18
Oprema ......................................................................................................................................... Stranica 18
Opseg isporuke ............................................................................................................................. Stranica 19
Tehnički podaci ............................................................................................................................. Stranica 19
Opće sigurnosne upute za električni alat
1. Sigurnost na radnom mjestu .................................................................................................... Stranica 20
2. Električna sigurnost ................................................................................................................... Stranica 20
3. Sigurnost osoba ........................................................................................................................ Stranica 20
4. Pažljivo postupanje s električnim uređajima i njihovo korištenje ........................................... Stranica 21
5. Uporaba i rukovanje akumulatorskim alatom ........................................................................ Stranica 21
6. Servis ......................................................................................................................................... Stranica 22
Sigurnosne upute za akumulatorsku bušilicu ............................................................................... Stranica 22
Pažnja, vodovi! ............................................................................................................................. Stranica 22
Originalna oprema / dodatni uređaji .......................................................................................... Stranica 22
Prije stavljanja u rad
Punjenje paketa baterija ............................................................................................................... Stranica 22
Umetanje paketa baterija u uređaj / vađenje paketa baterija ................................................... Stranica 23
Provjeravanje aku-stanja ............................................................................................................... Stranica 23
Zamjena alata ............................................................................................................................... Stranica 23
Određivanje okretnog momenta unaprijed ................................................................................. Stranica 23
2-brzinski mjenjač ......................................................................................................................... Stranica 24
Stavljanje u rad
Uključivanje / Isključivanje ............................................................................................................ Stranica 24
Uključivanje / isključivanje LED-svjetiljke ...................................................................................... Stranica 24
Podešavanje brzine....................................................................................................................... Stranica 24
Promjena smjera okretanja ........................................................................................................... Stranica 24
Savjeti i trikovi ............................................................................................................................... Stranica 24
Održavanje i čišćenje ...................................................................................................... Stranica 25
Servis ............................................................................................................................................ Stranica 25
Jamstveni list.......................................................................................................................... Stranica 25
Zbrinjavanje ........................................................................................................................... Stranica 26
Izjava o sukladnosti / proizvođač ........................................................................ Stranica 27

18 HR
Uvod
Uvod
Aku odvijač PABS 18-Li B2
Q
Uvod
Čestitamo Vam na kupnji novog uređaja.
Ovom kupnjom odlučili ste se za visokok-
valitetan proizvod. Uputa za uporabu je
sastavni dio ovog proizvoda. Ona sadrži važne
upute o sigurnosti, uporabi i uklanjanju otpada. Prije
upotrebe proizvoda upoznajte se sa svim njegovim
uputama za korištenje i sigurnosnim uputama. Ko-
ristite ovaj proizvod u skladu s navedenim uputama
te u navedene svrhe. Ukoliko proizvod dajete nekoj
drugoj osobi, predajte toj osobi također i sve upute.
Q
Uporaba u skladu sa namjenom
Ovaj uređaj je namijenjen za bušenje i odvijanje u
drvetu, plastici i metalu. Koristite uređaj isključivo
na opisani način i u navedenim područjima primjene.
Svaki drugi način uporabe i svaka promjena uređaja
smatra se nenamjenskom i krije znatnu opasnost od
nastanka nezgode. Proizvođač ne preuzima odgo-
vornost od štete nastale uslijed korištenja uređaja
protivnog njegovoj namjeni. Uređaj nije namjenjen
za komercijalnu uporabu.
Q
Oprema
1
Prekidač za odabir stupnja brzine
2
Prekidač za odabir smjera okretanja / blokada
3
Prekidač Uklj.-Isklj. / Regulator broja okretaja
U ovim uputama za uporabu / na uređaju rabi se slijedeće prikaze:
Čitati upute za rukovanje! Zaštitna klasa II
Obratiti pažnju na upozoravajuće
i sigurnosne upute!
Zaglavnik za svrdlo, Made In Germany
Čuvajte se strujnog udara!
Opasnost po život!
Aretiranje osovine
Opasnost od eksplozije!
Stupanj bušenja
(odabir okretnog momenta)
W
W (Efektivna snaga) Nosite zaštitu za sluh.
n
0
Određivanje broja praznohodne
brzine vrtnje
Držite djecu podalje od
električnog alata!
V
~
V (Naizmjenični napon)
Isključivo namijenjeno za uporabu
u unutarnjim prostorijama!
Ah
Amper-sati (Kapacitet akumulatora)
Vodite računa o tome, da se ne ošteti
uređaj, mrežni kabel i utikač!
Nm
Newton metar (okretni moment)
Materijal ambalaže i uređaj zbrinite
na način neškodljiv za okoliš!
Istosmjerna struja (struja i vrsta napona) Akumulator ne bacajte u kućni otpad!

19 HR
4
Držač bita
5
Pričvršćenje pojasa
6
Komplet akumulatora
7
Tipka za deblokiranje kompleta akumulatora
8
Tipka LED-svjetiljke
9
LED-svjetiljka
10
LED pokazivača akumutalora
11
Tipka stanje akumulatora
12
Radna LED-svjetiljka
13
Zaglavnik za svrdlo
14
Regulator za odabir okretnog momenta unaprijed
15
Uređaj za brzo punjenje
16
Crvena LED-signalizacija za kontrolu punjenja
17
Zelena LED-signalizacija za kontrolu punjenja
Q
Opseg isporuke
1 aku bušilica / odvijač s u aku-pakovanjem
1 bit PH2 50 mm
1 uređaj za brzo punjenje
1 kovčeg za nošenje
1 uputstvo za uporabu
Q
Tehnički podaci
PABS 18-Li B2 aku-bušilica/odvijač:
nazivni napon: 18 V
broj okretaja u
praznom hodu: 1. hod: maksimalno
400 min
-1
broj okretaja u
praznom hodu: 2. hod: maksimalno
1400 min
-1
raspon zaglavnika
za svrdlo: maksimalno 10 mm
maksimalan
promjer bušotine: čelik: 10 mm,
drvo: 30 mm
maksimalan
okretni moment: 35 Nm
PABS 18-Li B2-1 aku-pakovanje:
tip: LITHIUM-ION
nazivni napon: 18 V
kapacitet: 1,5 Ah
sadržaj energije: 27 Wh
PABS 18-Li B2-2 uređaj za brzo punjenje:
ULAZ / Input:
nazivni napon: 230 V∼, 50 Hz
potrošnja: 55 W
IZLAZ / Output:
nazivni napon: 18 V
struja punjenja: 2 A
trajanje punjenja: oko 60 min
zaštitna klasa: II /
Informacija o buci i vibraciji:
Mjerna vrijednost za buku utvrđena sukladno
EN 60745. A-ocjenjena razina buke električnog
alata iznosi tipično:
Razina zvučnog tlaka: 76 dB(A)
Razina snage zvuka: 87 dB(A)
Nesigurnost K: 3 dB
Ukupne vrijednosti titranja (vektorski zbroj triju
smjerova) su istražene sukladno EN 60745:
Vijak: Vrijednost emisije titranja
a
h,D
= 0,865 m / s
2
,
Nesigurnost K= 1,5 m / s
2
,
Bušenje: Vrijednost emisije titranja
a
h
= 2,546 m / s
2
,
Nesigurnost K= 1,5 m / s
2
.
Razina titranja, navedena u
ovim uputama, je istražena i određena sukladno
normiranom postupku mjerenja, koji je naveden u
EN 60745 i koji je prikladan za uspoređivanje stroja.
Navedena vrijednost emisije titranja se može koristiti
i za uvodnu procjenu izloženosti.
Razina titranja je promijenljiva, ovisno o korištenju
električnog alata, te može u pojedinim slučajevima
ležati iznad vrijednosti, navedene u ovim uputama.
Razina opterećenja titranja može biti podcjenjena,
ako se električni alat redovito koristi na takav način.
Uputa: Za precizno ocjenjivanje titrajnog otpere-
ćenja tijekom određenog radnog vremena, potrebno
je također uzeti u obzir vremena kad je stroj isključen,
ili je uključen ali se zapravo ne rabi. To može znatno
smanjiti titrajno opterećenje, tijekom cijelog radnog
vremena.
Uvod
Uvod

20 HR
Opće sigurnosne upute za električni alat
Opće sigurnosne upute
za električni alat
Pročitajte sigurnosne
upute kao i sve ostale upute! U slučaju ne
pridržavanja sigurnosnih uputa kao i ostalih uputa,
prijeti opasnost od strujnog udara, požara i / ili teš-
kih ozljeda.
Sačuvajte sve sigurnosne upute kao i sve
ostale upute za ubuduće!
U sigurnosnim uputa rabljeni izraz „električni alat“
odnosi se na električne uređaje sa mrežnim pogo-
nom (sa mrežnim kabelom) i na električni alat sa
akumula
torskim pogonom (bez mrežnog kabela).
1.
Sigurnost na radnom mjestu
a) Vodite uvijek računa o tome, da Vaše
radno mjesto bude čisto i dobro os-
vjetljeno. Nered i ne osvjetljeno područje
rada, može uzrokovati nezgode.
b)
Ne rabite stroj u području gdje
prijeti opasnost od eksplozije,
gdje se nalaze zapaljive teku-
ćine, plinovi ili prašine. Električni alati proiz-
vode iskre, koje mogu zapaliti prašinu ili pare.
c)
Za
vrijeme uporabe elek
trič-
nog alata, držite djecu i druge
osobe izvan dohvata istoga.
U slučaju nepažnje, možete izgubiti kontrolu
nad strojem.
2.
Električna sigurnost
a) Mrežni utikač uređaja mora odgova-
rati utičnici. Utikač se ni na kakav
način ne smije mijenjati. Ne koristite
adapterske utičnice zajedno s zaštitno
uzemljenim uređajima. Neizmijenjeni
utikači i odgovarajuće utičnice smanjuju rizik
električnog udara.
b) Izbjegavajte dodir tijela s uzemljenim
površinama kao što su cijevi, radijato-
ri, pećnice i hladnjaci. Postoji povećana
opasnost od električnog udara ukoliko je vaše
tijelo uzemljeno.
c) Uređaj držite podalje od kiše i vlage.
Prodiranje vode u unutrašnjost uređaja pove-
ćava opasnost električnog udara.
d)
Ne koristite kabel u neke
druge svrhe, npr. za nošenje
uređaja, vješanje uređaja ili
za izvlačenje utikača iz utičnice. Kabel
držite podalje od topline, ulja, oštrih
rubova i pokretnih dijelova uređaja.
Oštećeni ili spetljani kabel ili utikač povećava
rizik električnog udara.
e) Kod rada na otvorenome koristite
samo produžni kabel koji je dozvoljen
za korištenje na otvorenome. Upotreba
produžnog kabla namijenjenog za korištenje
na otvorenome smanjuje rizik električnog udara.
f) Ako je korištenje električnog alata u
vlažnim prostorima neizbježno, rabite
zaštitnu strujnu sklopku. Korištenje zaštit-
ne strujne sklopke, smanjuje rizik strujnog udara.
3. Sigurnost osoba
a) Budite uvijek pozorni, vodite računa
o tome što radite i razumno pristupite
radu s električnim alatom. Ne rabite
stroj, ako ste umorni ili pod utjecajem
droga, alkohola ili lijekova. Jedan trenu
tak
nepažnje za vrijeme korištenja stroja, može
uzrokovati teške ozljede.
b) Nosite osobnu zaštitnu opremu i uvijek
zaštitne očale. Korištenje osobne zaštitne
opreme, kao maske za prašinu, protuklizne
zaštitne cipele, zaštitnu kacigu ili štitnik za uši,
ovisno o vrsti i uporabi električnog alata,
smanjuje rizik od ozljeda.
c) Spriječite slučajno uključenje. Uvjerite
se u to, da je električni alat isključen,
prije uključenja na struju, podizanja
ili nošenja. Ako pri nošenju uređaja držite
prst na sklopki za UKLJUČENJE / ISKLJUČENJE
ili ako je uređaj uključen, prijeti opasnost od
nezgode.
Opće sigurnosne upute za električni alat
Seite wird geladen ...
Seite wird geladen ...
Seite wird geladen ...
Seite wird geladen ...
Seite wird geladen ...
Seite wird geladen ...
Seite wird geladen ...
Seite wird geladen ...
Seite wird geladen ...
Seite wird geladen ...
Seite wird geladen ...
Seite wird geladen ...
Seite wird geladen ...
Seite wird geladen ...
Seite wird geladen ...
Seite wird geladen ...
Seite wird geladen ...
Seite wird geladen ...
Seite wird geladen ...
Seite wird geladen ...
Seite wird geladen ...
Seite wird geladen ...
Seite wird geladen ...
Seite wird geladen ...
Seite wird geladen ...
Seite wird geladen ...
Seite wird geladen ...
Seite wird geladen ...
Seite wird geladen ...
Seite wird geladen ...
-
 1
1
-
 2
2
-
 3
3
-
 4
4
-
 5
5
-
 6
6
-
 7
7
-
 8
8
-
 9
9
-
 10
10
-
 11
11
-
 12
12
-
 13
13
-
 14
14
-
 15
15
-
 16
16
-
 17
17
-
 18
18
-
 19
19
-
 20
20
-
 21
21
-
 22
22
-
 23
23
-
 24
24
-
 25
25
-
 26
26
-
 27
27
-
 28
28
-
 29
29
-
 30
30
-
 31
31
-
 32
32
-
 33
33
-
 34
34
-
 35
35
-
 36
36
-
 37
37
-
 38
38
-
 39
39
-
 40
40
-
 41
41
-
 42
42
-
 43
43
-
 44
44
-
 45
45
-
 46
46
-
 47
47
-
 48
48
-
 49
49
-
 50
50


Parkside IAN 75636 Bedienungsanleitung
- Kategorie
- Akku-Kombibohrer
- Typ
- Bedienungsanleitung
- Dieses Handbuch eignet sich auch für
in anderen Sprachen
Verwandte Artikel
-
Parkside PABS 10.8 B2 Operation and Safety Notes
-
-
-
-
Parkside PABS 20-Li A1 Bedienungsanleitung
-
Parkside PABS 18 A1 Operation and Safety Notes
-
-
-
-
Parkside PABS 18-LI B2 Operation and Safety Notes