Silvercrest 106103 Bedienungsanleitung
- Kategorie
- Kaffeemaschinen
- Typ
- Bedienungsanleitung
Dieses Handbuch eignet sich auch für

IAN 106103
ESPRESSO MACHINE
CH
BEIE
DE’LONGHI APPLIANCES S.r.l.
Via L. Seitz, 47
31100 Treviso, Italy
Tel. +39-0422-4131
Fax +39-0422-413736
Version information · Version av information ·Informatie versie
Version des informations · Stand der Informationen:
12 / 2014 · Ident.-No.: cod. 4055108010 rev. 0
ESPRESSOMASCHINE
SEMR 850 A1
Bedienungsanleitung
DE AT CH
ESPRESSOAPPARAAT
SEMR 850 A1
Informatie versie
NL BE
MACHINE À EXPRESSO
SEMR 850 A1
Instructions d’utilisation
FR BE
AT
NL
GB / IE Operating Instructions Page 3
SE Användnings- och säkerhetsanvisningar Sida 16
NL / BE Aanwijzingen voor het gebruik en de veiligheid Pagina 29
FR / BE Instructions d‘utilisation et consignes de sécurité Page 42
DE / AT / CH Bedienungs- und Sicherheitshinweise Seite 55
GB
IE
Before reading, open the page with the images and learn about the different functions of the
appliance.
SE
Slå upp sidan med bilder och lär dig apparatens olika funktioner innan du börjar att läsa.
NL BE
Voordat u begint te lezen, opent u de pagina met de afbeeldingen om vertrouwd te raken met
de verschillende functies van het apparaat.
FR BE
Avant de lire le mode d‘emploi, ouvrez la page contenant les illustrations et familiarisez-vous
ensuite avec toutes les fonctions de l‘appareil.
DE AT CH
Klappen Sie vor dem Lesen die Seite mit den Abbildungen aus und machen Sie sich anschlie-
ßend mit allen Funktionen des Gerätes vertraut.
DE
IAN 106103
www.lidl-service.com
Typ 1388A
SEGB
FR
ESPRESSOMASKIN
SEMR 850 A1
Bruksanvisning
SE
ESPRESSO MACHINE
SEMR 850 A1
Operating Instructions
GB
IE

L M
N
Fig. 4 Fig. 5
F
G1
D
H
G
C
K
A
O P
Fig. 1
Fig. 2 Fig. 3
Fig. 6
B
E
I
Fig. 7
Fig. 10
Fig. 11 Fig. 12
Fig. 13
Fig. 8
Fig. 9
J
Fig. 14

IT
GB / IE
3
GB / IE
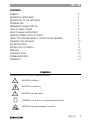
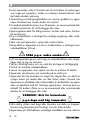
SYMBOLS
The information in this manual is labelled as follows:
DANGER for children
DANGER from electricity
DANGER from other causes
WARNING: risk of burns from high temperature steam
IMPORTANT possible damage to materials
SYMBOLS 3
IMPORTANT SAFEGUARDS 4
DESCRIPTION OF THE APPLIANCE 7
INTENDED USE 7
PRELIMINARY PHASES FOR USE 7
HOW TO MAKE COFFEE 8
HOW TO MAKE CAPPUCCINO 9
MAKING FURTHER CUPS OF COFFEE 9
USEFUL TIPS FOR OBTAINING A GOOD ITALIAN ESPRESSO 9
CLEANING THE APPLIANCE 10
DECALCIFICATION 11
PUTTING OUT OF SERVICE 11
DISPOSAL 12
TECHNICAL DATA 12
TROUBLESHOOTING 13
WARRANTY 14
CONTENTS

4
GB / IE
GB / IE
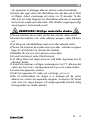
IMPORTANT SAFEGUARDS
READ THESE INSTRUCTIONS BEFORE USE.
ALWAYS KEEP THESE INSTRUCTIONS.
In case of transfer of the appliance, also hand this manual.
• This appliance is designed only for private use, and is therefore to be
considered unsuitable for commercial or industrial purposes.
• We decline any responsibility resulting from misuse or any use other
than those covered in this booklet.
• We suggest you keep the original box and packaging, as our free-of-
charge service does not cover any damage resulting from inadequate
packaging of the product when this is sent back to an Authorised
Service Centre.
DANGER for children
• The appliance can be used by children aged 8 years and up only if
they are monitored by a responsible person or if they have received
instructions regarding the appliance safe use and if they have under-
stood the dangers which may arise during the appliance use.
• Cleaning and maintenance by the user must not be carried out by
children unless they are older than 8 years and are monitored during
the operation. Children must be supervised at all times to ensure they
do not play with the appliance.
• Do not leave the packaging near children because it is potentially
dangerous.
• In the event that this appliance is to be disposed of, it is suggested that
the power chord is cut off. It is also recommended that all potentially
dangerous components are rendered harmless to prevent children
hurting themselves when playing with the apparatus.
DANGER from electricity
• This appliance can be used by persons who have reduced physical
sensory or mental capabilities, or lack of experience and knowledge,
only if they are monitored by a responsible person or if they have
received and understood instructions regarding the appliance safe

IT
GB / IE
5
GB / IE
use and if they have understood the dangers which may arise during
the appliance use.
• Before connecting the appliance to the power supply, make sure that
the voltage indicated on the plate on the bottom of the machine cor-
responds to the local mains voltage.
• The use of extension leads, which have not been authorised by the
appliance manufacturer, may cause damage and accidents.
• If the electric cable is damaged it must be replaced by the manufac-
turer or its Technical Assistance Service, or in any case by a person
with similar qualifications, in order to avoid any risk.
• Never let the live parts come into contact with water: this may cause
a short circuit.
• Unplug before any cleaning or maintenance operations.
• Do not immerse the appliance in water or other liquids.
• Always turn off the appliance and remove the power cable plug from
the socket-outlet before filling the tank with water.
DANGER from other causes
• Do not lift the appliance by grasping its water tank or its tray, but only
by grasping its body.
• Choose a sufficiently well lit and clean environment, with an easily
accessible electric socket.
• Avoid putting excessive quantities of water into the tank.
• Never leave the appliance unattended when it is connected to the
power supply.
• The appliance must be used and rested on a stable surface.
• The appliance is not to be used if it has been dropped, if there are
visible sign of damage or if it is leaking. Do not use the appliance if
the power cord or the plug are damaged, or if the appliance is faulty.
To prevent any accident, all repairs, including the replacement of the
power cord, must be carried out by an Authorised Service Centre or,
in any case, by qualified personnel.

6
GB / IE
GB / IE
WARNING: risk of burns
from high temperature steam
• Never direct the steam or hot water jet towards parts of the body;
handle the steam/hot water spout with care: risk of scalding!
• The outer metallic parts of the appliance and of the filter holder must
not be touched with the appliance in operation, because it could
cause burns.
• If water does not come out of the filter holder, it may be because the
filter is clogged. Stop the brewing and wait ten seconds. Remove and
disconnect the filter holder because any remaining pressure could
cause splashes or squirts. Then clean as explained in the relevant
paragraph.
IMPORTANT possible damage to materials
• Place the machine on a stable surface where it cannot be knocked
over.
• Never use the machine without water because the pump will burn out.
• Never fill the water tank with hot or boiling water.
• Do not place the machine on very hot surfaces or near open flames
in order to prevent damage to the body.
• The cable must not touch any hot parts of the machine.
• Do not use sparkling (carbonated) water.
• Never put in the filter substances other than coffee powder. They
could cause serious damage to the appliance.
• Do not leave the machine at a room temperature below 0 °C because
the water remaining in the boiler could freeze and cause damage.
• Never use the appliance outdoors.
• Do not expose the appliance to atmospheric agents (rain, sun, etc...).
• Before cleaning the appliance always unplug it and allow it cool
down. Clean only with a non-abrasive cloth that has been slightly
dampened with water, adding a few drops of mild, non-aggressive
detergent (never use solvents that damage plastic).

IT
GB / IE
7
GB / IE
DESCRIPTION OF THE APPLIANCE
A
Filter holder for ground coffee
I
Removable cup grille
B
Coffee measure/presser
J
ON/OFF switch
C
Perforated silicone disc (Thermocream®)
K
Steam dispensing knob
D
Filter for ground coffee
L
Boiler temperature indicator lamp
E
Removable water tank
M
Steam function switch
F
Power cord + Plug
N
Boiler temperature thermometer (C°
and F°)
G
Cappuccino maker
O
Coffee brewing switch
G1
Steam tube
P
“ON” indicator light
H
Drip tray
INTENDED USE
• You can use your appliance to prepare coffee and cappuccino; and
thanks to the possibility of dispensing hot water, you can also prepare
tea and tisanes. This appliance is designed only and solely for private
use, and is therefore to be considered unsuitable for industrial or pro-
fessional purposes.
• No other use of the machine is contemplated by the manufacturer,
which is exempt from any liability for all types of damages caused by
improper use of the machine. Improper use also results in any form of
warranty being forfeited.
PRELIMINARY PHASES FOR USE
Using the appliance for the first time
Check that the voltage of the domestic network is the same as that indicated on the technical
information plate of the appliance. Place the appliance on a stable surface. When using it
the first time, wash the tank and fill it with cool tap water – (1 liter MAX) – and then carefully
fit it firmly into its seat (Fig. 3).
Check that the tank is properly inserted; otherwise, the machine may not dispense
coffee.
Insert the plug into the socket, which must be earthed.
Starting the first time
After having filled the tank with cool tap water, start the machine. Press the on/off switch (J)
(Fig. 1) for a few seconds. The indicator light (P) will turn on to indicate that the machine is on.
If you are starting the machine for the first time or after a period of time during
which it has not been used, it is recommended that at least one cup of water be
allowed to pass through the boiler’s hydraulic circuit.

8
GB / IE
GB / IE
Place a container with a capacity of at least half a litre under the coffee spout and cappuccino
maker (Fig. 5). Put the coffee brewing switch (O) on the coffee position ( ). Wait that water
comes out from the coupling seat of the filter holder. Open the steam dispensing knob (K) and
make water come out of the cappuccino maker.
Stop dispensing by putting the coffee brewing switch (O) in the high position. Close the steam
knob. Wait for the boiler temperature indicator lamp (L) to turn on. At this point the coffee
maker is ready to brew coffee.
HOW TO MAKE COFFEE
Put the perforated silicone disc (C) and the filter for ground coffee (D) into the filter holder (A)
in the order indicated (Fig. 6). Measure out the coffee in the filter and lightly press with the
specially provided presser: completely fill two measures for two cups of coffee, and fill only
one for one cup. Insert the filter holder into its seat.
Tighten well by turning it from left to right while making sure you have hooked it
properly onto the flange (Fig. 7).
Warning!
If too much ground coffee is put inside the filter, turning the filter holder may
prove difficult and/or you may get leaks from the filter holder when the cof-
fee is being dispensed.
The filter ring should be preheated for a few minutes to ensure a nice, hot cup of coffee. This
will not be necessary for the cups of coffee that follow.
Wait for the
boiler temperature indicator lamp
(L) to turn on. Position the coffee brewing switch
(O) to coffee brewing ( ): the coffee will start coming out of the spouts of the filter holder. To
stop the flow move the coffee brewing switch (O) to the high position. The minimum serving of
coffee is 50 ml.
Warning!
Like professional coffee makers, do not remove the filter ring when the coffee
brewing switch is turned on (in coffee brewing position ).
Warning!
Wait about ten seconds after the coffee has been dispensed before removing
the filter holder. To remove it, turn it slowly from right to left so as to prevent
splashes or spurts of water or coffee.
When warming up, your appliance may release small puffs of steam from the filter
holder; this is perfectly normal.
The boiler temperature indicator lamp (L) will go on and off at regular intervals indicating that
the boiler’s thermostat is keeping the water at the right temperature. When using the coffee
maker for the first time and thereafter, it is best to begin brewing coffee only when the boiler
temperature indicator lamp (L) is on.
Auto-off function
If the machine is turned on but not in use, the auto-off function operates after 30 minutes. This
function puts the machine in standby. The ON indicator light (P) is off. To restart the machine
press again the on/off switch (J).

IT
GB / IE
9
GB / IE
Filling the water tank during use
No special operation is necessary when the water in the tank runs out as the machine is
equipped with a special self-priming device. Just unplug the machine, pull out the tank and
fill it with fresh cool water again.
HOW TO MAKE CAPPUCCINO
To make cappuccino, hot chocolate or heat any beverage, move the steam function switch
(M) to the steam position ( ) and wait until the boiler temperature indicator lamp (L) goes
on, which indicates that the heating unit has reached the right temperature to produce steam.
When warming up, your appliance may release small puffs of steam from the filter
holder; this is perfectly normal.
Turn the steam dispensing knob (K), having the foresight to position a cup underneath the
cappuccino maker (G): at first a little water will come out, immediately followed by a strong
jet of steam.
Close the steam dispensing knob (K) to stop the jet of steam and put the pot of milk to be
whipped under the cappuccino maker (Fig. 10). Plunge the wand all the way into the pot of
milk and again open the steam dispensing knob (K) until you get the result you want. During
these operations you may notice that the boiler temperature indicator lamp (L) goes on and
off from time to time, indicating that the boiler thermostat is keeping the water required for
the steam supply at the right temperature.
It is opportune you start dispensing the steam only when the lamp is on. Dispense
the steam for a few seconds after every use in order to free the hole of any milk
residue.
Close the steam dispensing knob (K). After the cappuccino is prepared, move the steam func-
tion switch (M) to the high position to cut out the steam function.
MAKING FURTHER CUPS OF COFFEE
To prepare a cup of coffee right after making cappuccino, it is necessary to bring the boiler
back to the coffee preparation temperature by performing these operations: put the steam
function switch (M) in the high position to cool down the boiler, wait for the boiler temperature
indicator lamp (L) to turn off and then turn on again. To cool the heating unit more quickly,
proceed as follows: after having placed a container underneath the cappuccino maker (G),
put the coffee brewing switch (O) in position (
); turn the steam dispensing knob (K): this
will cause water to flow out, until the boiler temperature indicator lamp (L) turns back off.
Now close the steam dispensing knob (K) and put the coffee brewing switch (O) in the high
position. Wait until the boiler temperature indicator lamp (L) turns back on. The coffee maker
is now ready to brew coffee again.
USEFUL TIPS FOR OBTAINING A GOOD ITALIAN ESPRESSO
The ground coffee in the filter holder has to be pressed lightly. Whether the coffee is stronger
or weaker depends on the degree the coffee is ground, the quantity put into the filter holder
and the pressing. Just a few seconds are needed for the coffee to flow down into the cups. If
the dispensing time is longer, this means that the coffee is ground too fine or that the coffee
put into the filter holder has been pressed too much.

10
GB / IE
GB / IE
CLEANING THE APPLIANCE
Warning!
All cleaning operations described below must be performed with the machine
off and with the electric plug disconnected from the socket-outlet.
Warning!
Regular maintenance and cleaning preserve and keep the machine efficient
for a longer amount of time. Never wash machine components in the dish
-
washer. Do not use direct jets of water.
Warning!
All operations must be performed when the machine is cold.
Cleaning the filter containing the grounds
Check that the holes are not clogged and if so, clean them with a small brush (Fig. 11).
Dispense boiling water from the filter holder with the filter inside, without coffee grounds, after
placing a glass underneath the dispenser in order to dissolve or remove any coffee residue
or impurities.
Warning!
Slowly remove and disconnect the filter holder because any remaining pres-
sure could cause splashes or squirts.
It is advisable to thoroughly clean the filter about every 3 months using detergent tabs, which
can be found at retail stores and the Authorised Service Centres, following the instructions
inside the package. As an alternative, you can use a simple dishwasher detergent tab (without
added rinse aid or other chemical additives) as follows:
• Put a dishwasher detergent tab into the filter (without coffee) when the machine is hot (after
heating for at least five minutes).
• Couple the filter holder to the machine and put a container underneath the filter holder.
• Put the coffee brewing switch (O) in the coffee position (
) to start dispensing water, then
dispense water for 15-20 seconds.
• Stop the water supply and let the tab act for at least 15 minutes while keeping the filter
holder coupled on the machine.
• Repeat the water dispensing operation by operating the pump for about 15-20 seconds,
and then letting it rest for another 15-20 seconds, until two tanks of water are used up.
• Remove the filter holder from the machine, remove the filter and rinse it well under running
tap water.
• Turn off the machine, disconnect the power cable from the socket-outlet and clean the
coupling seat of the filter holder with a sponge in order to remove any detergent residue
from the shower disc.
• Turn the machine back on, couple the filter holder once again and dispense at least 2 cups
of water again to complete the rinsing.
If the coffee machine is used daily, it is advisable to carry out the cleaning operation at least
every three months.
Cleaning the silicone disc
Wash the silicone disc (C) under running water, bending it slightly on the sides in order to

IT
GB / IE
11
GB / IE
free the centre hole of any residue of coffee grounds that could clog it (Fig. 12).
Cleaning the filter holder seat
With time, coffee residue may accumulate on the filter holder seat. It can be removed with a
toothpick, a sponge (Fig. 13), or by letting water run through without fitting the filter holder
(Fig. 4).
Cleaning the cappuccino maker
Warning!
Perform this operation when the chrome-plated pipe is cold so as to prevent
burns.
Unscrew the cappuccino maker (G) from the steam tube (G1) (Fig. 14) and wash it with
running water. The steam tube (G1) can be cleaned with a non-abrasive cloth. If necessary,
clean the small steam outlet hole again with a pin (Fig. 14). Screw the cappuccino maker
back on as far as it will go. After use, always let the steam nozzle run for a few seconds so
to free the outlet from any possible residue.
Cleaning the tank
Periodically clean the inside of the tank with a sponge or damp cloth.
Cleaning the grill and the drip tray
Remember to empty the drip tray from time to time (H).
Remove the grill (I) and wash it under running water; remove the drip tray (H) from the
machine, empty it and wash it under running water.
Cleaning the machine body
Warning!
Clean the fixed parts of the machine using only a damp, non-abrasive cloth
so as to not damage the body.
DECALCIFICATION
Good maintenance and regular cleaning preserve and keep the machine efficient for a longer
amount of time, considerably limiting the risks of lime deposits forming inside the appliance.
However, should your coffee machine fail to work properly as a result of the frequent use of
hard, high calcium content water, you may perform a decalcification procedure to restore
its operational efficiency. Should you need to decalcify your appliance, please follow the
instructions which come with the decalcifying product.
PUTTING OUT OF SERVICE
If you want to put the machine out of service, you must disconnect it electrically, empty the
water tank and drip tray and clean it (see the paragraph on “Cleaning the appliance”).
In the case of scrapping, you must separate the various materials used in making the machine
and dispose of them based on their composition and on the legal provisions in force in the
country of use.

12
GB / IE
GB / IE
DISPOSAL
Packaging
The product is packaged using recyclable materials, which must be disposed of in the proper
containers.
Electronic equipment
Do not dispose of electronic equipment in normal household waste.
Compliant with EU directive 2012/19/EC, at the end of its useful life, the appliance
must be disposed of in a suitable manner. This will make it possible to re-use recyclable
material, limiting the impact on the environment.
Dispose of the appliance at a collection centre for electrical waste or a recycling centre.
For more information, please contact your local disposal company or local authority.
TECHNICAL DATA
Mains Power: 220-240 V ~ 50/60 Hz
Power: 850 Watt

IT
GB / IE
13
GB / IE
TROUBLESHOOTING
If there are problems with operation, immediately turn off the machine and
unplug it from the socket-outlet.
PROBLEMS CAUSES SOLUTIONS
The coffee
maker does
not supply
steam.
There is little water and the
pump does not suck it up.
Check that the water level in the tank is correct. If
necessary, fill it with cool tap water.
The steam exit hole on the dis
-
penser wand is clogged.
Unclog any deposits that may have formed in the
hole of the steam tube with a pin (Fig. 14).
Coffee over
-
flowing from
the edges of
the filter ring.
Probably an excess amount of
ground coffee has been placed
in the filter ring preventing the
filter ring from being correctly
tightened into its housing.
Slowly remove and disconnect the filter holder
because any remaining pressure could cause splash-
es or squirts. Clean the coupling seat with a sponge
(Fig. 13). Repeat the operation placing the correct
quantity of coffee in the filter.
Residues of ground coffee have
remained on the gasket of the
filter holder coupling seat.
Clean the seal with a toothpick or a sponge (Fig.
13).
The exit holes of the filter
containing coffee grounds are
clogged.
Slowly remove and disconnect the filter holder
because any remaining pressure could cause splash
-
es or squirts. Clean the clogged filter holes with a
small brush or a pin.
The coffee is
not supplied
or flows too
slowly.
The holes of the perforated disc
in the filter holder coupling seat
are clogged.
Turn on the machine without the filter holder, making
the water run. Turn on the machine without the filter
holder, making the water run. If the water still does
not come out from all the holes evenly, carry out the
descaling cleaning operation, following the instruc
-
tions provided in the package.
The exit holes of the filter
containing coffee grounds are
clogged.
Slowly remove and disconnect the filter holder
because any remaining pressure could cause splash
-
es or squirts. Clean the clogged filter holes with a
small brush or a pin.
The coffee blend is ground too
fine.
Try using coarser coffee blends.
The coffee blend is pressed
down too much.
amper coffee inside the filter using less pressure.
The tanks is not inserted well. Fit the tank securely by pushing it as far as it will go.
There is little water and the
pump does not suck it up.
Check that the water level in the tank is correct. If
necessary, fill it with cool tap water.
The coffee is
too watery
and cold.
The blend has been ground too
coarsely.
A more finely ground blend must be used to obtain a
more concentrated and hotter coffee.

14
GB / IE
GB / IE
WARRANTY
Dear Customer,
This appliance is provided with a 3-year warranty (statutory warranty) from the date of purchase.
In case of a faulty product, the purchaser is covered by statutory consumer rights, which are not
limited by the following warranty.
Warranty conditions
The warranty period commences at the date of purchase. Keep the original receipt as proof of
purchase.
In case of defects in material or workmanship found within three years (statutory warranty) from the
date of purchase of the product, we will, at our discretion, repair or replace the appliance free of
charge. This intervention, under warranty requires that within the period of three years (statutory
warranty), that the faulty appliance and proof of purchase (receipt) be presented together with a
short description of the fault, including the date on which the problem was found.
In the event that the fault is covered by warranty, the appliance will be repaired or replaced. The
repair or replacement of the product does not imply the start of a new warranty period.
Warranty period and legal right to complaint due to fault
The warranty period is not extended by the legal warranty. The above also refers to parts that are
replaced or repaired. Report damage or any faults found at the time of purchase immediately after
unpacking. Repairs requested after the warranty period has expired will be charged.
Warranty application
This product has been made with care and according to strict quality standards; it is also scrupu-
lously inspected before delivery.
The warranty applies to defects in material and workmanship. The warranty does not extend to
parts of the product that are subject to normal wear and tear and which, as a result, can be con-
sidered wear parts; it also does not cover fragile parts such as switches, breakers and accumulators
in glass, or damage caused during transport.
This warranty will become null and void in the event that the product is damaged or not used or
subjected to maintenance as appropriate. For suitable product use, abide by the guidelines in the
instructions for use. Avoid all use or operations that are advised against in the instructions for use
or which are the subject of warnings.
This product is destined exclusively for private use and not for business purposes. The warranty
will become null and void in the event of abuse, improper use, use of force or interventions carried
out by persons other than our authorised assistance services.
Warranty procedures
To allow rapid processing of the problem, please proceed as follows:
• Any request must be accompanied by a receipt and by the code no. (IAN 106103) as proof
of purchase
• The code number is shown on the rating plate or front of the instructions for use (bottom left).
• In case of operating errors or other faults, contact the following assistance service by tele-
phone or email.
• If the product is found to be faulty, it can be sent, carriage paid, to the address provided by
the assistance centre, attaching proof of purchase (receipt), a description of the fault and the
date on which the problem was found.
• Package the faulty appliance with care before sending it to the assistance service.

IT
GB / IE
15
GB / IE
Company and seller‘s headquarters:
LIDL
Service address:
GB
Jaleno Europe Limited
Roe Head House
Far Common Road
Mirfield
West Yorkshire
WF14 0DQ
England
IE
Kenilworth Electrical
Electrolux Complex
Longmile road
Dublin 12
Phone hotline:
01924 481053 (GB)
014508703 / 014508705 (IE)
E-mail:
-
Name of manufacturer/importer:
De‘Longhi Appliances S.r.l.
Via L. Seitz, 47
31100 Treviso - Italy
Tel. +39-0422-4131
Fax +39-0422-413736
Product name:
Espresso Machine IAN 106103
Product/manufacturer ID no.:
SEMR 850 A1
Buyer’s name:
..............................................................
Postal Code/City:
..............................................................
Street:
..............................................................
Phone/E-mail:
..............................................................
Signature:
..............................................................
Fault description:
..............................................................
..............................................................
..............................................................
..............................................................
..............................................................
..............................................................
Warranty card

16
SE
SE
SYMBOLER
Informationen i denna bruksanvisning är märkt på följande sätt:
FARA för barn.
FARA p.g.a. elektricitet.
FARA p.g.a. andra orsaker.
VARNING!: Risk för brännskada p.g.a. ånga med hög temperatur.
OBSERVERA! Möjliga materiella skador.
SYMBOLER 16
VIKTIGA ANVISNINGAR 17
BESKRIVNING AV APPARATEN 20
AVSEDD ANVÄNDNING 20
INLEDANDE STEG FÖR ANVÄNDNING 20
KAFFEBRYGGNING 21
CAPPUCCINOBRYGGNING 22
ÅTERUPPTAGNING AV KAFFEBRYGGNING 22
ANVÄNDBARA TIPS FÖR EN GOD ITALIENSK ESPRESSO 22
RENGÖRING AV APPARATEN 23
AVKALKNING 24
NÄR MASKINEN TAS UR BRUK 24
AVFALLSHANTERING 25
TEKNISKA DATA 25
LÖSNING FÖR FÖLJANDE PROBLEM 26
GARANTI 27
INNEHÅLL

IT
SE
17
SE
VIKTIGA ANVISNINGAR
LÄS DENNA BRUKSANVISNING FÖRE ANVÄNDNING.
SPARA ALLTID BRUKSANVISNINGEN.
Vid ägarbyte av apparaten ska även denna bruksanvisning medfölja.
• Apparaten är endast avsedd för hushållsbruk och får inte användas
för kommersiellt eller industriellt bruk.
• Tillverkaren ansvarar inte för felaktig användning eller andra använd-
ningsområden än de som beskrivs i denna bruksanvisning.
• Det rekommenderas att spara originalförpackningen eftersom gratis
service inte gäller för de defekter som orsakas av att produkten inte
har förpackats på ett lämpligt sätt när den skickas till en auktoriserad
serviceverkstad.
FARA för barn
• Apparaten får användas av barn över 8 år endast om det sker under
uppsikt av en ansvarsfull person eller om de har fått lära sig hur
apparaten används på ett säkert sätt och har förstått vilka risker som
är förknippade med användningen.
• De rengörings- och underhållsmoment som ska utföras av användaren
får inte utföras av barn om de inte är över 8 år och hålls under upp-
sikt. Se till att inga barn leker med apparaten.
• Förpackningsmaterialet får inte lämnas inom räckhåll för barn efter-
som det utgör en potentiell fara.
• Skär av elsladden för att göra apparaten obrukbar om den ska bort-
skaffas som avfall. Det rekommenderas dessutom att göra de delar
av apparaten obrukbara som kan utgöra en fara, i synnerhet för barn
som kan få för sig att leka med apparaten.
FARA p.g.a. elektricitet
• Apparaten får användas av personer med nedsatt fysik, sensorisk eller
mental funktionsförmåga, eller som saknar nödvändig erfarenhet och
kunskap, endast om det sker under uppsikt av en ansvarsfull person
eller om de har fått lära sig hur apparaten används på ett säkert sätt
och har förstått vilka risker som är förknippade med användningen.

18
SE
SE
• Innan apparaten ansluts till elnätet ska du kontrollera att spänningen
som anges på typskylten i botten av maskinen överensstämmer med
det lokala elnätets spänning.
• Användning av förlängningssladdar som inte har godkänts av appa-
ratens tillverkare kan orsaka skador och olyckor.
• En skadad elsladd ska bytas ut av tillverkaren, en serviceverkstad eller
en behörig fackman för att förebygga alla risker.
• Spänningssatta delar får aldrig komma i kontakt med vatten: Det kan
bli kortslutning!
• Dra ut stickkontakten ur eluttaget före samtliga rengörings- eller under-
hållsmoment.
• Sänk inte ned apparaten i vatten eller andra vätskor.
• Stäng alltid av apparaten och dra ut stickkontakten ur eluttaget innan
vattenbehållaren fylls på.
FARA p.g.a. andra orsaker
• Lyft inte apparaten genom att ta tag om vattenbehållaren eller dropp-
tråget utan ta tag om stommen.
• Välj en tillräckligt belyst och ren miljö där eluttaget är lättillgängligt.
• Undvik att överfylla vattenbehållaren.
• Lämna inte apparaten utan uppsikt när den är ansluten till elnätet.
• Apparaten ska placeras och användas på en stabil yta.
• Apparaten får inte användas om någon har tappat den, om det finns
synliga tecken på skador eller om den läcker vatten. Använd inte
apparaten om elsladden eller stickkontakten är skadad eller om appa-
raten är behäftad med fel. Samtliga reparationer, inklusive byte av
elsladd, får endast utföras av en serviceverkstad eller auktoriserade
tekniker för att förebygga alla risker.
VARNING!: Risk för brännskada
p.g.a.ånga med hög temperatur
• Rikta aldrig strålen med ånga eller hetvatten mot delar av kroppen;
Hantera ång-/hetvattenröret försiktigt: Fara för brännskador!
• Apparatens och filterhållarens utvändiga metalldelar ska inte vidröras

IT
SE
19
SE
när apparaten är påslagen eftersom de kan orsaka brännskador.
• Kommer det inget vatten från filterhållaren kan det bero på att filtret
är tilltäppt. Avbryt utmatningen och vänta i ca 10 sekunder. Ta där-
efter bort och haka långsamt loss filterhållaren eftersom ett eventuellt
resttryck kan orsaka sprut eller stänk. Utför därefter rengöringen enligt
anvisningarna i motsvarande avsnitt.
OBSERVERA! Möjliga materiella skador
• Placera maskinen på en stabil yta där den inte kan vältas omkull.
• Använd inte maskinen utan vatten eftersom pumpen i detta fall brän-
ner.
• Fyll aldrig på vattenbehållaren med varmt eller kokande vatten.
• Placera inte maskinen på mycket varma ytor eller i närheten av öppna
lågor för att förhindra att stommen blir skadad.
• Elsladden får inte röra vid maskinens varma delar.
• Använd inte kolsyrat vatten (tillsatt kolsyra).
• Fyll aldrig filtret med något annat än malt kaffe. Apparaten kan få
allvarliga skador.
• Förvara inte maskinen vid lägre rumstemperatur än 0 °C eftersom det
vatten som finns kvar i värmesystemet kan frysa och orsaka skador.
• Använd inte apparaten utomhus.
• Utsätt inte apparaten för väder och vind (regn, sol o.s.v.).
• Efter att stickkontakten har dragits ut ur eluttaget och de varma
delarna har svalnat ska apparaten rengöras. Använd en lätt fuktad
mjuk trasa och några droppar milt rengöringsmedel (använd aldrig
lösningsmedel som skadar plasten).

20
SE
SE
BESKRIVNING AV APPARATEN
A
Filterhållare för malt kaffe
I
Utdragbart koppgaller
B
Kaffemått/-press
J
På/av-brytare
C
Hålförsedd siklikonskiva
(Thermocream®).
K
Vred för utmatning av ånga
D
Filter för malt kaffe
L
Kontrollampa för värmesystemets
temperatur
E
Utdragbar vattenbehållare
M
Brytare för ångfunktion
F
Elsladd + stickkontakt
N
Termometer för värmesystemets temperatur
(°C och °F).
G
Anordningen för cappuccino
O
Brytare för kaffebryggning
G1
Utmatningsrör för vatten/ånga
P
Kontrollampa för påslagning
H
Dropptråg
AVSEDD ANVÄNDNING
• Maskinen kan användas för att göra i ordning kaffe och cappuccino;
Tack vare att det går att mata ut hetvatten går det även att göra i
ordning te och andra drycker. Denna apparat är endast utformad för
privat bruk. Användning för industriella eller professionella ändamål
anses därför vara olämplig.
• Tillverkaren avråder från all annan användning av maskinen.
Tillverkaren frånsäger sig allt ansvar för alla slags skador som orsakas
av en felaktig användning av maskinen. Felaktig användning medför
dessutom bortfall av all form av garanti.
INLEDANDE STEG FÖR ANVÄNDNING
Förberedelser inför användning
Kontrollera att det lokala elnätets spänning överensstämmer med spänningen som anges på
apparatens typskylt. Placera därefter maskinen på en plan yta. Diska vattenbehållaren vid
det första användningstillfället och fyll på den med ej kolsyrat färskt vatten (MAX 1 L). Sätt
därefter i den korrekt (Fig. 3).
Kontrollera att vattenbehållaren är korrekt isatt, annars kan maskinen inte brygga
kaffe.
Sätt i stickkontakten i eluttaget som ska vara jordat.
Första användningstillfället
När vattenbehållaren har fyllts på med färskt vatten kan maskinen slås på. Tryck i några
sekunder på knappen (J) (Fig. 1). Kontrollampan (P) tänds som tecken på att maskinen är
påslagen.
Vid det första användningstillfället, eller om maskinen har stått oanvänd en tid,
Seite wird geladen ...
Seite wird geladen ...
Seite wird geladen ...
Seite wird geladen ...
Seite wird geladen ...
Seite wird geladen ...
Seite wird geladen ...
Seite wird geladen ...
Seite wird geladen ...
Seite wird geladen ...
Seite wird geladen ...
Seite wird geladen ...
Seite wird geladen ...
Seite wird geladen ...
Seite wird geladen ...
Seite wird geladen ...
Seite wird geladen ...
Seite wird geladen ...
Seite wird geladen ...
Seite wird geladen ...
Seite wird geladen ...
Seite wird geladen ...
Seite wird geladen ...
Seite wird geladen ...
Seite wird geladen ...
Seite wird geladen ...
Seite wird geladen ...
Seite wird geladen ...
Seite wird geladen ...
Seite wird geladen ...
Seite wird geladen ...
Seite wird geladen ...
Seite wird geladen ...
Seite wird geladen ...
Seite wird geladen ...
Seite wird geladen ...
Seite wird geladen ...
Seite wird geladen ...
Seite wird geladen ...
Seite wird geladen ...
Seite wird geladen ...
Seite wird geladen ...
Seite wird geladen ...
Seite wird geladen ...
Seite wird geladen ...
Seite wird geladen ...
Seite wird geladen ...
-
 1
1
-
 2
2
-
 3
3
-
 4
4
-
 5
5
-
 6
6
-
 7
7
-
 8
8
-
 9
9
-
 10
10
-
 11
11
-
 12
12
-
 13
13
-
 14
14
-
 15
15
-
 16
16
-
 17
17
-
 18
18
-
 19
19
-
 20
20
-
 21
21
-
 22
22
-
 23
23
-
 24
24
-
 25
25
-
 26
26
-
 27
27
-
 28
28
-
 29
29
-
 30
30
-
 31
31
-
 32
32
-
 33
33
-
 34
34
-
 35
35
-
 36
36
-
 37
37
-
 38
38
-
 39
39
-
 40
40
-
 41
41
-
 42
42
-
 43
43
-
 44
44
-
 45
45
-
 46
46
-
 47
47
-
 48
48
-
 49
49
-
 50
50
-
 51
51
-
 52
52
-
 53
53
-
 54
54
-
 55
55
-
 56
56
-
 57
57
-
 58
58
-
 59
59
-
 60
60
-
 61
61
-
 62
62
-
 63
63
-
 64
64
-
 65
65
-
 66
66
-
 67
67


Silvercrest 106103 Bedienungsanleitung
- Kategorie
- Kaffeemaschinen
- Typ
- Bedienungsanleitung
- Dieses Handbuch eignet sich auch für
in anderen Sprachen
- English: Silvercrest 106103 Owner's manual
- français: Silvercrest 106103 Le manuel du propriétaire
- Nederlands: Silvercrest 106103 de handleiding
- svenska: Silvercrest 106103 Bruksanvisning
Verwandte Artikel
Andere Dokumente
-
ARIETE Moka Aroma 1337/41 Benutzerhandbuch
-
ARIETE 1366 Picasso Cialdissima Benutzerhandbuch
-
-
Tristar CM-2276 Benutzerhandbuch
-
ARIETE 1334 Minuetto Benutzerhandbuch
-
-
Spidem RI9735/82 Benutzerhandbuch
-
Gaggia RI9301/11 Benutzerhandbuch
-
-
Gaggia Espresso Dose Benutzerhandbuch