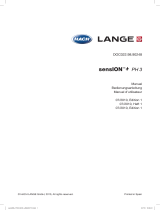
Hach sensION+ EC71 Benutzerhandbuch
- Kategorie
- Messung
- Typ
- Benutzerhandbuch
Dieses Handbuch eignet sich auch für

DOC022.98.90252
Manual
Bedienungsanleitung
Manuel d’utilisateur
07/2010, Edition 1
07/2010, Heft 1
07/2010, Edition 1
© HACH LANGE GmbH, 2010, All rights reserved. Printed in Spain
sensION+ EC71 HACH LANGE 7010.indd 1sensION+ EC71 HACH LANGE 7010.indd 1 8/7/10 16:14:338/7/10 16:14:33

sensION+ EC71 HACH LANGE 7010.indd 2sensION+ EC71 HACH LANGE 7010.indd 2 8/7/10 16:14:348/7/10 16:14:34

ENGLISHDEUTSCHFRANÇAISCONTACT
sensION+ EC71 HACH LANGE 7010.indd 3sensION+ EC71 HACH LANGE 7010.indd 3 8/7/10 16:14:348/7/10 16:14:34

sensION+ EC71 HACH LANGE 7010.indd 4sensION+ EC71 HACH LANGE 7010.indd 4 8/7/10 16:14:348/7/10 16:14:34

1
ENGLISH
1. Technical Specifications . . . . . . . . . . . . . . . . . . 2
2. General information . . . . . . . . . . . . . . . . . . . . . 3
2.1. Safety information . . . . . . . . . . . . . . . . . . . . 3
2.1.1. Use of hazard information . . . . . . . . . 3
2.1.2. Precautionary labels . . . . . . . . . . . . . . 3
2.2. General product information . . . . . . . . . . . . 3
2.3. Instrument composition . . . . . . . . . . . . . . . 3
3. Installation . . . . . . . . . . . . . . . . . . . . . . . . . . . . . 4
3.1. Assemblage . . . . . . . . . . . . . . . . . . . . . . . . . 4
3.2. Connections . . . . . . . . . . . . . . . . . . . . . . . . 5
4. Operation . . . . . . . . . . . . . . . . . . . . . . . . . . . . . . 5
4.1. Description . . . . . . . . . . . . . . . . . . . . . . . . . 5
4.2. Start-up . . . . . . . . . . . . . . . . . . . . . . . . . . . . 6
4.3. Factory configuration . . . . . . . . . . . . . . . . . . 6
4.4. General diagram . . . . . . . . . . . . . . . . . . . . . 7
4.5. Calibration . . . . . . . . . . . . . . . . . . . . . . . . . . 8
4.6. Other options for calibration . . . . . . . . . . . . 9
4.7. EC measurements . . . . . . . . . . . . . . . . . . . . 10
4.8. Reprogramming EC measurements . . . . . . . 11
4.9. Printing data of EC measurements . . . . . . . . 12
4.10. Salinity, TDS and Resistivity measurements . . 14
4.11. Data Logger . . . . . . . . . . . . . . . . . . . . . . . . . 16
4.12. System . . . . . . . . . . . . . . . . . . . . . . . . . . . . . 17
4.13. Temperature re-adjustment . . . . . . . . . . . . . 18
4.14. Recognized standards . . . . . . . . . . . . . . . . . 18
5. Sending data via the RS 232 C . . . . . . . . . . . . 19
6. Maintenance . . . . . . . . . . . . . . . . . . . . . . . . . . . 20
6.1. Clean the instrument . . . . . . . . . . . . . . . . . . 20
6.2. Sensor cleaning . . . . . . . . . . . . . . . . . . . . . . 20
7. Warning messages . . . . . . . . . . . . . . . . . . . . . . 20
8. Accessories and spares. . . . . . . . . . . . . . . . . . . 21
9. Warranty, liability and complain . . . . . . . . . . 21
Contact Information
Index
sensION+ EC71 HACH LANGE 7010.indd ANG:1sensION+ EC71 HACH LANGE 7010.indd ANG:1 8/7/10 16:14:348/7/10 16:14:34

2
1. Technical Specifications
Measuring ranges (resolution depending on scale)
Conductivity 0.01/0.001* µS to 500/1000** mS/cm
Resistivity 0 to 100 M
Salinity 5.85 mg/l to 311.1 g/l NaCl
T.D.S. 0 mg/l to 500 g/l
Temp -20.0 to 150.0 ˚C (-4 to 302 ˚F)
* only with C=0.1 cm
-1
** only with C=10 cm
-1
Measuring error (±1 digit)
Conductivity 0.5%
Resistivity 0.5 %
Salinity & TDS 0.5%
Temp 0.2 ˚C (0.4 ºF)
Reproducibility (±1 digit)
Conductivity ± 0.1 %
Resistivity
±
0.1 %
Salinity & TDS ± 0.1 %
Temp ± 0.1 ˚C (0.1 ºF)
Automatic temperature compensation
Manual entrance.
With Pt 1000 temperature probe (A.T.C.)
With NTC 10 K probe.
Temperature coefficient, TC
Linear, TC = 0.00 to 9.99 % / ºC.
Non-linear function for natural waters (UNE EN 27888)
Temperature reference, TRef
20 ˚C, 25 ˚C or any value between 0 and 99 ˚C.
Conductivity calibration (EC)
With 1, 2 or 3 standards selectable inside the range.
Recognition of molar standards.
Calibration at any EC, salinity or TDS value (indirect calibration)
Theoretical calibration.
Manual introduction of the calibration parameters.
Programmable calibration validity between 0 and 99 days.
Automatic recalibration warning
Accepted cell constants
With calibration: values between 0.05 to 50 cm
-1
.
Manual introduction: values between 0.05 to 15 cm
-1
.
Temperature readjustment
Correction of the temp. probe deviation (A.T.C.) at 25 ˚C (77 ˚F)
and 85 ˚C (185 ˚F).
Measuring mode
By stability, in continuous and by time.
Data Logger
Storage capacity up to 400 readings.
Storage the last 9 calibrations.
Languages
English, German, Spanish, French, Italian, and Portuguese.
Display
Graphic, backlit liquid crystal, 128x64 dots.
Inputs and outputs
Conductivity cell with built-in Pt1000 sensor, telephonic
connector.
Stirrer, RCA connector.
RS232C for printer or PC, telephonic connector.
External PC key board, mini DIN connector
Ambient conditions
Working temperature 5 to 40 ˚C (41 to 104 ºF).
Storage temperature -15 to 65 ˚C (5 to 149 ºF).
Relative humidity < 80% (not condensed).
Power supply
External plug-in power supply 100-240 VAC 0.4 A 47-63 Hz.
Materials
Enclosure, ABS and PC.
Keypad, PET with protective treatment.
Physical parameters
Weight: 1100 g.
Size: 350 x 200 x 110 mm.
sensION+ EC71 HACH LANGE 7010.indd ANG:2sensION+ EC71 HACH LANGE 7010.indd ANG:2 8/7/10 16:14:348/7/10 16:14:34

3
Electrical equipment marked with this symbol may not be dis-
posed of in European public disposal systems after 12 August of
2005. In conformity with European local and national regulations
(EU Directive 2002/96/EC), European electrical equipment users
must now return old or end-of life equipment to the Producer for
disposal at no charge to the user.
Note: For return for recycling, please contact the equipment
producer or supplier for instructions on how to return end-of-
life equipment, producer-supplied electrical accessories, and all
auxiliary items for proper disposal.
Version Cell Accessories Manual
LPV3110.98.0002 ––
✓✓
LPV3170.98.0002 LZW5070.97.0002
✓✓
ENGLISH
Accessories:
- Standard solutions 147 µS/cm , 1413 µS/cm and 12.88 mS/cm,
135 ml flasks.
- Magnetic stirrer.
- Calibration flasks, with magnetic bar inside.
- Plug-in power supply.
- Electrode’s stick and support.
2.2. Description
The
sensION
™
+ EC 71
is an instrument to measure conduc-
tivity, salinity, TDS and temperature.
2.3. Instrument composition
2. General information
As a result of constant improvements to our products sometimes
differences may exist between this manual and the instructions
supplied with the instrument.
2.1. Safety information
Please, read carefully this information before installing and using
the instrument !
Pay attention to all danger and caution statements.
2.1.1. Use of hazard information
DANGER
Indicates a potentially or imminently hazardous situation
that, if not avoided, will result in death or serious injury.
WARNING
Indicates a potentially or imminently hazardous situation
that, if not avoided, may result in death or serious injury.
CAUTION
Indicates a potentially hazardous situation that, if not
avoided, may result in minor or moderate injury.
Important note: Indicates a situation that, if not
avoided, could lead to damage to the instrument.
Important information that requires special emphasis.
Note: Information that supplements points in the main
text.
2.1.2. Precautionary labels
Read carefully all labels and tags attached to the instrument.
sensION+ EC71 HACH LANGE 7010.indd ANG:3sensION+ EC71 HACH LANGE 7010.indd ANG:3 8/7/10 16:14:348/7/10 16:14:34

4
3. Installation
DANGER
Only qualified personnel, following the local security regulations, should conduct the tasks described in this section of the
manual.
3.1. Assemblage
1. Unpack the instrument.
Note: Stirrer replacement
Before replacing the stirrer, disconnet it from the rear panel and
release the cable from the bottom of the instrument.
2. Verify that the shift is in
the same position than
in the picture.
3. Drive the stick into the
hole.
4. Turn the shift in a
counterclockwise until
the stick is well fixed.
Place the o-ring at
135-140 mm from the
base in order to avoid
the shock of the sensor
against the bottom of
the glass.
5. Place the electrode’s
support on the stick by
softly pressing the
button.
Holder for 3 sensors.
PN LZW93 21.
6. Place the electrode on
the electrode’s support.
Insert the electrode’s
cable through the
groove.
1. Turn the stirrer to
release or fix from base.
2. Pull up the stirrer and
replace it.
Place the cable of the
new stirrer through the
bottom groove of the
instrument.
140
sensION+ EC71 HACH LANGE 7010.indd ANG:4sensION+ EC71 HACH LANGE 7010.indd ANG:4 8/7/10 16:14:358/7/10 16:14:35

5
ENGLISH
3. Installation
1. Magnetic stirrer, RCA connector.
2. Conductivity cell, with built-in ATC, telephonic connector.
3. RS-232 for printer or PC, telephonic connector.
4. PC keyboard, mini DIN connector.
5. Plug-in power supply (12 V).
3.2. Connections
DANGER
Make sure the power adapter matches your local power
supply.
4. Operation
4.1. Description
Keys
Switch on / Switch off.
Confirms the option displayed. When there is more
than one option, accepts the one marked in negative.
Move backwards in the menus.
Selection between the different options displayed.
Selection of numeric values.
Move forwards / backwards a digit when entering a
numeric value.
Show the next display in those menus that have more
than one.
POWER INKEYBOARD
RS-232C
PRINTER / PCSTIRRER
CONDUCTIVITY
CELL
4
5
321
sensION+ EC71 HACH LANGE 7010.indd ANG:5sensION+ EC71 HACH LANGE 7010.indd ANG:5 8/7/10 16:14:468/7/10 16:14:46

6
SN: 0602 V 1.0
10-04-2010 17:15
SN: 0602 V 1.0
10-04-2010 17:45
SN: 0602 V1.00
DATA OUTPUT
Deactivated
For printer
For computer
SN: 0602 V1.00
Language ENGLISH
Sprache DEUTSCH
Idioma CASTELLANO
Langue FRANÇAIS
Lingua ITALIANO
Idioma Português
10-04-2010 17:45
EC MEASURE
New calibration
in 15 days
10-04-2010 17:15
EC MEASURE
Calibrate EC
10-04-2010 17:15
EC CALIBRATION
Calibrate EC
4. Operation
4.2. Start-up
Connect to the rear panel of the instrument:
- the conductivity cell
- the magnetic stirrer
- the plug-in power supply
Follow the next steps:
For the first time...
Successive times...
4.3. Factory configuration
The
sensION
™
+ EC 71
is an instrument for EC, salinity and TDS
measurements. The factory configuration is suitable for the
majority of applications.
Electrical conductivity (EC)
Temperature of reference (TRef) 25 ˚C
Temperature coefficient (CT) linear 2.00 %/ ºC.
Measurements: By stability.
In continuous pressing twice the key .
Calibration in 1, 2 or 3 points, with molar standards.
Calibration frequency, every 15 days.
Automatic sample coding.
Data sending, report type, etc. in accordance with the start up
configuration.
Salinity (NaCl)
Temperature of reference (TRef) 25 ˚C
Temperature coefficient (TC) linear 2.00 %/ ºC.
Measurements: By stability.
In continuous pressing twice the key .
Calibration in 1, 2 or 3 points, with molar standards.
Calibration frequency, every 15 days.
Automatic sample coding.
Data sending, report type, etc. in accordance with the start up
configuration.
Total dissolved solids (TDS)
Temperature of reference (TRef) 25 ˚C.
Temperature coefficient (TC) linear 2.00 %/ ºC.
Factor 0.64
Measurements: By stability.
In continuous pressing twice the key .
Calibration in 1, 2 or 3 points, with molar standards.
Calibration frequency, every 15 days.
Automatic sample coding.
Data sending, report type, etc. in accordance with the start up
configuration.
Resistivity ( )
Temperature of reference (TRef) 25 ˚C
Temperature coefficient (CT) linear 2.00 %/ ºC.
Measurements: By stability.
In continuous pressing twice the key .
Calibration in 1, 2 or 3 points, with EC molar standards.
Calibration frequency, every 15 days.
Automatic sample coding.
Data sending, report type, etc. in accordance with the start up
configuration.
Re-programming
To perform any modification in the default programming, for
example different measuring modes, calibration with other type
of buffers, etc. see corresponding chapters.
Press
Instrument switched off.
Press the keys
to select the
language.
Press the keys
to select the data
output. If a printer is available select the
corresponding options appearing on the
display. See page 17 (shady options)
Calibrate with standard solutions.
sensION+ EC71 HACH LANGE 7010.indd ANG:6sensION+ EC71 HACH LANGE 7010.indd ANG:6 8/7/10 16:14:478/7/10 16:14:47

7
INSTRUMENT CONDITIONS SN:70602 V1.0
Monday 30 July 2010 15:50
------------------------------------------------------------------------
EC MEASUREMENT
TC ......................................................................linear, 2.00%/˚C
TRef.........................................................................................25˚C
Measurement.........................................................by stability
Type of calibration .....................................molar standards
Frequency of calibration............................... every 15 days
SALINITY MEASUREMENT
TC ......................................................................linear, 2.00%/˚C
TRef.........................................................................................25˚C
Measurement..........................................................by stability
Type of calibration .....................................molar standards
TDS MEASUREMENT
TC ......................................................................linear, 2.00%/˚C
TRef.........................................................................................25˚C
Factor......................................................................................0,64
Measurement..........................................................by stability
Type of calibration .....................................molar standards
SYSTEM
Codification: .............................................................automatic
Data send ........................................................................ printer
Type of printer..............................................................thermal
Type of report ..............................................................reduced
Samples by report: ....................................................... several
Readjust temperature.........................................................NO
------------------------------------------------------------------------
EC CALIBRATION
DATA LOGGER
SYSTEM
EC MEASURE
New calibration
in 7 days
10-04-2007 17:15
...
Start meas. EC
...by stability
TC: Lineal 2.00%/˚C
TRef: 25˚C
Meas.: stability
Start measurement
Measuring conditions
Molar standards
Demal standards
NaCl standards
To a X value
Data introduction
Theoretical cal.
Cal. frequency
EC calibration
...
Start calibration
Molar standards
MEASURE
New calibration
in 7 days
10-04-2007 17:15
TDS MEASURE
NaCl MEASURE
10-04-2007 17:15
10-04-2007 17:15
Display data
Print
Reset
DATA LOGGER
Display data
Print
Reset
DATA LOGGER
10-04-2007 17:15
Sample ID
Data output
Type of report
Users
Header
SYSTEM
* * *
uS/cm @25˚C
Sample 1
21.3˚C
MEASURING
by stability
Identify sensor
Date / Time
Language
Display contrast
Readjust temp.
Stirring
Units temperature
Display data:
Measurement data
Cell history
Calibration data
DATA LOGGER
Sample ID:
Autom
atic
Manual
SYSTEM
Molar standards
Use standard 147 uS
Continue...
EC calibration
Print:
Measurement data
Cell history
Calibration data
Instrument conditions
DATA LOGGER
EC CALIBRATION
22.6˚C
147 uS/cm
@25˚C
00:23
ENGLISH
Example of ticket
4. Operation
4.4. General diagram
This is a general view over the way to access to all possibilities of
the instrument:
Reprogramation of measurements.
See page 11.
Calibration.
See pages 8 and 9
See page 16.
System.
See page 17.
Note:
The
sign on the
display indicates flashing.
Salinity, TDS and Resistivity
measurements. See page 14.
sensION+ EC71 HACH LANGE 7010.indd ANG:7sensION+ EC71 HACH LANGE 7010.indd ANG:7 8/7/10 16:14:488/7/10 16:14:48

8
Molar standards
Use standard 147 uS
Continue...
EC CALIBRATION
Molar standards
Use standard 1413 uS
Continue...
EC CALIBRATION
Molar standards
Use standard 12.88 mS
Continue...
EC CALIBRATION
...
Start calibration
Molar standards
EC CALIBRATION
22.6˚C
147 uS/cm
@25˚C
00:23
EC CALIBRATION
22.6˚C
1413 uS/cm
@25˚C
00:40
2nd standard OK
22.6˚C
1413 uS/cm @25˚C
00:55
1st standard OK
22.6˚C
147 uS/cm @25˚C
00:25
10-04-2010 17:15
EC CALIBRATION
Calibrate EC
Diagram for calibration4.5. Calibration
This process involves adjusting the values read by a conductivity
measuring system (instrument and cell) according to the values
of standard solutions.
Calibration is very important for highly accurate readings.
The equipment is capable of one-, two- and three-point calibration
using147µS/cm, 1413 µS/cm, 12.88 mS/cm and 111.8 mS/ cm
standards.
The calibration parameters are stored in the memory until a new
calibration is performed.
Normally the calibration is performed with molar standards.
Nevertheless, the instrument offers other options for calibration.
One-point calibration
This form of calibration is acceptable when measuring conduc-
tivity values around that of the standard used.
This is the most common type of calibration. In this type,
1413 µS/cm is the most commonly-used standard.
Two-point calibration
This type of calibration is recommended for work in high or low
conductivity regions where accuracy is required.
If you are calibrating with more than one standard, we recom-
mend that you start with the one with the lowest conductivity to
avoid contamination problems.
Three-point calibration
This type of calibration is recommended when the conductivity
of the samples to be measured ranges from low to high.
If you are calibrating with more than one standard, we recom-
mend that you start with the one with the lowest conductivity to
avoid contamination problems.
Calibration with molar standards
Standards 147uS/cm, 1413 uS/cm and 12.88 mS/cm (25˚C) are
supplied with the instrument.
Preparation
Fill the flasks with the corresponding standard solutions (50 ml)
The times of re-use of these liquids depends on the cell cleaning.
Hach recommend to use the same portion of standard 2 or 3
times.
Every calibration flask is supplied with a magnetic bar.
4. Operation
To modify the
standard calibra-
tion see page 9.
The instrument
controls automati-
cally the start/stop
of the stirrer.
Modify stirring
with
sensION+ EC71 HACH LANGE 7010.indd ANG:8sensION+ EC71 HACH LANGE 7010.indd ANG:8 8/7/10 16:14:498/7/10 16:14:49

9
EC CALIBRATION
Theoretical cal.
C=1.000 cm-1
Continue...
Calibration
Calibration frequency
Automatic warning.
1 day 00
hours
Type of calibration
Cal. Frequency
Display :No
Calibration
Type of calibration
Cal. Frequency
Display :No
Calibration
Molar standards
Demal standards
NaCl standards
To a X value
Data introduction
Calibration
Molar standards
Demal standards
NaCl standards
To a X value
Data introduction
Calibration
Molar standards
Demal standards
NaCl standards
To a X value
Data introduction
Calibration
Demal standards
NaCl standards
To a X value
Data introduction
Theoretical cal.
Calibration
EC CALIBRATION
Data introduction
C=1
.000 cm-1
Molar standards
Use standard 147 uS
Continue...
EC CALIBRATION
Molar standards
Demal standards
NaCl standards
To a X value
Data introduction
Calibration
Demal standards
Use
standard 12.85 uS
Continue...
EC CALIBRATION
Molar standards
Demal standards
NaCl standards
To a X value
Data introduction
Calibration
NaCl standard
Use
Standard 1014.90 uS
Continue...
EC CALIBRATION
To a X value
Use specific standard
Continue...
EC CALIBRATION
21,4˚C
* * *
uS/cm @
25˚C
00:01
EC CALIBRATION
21,4˚C
* * *
uS/cm @
25˚C
00:07
EC CALIBRATION
21,4˚C
83.1
uS/cm @
25˚C
00:05
EC CALIBRATION
Adjust value
83.1
uS/cm @
25˚C
00:15
EC CALIBRATION
Adjust value
85.0
uS/cm @
25˚C
00:15
EC CALIBRATION
10-04-2010 17:15
EC CALIBRATION
Calibrate EC
...
Start calibration
Molar standards
ENGLISH
4.6. Other options for calibration
Molar standards
147 µS/cm, 1413 µS/cm, 12.88 mS/cm and 111.8 mS/cm at 25 ˚C
(77 ˚F)
Demal standards
1049 µS/cm, 12.85 mS/cm and 111.31 mS/cm at 25 ˚C (77 ˚F)
NaCl standards
1014.9 µS/cm at 25 ˚C (77 ˚F)
Calibration to X value
Manual re-adjustment of the measured conductivity at any value
of the scale.
The EC readjustment is equivalent to calibration with only one
buffer.
Cell constant introduction
Manual introduction of the cell constant. For example, when the
cell has been calibrated previously in calibration laboratory.
Theoretical calibration
Selecting “theoretical calibration” the calibration data of the cell
in use are replaced by C=1.000 cm
-1
.
This step is prior to the obtention of a calibration certificate.
Calibration frequency
Select between 1 and 99 days.
The instrument by default is programmed for calibration every 15
days and indicates the remaining time to the new calibration.
Selecting 0 h the automatic re-calibration warning is deacti-
vated.
Note: Select “Display “ for simultaneous display of EC and
resistivity.
Important note:
Once the calibration is re-programmed, it will be performed with
the new programming.
4. Operation
The instrument goes
to main menu.
Start of calibration with the selected
standards.
Start calibration
The instrument goes
to the option “EC
CALIBRATION”.
Accept with
The instrument goes
in MEASURE menu.
The theoretical cali-
bration will be used.
Modify the data with
Accept with
The instrument goes to
MEASURE menu. The
introduced calibration
data will be used.
sensION+ EC71 HACH LANGE 7010.indd ANG:9sensION+ EC71 HACH LANGE 7010.indd ANG:9 8/7/10 16:14:508/7/10 16:14:50

10
21,4˚C
* * *
uS/cm @
25˚C
Sample 1 00:01
...
Start meas. EC
By stability
MEASURING
by stability
21,4˚C
825
uS/cm @
25˚C
Sample 1 00:01
MEASURING
(continuous)
21,4˚C
830
uS/cm @
25˚C
Stirring 30%
Sample 1 00:05
MEASURING
(continuous)
21,4˚C
* * *
uS/cm @
25˚C
Stirring 30%
Sample 1 00:05
MEASURING
by stability
21,4˚C
831
uS/cm @
25˚C
Sample 1 00:25
MEASURING
(continuous)
21,4˚C
* * *
uS/cm @
25˚C
Sample 1 00:10
MEASURING
by stability
21,4˚C
1215
uS/cm @
25˚C
Sample 1 00:25
Next sample
STABLE MEASUREMENT
21,4˚C
831
uS/cm @
25˚C
Sample 1 00:28
Next sample
HOLD
10-04-2010 17:45
EC MEASURE
New calibration
in 15 days
21˚C
* * *
uS/cm @
25˚C
Sample 1 00:01
MEASURING
by stability
21˚C
825
uS/cm @
25˚C
Sample 1 00:01
MEASURING
(continuous)
21˚C
* * *
uS/cm @
25˚C
Sample 1 00:01
MEASURING
by stability
21˚C
825
uS/cm @
25˚C
Sample 1 00:01
MEASURING
(continuous)
19˚C
* * *
uS/cm @
25˚C
Sample 1 00:05
MEASURING
by stability
19˚C
825
uS/cm @
25˚C
Sample 1 00:05
MEASURING
(continuous)
19˚C
* * *
uS/cm @
25˚C
Sample 1 00:10
MEASURING
by stability
19˚C
825
uS/cm @
25˚C
Sample 1 00:25
MEASURING
(continuous)
21,4˚C
830
uS/cm @
25˚C
Stirring 30%
Sample 1 00:28
MEASURING
(continuous)
21,4˚C
* * *
uS/cm @
25˚C
Stirring 30%
Sample 1 00:25
MEASURING
by stability
...
Start measurement
By stability
Sample:
_
by STABILITY
21,4˚C
* * *
uS/cm @
25˚C
Sample 1 00:01
MEASURE
by stability
21,4˚C
825
uS/cm @
25˚C
Sample 1 00:01
MEASURE
(continuous)
10-04-2010 17:45
EC MEASURE
New calibration
in 15 days
4.7. EC measurements
Measurement by stability
This is the default measuring mode for the
sensION
™
+ EC 71
.
Meanwhile the reading is in evolution, it appears on the display
momentary to orient the user. When the cell signal remains invar-
iable during a certain period of time, the reading is fixed on the
display, the reading is stable.
Stability criterion: 1 digit in 6 seconds.
If after 120 seconds the reading is not stable, the instrument
automatically passes in continuous measurement (the measured
value is displayed all the time).
To change measuring parameters see “Measure re-program-
ming”, page 11.
Magnetic stirrer: the instrument controls automatically the
start/stop of the stirrer.
Continuous measurement
The instrument displays the value obtained by the electrode all
the time. These data can be stored or printed with program-
mable interval of time. To select this type of measurement see
“Re-programming measurement”.
From the standard measuring mode (by stability), pressing twice
the key the measured value is shown on the display at any
moment but without option for data acquisition.
Measurement by time
The measurement is shown on the display after programmed
time. To select this measuring mode see “Re-programming meas-
urement”.
Manual samples coding
With
sensION
™
+ EC 71
it is possible to introduce specific
code (maximum 15 characters) per each sample using an external
PC key board or bar code. See SYSTEM, page 17.
4. Operation
Pressing twice measure-
ment in continuous.
With connected temperature probe.
Manual introduction of the temperature
Press ESC to quit measurement
etc.
etc.
etc.
etc.
Manual coding: introduce
the code for the sample.
A PC keyboard is required.
To vary stirring speed
Press to re-program
measurement. see page 11.
sensION+ EC71 HACH LANGE 7010.indd ANG:10sensION+ EC71 HACH LANGE 7010.indd ANG:10 8/7/10 16:14:518/7/10 16:14:51

11
Tref:
20˚C
25˚C
Other temperature
Measuring conditions
Measurement:
By stability
In continuous
By time
Measuring conditions
Measurement:
By stability
In continuous
By time
Measuring conditions
Measurement:
By stability
In continuous
By time
Measuring conditions
TC: lineal 2.00%/˚C
Reference T: 25˚C
Meas.: stability
Start measusrement
Measuring conditions
TC:
Lineal
Natural waters
Measuring conditions
TC lineal:
2
.00%/˚C
Measuring conditions
TC: lineal 2.00%/˚C
Reference T: 25˚C
Meas.: stability
Start measusrement
Measuring conditions
TC: lineal 2.00%/˚C
Reference T: 25˚C
Meas.: stability
Start measusrement
Measuring conditions
TC: lineal 2.00%/˚C
Reference T: 25˚C
Meas.: stability
Start measusrement
Measuring conditions
Measuring conditions
In continuous
Acquis. Interval
01
:00
Measuring conditions
By time
Acquis. Interval
00:01
:00
Measuring conditions
In continuous
Acquis. Interval
01:30
Measuring conditions
By time
Measurement time
00:01
:00
...
Start meas. EC
By stability
10-04-2010 17:45
EC MEASURE
New calibration
in 15 days
Default programming (standard) Other options
TC
• linear, TC = 2.00 % / ºC. • linear, TC selectable between 0.00 to 9.99 %/ºC.
• non-linear for natural waters, according to EN 27888
TRef
• 25 ˚C • 20 ˚C
• 25 ˚C
• other values
Measuring mode
• By stability.
- Criterion, 1 digit in 6 s.
• In continuous.
- The result is stored when the measurement
has finished.
- The result is printed when the measurement
has finished.
• By stability.
- Criterion, 1 digit in 6 s.
• In continuous. Selection of the time interval for:
- Data storage.
- Data printing.
• By time. Selection of the time interval for:
- Data storage.
- Data printing.
“Re-programming” flow chart
ENGLISH
Important note:
Once the measurement has been re-programmed, it will be
performed in accordance with the new parameters.
4. Operation
4.8. Re-programming EC measurements
Start of measurement
with new programming
Data storage in
the Data Logger. It
coincides with the
printing and PC
sending. Select-
ing 0 store/print
at the end of the
measurement.
Start measurement
sensION+ EC71 HACH LANGE 7010.indd ANG:11sensION+ EC71 HACH LANGE 7010.indd ANG:11 8/7/10 16:14:518/7/10 16:14:51

12
CALIBRATION REPORT
SN:70802 V1.10
Thursday, 14 February 2008 08:53
----------------------------------------
MOLAR STANDARDS
Standard Constant 'C Time St%
----------- ---------- ---- ------ ---
147.0 uS/cm 1.159cm-1 25.3 00:08 25
1413 uS/cm 1.153cm-1 25.3 00:11 25
12.88 mS/cm 1.158cm-1 25.3 00:13 25
Calibration frequency, every 24 days.
----------------------------------------
LABORATORY
TEST
========================================
CALIBRATION REPORT
SN:70802 V1.10
Thursday, 14 February 2008 08:53
----------------------------------------
EC CELL
Code: 50 70
Seriel n.: 801
CALIBRATED 14-02-2008 08:58:41
MOLAR STANDARDS
Standard Constant 'C Time St%
----------- ---------- ---- ------ ---
147.0 uS/cm 1.159cm-1 25.3 00:08 25
1413 uS/cm 1.153cm-1 25.3 00:11 25
12.88 mS/cm 1.158cm-1 25.3 00:13 25
Calibration frequency, every 24 days.
----------------------------------------
Operator: Pedro Martínez
----------------------------------------
SYSTEM
SYSTEM
Sample ID
Data output
Type Of Report
Sample ID
Data output
Type Of Report
SYSTEM
Data output:
Deactivated
For printer
For computer
External net
SYSTEM
Data Output
For printer
Dot matrix printer
Thermal printer
SYSTEM
Data output:
Deactivated
For printer
For computer
External net
10-04-2010 17:45
SYSTEM
Users
Antonio Sanz
User 2
User 3
User 4
10-04-2007 17:15
Molar standards
Use standard 147 uS
Continue...
EC CALIBRATION
...
Start calibration
Molar standards
10-04-2010 17:15
EC CALIBRATION
Calibrate EC
Molar standards
Use standard 147 uS
Continue...
EC CALIBRATION
...
Start calibration
Molar standards
10-04-2010 17:15
EC CALIBRATION
Calibrate EC
4. Operation
4.9. Printing data of EC measurements
4.9.1. Printer configuration
The printer can be configured at the start-up of the instrument or afterwards according to:
4.9.2. Calibration
Once the calibration has finished the calibration data will be automatically printed.
The report can be “reduced”, “standard” or “GLP” in accordance with the selected option in “System”, see page 17.
Reduced report
Standard and GLP report
Examples of calibration report:
Reduced report.
Standard and GLP report.
etc.
etc.
etc.
Only if work with users was se-
lected, see System page 17.
sensION+ EC71 HACH LANGE 7010.indd ANG:12sensION+ EC71 HACH LANGE 7010.indd ANG:12 8/7/10 16:14:528/7/10 16:14:52

13
MEASUREMENT REPORT
SN:70802 V1.10
Thursday, 14 February 2008 08:53
----------------------------------------
CONDITIONS MEASURE BY STABILITY
C.T. Linear 2.00%/'C T.R. 25'C
----------------------------------------
Sample E.C./cm Ts'C Time St%
----------- -------- ----- ------ ---
000103 96.9 mS 23.7 00:08 30
000104 9.93 mS 23.8 00:11 30
000105 1213 uS 23.7 00:08 30
tank1 120.3 uS 23.8 00:11 30
----------------------------------------
LABORATORY
TEST
========================================
MEASUREMENT REPORT
SN:70802 V1.10
Thursday, 14 February 2008 08:53
----------------------------------------
EC CELL
Code: 5070
Serial n.: 801
CALIBRATED 10-02-2008 08:58:41
----------------------------------------
CONDITIONS MEASURE BY STABILITY
C.T. Linear 2.00%/'C T.R. 25'C
----------------------------------------
Sample E.C./cm Ts'C Time St%
----------- -------- ----- ------ ---
000103 96.9 mS 23.7 00:08 30
000104 9.93 mS 23.8 00:11 30
000105 1213 uS 23.7 00:08 30
tank1 120.3 uS 23.8 00:11 30
----------------------------------------
Operator: Pedro Martínez
----------------------------------------
LABORATORY
TEST
========================================
MEASUREMENT REPORT
SN:70802 V1.10
Thursday, 14 February 2008 08:53
----------------------------------------
EC CELL
Code: 5070
Serial n.: 801
CALIBRATED 10-02-2008 08:58:41
MOLAR STANDARDS
Standard Constant 'C Time St%
----------- ---------- ---- ------ ---
147.0 uS/cm 1.159cm-1 25.3 00:08 25
1413 uS/cm 1.153cm-1 25.3 00:11 25
----------------------------------------
CONDITIONS MEASURE BY STABILITY
C.T. Linear 2.00%/'C T.R. 25'C
----------------------------------------
Sample E.C./cm Ts'C Time St%
----------- -------- ----- ------ ---
000103 96.9 mS 23.7 00:08 30
000104 9.93 mS 23.8 00:11 30
000105 1213 uS 23.7 00:08 30
tank1 120.3 uS 23.8 00:11 30
----------------------------------------
Operator: Pedro Martínez
Users
Antonio Sanz
User 2
User 3
User 4
10-04-2007 17:15
...
Start measurement
By Stability
21,4˚C
* * *
uS/cm @
25˚C
Sample 1 00:01
MEASURING
by stability
21,4˚C
825
uS/cm @
25˚C
Sample 1 00:01
MEASURING
(continuous)
10-04-2010 17:45
EC MEASURE
New calibration
in 15 days
...
Start measurement
By Stability
21,4˚C
* * *
uS/cm @
25˚C
Sanple 1 00:01
MEASURING
by stability
21,4˚C
825
uS/cm @
25˚C
Sample 1 00:01
MEASURING
(continuous)
10-04-2010 17:45
EC MEASURE
New calibration
in 15 days
ENGLISH
4. Operation
4.9.3. Measurement
Once the measurement has finished, the corresponding report
will be printed automatically.
The report can be “reduced”, “standard” or “GLP” in accord-
ance with the selected option in “SYSTEM”, see page 17.
Reduced report (factory programming)
Reduced report (continuous measurement)
The values corresponding to the programmed interval of time are
printed.
Standard and GLP report
Sample report (see System)
Several: The results from the different samples will be printed
one by one until the option MEASURE is quitted.
One: A complete report per sample.
Voluntary printing and report repetition (copies)
During measurement in continuous, pressing the key
the
measured value at that moment is printed. If the measurement is
by stability pressing the key a copy of the printed report can
be obtained.
(If a PC keyboard is used, it must be pressed F1 key).
Examples of measurement report:
Reduced report.
Standard report.
GLP report.
etc.
etc.
If measure in continuous
with factory program-
ming, the obtained data
is printed at the end of
the measurement.
etc.
etc.
sensION+ EC71 HACH LANGE 7010.indd ANG:13sensION+ EC71 HACH LANGE 7010.indd ANG:13 8/7/10 16:14:538/7/10 16:14:53

14
TC: lineal 2.00%/˚C
Tref: 25˚C
Meas.: stability
Start measurement
Measuring conditions
TC: lineal 2.00%/˚C
Tref: 25˚C
Meas.: stability
Start measurement
Measuring conditions
...
Start measurement
By Stability
21,4˚C
* * *
mg/l
Sample 1 00:01
MEASURING
by stability
21,4˚C
825
mg/l
Sample 1 00:01
MEASURING
(continuous)
10-04-2010 17:45
EC MEASURE
New calibration
in 15 days
10-04-2010 17:45
NaCl MEASURE
New calibration
in 15 days
EC MEASURE
New calibration
in 7 days
10-04-2010 17:15
NaCl MEASURE
New calibration
in 7 days
10-04-2010 17:15
TDS MEASURE
New calibration
in 7 days
10-04-2010 17:15
MEASURE
New calibration
in 7 days
10-04-2010 17:15
TC: lineal 2.00%/˚C
Tref: 25˚C
TDS factor: 0.64
Meas.: stability
Start measurement
Measuring conditions
TC: lineal 2.00%/˚C
Tref: 25˚C
TDS factor: 0.64
Meas.: stability
Start measurement
Measuring conditions
...
Start measurement
By Stability
21,4˚C
* * *
mg/l
Sample 1 00:01
MEASURING
by stability
21,4˚C
825
mg/l
Sample 1 00:01
MEASURING
(continuous)
10-04-2010 17:45
TDS MEASURE
New calibration
in 15 days
10-04-2010 17:45
NaCl MEASURE
New calibration
in 15 days
4.10. Salinity (NaCl), TDS and Resistivity measurements
TC: linear, selectable between entre 0 to 5 % / ºC.
TRef: 25 ˚C / 20 ˚C / others
Factor (only for TDS measurements): 0.40 to 1.00
Measuring modes:
By stability.
In continuous.
By time.
Procedure for change measuring units:
4.10.1. Salinity measurements:
Salinity measurement with printer, See EC measurement with printer, page 12.
4.10.2. TDS measurements:
TDS measurement with printer, See EC measurement with printer, page 12.
Important note:
It is not possible to measure salinity
with a TC=0 %/ ºC.
4. Operation
etc.
etc.
etc.
etc.
etc.
etc.
Measurement
in continuous
Measurement
in continuous
Reprogramming salinity
measurement conditions
Reprogramming TDS
measurement conditions
sensION+ EC71 HACH LANGE 7010.indd ANG:14sensION+ EC71 HACH LANGE 7010.indd ANG:14 8/7/10 16:14:548/7/10 16:14:54

15
TC: lineal 2.00%/˚C
Tref: 25˚C
Meas.: stability
Start measurement
Measuring conditions
TC: lineal 2.00%/˚C
Tref: 25˚C
Meas.: stability
Start measurement
Measuring conditions
...
Start measurement
By Stability
21,4˚C
* * *
.cm
Sample 1 00:01
MEASURING
by stability
21,4˚C
825
.cm
Sample 1 00:01
MEASURING
(continuous)
10-04-2010 17:45
MEASURE
New calibration
in 15 days
10-04-2010 17:45
TDS MEASURE
New calibration
in 15 days
ENGLISH
4.10.3. Resistivity measurementst:
Resistivity measurement with printer, See EC measurement with printer, page 12.
4. Operation
4.10.4. NaCl, TDS and Resistivity calibration
Standard recognition
The instrument recognises the same standard as in the EC cali-
bration, molar standards.
Calibration to X value
Manual readjustment of the selected unit, NaCl or TDS.
Cell constant introduction
Manual introduction of the cell constant. For example, when the
cell has been calibrated previously in calibration laboratory.
Theoretical calibration
Selecting theoretical calibration the calibration data in memory
will be replaced by C=1.000 cm
-1
.
This is a previous step of the obtention of calibration certificate.
Calibration frequency
Select between 0 h and 7 days. The instrument by default is
programmed for daily calibration and indicates the remaining
time to the new calibration. Selecting 0 h the automatic re-cali-
bration warning is deactivated.
etc. etc.
etc.
Measurement
in continuous
Reprogramming resistivity
measurement conditions
sensION+ EC71 HACH LANGE 7010.indd ANG:15sensION+ EC71 HACH LANGE 7010.indd ANG:15 8/7/10 16:14:558/7/10 16:14:55

16
INSTRUMENT CONDITIONS SN:70602 V1.0
Monday 30 July 2010 15:50
------------------------------------------------------------------------
EC MEASUREMENT
TC ......................................................................linear, 2.00%/˚C
TRef.........................................................................................25˚C
Measurement.........................................................by stability
Type of calibration .....................................molar standards
Frequency of calibration............................... every 15 days
SALINITY MEASUREMENT
TC ......................................................................linear, 2.00%/˚C
TRef.........................................................................................25˚C
Measurement..........................................................by stability
Type of calibration .....................................molar standards
TDS MEASUREMENT
TC ......................................................................linear, 2.00%/˚C
TRef.........................................................................................25˚C
Factor......................................................................................0,64
Measurement..........................................................by stability
Type of calibration .....................................molar standards
SYSTEM
Codification: .............................................................automatic
Data send ........................................................................ printer
Type of printer..............................................................thermal
Type of report ..............................................................reduced
Samples by report: ....................................................... several
Readjust temperature.........................................................NO
------------------------------------------------------------------------
EC CALIBRATION DATA SN:70602 V1.0
Monday 30 July 2010 15:50
Calibrated 30-07-07 08:30 25.0 ˚C
MOLAR STANDARDS
Standard Constant ˚C time St%
------------------ ------------ ------- --------- -------
147 µS/cm 0.997 23.8 00:15 30
1413 µS/cm 0.999 23.5 00:14 30
12.88 mS/cm 1.002 23.2 00:15 30
Calibration frequency, every 15 days
------------------------------------------------------------------------
CELL HISTORY SN:70602 V1.0
Monday 30 July 2010 15:50
------------------------------------------------------------------------
Installed : 01-03-07 15:39:32
In service: 06:30
Number of measurements: 216
Maximum value Minimum value
EC 31.2 mS/cm 1.115 µS/cm
Salinity -- --
TDS 19.97 g/l 315 mg/l
T (˚C) 32.2 12.3
------------------------------------------------------------------------
MEASUREMENT DATA SN:70602 V1.0
Monday 30 July 2010 15:50
Sample EC @25˚C ˚C Time St%
(/cm)
----------- ---------- --------- ---------- -------
15-03-07 14:36
38510 315 µS 23.5 00:15 30
15-03-07 14:40
38511 1515 µS 23.2 00:22 30
15-03-07 14:46
38512 2.26 mS 22.8 00:18 30
16-03-07 08:36
Pozo1 3.14 mS 23.1 00:25 30
------------------------------------------------------------------------
Display data
Print
Erase
DATA LOGGER
Display data
Print
Erase
DATA LOGGER
Display data
Print
Erase
DATA LOGGER
DATA LOGGER
DATA LOGGER
Meas. 1/400
By stability
Water p1
785 uS/cm @ 25˚C
1-2
DATA LOGGER
Cell
16-04-2007 15:46:12
In service: 10:55
Measurement no.: 272
1-2
DATA LOGGER
EC Calibration
16-04-2007 15:46:12
Molar standards
1413 uS 12.88 mS
1-3
DATA LOGGER
Display data:
Measurement Data
Cell Report
Calibration Data
Display data:
Measurement Data
Cell Report
Calibration Data
Display data:
Measurement Data
Cell Report
Calibration Data
DATA LOGGER
Reset:
Measurement Data
Cell Report
DATA LOGGER
Warning!
All data will be
lost.
Erase
DATA LOGGER
Next Prev.
Exit
Exit
10-04-2010 17:45
DATA LOGGER
Print:
Measurement Data
Cell Report
Calibration Data
Calibration Report
Instrument Conditions
DATA LOGGER
Report examples
4. Operation
4.11. Data Logger
The
sensION
™
+ EC 71
automatically memorizes the last 400 measurements, the current calibration, the electrode’s history
and the measuring conditions.
All these data can be viewed at any moment on display, printed or sent to a PC.
Report printing with configura-
tion “Printer data output”
Reset Data Logger
Display view
Standard or GLP report: If this type of
report is selected, there will be data about
the cell, report header and user’s name in
the reports with calibration data and cell’s
history.
First measurement.
To display the rest
of the data about the
first measurement.
To display the rest of
the measurements.
Cell data.
To display the rest
of the data.
Calibration data.
To display the rest
of the data.
sensION+ EC71 HACH LANGE 7010.indd ANG:16sensION+ EC71 HACH LANGE 7010.indd ANG:16 8/7/10 16:14:558/7/10 16:14:55
Seite wird geladen ...
Seite wird geladen ...
Seite wird geladen ...
Seite wird geladen ...
Seite wird geladen ...
Seite wird geladen ...
Seite wird geladen ...
Seite wird geladen ...
Seite wird geladen ...
Seite wird geladen ...
Seite wird geladen ...
Seite wird geladen ...
Seite wird geladen ...
Seite wird geladen ...
Seite wird geladen ...
Seite wird geladen ...
Seite wird geladen ...
Seite wird geladen ...
Seite wird geladen ...
Seite wird geladen ...
Seite wird geladen ...
Seite wird geladen ...
Seite wird geladen ...
Seite wird geladen ...
Seite wird geladen ...
Seite wird geladen ...
Seite wird geladen ...
Seite wird geladen ...
Seite wird geladen ...
Seite wird geladen ...
Seite wird geladen ...
Seite wird geladen ...
Seite wird geladen ...
Seite wird geladen ...
Seite wird geladen ...
Seite wird geladen ...
Seite wird geladen ...
Seite wird geladen ...
Seite wird geladen ...
Seite wird geladen ...
Seite wird geladen ...
Seite wird geladen ...
Seite wird geladen ...
Seite wird geladen ...
Seite wird geladen ...
Seite wird geladen ...
Seite wird geladen ...
Seite wird geladen ...
Seite wird geladen ...
Seite wird geladen ...
Seite wird geladen ...
Seite wird geladen ...
-
 1
1
-
 2
2
-
 3
3
-
 4
4
-
 5
5
-
 6
6
-
 7
7
-
 8
8
-
 9
9
-
 10
10
-
 11
11
-
 12
12
-
 13
13
-
 14
14
-
 15
15
-
 16
16
-
 17
17
-
 18
18
-
 19
19
-
 20
20
-
 21
21
-
 22
22
-
 23
23
-
 24
24
-
 25
25
-
 26
26
-
 27
27
-
 28
28
-
 29
29
-
 30
30
-
 31
31
-
 32
32
-
 33
33
-
 34
34
-
 35
35
-
 36
36
-
 37
37
-
 38
38
-
 39
39
-
 40
40
-
 41
41
-
 42
42
-
 43
43
-
 44
44
-
 45
45
-
 46
46
-
 47
47
-
 48
48
-
 49
49
-
 50
50
-
 51
51
-
 52
52
-
 53
53
-
 54
54
-
 55
55
-
 56
56
-
 57
57
-
 58
58
-
 59
59
-
 60
60
-
 61
61
-
 62
62
-
 63
63
-
 64
64
-
 65
65
-
 66
66
-
 67
67
-
 68
68
-
 69
69
-
 70
70
-
 71
71
-
 72
72
Hach sensION+ EC71 Benutzerhandbuch
- Kategorie
- Messung
- Typ
- Benutzerhandbuch
- Dieses Handbuch eignet sich auch für
in anderen Sprachen
- English: Hach sensION+ EC71 User manual
- français: Hach sensION+ EC71 Manuel utilisateur
Verwandte Artikel
Andere Dokumente
-
norbar 34398 Referenzhandbuch
-
Consort C3051 Benutzerhandbuch
-
 Thermo Fisher Scientific Eutech COND 6+, TDS 6+, Salt 6+ Bedienungsanleitung
-
TFA Digital pH Measurement Device PH CHECK Benutzerhandbuch
-
Oakton WD-35607-32 Bedienungsanleitung
-
Elcometer 138 Benutzerhandbuch
-
wtw TecnoLine LF 171 R/RS Bedienungsanleitung
-
wtw Cond 3400i Bedienungsanleitung
-
wtw Oxi 340/SET Instruction manuals
-
wtw Cond 330i Bedienungsanleitung


