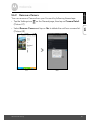
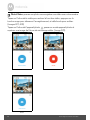
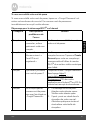
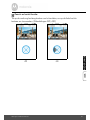
Motorola MBP854CONNECT-3 Benutzerhandbuch
- Kategorie
- Babyphone
- Typ
- Benutzerhandbuch
Dieses Handbuch eignet sich auch für

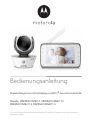
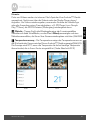
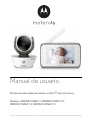
User’s Guide
Digital Video Baby Monitor With Wi-Fi
®
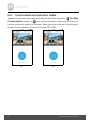
Internet Viewing
Models: MBP854CONNECT, MBP854CONNECT-2,
MBP854CONNECT-3, MBP854CONNECT-4
The features described in this User’s Guide are subject to modifications without prior notice.

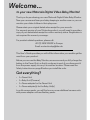
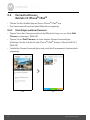
Welcome...
to your new Motorola Digital Video Baby Monitor!
Thank you for purchasing your new Motorola Digital Video Baby Monitor.
Now you can see and hear your baby sleeping in another room or you can
monitor your older children in their playroom.
Please retain your original dated sales receipt for your records.
For warranty service of your Motorola product, you will need to provide a
copy of your dated sales receipt to confirm warranty status. Registration is
not required for warranty coverage.
For product related questions, please call:
This User's Guide provides you with all the information you need to get the
most from your product.
Before you can use the Baby Monitor, we recommend you fully charge the
battery in the Parent Unit, so that it continues to work if you disconnect it
from the power supply to carry it to another location. Please read the
Safety Instructions on page 8 before you install the units.
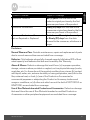
Got everything?
• 1 x Parent Unit
• 1 x Baby Unit (Camera)
• 1 x Power adapter for the Parent Unit
• 1 x Power adapter(s) for the Baby Unit(s)
In multi-camera packs, you will find one or more additional camera units
with power adapter units and battery packs.
+49 (0) 1805 938 802 in Europe
Email: motor[email protected]

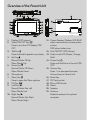
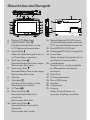
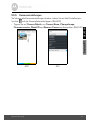
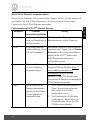
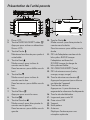
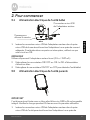
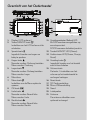
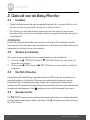
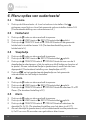
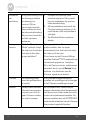
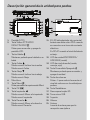
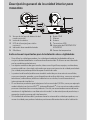
Overview of the Parent Unit
1. Display (LCD screen)
2. Video ON/OFF Key V
Press to turn the LCD display ON/
OFF
3. Talk Key T
Press and hold to speak to your baby
4. Up Key +
Normal Mode: Tilt Up
Menu Mode: Up
5. Down Key -
Normal Mode: Tilt Down
Menu Mode: Down
6. Microphone
7. Menu Key M
Press to open the Menu options
8. OK Key O
9. Left Key <
Normal Mode: Pan Left
Menu Mode: Left
10. Right Key >
Normal Mode: Pan Right
Menu Mode: Right
11. Power Adapter / Battery LED BLUE
when connected to a mains power
socket
RED when battery low.
12. Unit ON/OFF LED (Green)
13. Audio Level LED (Green, Orange,
Red)
14. Power Key 0
Press and Hold to turn the unit ON/
OFF
15. Volume Key
Press -/+ to decrease/increase
Volume level on Parent Unit
16. Reset Key
17. SD Card socket
18. Micro USB Socket
19. Stand
20. Speaker
21. Antenna
Raise the antenna for optimal
reception
18
15
11
14
13
16
17
19
20
6
7
8
9
2
3
4
5
10
12
1
RESET
21

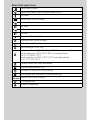
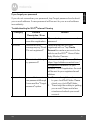
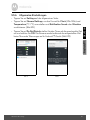
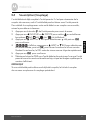
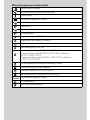
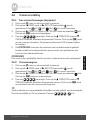
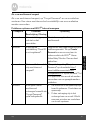
Parent Unit menu icons
Signal Level (4 Levels)
Night Vision Mode (Screen changes to Black/White)
Talk Mode
Battery Level Control (4 Levels)
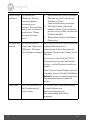
Pan Left
Pan Right
Tilt Up
Tilt Down
Zoom Level Control (1X, 2X)
Brightness Level Control (8 Levels)
Lullaby Control (5 Song Selections)
Alarm Setting (6h, 4h, 2h, Off)
Temperature Reading (HH ºC / ºF or LL ºC / ºF)
Icon & readings turn RED > 29ºC / 84ºF, and reading display
HH ºC / ºF > 36ºC / 97 ºF
Icon & readings turn RED < 14ºC / 57ºF, and reading display
LL ºC / ºF < 1ºC / 34 ºF
Camera Control (scan, view, add, delete)
Local Recording (Record, Play)
Set Video On Timer (5 min, 30 min, 60 min)
Time Setting (Date, Time format 12/24 Hour and Time)
Volume Level Control (8 Levels)
SD Card detection
No Baby Unit detected

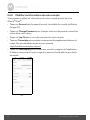
Important guidelines for installing your Baby Monitor
• To use your Video Monitor Baby and Parent Units together, you must be able to establish a
radio link between them, and the range will be affected by environmental conditions.
• Any large metal object, like a refrigerator, a mirror, a filing cabinet, metallic doors or
reinforced concrete between the Baby and Parent Unit may block the radio signal.
• The signal strength may also be reduced by other solid structures, like walls, or by radio
or electrical equipment, such as TVs, computers, cordless or mobile phones,
fluorescent lights or dimmer switches.
• Use of other 2.4 GHz products, such as wireless networks (Wi-Fi
®
routers), Bluetooth
®
systems, or microwave ovens, may cause interference with this product, so keep the
Baby Monitor away at least 1 metre from these types of products, or turn them off if they
appear to be causing interference.
• If the signal is weak, try raising the Parent Unit Antenna, moving the Parent and/or the
Baby Unit to different positions in the room(s).
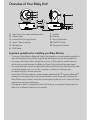
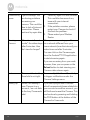
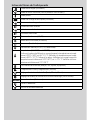
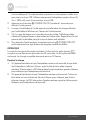
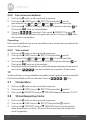
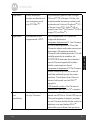
1. Light Sensor (for night mode detection) 7. Speaker
2. Camera Lens 8. Antenna
3. Infrared LEDs (for night vision) 9. Micro USB socket
4. Power / Status indicator 10. ON/OFF Switch
5. Microphone 11. Temperature Sensor
6. PAIR Button
Overview of Your Baby Unit
1
9
11
10
8
2
3
6
5
4
7
5V 1.5A

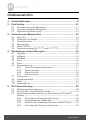
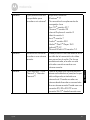
6 Table of contents
Table of contents
1. Safety Instructions.....................................................................................8
2. Getting Started........................................................................................11
2.1 Baby Unit Power Supply............................................................................ 11
2.2 Parent Unit Power Supply......................................................................... 11
2.3 Registration (Pairing) ................................................................................ 13
3. Using the Baby Monitor...........................................................................14
3.1 Setting up .................................................................................................. 14
3.2 Pan and Tilt................................................................................................ 14
3.3 Night Vision Mode .................................................................................... 14
3.4 Talk Mode.................................................................................................. 14
3.5 Video ON/OFF ......................................................................................... 14
3.6 Temperature Display (HH °C / °F or LL °C / °F)...................................... 15
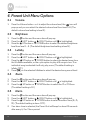
4. Parent Unit Menu Options ......................................................................16
4.1 Volume ...................................................................................................... 16
4.2 Brightness.................................................................................................. 16
4.3 Lullaby ....................................................................................................... 16
4.4 Zoom ......................................................................................................... 16
4.5 Alarm ......................................................................................................... 16
4.6 Camera Control........................................................................................ 17
4.6.1 Add (pair) a camera .................................................................. 17
4.6.2 View a camera ........................................................................... 17
4.6.3 Delete a camera ........................................................................ 18
4.6.4 Scan camera .............................................................................. 18
4.7 Temperature ............................................................................................. 18
4.8 Power Saving mode.................................................................................. 18
4.9 Video ......................................................................................................... 19
4.10 Time Setting .............................................................................................. 19
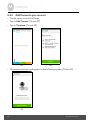
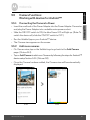
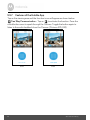
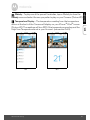
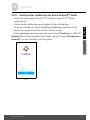
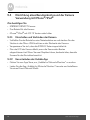
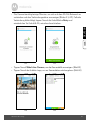
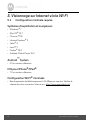
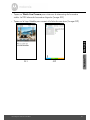
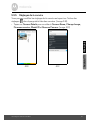
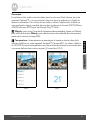
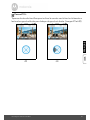
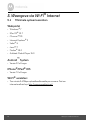
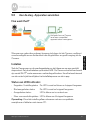
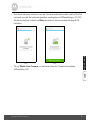
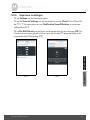
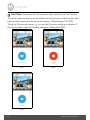
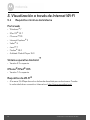
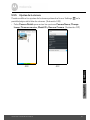
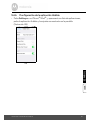
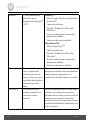
5. Wi-Fi Internet Viewing ............................................................................20
5.1 Minimum System Requirements.............................................................. 20
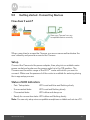
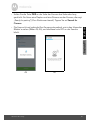
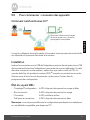
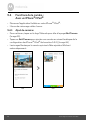
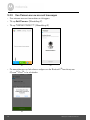
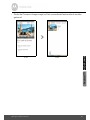
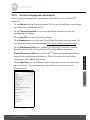
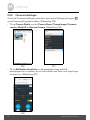
5.2 Getting started - Connecting Devices..................................................... 21
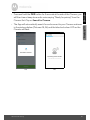
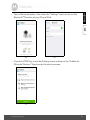
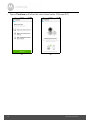
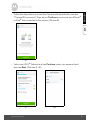
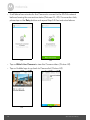
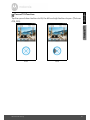
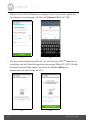
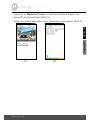
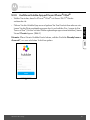
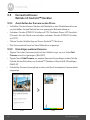
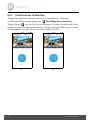
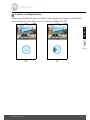
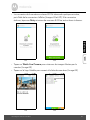
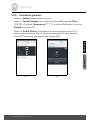
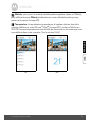
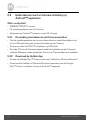
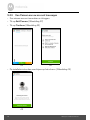
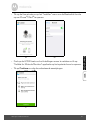
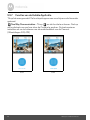
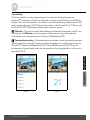
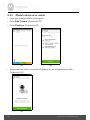
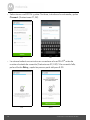
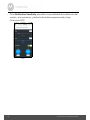
5.3 User Account and Camera Setup on Android™ Devices....................... 22
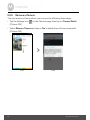
5.3.1 Power ON and Connect the Camera ...................................... 22
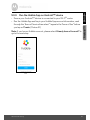
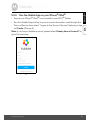
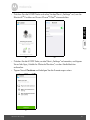
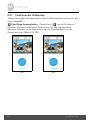
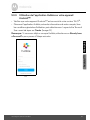
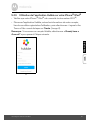
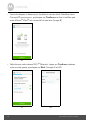
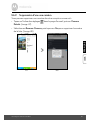
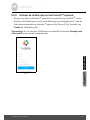
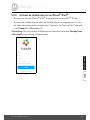
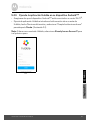
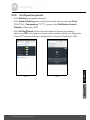
5.3.2 Download the Hubble App ....................................................... 22
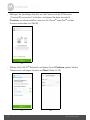
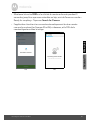
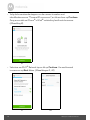
5.3.3 Run the Hubble App on Android™ device ............................. 23
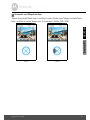
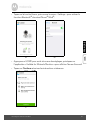
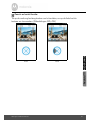
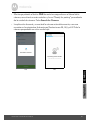
5.3.4 Add Camera to your account ................................................... 24

Table of contents 7
ENGLISH
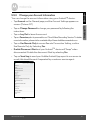
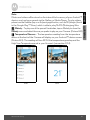
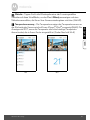
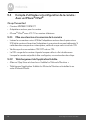
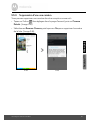
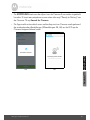
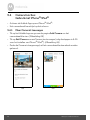
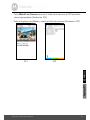
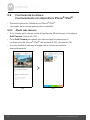
5.4 User Account and Camera Setup:
Working with iPhone
®
/iPad
®
...................................................................28
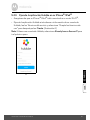
5.4.1 Power ON and Connect the Camera ......................................28
5.4.2 Download the Hubble App .......................................................28
5.4.3 Run the Hubble App on your iPhone
®
/iPad
®
.........................29
5.4.4 Add the Camera to your account .............................................30
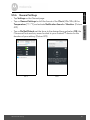
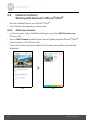
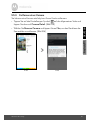
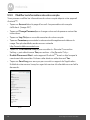
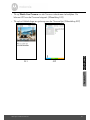
5.5 Camera Functions:
Working with devices for Android™ .......................................................35
5.5.1 Connecting the Camera to Power ...........................................35
5.5.2 Add more cameras ....................................................................35
5.5.3 Remove a Camera ....................................................................36
5.5.4 Change your Account Information ..........................................37
5.5.5 Camera settings ........................................................................38
5.5.6 General Settings ........................................................................39
5.5.7 Features of the Hubble App .....................................................40
5.6 Camera Functions:
Working with devices for iPhone
®
/iPad
®
...............................................44
5.6.1 Add more cameras ....................................................................44
5.6.2 Remove a Camera ....................................................................45
5.6.3 Change your Account Information ..........................................46
5.6.4 Camera settings ........................................................................47
5.6.5 General settings ........................................................................48
5.6.6 Hubble App Settings .................................................................49
5.6.7 Features of the Hubble App .....................................................50
5.7 Camera Functions:
Working with PC/Notebook.....................................................................54
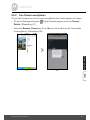
5.8 Procedure for Resetting the Camera .......................................................54
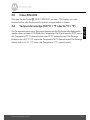
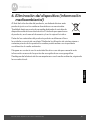
6. Disposal of The Device (environment)...................................................55
7. Cleaning ..................................................................................................56
8. Help..........................................................................................................57
9. General Information................................................................................65

8 Safety Instructions
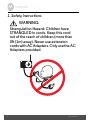
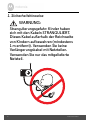
1. Safety Instructions
WARNING:
Strangulation Hazard: Children have
STRANGLED in cords. Keep this cord
out of the reach of children (more than
3ft (1m) away). Never use extension
cords with AC Adapters. Only use the AC
Adapters provided.

Safety Instructions 9
ENGLISH
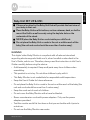
WARNING
This digital video Baby Monitor is compliant with all relevant standards
regarding electromagnetic fields and is, when handled as described in the
User's Guide, safe to use. Therefore, always read the instructions in this User's
Guide carefully before using the device.
• Adult assembly is required. Keep small parts away from children when
assembling.
• This product is not a toy. Do not allow children to play with it.
• This Baby Monitor is not a substitute for responsible adult supervision.
• Keep this User’s Guide for future reference.
• Do not place the Baby Unit or cords in the cot or within reach of the baby (the
unit and cords should be more than 1 metre away)
• Keep the cords out of reach of children.
• Do not cover the Baby Monitor with a towel or blanket.
• Never use extension cords with power adapters. Only use the power
adapters provided.
• Test this monitor and all its functions so that you are familiar with it prior to
actual use.
• Do not use the Baby Monitor near water.
Baby Unit SET UP & USE:
● Choose a location for the Baby Unit that will provide the best view of
your baby in their cot.
● Place the Baby Unit on a flat surface, such as a dresser, desk, or shelf or
mount the Unit to a wall securely using the keyhole slots on the
underside of the stand.
● NEVER place the Baby Unit or cords inside your child's cot.
● Do not place the Baby Unit or cords in the cot or within reach of the
baby (the unit and cords should be more than 1 metre away).

10 Safety Instructions
• Do not place the Baby Monitor near a heat source.
• Only use the chargers and power adapters provided. Do not use other
chargers or power adapters as this may damage the device and battery
pack.
• Do not touch the plug contacts with sharp or metal objects.
CAUTION
Risk of explosion if battery is replaced by an unapproved battery type.
Dispose of used batteries according to their instructions.
The Unit shall be setup and used such that parts of the user’s body other than the
hands are maintained at a distance of approximately 20 cm (8 inches) or more.

Getting Started 11
ENGLISH
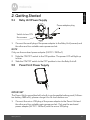
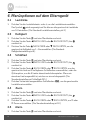
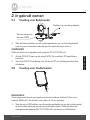
2. Getting Started
2.1 Baby Unit Power Supply
1. Connect the small plug of the power adapter to the Baby Unit (camera) and
the other end to a suitable mains power socket.
NOTE
Only use the enclosed power adapter (5V DC / 1500mA).
2. Slide the ON/OFF switch to the ON position. The power LED will light up
in blue.
3. Slide the ON/OFF switch to the OFF position to turn the Baby Unit off.
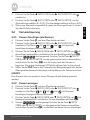
2.2 Parent Unit Power Supply
IMPORTANT
The Parent Unit is assembled with a built-in rechargeable battery pack (Lithium-
ion battery 1880mAh), please charge it for 16 hours before use.
1. Connect the micro USB plug of the power adapter to the Parent Unit and
the other end to a suitable mains power socket. Only use the enclosed
power adapter (5V DC / 1500mA) with the micro USB plug.
ON OFF
Switch to turn ON
the camera
Power adapter plug

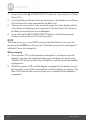
12 Getting Started
2. Press and hold the 0 POWER ON/OFF button for 1 second to turn ON the
Parent Unit.
3. Once the Baby and Parent Units are switched on, the display on the Parent
Unit will show the video captured by the Baby Unit.
4. If there is no connection or you are out of range, the video display will turn
off and the unit will beep every 5 seconds. Move the Parent Unit closer to
the Baby Unit until the link is re-established.
5. Press and hold the
0 POWER ON/OFF button, until the progress bar
finishes scrolling, to turn OFF the Parent Unit.
NOTE
The battery icon turns RED to indicate that the battery is low, and the
parent unit will beep every 15 seconds. The battery needs to be recharged; it
will take 12 hours to charge fully.
When charging
1. During power OFF, and the adapter is plugged in, an adapter logo will
display on-screen and a flashing battery logo will display for 15 seconds.
The Blue LED at the top left corner will light up; indicating that the adapter
is plugged in.
2. Whilst the power is ON, and the adapter is plugged in, the battery icon at
the top right corner of the screen will show that the battery is charging. The
Blue LED at the top left corner will light up to indicate that the adapter is
plugged in.

Getting Started 13
ENGLISH
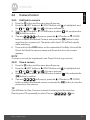
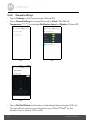
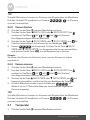
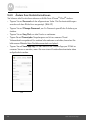
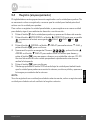
2.3 Registration (Pairing)
The Baby Monitor is pre-registered to your Parent Unit. You do not need to
register it again unless the Baby Unit loses its link with the Parent Unit.
To re-register your Baby Unit, or register a new Baby Unit, follow the procedures
below:
1. Press the
M button of the Parent Unit and the menu bar will pop up.
2. Press the
< LEFT button or > RIGHT button until is highlighted, and
the
del/ add/ view/ scan
menu will pop up.
3. Press the
+ UP button or - DOWN button to select
add
, and press the
O button to confirm.
4. Camera
will pop up, press the + UP button or - DOWN
button to select the desired Camera and press the
O button to start
searching for a camera unit. The green audio level LED will flash rapidly
while searching.
5. Press the
O button to confirm.
6. Press and hold the PAIR button underneath the Baby Unit until the Parent
Unit finds the camera, beeps and the video from the camera appears.
NOTE
If a particular Baby Unit was registered previously, registering this current
Baby Unit again will overwrite the old registration.
+

14 Using the Baby Monitor
3. Using the Baby Monitor
3.1 Setting up
• Place the Baby Unit in a convenient location (e.g. on a table) and point the
camera lens towards the area you want to monitor.
• Adjust the angle of the Baby Unit's head by rotating the camera up, down, left
and right until you are satisfied with the image in the Parent Unit.
NOTE
Do not place the Baby Unit within the baby's reach! If there is interference with
the picture or sound, try moving the units to different locations, and ensure they
are not close to other electrical equipment.
3.2 Pan and Tilt
The camera can be remotely controlled from the Parent Unit.
1. Press the
+ UP button or - DOWN button to tilt up or down.
2. Press the
< LEFT button or > RIGHT button to pan left or right.
3.3 Night Vision Mode
The Baby Unit has 8 high-intensity infrared LEDs for picking up clear images in
the dark. When the built-in photo sensor on the top of the unit detects a low level
of ambient light, the LEDs will automatically activate and the screen on the
Parent Unit will display in black and white. The icon will be displayed at the
top of the screen.
3.4 Talk Mode
Press and hold the T TALK button on the Parent Unit to talk to your baby through
the Baby Unit’s loudspeaker. The
T icon will be displayed at the top of the LCD
screen.
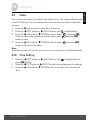
3.5 Video ON/OFF
Press V VIDEO ON/OFF key to turn the LCD display on or off, whilst still
leaving the audio monitor on.

Using the Baby Monitor 15
ENGLISH
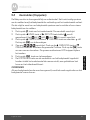
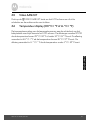
3.6 Temperature Display (HH °C / °F or LL °C / °F)
The temperature reading from the temperature sensor at the back of the Baby
Unit will be displayed at the top of the LCD screen. The readings will turn RED if
the temperature goes above 29°C / 84°F or below 14°C / 57°F. The reading will
change to HH °C / °F if the temperature goes above 36°C / 97°F. The reading
will change to LL °C / °F if the temperature goes below 1°C / 34°F.

16 Parent Unit Menu Options
4. Parent Unit Menu Options
4.1 Volume
1. Press the Volume button - or + to adjust the volume level, the icon will
pop up and you can select the desired volume level from level 0~8. (The
default volume level setting is level 4.)
4.2 Brightness
1. Press the M button and the menu bar will pop up.
2. Press the
< LEFT button or > RIGHT button until is highlighted.
3. Press the
+ UP button or - DOWN button to select the desired brightness
level from level 1 ~ 8. (The default brightness level setting is level 5.)
4.3 Lullaby
1. Press the M button and the menu bar will pop up.
2. Press the
< LEFT button or > RIGHT button until is highlighted.
3. Press the
+ UP button or - DOWN button to select the desired song from
the 5 lullabies available, or the cycle option to play all 5 songs in turn. If an
individual song is selected it will only play once. (The default setting is
lullaby OFF.)
4. Press
O on the selected lullabies to select the desired song sound level.
4.4 Zoom
1. Press the M button and the menu bar will pop up.
2. Press the
< LEFT button or > RIGHT button until is highlighted.
3. Press the
+ UP button or - DOWN button to select the
1X
or
2X
Zoom.
(The default setting is 1X.)
4.5 Alarm
1. Press the M button and the menu bar will pop up.
2. Press the
< LEFT button or > RIGHT button until is highlighted.
3. Press the
+ UP button or - DOWN button to select the alarm time (
6h
,
4h
,
2h
). (The default setting is alarm OFF.)
4. If an alarm time is selected, the Parent Unit will beep for about 45 seconds
after every 6, 4 or 2 hour period.

Parent Unit Menu Options 17
ENGLISH
4.6 Camera Control
4.6.1 Add (pair) a camera
1. Press the M button and the menu bar will pop up.
2. Press the
< LEFT button or > RIGHT button until is highlighted, and
the
del/ add/ view/ scan
menu will pop up.
3. Press the
+ UP button or - DOWN button to select
add
, and press the
O button to confirm.
4. Camera will pop up, press the
+ UP button or - DOWN
button to select the desired Camera, and press the
O button to start
searching for a camera unit. The green audio level LED will flash rapidly
while searching.
5. Press and hold the PAIR button on the underside of the Baby Unit until the
Parent Unit finds the camera, beeps and the picture from the camera
appears.
NOTE
A camera can only be registered to one Parent Unit at any one time.
4.6.2 View a camera
1. Press the M button and the menu bar will pop up.
2. Press the
< LEFT button or > RIGHT button until is highlighted and
the
del/ add/ view/ scan
menu pops up.
3. Press the
+ UP button or - DOWN button to select
view
, and press the
O button to confirm.
4. Camera will pop up, press the
+ UP button or - DOWN
button to select the desired camera, and press the
O button to view the
picture from that camera.
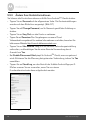
TIP
Quick Method to View Cameras instead of entering into the menu bar.
Directly press OK repeatedly to select Camera ,
scan
.

18 Parent Unit Menu Options
4.6.3 Delete a camera
1. Press the M button and the menu bar will pop up.
2. Press the
< LEFT button or > RIGHT button until is highlighted, and
the
del/ add/ view/ scan
menu will pop up.
3. Press the
+ UP button or - DOWN button to select
del
, and press the
O button to confirm.
4. Camera will pop up, press the
+ UP button or - DOWN
button to select the desired Camera, and press the
O button to delete
that registration.
Note:
You are not allowed to delete the camera if there is only one registered camera
in the system.
4.6.4 Scan camera
1. Press the M button and the menu bar will pop up.
2. Press the
< LEFT button or > RIGHT button until is highlighted, and
the
del/ add/ view/ scan
menu will pop up.
3. Press the
+ UP button or - DOWN button to select
scan
, and press the
O button to confirm.
4. The screen will then display images from different registered cameras in a
loop of Camera
, changing about every 12 seconds.
TIP
Quick Method to View Cameras instead of entering into the menu bar.
Directly press OK repeatedly to select Camera ,
scan
.
4.7 Temperature
1. Press the M button and the menu bar will pop up.
2. Press the
< LEFT button or > RIGHT button until is highlighted.
3. Press the
+ UP button or - DOWN button to select °C or °F.
4.8 Power Saving mode
1. Press the M button and the menu bar will pop up.
2. Press the
< LEFT button or > RIGHT button until V is highlighted.
3. Press the
+ UP button or - DOWN button to select auto video off after
5 mins, 30 mins or 60 mins if not in charging.

Parent Unit Menu Options 19
ENGLISH
4.9 Video
You can record a video of your baby with this function. The videos will be stored
on the SD Memory Card, so please ensure the memory card has enough free
memory.
1. Press the
M button and the menu bar will pop up.
2. Press the
< LEFT button or > RIGHT button until is highlighted.
3. Press the
+ UP button or - DOWN button to select , and press O
button to start video recording, thence select press and press
O
button to stop.
4. Press the
+ UP button or - DOWN button to select and press O
button to play back the video.
Note:
The video format is AVI which you can view on a computer/smartphone/tablet
4.10 Time Setting
1. Press the < LEFT button or > RIGHT button until is highlighted and
press
O Button.
2. Press the
< LEFT button or > RIGHT button to move between the settings.
3. Press the
+ UP button or - DOWN button to set Date, Time format and
Time.

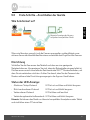
20 Wi-Fi Internet Viewing
5. Wi-Fi Internet Viewing
5.1 Minimum System Requirements
Web Portal
• Windows
®
7
• Mac OS
®
10.7
• Chrome™ 24
• Internet Explorer
®
9
• Safari
®
6
• Java™ 7
• Firefox
®
18.0
• Adobe
®
Flash
®
Player 15.0
Android
™
System
• Version 4.2 or above
iPhone
®
/iPad
®
iOS
• Version 7.0 or above
Wi-Fi
®
requirements:
• At least 0.6 Mbps upload bandwidth per camera. Test your Internet speed at:
http://www.speedtest.net/
Seite wird geladen ...
Seite wird geladen ...
Seite wird geladen ...
Seite wird geladen ...
Seite wird geladen ...
Seite wird geladen ...
Seite wird geladen ...
Seite wird geladen ...
Seite wird geladen ...
Seite wird geladen ...
Seite wird geladen ...
Seite wird geladen ...
Seite wird geladen ...
Seite wird geladen ...
Seite wird geladen ...
Seite wird geladen ...
Seite wird geladen ...
Seite wird geladen ...
Seite wird geladen ...
Seite wird geladen ...
Seite wird geladen ...
Seite wird geladen ...
Seite wird geladen ...
Seite wird geladen ...
Seite wird geladen ...
Seite wird geladen ...
Seite wird geladen ...
Seite wird geladen ...
Seite wird geladen ...
Seite wird geladen ...
Seite wird geladen ...
Seite wird geladen ...
Seite wird geladen ...
Seite wird geladen ...
Seite wird geladen ...
Seite wird geladen ...
Seite wird geladen ...
Seite wird geladen ...
Seite wird geladen ...
Seite wird geladen ...
Seite wird geladen ...
Seite wird geladen ...
Seite wird geladen ...
Seite wird geladen ...
Seite wird geladen ...
Seite wird geladen ...
Seite wird geladen ...
Seite wird geladen ...
Seite wird geladen ...
Seite wird geladen ...
Seite wird geladen ...
Seite wird geladen ...
Seite wird geladen ...
Seite wird geladen ...
Seite wird geladen ...
Seite wird geladen ...
Seite wird geladen ...
Seite wird geladen ...
Seite wird geladen ...
Seite wird geladen ...
Seite wird geladen ...
Seite wird geladen ...
Seite wird geladen ...
Seite wird geladen ...
Seite wird geladen ...
Seite wird geladen ...
Seite wird geladen ...
Seite wird geladen ...
Seite wird geladen ...
Seite wird geladen ...
Seite wird geladen ...
Seite wird geladen ...
Seite wird geladen ...
Seite wird geladen ...
Seite wird geladen ...
Seite wird geladen ...
Seite wird geladen ...
Seite wird geladen ...
Seite wird geladen ...
Seite wird geladen ...
Seite wird geladen ...
Seite wird geladen ...
Seite wird geladen ...
Seite wird geladen ...
Seite wird geladen ...
Seite wird geladen ...
Seite wird geladen ...
Seite wird geladen ...
Seite wird geladen ...
Seite wird geladen ...
Seite wird geladen ...
Seite wird geladen ...
Seite wird geladen ...
Seite wird geladen ...
Seite wird geladen ...
Seite wird geladen ...
Seite wird geladen ...
Seite wird geladen ...
Seite wird geladen ...
Seite wird geladen ...
Seite wird geladen ...
Seite wird geladen ...
Seite wird geladen ...
Seite wird geladen ...
Seite wird geladen ...
Seite wird geladen ...
Seite wird geladen ...
Seite wird geladen ...
Seite wird geladen ...
Seite wird geladen ...
Seite wird geladen ...
Seite wird geladen ...
Seite wird geladen ...
Seite wird geladen ...
Seite wird geladen ...
Seite wird geladen ...
Seite wird geladen ...
Seite wird geladen ...
Seite wird geladen ...
Seite wird geladen ...
Seite wird geladen ...
Seite wird geladen ...
Seite wird geladen ...
Seite wird geladen ...
Seite wird geladen ...
Seite wird geladen ...
Seite wird geladen ...
Seite wird geladen ...
Seite wird geladen ...
Seite wird geladen ...
Seite wird geladen ...
Seite wird geladen ...
Seite wird geladen ...
Seite wird geladen ...
Seite wird geladen ...
Seite wird geladen ...
Seite wird geladen ...
Seite wird geladen ...
Seite wird geladen ...
Seite wird geladen ...
Seite wird geladen ...
Seite wird geladen ...
Seite wird geladen ...
Seite wird geladen ...
Seite wird geladen ...
Seite wird geladen ...
Seite wird geladen ...
Seite wird geladen ...
Seite wird geladen ...
Seite wird geladen ...
Seite wird geladen ...
Seite wird geladen ...
Seite wird geladen ...
Seite wird geladen ...
Seite wird geladen ...
Seite wird geladen ...
Seite wird geladen ...
Seite wird geladen ...
Seite wird geladen ...
Seite wird geladen ...
Seite wird geladen ...
Seite wird geladen ...
Seite wird geladen ...
Seite wird geladen ...
Seite wird geladen ...
Seite wird geladen ...
Seite wird geladen ...
Seite wird geladen ...
Seite wird geladen ...
Seite wird geladen ...
Seite wird geladen ...
Seite wird geladen ...
Seite wird geladen ...
Seite wird geladen ...
Seite wird geladen ...
Seite wird geladen ...
Seite wird geladen ...
Seite wird geladen ...
Seite wird geladen ...
Seite wird geladen ...
Seite wird geladen ...
Seite wird geladen ...
Seite wird geladen ...
Seite wird geladen ...
Seite wird geladen ...
Seite wird geladen ...
Seite wird geladen ...
Seite wird geladen ...
Seite wird geladen ...
Seite wird geladen ...
Seite wird geladen ...
Seite wird geladen ...
Seite wird geladen ...
Seite wird geladen ...
Seite wird geladen ...
Seite wird geladen ...
Seite wird geladen ...
Seite wird geladen ...
Seite wird geladen ...
Seite wird geladen ...
Seite wird geladen ...
Seite wird geladen ...
Seite wird geladen ...
Seite wird geladen ...
Seite wird geladen ...
Seite wird geladen ...
Seite wird geladen ...
Seite wird geladen ...
Seite wird geladen ...
Seite wird geladen ...
Seite wird geladen ...
Seite wird geladen ...
Seite wird geladen ...
Seite wird geladen ...
Seite wird geladen ...
Seite wird geladen ...
Seite wird geladen ...
Seite wird geladen ...
Seite wird geladen ...
Seite wird geladen ...
Seite wird geladen ...
Seite wird geladen ...
Seite wird geladen ...
Seite wird geladen ...
Seite wird geladen ...
Seite wird geladen ...
Seite wird geladen ...
Seite wird geladen ...
Seite wird geladen ...
Seite wird geladen ...
Seite wird geladen ...
Seite wird geladen ...
Seite wird geladen ...
Seite wird geladen ...
Seite wird geladen ...
Seite wird geladen ...
Seite wird geladen ...
Seite wird geladen ...
Seite wird geladen ...
Seite wird geladen ...
Seite wird geladen ...
Seite wird geladen ...
Seite wird geladen ...
Seite wird geladen ...
Seite wird geladen ...
Seite wird geladen ...
Seite wird geladen ...
Seite wird geladen ...
Seite wird geladen ...
Seite wird geladen ...
Seite wird geladen ...
Seite wird geladen ...
Seite wird geladen ...
Seite wird geladen ...
Seite wird geladen ...
Seite wird geladen ...
Seite wird geladen ...
Seite wird geladen ...
Seite wird geladen ...
Seite wird geladen ...
Seite wird geladen ...
Seite wird geladen ...
Seite wird geladen ...
Seite wird geladen ...
Seite wird geladen ...
Seite wird geladen ...
Seite wird geladen ...
Seite wird geladen ...
Seite wird geladen ...
Seite wird geladen ...
Seite wird geladen ...
Seite wird geladen ...
Seite wird geladen ...
Seite wird geladen ...
Seite wird geladen ...
Seite wird geladen ...
Seite wird geladen ...
Seite wird geladen ...
Seite wird geladen ...
Seite wird geladen ...
Seite wird geladen ...
Seite wird geladen ...
Seite wird geladen ...
Seite wird geladen ...
Seite wird geladen ...
Seite wird geladen ...
Seite wird geladen ...
Seite wird geladen ...
Seite wird geladen ...
Seite wird geladen ...
Seite wird geladen ...
Seite wird geladen ...
Seite wird geladen ...
Seite wird geladen ...
Seite wird geladen ...
Seite wird geladen ...
Seite wird geladen ...
Seite wird geladen ...
Seite wird geladen ...
Seite wird geladen ...
Seite wird geladen ...
Seite wird geladen ...
Seite wird geladen ...
Seite wird geladen ...
Seite wird geladen ...
Seite wird geladen ...
Seite wird geladen ...
Seite wird geladen ...
Seite wird geladen ...
Seite wird geladen ...
Seite wird geladen ...
Seite wird geladen ...
Seite wird geladen ...
Seite wird geladen ...
Seite wird geladen ...
Seite wird geladen ...
Seite wird geladen ...
Seite wird geladen ...
Seite wird geladen ...
Seite wird geladen ...
Seite wird geladen ...
Seite wird geladen ...
Seite wird geladen ...
Seite wird geladen ...
Seite wird geladen ...
Seite wird geladen ...
Seite wird geladen ...
Seite wird geladen ...
Seite wird geladen ...
Seite wird geladen ...
Seite wird geladen ...
Seite wird geladen ...
Seite wird geladen ...
Seite wird geladen ...
Seite wird geladen ...
Seite wird geladen ...
Seite wird geladen ...
Seite wird geladen ...
Seite wird geladen ...
Seite wird geladen ...
Seite wird geladen ...
Seite wird geladen ...
Seite wird geladen ...
Seite wird geladen ...
-
 1
1
-
 2
2
-
 3
3
-
 4
4
-
 5
5
-
 6
6
-
 7
7
-
 8
8
-
 9
9
-
 10
10
-
 11
11
-
 12
12
-
 13
13
-
 14
14
-
 15
15
-
 16
16
-
 17
17
-
 18
18
-
 19
19
-
 20
20
-
 21
21
-
 22
22
-
 23
23
-
 24
24
-
 25
25
-
 26
26
-
 27
27
-
 28
28
-
 29
29
-
 30
30
-
 31
31
-
 32
32
-
 33
33
-
 34
34
-
 35
35
-
 36
36
-
 37
37
-
 38
38
-
 39
39
-
 40
40
-
 41
41
-
 42
42
-
 43
43
-
 44
44
-
 45
45
-
 46
46
-
 47
47
-
 48
48
-
 49
49
-
 50
50
-
 51
51
-
 52
52
-
 53
53
-
 54
54
-
 55
55
-
 56
56
-
 57
57
-
 58
58
-
 59
59
-
 60
60
-
 61
61
-
 62
62
-
 63
63
-
 64
64
-
 65
65
-
 66
66
-
 67
67
-
 68
68
-
 69
69
-
 70
70
-
 71
71
-
 72
72
-
 73
73
-
 74
74
-
 75
75
-
 76
76
-
 77
77
-
 78
78
-
 79
79
-
 80
80
-
 81
81
-
 82
82
-
 83
83
-
 84
84
-
 85
85
-
 86
86
-
 87
87
-
 88
88
-
 89
89
-
 90
90
-
 91
91
-
 92
92
-
 93
93
-
 94
94
-
 95
95
-
 96
96
-
 97
97
-
 98
98
-
 99
99
-
 100
100
-
 101
101
-
 102
102
-
 103
103
-
 104
104
-
 105
105
-
 106
106
-
 107
107
-
 108
108
-
 109
109
-
 110
110
-
 111
111
-
 112
112
-
 113
113
-
 114
114
-
 115
115
-
 116
116
-
 117
117
-
 118
118
-
 119
119
-
 120
120
-
 121
121
-
 122
122
-
 123
123
-
 124
124
-
 125
125
-
 126
126
-
 127
127
-
 128
128
-
 129
129
-
 130
130
-
 131
131
-
 132
132
-
 133
133
-
 134
134
-
 135
135
-
 136
136
-
 137
137
-
 138
138
-
 139
139
-
 140
140
-
 141
141
-
 142
142
-
 143
143
-
 144
144
-
 145
145
-
 146
146
-
 147
147
-
 148
148
-
 149
149
-
 150
150
-
 151
151
-
 152
152
-
 153
153
-
 154
154
-
 155
155
-
 156
156
-
 157
157
-
 158
158
-
 159
159
-
 160
160
-
 161
161
-
 162
162
-
 163
163
-
 164
164
-
 165
165
-
 166
166
-
 167
167
-
 168
168
-
 169
169
-
 170
170
-
 171
171
-
 172
172
-
 173
173
-
 174
174
-
 175
175
-
 176
176
-
 177
177
-
 178
178
-
 179
179
-
 180
180
-
 181
181
-
 182
182
-
 183
183
-
 184
184
-
 185
185
-
 186
186
-
 187
187
-
 188
188
-
 189
189
-
 190
190
-
 191
191
-
 192
192
-
 193
193
-
 194
194
-
 195
195
-
 196
196
-
 197
197
-
 198
198
-
 199
199
-
 200
200
-
 201
201
-
 202
202
-
 203
203
-
 204
204
-
 205
205
-
 206
206
-
 207
207
-
 208
208
-
 209
209
-
 210
210
-
 211
211
-
 212
212
-
 213
213
-
 214
214
-
 215
215
-
 216
216
-
 217
217
-
 218
218
-
 219
219
-
 220
220
-
 221
221
-
 222
222
-
 223
223
-
 224
224
-
 225
225
-
 226
226
-
 227
227
-
 228
228
-
 229
229
-
 230
230
-
 231
231
-
 232
232
-
 233
233
-
 234
234
-
 235
235
-
 236
236
-
 237
237
-
 238
238
-
 239
239
-
 240
240
-
 241
241
-
 242
242
-
 243
243
-
 244
244
-
 245
245
-
 246
246
-
 247
247
-
 248
248
-
 249
249
-
 250
250
-
 251
251
-
 252
252
-
 253
253
-
 254
254
-
 255
255
-
 256
256
-
 257
257
-
 258
258
-
 259
259
-
 260
260
-
 261
261
-
 262
262
-
 263
263
-
 264
264
-
 265
265
-
 266
266
-
 267
267
-
 268
268
-
 269
269
-
 270
270
-
 271
271
-
 272
272
-
 273
273
-
 274
274
-
 275
275
-
 276
276
-
 277
277
-
 278
278
-
 279
279
-
 280
280
-
 281
281
-
 282
282
-
 283
283
-
 284
284
-
 285
285
-
 286
286
-
 287
287
-
 288
288
-
 289
289
-
 290
290
-
 291
291
-
 292
292
-
 293
293
-
 294
294
-
 295
295
-
 296
296
-
 297
297
-
 298
298
-
 299
299
-
 300
300
-
 301
301
-
 302
302
-
 303
303
-
 304
304
-
 305
305
-
 306
306
-
 307
307
-
 308
308
-
 309
309
-
 310
310
-
 311
311
-
 312
312
-
 313
313
-
 314
314
-
 315
315
-
 316
316
-
 317
317
-
 318
318
-
 319
319
-
 320
320
-
 321
321
-
 322
322
-
 323
323
-
 324
324
-
 325
325
-
 326
326
-
 327
327
-
 328
328
-
 329
329
-
 330
330
-
 331
331
-
 332
332
-
 333
333
-
 334
334
-
 335
335
-
 336
336
-
 337
337
-
 338
338
-
 339
339
-
 340
340
-
 341
341
-
 342
342
-
 343
343
-
 344
344
-
 345
345
-
 346
346
-
 347
347
-
 348
348
-
 349
349
-
 350
350
-
 351
351
-
 352
352
-
 353
353
-
 354
354
-
 355
355
-
 356
356
-
 357
357
-
 358
358
-
 359
359
-
 360
360
-
 361
361
-
 362
362
-
 363
363
-
 364
364


Motorola MBP854CONNECT-3 Benutzerhandbuch
- Kategorie
- Babyphone
- Typ
- Benutzerhandbuch
- Dieses Handbuch eignet sich auch für
in anderen Sprachen
- English: Motorola MBP854CONNECT-3 User manual
- français: Motorola MBP854CONNECT-3 Manuel utilisateur
- español: Motorola MBP854CONNECT-3 Manual de usuario
- Nederlands: Motorola MBP854CONNECT-3 Handleiding
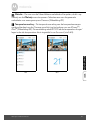
Verwandte Artikel
-
Motorola SCOUT73 Benutzerhandbuch
-
Motorola MBP853CONNECT Benutzerhandbuch
-
-
Motorola MBP662CONNECT-4 Schnellstartanleitung
-
Motorola MBP85CONNECT Schnellstartanleitung
-
-
-
-
-
Motorola EASE35 Benutzerhandbuch
Andere Dokumente
-
BabySense V24R-2 Benutzerhandbuch
-
 Miniland Baby digimonitor 2.4" plus Benutzerhandbuch
-
 Miniland digimonitor 2.4" gold Benutzerhandbuch
-
hubble Listen_L7_ Listen Glow Audio Baby Monitor Benutzerhandbuch
-
Philips SKM7491NF Benutzerhandbuch
-
 Miniland digimonitor 3.5" plus Benutzerhandbuch
-
 Miniland Baby digimonitor 1.8" Benutzerhandbuch
-
Alecto DVM-150 Bedienungsanleitung
-
SWITEL HS 2000 Benutzerhandbuch
-
SWITEL BSW 200 Bedienungsanleitung


