Lenco PPR-100WH Bedienungsanleitung
- Kategorie
- Radios
- Typ
- Bedienungsanleitung

1
Model: PPR-100
User manual –
Wall plug radio with Bluetooth,
Light, motion sensor and rechargeable battery
Gebruikershandleiding –
Wandstekkerradio met
bluetooth, verlichting, bewegingssensor en accu
Bedienungsanleitung –
Steckdosenradio Mit
Bluetooth, Beleuchtung, Bewegungsmelder und Akku
Mode d’emploi –
Radio pour prise murale avec
bluetooth, lumière, detecteur de mouvement et
batterie
Manual de usuario –
Radio de enchufe de pared
con bluetooth, luz, sensor de movimiento y batería
recargable

2
Index
English 2
Nederlands 23
Deutsch 45
Français 66
Español 88
Version: 1.0
English
PPR-100
CAUTION:
Usage of controls or adjustments or performance of
procedures other than those specified herein may
result in hazardous radiation exposure.
This unit should not be adjusted or repaired by anyone
except qualified service personnel.
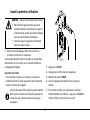
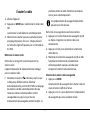
PRECAUTIONS BEFORE USE
KEEP THESE INSTRUCTIONS IN MIND:
1. Do not use this device near water.
2. Clean only with a slightly damp cloth.
3. Do not cover or block any ventilation openings.
When placing the device on a shelf, leave 5 cm
(2”) free space around the whole device.
4. Install in accordance with the supplied user
manual.

3
5. * Don’t step on or pinch the power adaptor. Be
very careful, particularly near the plugs and the
cable’s exit point. Do not place heavy items on
the power adaptor, which may damage it. Keep
the entire device out of children’s reach! When
playing with the power cable, they can seriously
injure themselves.
6. * Unplug this device during lightning storms or
when unused for a long period.
7. Keep the device away from heat sources such as
radiators, heaters, stoves, candles and other
heat-generating products or naked flame.
8. Avoid using the device near strong magnetic
fields.
9. Electrostatic discharge can disturb normal usage
of this device. If so, simply reset and restart the
device following the instruction manual. During
file transmission, please handle with care and
operate in a static-free environment.
10. Warning! Never insert an object into the product
through the vents or openings. High voltage
flows through the product and inserting an
object can cause electric shock and/or short
circuit internal parts. For the same reason, do
not spill water or liquid on the product.
11. Do not use in wet or moist areas such as
bathrooms, steamy kitchens or near swimming
pools.
12. Do not use this device when condensation may
occur.
13. Although this device is manufactured with the
utmost care and checked several times before
leaving the factory, it is still possible that
problems may occur, as with all electrical
appliances. If you notice smoke, an excessive
build-up of heat or any other unexpected
phenomena, you should disconnect the plug
from the main power socket immediately.

4
14. This device must operate on a power source as
specified on the specification label. If you are not
sure of the type of power supply used in your
home, consult your dealer or local power
company.
15. * The socket outlet must be installed near the
equipment and must be easily accessible.
16. * Do not overload ac outlets or extension cords.
Overloading can cause fire or electric shock.
17. * Devices with class 1 construction should be
connected to a main socket outlet with a
protective earthed connection.
18. * Devices with class 2 construction do not
require a earthed connection.
19. Keep away from rodents. Rodents enjoy biting
on power cords.
20. * Always hold the plug when pulling it out of the
main supply socket. Do not pull the power cord.
This can cause a short circuit.
21. Avoid placing the device on any surfaces that
may be subject to vibrations or shocks.
22. To clean the device, use a soft dry cloth. Do not
use solvents or petrol based fluids. To remove
severe stains, you may use a damp cloth with
dilute detergent.
23. The supplier is not responsible for damage or
lost data caused by malfunction, misuse,
modification of the device or battery
replacement.
24. Do not interrupt the connection when the device
is formatting or transferring files. Otherwise,
data may be corrupted or lost.
25. If the unit has USB playback function, the usb
memory stick should be plugged into the unit
directly. Don’t use an usb extension cable
because it can cause interference resulting in
failing of data.
26. The apparatus shall not be exposed to dripping
or splashing and make sure that no objects filled

5
with liquids, such as vases, are placed on or near
the apparatus.
27. * To completely disconnect the power input, the
mains plug of the apparatus shall be
disconnected from the mains, as the disconnect
device is the mains plug of apparatus.
28. If the unit works with battery, Battery shall not
be exposed to excessive heat such as sunshine,
fire or the like.
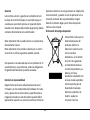
29. Attention should be drawn to the environmental
aspects of battery disposal.
30. The apparatus can only be used in moderate
extremely cold or climates warm environments
should be avoided.
31. The rating label has been marked on the bottom
or back panel of the apparatus.
32. This device is not intended for use by people
(including children) with physical, sensory or
mental disabilities, or a lack of experience and
knowledge, unless they’re under supervision or
have received instructions about the correct use
of the device by the person who is responsible
for their safety.
33. This product is intended for non professional use
only and not for commercial or industrial use.
34. Make sure the unit is adjusted to a stable
position. Damage caused by using this product in
an unstable position or by failure to follow any
other warning or precaution contained within
this user manual will not be covered by
warranty.
35. Never remove the casing of this apparatus.
36. Never place this apparatus on other electrical
equipment.
37. Do not use or store this product in a place where
it is subject to direct sunlight, heat, excessive
dust or vibration.
38. Do not allow children access to plastic bags.
39. Only use attachments/accessories specified by
the manufacturer.

6
40. Refer all servicing to qualified service personnel.
Servicing is required when the apparatus has
been damaged in any way, such as the power
supply cord or the plug, when liquid has been
spilled or objects have fallen into the apparatus,
when the apparatus has been exposed to rain or
moisture, does not operate normally, or has
been dropped.
41. *Do not use a damaged power cord or plug or a
loose outlet. Doing so may result in fire or
electric shock.
42. Prolonged exposure to loud sounds from
personal music players may lead to temporary or
permanent hearing loss.
43. If the product contains or is delivered with a
remote control containing coin / cell batteries:
Warning :
“Do not ingest battery, Chemical Burn
Hazard” or equivalent working.
[The remote control supplied with] This
product contains a coin / button cell
battery is swallowed, it can cause severe
internal burns in just 2 hours and can
lead to death.
Keep new and used batteries away from
children.
If the battery compartment does not
close securely, stop using the product
and keep it away from children.
If you think batteries might have been
swallowed or placed inside any part of
the body, seek immediate medical
attention.
INSTALLATION
• Unpack all parts and remove protective material.
• *Do not connect the unit to the mains before

7
checking the mains voltage and before all other
connections have been made.
* These instructions are related only to products using
power cable or AC power adaptor.
Accessories:
User manual

8
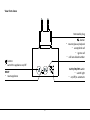
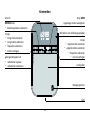
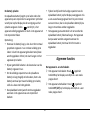
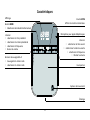
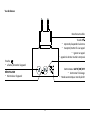
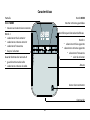
Features
Display
MEM button
display saved stations
MODE button
− select operating mode
< button
− select previous title
− select previous station
− select frequency
− decrease volume
Microphone for phone calls
> button
− select next title
− select next station
− select frequency
− increase volume
Speaker
Save slot buttons 1-4
− save radio station
− select radio station
Motion sensor
Light

9
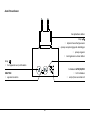
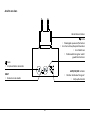
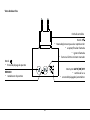
View from above
Removable plug
button:
− switch the appliance on/off
button
− resume/pause playback
− accept/end call
− ignore call
− call last-dialed number
AUTO/ON/OFF switch
− switch light
− on/off/to automatic
RESET
− reset appliance

10
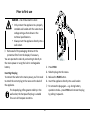
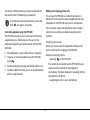
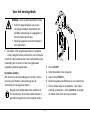
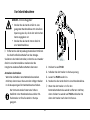
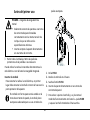
Prior to first use
DANGER – risk of fatal electric shock
Only connect the appliance to a properly
installed wall socket with the same mains
voltage rating as that shown in the
technical specifications.
Always insert the appliance directly into a
wall socket.
Remove all of the packaging. Remove m the
protective films from the display if necessary.
You can operate the radio by connecting it directly to
the mains power or using the built-in rechargeable
battery.
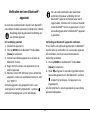
Inserting the plug
To connect the radio to the mains power, you first need
to attach the correct plug to the recess on the back of
the appliance.
The shaped plug offers greater stability in the
wall socket, the European flat plug is suitable
for use in all European countries.
1. Press PUSH.
2. Slide the plug into the recess.
3. Release the PUSH button.
4. Insert the appliance directly into a wall socket.
To remove the plug again – e.g. during battery
operation mode – press PUSH and remove the plug
by pulling it upwards.

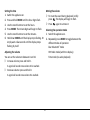
11
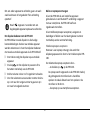
Charging the battery
The rechargeable battery begins to charge as soon as
the appliance is connected to a wall socket. Symbols
appear on the display showing the charging progress.
Once appears, the appliance is fully charged and
you can disconnect the appliance from the wall socket.
Note:
When the battery is empty, it normally takes around
2 hours to charge it fully. You can still use the
appliance while it is charging. However, it will take
longer to charge the appliance.
At a moderate volume, the battery life is
approx. 8 hours.
To preserve the full capacity of the rechargeable
battery for as long as possible, fully charge the
battery once a month, even if you have not been
using it.
The rechargeable battery will be charging constantly
whenever you operate the appliance using a wall
socket.
During operation, the current capacity of the
rechargeable battery is shown on the display. If you
hear a warning signal sounding at one-minute
intervals, the rechargeable battery is almost empty
and should be recharged.
The appliance turns off automatically just before the
rechargeable battery is completely empty. The
appliance can only be turned back on once the
rechargeable battery has been charged for at least
10-15 minutes.
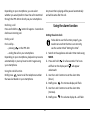
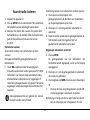
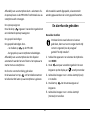
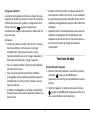
Basic functions
Switching the appliance on and off
Switching the appliance on: hold down until HI
appears on the display and you hear a series of
beeps.
Switching the appliance off: hold down until
OFF appears on the display and you hear a series of
beeps.

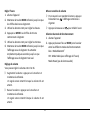
12
Setting the time
1. Switch the appliance on.
2. Press and hold MODE until the hour digits flash.
3. Use the <and> buttons to set the hours.
4. Press MODE. The minute digits will begin to flash.
5. Use the <and> buttons to set the minutes.
6. Hold down MODE until the display stops flashing. Or
simply wait a few seconds until the display stops
flashing by itself.
Adjusting the volume
You can set the volume to between 0 and 16.
Increase volume: press and hold >.
A signal will sound once volume 16 is reached.
Decrease volume: press and hold <.
A signal will sound once volume 0 is reached.
Muting the volume
To mute the sound during playback, briefly
press . The display will begin to flash.
Press again to unmute it.
Selecting the operation mode
1. Switch the appliance on.
2. Repeatedly press MODE to toggle between the
different modes of operation.
blue: Bluetooth
®
mode
FM: Radio mode (with time display)
Time mode (no audio playback)

13
Listening to the radio
1. Switch the appliance on.
2. Press MODE to select radio mode FM.
Radio playback will begin automatically.
3. Select the station you wish to play by repeatedly
pressing >. Each press of the button adjusts the
frequency by an interval of 0.1 MHz.
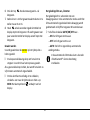
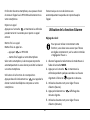
Saving radio stations
Automatically scan for and save radio stations
The appliance has 40 storage slots for radio stations.
Hold down until the frequency displayed
automatically continues counting up from
87.5 MHz. The station scan stops automatically as
soon as all available radio stations have been saved
or until all of the save slots have been filled. The
first saved radio station will then begin to play
automatically.
Save slots which are already in use may be
overwritten as a result.
Scanning for and saving stations manually
1. Press one of the save slot buttons 1, 2, 3 or 4, to
save a radio station in that slot.
2. Press < and > to select the radio station you want.
3. Press and hold the previously selected save slot
button 1, 2, 3 or 4 for a few seconds to save the
radio station selected.
Selecting saved radio stations
1. Press MEM.
The save slot of the radio station currently playing is
shown on the display
2. Press < and > to select the save slot you wish to use.
3. Press MEM once again to confirm your selection.
Or:
Press the save slot button 1, 2, 3 or 4 to bring up
the saved radio station.
Remark: there is a 50cm thin white cable pending at the
backside: this is the antenna. You can move it to
check the best reception of the radio stations.

14
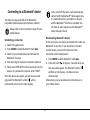
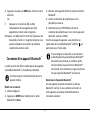
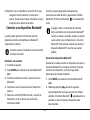
Connecting to a Bluetooth
®
device
The radio can play audio files from Bluetooth
®
-
compatible mobile devices (smartphones, tablets).
Always refer to the instruction manual for your
mobile device.
Establishing a connection
1. Switch the appliance on.
2. Press MODE to select Bluetooth® mode blue.
3. Switch on your mobile device and activate the
Bluetooth
®
-function.
4. Start scanning for devices on the external device.
5. Select Lenco PPR-100 from the list and connect the
devices. If a password is required, enter “0000”.
Once the devices are paired, you will hear an audio
signal and the Bluetooth
®
symbol will be
permanently shown on the radio display.
If you switch off the radio, it will automatically
connect with the Bluetooth® device again once
it is switched back on, provided it is close-by
and the Bluetooth® function is activated. You
will hear an audio signal once the Bluetooth®
device has been found.
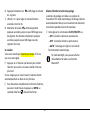
Disconnecting Bluetooth
®
devices
There can only be one device connected to the radio via
Bluetooth
®
at any time. If you would like to connect
another device, you must first disconnect the
connection which already exists:
1. Press MODE to select Bluetooth
®
mode blue.
2. Press and hold for approx. 2 seconds until you
hear two audio signals. The Bluetooth
®
symbol
will flash on the display – the device is now
disconnected.
Alternatively you can also disconnect the devices on
your mobile device.

15
To connect a different device, proceed as described in
the section titled “Establishing a connection”.
To reconnect a disconnected device, press and
hold for approx. 2 seconds.
Controlling playback using the PPR-100
The PPR-100 can play music in all current file formats
supported by your mobile device. You can control
playback using both your mobile device and the PPR-
100 itself.
Start playback on your mobile device, if required.
To pause or resume playback using the PPR-100,
press .
Set the volume by pressing and holding either <or>.
To select a different track, press < to skip backwards
and > to skip forwards.
Making and receiving phone calls
You can use the PPR-100 as a hands-free device if a
Bluetooth® connection has been established with your
smartphone. The PPR-100 has a built-in microphone.
You can accept, reject and end phone calls or make a
call to the last number you dialled using the redial
function.
Accepting phone calls
When you receive a call, the playback will be paused
and you will hear the ringing on the PPR-100.
Accept an incoming call by…
… pressing on the PPR-100.
The call will be conducted via the PPR-100. You can
speak hands-free thanks to the integrated
microphone. The ideal distance for speaking into the
microphone is 30-60 cm.
… accepting the call on your smartphone.

16
Depending on your smartphone, you can select
whether you would prefer to have the call transmitted
through the PPR-100 or directly via your smartphone.
Declining a call
Press and hold the button for approx. 3 seconds to
decline an incoming call.
Ending a call
End a call by…
… pressing on the PPR-100.
… ending the call on your smartphone.
Depending on your smartphone, playback may resume
automatically or you may have to start it again using
your smartphone.
Using the redial function
Briefly press twice to call the telephone number
that was last dialed on your smartphone.
Any music that is playing will be paused automatically
and will resume after the call.
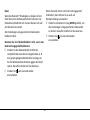
Using the alarm function
Setting the alarm clock
To be able to use this function properly, you
need to ensure that the time is set correctly,
see the section titled ”Setting the time”.
1. Switch on the appliance and select time mode using
MODE.
2. Press and hold for a few seconds. The hours
will flash on the display and will appear
underneath.
3. Use the < and > buttons to set the alarm time
(hours).
4. Briefly press . The minutes display will flash.
5. Use the < and > buttons to set the alarm time
(minutes).
6. Briefly press . The volume display U... will flash.

17
7. Use < and > to set the desired alarm volume
between 0 and 16.
8. Hold down for a few seconds until the display
stops flashing. Or simply wait a few seconds until
the display stops flashing by itself.
Being awakened
You will be wakened up by the buzzer at the time you
have set.
Press any button to stop the alarm. You will be
wakened up again 24 hours later.
If you do not press any button, the alarm will switch off
automatically after five minutes.
To completely disable the alarm function, switch to
time mode and press MEM. The alarm symbol
will disappear from the display.
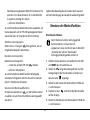
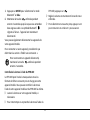
Turning the guide light on/off
The guide light is connected to a motion sensor. In
automatic mode, the light switches on automatically
once movement is detected and will remain switched
on for approx. 60 seconds.
Slide the AUTO/ON/OFF switch to...
… ON: the light will switch on permanently.
… OFF: the light will switch off permanently.
… AUTO: the light is set to automatic operation
mode.
In Autolight mode you can manually switch on
the radio or the Bluetooth® function.

18
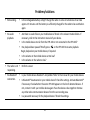
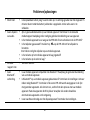
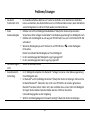
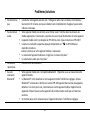
Problems/solutions
Not working.
Is the rechargeable battery empty? Charge the radio. In some circumstances it can take
approx. 15 minutes until the battery is sufficiently charged for the radio to be switched on
again.
No audio
playback.
Are there no audio files on your mobile device? Check in the relevant media folders. If
necessary, refer to the instruction manual of your device.
Is the mobile device too far from the PPR-100 or not connected to the PPR-100?
Has playback been paused? Briefly press on the PPR-100 to resume playback.
Begin playback on your mobile device, if required.
Is the volume on the mobile device set too low?
Is the volume on the radio too low?
The radio is not
responding.
Perform a reset.
No Bluetooth
®
connection.
Is your mobile device Bluetooth
®
-compatible? Refer to the manual for your mobile device.
Is Bluetooth® deactivated on your mobile device? Check the settings. Activate Bluetooth®
if necessary. Check whether the Lenco PPR-100 appears in the list of detected devices. If
not, connect it with your mobile device again. Place the devices close together. Remove
any other radio communication devices from the surrounding area.
Is a password necessary for the playback device? Check the settings.

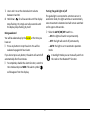
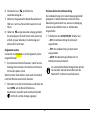
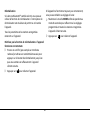
19
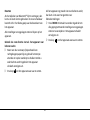
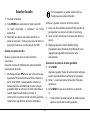
Reset
If Bluetooth® playback seems to lag, you can use the
reset function. The reset switch is located in the small
hole at the top of the appliance.
All settings and saved stations will remain on the
appliance.
Do not use the reset function if the device is working
properly.
Take a thin implement (e.g. a straightened-out
paperclip) and use its blunt end to press the reset
button until you can feel it being pushed. The
appliance will then switch off.
Press to turn the appliance back on.
If the appliance is still not working properly, you can
restore its factory settings:
Press and hold MODE for at least 8 seconds to
delete all of the programmed settings and saved
stations. The appliance will then switch off.
Press to switch the appliance back on.

20
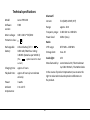
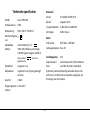
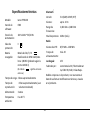
Technical specifications
Model:
Lenco PPR-100
Software
version:
F003
Mains voltage:
100 V-240 V~ 50/60Hz
Protection class:
II
Rechargeable
battery:
Lithium battery/3.7 V
1050 mAh/Watt hour rating:
3.89 Wh (tested as per UN 38.3)
(The symbol stands for direct
current)
Charging time:
approx. 2 hours
Playback time:
approx. 8 hours (at a moderate
volume)
Power:
3 watts
Ambient
temperature:
0 to +40 °C
Bluetooth
®
Version:
5.0 (A2DP, AVRCP, HFP)
Range:
approx. 10 m
Frequency range:
2.402 GHz to 2.480 GHz
Power level:
4 dBm (max.)
Radio
VHF range:
87.5 MHz – 108 MHz
Storage slots:
max. 40
Guide light:
LED
Manufactured by:
Lenco Benelux BV, Thermiekstraat
1a, 6361 HB Nuth, The Netherlands
In the course of product improvement, we reserve the
right to make technical and optical modifications to
the product.
Seite wird geladen ...
Seite wird geladen ...
Seite wird geladen ...
Seite wird geladen ...
Seite wird geladen ...
Seite wird geladen ...
Seite wird geladen ...
Seite wird geladen ...
Seite wird geladen ...
Seite wird geladen ...
Seite wird geladen ...
Seite wird geladen ...
Seite wird geladen ...
Seite wird geladen ...
Seite wird geladen ...
Seite wird geladen ...
Seite wird geladen ...
Seite wird geladen ...
Seite wird geladen ...
Seite wird geladen ...
Seite wird geladen ...
Seite wird geladen ...
Seite wird geladen ...
Seite wird geladen ...
Seite wird geladen ...
Seite wird geladen ...
Seite wird geladen ...
Seite wird geladen ...
Seite wird geladen ...
Seite wird geladen ...
Seite wird geladen ...
Seite wird geladen ...
Seite wird geladen ...
Seite wird geladen ...
Seite wird geladen ...
Seite wird geladen ...
Seite wird geladen ...
Seite wird geladen ...
Seite wird geladen ...
Seite wird geladen ...
Seite wird geladen ...
Seite wird geladen ...
Seite wird geladen ...
Seite wird geladen ...
Seite wird geladen ...
Seite wird geladen ...
Seite wird geladen ...
Seite wird geladen ...
Seite wird geladen ...
Seite wird geladen ...
Seite wird geladen ...
Seite wird geladen ...
Seite wird geladen ...
Seite wird geladen ...
Seite wird geladen ...
Seite wird geladen ...
Seite wird geladen ...
Seite wird geladen ...
Seite wird geladen ...
Seite wird geladen ...
Seite wird geladen ...
Seite wird geladen ...
Seite wird geladen ...
Seite wird geladen ...
Seite wird geladen ...
Seite wird geladen ...
Seite wird geladen ...
Seite wird geladen ...
Seite wird geladen ...
Seite wird geladen ...
Seite wird geladen ...
Seite wird geladen ...
Seite wird geladen ...
Seite wird geladen ...
Seite wird geladen ...
Seite wird geladen ...
Seite wird geladen ...
Seite wird geladen ...
Seite wird geladen ...
Seite wird geladen ...
Seite wird geladen ...
Seite wird geladen ...
Seite wird geladen ...
Seite wird geladen ...
Seite wird geladen ...
Seite wird geladen ...
Seite wird geladen ...
Seite wird geladen ...
Seite wird geladen ...
-
 1
1
-
 2
2
-
 3
3
-
 4
4
-
 5
5
-
 6
6
-
 7
7
-
 8
8
-
 9
9
-
 10
10
-
 11
11
-
 12
12
-
 13
13
-
 14
14
-
 15
15
-
 16
16
-
 17
17
-
 18
18
-
 19
19
-
 20
20
-
 21
21
-
 22
22
-
 23
23
-
 24
24
-
 25
25
-
 26
26
-
 27
27
-
 28
28
-
 29
29
-
 30
30
-
 31
31
-
 32
32
-
 33
33
-
 34
34
-
 35
35
-
 36
36
-
 37
37
-
 38
38
-
 39
39
-
 40
40
-
 41
41
-
 42
42
-
 43
43
-
 44
44
-
 45
45
-
 46
46
-
 47
47
-
 48
48
-
 49
49
-
 50
50
-
 51
51
-
 52
52
-
 53
53
-
 54
54
-
 55
55
-
 56
56
-
 57
57
-
 58
58
-
 59
59
-
 60
60
-
 61
61
-
 62
62
-
 63
63
-
 64
64
-
 65
65
-
 66
66
-
 67
67
-
 68
68
-
 69
69
-
 70
70
-
 71
71
-
 72
72
-
 73
73
-
 74
74
-
 75
75
-
 76
76
-
 77
77
-
 78
78
-
 79
79
-
 80
80
-
 81
81
-
 82
82
-
 83
83
-
 84
84
-
 85
85
-
 86
86
-
 87
87
-
 88
88
-
 89
89
-
 90
90
-
 91
91
-
 92
92
-
 93
93
-
 94
94
-
 95
95
-
 96
96
-
 97
97
-
 98
98
-
 99
99
-
 100
100
-
 101
101
-
 102
102
-
 103
103
-
 104
104
-
 105
105
-
 106
106
-
 107
107
-
 108
108
-
 109
109


Lenco PPR-100WH Bedienungsanleitung
- Kategorie
- Radios
- Typ
- Bedienungsanleitung
in anderen Sprachen
- English: Lenco PPR-100WH Owner's manual
- français: Lenco PPR-100WH Le manuel du propriétaire
- español: Lenco PPR-100WH El manual del propietario
- Nederlands: Lenco PPR-100WH de handleiding
Verwandte Artikel
-
Lenco PDR-040BAMBOOBK Bedienungsanleitung
-
Lenco DIR-150 Bedienungsanleitung
-
-
-
-
-
-
-
-
Lenco PA-325 Benutzerhandbuch