Parkside PTSG 140 B2 Translation Of The Original Instructions
- Kategorie
- Elektrowerkzeuge
- Typ
- Translation Of The Original Instructions

DISC SANDER PTSG 140 B2
IAN 290842
TELLERSCHLEIFGERÄT
Originalbetriebsanleitung
DISC SANDER
Translation of the original instructions
290842_par_Tellerschleifgerät_cover_GB_IE_NI.indd 2 04.10.17 09:57

GB / IE / NI Translation of the original instructions Page
DE / AT / CH Originalbetriebsanleitung Seite
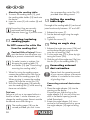
Before reading, unfold the page containing the illustrations and familiarise yourself with all functions of the
device.
Klappen Sie vor dem Lesen die Seite mit den Abbildungen aus und machen Sie sich anschließend mit allen
Funktionen des Gerätes vertraut.
290842_par_Tellerschleifgerät_cover_GB_IE_NI.indd 3 04.10.17 09:57
4
15

K L M N O P Q R S T
U V W X Y Z
A
B C D E F G H I J
1
11
2 3
546789
10
4
12
13
14 15 16
17
4
4
16
16
18
19
1
2
13a13b

4
G B I E N I
Content
Introduction .................................4
Intended purpose ......................... 4
General description ......................4
Scope of delivery .............................5
Description of functions .....................5
Overview ........................................5
Technical Data .............................. 5
Notes on safety............................5
Symbols and icons ...........................6
General notes on safety ....................6
General Safety Instructions for Power
Tools ...............................................6
Safety instructions for disc sander ......8
Residual risks ...................................9
Initial start-up ..............................9
Securing the disc sanding device .......9
Mounting / dismounting
the sanding table .............................9
Adhering/replacing sanding paper ..10
Setting the sanding table angle ........10
Using an angle stop .......................10
Connecting external dust extraction ..10
Operation ..................................11
Switching on and off ......................11
Sanding ........................................11
Cleaning ....................................11
Replacement parts/Accessories ..12
Maintenance ..............................12
Storage ......................................12
Waste disposal
and environmental protection ....12
Guarantee ................................. 13
Repair Service ............................14
Service-Center ............................ 14
Importer .................................... 14
Introduction
Congratulations on the purchase of your
new device. With it, you have chosen a
high quality product.
During production, this equipment has
been checked for quality and subjected to
equipment is therefore guaranteed.
The operating instructions constitute
part of this product. They contain
important information on safety, use
and disposal.
Before using the product, familiarise
yourself with all of the operating and
safety instructions. Use the product
only as described and for the appli-
Keep this manual safely and in the
event that the product is passed on,
hand over all documents to the third
party.
Intended purpose
The disc sanding device is suitable for san-
ding soft and hard woods.
The device is intended to be used by do-it-
yourselfers. It was not designed for heavy
commercial use.
The tool is not to be used by persons.
under the age of 16. Children over the
age of 16 may use the tool except under
supervision. The manufacturer is not liable
for damage caused by an improper use or
incorrect operation of this device.
General description
An illustration of the most im-
portant functional components
can be found on the front and
the back fold-out pages.
Translation of the original
EC declaration of conformity ...... 29

5
N II EG B
Scope of delivery
Unpack the device and check for comple-
teness. Dispose of the packaging material
properly.
- Disc sanding device
- Sanding disc
- Screw clamp
- Angle stop
- 2x granulation 80
- 2x granulation 150
- 2x granulation 240
- Angle adapter and adapter for exter-
nal dust extraction
- Hexagon socket wrench
- Operating instructions
Description of functions
Please refer to the descriptions below for
information about the operating devices.
Overview
1 Sanding disc
2 Speed regulator
3 On/off switch
4 Receptor for screw clamp
5 Mains plug
6 Angle scale
7 Screw for angle locking
8 Washer
10 Sanding table holder
11 Sanding table
12 Slot for angle stop
13 Angle stop
13a Angle stop rail
13b Angle stop screw
14 Angle adapter
for external dust extraction
15 Adapter
for external dust extraction
16 Screw clamp
17 Hexagon socket wrench
18 Sanding paper
1
Technical Data
Disc sander ................ PTSG 140 B2
Rated input voltage .......... 230 V~, 50 Hz
Power input ............. 140 W (S2 15 min)*
Idling speed (n
0
) .............max. 3600 min
-1
Safety class .....................................II
Protection category ..........................IPX0
Weight ........................................2,4 kg
Sanding disc diameter ................ 125 mm
Sound pressure level
(L
pA
) ................... 62,7 dB(A); K
pA
= 3 dB
Sound power level (L
WA
)
measured .......... 75,7 dB(A); K
WA
= 3 dB
* After continuous operation of 15 minutes the
drill stops until the device temperature de-
viates by less than 2 K (2°C) from the room
temperature.
Levels of noise were determined according
to the norms and regulations in the decla-
ration of conformity.
Notes on safety
CAUTION! When using power
tools, observe the following basic
safety measures for the prevention
of electric shocks and the risk of
Please read all these instructions
before using this electric tool and
please keep the safety instructions.

6
G B I E N I
Symbols and icons
Symbols on the device:
Warning!
Read the manual!
Warning! Electric shock hazard.
Always unplug the device before
working on it.
Wear eye and hearing protection
Wear respiratory protection.
Wear safety gloves.
Protection class II
(double insulation)
Sanding disc direction
of rotation
Electrical machines do not belong
with domestic waste
Symbols used in the instructions:
Hazard symbols with in-
formation on prevention of
personal injury and property
damage.
Precaution symbol with information
on prevention of harm / damage.
Connect the machine to the power
supply.
Pull out the mains plug.
Notice symbol with information on
how to handle the device properly.
General notes on safety
Caution! When using power tools,
observe the following basic safety
measures for the prevention of
electric shocks and the risk of injury
General Safety Instructions
for Power Tools
WARNING! Read all safety
instructions and guidelines
carefully. Failure to follow the sa-
fety instructions and guidelines may
serious injuries.
Save all safety instructions and
guidelines for the future.
The term „power tool“ used in the safety inst-
ructions refers to mains-operated electric tools
(with a mains cable) and to battery-opera-
ted electric tools (without a mains cable).
Safe working
• Keep your work area tidy. An un-
tidy workplace can lead to accidents.
• Consider environment in uences
- Do not expose power tools to rain.
- Do not use power tools in damp or
wet surroundings.
- Ensure the work area is adequately lit.
- Do not use power tools where there is
• Protect yourself against elec-
tric shock. Avoid body contact with
earthed parts (e.g. pipes, radiators,
electric cookers, refrigerators).
• Keep other people away. Do not
allow other people, especially children,
to touch the power tool or cable. Keep
them away from your work area.

7
N II EG B
- Follow the instructions for lubrication
and changing tools.
- Regularly check the connection cable
of the power tool and, if it is dama-
specialist.
- Check extension cords periodically and
replace them if they are damaged.
- Keep handles dry, clean and free
from oil and grease.
• Remove the plug from the mains
socket when the power tool is not in
use, before maintenance and when
changing tools such as saw blades,
drill bits, cutters.
• Do not allow any tool keys to
remain inserted. Check, before
switching on, that keys and adjusting
tools have been removed.
• Avoid unintentional starting.
Make sure that the switch is off when
inserting the plug into the socket.
• Use extension cables outdoors.
Only use approved and appropriately
marked extension cables outdoors.
• Pay attention at all times. Pay
attention to what you are doing. Work
using common sense. Do not use the
power tool if you cannot concentrate.
• Check the power tool for possib-
le damage
- Before further use of the power tool, sa-
fety devices or slightly damaged parts
must be carefully examined in respect of
their proper and intended function.
- Check that the moving parts are wor-
king properly and are not jammed or
whether parts are damaged. All parts
conditions to ensure the proper opera-
tion of the power tool.
- Damaged safety equipment and parts
must be repaired properly or replaced
by an authorised specialist workshop
• Store unused power tools safely.
Unused power tools should be stored in
a dry, high or locked place, out of the
reach of children.
• Do not overload your power
tool. They work better and more safe-
• Use the correct power tool.
- Do not use low-performance machines
for heavy work.
- Do not use the power tool for purpo-
ses for which it is not intended. For ex-
ample, do not use use a circular hand
saw for cutting tree branches or logs.
• Wear suitable clothing
- Do not wear loose clothing or jewel-
lery that might become caught in mo-
ving parts.
- When working outdoors, non-slip
footwear is recommended.
- Wear a hair net to contain long hair.
• Use protective equipment
- Wear safety goggles.
- Use a dust mask for work which gene-
rates dust.
• Connect a dust extraction de-
vice. If connections are available for
dust extraction and collection devices,
make sure that these are connected
and properly used.
• Do not use the cable for purpo-
ses for which it is not intended.
Do not use the cable to pull the plug
from the socket. Protect the cable from
heat, oil and sharp edges.
• Secure the workpiece. Use jigs or
a vice to hold the workpiece securely.
This is safer than using your hand.
• Avoid abnormal body postures.
Ensure secure footing and keep your
balance at all times.
• Maintain tools with care
- Keep cutting tools sharp and clean for
better and safer working.

8
G B I E N I
unless otherwise indicated in the inst-
ructions.
- Damaged switches must be replaced
at a customer service workshop.
- Do not use power tools if the switch
cannot be turned on and off.
• CAUTION! The use of other bits and
other accessories can result in a risk of
personal injury.
• Have your power tool be re-
paired by a quali ed electrician
- This power tool complies with the
relevant safety regulations. Repairs
electrician, using original spare parts;
otherwise accidents involving the user
may result.
Service:
• Have your power tool repaired
only by quali ed specialists and
only with original spare parts.
This will ensure that the power tool re-
mains safe.
Safety instructions for disc
sander
Caution! Risk of injury! Wear
personal protective
equipment.
Wear safety goggles, hearing
protection, a dust mask and gloves.
• When working under dust-prone condi-
tions, ensure ventilation holes are clear.
Disconnect the device from the power
supply prior to cleaning.
• Caution, risk of injury! The sanding disc
will continue to run for a short time af-
ter switching off the machine.
• Never make the warning labels on the
power tool illegible.
• Attach the power tool to a so-
lid, at and horizontal surface.
If the power tool is prone to slipping
or wobbling, the bit cannot be guided
smoothly and safely.
• The bit should only be moved
against the workpiece when the
device is turned on. Otherwise
there is a danger of the bit becoming
jammed in the workpiece and the work-
piece rotating with the bit. This can
lead to injuries.
• Switch the power tool off imme-
diately if the bit jams.
- The power tool is overloaded;
- It becomes stuck in the workpiece
being machined.
• Set the correct speed before st-
arting work.
• After completing your work, do
not touch the sanding disc until
it has cooled down. The bit beco-
mes very hot during use.
• Inspect the cable regularly and
have a damaged cable repaired
only by an authorised customer
service centre. Replace dama-
ged extension cables. This will en-
sure that the power tool remains safe.
• Store the power tool safely
when not in use. The storage
place must be dry and lockable.
This prevents the power tool from being
damaged as a result of being stored or
operated by inexperienced people.
• Never leave the tool before it
has come to a complete stand-
still. Bits still in motion can cause injury.
• Do not use the power tool with
a damaged cable. Do not touch

9
N II EG B
the damaged cable and pull the
mains plug if the cable is da-
maged while working. Damaged
cables increase the risk of electric shock.
• Avoid abnormal body postures.
Ensure secure footing and keep your
balance at all times.
• To avoid hazards, any replacement of
the plug or the connection line must
always be executed by the manufactu-
rer of the electric tool or their customer
service.
• Water must be kept away from the po-
wer tool’s electrical parts and people
within the working range.
• Caution! Never remove any loo-
se splinters, chips or jammed pi-
eces of wood when the sanding
disc is still running. Always switch
off the machine before repairing any
faults or removing jammed pieces of
wood - pull the mains plug.
Residual risks
Even if properly operating and handling this
electric tool, some residual risks will remain.
Due to its construction and build, this electric
a) Lung damage, if suitable respiratory
protection is not worn.
b) Hearing damage, if suitable ear pro-
tection is not worn.
c) Damages to health due to
- touching the area of the grinding tool
which was not covered;
- the ejection of pieces from workpiece
or damaged grinding discs.
d) Damage to your health caused by
swinging your hands and arms when
operating the appliance for longer pe-
riods of time or if the unit is not held or
maintained properly.
Warning! During operation, this
electric tool generates an electro-
circumstances, may impair the
functionality of active or passive
medical implants. To reduce the risk
of serious or lethal injuries, we rec-
ommend that persons with medical
implants consult their doctor and the
manufacturer of their medical im-
plant before operating the machine.
Initial start-up
Avoid unintentional starting.
Ensure that the mains plug is remo-
ved before carrying out any adjust-
ments, maintenance or repair work.
Before operating the disc sanding device,
you must secure it against tipping.
K L M N O P Q R S T
U V W X Y Z
A
B C D E F G H I J
Securing the disc
sanding device
Secure the disc sanding device horizon-
tally (
) or vertically () to the working
surface.
The enclosed screw clamp (16) must grip
into one of the two receptors (4).
Mounting / dismounting
the sanding table
Dismounting the sanding table:
1. Release the screw (9) underneath the
sanding table (11) using the hexagon
socket wrench enclosed (17).
2. Remove the screw (9) and the washer
(8) and pull the sanding table holder
(10) away from the device.

1 0
G B I E N I
Mounting the sanding table:
3. To mount the sanding table (11), push
the sanding table holder (10) back onto
the device.
4. Insert the screw (9) with washer (8) and
tighten.
Ensure the 4 lugs are correctly
positioned (see illustration
)
otherwise screw (
9) will not screw
in.
Adhering/replacing
sanding paper
Do NOT remove the white lm
from the sanding disc!
Caution! Risk of injury! Discon-
nect the device from the power sup-
ply to prevent unintentional starting.
dismount the sanding table (11)
and holder (10) (see “Dismounting/
mounting the sanding table”).
1
-
verse side of the sanding paper (18).
When re-using it, remove the sanding
1 1
2. Stick the sanding paper (18) centrally
onto the sanding disc (1) while ensuring
there are no bubbles.
Trial run:
Perform a trial run at top speed without a
load for at least 1 minute whenever you
change the sanding paper. Remain outside
the hazard area while doing so.
The sanding paper (18) can be
re-used provided you stick it onto
1
provided when being stored.
Setting the sanding
table angle
The angle of the sanding table (11) can be ad-
justed continuously between -10° and +50°.
1. Release the screws (7).
2. Set the desired angle using the angle
scale (6).
3. Tighten the screws (7).
Using an angle stop
1. Release the angle stop screw (13b) and
set the desired angle using the scale
onto the rail marking (13a).
2. Fix the angle stop (13) in place by tigh-
tening the screw (13b).
3. Slide the rail of the angle stop (13a) into
the slot (12) on the sanding table (11).
Connecting external
dust extraction
Please check the operating manual
of your vacuum cleaner to ascertain
whether it is suitable for the suction
of grinding chips.
Connecting external dust extrac-
tion:
1. Place the angle adapter (14) into the
opening on the device.
Ensure that you slide the lug on the
angle adapter (14) into one of the two
slots in the device opening (see de-
tailed illustrations).
2. Rotate the angle adapter (14) into a
vertical or horizontal position to secure
the angle adapter (14) against falling
out.

1 1
N II EG B
Removing external dust
extraction:
3. Gently turn and pull on the angle adap-
ter (14) to remove it.
It can be removed when the arrow on the
angle adapter (14) and the marking on
the device housing are exactly aligned.
An additional adapter (15) with a
larger diameter is provided with the
device and this can, if required, be
attached to the angle adapter (14).
If necessary, you can connect the
suction hose of a vacuum cleaner
directly onto the angle adapter.
Operation
Before initial operation, perform a trial run
at top speed without a load for at least 1
minute. Remain outside the hazard area
while doing so.
Switching on and off
Make sure that the power supply
voltage matches the voltage rating
indicated on the device‘s type plate.
Connect the machine to the power
supply.
1. Select the desired speed using the
speed regulator (2).
Switching on:
2. Press the power switch “I” (3), the de-
vice starts.
Switching off:
3. Press the off switch „O“ (3), the device
turns off.
4. Next, remove the mains plug (5) from
the wall socket.
After switching on the device, wait until the
device has reached its max. speed. Only
then may you commence sanding.
Sanding
The arrow above the sanding disc
(
K L M N O P Q R S T
U V W X Y Z
A B C D E F G H I J
1) indicates the direction of rotation of
the disc sanding device.
The sanding speed can be regulated using
the speed regulator (
K L M N O P Q R S T
U V W X Y Z
A B C D E F G H I J
2).
Mounting horizontally (
):
• Place the workpiece on the sanding
table (11) and slowly bring it to the
desired angle towards the left half of
the sanding disc (
K L M N O P Q R S T
U V W X Y Z
A B C D E F G H I J
1).
Mounting vertically (
):
•
Slowly bring the workpiece to the desired
angle towards the sanding disc (
K L M N O P Q R S T
U V W X Y Z
A B C D E F G H I J
1).
Cleaning
Pull the mains plug before any ad-
justments, maintenance or repair.
Do not use any cleaning agents or
solvents. Chemical substances can etch
the plastic parts of the device. Never
clean the device under running water.
Have any work on the device
that is not described in this ins-
truction guide performed by a
professional. Only use original
parts. Allow the device to cool
off before any maintenance
or cleaning is undertaken.
There is a risk of burning!
• Thoroughly clean the device after every
use.

1 2
G B I E N I
• Clean the ventilation openings and the
surface of the device with a soft brush
or cloth.
• Remove chips, dust and dirt, i.e. with a
brush.
Maintenance
The device is maintenance free.
Always check the device before using it
for obvious defects such as loose, worn or
damaged parts, correct the positioning of
screws or other parts. Exchange the dama-
ged parts.
Storage
• Store the appliance in a dry place well
out of reach of children.
Waste disposal
and environmental
protection
Be environmentally friendly. Return the
tool, accessories and packaging to a recy-
them.
Electrical machines do not belong
with domestic waste.
• Hand over the device at an utilization
location. The plastic and metal parts
employed can be separated out and
thus recycled use can be implemented.
Ask our Service-Center for details.
• Defective units returned to us will be
disposed of for free.
Replacement parts/Accessories
Spare parts and accessories can be obtained at
www.grizzly-service.eu
If you do not have internet access, please contact the Service Centre via telephone
(see “Service-Center” page 14). Please have the order number mentioned below ready.
Position Manual Description Ordernumber
1
5 x granulation 80 91104587
5 x granulation 150 91104588
5 x granulation 240 91104589
13 Angle stop 91104582
13 a Angle stop rail 91104581
13 b Angle stop screw 91104583
11 Sanding table 91104580
14 Angle adapter 91104575
15 Adapter 91104576

1 3
N II EG B
Guarantee Cover
The equipment has been carefully pro-
duced in accordance with strict quality
guidelines and conscientiously checked
prior to delivery.
The guarantee applies for all material and
manufacturing defects. This guarantee
does not extend to cover product parts
that are subject to normal wear and may
therefore be considered as wearing parts
(e.g. sanding paper) or to cover damage to
breakable parts (e.g. switches).
This guarantee shall be invalid if the prod-
uct has been damaged, used incorrectly or
not maintained. Precise adherence to all of
manual is required for proper use of the
product. Intended uses and actions against
which the operating manual advises or
warns must be categorically avoided.
The product is designed only for private
and not commercial use. The guarantee
will be invalidated in case of misuse or
improper handling, use of force, or inter-
ventions not undertaken by our authorised
service branch.
Processing in Case of Guarantee
• Please have the receipt and item num-
ber (IAN 290842) ready as proof of
purchase for all enquiries.
-
ing plate.
• Should functional errors or other de-
fects occur, please initially contact the
telephone or by e-mail. You will then
receive further information on the pro-
cessing of your complaint.
Guarantee
Dear Customer,
This equipment is provided with a 3-year
guarantee from the date of purchase.
In case of defects, you have statutory rights
against the seller of the product. These
statutory rights are not restricted by our
guarantee presented below.
Terms of Guarantee
The term of the guarantee begins on the
date of purchase. Please retain the original
receipt. This document is required as proof
of purchase.
If a material or manufacturing defect
occurs within three years of the date of
purchase of this product, we will repair or
replace – at our choice – the product for
you free of charge. This guarantee requires
the defective equipment and proof of pur-
chase to be presented within the three-year
period with a brief written description of
what constitutes the defect and when it oc-
curred.
If the defect is covered by our guarantee,
you will receive either the repaired product
or a new product. No new guarantee pe-
riod begins on repair or replacement of the
product.
Guarantee Period and Statutory
Claims for Defects
The guarantee period is not extended by
the guarantee service. This also applies for
replaced or repaired parts. Any damages
and defects already present at the time of
purchase must be reported immediately af-
ter unpacking. Repairs arising after expiry
of the guarantee period are chargeable.

1 4
G B I E N I
• After consultation with our customer
service, a product recorded as defective
can be sent postage paid to the service
address communicated to you, with the
proof of purchase (receipt) and speci-
and when it occurred. In order to avoid
acceptance problems and additional
costs, please be sure to use only the ad-
dress communicated to you. Ensure that
the consignment is not sent carriage
forward or by bulky goods, express or
other special freight. Please send the
equipment inc. all accessories supplied
at the time of purchase and ensure ad-
equate, safe transport packaging.
Repair Service
For a charge, repairs not covered by
the guarantee can be carried out by
our service branch, which will be happy to
issue a cost estimate for you.
We can handle only equipment that has
been sent with adequate packaging and
postage.
Attention: Please send your equipment to
our service branch in clean condition and
with an indication of the defect.
Equipment sent carriage forward or by
bulky goods, express or other special
freight will not be accepted.
We will dispose of your defective devices
free of charge when you send them to us.
Service-Center
G B
Service Great Britain
1 5
(£ 0.10/Min.)
IAN 290842
I E
Service Ireland
N I
Service Northern Ireland
1 4
(0,08 EUR/Min., (peak))
(0,06 EUR/Min., (off peak))
IAN 290842
Importer
Please note that the following address is
not a service address. Please initially con-
Grizzly Tools GmbH & Co KG
Stockstädter Straße 20
63762 Großostheim
Germany
www.grizzly-service.eu

1 5
CHATDE
Inhalt
Einleitung ...................................15
Bestimmungsgemäße
Verwendung .............................. 15
Allgemeine Beschreibung ........... 16
Lieferumfang..................................16
Funktionsbeschreibung ....................16
Übersicht ......................................16
Technische Daten ........................16
Sicherheitshinweise .................... 17
Symbole und Bildzeichen ................17
Allgemeine Sicherheitshinweise .......17
Allgemeine Sicherheitshinweise
für Elektrowerkzeuge ......................17
Sicherheitshinweise
für Tellerschleifer ............................20
Restrisiken .....................................21
Inbetriebnahme .........................21
Tellerschleifgerät sichern .................21
Schleiftisch
demontieren / montieren ................21
Schleifpapier
aufkleben / auswechseln.....................22
Winkel des Schleiftisches einstellen ..22
Winkelanschlag verwenden ............22
Externe Staubabsaugung anschließen .22
Betrieb .......................................23
Ein- und Ausschalten .......................23
Schleifen .......................................23
Reinigung ..................................24
Wartung ....................................24
Lagerung ...................................24
Entsorgung / Umweltschutz ........24
Ersatzteile / Zubehör .................25
Garantie .................................... 26
Reparatur-Service ......................27
Service-Center ............................ 27
Importeur ..................................27
Einleitung
Herzlichen Glückwunsch zum Kauf Ihres
neuen Gerätes. Sie haben sich damit für
ein hochwertiges Gerät entschieden.
Dieses Gerät wurde während der Produkti-
on auf Qualität geprüft und einer Endkon-
trolle unterzogen. Die Funktionsfähigkeit
Ihres Gerätes ist somit sichergestellt.
Die Betriebsanleitung ist Bestandteil
dieses Gerätes. Sie enthält wichtige
Hinweise für Sicherheit, Gebrauch
und Entsorgung. Machen Sie sich
vor der Benutzung des Gerätes mit
allen Bedien- und Sicherheitshin-
weisen vertraut. Benutzen Sie das
Gerät nur wie beschrieben und für
die angegebenen Einsatzbereiche.
Bewahren Sie die Betriebsanleitung
gut auf und händigen Sie alle Un-
terlagen bei Weitergabe des Gerä-
tes an Dritte mit aus.
Bestimmungsgemäße
Verwendung
Das Tellerschleifgerät ist zum Schleifen von
Weich- und Harthölzern geeignet.
Das Gerät ist für den Einsatz im Heimwer-
kerbereich bestimmt. Es wurde nicht für
den gewerblichen Dauereinsatz konzipiert.
Das Gerät ist nicht zum Gebrauch durch
Personen unter 16 Jahren bestimmt. Ju-
1
nur unter Aufsicht benutzen.
Der Hersteller haftet nicht für Schäden, die
durch bestimmungswidrigen Gebrauch
oder falsche Bedienung verursacht wurden.
Original EG-Konformitäts-
erklärung .................................. 28

1 6
DE AT CH
Allgemeine
Beschreibung
Die Abbildung der wichtigsten
der vorderen und hinteren Aus-
klappseite.
Lieferumfang
Packen Sie das Gerät aus und kontrollieren
Sie, ob es vollständig ist. Entsorgen Sie
das Verpackungsmaterial ordnungsgemäß.
- Tellerschleifgerät
- Schleifteller
- Schraubzwinge
- Winkelanschlag
- 6 x Schleifpapier + Trägerfolie
- 2x Körnung 80
- 2x Körnung 150
- 2x Körnung 240
- Winkeladapter und Adapter
zur externen Staubabsaugung
- Innensechskantschlüssel
- Betriebsanleitung
Funktionsbeschreibung
Die Funktion der Bedienteile entnehmen Sie
bitte den nachfolgenden Beschreibungen.
Übersicht
1 Schleifteller
2 Drehzahlregler
3 Ein-/Ausschalter
4 Aufnahme für Schraubzwinge
5 Netzstecker
6 Winkelskala
7 Schraube zur Winkelarreteirung
8 Unterlegscheibe
9 Schraube
zur Schleiftischbefestigung
10 Schleiftischhalterung
11 Schleiftisch
12 Nut für Winkelanschlag
13 Winkelanschlag
13a Schiene Winkelanschlag
13b Schraube Winkelanschlag
14 Winkeladapter zur externen
Staubabsaugung
15 Adapter zur externen
Staubabsaugung
16 Schraubzwinge
17 Innensechskantschlüssel
18 Schleifpapier
19 Trägerfolie
Technische Daten
Tellerschleifgerät ....... PTSG 140 B2
Nenneingangsspannung ... 230 V~, 50 Hz
Leistungsaufnahme ... 140 W (S2 15 min)*
Leerlaufdrehzahl (n
0
) .......max. 3600 min
-1
Schutzklasse ....................................II
Schutzart ........................................IPX0
Gewicht .......................................2,4 kg
Durchmesser Schleifteller ............ 125 mm
Schalldruckpegel
(L
pA
) ................... 62,7 dB(A); K
pA
= 3 dB
Schallleistungspegel (L
WA
)
gemessen .......... 75,7 dB(A); K
WA
= 3 dB
* Auf die ununterbrochene Betriebsdauer von
15 Minuten erfolgt eine Ruhepause, bis die
Gerätetemperatur weniger als 2 K (2°C) von
der Raumtemperatur abweicht.
Lärmwerte wurden entsprechend den in
der Konformitätserklärung genannten Nor-
men und Bestimmungen ermittelt.

1 7
CHATDE
Sicherheitshinweise
ACHTUNG! Beim Gebrauch von
Elektrowerkzeugen sind zum Schutz
gegen elektrischen Schlag, Verlet-
zungs- und Brandgefahr folgende
grundsätzliche Sicherheitsmaßnah-
men zu beachten.
Lesen Sie alle diese Hinweise,
bevor Sie dieses Elektrowerkzeug
benutzen, und bewahren Sie die
Sicherheitshinweise gut auf.
Symbole und Bildzeichen
Bildzeichen auf dem Gerät:
Achtung!
Betriebsanleitung lesen!
Gefahr durch elektrischen Schlag!
Ziehen Sie vor Wartungs- und Re-
paraturarbeiten den Netzstecker
aus der Steckdose.
Tragen Sie Augen-, Gehörschutz
Tragen Sie einen Atemschutz.
Tragen Sie Schutzhandschuhe.
Schutzklasse II (Doppelisolierung)
Drehrichtung der Schleifscheibe
Elektrogeräte gehören nicht in den
Hausmüll.
Symbole in der Betriebsanleitung:
Gefahrenzeichen mit Anga-
ben zur Verhütung von Per-
sonen- oder Sachschäden.
Gebotszeichen mit Angaben zur
Verhütung von Schäden.
Schließen Sie das Gerät an die
Netzspannung an.
Ziehen Sie den Netzstecker.
Hinweiszeichen mit Informationen
zum besseren Umgang mit dem
Gerät.
Allgemeine
Sicherheitshinweise
Achtung! Beim Gebrauch von Elek-
trowerkzeugen sind zum Schutz
gegen elektrischen Schlag, Verlet-
zungs- und Brandgefahr folgende
grundsätzliche Sicherheitsmaßnah-
Es besteht die Gefahr von Verlet-
zungen.
Allgemeine
Sicherheitshinweise für
Elektrowerkzeuge
WARNUNG! Lesen Sie alle
Sicherheitshinweise und An-
weisungen. Versäumnisse bei der
Einhaltung der Sicherheitshinweise
und Anweisungen können elekt-
rischen Schlag, Brand und/oder
schwere Verletzungen verursachen.
Bewahren Sie alle Sicherheitshin-
weise und Anweisungen für die
Zukunft auf.
Der in den Sicherheitshinweisen verwende-
te Begriff ,,Elektrowerkzeug” bezieht sich
auf netzbetriebene Elektrowerkzeuge (mit
Netzkabel) und auf akkubetriebene Elekt-
rowerkzeuge (ohne Netzkabel).

1 8
DE AT CH
• Tragen Sie geeignete Kleidung.
- Tragen Sie keine weite Kleidung oder
Schmuck, sie könnten von bewegli-
chen Teilen erfasst werden.
- Bei Arbeiten im Freien ist rutschfestes
Schuhwerk empfehlenswert.
- Tragen Sie bei langen Haaren ein
Haarnetz.
• Benutzen Sie Schutzausrüstung.
- Tragen Sie eine Schutzbrille.
- Verwenden Sie bei stauberzeugenden
Arbeiten eine Atemmaske.
• Schließen Sie die Staubabsaug-
Einrichtung an. Falls Anschlüsse zur
Staubabsaugung und Auffangeinrich-
tung vorhanden sind, überzeugen Sie
sich, dass diese angeschlossen und
richtig benutzt werden.
• Verwenden Sie das Kabel nicht
für Zwecke, für die es nicht be-
stimmt ist. Benützen Sie das Kabel
nicht, um den Stecker aus der Steckdo-
se zu ziehen. Schützen Sie das Kabel
vor Hitze, Öl und scharfen Kanten.
• Sichern Sie das Werkstück. Benüt-
zen Sie Spannvorrichtungen oder einen
Schraubstock, um das Werkstück fest-
zuhalten. Es ist damit sicherer gehalten
als mit Ihrer Hand.
• Vermeiden Sie abnormale Kör-
perhaltung. Sorgen Sie für sicheren
Stand und halten Sie jederzeit das
Gleichgewicht.
• Pegen Sie Ihre Werkzeuge mit
Sorgfalt.
- Halten Sie die Schneidwerkzeuge
scharf und sauber, um besser und si-
cherer arbeiten zu können.
- Befolgen Sie die Hinweise zur Schmie-
rung und zum Werkzeugwechsel.
- Kontrollieren Sie regelmäßig die An-
schlussleitung des Elektrowerkzeugs und
lassen Sie diese bei Beschädigung von
einem anerkannten Fachmann erneuern.
Sicheres Arbeiten
• Halten Sie Ihren Arbeitsbereich
in Ordnung. Unordnung im Arbeits-
bereich kann Unfälle zur Folge haben.
• Berücksichtigen Sie Umgebungs-
einüsse.
- Setzen Sie Elektrowerkzeuge nicht
dem Regen aus.
- Benützen Sie Elektrowerkzeuge nicht
in feuchter oder nasser Umgebung.
- Sorgen Sie für gute Beleuchtung des
Arbeitsbereichs.
- Benutzen Sie Elektrowerkzeuge nicht, wo
Brand- oder Explosionsgefahr besteht.
• Schützen Sie sich vor elektri-
schem Schlag. Vermeiden Sie Kör-
perberührungen mit geerdeten Teilen
(z.B. Rohren, Radiatoren, Elektroherden,
Kühlgeräten).
• Halten Sie andere Personen fern.
Lassen Sie andere Personen, insbeson-
dere Kinder, nicht das Elektrowerkzeug
oder das Kabel berühren. Halten Sie sie
von Ihrem Arbeitsbereich fern.
• Bewahren Sie unbenutzte Elekro-
werkzeuge sicher auf. Unbenutzte
Elektrowerkzeuge sollten an einem
trockenen, hochgelegenen oder abge-
schlossenen Ort, außerhalb der Reich-
weite von Kindern, abgelegt werden.
• Überlasten Sie Ihr Elektrowerk-
zeug nicht. Sie arbeiten besser und si-
cherer im angegebenen Leistungsbereich.
• Benutzen Sie das richtige Elekt-
rowerkzeug.
- Verwenden Sie keine leistungsschwa-
chen Maschinen für schwere Arbeiten.
- Benutzen Sie das Elektrowerkzeug
nicht für solche Zwecke, für die es
nicht vorgesehen ist. Benutzen Sie zum
Beispiel keine Handkreissäge zum
Schneiden von Baumästen oder Holz-
scheiten.

1 9
CHATDE
- Kontrollieren Sie Verlängerungslei-
tungen regelmäßig und ersetzen Sie
diese, wenn sie beschädigt sind.
- Halten Sie Handgriffe trocken, sauber
und frei von Öl und Fett.
• Ziehen Sie den Stecker aus der
Steckdose. Bei Nichtgebrauch des
Elektrowerkzeugs, vor der Wartung
und beim Wechsel von Werkzeugen
wie z.b. Sägeblatt, Bohrer, Fräser.
• Lassen Sie keine Werkzeug-
schlüssel stecken. Überprüfen Sie
vor dem Einschalten, dass Schlüssel
und Einstellwerkzeuge entfernt sind.
• Vermeiden Sie unbeabsichtigten
Anlauf. Vergewissern Sie sich, dass
der Schalter beim Einstecken des Ste-
ckers in die Steckdose ausgeschaltet ist.
• Benutzen Sie Verlängerungs-
kabel für den Außenbereich.
Verwenden Sie im Freien nur dafür
zugelassene und entsprechend gekenn-
zeichnete Verlängerungskabel.
• Seien Sie aufmerksam. Achten
Sie darauf, was Sie tun. Gehen Sie mit
Vernunft an die Arbeit. Benutzen Sie
das Elektrowerkzeug nicht, wenn Sie
unkonzentriert sind.
• Überprüfen Sie das Elektro-
werkzeug auf eventuelle Be-
schädigungen.
- Vor weiterem Gebrauch des Elekt-
rowerkzeugs müssen Schutzvorrich-
tungen oder leicht beschädigte Teile
sorgfältig auf ihre einwandfreie und
bestimmungsgemäße Funktion unter-
sucht werden.
- Überprüfen Sie, ob die beweglichen
Teile einwandfrei funktionieren und nicht
klemmen oder ob Teile beschädigt sind.
Sämtliche Teile müssen richtig montiert
sein und alle Bedingungen erfüllen,
um den einwandfreien Betrieb des
Elektrowerkzeugs zu gewährleisten.
- Beschädigte Schutzvorrichtungen
und Teile müssen bestimmungsgemäß
durch eine anerkannte Fachwerkstatt
repariert oder ausgewechselt werden,
soweit nichts anderes in der Ge-
brauchsanweisung angegeben ist.
- Beschädigte Schalter müssen bei einer
Kundendienstwerkstatt ersetzt werden.
- Benutzen Sie keine Elektrowerkzeuge,
bei denen sich der Schalter nicht ein-
und ausschalten lässt.
• ACHTUNG! Der Gebrauch anderer
Einsatzwerkzeuge und anderen Zube-
hörs kann eine Verletzungsgefahr für
Sie bedeuten.
• Lassen Sie Ihr Elektrowerkzeug
durch eine Elektrofachkraft re-
parieren. Dieses Elektrowerkzeug
entspricht den einschlägigen Sicher-
heitsbestimmungen. Reparaturen dürfen
nur von einer Elektrofachkraft ausge-
führt werden, indem Originalersatzteile
verwendet werden; andernfalls können
Unfälle für den Benutzer entstehen.
Service:
• Lassen Sie Ihr Elektrowerkzeug
nur von qualiziertem Fachper-
sonal und nur mit Original-Er-
satzteilen reparieren. Damit wird
sichergestellt, dass die Sicherheit des
Elektrowerkzeuges erhalten bleibt.

2 0
DE AT CH
Sicherheitshinweise für
Tellerschleifer
Achtung! Verletzungsgefahr!
Tragen Sie persönliche
Schutzausrüstung.
Tragen Sie eine Schutzbrille,
Gehörschutz, eine Staubmaske und
Handschuhe.
• Sorgen Sie beim Arbeiten unter staubi-
gen Bedingungen für freie Belüftungs-
öffnungen. Trennen Sie das Gerät vor
der Reinigung von der Netzversorgung.
• Achtung, Verletzungsgefahr! Die
Schleifscheibe läuft nach Abschalten
der Maschine noch kurz nach.
• Machen Sie Warnschilder am Elektro-
werkzeug niemals unkenntlich.
• Befestigen Sie das Elektrowerk-
zeug auf einer festen, ebenen
und waagerechten Fläche. Wenn
das Elektrowerkzeug verrutschen oder
wackeln kann, kann das Einsatzwerk-
zeug nicht gleichmäßig und sicher ge-
führt werden.
• Führen Sie das Einsatzwerkzeug
nur eingeschaltet gegen das
Werkstück. Es besteht sonst die Ge-
fahr, dasss sich das Einsatzwerkzeug
im Werkstück verhakt und das Werk-
stück mitgenommen wird. Dies kann zu
Verletzungen führen.
• Schalten Sie das Elektrowerk-
zeug sofort aus, wenn das Ein-
satzwerkzeug blockiert.
- das Elektrowerkzeug überlastet wird;
- es im zu bearbeitenden Werkstück
verkantet.
• Stellen Sie vor Arbeitsbeginn die
richtige Drehzahl ein.
• Fassen Sie die Schleifscheibe
nach dem Arbeiten nicht an, be-
vor es abgekühlt ist. Das Einsatz-
werkzeug wird beim Arbeiten sehr heiß.
• Untersuchen Sie regelmäßig das
Kabel und lassen Sie ein be-
schädigtes Kabel nur von einer
autorisierten Kundendienststelle
reparieren. Ersetzen Sie beschä-
digte Verlängerungskabel. Damit
wird sichergestellt, dass die Sicherheit
des Elektrowerkzeuges erhalten bleibt.
• Bewahren Sie das unbenutzte
Elektrowerkzeug sicher auf. Der
Lagerplatz muss trocken und
abschließbar sein. Dies verhindert,
dass das Elektrowerkzeug durch die
Lagerung beschädigt oder von unerfah-
renen Personen bedient wird.
• Verlassen Sie das Werkzeug nie,
bevor es vollständig zum Still-
stand gekommen ist. Nachlaufen-
de Einsatzwerkzeuge können Verletzun-
gen verursachen.
• Benutzen Sie das Elektrowerk-
zeug nicht mit beschädigtem Ka-
bel. Berühren Sie das beschädig-
te Kabel nicht und ziehen Sie den
Netzstecker, wenn das Kabel
während des Arbeitens beschä-
digt wird. Beschädigte Kabel erhöhen
das Risiko eines elektrischen Schlages.
• Vermeiden Sie abnormale Kör-
perhaltung. Sorgen Sie für sicheren
Stand und halten Sie jederzeit das
Gleichgewicht.
• Der Austausch des Steckers oder der
Anschlussleitung ist immer vom Herstel-
ler der Elektrowerkzeugs oder seinem
Kundendienst auszuführen.
• Wasser ist von elektrischen Teilen des
Elektrowerkzeugs und von Personen im
Arbeitsbereich fernzuhalten.
• Achtung! Entfernen Sie nie lose
Splitter, Späne oder einge-
klemmte Holzteile bei laufendem
Seite wird geladen ...
Seite wird geladen ...
Seite wird geladen ...
Seite wird geladen ...
Seite wird geladen ...
Seite wird geladen ...
Seite wird geladen ...
Seite wird geladen ...
Seite wird geladen ...
Seite wird geladen ...
Seite wird geladen ...
Seite wird geladen ...
-
 1
1
-
 2
2
-
 3
3
-
 4
4
-
 5
5
-
 6
6
-
 7
7
-
 8
8
-
 9
9
-
 10
10
-
 11
11
-
 12
12
-
 13
13
-
 14
14
-
 15
15
-
 16
16
-
 17
17
-
 18
18
-
 19
19
-
 20
20
-
 21
21
-
 22
22
-
 23
23
-
 24
24
-
 25
25
-
 26
26
-
 27
27
-
 28
28
-
 29
29
-
 30
30
-
 31
31
-
 32
32


Parkside PTSG 140 B2 Translation Of The Original Instructions
- Kategorie
- Elektrowerkzeuge
- Typ
- Translation Of The Original Instructions
in anderen Sprachen
- English: Parkside PTSG 140 B2
Verwandte Artikel
-
Parkside PTSG 140 A1 Translation Of The Original Instructions
-
Parkside PWBS 180 A1 Translation Of The Original Instructions
-
Parkside PMFS 200 B2 Translation Of The Original Instructions
-
-
Parkside PKGA 20-Li B1 Original Instructions Manual
-
Parkside PHS 160 E5 Translation Of The Original Instructions
-
-
-
Parkside PEXS 270 A1 Benutzerhandbuch
-
Parkside 317125-1904 Translation Of The Original Instructions