
1
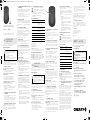
①DPI-Taste mit LED für Batteriestatus, DPI-
Einstellung und Funkverbindung
Bevor Sie beginnen ...
Die CHERRY MW 2180 ist eine kabellose Maus zur
Bedienung von PCs/Notebooks.
Für Informationen zu weiteren Produkten, Downloads
und vielem mehr, besuchen Sie bitte www.cherry.de.
1 Zu Ihrer Sicherheit
Erstickungsgefahr durch Verschlucken von
Kleinteilen
• Bewahren Sie das Gerät außerhalb der Reichweite
von Kindern unter 3 Jahren auf.
Explosionsgefahr durch falsche oder falsch
eingelegte Batterie
• Verwenden Sie nur Batterien des in den
Technischen Daten genannten Typs.
• Legen Sie die Batterie entsprechend der
Markierungen (+/-) im Batteriefach ein.
"Repetitive Strain Injury" = "Verletzung durch
wiederholte Beanspruchung"
RSI entsteht durch kleine, sich ständig
wiederholende Bewegungen.
• Richten Sie Ihren Arbeitsplatz ergonomisch ein.
• Machen Sie mehrere kleine Pausen, ggf. mit
Dehnübungen.
• Ändern Sie oft Ihre Körperhaltung.
2 Empfänger mit dem PC/Notebook
verbinden
1 Ziehen Sie den Empfänger aus dem Fach an der
Unterseite der Maus.
2 Schließen Sie den Empfänger möglichst an einer
USB 2.0-Buchse des PCs/Notebooks an (diese hat
meist eine weiße oder schwarze Führung).
3 Legen Sie eine Batterie in die Maus ein.
3 Empfänger in der Maus verstauen
Der Empfänger ist so klein, dass er auch beim
Transport eines Notebooks in der USB-Buchse
bleiben kann. Zum Schutz vor Verschmutzung und
Verlust ziehen Sie den Empfänger ab und deponieren
ihn in der Maus.
DE BEDIENUNGS-
ANLEITUNG
Jedes Gerät ist anders!
In der Bedienungsanleitung erhalten Sie
Hinweise zur effektiven und zuverlässigen
Verwendung.
• Lesen Sie die Bedienungsanleitung
aufmerksam durch.
• Bewahren Sie die Bedienungsanleitung auf und
geben Sie sie an andere Benutzer weiter.
4 Empfindlichkeit der Maus einstellen
(DPI-Zahl)
Zum präzisen Arbeiten können Sie die Auflösung des
Sensors der Maus ändern. Mit der Höhe der DPI-Zahl
steigt die Geschwindigkeit des Mauszeigers.
• Drücken Sie die DPI-Taste.
Die DPI-Zahl wechselt mit jedem Druck. Die LED
blinkt je nach Einstellung:
1x = 1000 dpi, 2x = 1600 dpi, 3x = 2400 dpi
5 Mausuntergrund
Eine helle, strukturierte Fläche als Mausuntergrund
steigert die Effektivität der Maus, spart Energie und
gewährleistet eine optimale Bewegungserkennung.
Eine spiegelnde Fläche ist als Mausuntergrund nicht
geeignet.
6 Energiespar-Funktion
Die Maus schaltet bei Nichtbenutzung in den
Energiesparmodus, in dem sie fast keine Energie
benötigt. Bei der ersten Bewegung schaltet sie sich
automatisch wieder ein.
Einen Transport der Maus nimmt diese als Bewegung
wahr und ist ständig aktiv. Um die Batterie zu
schonen, sollten Sie sie deshalb während des
Transports aus der Maus nehmen.
7 Batteriestatus
Wenn die Spannung der Batterie der Maus nachlässt,
beginnt die LED langsam zu blinken.
• Wechseln Sie die Batterie möglichst bald.
8 Geräte individuell konfigurieren
Mit der Software CHERRY KEYS können Sie die
Tasten der Maus und viele Tasten der Tastatur frei
belegen. Dadurch können Sie mit einem Tastendruck
auf Apps, Dateien, individuelle Textbausteine oder
Makros zugreifen.
Sie erhalten CHERRY KEYS als kostenlosen
Download auf www.cherry.de.
Probieren Sie es aus!
9 Maus reinigen
1 Entnehmen Sie die Batterie aus der Maus.
HINWEIS: Beschädigung durch aggressive
Reinigungsmittel oder Flüssigkeit in der Maus
• Verwenden Sie zur Reinigung keine Lösungsmittel
wie Benzin oder Alkohol und keine Scheuermittel
oder Scheuerschwämme.
• Verhindern Sie, dass Flüssigkeit in die Maus
gelangt.
2 Reinigen Sie die Maus mit einem leicht feuchten
Tuch und etwas mildem Reinigungsmittel
(z. B. Geschirrspülmittel).
3 Trocknen Sie die Maus mit einem fusselfreien,
weichen Tuch.
10 Falls die Maus nicht funktioniert
• Prüfen Sie, ob die Batterie korrekt eingelegt ist
und genügend Spannung hat.
• Schließen Sie den Empfänger an einer USB 2.0-
Buchse des PCs/Notebooks an (diese hat meist
eine weiße oder schwarze Führung). An USB 3.0-
Buchsen (blaue Führung) kommt es manchmal zu
Fehlfunktionen.
• Schließen Sie den Empfänger an einem anderen
USB-Anschluss am PC/Notebook an.
• Stellen Sie eine neue Verbindung zum Empfänger
her:
– Halten Sie die Maus möglichst nah an den
Empfänger.
– Drücken Sie 3 Sekunden lang gleichzeitig die
Scrollrad-Taste und die linke und rechte
Maustaste.
Die LED leuchtet 20 Sekunden.
– Ziehen Sie währenddessen den Empfänger aus
der USB-Buchse und stecken Sie ihn wieder
ein.
Wenn die LED erlischt, ist die Verbindung
hergestellt. Falls die Maus nicht funktioniert:
Wiederholen Sie den Vorgang.
11 Geräte und Batterien entsorgen
• Entsorgen Sie Geräte und Batterien mit
diesem Symbol nicht mit dem Hausmüll.
• Entnehmen Sie die Batterien aus den
Geräten.
• Entsorgen Sie die Geräte und Batterien,
entsprechend den gesetzlichen Vorschriften, bei
Ihrem Händler oder den kommunalen
Sammelstellen.
12 Technische Daten
13 Kontakt
Cherry Europe GmbH
Cherrystraße 2
91275 Auerbach/OPf.
Internet: www.cherry.de
Telefon: +49 (0) 9643 2061-100*
*zum Ortstarif aus dem deutschen Festnetz, abweichende
Preise für Anrufe aus Mobilfunknetzen möglich
14 EU-Konformitätserklärung
Hiermit erklärt die Cherry Europe GmbH,
Auerbach/OPf., Deutschland, dass dieser
Funkanlagentyp der Richtlinie 2014/53/EU
entspricht. Den vollständigen Text der EU-Konformi-
tätserklärung finden Sie unter folgender Internet-
Adresse: www.cherry.de/compliance.
①DPI button with LED for battery status, DPI
setting and wireless connection
Before you begin ...
The CHERRY MW 2180 is a wireless mouse for
operating PCs and laptops.
For information on other products, downloads and
much more, visit us at www.cherry.de.
1For your safety
Risk of choking from swallowing small parts
• Keep the device out of the reach of children under
3 years.
Danger of explosions due to wrong or incorrectly
inserted battery
• Only use batteries of the type named in the
technical specification.
• Insert the battery in accordance with the markings
(+/-) in the battery compartment.
RSI stands for "Repetitive Strain Injury"
RSI arises due to small movements continuously
repeated over a long period of time.
• Set up your workspace ergonomically.
• Take several short breaks, with stretching
exercises if necessary.
• Change your posture often.
Bezeichnung Wert
Versorgungsspannung Maus: 0,9 ... 1,5 V SELV
Empfänger:
5,0 V/DC ±5 % SELV
Stromaufnahme Maus: max. 10 mA
Empfänger: max. 25 mA
Batterie 1 Alkali-Mangan-Batterie,
Typ LR6 (AA)
Sendefrequenz 2400,0 ... 2483,5 MHz
Sendeleistung Max. 10 mW (EIRP)
Lagertemperatur -20 °C ... +65 °C
Betriebstemperatur 0 °C ... +50 °C
EN OPERATING
MANUAL
Every device is different!
The operating instructions contain
information on effective and reliable use.
• Read the operating instructions carefully.
• Keep the operating instructions and pass them
on to other users.
2 Connecting the receiver to the PC/
laptop
1 Pull the receiver out of the compartment on the
bottom of the mouse.
2 Connect the receiver to a USB 2.0 port on your PC/
laptop if possible (this usually has a white or black
guide).
3 Insert a battery into the mouse.
3 Storing the receiver in the mouse
The receiver is so small that it can stay in the USB
socket of a laptop while being transported. To avoid
any damage, you can also pull out the receiver and
deposit it in the mouse to protect it from dirt and
loss.
4 Setting the sensitivity of the mouse
(DPI rate)
For precise work you can change the resolution of the
mouse sensor. The speed of the mouse pointer
increases with the level of the DPI rate.
• Press the DPI button.
The DPI rate changes every time the button is
pressed. The LED flashes according to the setting:
1x = 1000 dpi, 2x = 1600 dpi, 3x = 2400 dpi
5 Surface under the mouse
The mouse is most effective on a light-colored,
textured surface, which saves energy and ensures
optimal motion detection.
A reflective surface is not suitable for using the
mouse on.
6 Energy-saving function
When not in use, the mouse switches to a energy-
saving mode which requires almost no power. The
first movement switches it back on automatically.
When the mouse is transported, it recognizes this as
movement and is permanently activated. For this
reason, to preserve the battery, you should remove it
from the mouse during transport.
7Battery status
When the voltage of the mouse battery drops, the
LED starts to flash slowly.
• Replace the battery as soon as possible.
8 Configure devices individually
With the CHERRY KEYS software you can freely
assign the mouse buttons and many keys on the
keyboard. This allows you to access apps, files,
individual text modules or macros at the touch of a
button.
You can obtain CHERRY KEYS as a free download at
www.cherry.de.
Give it a go!
9Cleaning the mouse
1 Remove the battery from the mouse.
NOTICE: Damage due to aggressive cleaning agents
or liquid in the mouse
• Do not use solvents such as benzene, alcohol,
scouring agents or abrasive scourers for cleaning
the mouse.
• Prevent any liquid from getting inside the mouse.
2 Clean the mouse with a slightly damp cloth and
some mild detergent (such as washing-up liquid).
3 Dry the mouse with a soft, lint-free cloth.
10 If the mouse is not working
• Check whether the battery is inserted correctly
and has sufficient voltage.
• Connect the receiver to a USB 2.0 port on your
PC/laptop (this usually has a white or black guide).
Malfunctions occasionally occur on USB 3.0 ports
(blue guide).
• Connect the receiver to another USB 2.0 port on
the PC/laptop.
• To establish a new connection to the receiver:
– Hold the mouse as close as possible to the
receiver.
– Simultaneously press the Scroll button and the
left and right mouse buttons and hold for
3 seconds.
The LED lights up for 20 seconds.
– During this time, disconnect the receiver from
the USB port and plug it back in again.
When the LED goes out, the connection is
established. If the mouse is not working:
Repeat the process.
11 Disposing of the devices and
batteries
• Do not dispose of devices and batteries
with this symbol in household waste.
• Take the batteries out of the devices.
• Dispose of the devices and batteries in accordance
with statutory regulations – at your local dealer or
at municipal recycling centers.
12 Technical data
13 Certifications
13.1 EU Declaration of conformity
The company Cherry Europe GmbH, Auer-
bach/OPf., Germany hereby declares that
this radio system model conforms to the
European guideline 2014/53/EU. The full text of the
EU declaration of conformity can be found under the
following Internet address:
www.cherry.de/compliance.
13.2 Federal Communications Commission
(FCC) Radio Frequency Interference
Statement
This device complies with part 15 of the FCC Rules.
Operation is subject to the following two conditions:
(1) This device may not cause harmful interference,
and (2) this device must accept any interference
received, including interference that may cause
undesired operation.
Note: This equipment has been tested and found to
comply with the limits for a Class B digital device,
pursuant to part 15 of the FCC Rules. These limits
are designed to provide reasonable protection against
harmful interference in a residential installation. This
equipment generates, uses and can radiate radio
frequency energy and, if not installed and used in
accordance with the instructions, may cause harmful
interference to radio communications. However,
there is no guarantee that interference will not occur
in a particular installation. If this equipment does
cause harmful interference to radio or television
reception, which can be determined by turning the
equipment off and on, the user is encouraged to try to
correct the interference by one or more of the
following measures:
Designation Value
Supply voltage Mouse: 0.9 ... 1.5 V SELV
Receiver:
5.0 V/DC ±5% SELV
Power consumption Mouse: max. 10 mA
Receiver: max. 25 mA
Battery 1 alkaline-manganese
battery, type LR6 (AA)
Transmission
frequency
2400.0 ... 2483.5 MHz
Transmission power Max. 10 mW (EIRP)
Storage temperature -20 °C ... +65 °C
Operating temperature 0 °C ... +50 °C
• Reorient or relocate the receiving antenna.
• Increase the separation between the equipment
and receiver.
• Connect the equipment into an outlet on a circuit
different from that to which the receiver is
connected.
• Consult the dealer or an experienced radio/TV
technician for help.
Caution: Any changes or modifications not expressly
approved by the party responsible for compliance
could void the user's authority to operate the
equipment.
13.3 RF exposure statement
This device complies with the RF exposure
requirements for mobile and fixed devices. However,
the device shall be used in such a manner that the
potential for human contact during normal operation
is minimized.
13.4 UKCA
UK Authorised Representative:
Authorised Representative Service
The Old Methodist Chapel
Great Hucklow
SK17 8RG
UK
①DPI 键带有 LED,可显示电池状态、
DPI 设置与无线连接
在开始操作之前 ...
CHERRY MW 2180 是一款用于操作电脑 / 笔记本
电脑的无线鼠标。
关于其他产品的信息、下载和更多服务请访问
www.cherry-world.com。
1为了您的安全
吞咽小零件可能会引起窒息危险
•请将设备保存在 3 岁以下儿童无法够及之
处。
错误放入的电池有爆炸危险
•仅可使用技术数据中指定的电池类型。
•按照电池仓中的标记 (+/-) 放入电池。
“
Repetitive Strain Injury
”=“重复性劳损”
RSI 是由于频繁重复的小幅度运动造成的。
•按照人体工程学调整您的工作位置。
•多加休息,必要时进行伸展运动。
•经常变换您的身体姿势。
2将接收器连接到电脑 / 笔记本电
脑上
1从鼠标底部的隔层中拔出接收器。
2尽量将接收器连接到电脑 / 笔记本电脑的
USB 2.0 插口中 (通常有白色或黑色的导
线)。
3将电池放入鼠标中。
简体字 操作手册
设备各不相同!
在使用说明书中您可以获取有关可靠
高效操作的说明。
•请仔细阅读使用说明书。
•请保管好使用说明书,必要时将其转交给
其他用户。
64410169-00, DE, EN, ZHs, ZHt, © Mär 2022
(JW-2180xx-x/xx = Mod. JF-2180, JR-2180)
CHERRY MW 2180
Wireless Mouse
①
64410169-00_DE-EN-2ZH_MW2180.fm Seite 1 Sonntag, 27. März 2022 2:45 14. Cut to size 330 x 240 mm.

2
3接收器存放在鼠标中
接收器非常小,即使是在移动笔记本电脑时也
可以保留在 USB 插口中。为了防止污染和丢
失,在不使用时请拔下接收器并将其存放在鼠
标中。
4设置鼠标的灵敏度 (DPI 数值)
对于精细操作,您可以更改鼠标传感器的分辨
率。 DPI 数值越高,鼠标的速度越快。
•按下 DPI 键。
每按一次, DPI 数值就会改变。 LED 会根
据设置闪烁:
1x = 1000 dpi、2x = 1600 dpi、3x = 2400 dpi
5鼠标底面
在浅色的结构化底面上使用鼠标可提高鼠标的
效率、节省能耗并确保最佳的运动识别。
不适合在反光表面上使用鼠标。
6节能功能
鼠标在不使用时进入节能模式,几乎不需要消
耗电量。下一次移动时,鼠标将自动再次启
动。
鼠标会将运输过程识别为运动过程,因此会一
直处于激活状态。因此,为了保护电池,您应
在运输期间从鼠标取出电池。
7电池状态
当鼠标电池电量不足时, LED 会开始缓慢闪
烁。
•应尽快更换电池。
8个性化配置设备
您可以使用 CHERRY KEYS 软件自由分配鼠标
键和键盘的多个按键。如此一来,只需单击
App,您就能够访问各种文件、个性化的文本
模块或宏。
请在 www.cherry-world.com 免费下载 CHERRY
KEYS。
来试试吧!
9清洁鼠标
1从鼠标取出电池。
注意!腐蚀性清洁剂和液体会损坏鼠标
•清洁时切勿使用汽油或酒精之类的溶剂,
也不得使用去污剂或百洁布。
•避免液体进入鼠标。
2请使用微湿的清洁布和柔和的清洁剂
(如餐具洗涤剂)清洁鼠标。
3然后用柔软不掉毛的清洁布将鼠标擦干。
10 如果鼠标不能正常工作
•检查电池是否已正确放入并且有足够的电
压。
•将接收器连接到电脑/笔记本电脑的 USB 2.0
插口中 (通常有白色或黑色的导线)。
USB 3.0 插口 (蓝色导线)有时会发生故
障。
•将接收器连接到电脑 / 笔记本电脑上的另一
个 USB 接口。
•与接收器建立新的连接:
–将鼠标尽可能靠近接收器。
–同时按住滚轮键和鼠标左右键 3 秒。
LED 亮起 20 秒。
–在此过程中,将接收器从 USB 插口中拔
出并再次插入。
如 LED 熄灭,代表已建立连接。如果鼠
标不能正常工作:重复上述过程。
11 设备和电池的废弃处理
•不得将具有此符号的设备和电池混入
生活垃圾一同废弃处理。
•从设备中取出电池。
•根据法律规定,在您的经销商处或市政收集
点废弃处理这些设备和电池。
12 技术参数
13 联系方式
珠海确励电子有限公司
珠海市高新区唐家湾镇金园一路 8 号
519060 珠海,广东
电话:400-699-0333
www.cherry-world.com
確勵香港電子有限公司
香港九龍尖沙咀廣東道 30 號新港
中心二座 5樓509 號室 19 號房
电话:00852 3959 8252
www.cherry-world.com
①具LED 燈的 DPI 鍵,可顯示電池狀態、
DPI 設定和無線連接
在您開始前 ...
CHERRY MW 2180 是一款用於操作電腦 / 筆記型
電腦的無線滑鼠。
關於其他產品的訊息、下載和更多服務請造訪
www.cherry-world.com。
1為了您的安全
吞嚥小部件會導致窒息
•請將裝置存放在 3 歲以下兒童無法觸及之
處。
注意:電池不正確或插入不正確導致爆
炸危險
•請只使用技術數據中提及的電池型號。
•按照 (+/-) 標記將電池放入電池盒中。
「
Repetitive Strain Injury
」= 「重複性勞損」
RSI 是由持續重複的小動作造成的。
•按照人體工學調整您的工位。
•縮短休息間隔,必要時進行伸展運動。
•經常變換您的身體姿勢。
2連接接收器和電腦 / 筆記型電腦
1從滑鼠底部的格層中拉出接收器。
2盡可能將接收器連接到電腦 / 筆記型電腦的
USB 2.0 插口上 (這通常有白色或黑色的導
線)。
3將電池放入滑鼠中。
名称 数值
电源电压 鼠标:0.9 ... 1.5 V SELV
接收器: 5.0 V/DC ±5 % SELV
电流消耗 鼠标:最大 10 mA
接收器:最大 25 mA
电池 1 个碱性锰电池,型号
LR6 (AA)
发射频率 2400.0 ... 2483.5 MHz
发射功率 最大 10 mW (EIRP)
存放温度 -20 °C ... +65 °C
运行温度 0 °C ... +50 °C
繁體字 使用說明書
每個裝置都不一樣!
使用說明書中包含有效和可靠使用的
提示。
•仔細閱讀使用說明書。
•妥善保管使用說明書並傳遞給其他使用
者。
3接收器裝填在滑鼠中
接收器很小,可以在筆記型電腦運輸時保留在
USB 插孔中。為了防止污染和損失,拔下接收
器並將其存放在滑鼠中。
4設定滑鼠的靈敏度 (DPI 數值)
為了更精準地完成工作,您可以更改滑鼠感測
器的解析度。DPI 數值越高,滑鼠指標的速度
就越快。
•按下 DPI 鍵。
每按一次,DPI 數值就會改變。LED 會根據
設定閃爍:
1x = 1000 dpi、2x = 1600 dpi、3x = 2400 dpi
5滑鼠操作表面
平整的淺色表面有助於提升滑鼠的效率、節約
電量,並可確保最優辨識滑鼠運動。
反光表面不適於滑鼠操作。
6節能功能
滑鼠在不使用時切入節能模式,幾乎不需要任
何電量。首次移動時,它將重新自動啟動。
運輸滑鼠被視為一種移動並且始終處於啟動狀
態。因此,為了保護電池,您應在運輸期間從
滑鼠取出電池。
7電池狀態
當滑鼠電池電量不足時,LED 會開始緩慢閃
爍。
•需盡快更換電池。
8個人化配置設備
您可以使用 CHERRY KEYS 軟體自由分配滑鼠鍵
和鍵盤的多個按鍵。如此一來,只需按一下
App,您就能夠存取各種檔案,個人化的文字
模組或巨集。
請在 www.cherry-world.com 免費下載
CHERRY KEYS。
來試試吧!
9清潔滑鼠
1從滑鼠取出電池。
注意!腐蝕性清潔劑和液體會損壞滑鼠
•勿使用汽油或酒精等溶劑,以及磨砂式表面
清潔劑、硬質海綿來進行清潔。
•防止液體進入滑鼠內部。
2請使用略微潤濕的清潔布及柔和的清潔劑
(例如餐具清潔劑)來清潔滑鼠。
3利用無絨軟布擦乾滑鼠。
10 如果滑鼠無作用
•檢查電池是否正確放入并具有充足的電壓。
•將接收器連接到電腦/筆記型電腦的 USB 2.0
插孔上 (這通常有白色或黑色的導線)。
USB 3.0 插孔 (藍色導線)上有時會發生故
障。
•將接收器連接到電腦的另一個 USB 接口。
•與接收器建立新的連接:
–將滑鼠盡可能靠近接收器。
–同時按住滾輪鍵和滑鼠左右鍵 3 秒。
LED 亮起 20 秒。
–在此過程中,將接收器從 USB 插口中拔
出並再次插入。
如 LED 熄滅,代表已建立連接。如果滑
鼠無法正常操作:重複上述過程。
11 裝置和電池的廢棄處理
•不得將具有此符號的裝置和電池混入
生活垃圾一起廢棄處理。
•從裝置中取出電池。
•根據法律規定,請在您的經銷商處或市政收
集點廢棄處理這些裝置和電池。
12 技術數據
13 聯絡方式
確勵電子有限公司 ( 香港 ),台灣分部
大安區光復南路 72 巷73 號2樓
市井商務中心
106 臺北市
電話:+886 2 7746 1776
www.cherry-world.com
名稱 數值
電源電壓 滑鼠:0.9 ... 1.5 V SELV
接收器: 5.0 V/DC ±5 % SELV
耗電量 滑鼠:最大 10 mA
接收器:最大 25 mA
電池 1 塊鹼性錳電池,型號 LR6 (AA)
發射頻率 2400.0 至2483.5 MHz
發射功率 最大 10 mW (EIRP)
存放溫度 -20 °C 至+65 °C
操作溫度 0 °C 至+50 °C
RECEIVER LABEL
CONTACT
For Europe
Cherry Europe GmbH
Cherrystraße 2
91275 Auerbach/OPf.
Germany
Internet: www.cherry.de
For USA
Cherry Americas, LLC
5732 95th Avenue
Suite 850
Kenosha, WI 53144
USA
Tel.: +1 262 942 6508
Email: sales@cherryamericas.com
Internet: www.cherryamericas.com
限用物質含有情況標示聲明書
(Declaration of the Presence Condition of the Restricted Substances Marking)
備考 1. 〝超出 0.1 wt %〞及 〝超出 0.01 wt %〞係指限用物質之百分比含量超出百分比含量基準值。
(Note 1: “Exceeding 0.1 wt %” and “exceeding 0.01 wt %” indicate that the percentage content of the restricted
substance exceeds the reference percentage value of presence condition.)
備考 2. 〝○〞係指該項限用物質之百分比含量未超出百分比含量基準值。
(Note 2: "○" indicates that the percentage content of the restricted substance does not exceed the percentage
of reference value of presence.)
備考 3. 〝-〞係指該項限用物質為排除項目。
(Note 3: "-" indicates that the restricted substance corresponds to the exemption.)
限用物質及其化學符號
(Restricted substances and its chemical symbols)
單元
(Unit) 鉛Pb
(Lead) 汞Hg
(Mer-
cury)
鎘 Cd
(Cad-
mium)
六價鉻 Cr+6
(Hexavalent
chromium)
多溴聯苯 PBB
(Polybrominated
biphenyls)
多溴二苯醚 PBDE
(Polybrominated
diphenyl ethers)
電路板 (PCB) ○○○ ○ ○ ○
電子部件
(Electric components) -○○ ○ ○ ○
焊膏 (Solder paste) ○○○ ○ ○ ○
電源線 (Cable) ○○○ ○ ○ ○
外殼 (Plastic parts) ○○○ ○ ○ ○
金屬零件 (Metal parts) ○○○ ○ ○ ○
橡膠零件 (Rubber parts) ○○○ ○ ○ ○
電池 (Battery) -○○ ○ ○ ○
关于有害物质的用户说明 ( 中华人民共和国电子工业标准 SJ/T11364-2014)
○:表示该有害物质在该部件所有均质材料中的含量均在 GB/T 26572 标准规定的限量以下。
X: 表示该有害物质至少在该部件的某一均质材料中的含量超过 GB/T 26572 标准规定的限量。
注: 环保使用期限取决于产品正常工作的温度和湿度等条件。
有毒有害物质或元素
部件名称 Pb
[铅]
Hg
[汞] Cd
[镉] Cr+6
[ 六价铬 ] PBB
[ 多溴联苯 ] PBDE
[多溴二苯醚]
PCB/ 挠性电路 ○○○ ○ ○ ○
电子元器件 X○○ ○ ○ ○
锡膏 ○○○ ○ ○ ○
缆线 ○○○ ○ ○ ○
塑料部件 ○○○ ○ ○ ○
金属部件 ○○○ ○ ○ ○
橡胶部件 ○○○ ○ ○ ○
电池 X○○ ○ ○ ○
①
64410169-00_DE-EN-2ZH_MW2180.fm Seite 2 Sonntag, 27. März 2022 2:45 14
-
 1
1
-
 2
2


in anderen Sprachen
- English: Cherry MW 2180 User manual
- 日本語: Cherry MW 2180 ユーザーマニュアル
Verwandte Artikel
-
Cherry JD-8500EU-2 Benutzerhandbuch
-
Cherry MW 4500 Benutzerhandbuch
-
Cherry MW 8C Ergo Wireless Mouse Benutzerhandbuch
-
Cherry B.Unlimited AES Benutzerhandbuch
-
Cherry 64410150-00 GENTIX BT Bluetooth Mouse Benutzerhandbuch
-
Cherry MW 2400 Benutzerhandbuch
-
Cherry DW 910 Benutzerhandbuch
-
Cherry JD-8560BE-0 Benutzerhandbuch
-
Cherry DW 8000 Benutzerhandbuch
-
Cherry MX3824 Benutzerhandbuch