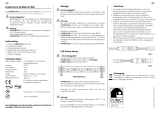
Collingwood Lighting LSNT Benutzerhandbuch
- Typ
- Benutzerhandbuch

Neon Strip I Ruban LED néon I Neonstreifen
Installation instructions I Consignes d’installation I Montageanleitung
t +44 (0) 1604 495 151 f +44 (0) 1604 495 095 e sales@collingwoodgroup.com w collingwoodlighting.com
Collingwood Lighting, Brooklands House, Sywell Aerodrome, Sywell, Northampton NN6 0BT, United Kingdom
t +33 (0) 4 816 816 10 f +33 (0) 4 816 816 11 e ventes@collingwoodgroup.com w collingwoodlighting.com
Collingwood Lighting Limited, 43-47 Avenue de la Grande Armée, 75 116, Paris, France
EN
FR
CWI 8247 V1
Installation
1. Isolate the mains supply, prior to wiring.
2. If necessary cut the strip to the required length, the
cutting lines are marked on the neon strip. To maintain IP
rating use the end cap to seal the neon strip (one end cap
is supplied with the neon strip; extra can be acquired)
3. Fix the mounting clips or profiles in the desired position.
If using clips minimum 3 per meter should be used (clips
and profiles available separately).
4. Install the neon strip in profiles or clips.
Note: Do not secure neon strip with nails, screws, staples
or anything that can damage the silicone coating
5. Connect the strip to a suitable constant voltage 24V driver.
Note: If used with solder-free connector make sure the
polarity is correct (black/white cable from the connector).
The polarity can change depending on where the
connector was installed, head or tail of the strip.
Installation data
• Isolate the mains supply, prior to wiring.
• This unit must be wired by a qualified electrician or
suitable competent person.
• Do not twist or bend excessively, see Fig 1 and Fig 2 for
bend radius
• Power consumption LSNS73/LSNT73- 6.5W/m, LSNS75/
LSNT75 – 9.6W/m
• Use only with SELV 24V constant voltage drivers.
Installation
1. Isolez l’alimentation secteur avant le câblage.
2. Si nécessaire, coupez le ruban à la longueur requise ; les
lignes de coupe sont marquées sur le ruban néon. Afin
de maintenir l’indice IP, utilisez l’embout pour sceller le
ruban néon (un embout est fourni et peut être acheté
séparément).
3. Fixez les clips de montage ou les profilés dans la position
souhaitée. Utilisez au moins 3 clips par mètre (clips et
profilés disponibles séparément).
4. Placez le ruban néon dans les profilés ou les clips.
Remarque: ne fixez pas le ruban néon avec des clous, des
vis, des agrafes ou tout ce qui pourrait endommager le
revêtement en silicone).
5. Connectez le ruban à un pilote 24V à tension constante
approprié.
Remarque: en cas d’utilisation avec un connecteur sans
soudure, assurez-vous que la polarité est correcte (câble
noir/blanc du connecteur). La polarité peut changer en
fonction de l’endroit où le connecteur est installé, en tête
ou en bout de ruban.
Données d’installation
• Isolez l’alimentation secteur avant le câblage.
• Cet élément doit être câblé par un électricien qualifié ou
une personne compétente.
• Ne pas tordre ou plier excessivement ; voir fig. 1 et fig. 2
pour le rayon de courbure.
• Consommation : LSNS73/LSNT73- 6,5W/m, LSNS75/
LSNT75 – 9,6W/m
• Utilisez uniquement avec des pilotes 24V SELV à tension
constante.
Einbau
1. Trennen Sie vor der Verdrahtung die Netzversorgung.
2. Schneiden Sie den Streifen ggf. auf die gewünschte
Länge, die Schnittlinien sind auf dem Neonstreifen
markiert. Um die IP-Schutzart beizubehalten, verwenden
Sie die Endkappe zum Abdichten des Neonstreifens
(eine Endkappe wird mit dem Neonstreifen geliefert;
zusätzliche können erworben werden)
3. Fixieren Sie die Montageclips oder Profile in der
gewünschten Position. Bei Verwendung von Clips sollten
mindestens 3 pro Meter verwendet werden (Clips und
Profile sind separat erhältlich).
4. Installieren Sie den Neonstreifen in Profilen oder Clips.
Hinweis: Neonstreifen nicht mit Nägeln, Schrauben,
Heftklammern oder anderen Gegenständen befestigen,
die Silikonbeschichtung beschädigen können
5. Verbinden Sie den Streifen mit einem geeigneten 24V
Konstantspannungstreiber.
Hinweis: Bei Verwendung mit lötfreien Steckern auf
richtige Polarität achten (schwarzes / weißes Kabel vom
Stecker). Die Polarität kann sich ändern, je nachdem,
wo der Stecker installiert wurde, Anfang oder Ende des
Streifens.
Installationsdaten
• Trennen Sie vor der Verdrahtung die Netzversorgung.
• Diese Einheit muss von einem qualifizierten Elektriker
oder einer geeigneten kompetenten Person verkabelt
werden.
• Nicht zu stark verdrehen oder biegen, siehe Fig 1 und Fig
2 für Biegeradius
• Leistungsaufnahme LSNS73/LSNT73 – 6,5 W/m,
LSNS75/LSNT75 – 9,6 W/m
• Nur mit SELV 24V Konstantspannungstreibern
verwenden.
Disposal of this product should be separate from household
waste. Please separate these items from other types
of waste and recycle them responsibly to promote the
sustainable reuse of material resource. Household
users should contact their local government office for
details of where and how they can take these items for
environmentally safe recycling.
Dieses Produkt darf nicht im Haushaltsmüll entsorgt
werden. Bitte trennen Sie diese Gegenstände von anderen
Abfallarten und recyceln Sie sie verantwortungsbewusst, um
die nachhaltige Wiederverwendung von Materialressourcen
zu fördern. Privathaushalte kontaktieren bitte ihre
regionalen Ämter für Informationen darüber.
Ce produit ne doit pas être éliminé avec les ordures
ménagères. Merci de le séparer des autres déchets et de
le recycler de manière responsable afin de promouvoir
la réutilisation des ressources matérielles. Les
consommateurs doivent contacter leurs autorités locales
pour plus d’information quant aux lieux et méthodes de
recyclage en accord avec la protection de l’environnement.
EN FR DE
5 year warranty
5 ans de garantie
5 Jahres-Garantie
Side bend strip LSNS
Ruban à courbure latérale LSNS
Seitenbiegestreifen LSNS
Fig 2.Fig 1.
R>60mm
R>60mm
12mm
12mm
13mm
17mm
Non-replaceable light source
Source non remplaçable
Nicht austauschbare Lichtquelle
This product contains a light source of energy efficiency class F
Ce produit contient une source lumineuse de classe d’efficacité énergétique F
Dieses Produkt enthält eine Lichtquelle mit der Energieeffizienzklasse F
Top bend strip LSNT
Ruban à courbure supérieure LSNT
Oberer Biegestreifen LSNT

t +44 (0) 1604 495 151 f +44 (0) 1604 495 095 e sales@collingwoodgroup.com w collingwoodlighting.com
Collingwood Lighting, Brooklands House, Sywell Aerodrome, Sywell, Northampton NN6 0BT, United Kingdom
t +33 (0) 4 816 816 10 f +33 (0) 4 816 816 11 e ventes@collingwoodgroup.com w collingwoodlighting.com
Collingwood Lighting Limited, 43-47 Avenue de la Grande Armée, 75 116, Paris, France
EN
FR
CWI 8247 V1
Installation of the solder-free strip-cable and strip-cable-
strip connector
1. Slide clear PC shell over the neon strip and insert the
silicone pad-3(see Fig 3).
2. Install the u-shaped teeth clip, with the teeth faced the
silicone coating(Fig 4)
3. Insert the silicone pad-1 over the connector pins (Fig 5).
4. Insert the connector plug so the pins are in contact with
strip copper pads (Fig 6).
5. Insert the u-shaped clip (Fig 7 and Fig 8).
6. Slide clear PC shell over the connector.
7. Regard the connector cable polarity (Black / White), as it
can change depending on the position it’s installed (head
or tail of the strip)
Installation du câble sans soudure et du connecteur néon
1. Faites glisser la gaine PC transparente sur le ruban néon
et insérez le tampon en silicone 3 (fig3).
2. Installez le clip dentelé en U, avec le bord dentelé face au
revêtement en silicone (fig. 4).
3. Insérez le tampon en silicone 1 au-dessus des broches
du connecteur (fig. 5).
4. Insérez la fiche du connecteur de façon à ce que les
broches soient en contact avec les bandes de cuivre
(fig 6).
5. Insérez le clip en U (fig. 7 et fig. 8).
6. Faites glisser la gaine PC transparente sur le connecteur.
7. Veillez à respecter la polarité du câble connecteur (noir
/ blanc), car elle peut changer en fonction de la position
d’installation (début ou fin de ruban)
Montage des lötfreien Abisolierkabels und Abisolierkabel-
Streifenverbinders
1. Schieben Sie die durchsichtige PC-Schale über den
Neonstreifen und setzen Sie das Silikonpad-3 ein (siehe
Fig 3).
2. Bringen Sie die U-förmige Zahnklammer an, wobei die
Zähne zur Silikonbeschichtung zeigen (Fig 4).
3. Stecken Sie das Silikonpad-1 über die Anschlussstifte
(Fig 5).
4. Stecken Sie den Anschlussstecker so ein, dass die Stifte
Kontakt mit den Streifenkupferpads haben (Fig 6).
5. Setzen Sie den U-förmigen Clip ein (Fig 7 und Fig 8).
6. Schieben Sie die durchsichtige PC-Schale über den
Anschluss.
7. Beachten Sie die Polarität des Anschlusskabels (Schwarz
/ Weiß), da sie sich je nach Einbauposition (Anfang oder
Ende des Streifens) ändern kann.
EN FR DE
Neon lamp strip
Clear PC shell
Silicone pad-3
Silicone pad-1
U-shape teeth clip
Connector head
FPCB
PC sheet
U-shape metal clip
Fig 3.
Fig 5.
Fig 7. Fig 8.
Fig 6.
Fig 4.
Neon Strip I Ruban LED néon I Neonstreifen
Installation instructions I Consignes d’installation I Montageanleitung
5 year warranty
5 ans de garantie
5 Jahres-Garantie
Non-replaceable light source
Source non remplaçable
Nicht austauschbare Lichtquelle
This product contains a light source of energy efficiency class F
Ce produit contient une source lumineuse de classe d’efficacité énergétique F
Dieses Produkt enthält eine Lichtquelle mit der Energieeffizienzklasse F

t +44 (0) 1604 495 151 f +44 (0) 1604 495 095 e sales@collingwoodgroup.com w collingwoodlighting.com
Collingwood Lighting, Brooklands House, Sywell Aerodrome, Sywell, Northampton NN6 0BT, United Kingdom
t +33 (0) 4 816 816 10 f +33 (0) 4 816 816 11 e ventes@collingwoodgroup.com w collingwoodlighting.com
Collingwood Lighting Limited, 43-47 Avenue de la Grande Armée, 75 116, Paris, France
EN
FR
CWI 8247 V1
Installation of the solder-free strip-strip connector
1. Install the u-shaped teeth clip with the teeth facing the
silicone coating and the silicon pad-3 for each neon
strip(Fig11)
2. Insert two silicone pad-4 over the connector pins.
3. Insert connector plugs so the pins are in contact with
strip copper pads (Fig 12).
4. Install the u clip-c from the bottom and then clear PC
shell from the top of the neon strip (Fig 13 and Fig 14).
5. Regard the connector cable polarity (Black / White), as it
can change depending on the position it’s installed (head
or tail of the strip)
Installation du connecteur néon câble sans soudure
1. Installez pour chaque ruban néon le clip dentelé en U
avec le bord dentelé face au revêtement en silicone et le
tampon en silicone 3 (fig. 11)
2. Insérez deux tampons en silicone 4 au-dessus des
broches du connecteur.
3. Insérez les fiches du connecteur de façon à ce que les
broches soient en contact avec les bandes de cuivre (Fig.
6).
4. Installez le clip en U C par le bas puis retirez la gaine PC
transparente du haut du ruban néon (fig. 13 et fig. 14).
5. Veillez à respecter la polarité du câble connecteur (noir
/ blanc), car elle peut changer en fonction de la position
d’installation (début ou fin de ruban)
Montage des lötfreien Streifenverbinders
1. Bringen Sie den U-förmigen Zahnclip mit den Zähnen
zur Silikonbeschichtung und das Silikonpad-3 für jeden
Neonstreifen an (Fig 11).
2. Stecken Sie zwei Silikonpads-4 über die Steckerstifte.
3. Stecken Sie die Anschlussstecker so ein, dass die Stifte
Kontakt mit den Streifenkupferpads haben (Fig 6).
4. Installieren Sie den U Clip-c von unten und dann
die durchsichtige PC-Schale von der Oberseite des
Neonstreifens (Fig 13 und Fig 14).
5. Beachten Sie die Polarität des Anschlusskabels (Schwarz
/ Weiß), da sie sich je nach Einbauposition (Anfang oder
Ende des Streifens) ändern kann.
EN FR DE
Fig 11.
Fig 13. Fig 14.
Fig 12.
Silicone pad-1
U tooth clip
U clip-C
Silicone pad-4
Pin connector
FPCB
PC sheet
Clear PC shell
Neon Strip I Ruban LED néon I Neonstreifen
Installation instructions I Consignes d’installation I Montageanleitung
5 year warranty
5 ans de garantie
5 Jahres-Garantie
Non-replaceable light source
Source non remplaçable
Nicht austauschbare Lichtquelle
This product contains a light source of energy efficiency class F
Ce produit contient une source lumineuse de classe d’efficacité énergétique F
Dieses Produkt enthält eine Lichtquelle mit der Energieeffizienzklasse F
Fig 9. Fig 10.

t +44 (0) 1604 495 151 f +44 (0) 1604 495 095 e sales@collingwoodgroup.com w collingwoodlighting.com
Collingwood Lighting, Brooklands House, Sywell Aerodrome, Sywell, Northampton NN6 0BT, United Kingdom
t +33 (0) 4 816 816 10 f +33 (0) 4 816 816 11 e ventes@collingwoodgroup.com w collingwoodlighting.com
Collingwood Lighting Limited, 43-47 Avenue de la Grande Armée, 75 116, Paris, France
EN
FR
CWI 8247 V1
Installation of the solder-free end cap
1. Slide clear PC shell over the neon strip (see Fig 15).
2. Install the u-shaped teeth clip, with the teeth faced the
silicone coating(Fig 15)
3. Insert the end cap head and silicone pad (Fig 16).
4. Insert the u-shaped clip (Fig 17).
5. Slide clear PC shell over the end cap (Fig 19).
6. Regard the connector cable polarity (Black / White), as it
can change depending on the position it’s installed (head
or tail of the strip)
Installation de l’embout sans soudure
1. Faites glisser la gaine PC transparente sur le ruban néon
(fig. 15).
2. Installez le clip en U dentelé avec le bord dentelé face au
revêtement en silicone (fig. 15).
3. Insérez l’embout et le tampon en silicone (fig. 16).
4. Insérez le clip en U (fig. 17).
5. Faites glisser la gaine PC transparente sur l’embout (fig.
19).
6. Veillez à respecter la polarité du câble connecteur (noir
/ blanc), car elle peut changer en fonction de la position
d’installation (début ou fin de ruban)
Montage der lötfreien Endkappe
1. Schieben Sie die durchsichtige PC-Schale über den
Neonstreifen (siehe Fig 15).
2. Installieren Sie den U-förmigen Zahnclip, wobei die
Zähne der Silikonbeschichtung zugewandt sind (Fig 15).
3. Setzen Sie den Endkappenkopf und das Silikonpolster
ein (Fig 16).
4. Setzen Sie den U-förmigen Clip ein (Fig 17).
5. Schieben Sie die durchsichtige PC-Schale über die
Endkappe (Fig 19).
6. Beachten Sie die Polarität des Anschlusskabels (Schwarz
/ Weiß), da sie sich je nach Einbauposition (Anfang oder
Ende des Streifens) ändern kann.
EN FR DE
Fig 17.
Fig 19.
Fig 18.
Fig 15.
Clear PC shell
U-shape teeth clip
Silicone pad
End cap head
Fig 16.
U-shape metal clip
Neon Strip I Ruban LED néon I Neonstreifen
Installation instructions I Consignes d’installation I Montageanleitung
5 year warranty
5 ans de garantie
5 Jahres-Garantie
Non-replaceable light source
Source non remplaçable
Nicht austauschbare Lichtquelle
This product contains a light source of energy efficiency class F
Ce produit contient une source lumineuse de classe d’efficacité énergétique F
Dieses Produkt enthält eine Lichtquelle mit der Energieeffizienzklasse F
-
 1
1
-
 2
2
-
 3
3
-
 4
4
Collingwood Lighting LSNT Benutzerhandbuch
- Typ
- Benutzerhandbuch
in anderen Sprachen
Verwandte Papiere
Sonstige Unterlagen
-
 COLLINGWOOD SL250 Bedienungsanleitung
-
 COLLINGWOOD LSFA Benutzerhandbuch
-
COLLINGWOOD FL01 Benutzerhandbuch
-
 COLLINGWOOD 880KJ Benutzerhandbuch
-
COLLINGWOOD JB2 Bedienungsanleitung
-
 VARDAFLEX RU-86548 Benutzerhandbuch
-
COLLINGWOOD JB2 Bedienungsanleitung
-
COLLINGWOOD SL240 Benutzerhandbuch
-
BEGLEC LED Neonflex BLUE 0.91M(1unit) Bedienungsanleitung
-
Aeg-Electrolux DD 8794 Benutzerhandbuch


