Seite wird geladen ...

Product Instruction
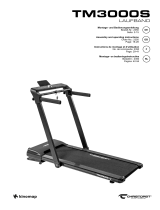
Model:CS-WP2
Please read the instruction carefully before using

Catalog
1ˊSecurity cautions................................................................. 1
2ˊWarranty commitment......................................................... 2
3ˊConfiguration list and technical parameters........................ 3
4ˊProduct parts....................................................................... 4
5ˊAssembly instructions......................................................... 4
6ˊFunctional operation instructions........................................ 6
7ˊWarm-up exercise............................................................... 7
8ˊMaintenance guidelines...................................................... 9
9ˊFault code........................................................................... 10

-1-
Thank you for purchasing our product, which will help to improve your health.
1. Safety precautions
In order to ensure your safety and avoid accidents, please read the instructions carefully
before use.
zThis product is indoor use only, please do not make it or use it outdoors; the treadmill should be
placed inaflat and clean position, do not put it inathick carpet or near water area, there should
be 1000*2000mm barrier-free safety area behind the treadmill.
zThis product is for adults, minors need adult care. It is forbidden for those who feel unwell or
mentally handicapped or lack common sense to use it. Unless they are under the supervision
or guidance of the person responsible for their safety regarding the use of the product.
zIf the power cord is damaged, in order to avoid danger, it must be replaced by the manufacturer
or professional maintenance personnel.
zThis product is only used for 220V-240V AC voltage. Please use the power socket with safe
ground line. The installation and grounding of the grounding plug must be consistent with the
parameters of the user's area. If the plug and socket are incompatible, please arrange qualified
electricians or after-sales personnel to handle it.
zCheck all parts before use to ensure that the screw and nut are locked.
zWhen using it, please wear comfortable and tight clothes to avoid the clothes beinghung by the
machine. Don't let children or pets come near to avoid accidents.
zAvoid all moving parts with both hands. Do not put hands and feet in the space under the
running belt.
zThis product is suitable for home use, not suitable for professional trainingand testing, and can
not be used for medical purposes.
zThe heart rate display of this product does not provide data for medical purpose.
zThis product is only for one person on the running belt.
zBefore cleaning and maintenance, please shut down and unplug the power plug.
zShut down the machine and unplugthepowerplug when you leave.
zPlease use the spare parts provided by the original factory. It is strictly forbidden to replace
them privately.
zThis product is of HC grade, and maximum person weight is 110kg.

-2-
2. Quality Assurance Commitment
We ensure that the product is made of high quality materials.
In normal use, if there isaproblem, we will be responsible for the warranty
.
The warranty period is one year (from the date of purchase). If you buy products with quality problems,
please contact our customer service within 12 months. Please do not deal with them without permission.
The followings are not covered by the warranty:
zDamage caused by external factors.
zUse non-original accessories.
zPrivately handled incorrectly.
zNot follow the instructions.
This pledge is valid only for private use by families and is not applicable to professional training such as
gyms.
If you need to buy non-warranty accessories, please contact customer service. Please provide the
following information when ordering:
zInstructions.
zProduct model.
zFittings serial number.
zCertificate of purchase date.
Before the confirmation of our customer service, please do not send the products to ourcompany, and
send them back without permission. Our company does not bear any cost.
3. Configuration list and technical parameters
Thismodel has standard version(nohandle) and luxury version (with handle),
1. Walkingpad configuration
Name Sketch (for reference) Qty
Walkingpad machine 1
Remote controller 1
Power cord (Europe-standard,
British Specification Plug ) 2
Instructions,warranty card
Inner hexagonspanner 1
1
Silicone oil 1

-3-
2. Technical parameters
Para name Parameters
Packing dimension 1410*650*145 mm
Dimensions 1340*590*125 mm
Running belt area 430*1080 mm
maximum power 440 W
Speed range 1.0-6.0 KM/H
Max capacity 110 kg
Net/Gross weight 23.9/28.2 KG
4. Product parts
1. Standard version
5. Assembly instructions
Assembly steps
Step 1˖
Open the packing box, remove the relevant accessories and machine from the box, and place the
machine on flat floor. Then take the power cord and connect the product suffix socket to the machine
product suffix socket, and the assembly is finished.
Display panel
High quality audio
Remote controller receiver
Running belt
Foot Strake
Engine upper cover
Rear left cover
Rear right coverEngine
Bottom cover

-4-
6. Functional operation instructions
Display panel
Remote controller
Operation instructions
Function˖
1: Remote START/STOP, speed increase/decrease.
2: Bluetooth music
3 Speed display range 1.0-6.0KM Caloriesrange 0001-9999KCAL Time range
01-99MINUTES Distance range 0.01-99 KM.
4:Hibernation time 1 minute without operation, the LED tube flicker every
second after hibernation.
5˖Lubrication sign˖Every 100km shows.
Button˖when machine standby, press Button machine run from 0.8km, press
again it will stop.
(START/STOP is a switch button)
+ Button˖when machine running,press +button, the speed will increase 0.5km; long p ress will
continually increase by 0.5km.
Additional function: when machine standby, long press it will omit lubrication sign.
ˉButton: when machine running, pressbutton, the speed will decrease 0.5km; long press will
continually decrease by 0.5km.
SpeedCaloriesTime Distance
Bluetooth
Need lubrication Infrared receiver
Speed decrease
1. Speed increase
2. Long press when standby to
omit lubrication sign1. Start/Stop

-5-
Start-up instructions
1. Whenthe power is on, the two sides of the digital tube flicker from side to center,
The left side digital tube on and enters standby status.
2. Press the start button of the remote controller, three horizontal bars appear in turn from
bottom digital tube, and the machine starts running at 1.0KM speed.
Speed control
When running, the speed of the remotecontroller is increased by 0.5 kilometersper click of
the speed + button, and the speed of the long press of the speed + button can be increased by
0.5km continuously.
When running, the speed of the remote controller decreases by 0.5km per click of the speed-button,
and the speed-button decreases continuously by 0.5km per click of the long press of the speed-button.
Stop the machine
In the running state, press the remote control button ,
and the machine stops running.
Mobile phone Bluetooth music connection operation
Open the Bluetooth search address from “maxfree 00001 to 65000” numbers: for example:
search for the number in the address" maxfree 00008" and click on themaxfree 00008 Bluetooth
icon

-6-
If the next step is paired or the password appears, just enter 0000 and click on the pair.
Pairing success
Note: Bluetooth music will be automatically connected next time after the
first connection to bluetooth
Mobile phone Bluetooth music release operation
Click on the link to find Unpair
7. Warm-up exercise
Before exercising, it's better to do stretching exercisesfirst. A successful exercise plan must
include warm-up, aerobic and relaxation exercises. The number of exercises should be at least two or
three times a week. You can takeaday off for exercise. After a few months, you can increase the
number of exercises to four to five days a week.
Warm-up is an important part of your fitness exercise. Warm-up before every exercise.
Moderate warming-up can prepare your body for the next more intense exercise, because warming-up
can help muscle warm up and stretch, improve blood circulation and pulse, and send more oxygen into
muscle. Repeated warm-up exercise can also reduce muscle soreness after aerobic exercise. We
recommend the following warm-up and relaxation exercises.
1. Stretch downward: Bend your knees slightly
andbend your bodyforward slowly. Relax
your back and shouldersand touch your
toes with both hands. Hold for 10 to 15
seconds, then relax. Repeat three times.
Figure 1 Figure 1
Want to pair with maxfree-Audio?
Cancel Yes
maxfree 00008
Remame
Unpair
maxfree 0008
connected/full power/Using
Allow access to your contacts and history
SBC

-7-
2. Stretch your ankles: Sit onaclean cushion
and straighten one leg. Put the other leg
inward so that it is close to the straight leg.
Try to touch your toes with your hands.
Keep it for 10 to 15 seconds. Then relax.
Repeat each leg three timesDŽ
Figure 2
3. Extension of the calf and foot tendons: body forward
hands against the wall the left leg arches forward,
the rightleg is straight, the left leg is on the
ground, then bend your left leg and hold it for 10
to 15 seconds, then relax, repeat each leg three times.
Figure 3
4. Head movement: 1-tilt your head to the right and
feel the left neck muscle stretch; 2-turn head to the
back; turn head to the left; 4-turn your head to front
of the chest. then relax and do it three times.
Figure 4
5. Waist movement: stretch your arms to the left and right,
then slowly lift it up, over your head. Put your right arm
as far as possible to the ceiling.Straighten, hold for 1
second, and feel the stretch of yourrightmuscle.
Repeat the same action on the left arm.
Figure 5
8. Maintenance guide
Warning: Be sure to unplug the power plug of the machine before
maintaining the product.
zUse cloth to clean product surface.
zFull cleaning will prolong the service life of the machine.
Figure 4
Figure 5
Figure 3
Figure 2
zClean the dustregularly to keep the parts clean.Clean the exposed parts on
both sides of the

-8-
running belt. This will reduce the accumulation of impurities in the running belt. Keep
your sneakers clean. Avoid bringing foreign bodies under yourrunning belt and wearing
your running board and belt. The surface of the running belt should be scrubbed with
a soapy wet cloth.
Please be careful not to splash water on the electrical components and under the running belt.
zCheck and lock all parts of the treadmill regularly, replace defective parts and/or leave the
equipment idle for repair.
1. Adjusting the Running Belt
If you are using a walking machine, you can adjust the belt tightness to improve the slippage or
non-fluidity of the running belt.
Adjusting running has two functions: tightening adjustment and belt center position adjustment.
Running belt has been adjusted when it is out of the factory, but after use, the running belt will be
stretched, which will deviate from the center position and cause the running belt to rub the foot sidebars
and rear cover damage. It is normal for the running belt to be stretched during use.
Adjusting Running Belt Method
Step 1: Insert the 5 mm hexagonal wrench into the adjusting screw on the left side of the belt, and
turn the wrench 1/4 times clockwise to adjust the rear drum to tighten the belt.
Step 2: Insert the 5 mm hexagonal wrench into the adjusting screw on the right side of the belt, and
turn the wrench 1/4 times clockwise to adjust the rear drum to tighten the belt.
Step 3: Repeat steps 1 and 2 until the running belt does not slip.
Note: The belt should not be adjusted too tightly. This will break the running belt, increase the
pressure of the front/back drum, bring harm to the drum bearings, produce abnormal sound or other
problems.
If you want to reduce the tension of the running belt, please rotate the wrench counterclockwise.
Note that the left and right sides should rotate the same distance.
Running belt centered
When you use a walking machine, the pressure on the runningbelt is unbalanced due to the different
force exerted by the two feet during running, which results in the belt deviating from the center. This
deviation is normal, and when no one runs on a running belt, it returns to the center. If you can'tget back
to the center, you need to bring the running belt back to the center.
1. Running the treadmill without load andadjusting its speed to 6km/H.
2. Observe the distance from the running belt to the left and right sidebars.
If left, useahexagonal wrench and turn the left screw clockwise for 1/4 turns.
Loosen
Fasten
Loosen
Fasten

-9-
If you turn right, useahexagonal wrench and turn the right screw clockwisefor 1/4 turns.
If the running belt is still not in the middle, repeat the above action until it is adjusted to
the middle.
3. After adjusting the running belt to the middle, adjust the speed to the high speed, and
observe the
deviation of the running belt and the running smoothness. If there are devi
ations, repeat the adjustment
steps.
4. If the above steps do not work, you need to tighten the running belt again.
Warning! Do not over tighten the drum! This willlead to permanent bearing damage!
2. Lubricating oil for walking machine
The walking machine has been pre-lubricated before leaving the factory. But because the
friction between the running belt and the running board has a great influence on the service life and
performance of the product, lubricating oil should be added according to the machine prompt.
Whenever the cumulative mileage of the walking machine reaches 100 KM, the display screen will
displayared refueling display.
Note: Please use treadmill lubricant or contact our company directly.
Lubrication steps˖
zCut the seal of the inner mouth of the oil bottle and cut a small opening of the cap of the oil
bottle (it can be extruded smoothly).
zTurn up the plug cover of the filling hole.
zSet the machine to 1 KM speed, and extrude the appropriate amount of oil at the orifice of the
oil bottle, about 20 ml each time.
zAfter adding silicone oil, the machine runs for about 3 minutes. When the silicone oil reaches
the running belt evenly, press the remote control key to stop the machine, and then press the
remote control + key for 20 seconds to clear the refueling prompt icon.
Fuel up.
Note: attention should be paid to safety during refueling operations.
Lubrication sign
Lubricating hole plug
silicone oil

- 10 -
9. Trouble code
snoituloseRsesuaCedoC
E01 Poor communication
between electronic meter
and controller
1. Check that the connection between the electronic
meter and the controller is not properly connected.
2. The main IC of the controller contacts badly and is
re-tightened.
3. Controller powersupply abnormal, change
controllerDŽ
E02 Explosion-proofand
impact-proof protection
1. If the motor is open or in bad contact, replace the
motor or check the connecting terminals.
2. Power tube breakdown, replace it or the
controller.
E05 Over current protection 1. Overload.
2. The resistance of the treadmill is too heavy and
needs to be lubricated.
3. The motor is damaged, replace it.
E06 Overload protection

Catalogue
1ˊAttentions de sécurité .........................................................1
2ˊ
Engagement de garantie...............................................................2
3ˊListe de configuration et paramètres techniques.................3
4ˊPièces du produit.................................................................4
5ˊ Instructions de montage.......................................................5
6ˊInstructions de fonctionnement............................................6
7ˊExercice d'échauffement...............................................................7
8ˊ
9ˊ
Consignes de maintenance..................................................9
Code d'erreur......................................................................10

-1-
Merci d'avoir acheté notre produit, ce qui contribuera à améliorer votre santé.
1.Précautions de sécurité
Afin d'assurer votre sécurité et d'éviter les accidents, veuillez lire attentivement les instructions
avant utilisation.
zCe produit est destiné à une utilisation en intérieur uniquement, veuillez ne pas le fabriquer
ou l'utiliser à l'extérieur; le tapis roulant doit être placé dans une position plate et propre, ne le
placez pas dans un tapis épais ou près d'une zone d'eau, il doit y avoir une zone de sécurité
sans barrière de 1000 * 2000 mm derrière le tapis roulant.
zCe produit est destiné aux adultes, les mineurs ont besoin de soins pour adultes. Il est interdit
à ceux qui se sentent mal ou handicapés mentaux ou manquent de bon sens de l'utiliser. À
moins qu'ils ne soient sous la supervision ou les conseils de la personne responsable de leur
sécurité concernant l'utilisation du produit.
zSi le cordon d'alimentation est endommagé, afin d'éviter tout danger, il doit être remplacé par
le fabricant ou le personnel de maintenance professionnel.
zCe produit est uniquement utilisé pour une tension de 220V-240V AC. Veuillez utiliser la prise
d'alimentation avec une ligne de mise à la terre sûre. L'installation et la mise à la terre de la
fiche de mise à la terre doivent être conformes aux paramètres de la zone de l'utilisateur. Si la
fiche et la prise sont incompatibles, veuillez demander à un électricien qualifié ou au personnel
après-vente de le manipuler.
zVérifiez toutes les pièces avant utilisation pour vous assurer que la vis et l'écrou sont verrouillés.
zLors de son utilisation, veuillez porter des vêtements confortables et serrés pour éviter que
les vêtements ne soient suspendus par la machine. Ne laissez pas les enfants ou les
animaux s'approcher pour éviter les accidents.
zEvitez toutes les pièces mobiles à deux mains. Ne placez pas les mains et les pieds dans
l'espace sous la ceinture de course.
zCe produit convient à un usage domestique, ne convient pas à une formation et à des tests
professionnels et ne peut pas être utilisé à des fins médicales.
zL'affichage de la fréquence cardiaque de ce produit ne fournit pas de données à des fins
médicales.
zCe produit est destiné à une seule personne sur la bande de roulement.
zAvant de nettoyer et d'entretenir, veuillez éteindre et débrancher la fiche d'alimentation.
zArrêtez la machine et débranchez la fiche d'alimentation lorsque vous partez.
zVeuillez utiliser les pièces de rechange fournies par l'usine d'origine. Il est strictement interdit
de les remplacer en privé.
zCe produit est de qualité HC et le poids maximal d'une personne est de 110 kg.

-2-
2.Engagement d'assurance qualité
Nous nous assurons que le produit est fait de matériaux de haute qualité.
En utilisation normale, en cas de problème, nous serons responsables de la garantie.
La période de garantie est d'un an (à compter de la date d'achat). Si vous achetez des produits
présentant des problèmes de qualité, veuillez contacter notre service client dans les 12 mois.
Veuillez ne pas les traiter sans autorisation.
.
Les éléments suivants ne sont pas couverts par la garantie:
zDommages causés par des facteurs externes.
zUtilisez des accessoires non originaux.
zGestion privée incorrecte.
zNe suivez pas les instructions.
Cet engagement est valable uniquement pour un usage privé par les familles et ne s'applique pas à
la formation professionnelle telle que les gymnases.
Si vous avez besoin d’acheter des accessoires non couverts par la garantie, veuillez contacter le
service client. Veuillez fournir les informations suivantes lors de la commande:
zInstructions.
zModèle de produit.
zNuméro de série des raccords.
zCertificat de la date d'achat.
Avant la confirmation de notre service client, veuillez ne pas envoyer les produits à notre entreprise
et les renvoyer sans autorisation. Notre entreprise ne supporte aucun frais.
3.Liste de configuration et paramètres techniques
Ce modèle a la version standard (sans poignée) et la version luxe (avec poignée)
1.Configuration du pavé numérique
Nom Croquis (pour référence) Qté
Machine à tapis de marche 1
Télécommande 1
Cordon d'alimentation
(norme européenne, prise de
spécification britannique)
Instructions, carte de garantie
2
Clé hexagonale intérieure 1
1
Huile de silicone 1

-3-
2.paramètres techniques
Nom du para Paramètres
Dimension d'emballage 1410*650*145 mm
430*1080 mm
Dimensions 1340*590*125 mm
Zone de ceinture de course
Puissance maximum 440 W
Plage de vitesse 1.0-6.0 KM/H
capacité maximale 110 kg
23.9/28.2 KGPoids net / brut
4.pièces du produit
1.version standard
5.Assembly instructions
Étape 1:
Étapes d'assemblage
Ouvrez la boîte d'emballage, retirez les accessoires et la machine concernés de la boîte et placez la
machine sur un sol plat. Prenez ensuite le cordon d'alimentation et connectez la prise du suffixe du
produit à la prise du suffixe du produit de la machine, et l'assemblage est terminé.
Panneau d'affichage
Audio de haute qualité
Récepteur de la télécommande
Ceinture de course
Foot Strike
Couvercle supérieur du moteur
Capot arrière gauche
Capot arrière droitCouvercle inférieur du moteur

-4-
6.instructions de fonctionnement fonctionnel
Panneau d'affichage
Function˖
1: START / STOP à distance, augmentation / diminution de la vitesse.
2: musique Bluetooth.
3: Plage d'affichage de la vitesse 1.0-6.0KM Plage de calories 0001-9999KCAL
Plage de temps 01-99MINUTES, Plage de distance 0,01 à 99 km.
ˈ
4: Temps d'hibernation 1 minute sans fonctionnement, le tube LED scintille toutes les
secondes après l'hibernation.
5Signe de lubrification Tous les 100 km montre.
Button˖Bouton: lorsque la machine est en veille, appuyez sur la machine à bouton
à partir de 0,8 km, appuyez à nouveau pour qu'elle s'arrête.
(START / STOP est un bouton de commutation)
Bouton +: lorsque la machine fonctionne, appuyez sur le bouton +, la vitesse augmentera de
0,5 km; la pression longue augmentera continuellement de 0,5 km.
Fonction supplémentaire: lorsque la machine est en veille, appuyez longuement sur elle omettra
le signe de lubrification.
Bouton-: lorsque la machine fonctionne, appuyez sur le bouton-, la vitesse diminuera de
0,5 km; la pression longue diminuera continuellement de 0,5 km.
La vitesse CaloriesTemps Distance
bluetooth
Besoin de lubrification
Télécommande
Instructions d'utilisation
Récepteur infrarouge
diminution de la vitesse
1. augmentation de la vitesse
2. appuyez longuement en veille
pour omettre le signe de
lubrification 1. démarrage / arrêt

-5-
Instructions de démarrage
1. 1.Lorsque l'appareil est sous tension, les deux côtés du tube numérique scintillent d'un côté à
l'autre Le tube numérique gauche s'allume et passe en mode veille.
2.Appuyez sur le bouton de démarrage de la télécommande, trois barres horizontales
apparaissent tour à tour du bas vers le haut du tube numérique, et la machine commence
à fonctionner à une vitesse de 1,0 km.
Contrôle de vitesse
Lors de l'exécution, la vitesse de la télécommande est augmentée de 0,5 kilomètre par clic du
bouton vitesse +, et la vitesse de la pression longue sur le bouton vitesse + peut être augmentée
de 0,5 km en continu.
Lors de l'exécution, la vitesse de la télécommande diminue de 0,5 km par clic du bouton de
vitesse, et le bouton de vitesse diminue en continu de 0,5 km par clic de la longue pression sur
le bouton de vitesse.
Arrêtez la machine
En état de marche, appuyez sur le bouton de la télécommande,
et la machine s'arrête de fonctionner.
Opération de connexion de musique Bluetooth pour téléphone portable
Ouvrez l'adresse de recherche Bluetooth à partir des numéros «maxfree 00001 à 65000»:
par exemple: recherchez le numéro dans l'adresse «maxfree 00008» et cliquez sur l'icône
Bluetooth maxfree 00008

-6-
Si l'étape suivante est couplée ou que le mot de passe apparaît, entrez simplement 0000
et cliquez sur la paire.
Succès du jumelage
Remarque: la musique Bluetooth sera automatiquement connectée la prochaine fois après la
première connexion à Bluetooth.
Opération de libération de musique Bluetooth pour téléphone portable
Cliquez sur le lien pour trouver Dissocier
7.Exercice d'échauffement
Avant de faire de l'exercice, il est préférable de faire des exercices d'étirement en premier.
Un plan d'exercice réussi doit comprendre des exercices d'échauffement, d'aérobie et de
relaxation. Le nombre d'exercices doit être d'au moins deux ou trois fois par semaine.
Vous pouvez prendre un jour de congé pour faire de l'exercice. Après quelques mois,
vous pouvez augmenter le nombre d'exercices à quatre à cinq jours par semaine.
L'échauffement est une partie importante de votre exercice de fitness. Échauffez-vous avant
chaque exercice. Un échauffement modéré peut préparer votre corps pour le prochain exercice
plus intense, car l'échauffement peut aider les muscles à se réchauffer et à s'étirer, à améliorer
la circulation sanguine et le pouls, et à envoyer plus d'oxygène dans les muscles. Des exercices
d'échauffement répétés peuvent également réduire la douleur musculaire après un exercice
aérobie. Nous recommandons les exercices d'échauffement et de relaxation suivants.
1. étirer vers le bas: pliez légèrement les genoux
et pliez lentement votre corps vers l'avant. Se détendre
votre dos et vos épaules et touchez votre
orteils à deux mains. Maintenez la position pendant 10 à 15
secondes, puis détendez-vous. Répétez trois fois.
Figure 1 Figure 1
Want to pair with maxfree-Audio?
Cancel Yes
maxfree 00008
Remame
Unpair
maxfree 0008
connected/full power/Using
Allow access to your contacts and history
SBC

-7-
2.Étirez vos chevilles: asseyez-vous sur un coussin propre
et redressez une jambe. Mettez l'autre jambe
vers l'intérieur afin qu'il soit proche de la jambe droite.
Essayez de toucher vos orteils avec vos mains.
Gardez-le pendant 10 à 15 secondes. Détendez-vous ensuite.
Répétez chaque jambe trois fois.
Figure 2
3.Extension des tendons du mollet et du pied: corps vers l'avant
les mains contre le mur, la jambe gauche se cambre en avant,
la jambe droite est droite, la jambe gauche est sur le
sol, puis pliez votre jambe gauche et maintenez-la pendant 10
à 15 secondes, puis détendez-vous, répétez chaque jambe trois fois.
4. Mouvement de la tête: inclinez votre tête vers la droite et
sentir l'étirement du muscle du cou gauche; Tête à 2 tours
retour; tourner la tête vers la gauche; 4-tournez la tête vers l'avant
de la poitrine. puis détendez-vous et faites-le trois fois.
Figure 4
5. mouvement de taille: étirez vos bras vers la gauche et la droite,
puis soulevez-le lentement, au-dessus de votre tête. Mettez votre
bras droit autant que possible au plafond. Redresser, tenir pendant 1
seconde, et ressentez l'étirement de votre muscle droit.
Répétez la même action sur le bras gauche.
Figure 5
8.Guide d'entretien
zUtilisez un chiffon pour nettoyer la surface du produit.
zUn nettoyage complet prolongera la durée de vie de la machine.
Figure 4
Figure 5
Figure 3
Figure 3
Figure 2
Avertissement: veillez à débrancher la fiche d'alimentation de la machine
avant d'entretenir le produit.
1/67