2 / 12 MA251
Sicherheitshinweise Safety instructions
Bedeutung der Bedienungsanleitung
Wenn die Bedienungsanleitung und die folgenden Sicherheits-
hinweise NICHT befolgt werden, können Lebensgefahr durch
Stromschlag, Lichtbögen, Brand oder ein Ausfall des Systems
die Folge sein�
•Bedienungsanleitung vollständig befolgen�
Das Produkt nur entsprechend dieser Bedienungsanleitung und
der technischen Daten anschließen und verwenden�
Die digitale Bedienungsanleitung und die technischen Daten sind
unter dem folgenden Link verfügbar:
•www�staubli�com/re-downloads�html
Importance of the instruction manual
NOT following the instruction manual and safety instructions
could result in life-threatening injuries due to electric shock, elec-
tric arcs, fi re, or failure of the system�
•Follow the entire instruction manual�
Use the product only according to this instruction manual and
the technical data�
The digital instruction manual and the technical data are
availableat:
•www�staubli�com/re-downloads�html
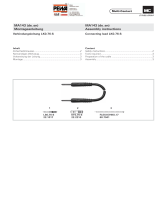
Bestimmungsgemäße Verwendung
Die vorliegenden Handwerkzeuge sind für die ordnungsgemäße
Durchführung des Anschlusses von Stäubli PV-Steckverbindern
mit PV-Leitungen im spannungsfreien Zustand vorgesehen�
Das Werkzeug ist NICHT geeignet für Arbeiten unter Spannung
(IEC 60900)�
Intended use
The present hand tools are in place to deliver crimp excellence
for Stäubli PV connectors with cables� Crimpings shall be carried
out only in de-energized state of the cables�
The hand tool is NOT suitable for Live working (IEC 60900)�
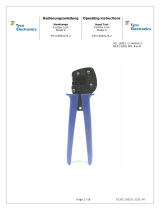
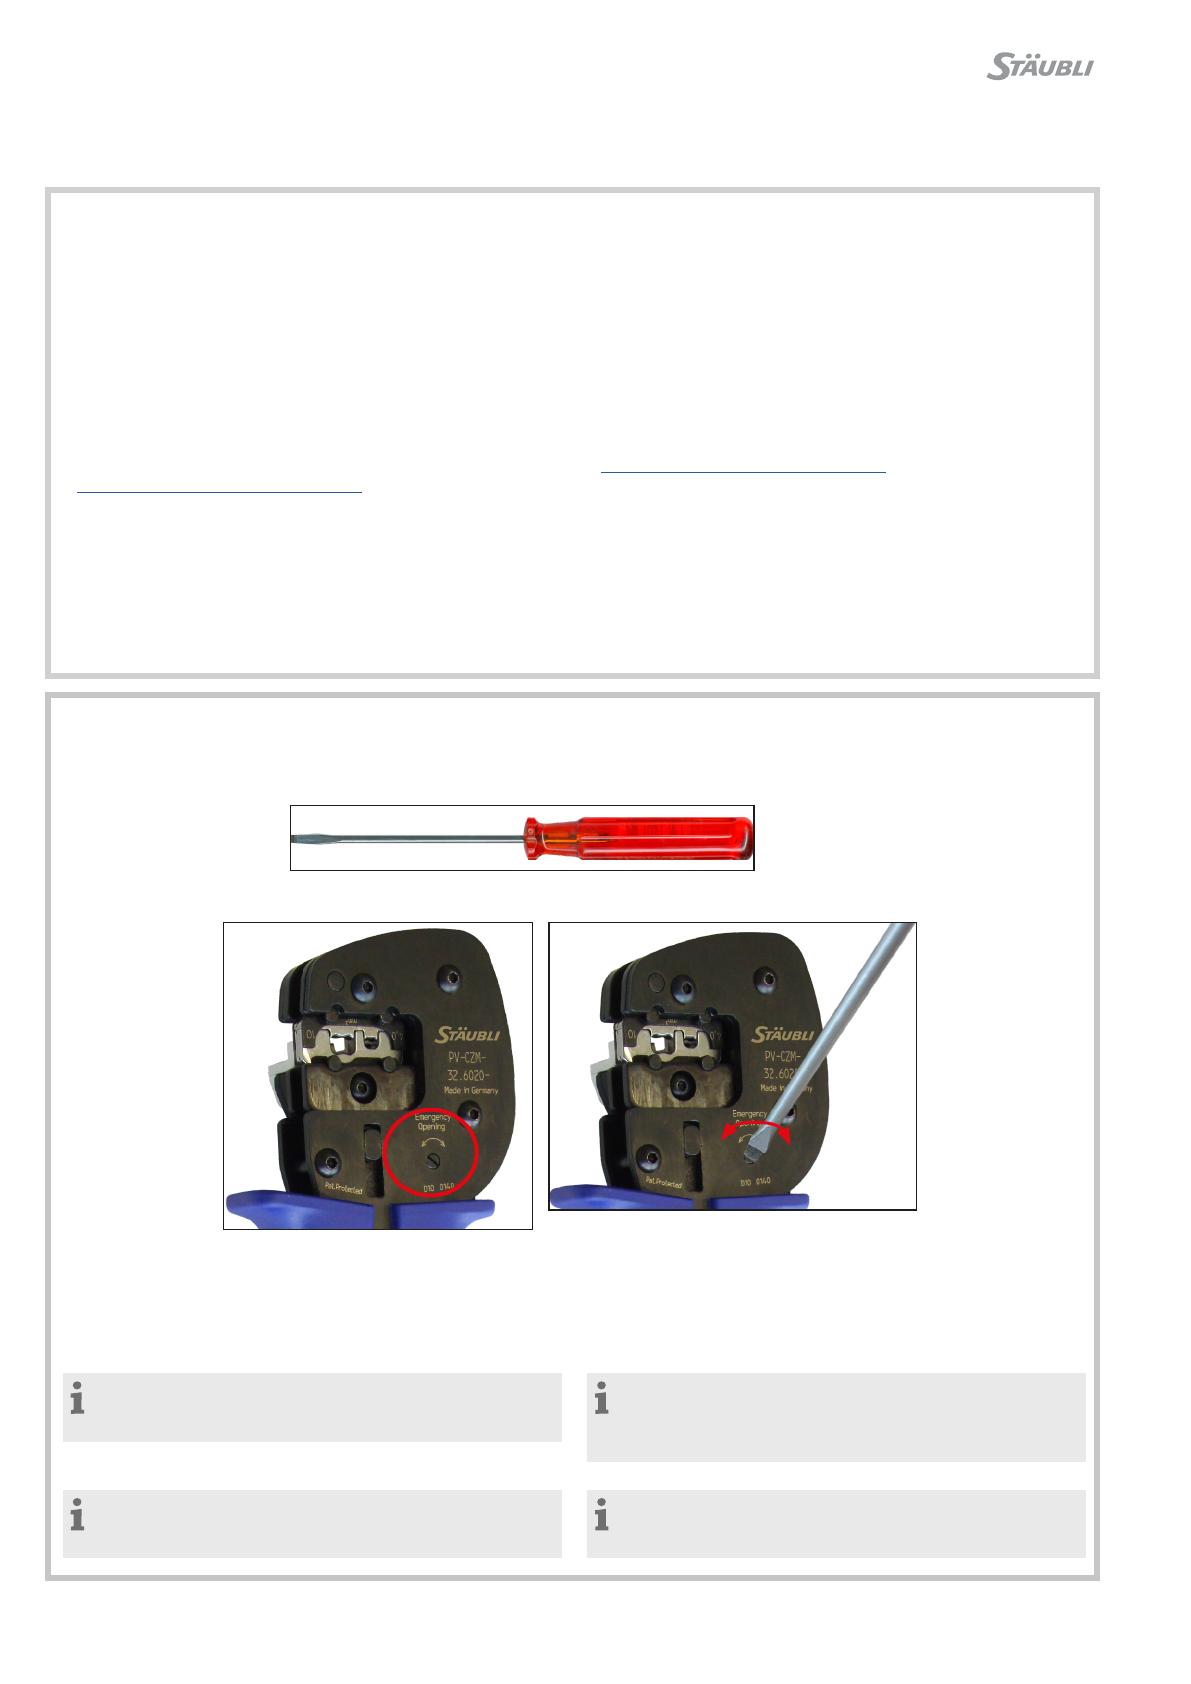
Crimpzange notönen Crimping pliers emergency opening
Benötigtes Werkzeug zur Notönung der Crimpzange:
Schraubendreher mit einer feinen Spitze z�B� 3 × 75 mm
Required tool for emergency opening:
Screwdriver with fine tip e�g� 3 × 75mm
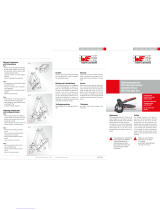
Ziel: Crimpzange notönen. Goal: crimping pliers emergency opening.
Handlungsschritt:
•Schraube mit dem Schraubendreher drehen
(mit/gegen Uhrzeigersinn)�
Resultat:
•Die Verriegelung löst sich�
Action step:
•Turn the screw with the screwdriver
(clockwise/counterclockwise)�
Result:
•The locking mechanism loosens�
Hinweis:
Nach einer Notönung der Crimpzange darf der gerade
bearbeitete Crimp nicht mehr verwendet werden�
Note:
Once the crimping pliers have been opened using the
emergency opening, the metal crimp in process needs to be
discarded�
Hinweis:
Nach einer Notönung kann die Crimpzange unmittelbar für
eine nächste Crimp Herstellung wieder benutzt werden�
Note:
No special action necessary to use the crimping pliers for
any next crimp operation following an emergency opening�