Silvercrest SKME 150 A1 Operating Instructions Manual
- Kategorie
- Kaffeezubehör
- Typ
- Operating Instructions Manual

ELECTRIC COFFEE GRINDER SKME 150 A1
ELECTRIC COFFEE GRINDER
Operating instructions
ELEKTRISK KAFFEKVARN
Bruksanvisning
ELEKTRINĖ KAVAMALĖ
Vartotojo vadovas
SÄHKÖKÄYTTÖINEN
KAHVIMYLLY
Käyttöohje
ELEKTRYCZNY MŁYNEK DO KAWY
Instrukcja obsługi
ELEKTRISCHE KAFFEEMÜHLE
Bedienungsanleitung
IAN 274404
CPE274404_Kaffeemühle_Cover_LB3.indd 2 04.11.15 11:47

English ................................................... 2
Suomi .................................................. 20
Svenska............................................... 36
Polski................................................... 52
Lietuviškai............................................ 72
Deutsch................................................ 88
ID: SKME 150 A1_16_V1.4
&3(B$XVNODSSIP6HLWH0RQWDJ'H]HPEHU

Overview / Yleiskatsaus / Översikt / Przegld /
Apžvalga / Übersicht
A
9
B
8
7
1
2
3
4
5
7
6
8
&3(B$XVNODSSIP6HLWH0RQWDJ'H]HPEHU

2
GB
Contents
1. Overview ......................................................2
2. Intended purpose ..........................................4
3. Safety instructions .........................................5
4. Items supplied ..............................................9
5. Operation .....................................................9
5.1 Assembly.................................................... 10
5.2 Tips on the degree of grinding and quality ..... 10
5.3 Operating the device ................................... 11
6. Cleaning .....................................................12
7. Storage .......................................................13
8. Troubleshooting ..........................................14
9. Disposal ......................................................15
10. Technical specifications ................................15
11. Warranty of the HOYER HandelGmbH ........16
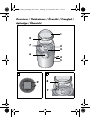
1. Overview
1 Lid
2 Grinding space
3 Blades
4 Connector cable with mains plug
5 Motor unit
6 Switch
7
Marking for the locking ( ) and unlocking mechanism ( )
8 Attachment markings
9 Cable spool (at the bottom)
BB&3(B.DIIHHPKOHB%ERRN6HLWH'LHQVWDJ'H]HPEHU

3
GB
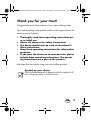
Thank you for your trust!
Congratulations on the purchase of your new coffee grinder.
For a safe handling of the product and in order to get to know the
entire scope of features:
• Thoroughly read these operating instructions pri-
or to initial use.
• Above all, observe the safety instructions!
• The device should only be used as described in
these instructions.
• Keep these operating instructions for information
purposes.
• If you pass the device on to someone else, please
include these operating instructions. The operat-
ing instructions are a part of the product.
We hope that you enjoy using your new coffee grinder!
Symbol on your device
The food-safe material of devices with this symbol will
not change the taste or smell of food.
BB&3(B.DIIHHPKOHB%ERRN6HLWH'LHQVWDJ'H]HPEHU

4
GB
2. Intended purpose
The coffee grinder is exclusively suited for grinding coffee and es-
presso beans.
The device is designed for private, domestic use. The device must
only be used indoors.
This device must not be used for commercial purposes.
Foreseeable misuse
We recommend the following maximum operating
time:
Coffee beans:
3 x 30 seconds with a 1-minute break each in between; after-
wards, 60 minutes break to cool the device.
Espresso beans:
2 x 45 seconds with a 1-minute break each in between; after-
wards, 60 minutes break to cool the device.
The device could be damaged by an extended, continuous oper-
ating time.
BB&3(B.DIIHHPKOHB%ERRN6HLWH'LHQVWDJ'H]HPEHU

5
GB
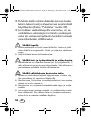
3. Safety instructions
Warnings
If necessary, the following warnings will be used in these operat-
ing instructions:
DANGER! High risk: failure to observe this warning
may result in injury to life and limb.
WARNING! Moderate risk: failure to observe this warning may
result in injury or serious material damage.
CAUTION: low risk: failure to observe this warning may result
in minor injury or material damage.
NOTE: circumstances and specifics that must be observed when
handling the device.
Instructions for safe operation
~
This device must not be used by children.
~
Children must not play with the device.
~
The device and the power cable must be kept
away from children.
~
This device can be used by people with restrict-
ed physical, sensory or intellectual abilities or
people without adequate experience and/or
understanding if they are supervised or instruct-
ed on how to use this device safely and if they
are aware of the resulting risks.
BB&3(B.DIIHHPKOHB%ERRN6HLWH'LHQVWDJ'H]HPEHU

6
GB
~
Disconnect the mains plug from the wall
socket …
… when it is not supervised,
… before you assemble or disassemble the
device, and
… before you clean the device.
~
Clean all parts and surfaces that will come into
contact with food before using the device for
the first time (see “Cleaning” on page 12).
~
If the mains power cable of this device should
become damaged, it must be replaced by the
manufacturer, the manufacturer's customer ser-
vice department or a similarly qualified spe-
cialist, in order to avoid any hazards.
DANGER for children
~ Children must not play with packing material. Do not allow
children to play with plastic bags. There is a risk of suffoca-
tion.
~ Keep the device out of the reach of children.
DANGER to and from pets and livestock
~ Electrical devices can represent a hazard to pets and live-
stock. In addition, animals can also cause damage to the de-
vice. For this reason you should keep animals away from
electrical devices at all times.
BB&3(B.DIIHHPKOHB%ERRN6HLWH'LHQVWDJ'H]HPEHU

7
GB
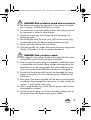
DANGER! Risk of electric shock due to moisture
~ The device must never be operated in the vicinity of a bath-
tub, a shower, a filled hand basin or similar.
~ The motor unit, the power cable and the mains plug must not
be immersed in water or other liquids.
~ Protect the motor unit from dampness and dripping and
splashing water.
~ Should liquids enter the motor unit, pull out the mains plug
immediately. Have the device checked before reusing.
~ Never touch the device with wet hands.
~ If the device falls into water, disconnect the mains plug imme-
diately. Only then is it safe to retrieve the device.
DANGER! Risk of electric shock
~ Only plug the mains plug into the wall socket after the motor
unit and the accessories have been assembled.
~ Only connect the mains plug to a properly installed and eas-
ily accessible wall socket whose voltage corresponds to the
specifications on the rating plate. The wall socket must con-
tinue to be easily accessible after the device is plugged in.
~ Ensure that the power cable cannot be damaged by sharp
edges or hot points. Do not wrap the power cable around
the device.
~ Even after it has been switched off, the device has not been
completely disconnected from the mains. In order to fully dis-
connect it, pull out the mains plug.
~ When using the device, ensure that the power cable cannot
be trapped or crushed.
~ To pull the mains plug out of the wall socket, always pull on
the mains plug, and never on the power cable.
BB&3(B.DIIHHPKOHB%ERRN6HLWH'LHQVWDJ'H]HPEHU

8
GB
~ Disconnect the mains plug from the wall socket …
… if there is a fault,
… when you are not using the device,
… prior to any cleaning, and
… during thunderstorms.
~ Do not use the device if there is visible damage to the device
or the power cable.
~ To avoid any risk, do not make modifications to the product.
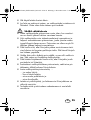
DANGER! Risk of injury from cutting
~ The blades are sharp. Please be very careful especially
when cleaning them.
~
Never reach into rotating blades. Do not touch rotating parts
with spoons or similar utensils. Keep long hair or loose clothing
away from rotating parts as well.
~ The blade continues to rotate after the device is switched off.
Wait until it becomes stationary before opening the lid.
WARNING! Risk of material damage
~
Only use the original accessories.
~ Do not use any astringent or abrasive cleaning agents.
BB&3(B.DIIHHPKOHB%ERRN6HLWH'LHQVWDJ'H]HPEHU

9
GB
4. Items supplied
1 coffee grinder
1 operating instructions
Unpacking
1. Remove all parts from the packaging.
2. Check that all parts are present and intact.
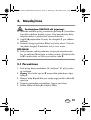
5. Operation
DANGER! Risk of injury from cutting!
~ Never reach into the rotating blades3. Do not touch rotating
parts with spoons or similar utensils. Keep long hair or loose
clothing away from rotating parts as well.
~ Only press switch6 after the lid1 has been positioned cor-
rectly.
~
The blade
3
continues to rotate after the device is switched off.
Wait until it becomes stationary before opening the lid
1
.
WARNING!
~ In order to prevent damage to the device, interrupt the pro-
cess immediately if the blade3 is either turning with difficul-
ty or not turning at all. Pull out the mains plug4 and check if
there is an obstruction in the grinding space2.
BB&3(B.DIIHHPKOHB%ERRN6HLWH'LHQVWDJ'H]HPEHU

10
GB
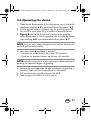
5.1 Assembly
1. Clean the device prior to its first use (see “Cleaning” on
page 12).
2. Figure A: unwind a sufficient length of cable4 from the ca-
ble spool9.
3. Feed the connector cable4 through the small opening in the
bottom of the motor unit5.
4. Place the device on a solid, flat surface.
5. Connect the mains plug4 with a wall socket.
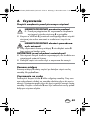
5.2 Tips on the degree of grinding and
quality
• The degree of grinding depends on the quantity of coffee
within the grinding space as well as the duration of grind-
ing.
• Brief grinding produces a coarse ground coffee.
• The longer the grinding takes the finer the ground coffee.
• Espresso beans must be ground longer (45 seconds), since
very fine ground coffee is required for espresso.
• Try different quantities until you find the one right for you.
Indication:
- 7 g of beans are approximately required for 1 cup of coffee
- 20 g of espresso beans are approximately required for
2 cups of espresso
BB&3(B.DIIHHPKOHB%ERRN6HLWH'LHQVWDJ'H]HPEHU

11
GB
5.3 Operating the device
1. Open the lid
1
and remove it. For this purpose, turn it so that the
attachment marking
8
is positioned above the symbol
7
.
2. Fill the desired amount of beans into the grinding space2.
Do not fill in more than 50 g of coffee- or espresso beans.
3.
Figure B:
put the lid
1
onto the opening of the grinding
space
2
and close it. For this purpose, turn it so that the attach-
ment marking
8
is positioned above the symbol
7
.
NOTE: for your own safety, the device can only be started with
the lid1 positioned correctly.
4. Press the switch6 and keep it pressed.
- Duration for coffee beans: up to max. 30 seconds
- Duration for espresso beans: up to max. 45 seconds
NOTE: read the instructions of your espresso/coffee machine re-
garding the required degree of grinding.
5. Release the switch6 when the desired degree of grinding is
reached. Wait until the blades3 are at a standstill.
6. Pull out the mains plug4 and open the lid1.
7. Take the ground coffee out with a spoon.
BB&3(B.DIIHHPKOHB%ERRN6HLWH'LHQVWDJ'H]HPEHU

12
GB
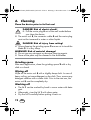
6. Cleaning
Clean the device prior to its first use!
DANGER! Risk of electric shock!
~ Pull the mains plug4 out of the wall socket before
you clean the device.
~ The motor unit5, the connector cable4 and the mains plug
must not be immersed in water or other liquids.
DANGER! Risk of injury from cutting!
~ When cleaning the grinding space2 ensure not to touch the
blade3. It is very sharp.
WARNING! Risk of material damage!
~ Do not use any astringent or abrasive cleaning agents.
~ None of the parts may be cleaned in the dishwasher.
Grinding space
After each application, clean the grinding space2 with a dry
cloth or a brush.
Wiping off
Wipe off the motor unit5 with a slightly damp cloth. In case of
heavy soiling, put some detergent on the cloth. Then, remove any
detergent residues with a clean cloth. Prior to the next use, the
motor unit5 must be completely dry.
Washing off
•The lid1 can be washed by hand in warm water with deter-
gent.
• Afterwards, rinse the lid1 with clean water.
• Dry the lid1 carefully before putting it back on.
BB&3(B.DIIHHPKOHB%ERRN6HLWH'LHQVWDJ'H]HPEHU

13
GB
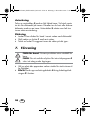
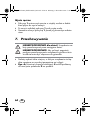
7. Storage
DANGER for children! Keep the device out of the
reach of children.
DANGER! In order to avoid accidents, the mains
plug4 must never be connected to a wall socket while
in storage.
• Select a location where neither high temperatures nor mois-
ture can affect the device.
• Figure A: wind the connector cable4 around the cable
spool9 in the bottom.
BB&3(B.DIIHHPKOHB%ERRN6HLWH'LHQVWDJ'H]HPEHU

14
GB
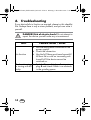
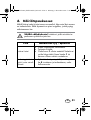
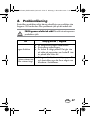
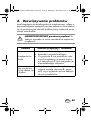
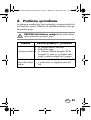
8. Troubleshooting
If your device fails to function as required, please try this checklist
first. Perhaps there is only a minor problem, and you can solve it
yourself.
DANGER! Risk of electric shock! Do not attempt to
repair the device yourself under any circumstances.
Fault Possible causes / Action
No function
• Has the device been connected to the
power supply?
• Check the connection.
• Has the lid1 been positioned correctly?
Without lid or with an incorrectly posi-
tioned lid1 the device cannot be
switched on.
Blade not turning
or turning with dif-
ficulty.
• Switch off immediately, pull out mains
plug4 and check if there is an obstacle
in the grinding space.
BB&3(B.DIIHHPKOHB%ERRN6HLWH'LHQVWDJ'H]HPEHU

15
GB
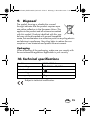
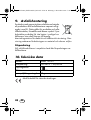
9. Disposal
The symbol showing a wheelie bin crossed
through indicates that the product requires sepa-
rate refuse collection in the European Union. This
applies to the product and all accessories marked
with this symbol. Products identified with this sym-
bol may not be discarded with normal household
waste, but must be taken to a collection point for recycling electric
and electronic appliances. Recycling helps to reduce the con-
sumption of raw materials and protect the environment.
Packaging
When disposing of the packaging, make sure you comply with
the environmental regulations applicable in your country.
10. Technical specifications
Subject to technical modification.
Model: SKME 150 A1
Mains voltage:
220-240 V ~ 50/60 Hz
Protection class: II
Power rating: 150 W
max. capacity: 50 g
BB&3(B.DIIHHPKOHB%ERRN6HLWH'LHQVWDJ'H]HPEHU

16
GB
11. Warranty of the
HOYER HandelGmbH
Dear Customer,
your device is provided with a 3 year warranty starting with the
purchase date. In the event of product defects, you are entitled to
statutory rights against the vendor. These statutory rights are not
restricted by our warranty presented in the following.
Warranty conditions
The warranty period starts with the purchase date. Please keep
the original purchase receipt in a safe place. This document is re-
quired to verify the purchase.
If within three years from the purchase date of this product a ma-
terial or factory defect occurs, the product will be repaired or re-
placed by us – at our discretion – free of charge to you. This
warranty implies that within the period of three years the defec-
tive device and the purchase receipt are presented, including a
brief written description of the defect and the time it occurred.
If the defect is covered by our warranty, the repaired or a new
product will be returned to you. No new warranty period starts
with a repair or replacement of the product.
Warranty period and statutory claims for defects
The warranty period is not extended when the warranty has been
claimed. This also applies to replaced and repaired parts. Any
damages and defects already existing at the time of purchase
must be reported immediately upon unpacking. Repairs arising
after the expiration of the warranty period are subject to a
charge.
BB&3(B.DIIHHPKOHB%ERRN6HLWH'LHQVWDJ'H]HPEHU

17
GB
Warranty coverage
The device was produced carefully according to strict quality
guidelines and tested diligently prior to delivery.
The warranty applies to material or factory defects. This warranty
does not include product parts that are subject to standard wear
and therefore can be considered wear parts; the same applies to
damages at fragile parts, e.g. switches, rechargeable batteries
or parts made of glass.
This warranty expires if the product is damaged, not used as in-
tended or not serviced. For the proper operation of the product,
all instructions listed in the operating instructions must be ob-
served carefully. Any form of use and handling that is advised
against in the operating instructions or warned against must al-
ways be avoided.
The product is only intended for private and not for commercial
use. In the case of incorrect and improper treatment, use of force
and interventions not performed by our authorised Service Cen-
tre, the warranty shall cease.
Handling in case of a warranty claim
In order to ensure prompt processing of your matter, please ob-
serve the following notes:
• Please keep the article number IAN: 274404 and the pur-
chase receipt as a purchase verification for all inquiries.
• If faulty operation or other defects occur, first contact the Ser-
vice Centre listed in the following by telephone or email.
• Then, you are able to send a product reported as defective
free of charge to the service address specified to you, includ-
ing the purchase receipt and the information on the defect
and when it occurred.
Please visit www.lidl-service.com to download this and
many other manuals, product videos and software.
BB&3(B.DIIHHPKOHB%ERRN6HLWH'LHQVWDJ'H]HPEHU

18
GB
Service Centre
Service Great Britain
Tel.: 0871 5000 720 (£ 0.10/Min.)
E-Mail: hoyer@lidl.co.uk
Service Ireland
Tel.: 1890 930 034
(0,08 EUR/Min., (peak)) (0,06 EUR/Min., (off peak))
E-Mail: hoyer@lidl.ie
IAN: 274404
Supplier
Please note that the following address is no service address.
First contact the aforementioned Service Centre.
HOYER Handel GmbH
Kühnehöfe 5
22761 Hamburg
Germany
GB
IE
BB&3(B.DIIHHPKOHB%ERRN6HLWH'LHQVWDJ'H]HPEHU
Seite wird geladen ...
Seite wird geladen ...
Seite wird geladen ...
Seite wird geladen ...
Seite wird geladen ...
Seite wird geladen ...
Seite wird geladen ...
Seite wird geladen ...
Seite wird geladen ...
Seite wird geladen ...
Seite wird geladen ...
Seite wird geladen ...
Seite wird geladen ...
Seite wird geladen ...
Seite wird geladen ...
Seite wird geladen ...
Seite wird geladen ...
Seite wird geladen ...
Seite wird geladen ...
Seite wird geladen ...
Seite wird geladen ...
Seite wird geladen ...
Seite wird geladen ...
Seite wird geladen ...
Seite wird geladen ...
Seite wird geladen ...
Seite wird geladen ...
Seite wird geladen ...
Seite wird geladen ...
Seite wird geladen ...
Seite wird geladen ...
Seite wird geladen ...
Seite wird geladen ...
Seite wird geladen ...
Seite wird geladen ...
Seite wird geladen ...
Seite wird geladen ...
Seite wird geladen ...
Seite wird geladen ...
Seite wird geladen ...
Seite wird geladen ...
Seite wird geladen ...
Seite wird geladen ...
Seite wird geladen ...
Seite wird geladen ...
Seite wird geladen ...
Seite wird geladen ...
Seite wird geladen ...
Seite wird geladen ...
Seite wird geladen ...
Seite wird geladen ...
Seite wird geladen ...
Seite wird geladen ...
Seite wird geladen ...
Seite wird geladen ...
Seite wird geladen ...
Seite wird geladen ...
Seite wird geladen ...
Seite wird geladen ...
Seite wird geladen ...
Seite wird geladen ...
Seite wird geladen ...
Seite wird geladen ...
Seite wird geladen ...
Seite wird geladen ...
Seite wird geladen ...
Seite wird geladen ...
Seite wird geladen ...
Seite wird geladen ...
Seite wird geladen ...
Seite wird geladen ...
Seite wird geladen ...
Seite wird geladen ...
Seite wird geladen ...
Seite wird geladen ...
Seite wird geladen ...
Seite wird geladen ...
Seite wird geladen ...
Seite wird geladen ...
Seite wird geladen ...
Seite wird geladen ...
Seite wird geladen ...
Seite wird geladen ...
Seite wird geladen ...
Seite wird geladen ...
Seite wird geladen ...
Seite wird geladen ...
Seite wird geladen ...
Seite wird geladen ...
Seite wird geladen ...
-
 1
1
-
 2
2
-
 3
3
-
 4
4
-
 5
5
-
 6
6
-
 7
7
-
 8
8
-
 9
9
-
 10
10
-
 11
11
-
 12
12
-
 13
13
-
 14
14
-
 15
15
-
 16
16
-
 17
17
-
 18
18
-
 19
19
-
 20
20
-
 21
21
-
 22
22
-
 23
23
-
 24
24
-
 25
25
-
 26
26
-
 27
27
-
 28
28
-
 29
29
-
 30
30
-
 31
31
-
 32
32
-
 33
33
-
 34
34
-
 35
35
-
 36
36
-
 37
37
-
 38
38
-
 39
39
-
 40
40
-
 41
41
-
 42
42
-
 43
43
-
 44
44
-
 45
45
-
 46
46
-
 47
47
-
 48
48
-
 49
49
-
 50
50
-
 51
51
-
 52
52
-
 53
53
-
 54
54
-
 55
55
-
 56
56
-
 57
57
-
 58
58
-
 59
59
-
 60
60
-
 61
61
-
 62
62
-
 63
63
-
 64
64
-
 65
65
-
 66
66
-
 67
67
-
 68
68
-
 69
69
-
 70
70
-
 71
71
-
 72
72
-
 73
73
-
 74
74
-
 75
75
-
 76
76
-
 77
77
-
 78
78
-
 79
79
-
 80
80
-
 81
81
-
 82
82
-
 83
83
-
 84
84
-
 85
85
-
 86
86
-
 87
87
-
 88
88
-
 89
89
-
 90
90
-
 91
91
-
 92
92
-
 93
93
-
 94
94
-
 95
95
-
 96
96
-
 97
97
-
 98
98
-
 99
99
-
 100
100
-
 101
101
-
 102
102
-
 103
103
-
 104
104
-
 105
105
-
 106
106
-
 107
107
-
 108
108
-
 109
109
-
 110
110


Silvercrest SKME 150 A1 Operating Instructions Manual
- Kategorie
- Kaffeezubehör
- Typ
- Operating Instructions Manual
in anderen Sprachen
- English: Silvercrest SKME 150 A1
- polski: Silvercrest SKME 150 A1
- svenska: Silvercrest SKME 150 A1
- suomi: Silvercrest SKME 150 A1
Verwandte Artikel
-
Silvercrest SKME 150 A1 Operating Instructions Manual
-
-
-
-
-
-
Silvercrest SKME 150 C2 Operating Instructions Manual
-
-
-