Parkside PKLL 7 E4 Benutzerhandbuch
- Kategorie
- Kaffeezubehör
- Typ
- Benutzerhandbuch

Cross line laser PKLL 7 E4
Kreuzlinienlaser
Originalbetriebsanleitung
Cross line laser
Translation of the original instructions
IAN 385107_2107
Niveau laser en croix
Traduction des instructions d‘origine
Kruislijnenlaser
Vertaling van de originele
gebruiksaanwijzing

GB /IE Translation of the original instructions Page 4
FR/BE Traduction des instructions d‘origine Page 18
NL/BE Vertaling van de originele gebruiksaanwijzing Pagina 33
DE/AT/CH Originalbetriebsanleitung Seite 48
Before reading, unfold the page containing the illustrations and familiarise
yourself with all functions of the device.
Avant de lire le mode d‘emploi, ouvrez la page contenant les illustrations et
familiarisez-vous ensuite avec toutes les fonctions de l‘appareil.
Vouw vóór het lezen de pagina met de afbeeldingen open en maak u ver-
trouwd met alle functies van het apparaat.
Klappen Sie vor dem Lesen die Seite mit den Abbildungen aus und machen
Sie sich anschließend mit allen Funktionen des Gerätes vertraut.

1
3
5
2
4
8
9
10
6
5
7
3

4
GB IE
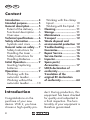
Content
Introduction ...................... 4
Intended purpose.............. 5
General description .......... 5
Extent of the delivery ......5
Functional description .....6
Overview ......................6
Technical specications ..... 6
Safety information ............ 6
Symbols and icons .........6
General notes on safety .... 7
Safety Instructions for
Handling the Laser .........7
Safety Instructions for
Handling Batteries ..........8
Initial Operation ............... 9
Inserting/replacing
batteries ........................9
Operation ........................ 9
Working with the
automatic leveller ...........9
Working without the
automatic leveller .........10
Introduction
Congratulations on the
purchase of your new
device. With it, you have
chosen a high quality pro-
UKCA declaration of
conformity ...................... 63
Translation of the
original EC declaration
of conformity .................. 64
Working with the clamp
tripod .........................10
Working with the tripod .. 11
Cleaning ........................ 11
Storage .......................... 11
Maintenance .................. 12
Transport ....................... 12
Waste disposal and
environmental protection 12
Troubleshooting .............. 13
Guarantee ...................... 14
Repair Service ................ 16
Service-Center ................ 16
Importer ......................... 16
Spare parts/
Accessories ..................... 17
duct. During production, this
equipment has been checked
for quality and subjected to
a nal inspection. The func-
tionality of your equipment is
therefore guaranteed.

5
GB IE
The operating instruc-
tions constitute part of
this product. They contain
important information on sa-
fety, use and disposal.
Before using the product,
familiarise yourself with all
of the operating and safety
instructions. Use the product
only as described and for the
applications specied. Keep
this manual safely and in
the event that the product is
passed on, hand over all do-
cuments to the third party.
Intended purpose
The cross-line laser is suitab-
le for projecting vertical and
horizontal lines.
The device is only intended
for indoor use.
The device is intended to be
used by do-it-yourselfers. It
was not designed for heavy
commercial use.
The device is to be used by
adults. Children under the
age of 16 may not use the
device except under super-
vision.
The manufacturer is not lia-
ble for damage caused by
improper use or incorrect
operation.
General
description
See the front fold-
out page for
illustrations.
Extent of the
delivery
Carefully unpack the ap-
pliance and check that it is
complete. Dispose of the pa-
ckaging material correctly.
• Cross Line Laser
• Clamp tripod
with clamping jaws
• 2 x 1.5 V batteries,
AAA size
• Instruction Manual

6
GB IE
Functional
description
Refer to the following de-
scriptions for a functional
description of the controls.
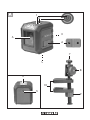
Overview
1 On/off switch
2 LED ring
3 Battery compartment
4 Levelling stop / transport
securing device
5 Thread for tripod faste-
ning
6 Laser
7 Tripod screw
8 Retaining screw
9 Clamping nut
10 Clamping jaw
Technical
specifications
Cross Line Laser .... PKLL 7 E4
Working range .......... 7 m*
Weight (incl. batteries) ........
...................approx. 245 g
Power supply ............3 V
......... (2 x AAA 1.5 V cells)
Protection type ............ IP20
Self-levelling range ...... ± 4°
Levelling accuracy
at 0° to ± 4° ... ± 0.8 mm/m
from ± 4° ....... ± 1.0 mm/m
Laser
Wavelength .......... 635 nm
Laser class ......................2
Levelling time .. approx. 6 sec
* The working range may be restric-
ted by environmental conditions
(e.g. bright light).
Safety information
Symbols and icons
Symbols on the device:
LASER CLASS 2
EN 60825-1:2014
λ = 635 nm
P0 < 1 mW
Caution! - Laser beam
Do not look into the beam!
Laser class 2

7
GB IE
General notes
on safety
• Observe the information
on operation, cleaning,
storage and disposal in the
operating instructions.
• Keep children away from
the device.
• Check the device each
time before using. If da-
maged, have the device
repaired. Do not use the
device if damaged.
• Turn off the device when
not in use. Do not leave the
device unsupervised.
• Keep the device away from
medical devices, magnetic
data storage media and
magnetically sensitive de-
vices.
Safety Instructions
for Handling the
Laser
• Caution: Leaser beam
– Do not look into the
beam! Laser class 2
• Do not aim the laser beam
at people.
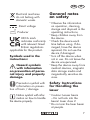
Electrical machines
do not belong with
domestic waste.
Direct voltage
Producer
UKCA mark
indicates conformity
with relevant Great
Britain regulations
applicable for the product.
Symbols used in the
instructions:
Hazard symbols
with information
on prevention of perso-
nal injury and property
damage.
Precaution symbol with
information on preven-
tion of harm / damage
Notice symbol with infor-
mation on how to handle
the device properly.

8
GB IE
Safety Instructions
for Handling
Batteries
• Ensure at all times that
the batteries are inserted
with the correct polarity
(+and–), as shown on the
battery itself.
• Do not short-circuit the bat-
teries.
• Do not charge non-rechar-
geable batteries.
• Do not overcharge batte-
ries!
• Do not mix old and new
batteries or batteries of a
different type or from diffe-
rent manufacturers! Repla-
ce all batteries of a set at
the same time.
• Remove used batteries im-
mediately from the device
and dispose of them cor-
rectly!
• Do not heat the batteries!
• Do not carry out any wel-
ding or soldering work
directly on the batteries!
• Do not take the batteries
apart!
• Do not deform the batteries!
• Do not throw the batteries
into re!
• Store the batteries out of
the reach of children.
• Do not allow children to re-
place the batteries without
supervision!
• Do not store the batteries
close to a re, cookers or
other sources of heat. Do
not place the battery in di-
rect sunlight and do not use
or store it in motor vehicles
in hot weather.
• Store used batteries in the
original packaging and
keep them away from
metal objects. Do not mix
(up) unpacked batteries!
Otherwise this may cause
the battery to short-circuit,
resulting in damage, burns
or even the danger of re.
• Remove batteries from the
device if this is not going
to be used for a prolonged
period, unless it is to be
used in emergencies!
• NEVER touch batteries
which have leaked without
appropriate protection. If
the leaked liquid comes

9
GB IE
into contact with the skin,
you should rinse off this
area of the skin immedia-
tely under running water.
Make sure at all events that
your eyes and mouth do not
come into contact with the
liquid. If they do, seek me-
dical advice immediately.
• Clean the battery contacts
and the equivalent contacts
in the device before inser-
ting the batteries.
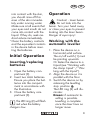
Initial Operation
Inserting/replacing
batteries
1. Open the battery com-
partment (3).
2. Insert two AAA batteries.
Ensure you place the bat-
teries into the compart-
ment in accordance with
the illustration.
3. Close the battery com-
partment (3).
The LED ring (2) will ash
red when the battery
charge is low.
Operation
Caution! - Laser beam.
Do not look into the
beam. Turn your head away
or close your eyes to prevent
looking into the laser beam.
Danger of eye injury!
Working with the
automatic leveller
1. Place the device on a
horizontal solid surface.
The on/off switch (1) must
be pointing upwards.
Or fasten the device to a
tripod (see “Working with
the clamp tripod” / “Wor-
king with the tripod”).
2. Align the device so it is
parallel with the oor
3. Switch the device on by
releasing the levelling
stop: position .
The LED ring (2) will illu-
minate:
Green: if automatic le-
velling is possible.
Levelling is complete
once the laser lines no
longer move.

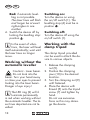
10
GB IE
Red: if automatic level-
ling is not possible.
The laser lines will ash
and longer be at exact
right-angles to one
another.
4. Switch the device off by
locking the levelling stop:
position .
In the event of vibra-
tions, the laser will level
itself automatically; wait until
the laser lines no longer
move.
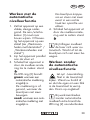
Working without the
automatic leveller
Caution! - Laser beam.
Do not look into the
beam. Turn your head away
or close your eyes to prevent
looking into the laser beam.
Danger of eye injury!
The LED ring (2) will il-
luminate permanently
in red when working without
the automatic leveller. The la-
ser lines depicted are not le-
velled.
Switching on:
Turn the device on using
the on/off switch (1). The
levelling stop (4) must be in
position .
Switching off:
Turn the device off using the
on/off switch (1).
Working with the
clamp tripod
The clamp tripod provided
can be used to attach the de-
vice to various objects.
1. Release the clamping
nut(9).
2. Position the clamping
jaws (10) to the desired
location.
3. Turn the clamping nut (9)
until fastened.
4. Place the device with
thread (5) onto the tripod
screw (7) and tighten by
hand.
Do not use excessive
force as this may dama-
ge the device.

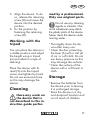
11
GB IE
5. Align the device. To do
so, release the retaining
screw (8) and move the
device into the desired
position.
6. Fix the position by
fastening the retaining
screw(8).
Working with the
tripod
You can place the device in
a stable position and adjust
the height using a tripod
(not provided in scope of
delivery).
Place the device with th-
read(5) onto the tripod
screw and tighten by hand.
Do not use excessive force
as this may damage the
device.
Cleaning
Have any work on
the device that is
not described in this in-
struction guide perfor-
med by a professional.
Only use original parts.
Do not use any cleaning
agents or solvents. Che-
mical substances may attack
the plastic parts of the device.
Never clean the device under
running water.
• Thoroughly clean the de-
vice after every use.
• Clean the disc protecting
the laser (6) with a soft jet
of air, or soft cloth. Do not
use heavy pressure as this
may damage the surface!
• Clean the surface of the
device with a soft brush or
cloth.
Storage
• Remove the batteries from
the device prior to leaving
it in prolonged storage.
• Store the device in a dry
and dustproof location and
out of reach of children.

12
GB IE
Maintenance
The device is maintenance
free.
Transport
Turn off the laser and lock the
levelling stop (4) when trans-
porting (position ) in order
to protect the levelling pendu-
lum from impact damage.
Waste
disposal and
environmental
protection
Take the batteries out of the
device and recycle the de-
vice, batteries, accessories
and packaging in an envi-
ronmentally friendly manner.
Electrical machines do
not belong with dome-
stic waste.
• Dispose of the batteries ac-
cording to local regulations.
Hand in the batteries at a
used battery collection point
where they are recycled in
an environmentally friendly
manner. Dispose of the bat-
teries in a discharged state.
For more information, please
contact your local waste
management provider or our
service centre.
In accordance with the Direc-
tive 2012/19/EU on waste
electrical and electronic
equipment, used electrical
devices must be collected
separately for disposal and
recycled in an environmental-
ly sound manner.
Depending on the implementa-
tion in national law, you may
have the following options:
• Return to a shop,
• Hand over to an ofcial
collection point. For more
information, please contact
your local waste manage-
ment provider or our service
centre.
• Return to the manufacturer/
distributor. We will dispose
of any defective devices

13
GB IE
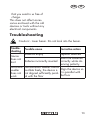
Troubleshooting
Caution! - Laser beam. Do not look into the beam.
Trouble-
shooting Possible cause Corrective action
Device
does not
start
Batteries empty Replace batteries
Batteries incorrectly inserted Insert the batteries
correctly while ob-
serving polarity
Automatic
leveller
does not
work
The automatic leveller cannot
oscillate freely, the device is
not aligned sufciently paral-
lel with the oor
Align the device so
it is parallel with
the oor
that you send to us free of
charge.
This does not affect acces-
sories enclosed with the old
devices or tools without any
electrical components.

14
GB IE
Guarantee
Dear Customer,
This equipment is provided
with a 3-year guarantee
from the date of purchase.
In case of defects, you have
statutory rights against the
seller of the product. These
statutory rights are not re-
stricted by our guarantee
presented below.
Terms of Guarantee
The term of the guarantee
begins on the date of pur-
chase. Please retain the
original receipt. This docu-
ment is required as proof of
purchase.
If a material or manufactur-
ing defect occurs within
three years of the date of
purchase of this product, we
will repair or replace – at
our choice – the product
for you free of charge. This
guarantee requires the de-
fective equipment and proof
of purchase to be presented
within the three-year period
with a brief written descrip-
tion of what constitutes the
defect and when it occurred.
If the defect is covered by
our guarantee, you will
receive either the repaired
product or a new product.
No new guarantee period
begins on repair or replace-
ment of the product.
Guarantee Period and
Statutory Claims for
Defects
The guarantee period is not
extended by the guarantee
service. This also applies
for replaced or repaired
parts. Any damages and
defects already present at
the time of purchase must be
reported immediately after
unpacking. Repairs arising
after expiry of the guarantee
period are chargeable.
Guarantee Cover
The equipment has been
carefully produced in ac-
cordance with strict quality
guidelines and conscien-
tiously checked prior to
delivery.

15
GB IE
The guarantee applies for all
material and manufacturing
defects. This guarantee does
not extend to cover product
parts that are subject to nor-
mal wear and may therefore
be considered as wearing
parts (e.g. batteries) or to
cover damage to breakable
parts (e.g. switch).
This guarantee shall be
invalid if the product has
been damaged, used incor-
rectly or not maintained.
Precise adherence to all of
the instructions specied in
the operating manual is re-
quired for proper use of the
product. Intended uses and
actions against which the
operating manual advises or
warns must be categorically
avoided.
The product is designed
only for private and not
commercial use. The guar-
antee will be invalidated in
case of misuse or improper
handling, use of force, or
interventions not undertaken
by our authorised service
branch.
Processing in Case of
Guarantee
To ensure quick handling of
you issue, please follow the
following directions:
• Please have the receipt
and identication number
(IAN385107_2107) ready
as proof of purchase for
all enquiries.
• Please nd the item num-
ber on the rating plate.
• Should functional errors or
other defects occur, please
initially contact the service
department specied below
by telephone or by e-mail.
You will then receive further
information on the process-
ing of your complaint.
• After consultation with our
customer service, a product
recorded as defective can
be sent postage paid to
the service address com-
municated to you, with the
proof of purchase (receipt)
and specication of what
constitutes the defect and
when it occurred. In or-
der to avoid acceptance
problems and additional

16
GB IE
costs, please be sure to
use only the address com-
municated to you. Ensure
that the consignment is not
sent carriage forward or
by bulky goods, express or
other special freight. Please
send the equipment inc.
all accessories supplied at
the time of purchase and
ensure adequate, safe
transport packaging.
Repair Service
For a charge, repairs not
covered by the guarantee
can be carried out by our
service branch, which will
be happy to issue a cost esti-
mate for you.
We can handle only equip-
ment that has been sent with
adequate packaging and
postage.
Attention: Please send your
equipment to our service
branch in clean condition and
with an indication of the de-
fect. Equipment sent carriage
forward or by bulky goods,
express or other special
freight will not be accepted.
We will dispose of your defec-
tive devices free of charge
when you send them to us.
Service-Center
GB Service
Great Britain
Tel.: 0800 404 7657
E-Mail: [email protected]
IAN385107_2107
IE Service
Ireland
Tel.: 1800 101010
E-Mail: [email protected]
IAN385107_2107
Importer
Please note that the following
address is not a service ad-
dress. Please initially contact the
service centre specied above.
Grizzly Tools
GmbH & Co. KG
Stockstädter Straße 20
63762 Großostheim
Germany
www.grizzlytools.de

17
GB IE
Imported for
GB market by:
Lidl Great Britain Ltd.
Lidl House,
14 Kingston Road
Surbiton, KT5 9NU
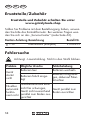
Spare parts/Accessories
Spare parts and accessories can be obtained at
www.grizzlytools.shop
If you have issues ordering, please use the contact form. If
you have any other questions, contact the ”Service-Center”
(see page 16).
Position
instruction manual Description Order No.
7-10 Clamp tripod (complete) 91102999

18
FR BE
Tabele des
matières
Introduction .................... 19
Fins d‘utilisation ............. 19
Description générale ....... 19
Volume de la livraison ..20
Description du
fonctionnement ............20
Vue d‘ensemble ...........20
Caractéristiques
techniques ...................... 20
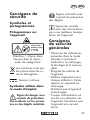
Consignes de sécurité ..... 21
Symboles et
pictogrammes ..............21
Consignes de sécurité
générales ....................... 21
Consignes de sécurité
pour la manipulation
du laser ......................22
Consignes de sécurité
pour la manipulation
des piles .....................22
Mise en service ............... 23
Installer/remplacer
les piles ......................23
Opération ...................... 23
Travailler avec le
dispositif de nivellement
automatique ................24
Traduction de la décla-
ration de conformité CE
originale ........................ 65
Travailler sans le
dispositif de nivellement
automatique ................24
Travailler avec le trépied
de serrage ..................25
Travailler avec
le trépied ....................25
Nettoyage ...................... 26
Rangement ..................... 26
Maintenance .................. 26
Transport ....................... 26
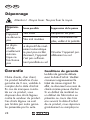
Elimination et protection
de l’environnement ......... 27
Dépannage .................... 28
Garantie ........................ 28
Service Réparations ........ 31
Service-Center ................ 31
Importateur .................... 31
Pièces de rechange /
Accessoires ..................... 32

19
FR BE
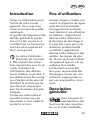
Introduction
Toutes nos félicitations pour
l’achat de votre nouvel
appareil. Vous avez ainsi
choisi un produit de qualité
supérieure.
La qualité de l’appareil a été
vériée pendant la produc-
tion et il a été soumis à un
contrôle nal. Le fonctionne-
ment de votre appareil est
donc ainsi garanti.
La notice d’utilisation
fait partie de ce produ-
it. Elle contient des instruc-
tions importantes pour la sé-
curité, l’utilisation et
l’élimination des déchets.
Avant d’utiliser ce produit, li-
sez attentivement les consig-
nes d’emploi et de sécurité.
N’utilisez le produit que tel
que décrit et uniquement
pour les domaines d’emploi
indiqués.
Conservez cette notice et
remettez-la avec tous les
documents si vous cédez le
produit à un tiers.
Fins d‘utilisation
Le laser à lignes croisées con-
vient à la projection de lignes
verticales et horizontales.
Cet appareil est exclusive-
ment destiné à une utilisation
en intérieur. L‘appareil est
destiné à être utilisé dans
le domaine du bricolage. Il
n‘a pas été conçu pour une
utilisation professionnelle
constante. L‘appareil est
destiné à être utilisé par des
adultes. Les jeunes de plus
de 16 ans ne doivent utiliser
cet appareil que sous la sur-
veillance d‘un adulte.
Le fabricant ne peut être
tenu pour responsable des
dommages causés par une
utilisation inappropriée ou
par une manipulation incor-
recte.
Description
générale
Vous trouverez la
représentation des
fonctions les plus importan-
tes sur le volet rabattable.

20
FR BE
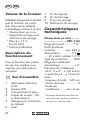
Volume de la livraison
Déballez l’appareil et vériez
que la livraison est comp-
lète. Evacuez le matériel
d’emballage comme il se doit.
• Niveau laser en croix
• Trépied de serrage avec
mâchoires de serrage
• Piles 2 x 1,5 V,
formatAAA
• Notice d‘utilisation
Description du
fonctionnement
Pour la fonction des pièces
de service, veuillez vous
reporter aux descriptions
suivantes.
Vue d‘ensemble
1 Interrupteur Marche/
Arrêt
2 Anneau LED
3 Compartiment à piles
4 Loquet du niveau / Sé-
curité transport
5 Filetage pour la xation
du trépied
6 Laser
7 Vis du trépied
8 Vis de blocage
9 Écrou de serrage
10 Mâchoires de serrage
Caractéristiques
techniques
Niveau laser en croix .........
........................... PKLL 7 A4
Plage de travail ......... 7 m*
Poids (batteries
incluses) ............env. 245 g
Alimentation ............. 3 V
.....(2 x AAA cellules 1,5 V)
Type de protection ...... IP20
Plage de nivellement
automatique ............... ± 4°
Précision de nivellement
de 0° à ± 4° ..± 0,8 mm/m
à partir de ± 4 ...± 1,0 mm/m
Laser
Longueur d‘onde ... 635 nm
Classe de laser ...............2
Durée de
nivellement ........ env. 6 sec
* La plage de travail peut être rest-
reinte par les conditions ambian-
tes (par ex. lumière vive).
Seite wird geladen ...
Seite wird geladen ...
Seite wird geladen ...
Seite wird geladen ...
Seite wird geladen ...
Seite wird geladen ...
Seite wird geladen ...
Seite wird geladen ...
Seite wird geladen ...
Seite wird geladen ...
Seite wird geladen ...
Seite wird geladen ...
Seite wird geladen ...
Seite wird geladen ...
Seite wird geladen ...
Seite wird geladen ...
Seite wird geladen ...
Seite wird geladen ...
Seite wird geladen ...
Seite wird geladen ...
Seite wird geladen ...
Seite wird geladen ...
Seite wird geladen ...
Seite wird geladen ...
Seite wird geladen ...
Seite wird geladen ...
Seite wird geladen ...
Seite wird geladen ...
Seite wird geladen ...
Seite wird geladen ...
Seite wird geladen ...
Seite wird geladen ...
Seite wird geladen ...
Seite wird geladen ...
Seite wird geladen ...
Seite wird geladen ...
Seite wird geladen ...
Seite wird geladen ...
Seite wird geladen ...
Seite wird geladen ...
Seite wird geladen ...
Seite wird geladen ...
Seite wird geladen ...
Seite wird geladen ...
Seite wird geladen ...
Seite wird geladen ...
Seite wird geladen ...
Seite wird geladen ...
Seite wird geladen ...
Seite wird geladen ...
-
 1
1
-
 2
2
-
 3
3
-
 4
4
-
 5
5
-
 6
6
-
 7
7
-
 8
8
-
 9
9
-
 10
10
-
 11
11
-
 12
12
-
 13
13
-
 14
14
-
 15
15
-
 16
16
-
 17
17
-
 18
18
-
 19
19
-
 20
20
-
 21
21
-
 22
22
-
 23
23
-
 24
24
-
 25
25
-
 26
26
-
 27
27
-
 28
28
-
 29
29
-
 30
30
-
 31
31
-
 32
32
-
 33
33
-
 34
34
-
 35
35
-
 36
36
-
 37
37
-
 38
38
-
 39
39
-
 40
40
-
 41
41
-
 42
42
-
 43
43
-
 44
44
-
 45
45
-
 46
46
-
 47
47
-
 48
48
-
 49
49
-
 50
50
-
 51
51
-
 52
52
-
 53
53
-
 54
54
-
 55
55
-
 56
56
-
 57
57
-
 58
58
-
 59
59
-
 60
60
-
 61
61
-
 62
62
-
 63
63
-
 64
64
-
 65
65
-
 66
66
-
 67
67
-
 68
68
-
 69
69
-
 70
70


Parkside PKLL 7 E4 Benutzerhandbuch
- Kategorie
- Kaffeezubehör
- Typ
- Benutzerhandbuch
in anderen Sprachen
- English: Parkside PKLL 7 E4 User manual
- français: Parkside PKLL 7 E4 Manuel utilisateur
- Nederlands: Parkside PKLL 7 E4 Handleiding
Verwandte Artikel
Andere Dokumente
-
geo-FENNEL FLG 80-GREEN TRACKING Benutzerhandbuch
-
Laserliner SmartCross-Laser Set Bedienungsanleitung
-
-
Laserliner SmartCross-Laser Bedienungsanleitung
-
-
-