
PGS
PGS
0311
6616101_01
The PGS accessory, designed for installation on units in the
NRA, NRC, NRS, NBW, NRW, AN and CR series, is used to
activate the timer programmer function.
The compact PGS electronic board features an integrated
circuit with clock function, a timer setting memory and
rechargeable buffer battery to ensure continuous clock ope-
ration when the unit is not operating.
The timer function allows the user to program machine start-
up during 2 daily time periods. Both daily and weekly pro-
gramming is possible: in the case of daily settings, program-
med operating time is the same; in the case of weekly set-
tings, operation time can vary for each day of the week.
L'accessorio PGS, installabile sulle macchine delle serie
NRA, NRC, NRS, NBW, NRW, AN, CR, permette di attivare
la funzione timer programmatore.
E' una scheda elettronica di dimensioni ridotte sulla quale è
montato un circuito integrato con funzione di orologio, una
memoria nella quale vengono salvate le impostazioni del
timer e una batteria tampone ricaricabile per il funzionamen-
to dell'orologio a macchina spenta.
La funzione timer consente di programmare l'accensione
della macchina durante due fasce orarie nell'arco della gior-
nata.
La programmazione può essere giornaliera oppure settima-
nale: nel primo caso le fasce orarie di funzionamento sono
ogni giorno le stesse; nel secondo caso possono essere
diversificate per ogni giorno della settimana.
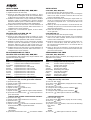
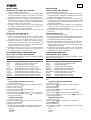
2
1
Fig. 1
L'accessoire “PGS”, installable sur les machines série NRA,
NRC, NRS, NBW, NRW, AN, CR, permet d'activer la fonc-
tion temporisateur programmateur.
C'est une carte électronique aux dimensions réduites sur
laquelle sont montés un circuit intégré ayant fonction d'hor-
loge, une mémoire dans laquelle sont enregistrées les pro-
grammations du temporisateur et une batterie tampon
rechargeable pour le fonctionnement de l'horloge lorsque la
machine est éteinte.
La fonction temporisateur permet de programmer la mise en
marche de la machine durant 2 tranches horaires sur l'espa-
ce de la journée. La programmation peut être journalière ou
hebdomadaire: dans le premier cas, les tranches horaires
de fonctionnement sont chaque jour les mêmes; dans le
second cas, elles peuvent être diversifiées pour chaque jour
de la semaine.
Das auf die Geräte der Serie NRA, NRC, NRS, NBW, NRW,
AN, CR installierbare Zubehör PGS gestattet die Aktivierung
der Timer-Funktion.
Es handelt sich um eine Elektronikkarte kleinen Formats mit
einem IC (Uhrfunktion), einem Speicher für die Eingaben
der Uhr, einem Speicher für die Eingaben des Timer und
einer ladbaren Pufferbatterie zur Uhrfunktion bei abgeschal-
tetem Gerät.
Mit der Timer-Funktion kann die Einschaltung der Einheit in
zwei Zeitschienen/Tag programmiert werden. Es ist eine
tägliche bzw. wöchentliche Programmierung möglich: im
ersten Fall erfolgt der Betrieb an jedem Tag zu den gleichen
Uhrzeiten, im zweiten Fall lassen sich pro Wochentag unter-
schiedliche Zeitschienen eingeben.
El accesorio PGS se puede instalar en las máquinas de las
series NRA, NRC, NRS, NBW, NRW, AN, CR y permite acti-
var la función de temporizador programador.
Es una tarjeta electrónica de tamaño reducido en el que
está montado un circuito integrado con función de reloj, una
memoria en la que se guardan las predisposiciones del tem-
porizador y una batería tampón recargable para el funciona-
miento del reloj con la máquina apagada.
La función temporizador permite programar el encendido de
la máquina durante dos bandas horarias a lo largo del día.
La programación puede ser diaria o semanal: en el primer
caso, las bandas horarias de funcionamiento son cada día
las mismas; en el segundo caso, pueden ser diferentes para
cada día de la semana.

2
INSTALLAZIONE
Macchine delle serie NRA, NRC, NBW, NRS.
1) togliere tensione alla macchina;
2) inserire le due guide porta-scheda in plastica (2, Fig.1);
negli appositi fori rettangolari ai lati del connettore femmi-
na M2 sulla faccia posteriore della scheda visualizzatore;
3) installare la scheda PGS (1, Fig.1) inserendo il connettore
maschio a 6 poli nel connettore M2; si presti la massima
attenzione affinché al polo n°1 della scheda PGS corrispon-
da il n°1 del connettore M2 della scheda visualizzatore;
4) restituire tensione alla macchina: la scheda elettronica di
controllo riconoscerà la presenza della scheda PGS e si
configurerà per la nuova funzione;
5) verificare che sul visualizzatore appaia, in alto a destra,
l’ora corrente
Macchine delle serie NRW, AN, CR.
1) togliere tensione alla macchina;
2) inserire le due guide porta-scheda in plastica (2, Fig.1)
negli appositi fori rettangolari ai lati del connettore femmi-
na M17 sulla faccia posteriore della scheda di controllo;
3) installare la scheda PGS (1, Fig.1) inserendo il connettore
maschio a 6 poli nel connettore M17; si presti la massima
attenzione affinché al polo n°1 della scheda PGS corri-
sponda il n°1 del connettore M17 della scheda di controllo;
4) restituire tensione alla macchina: la scheda elettronica di
controllo riconoscerà la presenza della scheda PGS e si
configurerà per la nuova funzione.
PROGRAMMAZIONE DEL TIMER
Macchine delle serie NRA, NRC, NBW, NRS.
Con l'installazione della scheda PGS, vengono attivati i SET
riportati nella tabella seguente:
SET FUNZIONE
Time impostazione ora e giorno della settimana
Timer selezione della modalità di funzionamento
Giornaliero impostazione fasce orarie
Lunedì impostazione fasce orarie lunedì
Martedi impostazione fasce orarie martedì
Mercoledi impostazione fasce orarie mercoledì
Giovedi impostazione fasce orarie giovedì
Venerdi impostazione fasce orarie venerdì
Sabato impostazione fasce orarie sabato
Domenica impostazione fasce orarie domenica
La programmazione del timer prevede le seguenti operazioni:
-impostazione dell’ ora e del giorno della settimana:
1) premere il tasto
SET;
2) agendo sui tasti visualizzare il set “Time”;
3) premere il tasto ;
4) digitare il codice di accesso;
5) agendo sui tasti modificare l'ora;
6) premere il tasto
SET;
7) agendo sui tasti modificare il giorno della settimana
8) premendo nuovamente il tasto i valori impostati ven-
gono memorizzati;
-selezione della modalità di funzionamento del timer:
1) premere il tasto
SET;
2) agendo sui tasti visualizzare il set “Timer”;
3) premere il tasto ;
4) digitare il codice di accesso;
5) agendo sui tasti selezionare la modalità di funziona-
mento desiderata tra le seguenti alternative:
- GIORNO
- SETTIMANA
- NESSUNO
6) premendo nuovamente il tasto la selezione effettua-
+
-
+
-
+
-
+
-
+
-
INSTALLATION
Series NRA, NRC, NBW, NRS.
1) Isolate the machine from the power supply.
2) Insert the two plastic board guides in the rectangular
holes on the sides of female connector M2 on the rear
surface of the display board.
3) Install the PGS board by inserting the 6-pole male con-
nector in connector M2; make sure that pole no. 1 on the
PGS board corresponds to no. 1 of connector M2 on the
display board.
4) Power up the unit; the electronic control board will ack-
nowledge the presence of PGS board and will self confi-
gure for the new function.
5) Check that the display shows the correct time upstream
on the right side.
Series NRW, AN, CR.
1) Isolate the machine from the power supply.
2) Insert the two plastic board guides in the rectangular
holes on the sides of female connector M17 on the rear
surface of the control board.
3) Install the PGS board by inserting the 6-pole male con-
nector in connector M17; make sure that pole no. 1 on
the PGS board corresponds to no. 1 of connector M17 on
the control board.
4) Power up the unit; the electronic control board will ack-
nowledge the presence of PGS board and will self confi-
gure for the new function.
PROGRAMMING THE TIMER
Series NRA, NRC, NBW, NRS.
When the PGS board is installed, the settings shown in the
table below are activated:
SET FUNCTION
Time
setting of time and day of the week
Timer
selection of timer operating mode
Day
setting of time periods
Monday
Monday time settings
Tuesday
Tuesday time settings
Wednesday
Wednesday time settings
Thursday
Thursday time settings
Friday
Friday time settings
Saturday
Saturday time settings
Sunday
Sunday time settings
To program the timer, proceed as follows:
-setting time and day of the week
1) Press the
SET
button;
2) By means of the buttons, display the “
Time
” setting;
3) Press the button;
4) Enter the access code;
5) Change the time setting by means of buttons ;
6) Press the
S
ET
button;
7) Change the day setting by means of buttons ;
8) Press the button again to store the new settings;
-selecting the timer mode
1) Press the
SET
button;
2)
By means of the buttons, display the “
Timer
” setting;
3) Press the button;
4) Enter the access code;
5) By means of the buttons, select one of the following
time modes:
- DAY
- WEEK
- NONE
6) Press the button again to store the selection.
+
-
+
-
+
-
+
-
+
-

3
ta viene memorizzata.
Modalità “GIORNO”:
-
consente di impostare nell’arco della giornata due fasce ora-
rie di funzionamento, uguali per tutti i giorni della settimana;
- viene visualizzato il set “Giornaliero”;
- non vengono visualizzati i set da “Lunedì” a “Domenica”.
Modalità “SETTIMANA”:
- consente di impostare due fasce orarie di funzionamento
per ciascun giorno della settimana;
- non viene visualizzato il set “Giornaliero”;
- vengono visualizzati i set da “Lunedì” a “Domenica”.
Modalità “NESSUNO”:
- il timer programmatore viene disattivato;
-
i set da “Giornaliero” a “Domenica” non vengono visualizzati.
-impostazione delle fasce orarie
1) premere il tasto
SET;
2) agendo sui tasti visualizzare il set “Giornaliero” se
“Timer=GIORNO”, oppure il giorno della settimana per il
quale si vogliono impostare le fasce orarie se
“Timer=SETTIMANA”;
3) premere il tasto ;
4) digitare il codice di accesso;
5) modificare il valore di “START 1” per mezzo dei tasti
6) premere il tasto ;
7) modificare il valore di “STOP 1” per mezzo dei tasti
8) premere il tasto ;
9) modificare il valore di “START 2” per mezzo dei tasti
10)premere il tasto ;
11)modificare il valore di “STOP 2” per mezzo dei tasti
12)premendo nuovamente il tasto le fasce orarie impo-
state vengono memorizzate.
Per eliminare una fascia oraria impostare la stessa ora per
START e STOP; es.: START 1=10.30, STOP 1=10.30.
Il timer non consente di far precedere l’inizio della seconda
fascia oraria alla fine della prima.
-configurazione della scheda di controllo:
Sulla scheda di controllo della macchina dev’essere impo-
stato il comando remoto, altrimenti il timer viene ignorato.
Inoltre il pannello remoto dev’essere posizionato su ”ON”,
altrimenti la macchina rimane spenta (OFF) nonostante il
consenso del timer.
Macchine delle serie NRW, AN, CR.
Con l'installazione della scheda PGS, vengono attivati i set
riportati nella tabella seguente:
SET FUNZIONE
h h impostazione ora e minuti
g g impostazione giorno della settimana
t i M selezione della modalità di funzionamento
q u o impostazione fasce orarie
l u n impostazione fasce orarie lunedì
M a r impostazione fasce orarie martedì
M e r impostazione fasce orarie mercoledì
g i o impostazione fasce orarie giovedì
V e n impostazione fasce orarie venerdì
S a b impostazione fasce orarie sabato
d o M impostazione fasce orarie domenica
La programmazione del timer prevede le seguenti operazioni:
-impostazione dell’ora e del giorno della settimana:
1) premere ripetutamente il tasto
SEL fino a che il led giallo
si posiziona sul simbolo
SET;
2) agendo sui tasti visualizzare il set “h h” (Time);
3) premere il tasto ;
+
-
+
-
+
-
+
-
+
-
+
-
Mode “
DAY
”:
- allows programming of two unit operating times in a day;
settings remain identical for each day of the week;
- displays the “
Day
” setting;
- does not display settings of “
Monday
” to “
Sunday
”.
Mode “
WEEK
”:
- allows programming of two unit operating times for each
day of the week;
- does not display the “
Day
” setting;
- displays settings of “
Monday
” to “
Sunday
”.
Mode “
NONE
”:
- timer programmer is deactivated;
-“
Day”
and “
Weekly
” settings are not displayed.
- setting operating times
1) Press the
SET
button;
2) By means of the buttons, display the “
Day
” settings
(if “
Timer = DAY
”), or the day of the week for which set-
tings are to be made (if “
Timer = WEEK
”);
3) Press the button;
4) Enter the access code;
5) Adjust the “START 1” setting with the buttons;
6) Press the button;
7) Adjust the “STOP 1” setting with the buttons;
8) Press the button;
9) Adjust the “START 2” setting with the buttons;
10)Press the button;
11)Adjust the “STOP 2” setting with the buttons;
12)Press the button again to store the new time set-
tings.
To deactivate a time setting, simply set the same time for
START and STOP (e.g. START 1=10.30, STOP 1=10.30).
The timer will not allow commencement of the second set-
ting before the end of the first.
-board settings
The remote control on the machine control board must be
configured, otherwise the timer will be ignored. The remote
panel must also be set to the ”ON” position (if not, the
machine will remain off despite the permissive given by the
timer).
Series NRW, AN, CR.
When the PGS board is installed, the settings shown in the
table below are activated:
SETTING FUNCTION
h h
setting of time
g g
setting of day of the week
t i M
selection of timer operating mode
q u o
setting of time periods
l u n
Monday time settings
M a r
Tuesday time settings
M e r
Wednesday time settings
g i o
Thursday time settings
V e n
Friday time settings
S a b
Saturday time settings
d o M
Sunday time settings
To program the timer, proceed as follows:
-setting the time and day of the week:
1) Press the
SEL
button repeatedly until the yellow led is
over the
SET
symbol;
2) Press the buttons to display the “
h h
” set Time;
3) Press the button;
4)
If the yellow led over the
SET
symbol starts flashing,
proceed to the next point; if the display shows the mes-
sage , enter the access code by means of the
+
-
+
-
+
-
+
-
+
-
+
-

4
4) se il led giallo in corrispondenza del simbolo SET inizia a
lampeggiare, passare al punto successivo; se invece sul
display appare la scritta introdurre il codice di
accesso agendo sui tasti ; premere quindi il tasto
per confermare il valore impostato; se il led giallo in
corrispondenza del simbolo
SET inizia a lampeggiare,
passare al punto successivo; in caso contrario (codice
errato) reinserire il codice ripetendo l’operazione;
5) modificare l’ora mediante i tasti ;
6) premere il tasto ;
7) modificare i minuti mediante i tasti ;
8) premere il tasto ;
9) agendo sui tasti visualizzare il set “g g” (Weekday);
10)premere il tasto ;
11)modificare il giorno della settimana agendo sui tasti
12)premendo nuovamente il tasto l’ora e il giorno della
settimana impostati vengono memorizzati;
-selezione della modalità di funzionamento del timer:
1) premere ripetutamente il tasto
SEL fino a che il led giallo
si posiziona sul simbolo
SET;
2) agendo sui tasti visualizzare il set “t i M”.(Timer);
3) premere il tasto ;
4) se il led giallo in corrispondenza del simbolo
SET inizia a
lampeggiare, passare al punto successivo; se invece sul
display appare la scritta introdurre il codice di
accesso agendo sui tasti ; premere quindi il tasto
per confermare il valore impostato; se il led giallo in
corrispondenza del simbolo
SET inizia a lampeggiare,
passare al punto successivo; in caso contrario (codice
errato) reinserire il codice ripetendo l’operazione;
5) agendo sui tasti selezionare la modalità di funziona-
mento desiderata tra le seguenti alternative:
- q u o
- S e t
- n o
6) premendo nuovamente il tasto la selezione effettua-
ta viene memorizzata.
q u o: (Timer Giornaliero)
-
consente di impostare nell’arco della giornata due fasce ora-
rie di funzionamento, uguali per tutti i giorni della settimana;
- viene visualizzato il set “q u o”;
- non vengono visualizzati i set da “ l u n” a “d o M”;
S e t: (Timer Settimanale)
- consente di impostare due fasce orarie di funzionamento
per ciascun giorno della settimana;
- non viene visualizzato il set “q u o”;
- vengono visualizzati i set da “l u n” a “d o M”;
n o : (Timer non impostato)
- il timer programmatore viene disattivato;
- i set da “q u o” a “d o M” non vengono visualizzati;
-impostazione delle fascie orarie:
1) premere ripetutamente il tasto
SEL fino a che il led giallo
si posiziona sul simbolo
SET;
2)
agendo sui tasti visualizzare il set
“q u o” se “t i M =
q u o”, oppure il giorno della settimana (“l u n” ...”d o M”) per
il quale si vogliono impostare le fasce orarie se “t i M= S e t”;
3) premere il tasto ;
4) se il led giallo in corrispondenza del simbolo
SET inizia a
lampeggiare, passare al punto successivo; se invece sul
display appare la scritta introdurre il codice di
accesso agendo sui tasti ; premere quindi il tasto
per confermare il valore impostato; se il led giallo in
corrispondenza del simbolo
SET inizia a lampeggiare,
passare al punto successivo; in caso contrario (codice
errato) reinserire il codice ripetendo l’operazione;
+
-
+
-
+
-
+
-
+
-
+
-
+
-
+
-
+
-
+
-
buttons, then press the button to confirm the
settings. If the yellow led over the
SET
symbol starts fla-
shing, proceed to the next point. If the led does not flash,
an incorrect code has been entered; repeat the procedu-
re to enter the code;
5) Adjust the time setting by means of the buttons;
6) Press the button;
7) Adjust the minutes by means of the buttons;
8) Press the button;
9) Press buttons to display the Weekday “
g g
” setting;
10)Press the button;
11)Press the buttons to select the day of the week;
12)Press the button again to store the time and the day
of the week selected;
- selecting the timer mode:
1) Press the
SEL
button repeatedly until the yellow led is
over the
SET
symbol;
2)
Press the buttons to display the Timer “
T i M
” setting;
3) Press the button;
4) If the yellow led over the
SET
symbol starts flashing, pro-
ceed to the next point; if the display shows the message
, enter the access code by means of the but-
tons, then press the button to confirm the settings. If
the yellow led over the
SET
symbol starts flashing, pro-
ceed to the next point. If the led does not flash, an incor-
rect code has been entered; repeat the procedure to
enter the code;
5) By means of the buttons, select the desired opera-
ting mode from one of the following:
- q u o
- S e t
- n o
6) Press the button again to store the selection made.
q u o
: (Daily Timer)
- allows programming of two unit operating times in a day;
settings remain identical for each day of the week;
- displays the “
q u o
” setting;
- does not display settings of “
l u n
” to “
d o M
”;
S e t
: (Weekly Timer)
- allows programming of two unit operating times for each
day of the week;
- does not display the “
q u o
” setting;
- displays settings of “
l u n
” to “
d o M
”;
n o
: (Timer not set)
- timer programmer is deactivated;
- settings from “
q u o
” to “
d o M
” are not displayed;
-time settings:
1) Press the
SEL
button repeatedly until the yellow led is
positioned over the
SET
symbol;
2) By means of the buttons, display the “
q u o
” settings
(if “
t i M
” = “
q u o
”), or the day of the week (“
l u n
” ...”
d o M
”)
for which the settings are to be made (if ““
t i M
” = “
S e t
”);
3) Press the button;
4) If the yellow led over the
SET
symbol starts flashing, pro-
ceed to the next point; if the display shows the message
, enter the access code by means of the but-
tons, then press the button to confirm the settings. If
the yellow led over the
SET
symbol starts flashing, pro-
ceed to the next point. If the led does not flash, an incor-
rect code has been entered; repeat the procedure to
enter the code;
5) The start time of the first daily setting will appear, e.g.
= 7.10 a.m.; adjust the time by means of the
buttons;
6) Press the button;
+
-
+
-
+
-
+
-
+
-
+
-
+
-
+
-
+
-
+
-

5
5) a questo punto appare l’ora di inizio della prima fascia
oraria: es. = ore 7.10; modificarla secondo le pro-
prie eseigenze mediante i tasti ;
6) premere il tasto ;
7) appare quindi l’ora alla quale termina la prima fascia ora-
ria; modificarla mediante i tasti ;
8) premere il tasto ;
9) a questo punto appare l’ora di inizio della seconda fascia
oraria; modificarla mediante i tasti ;
10)premere il tasto ;
11)appare quindi l’ora alla quale termina la seconda fascia
oraria: modificarla mediante i tasti ;
12)premendo nuovamente il tasto vengono memorizza-
te le fasce orarie impostate.
Per eliminare una fascia oraria impostare la stessa ora per
l’inizio e per la fine.
Il timer non consente di far precedere l’inizio della seconda
fascia oraria alla fine della prima.
-configurazione della scheda di controllo:
Sulla scheda di controllo della macchina dev’essere impo-
stato il comando remoto, altrimenti il timer viene ignorato.
Inoltre il pannello remoto dev’essere posizionato su”ON”,
altrimenti la macchina rimane spenta (OFF) nonostante il
consenso del timer.
+
-
+
-
+
-
+
-
7) The end time of the first daily setting will appear; adjust it
by means of the buttons;
8) Press the button;
9) The start time of the second daily setting will now appear;
adjust the time by means of the buttons;
10)Press the button;
11) The end time of the second daily setting will appear;
adjust it by means of the buttons;
12)Press the button again to store all time settings.
To deactivate a time setting, simply set the same time for
START and STOP.
The timer will not allow commencement of the second set-
ting before the end of the first.
-board settings:
The remote control on the machine control board must be
configured, otherwise the timer will be ignored. The remote
panel must also be set to the ”ON” position (if not, the
machine will remain off despite the permissive given by the
timer).
+
-
+
-
+
-

6
INSTALLATION
Machines des séries NRA, NRC, NBW, NRS.
1 couper la tension de la machine;
2)
insérer les deux glissières porte-carte en plastique dans
les trous rectangulaires prévus sur les côtés du connecteur
femelle M2 sur la face arrière de la carte de visualisation;
3) installer la carte PGS en enfichant le connecteur mâle à
6 pôles dans le connecteur M2; faire très attention que le
n°1 du connecteur M2 de la carte de visualisation corre-
sponde au pôle n°1 de la carte PGS;
4) remettre la machine sous tension: la carte électronique
de contrôle reconnaîtra la présence de la carte PGS et
se configurera pour la nouvelle fonction;
5) vérifier que l'heure actuelle apparaît en haut à droite de
l'affichage.
Machines des séries NRW, AN, CR.
1) couper la tension de la machine;
2)
insérer les deux glissières porte-carte en plastique dans
les trous rectangulaires prévus sur les côtés du connec-
teur femelle M17 sur la face arrière de la carte de contrôle;
3) installer la carte PGS en enfichant le connecteur mâle à
6 pôles dans le connecteur M17; faire très attention que
le n°1 du connecteur M17 de la carte de contrôle corre-
sponde au pôle n°1 de la carte PGS;
4) remettre la machine sous tension: la carte électronique
de contrôle reconnaîtra la présence de la carte PGS et
se configurera pour la nouvelle fonction.
PROGRAMMATION DU TEMPORISATEUR
Machines des séries NRA, NRC, NBW, NRS.
L'installation de la carte PGS active les parametres indiqués
dans le tableau ci-dessous:
PARAMETRE FONCTION
Heures programmation heure et jour de la semaine
Timer sélection du mode de fonctionnement
Jour programmation tranches horaires
Lundi programmation tranches horaires lundi
Mardi programmation tranches horaires mardi
Mercredi programmation tranches horaires mercredi
Jeudi programmation tranches horaires jeudi
Vendredi programmation tranches horaires vendredi
Samedi programmation tranches horaires samedi
Dimanche programmation tranches horaires dimanche
La programmation du temporisateur prévoit les opérations
suivantes:
-programmation heure et jour semaine:
1) presser la touche SET;
2) à l'aide des touches afficher le paramètre “Heures”;
3) presser la touche ;
4) taper le code d'accès;
5) à l'aide des touches , modifier l'heure;
6) presser la touche
SET;
7) à l'aide des touches , modifier le jour de la semaine;
8) en pressant de nouveau la touche , on enregistre les
valeurs programmées;
- sélection mode timer:
1) presser la touche
SET;
2) à l'aide des touches , afficher le paramètre “Timer”;
3) presser la touche ;
4) taper le code d'accès;
5) à l'aide des touches , sélectionner le mode de fonc-
tionnement souhaité parmi les alternatives suivantes:
- JOUR
- SEMAINE
- AUCUN
+
-
+
-
+
-
+
-
+
-
INSTALLATION
Geräte Serie NRA, NRC, NBW, NRS
1) Geräteversorgung unterbrechen
2) Die 2 Kartenprofile aus Kunststoff in die entsprechenden
Viereckbohrungen seitlich der Steckbuchse M2 auf der
Rückseite der Displaykarte einschieben
3) 6-poligen Steckverbinder der Karte PGS in die Buchse
M2 einstecken und hierbei darauf achten, daß der 1. Stift
der Karte PGS dem 1. Einschub auf der Buchse M2 der
Displaykarte entspricht
4) Geräteversorgung wieder herstellen: die Steuerkarte
erkennt die neu installierte Karte PGS und führt die
Konfiguration der neuen Funktion aus
5) Auf dem Display müß die aktuelle Uhrzeit oben rechts
erscheinen.
Geräte Serie NRW, AN, CR
1) Geräteversorgung unterbrechen
2) Die 2 Kartenprofile aus Kunststoff in die entsprechenden
Viereckbohrungen seitlich der Steckbuchse M17 auf der
Rückseite der Displaykarte einschieben
3) 6-poligen Steckverbinder der Karte PGS in die Buchse
M17 einstecken und hierbei darauf achten, daß der 1.
Stift der Karte PGS dem 1. Einschub auf der Buchse M17
der Displaykarte entspricht
4) Geräteversorgung wieder herstellen: die Steuerkarte
erkennt die neu installierte Karte PGS und führt die
Konfiguration der neuen Funktion aus
TIMERPROGRAMMIERUNG
Geräte Serie NRA, NRC, NBW, NRS
Bei Installation der Karte PGS werden die sollwerte in nach-
stehender Tabelle aktiviert:
SOLLWERT FUNKTION
Uhrzeit
Eingabe aktuelle Uhrzeit und Wochentag
Timer
Auswahl des Timer-Betriebsmodus
Täglich
Eingabe Zeitschienen
Montag
Eingabe Zeitschienen Montag
Dienstag
Eingabe Zeitschienen Dienstag
Mittwoch
Eingabe Zeitschienen Mittwoch
Donnerstag
Eingabe Zeitschienen Donnerstag
Freitag
Eingabe Zeitschienen Freitag
Samstag
Eingabe Zeitschienen Samstag
Sonntag
Eingabe Zeitschienen Sonntag
Die Timerprogrammierung ist in folgende Schritte geglie-
dert:
- Eingabe von Uhrzeit und Wochentag:
1) Taste
SET
drücken;
2) Durch Tasten den Sollwert “Uhrzeit” anzeigen;
3) Taste drücken;
4) Paßwort eintippen;
5) Durch Tasten die neue Uhrzeit einstellen;
6) Taste
SET
drücken;
7) Durch Tasten den neuen Wochentag eingeben;
8) Durch abermaligen Druck auf Taste werden die
Eingaben gespeichert;
- Auswahl Timermodus:
1) Taste
SET
drücken;
2) Durch Tasten den Sollwert “
Timer
” anzeigen;
3) Taste drücken;
4) Paßwort eintippen;
5) Durch Tasten den gewünschten Betriebsmodus
auswählen, u.z.:
- TAG
- WOCHE
-
KEIN
+
-
+
-
+
-
+
-
+
-

7
6) en pressant de nouveau la touche la sélection effec-
tuée est enregistrée.
Mode “JOUR”:
- permet de programmer sur l'espace de la journée deux
tranches horaires de fonctionnement, identiques pour
tous les jours de la semaine;
- le paramètre “Jour” est visualisé;
- les paramètres de “Lundi” à “Dimanche” ne sont pas
visualisés.
Mode “SEMAINE”:
- permet de programmer deux tranches horaires de fonc-
tionnement pour chaque jour de la semaine;
- le paramètre “Jour” n'est pas visualisé;
- les paramètres de “Lundi” à “Dimanche” sont visualisés.
Mode “AUCUN”:
- le temporisateur programmateur est désactivé;
- les paramètres de “Jour” à “Dimanche” ne sont pas
visualisés.
-programmation des tranches horaires
1) presser la touche
SET;
2) à l'aide des touches , afficher le paramètre “Jour”, si
“Timer=JOUR”, ou le jour de la semaine pour lequel on
veut programmer les tranches horaires, si
“Timer=SEMAINE”;
3) presser la touche ;
4) taper le code d'accès;
5)
modifier la valeur de “START 1” à l'aide des touches ;
6) presser la touche ;
7) modifier la valeur de “STOP 1” à l'aide des touches ;
8) presser la touche ;
9)
modifier la valeur de “START 2” à l'aide des touches ;
10)presser la touche ;
11)
modifier la valeur de “STOP 2” à l'aide des touches ;
12)en pressant de nouveau la touche , on enregistre les
tranches horaires programmées.
Pour éliminer une tranche horaire, programmer la même
heure pour START et STOP; par ex.:
START 1=10.30, STOP 1=10.30.
Le temporisateur ne permet pas de faire commencer la
deuxième tranche horaire avant la fin de la première.
-programmation carte
On doit programmer la commande à distance sur la carte de
contrôle de la machine, sinon le temporisateur est ignoré.
De plus, le panneau à distance doit être mis sur ”ON”, sinon
la machine reste éteinte (OFF) malgré la validation du tem-
porisateur.
Machines des séries NRW, AN, CR.
L'installation de la carte PGS active les parametres indiqués
dans le tableau ci-dessous:
PARAMETRE FONCTION
h h programmation heure
g g programmation jour de la semaine
t i M sélection du mode de fonctionnement
q u o programmation tranches horaires
l u n programmation tranches horaires lundi
M a r programmation tranches horaires mardi
M e r programmation tranches horaires mercredi
g i o programmation tranches horaires jeudi
V e n programmation tranches horaires vendredi
S a b programmation tranches horaires samedi
d o M programmation tranches horaires dimanche
La programmation du temporisateur prévoit les opérations
suivantes:
-programmation heure et jour semaine:
1) presser plusieurs fois la touche SEL jusqu'à ce que la
+
-
+
-
+
-
+
-
+
-
6) Durch abermaligen Druck auf Taste werden die
Eingaben gespeichert.
Betriebsmodus “
TAG ”
:
- Eingabe von zwei gleichen Betriebs-Zeitschienen an
jedem Tag;
- Anzeige des Sollwerts “
Täglich
”;
- Keine Anzeige der Sollwerte “
Montag
” bis “
Sonntag
”.
Betriebsmodus
”WOCHE”
:
- Eingabe von unterschiedlichen zwei Betriebs-
Zeitschienen pro Wochentag;
- Keine Anzeige des Sollwerts “
Täglich
”;
- Anzeige der Sollwerte “
Montag
” bis “
Sonntag
”.
Betriebsmodus
“KEIN”
:
- Deaktivierung des Timer;
- Keine Anzeige der Sollwerte “
Täglich
” bis “
Sonntag
”.
-Eingabe der Zeitschienen
1) Taste
SET
drücken;
2) Durch Tasten den Sollwert “
Täglich
” bei
“
Timer=TAG
” bzw. des Wochentags zur Eingabe der
Zeitschienen bei “
Timer=WOCHE
” anzeigen;
3) Taste drücken;
4) Paßwort eintippen;
5) Wert von “START 1” über Tasten ändern;
6) Taste drücken;
7) Wert von “STOP 1” über Tasten ändern;
8) Taste drücken;
9) Wert von “START 2” über Tasten ändern;
10)Taste drücken;
11)Wert von “STOP 2” über Tasten ändern;
12)Durch abermaligen Druck auf Taste werden die ein-
gegebenen Zeitschienen gespeichert.
Zum Löschen einer Zeitschiene die gleiche Uhrzeit für
START und STOP eingeben; z.B.:
START 1=10.30, STOP 1=10.30.
Der Timer gestattet es nicht, die zweite Zeitschiene vor
Ende der ersten beginnen zu lassen.
-Einstellungen der Karte
Auf der Steuerkarte des Geräts muß die Fernbedienung ein-
gestellt sein, anderenfalls wird der Timer nicht festgestellt.
Die Fernbedienung außerdem auf ”ON” setzen, da das
Gerät ansonsten trotz Timerfreigabe ausgeschaltet bleibt
(OFF).
Geräte Serie NRW, AN, CR
Bei Installation der Karte PGS werden die sollverte in nach-
stehender Tabelle aktiviert:
SOLLWERT FUNKTION
h h
Eingabe aktuelle Uhrzeit
g g
Eingabe Wochentag
t i M
Auswahl des Timer-Betriebsmodus
q u o
Eingabe Zeitschienen
l u n
Eingabe Zeitschienen Montag
M a r
Eingabe Zeitschienen Dienstag
M e r
Eingabe Zeitschienen Mittwoch
g i o
Eingabe Zeitschienen Donnerstag
V e n
Eingabe Zeitschienen Freitag
S a b
Eingabe Zeitschienen Samstag
d o M
Eingabe Zeitschienen Sonntag
Die Timerprogrammierung ist in folgende Schritte geglie-
dert:
-Eingabe von Uhrzeit und Wochentag:
1) Taste
SEL
so oft drücken, bis die gelbe Led auf dem
+
-
+
-
+
-
+
-
+
-

8
led jaune se positionne sur le symbole SET;
2) à l'aide des touches , visualiser le paramètre Heure
“h h”;
3) presser la touche ;
4) si la led jaune en regard du symbole
SET commence à
clignoter, passer au point suivant; en revanche, si sur l'af-
fichage apparaît le message entrer le code
d'accès à l'aide des touches
; presser ensuite la touche pour confirmer la valeur
programmée; si la led jaune en regard du symbole
SET
commence à clignoter, passer au point suivant; en cas
contraire (code incorrect), entrer de nouveau le code en
répétant l'opération;
5) modifier l'heure à l'aide des touches ;
6) presser la touche ;
7) modifier les minutes à l'aide des touches ;
8) presser la touche ;
9) à l'aide des touches, visualiser le paramètre Jour de la
Semaine “g g”;
10)presser la touche ;
11)modifier le jour de la semaine à l'aide des touches ;
12)en pressant de nouveau la touche , l'heure et le jour
de la semaine programmés sont enregistrés;
-sélection mode temporisateur:
1) presser plusieurs fois la touche
SEL jusqu'à ce que la led
jaune se positionne sur le symbole
SET;
2) à l'aide des touches visualiser le paramètre Timer
“T i M”;
3) presser la touche ;
4) si la led jaune en regard du symbole
SET commence à
clignoter, passer au point suivant; en revanche, si sur l'af-
fichage apparaît le message entrer le code
d'accès à l'aide des touches
; presser ensuite la touche pour confirmer la valeur
programmée; si la led jaune en regard du symbole
SET
commence à clignoter, passer au point suivant; en cas
contraire (code incorrect), entrer de nouveau le code en
répétant l'opération;
5) à l'aide des touches sélectionner le mode de fonc-
tionnement souhaité parmi les alternatives suivantes:
- q u o
- S e t
- n o
6) en pressant de nouveau la touche la sélection effec-
tuée est enregistrée
q u o: (Temporisateur Journalier)
- permet de programmer sur l'espace de la journée deux
tranches horaires de fonctionnement, identiques pour
tous les jours de la semaine;
- le paramètre “q u o” est visualisé;
- les paramètres de “ l u n” à “d o M” ne sont pas visuali-
sés;
S e t: (Temporisateur Hebdomadaire)
- permet de programmer deux tranches horaires de fonc-
tionnement pour chaque jour de la semaine;
- le paramètre “q u o” n'est pas visualisé;
- les paramètres de “l u n” à “d o M” sont visualisés;
n o : (Temporisateur non programmé)
- le temporisateur programmateur est désactivé;
-
les paramètres de “q u o” à “d o M” ne sont pas visualisés;
-programmation tranches horaires:
1) presser plusieurs fois la touche
SEL jusqu'à ce que la led
jaune se positionne sur le symbole
SET;
2)
à l'aide des touches visualiser le paramètre “q u o”,
si “t i M”=“q u o”, ou le jour de la semaine (“l u n” ...”d o M”)
+
-
+
-
+
-
+
-
+
-
+
-
+
-
+
-
+
-
Kennzeichen
SET
steht;
2) Durch Tasten den Sollwert Uhrzeit “
h h
” anzeigen;
3) Taste drücken;
4) Bei Blinken der gelben Led auf dem Kennzeichen
SET
zum nächsten Schritt übergehen erscheint auf dem
Display die Meldung das Paßwort anhand der
Tasten eingeben,
dann durch Taste die Eingabe bestätigen; blinkt die
gelbe Led auf dem Kennzeichen
SET
auf, zum nächsten
Schritt übergehen, anderenfalls (falsches Paßwort) das
richtige Paßwort eingeben und Schritt wiederholen;
5) Durch Tasten die neue Uhrzeit einstellen;
6) Taste drücken;
7) Durch Tasten die neuen Minuten einstellen;
8) Taste drücken;
9) Durch Tasten den Sollwert Wochentag “
g g
” anzei-
gen;
10) Taste drücken;
11) Durch Tasten den neuen
Wochentag eingeben;
12) Durch abermaligen Druck auf werden die Eingaben
von Uhrzeit und Wochentag gespeichert;
-Auswahl Timermodus:
1) Taste
SEL
so oft drücken, bis die gelbe Led auf dem
Kennzeichen
SET
steht;
2) Durch Tasten den Sollwert Timer “
T i M
” anzeigen;
3) Taste drücken;
4) Bei Blinken der gelben Led auf dem Kennzeichen
SET
zum nächsten Schritt übergehen; erscheint auf dem
Display die Meldung das Paßwort anhand der
Tasten eingeben,
dann durch Taste die Eingabe bestätigen; blinkt die
gelbe Led auf dem Kennzeichen
SET
auf, zum nächsten
Schritt übergehen, anderenfalls (falsches Paßwort) das
richtige Paßwort eingeben und Schritt wiederholen;
5) Durch Tasten den gewünschten Betriebsmodus
auswählen, u.z.:
- q u o
- S e t
- n o
6) Durch abermaligen Druck auf Taste wird die
Auswahl gespeichert;
q u o:
(Tagestimer)
- Eingabe von zwei gleichen Betriebs-Zeitschienen an
jedem Tag;
- Anzeige des Sollwerts
“q u o”;
- Keine Anzeige der Sollwerte
“ l u n”
bis
“d o M”;
S e t:
(Wochentimer)
- Eingabe von unterschiedlichen zwei Betriebs-
Zeitschienen pro Wochentag;
- Keine Anzeige des Sollwerts
“q u o”;
- Anzeige der Sollwerte
“l u n”
bis
“d o M”;
n o :
(Keine Timereingabe)
- Deaktivierung des Timer;
- Keine Anzeige der Sollwerte
“q u o”
bis
“d o M”;
-Eingabe der Zeitschienen:
1) Taste
SEL
so oft drücken, bis die gelbe Led auf dem
Kennzeichen
SET
steht;
2) Durch Tasten den Sollwert
“q u o”
bei
“t i M”=“q u o”
bzw. des Wochentags
(“l u n” ...”d o M”)
zur Eingabe der
Zeitschienen bei
“t i M”=“S e t”;
3) Taste drücken;
+
-
+
-
+
-
+
-
+
-
+
-
+
-
+
-
+
-
+
-

9
pour lequel on veut programmer les tranches horaires, si
“t i M”=“S e t”;
3) presser la touche ;
4) si la led jaune en regard du symbole
SET commence à
clignoter, passer au point suivant; en revanche, si sur l'af-
fichage apparaît le message entrer le code
d'accès à l'aide des touches
; presser ensuite la touche pour confirmer la valeur
programmée; si la led jaune en regard du symbole
SET
commence à clignoter, passer au point suivant; en cas
contraire (code incorrect), entrer de nouveau le code en
répétant l'opération;
5) à ce stade apparaît l'heure de début de la première tran-
che horaire: par ex. = 7h10; la modifier en fonction
des exigences à l'aide des touches ;
6) presser la touche ;
7) on voit apparaître l'heure à laquelle se termine la premiè-
re tranche horaire; la modifier à l'aide des touches ;
8) presser la touche ;
9) à ce stade apparaît l'heure de début de la deuxième tran-
che horaire; la modifier à l'aide des touches ;
10)presser la touche ;
11)on voit alors apparaître l'heure à laquelle se termine la
deuxième tranche horaire; la modifier à l'aide des tou-
ches ;
12)en pressant de nouveau la touche on enregistre les
tranches horaires programmées.
Pour éliminer une tranche horaire, programmer la même
heure pour le début et la fin.
Le temporisateur ne permet pas de faire commencer la
deuxième tranche horaire avant la fin de la première.
-programmation carte:
La commande à distance doit être programmée sur la carte
de contrôle de la machine, sinon le temporisateur est
ignoré. De plus, le panneau à distance doit être mis sur
”ON”, sinon la machine reste éteinte (OFF) malgré la valida-
tion du temporisateur.
+
-
+
-
+
-
+
-
+
-
4) Bei Blinken der gelben Led auf dem Kennzeichen
SET
zum nächsten Schritt übergehen erscheint auf dem
Display die Meldung das Paßwort anhand der
Tasten eingeben, dann durch Taste die
Eingabe bestätigen; blinkt die gelbe Led auf dem
Kennzeichen
SET
auf, zum nächsten Schritt übergehen,
anderenfalls (falsches Paßwort) das richtige Paßwort ein-
geben und Schritt wiederholen;
5) An dieser Stelle erscheint die Startuhrzeit der ersten
Zeitschiene: z.B. = 7.10 Uhr; die Uhrzeit nach
Bedarf anhand der Tasten verstellen;
6) Taste drücken;
7) Es erscheint nun die Stopuhrzeit der ersten Zeitschiene;
die Uhrzeit anhand der Tasten verstellen;
8) Taste drücken;
9) An dieser Stelle erscheint die Startuhrzeit der zweiten
Zeitschiene, die Uhrzeit anhand der Tasten verstel-
len;
10)Taste drücken;
11)Es erscheint nun die Stopuhrzeit der zweiten
Zeitschiene, die Uhrzeit anhand der Tasten verstel-
len;
12)Durch abermaligen Druck auf Taste werden die ein-
gegebenen Zeitschienen gespeichert.
Zum Löschen einer Zeitschiene die gleiche Uhrzeit für
START
und
STOP
eingeben.
Der Timer gestattet es nicht, die zweite Zeitschiene vor
Ende der ersten beginnen zu lassen.
- Einstellungen der Karte:
Auf der Steuerkarte des Geräts muß die Fernbedienung ein-
gestellt sein, anderenfalls wird der Timer nicht festgestellt.
Die Fernbedienung außerdem auf ”ON” setzen, da das
Gerät ansonsten trotz Timerfreigabe ausgeschaltet bleibt
(OFF).
+
-
+
-
+
-
+
-
+
-

10
INSTALACIÓN
Máquinas de las series NRA, NRC, NBW, NRS.
1) Quitar la corriente a la máquina;
2) Insertar las dos guías porta-tarjeta de plástica (2, Fig. 1)
en los especiales orificios rectangulares, a los lados del
conector hembra M2, en la cara posterior de la tarjeta
visualizador;
3) Instalar la tarjeta PGS (1, Fig.1) insertando el conector
macho de 6 polos en el conector M2; préstese la máxima
atención a que el polo n°1 de la tarjeta PGS corresponda
con el n°1 del conector M2 de la tarjeta visualizador;
4) Dar tensión a la máquina: la tarjeta electrónica de control
reconocerá la presencia de la tarjeta PGS y se configu-
rará para la nueva función;
5) Verificar que en el visualizador aparezca, en la parte
superior derecha, la hora en curso.
Máquinas de las series NRW, AN, CR.
1) Quitar la corriente a la máquina;
2) Insertar las dos guías porta-tarjeta de plástico (2, Fig.1)
en los especiales orificios rectangulares, a los lados del
conector hembra M17, en la cara posterior de la tarjeta
de control;
3) Instalar la tarjeta PGS (1, Fig.1) insertando el conector
macho de 6 polos en el conector M17; hay que asegurarse
de que el polo n°1 de la tarjeta PGS corresponda con el
n°1 del conector M17 de la tarjeta de control;
4) Dar tensión a la máquina: la tarjeta electrónica de control
reconocerá la presencia de la tarjeta PGS y se configu-
rará para la nueva función.
PROGRAMACION DEL TEMPORIZADOR
máquinas de las series NRA, NRC, NBW, NRS.
Con la instalación de la tarjeta PGS, se activan los SET pre-
sentados en la tabla siguiente:
SET FUNCIÓN
Time configuración hora y día de la semana
Temporizad. selección de la modalidad de funcionamiento
Diario configuración bandas horarias
Lunes configuración bandas horarias lunes
Martes configuración bandas horarias martes
Miércoles configuración bandas horarias miércoles
Jueves configuración bandas horarias jueves
Viernes configuración bandas horarias viernes
Sábado configuración bandas horarias sábado
Domingo configuración bandas horarias domingo
La programación del temporizador prevé las siguientes ope-
raciones:
-configuración de la hora y del día de la semana:
1) pulsar la tecla SET;
2) mediante las teclas visualizar el set "Time";
3) pulsar la tecla ;
4) escribir el código de acceso;
5) mediante las teclas modificar la hora;
6) pulsar la tecla SET
;
7) mediante las teclas modificar el día de la semana
8) Pulsando de nuevo la tecla son memorizados los
valores configurados;
-selección de la modalidad de funcionamiento del
temporizador:
1) pulsar la tecla SET;
2) mediante las teclas visualizar el set
"Temporizador";
3) pulsar la tecla ;
4) escribir el código de acceso;
5) mediante las teclas seleccionar la modalidad de
funcionamiento deseada entre las siguientes alternativas:
+
-
+
-
+
-
+
-
+
-
- DÍA
- SEMANA
- NINGUNO
6) Pulsando de nuevo la tecla es memorizada la
selección efectuada.
Modalidad "DIA":
-
Permite configurar en el arco del día, dos bandas horarias
de funcionamiento, iguales para todos los días de la sema-
na;
- Aparece el set "Diario";
- No aparecen visualizados los set de "Lunes" a
"Domingo".
Modalidad "SEMANA":
- permite predisponer dos bandas horarias de funciona-
miento para cada día de la semana;
- no aparece visualizado el set "Diario";
- Aparecen visualizados los set de "Lunes" a "Domingo".
Modalidad "NINGUNO”:
- el temporizador programador es desactivado;
-
los set de "Diario" a "Domingo" no son visualizados.
-configuración de las bandas horarias
1) pulsar la tecla
SET;
2) mediante las teclas visualizar el set "Diario" si
"Temporizador = DÍA", o bien el día de la semana para el
que se desea predisponer las bandas horarias si
"Temporizador = SEMANA";
3) pulsar la tecla ;
4) escribir el código de acceso;
5) modificar el valor de "START 1" por medio de las teclas
6) pulsar la tecla ;
7) Modificar el valor de "STOP 1" por medio de las teclas
8) pulsar la tecla ;
9) modificar el valor de "START 2" por medio de las teclas
10)pulsar la tecla ;
11)modificar el valor de "STOP 2" por medio de las teclas
12)pulsando de nuevo la tecla son memorizadas las
bandas horarias predispuestas.
Para eliminar una banda horaria, predisponer la misma hora
para START y STOP; por ej.: START 1=10.30, STOP
1=10.30.
El temporizador no permite hacer preceder el inicio de la
segunda banda horaria al final de la primera.
-configuración de la tarjeta de control:
En la tarjeta de control de la máquina debe estar predispue-
sto el comando remoto, de lo contrario el temporizador es
ignorado. Además el panel remoto debe estar en la posición
de "ON", de lo contrario la máquina permanece apagada
(OFF) a pesar del asenso del temporizador.
Máquinas de las series NRW, AN, CR.
Con la instalación de la tarjeta PGS, se activan los set pre-
sentados en la tabla siguiente:
SET FUNCIÓN
h h predisposición de hora y minutos
g g predisposición del día de la semana
t i M selección de la modalidad de funcionamiento
q u o predisposición de bandas horarias
l u n predisposición de bandas horarias lunes
M a r predisposición de bandas horarias martes
M e r predisposición de bandas horarias miércoles
g i o predisposición de bandas horarias jueves
V e n predisposición de bandas horarias viernes
S a b predisposición de bandas horarias sábado
d o M predisposición de bandas horarias domingo
+
-
+
-
+
-
+
-
+
-

11
La programación del temporizador prevé las siguientes ope-
raciones:
-predisposición de la hora y del día de la semana:
1) pulsar repetidamente la tecla SEL hasta que el led ama-
rillo se sitúe en el símbolo SET;
2) mediante las teclas visualizar el set "h h" (Time);
3) pulsar la tecla ;
4) si el led amarillo en correspondencia del símbolo SET
empieza a parpadear, pasar al punto sucesivo; si, en
cambio, en el visor aparece el rótulo introducir el
código de acceso mediante las teclas ; y después
pulsar la tecla para confirmar el valor predispuesto; si el
led amarillo en correspondencia del símbolo SET empie-
za a parpadear, pasar al punto sucesivo; en caso contra-
rio (código erróneo), insertar de nuevo el código repitien-
do la operación;;
5) modificar la hora mediante las teclas ;
6) pulsar la tecla ;
7) modificar los minutos mediante las teclas ;
8) pulsar la tecla ;
9) mediante las teclas visualizar el set "g g"
(Weekday);
10)pulsar la tecla ;
11)modificar el día de la semana mediante las teclas
12)pulsando de nuevo la tecla son memorizados la
hora y el día de la semana predispuestos;
-selección de la modalidad de funcionamiento del
temporizador
1) pulsar repetidamente la tecla SEL hasta que el led ama-
rillo se sitúe en el símbolo SET;
2) Mediante las teclas $$$ visualizar el set "t i
M".(Temporizador);
3) pulsar la tecla ;
4) si el led amarillo en correspondencia del símbolo SET
empieza a parpadear, pasar al punto sucesivo; si, en
cambio, en el visor aparece el rótulo int roducir el
código de acceso mediante las teclas ; y después
pulsar la tecla para confirmar el valor predispuesto;
si el led amarillo en correspondencia del símbolo SET
empieza a parpadear, pasar al punto sucesivo; en caso
contrario (código erróneo), insertar de nuevo el código
repitiendo la operación;
5) mediante las teclas seleccionar la modalidad de
funcionamiento deseada entre las siguientes alternativas:
- q u o
- S e t
- n o
6) pulsando de nuevo la tecla es memorizada la selec-
ción efectuada.
q u o: (Temporizador Diario)
-
permite predisponer en el arco del día dos bandas horarias
de funcionamiento, iguales para todos los días de la semana;
- aparece visualizado el set "q u o";
- no aparecen visualizados los set de " l u n" a " d o m";
S e t: (Temporizador Semanal)
- permite predisponer dos bandas horarias de funciona-
miento para cada día de la semana;
- no aparece visualizado el set "q u o";
- aparecen visualizados los set de "l u n" a " d o m";
n o : (Temporizador no predispuesto )
- el temporizador programador es desactivado;
- los set de "q u o " a "d o m" no son visualizados;
-predisposición de las bandas horarias:
1) Pulsar repetidamente la tecla SEL hasta que el led ama-
rillo se sitúe en el símbolo SET;
+
-
+
-
+
-
+
-
+
-
+
-
+
-
+
-
2)
mediante las teclas visualizar el set "q u o" si "t i m = q
u o", o bien el día de la semana ("L u n"..."d o m") para el que
se desean predisponer las bandas horarias si "t i M= S e t";
3) pulsar la tecla ;
4) si el led amarillo en correspondencia del símbolo SET
empieza a parpadear, pasar al punto sucesivo; en cam-
bio, si en el visor aparece el rótulo introducir el
código de acceso mediante las teclas ; y después
pulsar la tecla para confirmar el valor predispuesto;
si el led amarillo en correspondencia del símbolo SET
empieza a parpadear, pasar al punto sucesivo; en caso
contrario (código erróneo), insertar de nuevo el código
repitiendo la operación;
5) ahora aparece la hora de inicio de la primera banda hora-
ria: ej = 7.10 horas; modificarla en función de las
propias exigencias mediante las teclas ;
6) pulsar la tecla ;
7) ahora aparece la hora a la que termina la primera banda
horaria; modificarla mediante las teclas ;
8) pulsar la tecla ;
9) ahora aparece la hora de inicio de la segunda banda
horaria; modificarla mediante las teclas ;
10)pulsar la tecla ;
11)ahora aparece la hora a la que termina la segunda
banda horaria: modificarla mediante las teclas ;
12)Pulsando de nuevo la tecla se memorizan las bandas
horarias predispuestas.
Para eliminar una banda horaria, predisponer la misma hora
para el inicio y para el final.
El temporizador no permite hacer preceder el inicio de la
segunda banda horaria al final de la primera.
-configuración de la tarjeta de control:
En la tarjeta de control de la máquina debe estar predispue-
sto el comando remoto, de lo contrario el temporizador es
ignorado. Además el panel remoto debe estar en la posición
de "ON", de lo contrario la máquina permanece apagada
(OFF) a pesar del asenso del temporizador.
+
-
+
-
+
-
+
-
+
-
+
-

AERMEC S.p.A.
37040 Bevilacqua (VR) - Italia
Via Roma, 44 - Tel. (0442) 633111
Telefax (0442) 93730 - 93566
www .aermec. com
I dati tecnici riportati nella presente documentazione non sono impegnativi.
AERMEC S.p.A. si riserva la facoltà di apportare in qualsiasi momento tutte le
modifiche ritenute necessarie per il miglioramento del prodotto.
Technical data shown in this booklet are not binding.
AERMEC S.p.A. shall have the right to introduce at any time whatever modifica-
tions deemed necessary to the improvement of the product.
Los datos técnicos de la presente documentación no son vinculantes. Aermec
S.p.A. Se reserva la facultad de aportar, en cualquier momento, todos los cambios
considerados necesarios para la mejora del producto.
Les données figurant dans la présente documentation ne nous engagent pas.
AERMEC S.p.A. se réserve le droit d’apporter à tout moment toutes les modifica-
tions qu'elle jugerait opportunes pour l'amélioration de son produit.
Im Sinne des technischen Fortschrittes behält sich AERMEC S.p.A. vor, in der
Produktion Änderungen und Verbesserungen ohne Ankündigung durchzuführen.
-
 1
1
-
 2
2
-
 3
3
-
 4
4
-
 5
5
-
 6
6
-
 7
7
-
 8
8
-
 9
9
-
 10
10
-
 11
11
-
 12
12


in anderen Sprachen
- English: Aermec PGS Quick start guide
- français: Aermec PGS Guide de démarrage rapide
- español: Aermec PGS Guía de inicio rápido
- italiano: Aermec PGS Guida Rapida
Verwandte Papiere
Sonstige Unterlagen
-
Bticino ELECTRONIC TIMING THERMOSTAT ART. 4477 Bedienungsanleitung
-
Olimpia Splendid S1 E 12T Benutzerhandbuch
-
Olimpia Splendid Unico Benutzerhandbuch
-
Extraflame System expansion motherboard kit Bedienungsanleitung
-
CIAT BOSS & BOSS MINI SUPERVISION Benutzerhandbuch
-
Aldes Dee Fly Cube 550+ Installation Instructions Manual
-
Master SM40 4inch E21 Bedienungsanleitung
-
Roland E16 Bedienungsanleitung
-
Avermedia AVerLife XVision HD Benutzerhandbuch
-
mXion PGS Benutzerhandbuch