10
PARTS AND FEATURESPARTS AND FEATURES
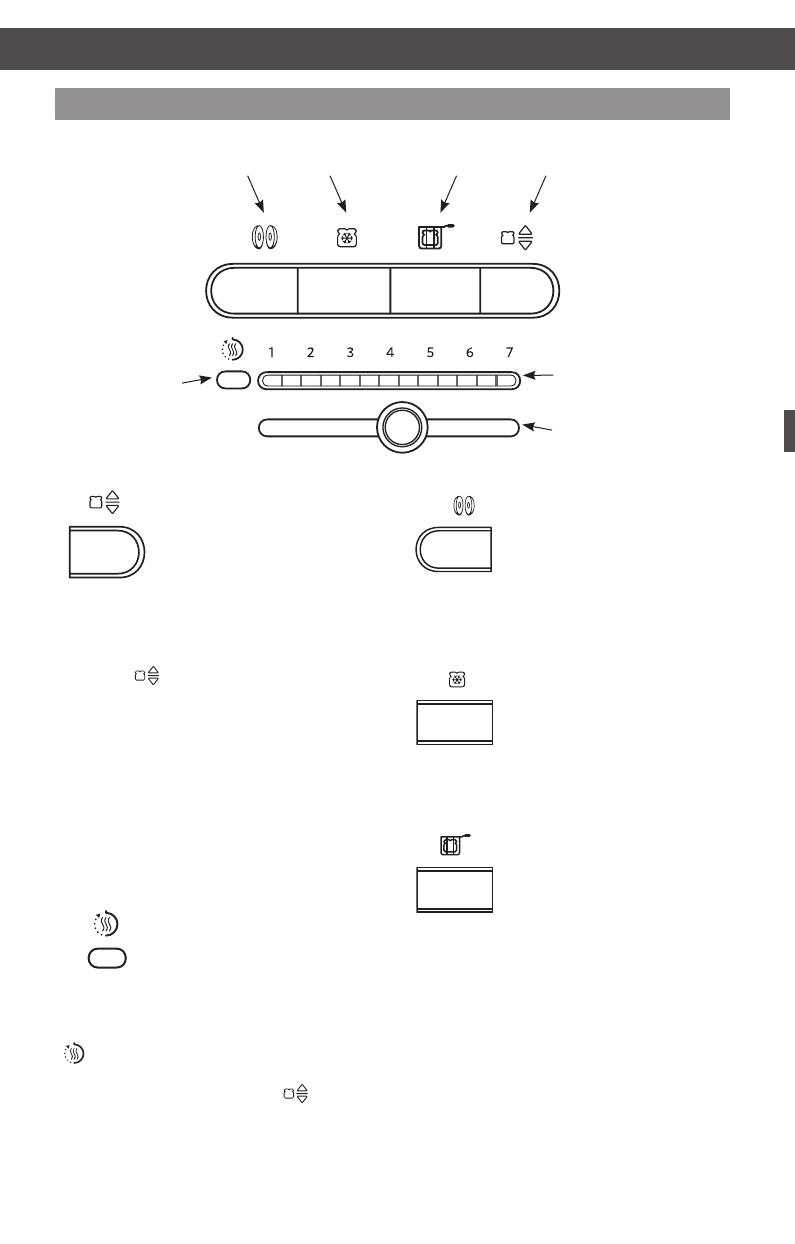
Toast/Cancel function
This is an automatic toaster.
As soon as bread is placed
in either slot it will begin to
lower and toasting will begin
using the selected settings.
Some food may be too light to trigger
automatic toasting. If food does not begin
to drop after 3 seconds, press TOAST/
CANCEL ( ) to start the cycle manually.
Press again to cancel a toasting cycle already
in process, or to end a Keep warm cycle.
Shade control and Shade indicator
lights/Countdown timer
Precisely sets the desired brownness level.
Indicator lights show the setting at a glance.
During toasting, lights on the shade setting
bar will blink to indicate time left in the
toasting cycle.
Keep warm indicator
If the food is not removed
within 45 seconds of the end
of a cycle, the toaster will
automatically lower the food
and activate a “Keep warm” cycle using low
heat for up to 3 minutes. The Keep warm
( ) indicator will light while this cycle is
active. You can cancel this cycle at any time
by pressing TOAST/CANCEL ( ).
Bagel function
Your Toaster features a special
setting for toasting bagels,
ensuring optimal heat and
time for the best results. The
heating elements will adjust to
nicely toast the inside of a cut bagel without
burning the bagel’s outside surface.
Frozen function
Your Toaster features a
Frozen function that gently
defrosts and toasts frozen
bread. Use Frozen for frozen
foods only.
Sandwich function
Your Toaster features a
special “Sandwich” setting to
be used exclusively with the
KitchenAid Sandwich rack to
toast sandwiches made with
thinly sliced meats and cheese. See “Toasting
sandwiches” for more information.
Shade
control
Shade indicator lights/
Countdown timer
Keep warm
indicator
Bagel
function
Frozen
function
Sandwich
function
Toast/Cancel
function
Control panel features
OPERATING THE TOASTER
W10506838B_01_EN_v02.indd 10 2/12/14 5:32 PM


