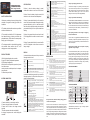
ECO-WORTHY EW1907-30A 12V24V 30A Solar Charge Controller Benutzerhandbuch
- Typ
- Benutzerhandbuch

SAFETY INSTRUCTIONS
1.Make sure your battery has enough voltage for the
controller to recognize the battery type before first
installation.
2.The battery cable should be as short as possible to
minimize transmission loss.
3.This controller is suitable for 12 / 24 V maintenance
free lead-acid battery, gel battery and lithium iron
phosphate battery. Please select the corresponding
battery type in the setting menu.
4.The charge controller is only suitable for regulating
solar modules. Never connect other DC or AC
charging source to the charge controller.
PRODUCT FEATRES
1.Build-in industrial grade micro controller.
2.Large LCD display, all adjustable parameter.
3.PWM charge management.
4.Build-in short-circuit protection,open-circuit protec-
tion, diode reverse
current protection,overload protection, low tempera-
ture production.
5.Lithium battery activation
SYSTEM CONNECTION
1.Connect the battery to the charge controller
2.Connect the solar module to the controller
3.Connect the DC loads to the charge controller
(optional)
* Reverse sequence order when uninstalling!
An improper sequence order could damage the
controller!
KEY FUNCTIONS
Function 1: when the battery voltage is normal,
double-click the button to turn on or turn off the load.
Function 2: when the battery voltage is normal, click
the button to view the current and temperature.
Function 3: press and hold the key for 2s to enter the
menu. On the menu that needs to change the setting,
press and hold the key for 2s to make the number
flash, then click to adjust the setting value, and then
press and hold the key for 2s to stop the number from
flashing.
Function 4: long press the key for more than 10s until
F01 is displayed on the screen to restart the control-
ler.
Function 5: press and hold the key for more than 20s
until F02 is displayed on the screen to restore the
factory settings.
DISPLAY
Q:why is my charging current so low?
A:Incorrect PV voltage or any shading on the solar panels
may cause low PV output current. Or it may caused by the
PWM charging mode that would decrease the charging
current when the battery type is “b01” or “b03” and the
voltage has risen to the pre-set voltage.(MENU3)
Q:why is my load off unintentionally?
A:Check MENU7, MENU9 and MENU10 to see what mode
have you set controller to. For example, if you set MENU7 to
00H, then the controller would cut-off DC output then
the sun is set and there’s no more PV input. If all the settings
are normal but your load is still off, you should check if you
load or wire is defective.
Q:the power generation is not enough to supply my
load, what should i do?
A:In this case, it’s suggested to add additional solar panels
and battery to expand the generation and capacity of your
system. Or you could just lessen your loads to slow down the
power consumption.
Q:why does my battery runs out of power so quickly
right after it’s fully charged?
A:It could be because the power of your load is way higher
than the capacity of your battery. In this case, add more
batteries or lessen your loads. Or test your battery to see if
it’s dying due to long-time usage. You can test it this way:
discharge your battery to nearly empty, then charge it with
PV or AC input. If the battery voltage rises rapidly and drops
rapidly when you disconnect the charge, then your battery
may be dying and you should replace it.
TECHNICAL PARAMETR
VOLTAGE PARAMETER
*all voltage doubles while using 24V system.
*ECO-WORTHY preserves the right to change product
specifications without prior notice.
ERROR DISPLAY
In the main interface,short press the key to enter the
following interface in turm.
In the main interface,long press the key to enter the
following interfaces in turn,and then short press to
switch to different interfaces.
12V24V 30A
Solar Charge Controller
FOR EW1907-30A
FQA
Q:why doesn’t the controller showing charging when I
connect the solar panels?
A:Check if all the connections are correct and tight, and
there is no revers current occurred. If everything is correct,
check if the panels are clean and not covered by anything. If
everything are in fine condition, check if panels are connect-
ed to the right voltage as the pre-set voltage of the controller
(MENU1). If everything is normal but still not charging, use a
multimeter to test every panel to see if there’s a defective
one.
Floating charge voltage redulation interface (only valid for B01 and B03)
PWM floating charge voltage value
Setting suggestion: it is recommended to keep the default value.
Setting mode: the same as above.
Low voltage re-connect (LVR) setting
When a low voltage disconnect happens,the controller will wait until the
voltage
raise more then this voltage,then it will re-connect the load again.
Setting method: the same as above.
Low voltage disconnect (LVD)setting.
When battery voltage is lower than this voltage,the controller will cut off the
output automatically.
Setting method: the same as above.
PV input control setting
“Lcl” indicates load would only turn on during night time.
“Lc2” indicates load would only turn on during day time.
Notice: Timer control (MENU7) has a higher priority than PV control. Setting
method: the same as above.
Short-circuit protection setting.
Sc.n indicates short-circuit protection is on
Sc.f indicates short-circuit protection is off
When the short-circuit protection is on, the controller would cut off DC output
when the load is short-circuited and turn back on when the short-circuit is
lifted.
Battery low voltage warning.
Check if the PV input voltage or the battery voltage fit the pre-set voltage of
the controller. If not, press the button once to return to main screen, and
correct the voltage following the setting method of “MENU 01” above.
Battery high voltage warning.
Check if the PV input voltage or the battery voltage fit the pre-set voltage of
the controller. If not, press the button once to return to main screen, and
correct the voltage following the selling method of “MENU 01” above.
Output over current warning.
Load current exceed rated current.if it does not resume within 60 seconds,it
will turn into E04 warning.
Press button to ignore for one time and force to work again.
Output short-circuit warning.
Output automatic disable when there is a short-circuit and will resume after
10 seconds.
Press button to ignore for one time and force to work again.
High temperature warning.
when the temperature of the controller exceeds 80°C, it will enter stand-by
mode and stop charging or discharging until the temperature falls to 70°C.
Press button to ignore for one time and force to work again.
PV over-voltage warning.
In order to protect the internal circuit,Charging automatic stop when PV
voltage exceed 50V and automatic recover when voltage drop below
45V.(for I 2V/24V system)
Load output timer control
[24H] -output turn on all the time.
[00H] -output turn on/off based on PV input
[1-23H] -when PV input failed, output turn off after 1-23 hours
Attention: no matter which mode is selected ,output will turn off when battery
is in a LVD condition.
Setting method: the same as above.
PWM charging setting
“Pon” indicates PWM charging mode is on
“Pof indicates PWM charging mode is off
For “b01” and “b03”, it’s suggested to turn on PWM. If not, the battery may
not be able to fully charged.
For “b02”, the PWM is turned off by default. Because normally, lithium
battery is equipped with BMS, and the PWM may cause conflict with BMS
protection and fail the system. Therefore, when the battery type is set to
“b02”, the PWM would automatically turn off. But it can be manually turn on.
Setting method: the same as above.
Charging ampere display.
Discharging ampere display.
Controller’s body temperature display.if the controller gets too hot
during running it will automatic shut down and wait for the temperature
to drop to normal level and then it will work again.
Syst voltage type selection interface. The factory default battery
voltage type is 12V, the interface is displayed as “ul2v”. If 24V is
needed, it should be set as “u24v”.
Setting method: long press for more than 2S until the number flashes,
then short press for adjustment, and then wait for 2S until the number
stop flashing to conform.
Battery type
B0l =GEL General lead-acid(default)
B02=LiFePO4 Battery
B03=SLA
B0l ,B03 has 3-stage charging process.
B02 has only ON-OFF charging process.
Setting method: the same as above.
Charging voltage regulation interface
For B0l and B03, the battery voltage will be charged to this value first,
and then the battery will be maintained at a constant PWM voltage for
2 hours before switching to floating charge. For B02, due to the
impulse stop mode, when the battery voltage reaches this value, the
charging will be stopped immediately. When the battery voltage drops
to 0.6V below this value, the charging will be restarted.
During normal charging, the arrow is always on, and after floating
charge, the arrow is slow flashing.
Setting suggestion: it is recommended to keep the default value.
Setting method: the same as above.
Systemspannung
MAX.PV-Eingang
Nennstrom
USB-Ausgang
Ladekontrolle
Standby verloren
Arbeitstemp
Größe Gewicht
HVD
HVR
Masse (Absorption)
Ausgleichen
Schweben
Gebührenrückgabe
LVR
LVD
Batterietyp

FQA
F: Warum zeigt der Controller keinen Ladevorgang an,
wenn ich die Solarmodule anschließe?
A: Überprüfen Sie, ob alle Verbindungen korrekt und fest
sind und kein Rückstrom aufgetreten ist. Wenn alles in
Ordnung ist, überprüfen Sie, ob die Paneele sauber und frei
von Gegenständen sind. Wenn alles in Ordnung ist,
überprüfen Sie, ob die Panels an die richtige Spannung
angeschlossen sind, wie die voreingestellte Spannung des
Controllers (MENU1). Wenn alles normal ist, aber immer
noch nicht aufgeladen wird, verwenden Sie ein Multimeter,
um jedes Panel zu testen, um festzustellen, ob es ein
defektes gibt.
SICHERHEITSHINWEISE
1. Stellen Sie vor der ersten Installation sicher, dass
Ihre Batterie genügend Spannung hat, damit der
Controller den Batterietyp erkennen kann.
2. Das Batteriekabel sollte so kurz wie möglich sein,
um Übertragungsverluste zu minimieren.
3.Dieser Controller ist für wartungsfreie 12 / 24
V-Blei-Säure-Batterien, Gel-Batterien und
Lithium-Eisen-Phosphat-Batterien geeignet. Bitte
wählen Sie im Einstellungsmenü den entsprechen-
den Batterietyp aus.
4.Der Laderegler ist nur zur Regelung von Solarmod-
ulen geeignet. Schließen Sie niemals eine andere
DC- oder AC-Ladequelle an den Laderegler an.
PRODUKTEIGENSCHAFTEN
1. Eingebauter Mikrocontroller in Industriequalität.
2.Große LCD-Anzeige, alle einstellbaren Parameter.
3. PWM-Lademanagement.
4. Eingebauter Kurzschlussschutz, Leerlaufschutz,
Diodenumkehrung
Stromschutz, Überlastschutz, Niedertemperaturpro-
duktion.
5. Aktivierung der Lithiumbatterie
SYSTEMVERBINDUNG
1.Schließen Sie die Batterie an den Laderegler an
2.Schließen Sie das Solarmodul an den Controller
an
3.Schließen Sie die DC-Lasten an den Laderegler an
(optional)
* Umgekehrte Reihenfolge beim Deinstallieren!
Eine falsche Reihenfolge kann die Steuerung
beschädigen!
SCHLÜSSELFUNKTIONEN
Funktion 1: Wenn die Batteriespannung normal ist,
doppelklicken Sie auf die Taste, um die Last ein-
oder auszuschalten.
Funktion 2: Wenn die Batteriespannung normal ist,
klicken Sie auf die Schaltfläche, um den Strom und
die Temperatur anzuzeigen.
Funktion 3: Halten Sie die Taste 2 Sekunden lang
gedrückt, um das Menü aufzurufen. Halten Sie in
dem Menü, das die Einstellung ändern muss, die
Taste 2 Sekunden lang gedrückt, damit die Zahl
blinkt, klicken Sie dann, um den Einstellungswert
anzupassen, und halten Sie dann die Taste 2 Sekun-
den lang gedrückt, um das Blinken der Zahl zu
beenden.
Funktion 4: Halten Sie die Taste länger als 10 Sekun-
den gedrückt, bis F01 auf dem Bildschirm angezeigt
wird, um den Controller neu zu starten.
Funktion 5: Halten Sie die Taste länger als 20 Sekun-
den gedrückt, bis F02 auf dem Bildschirm angezeigt
wird, um die Werkseinstellungen wiederherzustellen.
ANZEIGE
F: Warum ist mein Ladestrom so niedrig?
A: Eine falsche PV-Spannung oder eine Verschattung der
Solarmodule kann zu einem niedrigen PV-Ausgangsstrom
führen. Oder es kann durch den PWM-Lademodus
verursacht werden, der den Ladestrom verringern würde,
wenn der Batterietyp „b01“ oder „b03“ ist und die Spannung
auf die voreingestellte Spannung angestiegen ist. (MENU3)
F: Warum wird meine Last unbeabsichtigt
abgeschaltet?
A: Überprüfen Sie MENU7, MENU9 und MENU10, um zu
sehen, auf welchen Modus Sie den Controller eingestellt
haben. Wenn Sie beispielsweise MENU7 auf 00H
einstellen, würde der Controller den DC-Ausgang
abschalten, wenn die Sonne untergeht und es keinen
PV-Eingang mehr gibt. Wenn alle Einstellungen normal sind,
aber Ihre Last immer noch ausgeschaltet ist, sollten Sie
überprüfen, ob Ihre Last oder Ihr Kabel defekt ist.
F: Die Stromerzeugung reicht nicht aus, um meine Last
zu versorgen, was soll ich tun?
A: In diesem Fall wird empfohlen, zusätzliche Solarmodule
und Batterien hinzuzufügen, um die Erzeugung und
Kapazität Ihres Systems zu erweitern. Oder Sie könnten
einfach Ihre Lasten verringern, um den Stromverbrauch zu
verlangsamen.
F: Warum geht meinem Akku so schnell die Energie aus,
nachdem er vollständig aufgeladen ist?
A: Es könnte daran liegen, dass die Leistung Ihrer Last viel
höher ist als die Kapazität Ihrer Batterie. Fügen Sie in
diesem Fall mehr Batterien hinzu oder verringern Sie Ihre
Lasten. Oder testen Sie Ihren Akku, um zu sehen, ob er
aufgrund einer langen Nutzung leer ist. Sie können es auf
diese Weise testen: Entladen Sie Ihre Batterie fast leer und
laden Sie sie dann mit PV- oder AC-Eingang auf. Wenn die
Batteriespannung schnell ansteigt und schnell abfällt, wenn
Sie die Ladung trennen, ist Ihre Batterie möglicherweise leer
und Sie sollten sie ersetzen.
TECHNISCHE PARAMETR
VOLTAGE PARAMETER
*Bei Verwendung eines 24-V-Systems verdoppelt sich die
gesamte Spannung.
*ECO-WORTHY behält sich das Recht vor, Produktspezi-
fikationen ohne vorherige Ankündigung zu ändern.
ERROR DISPLAY
Drücken Sie in der Hauptschnittstelle kurz die Taste ,
um die folgende Schnittstelle im Turm aufzurufen.
Drücken Sie in der Hauptschnittstelle lange auf die Taste,
um nacheinander die folgenden Schnittstellen aufzurufen,
und drücken Sie dann kurz, um zu verschiedenen Schnitt-
stellen zu wechseln.
12V24V 30A
Solarladeregler
FOR EW1907-30A
Ladeampere-Anzeige.
Entladestromanzeige.
Anzeige der Körpertemperatur des Controllers. Wenn der Controller während
des Betriebs zu heiß wird, schaltet er sich automatisch ab und wartet, bis die
Temperatur auf ein normales Niveau gesunken ist, und funktioniert dann
wieder.
Redulationsschnittstelle für potentialfreie Ladespannung (nur für B01 und
B03)
PWM-Wert der schwebenden Ladespannung
Einstellvorschlag: Es wird empfohlen, den Standardwert beizubehalten.
Einstellmodus: wie oben.
Niederspannungs-Wiederverbindungseinstellung (LVR).
Wenn eine Niederspannungstrennung auftritt, wartet der Controller, bis die
Spannung anliegt
Erhöhen Sie mehr als diese Spannung, dann wird die Last wieder
angeschlossen.
Einstellmethode: die gleiche wie oben.
Niederspannungstrennung (LVD)-Einstellung.
Wenn die Batteriespannung niedriger als diese Spannung ist, schaltet der
Controller den Ausgang automatisch ab.
Einstellmethode: die gleiche wie oben.
PV-Eingangssteuerungseinstellung
„Lcl“ zeigt an, dass sich die Last nur während der Nacht einschalten würde.
„Lc2“ zeigt an, dass sich die Last nur tagsüber einschalten würde.
Hinweis: Die Zeitsteuerung (MENU7) hat eine höhere Priorität als die
PV-Steuerung. Einstellmethode: die gleiche wie oben.
Einstellung Kurzschlussschutz.
Sc.n zeigt an, dass der Kurzschlussschutz eingeschaltet ist
Sc.f zeigt an, dass der Kurzschlussschutz ausgeschaltet ist
Wenn der Kurzschlussschutz eingeschaltet ist, würde der Controller den
DC-Ausgang abschalten wenn die Last kurzgeschlossen ist und wieder
einschalten, wenn der Kurzschluss aufgehoben wird.
Einstellmethode: die gleiche wie oben.
Warnung bei niedriger Batteriespannung.
Prüfen Sie, ob die PV-Eingangsspannung oder die Batteriespannung mit
der voreingestellten Spannung des Reglers übereinstimmt. Wenn nicht,
drücken Sie die Taste einmal, um zum Hauptbildschirm zurückzukehren,
und korrigieren Sie die Spannung gemäß der Einstellmethode von „MENU
01“ oben.
Batterie-Hochspannungswarnung.
Prüfen Sie, ob die PV-Eingangsspannung oder die Batteriespannung mit
der voreingestellten Spannung des Reglers übereinstimmt. Wenn nicht,
drücken Sie die Taste einmal, um zum Hauptbildschirm zurückzukehren,
und korrigieren Sie die Spannung gemäß der Verkaufsmethode von „MENÜ
01“ oben.
Überstromwarnung ausgeben.
Der Laststrom überschreitet den Nennstrom. Wenn er nicht innerhalb von
60 Sekunden wieder aufgenommen wird, wird er zur E04-Warnung.
Drücken Sie die Taste, um sie einmal zu ignorieren und die erneute Arbeit
zu erzwingen.
Ausgang Kurzschlusswarnung.
Automatische Deaktivierung des Ausgangs bei Kurzschluss und
Wiederaufnahme nach 10 Sekunden.
Drücken Sie die Taste, um sie einmal zu ignorieren und die erneute Arbeit
zu erzwingen.
Warnung vor hoher Temperatur.
Wenn die Temperatur des Controllers 80 °C übersteigt, wechselt er in den
Standby-Modus und stoppt das Laden oder Entladen, bis die Temperatur
auf 70 °C fällt. Drücken Sie die Taste, um sie einmal zu ignorieren und die
erneute Arbeit zu erzwingen.
PV-Überspannungswarnung.
Um den internen Stromkreis zu schützen, wird der Ladevorgang
automatisch gestoppt, wenn die PV-Spannung 50 V überschreitet, und
automatisch wiederhergestellt, wenn die Spannung unter 45 V abfällt. (für I
2 V / 24 V-System)
Zeitsteuerung des Lastausgangs
[24H] -Ausgang ständig eingeschaltet.
[OOH] - Ausgang ein-/ausschalten basierend auf PV-Eingang
[1’23H] – Wenn der PV-Eingang ausgefallen ist, schaltet sich der Ausgang
nach 1–23 Stunden aus
Achtung: Unabhängig davon, welcher Modus ausgewählt ist, wird der
Ausgang ausgeschaltet, wenn sich die Batterie in einem LVD-Zustand
befindet.
Einstellmethode: die gleiche wie oben.
PWM-Ladeeinstellung
„Pon“ zeigt an, dass der PWM-Lademodus eingeschaltet ist
„Pof zeigt an, dass der PWM-Lademodus ausgeschaltet ist
Für „b01“ und „b03“ wird empfohlen, PWM einzuschalten. Andernfalls kann
der Akku möglicherweise nicht vollständig aufgeladen werden.
Bei „b02“ ist die PWM standardmäßig ausgeschaltet. Weil Lithiumbatterien
normalerweise mit BMS ausgestattet sind und die PWM Konflikte mit dem
BMS-Schutz verursachen und das System versagen kann. Wenn der
Batterietyp auf „b02“ eingestellt ist, schaltet sich die PWM daher
automatisch aus. Aber es kann manuell eingeschaltet werden.
Einstellmethode: die gleiche wie oben.
Schnittstelle zur Auswahl des Syst-Spannungstyps. Der werkseitig
voreingestellte Batteriespannungstyp ist 12 V, die Schnittstelle wird als „ul2v“
angezeigt. Wenn 24 V benötigt werden, sollte es als „u24v“ eingestellt
werden.
Einstellmethode: Drücken Sie länger als 2 Sekunden, bis die Zahl blinkt,
drücken Sie dann kurz, um die Einstellung vorzunehmen, und warten Sie
dann 2 Sekunden, bis die Zahl aufhört zu blinken, um sich anzupassen.
Batterietyp
BOl =GEL Allgemeine Bleisäure (Standard)
B02=LiFePO4-Batterie
B03=SLA
BOl, B03 hat einen 3-stufigen Ladevorgang.
B02 hat nur einen ON-OFF-Ladevorgang.
Einstellmethode: die gleiche wie oben.
Ladespannungsregelschnittstelle
Bei BO1 und B03 wird die Batteriespannung zuerst auf diesen Wert
geladen, und dann wird die Batterie 2 Stunden lang auf einer
konstanten PWM-Spannung gehalten, bevor auf Erhaltungsladung
umgeschaltet wird. Bei B02 wird der Ladevorgang aufgrund des
Impulsstoppmodus sofort gestoppt, wenn die Batteriespannung
diesen Wert erreicht. Wenn die Batteriespannung auf 0,6 V unter
diesen Wert fällt, wird der Ladevorgang neu gestartet.
Während des normalen Ladevorgangs leuchtet der Pfeil immer und
nach der Erhaltungsladung blinkt der Pfeil langsam.
Einstellungsvorschlag: Es wird empfohlen, den Standardwert
beizubehalten. Einstellmethode: die gleiche wie oben.
System Voltage
MAX.PV input
Rated current
USB output
Charge control
Standby lost
Working temp
S izel Weight
HVD
HVR
Bulk(Absorrption)
Equalize
Float
Charge return
LVR
LVD
Battery type
-
 1
1
-
 2
2


ECO-WORTHY EW1907-30A 12V24V 30A Solar Charge Controller Benutzerhandbuch
- Typ
- Benutzerhandbuch
in anderen Sprachen
Sonstige Unterlagen
-
Victron energy BlueSolar PWM Charge Controller - LCD - USB 12V 24V 30A 48V 10A 20A 30A Bedienungsanleitung
-
Victron energy BlueSolar PWM Charge Controller - LCD - USB 12V 24V 30A 48V 10A 20A 30A Bedienungsanleitung
-
-
Pro-User 16433 Bedienungsanleitung
-
-
 Phocos CXNup Series Benutzerhandbuch
-
BYGD Solar Charger Controller Benutzerhandbuch
-
Renogy CTRL-WND30-LI Benutzerhandbuch
-
Goal Zero 10 Amp Benutzerhandbuch
-
Victron energy BlueSolar PWM-Pro Bedienungsanleitung
