Seite wird geladen ...

Bedienungsanleitung
User Manual
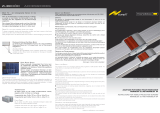
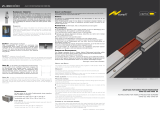
Projection screen 4:3 with Stand
Mobile Projektionsleinwand mit Stativ
Portable projection screen with tripod stand
No. 80901200
No. 80901203
www.eurolite.de
TRIPOD
SCREEN
Projection Screen 4:3

2
•
DE
INHALT
EINFÜHRUNG ..................................................... 3
Produktmerkmale ................................................... 3
WICHTIGE SICHERHEITSHINWEISE ................. 4
REINIGUNG UND PFLEGE .................................. 4
BESCHREIBUNG DER TEILE .............................. 5
AUFBAU .............................................................. 5
ABBAU ................................................................. 6
TECHNISCHE DATEN ......................................... 6
D00125056,
Version 1.0, Stand 31/07/2019
Produkt-Updates, Dokumentation, Software und Support
erhalten Sie unter www.eurolite.de. Die neueste Version
der Bedienungsanleitung finden Sie im Downloadbereich
des Produkts.
© 2019 Eurolite. Alle Rechte vorbehalten.
Dieses Dokument darf ohne schriftliche Genehmigung des
Copyrightinhabers weder ganz noch teilweise reproduziert
werden. Der Inhalt dieses Dokuments kann ohne vorherige
Ankündigung modifiziert werden, wenn Änderungen in
Methodik, Design oder Herstellung dies erforderlich
machen.
Alle in diesem Dokument erwähnten Marken gehören den
jeweiligen Eigentümern.

3
•
DE
EINFÜHRUNG
Erleben Sie Eurolite.
Videos zum Produkt,
passendes Zubehör,
Dokumentation,
Firmware- und Software-
Updates, Support und
News zur Marke. Sie
finden all das und vieles
mehr auf unserer
Website. Besuchen Sie
uns auch auf unserem
YouTube-Kanal und
Facebook.
www.eurolite.de
www.youtube.com/
eurolitevideo
www.facebook.com/
Eurolitefans
Willkommen bei Eurolite! Schön, dass Sie sich für eines unserer Produkte
entschieden haben. Eurolite bietet Ihnen Zugang zur Welt der Showtechnik mit
einer weltweit einzigartigen Vielfalt an Produkten sowohl für professionelle
Anwender als auch für Einsteiger.
Wenn Sie nachfolgende Hinweise beachten, sind wir sicher, dass Sie über viele
Jahre Freude an Ihrem Kauf haben werden. Diese Bedienungsanleitung zeigt
Ihnen, wie Sie Ihr neues Produkt von Eurolite installieren, in Betrieb nehmen
und nutzen.
Damit Sie sich und andere keinen Gefahren aussetzen, beachten Sie bitte
unbedingt alle Sicherheitshinweise und verwenden das Produkt nur wie in
dieser Anleitung beschrieben. Bitte bewahren Sie diese Bedienungsanleitung
für weiteren Gebrauch auf und geben Sie sie ggf. an nachfolgende Besitzer
weiter.
Produktmerkmale
• Stativleinwand für Video- und Bildprojektion im eigenen Zuhause, Büro,
Konferenzraum, Klassenzimmer oder auch im Freien
• Weißes Stahlblechgehäuse in moderner Optik
• Bildwandfläche im 4:3 Format
• Gain-Faktor von 1,2 für universalen Einsatz
• Blitzschnelle Installation
• Einfach zu reinigen
• Stabbeschwerte Leinwand zur Vermeidung von Bewegungen und
Wellenbildung
• Mit umlaufendem schwarzem Rand oben, unten, rechts und links
• Für alle LCD- und DLP-Beamer geeignet
• Absolut lichtundurchlässig durch schwarze Rückseite
• Stufenlose Höheneinstellung durch automatische Verriegelung mit nur einer
Hand möglich
• Matte, weiße Leinwand für farbechte Projektionen
• Integrierter Tragegriff und Tuchsicherung
• Leichtbauweise für einfachen Transport
• Robustes und stabiles Dreibeingestell aus Stahlblech

4
•
DE
WICHTIGE SICHERHEITSHINWEISE
WARNUNG!
Lesen Sie aufmerksam die Sicherheitshinweise und benutzen Sie das Produkt nur wie in dieser
Anleitung beschrieben, damit es nicht versehentlich zu Verletzungen oder Schäden kommt.
• Die Stativleinwand eignet sich zur Darstellung von Filmen, Präsentationen, Fotos, etc. im privaten und
gewerblichen Bereich. Das höhenverstellbare Dreibeingestell kann dank des integrierten Tragegriffs und seines
geringen Gewichts einfach transportiert werden.
• Verwenden Sie das Produkt ausschließlich gemäß den hier gegebenen Vorgaben. Bei Schäden, die durch
Nichtbeachten dieser Anleitung verursacht werden, erlischt jeder Gewährleistungsanspruch. Für Folgeschäden
wird keine Haftung übernommen.
• Aus Sicherheitsgründen ist das eigenmächtige Umbauen oder Verändern des Produkts nicht gestattet und hat
den Verfall der Gewährleistung zur Folge.
• Das Produkt ist kein Spielzeug. Halten Sie es vor Kindern fern. Lassen Sie Verpackungsmaterial nicht achtlos
liegen.
• Das Stativ muss immer auf einem ebenen Untergrund aufgestellt werden, der genügend belastbar ist, um das
Stativ samt Last zu tragen. Bei einer Aufstellung auf weichen oder losen Flächen kann das Stativ kippen und
Verletzungen und Sachschäden verursachen.
• Das Produkt sollte nicht bei starkem Wind verwendet werden. Öffnen Sie das Stativ vollständig, um eine stabile
Konstruktion zu gewährleisten.
• Verwenden Sie das Produkt nicht bei extrem hoher Temperaturen oder Luftfeuchtigkeit und an extrem staubigen
oder verschmutzten Orten.
• Gehen Sie vorsichtig mit dem Produkt um. Durch Stöße, Schläge oder dem Fall aus bereits geringer Höhe wird
es beschädigt.
• Vor der Benutzung auf Beschädigungen prüfen. Bei Beschädigungen darf das Stativ nicht mehr eingesetzt
werden.
• Benutzen Sie die Originalverpackung, um das Gerat bei Transport und Lagerung optimal vor Erschütterungen,
Staub und Feuchtigkeit zu schützen.
• Das Produkt enthält keine zu wartenden Teile. Unternehmen Sie keine Reparaturversuche, da dies ein
Sicherheitsrisiko darstellt.
• Beachten Sie bei der Entsorgung die in Ihrem Land geltenden Gesetze.
REINIGUNG UND PFLEGE
• Rollen Sie die Leinwand nach jedem Gebrauch wieder ein.
• Vermeiden Sie das Falten der Leinwand.
• Schützen Sie das Bildwandtuch vor starker Verunreinigung. Es kann bei Bedarf mit milder Seifenlauge und
einem weichen Tuch gereinigt werden.
• Bewegliche Teile der Projektionswand sind dauergeschmiert und wartungsfrei.
• Achten Sie darauf, dass die Leinwand in einem sauberen Zustand ist bevor Sie sie zur längeren Aufbewahrung
verstauen.
• Achten Sie darauf, dass die Leinwandoberfläche nicht mit scharfkantigen Gegenständen, Flüssigkeiten, Rauch
oder Chemikalien in Berührung kommen kann.
• Setzen Sie die Leinwand außerdem keinen hohen Temperaturen aus und lagern Sie sie in einer trockenen
Umgebung.

5
•
DE
BESCHREIBUNG DER TEILE
Stativ
Leinwand
Auszugsrohr
Leinwandhülse
Griff
Aufhängung
Feststellknopf
Verriegelung für
Leinwandhülse
Spannknopf
AUFBAU
1) Nehmen Sie das Produkt vorsichtig aus der Verpackung.
2) Halten Sie das Produkt aufrecht und klappen Sie für bessere Stabilität die Stativbeine (1) leicht aus.
3) Drücken Sie den Spannknopf (5) und ziehen Sie das Auszugsrohr (2) aus bis es einrastet.
4) Drehen Sie nun die Leinwandhülse (7) so in die Horizontale, dass die Leinwand nach oben zeigt.
5) Ziehen Sie die Leinwand nun vorsichtig an der Aufhängung (8) aus der Hülse (7) nach oben. Für eine flexible
Einstellung des Neigungswinkels der Leinwand gibt es drei Einkerbungen für die Befestigung der
Aufhängung.
6) Heben Sie die Konstruktion vorsichtig an und klappen Sie die Stativbeine (1) jetzt vollständig aus.
7) Jetzt kann mithilfe des Spannknopfes (5) die Höhe der Leinwand eingestellt werden. Benutzen Sie dazu am
besten beide Hände: Halten Sie das Auszugsrohr (2) gut fest, um ein unkontrolliertes Heruntergleiten zu
verhindern und drücken Sie mit der anderen Hand den Spannknopf.

6
•
DE
ABBAU
1) Senken Sie den oberen Teil des Stativs ab.
2) Entfernen Sie die obere Stützstange von der Spitze des Stativs und rollen Sie die Leinwand zurück in die
Hülse.
3) Drücken Sie die Verriegelung herunter, ziehen Sie die Leinwandhülse aus der Stativhalterung und drehen Sie
sie zurück in die Vertikale.
4) Ziehen Sie nun die Stativbeine ein.
TECHNISCHE DATEN
Modell
80901200 80901203
Format:
4:3
Typ:
Mobile Rollobildwand D
Projektionsart:
Aufprojektion
Diagonale:
2,15 m (85") 2,50 m (100")
Bildwandgröße:
172 x 130 cm 200 x 150 cm
Maße (T x B x
H):
800 x 1875 x 2250 mm 800 x 2155 x 2480 mm
Transportmaße (T x B x H):
170 x 80 x 1940 mm 170 x 80 x 2205 mm
Randabdeckung:
3,5 cm
Gain:
1,2
Sichtwinkel:
160°
Trägermaterial:
PVC
Oberfläche:
Matt, weiß
Technische Daten können im Zuge der Weiterentwicklung des Produkts ohne vorherige Ankündigung geändert werden.

7
•
EN
CONTENTS
INTRODUCTION .................................................. 8
Product features ..................................................... 8
IMPORTANT SAFETY INSTRUCTIONS .............. 9
CLEANING AND CARE ....................................... 9
DESCRIPTION OF PARTS .................................. 10
SETUP ................................................................. 10
DISASSEMBLY .................................................... 11
TECHNICAL SPECIFICATIONS .......................... 11
D00125056,
version 1.0, publ. 31/07/2019
For product updates, documentation, software and
support please visit www.eurolite.de. You can find the
latest version of this user manual in the product’s
download section.
© 2019 Eurolite. All rights reserved.
No part of this document may be reproduced in any form
without the written permission of the copyright owner.
The contents of this document are subject to revision
without notice due to continued progress in
methodology, design, and manufacturing. Eurolite shall
have no liability for any error or damage of any
kind resulting from the use of this document.
All trademarks mentioned herein are the property of their
respective owners.

8
•
EN
INTRODUCTION
Experience Eurolite.
Product videos, suitable
accessories, firmware
and software updates,
documentation and the
latest news about the
brand. You will find this
and much more on our
website. You are also
welcome to visit our
YouTube channel and
find us on Facebook.
www.eurolite.de
www.youtube.com/
eurolitevideo
www.facebook.com/
Eurolitefans
W
elcome to Eurolite! Thank you for choosing one of our products.
Eurolite is
your connection to the world of show with an unparalleled variety of products,
both for professionals and beginners.
If you follow the instructions given in this manual, we are sure that you will
enjoy this product for a long period of time. This user manual will show you
how to install, set up and operate your new Eurolite product.
Users of this product are recommended to carefully read all warnings in order
to protect yourself and others from damage. Please keep this manual for future
needs and pass it on to further owners.
Product features
• Projection screen with stand for video and image projection in your own
home, office, conference room, classroom or even outdoors
• White steel sheet housing in a modern look
• Projection screen in 4:3 aspect ratio
• Gain factor of 1.2 for universal use
• Quick installation
• Easy to clean
• Bar-tensioned canvas to keep the fabric flat and immobile
• With surrounding black border top, bottom, right and left
• Suitable for all LCD and DLP projectors
• Impervious to light due to black back
• Continuous screen height adjustment with only one hand due to auto-locking
mechanism
• Matt, white canvas for genuine projections
• Integrated carrying handle and screen fixation
• Lightweight design for easy transportation
• Solid tripod stand made of steel sheet

9
•
EN
IMPORTANT SAFETY INSTRUCTIONS
WARNING!
Please read the safety warnings carefully and only use the product as describe in this manual to avoid
accidental injury or damage.
• The tripod screen is designed for displaying films, presentations, photos, etc. and is suitable for private and
commercial use. Thanks to the integrated carrying handle and the lightweight design, the height-adjustable
tripod can be easily transported.
• Only use the product according to the instructions given herein. Damages due to failure to follow these
operating instructions will void the warranty! We do not assume any liability for any resulting damage.
• Unauthorized rebuilds or modifications of the product are not permitted for reasons of safety and render the
warranty invalid.
• This product is not a toy. Keep it out of the reach of children. Do not leave packaging material lying around
carelessly.
• The stand must always be set up on firm ground capable of supporting the weight of both the stand and the
load. When the stand is installed on soft or uneven ground, the stand may tip over and cause injuries and
property damage.
• The stand should not be used in windy environment. Open the legs completely to ensure a stable construction.
• Do not use the product at extremely high temperatures or humidity and in extremely dusty or dirty locations.
• Handle the product with care; it can be damaged by impacts, blows, or accidental falls, even from a low height.
• Before taking it into operation, check the stand upon possible damages. If defective, the stand must not be taken
into operation.
• Please use the original packaging to protect the device against vibration, dust and moisture during
transportation or storage.
• There are no serviceable parts inside. Do not try to repair the product by yourself as this may result in damage.
• Comply with all applicable disposal laws in your country.
CLEANING AND CARE
• Roll up the screen after each use.
• Avoid folding the screen fabric.
• The screen fabric has to be prevented from intense soiling and can be cleaned with a mild soap solution and a
soft cloth if required.
• All mechanical parts of the screen are permanently lubricated and maintenance-free.
• Make sure the screen is clean before storing it.
• Keep away sharp-edged objects, liquids, smoke and chemicals from the screen surface.
• Do not expose the screen to high temperatures and make sure it is stored in a dry environment.

10
•
EN
DESCRIPTION OF PARTS
Tripod
Screen
Extension tube
Screen housing
Handle
Hanging strip
Locking knob
Latch for screen housing
Tension knob
SETUP
1) Carefully unpack the product.
2) Hold the product upright and slightly open the tripod legs (1) for increased stability during installation.
3) Press the tension knob (5) and extend the extension tube (2) until it clicks into place.
4) Put the screen housing (7) in a horizontal position with the screen facing upwards.
5) Now carefully pull the screen upwards holding on to the hanging string (8). To ensure a flexible adjustment of
the inclination angle of the screen, you can attach the hanging string to one of three indentations.
6) Lift the construction and fully open the tripod legs (1).
7) You can now adjust the screen height using the tension knob (5). Ideally, use both hands for this procedure:
Firmly hold the extension tube (2) with one hand to keep it from dropping too fast and press the tension knob
with the other hand.

11
•
EN
DISASSEMBLY
1) Lower the upper section of the tripod.
2) Remove the top supporting rod from the top of the tripod and lower the screen until it is fully retracted into its
housing.
3) Hold down the latch, pull the screen housing out of the tripod socket and put it back into a vertical position.
4) Now retract the tripod legs.
TECHNICAL SPECIFICATIONS
Model
80901200 80901203
Format:
4:3
Type:
Mobile roller screen D
Projection type:
Front projection
Diagonal:
2.15 m (85") 2.50 m (100")
Screen area:
172 x 130 cm 200 x 150 cm
Dimensions (D x W x H):
800 x 1875 x 2250 mm 800 x 2155 x 2480 mm
Transport dimensions (D x W x H):
170 x 80 x 1940 mm 170 x 80 x 2205 mm
Surrounding border:
3.5 cm
Gain:
1.2
Viewing angle:
160°
Base material:
PVC
Screen surface:
Matt, white
Specifications are subject to change without notice due to product improvements.

Eurolite is a brand of
Steinigke Showtechnic GmbH Andreas
-
Bauer
-
Str. 5 97297 Waldbüttelbrunn Germany
D00125056 Version 1.0 Publ. 31/07/2019
1/12