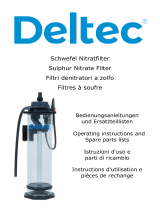
T5 UV Gerät
T5 UV Sterilizer
Sterilizzatore UV T5
Bedienungsanleitung und Ersatzteilliste
Operating instruction and Spare parts list
Istruzioni d’uso e parti di ricambio

DeltecT5 UV Geräte
Deltec T5 UV-Geräte sind kompakt und herkömmlichen UV-Geräten in der Wirkung weit
überlegen. Durch die Verwendung spezieller Quarz T5 Röhren und Quarz Schutzröhren wird eine
höchstmögliche Strahlungsintensität erreicht.
Durch die elektrischen Vorschaltgeräte ergibt sich eine gleichmäßige Strahlung und eine
verlängerte Einsatzdauer der T5 Röhre (ca. 9000 Std.)
Einbau
Das UV-Gerät ist wasserdicht (IP 67); das Vorschaltgerät jedoch nicht, es muss deshalb so
installiert werden, dass es vor Wasser geschützt ist.
Das UV-Gerät kann an den 4 Befestigungskonsolen (Nr. 9) horizontal oder vertikal montiert
werden. Dabei ist zu beachten, dass
a) genug Platz zum wechseln der T5 Röhren vorhanden ist.
b) bei waagerechtem Einbau die Wasseranschlüsse zur besseren Entlüftung nach oben zeigen.
c) bei vertikalem Einbau die elektronische Anschlussleitung von oben kommt. Das Wasser
soll das UV-Gerät von unten nach oben durchfließen.
Zusammenbau
Wichtig: Das Schutzrohr aus Quarzglas ist leicht zerbrechlich und ist deshalb beim Einbau sehr
vorsichtig zu handhaben.
Beim Einbau des Quarzglas Rohres das UV-Gerät vertikal halten und darauf achten, dass das
geschlossene Quarzglas Rohrende ohne Kraftaufwand ganz in die untere Zentrierung (10) des
UV-Gerätes eingeschoben wird. Die Viton Dichtung (5) des Quarzglas Rohres muss bei richtigem
Einbau in dem Dichtungssitz (11) des UV-Gerätes sitzen.
Bei dem Zusammenstecken der T5 Röhre (6) mit dem Anschlussstecker darauf achten, dass das
Steckbild rechteckig ist. D.h. ein gewaltsames falsches zusammenstecken kann zu Schäden
führen.
Die T5 Röhre vorsichtig in das Quarzglasrohr einführen. Zuerst die Kappe (12) und danach die
Kabelverschraubung (13) von Hand festziehen.
Bitte beachten: Niemals im ausgebauten Zustand die UV-Röhre einschalten und in das Licht
blicken. UV-Licht kann zu ernsthaften Augenschäden führen.
Beim Anschrauben der Schlauchanschlüsse die mitgelieferten Flachdichtungen (3) nicht
vergessen. Dies gilt nur für Einzelgeräte. Bei zwei oder vierfach Geräten müssen die
Verschraubungen mit Teflonband abgedichtet, und die PVC Anschlüsse in der gewünschten
Position mit PVC-Kleber verklebt werden. Die Wasserversorgung sollte über einen Absperrhahn
auf der Einlaufseite geregelt werden. Die Ablaufseite darf nicht gedrosselt werden.
Vor dem Anschluss des UV-Gerätes an das Stromnetz bitte das UV-Gerät sowie die
Wasseranschlüsse auf Leckstellen hin überprüfen. Erst wenn alles in Ordnung ist, die in der
Tabelle angegebenen max. Durchflussmengen einstellen. Im Zweifelsfall die Durchflussmenge
reduzieren. Eine zu hohe Durchflussmenge reduziert die Wirkung.
Wartung
Ca. alle 6 Monate das Quarzglasrohr mit Alkohol reinigen. Nach ca. 9000 Betriebsstunden (ca. 1
Jahr) die T5 Röhre erneuern.
Vorschaltgerät
Auf dem Vorschaltgerät befinden sich zwei LED´s und ein Summer, welche den Zustand der
T5 Röhre anzeigen. Grüne LED: UV-Gerät in Betrieb. Rote LED und Summer: T5 Röhre defekt.
Sicherheitshinweise
Das Vorschaltgerät vor Wasser schützen.
Niemals ungeschützt in das Licht einer eingeschalteten UV-Lampe sehen.

Technische Daten
Leistungsaufnahme
Wasserdurchfluss
max.
Aquariengröße
geringer Besatz
Aquariengröße
normaler Besatz
Typ 101
10W
500 Ltr./Std.
500 Ltr.
250 Ltr.
Typ 201
20W
1000 Ltr./Std.
1000 Ltr.
500 Ltr.
Typ 391
39W
2000 Ltr./Std.
2000 Ltr.
1000 Ltr.
Typ 392
2x39W
4000 Ltr./Std.
4000 Ltr.
2000 Ltr.
Typ 394
4x39W
8000 Ltr./Std.
8000 Ltr.
4000 Ltr.
Typ 801
1x80W
3000 Ltr./Std.
4000 Ltr.
2000 Ltr
Typ 802
2x80W
6000 Ltr./Std.
8000 Ltr.
4000 Ltr.
Typ 804
4x80W
12000 Ltr./Std.
16000 Ltr.
8000 Ltr.

Ersatzteilliste
Art. Nr.
Typ 101
Art. Nr.
Typ 201
Art. Nr.
Typ 391
Art. Nr.
Typ 392
Art. Nr.
Typ 394
Art. Nr.
Typ 801
Art. Nr.
Typ 802
Art. Nr.
Typ 804
Bezeichnung
99400000
99401000
99402000
99410000
99411000
9940300
0
9940400
0
9940500
0
Typ 101 - 804
1
99431000
99432000
99433000
99433000
99433000
9943300
0
9943300
0
9943300
0
Gerätekörper
2
99440000
99441000
99441000
99441000
99441000
9944100
0
9944100
0
9944100
0
Schlauchtülle+ Überwurfm.
3
99442000
99442000
99442000
99442000
99442000
9944200
0
9944200
0
9944200
0
Flachdichtung
4
99425000
99426000
99427000
99427000
99427000
9942700
0
9942700
0
9942700
0
Quarz-Schutzröhre
5
99443000
99443000
99443000
99443000
99443000
9944300
0
9944300
0
9944300
0
Viton Dichtung
6
99420000
99421000
99422000
99422000
99422000
9942300
0
9942300
0
9942300
0
Quarz T5 UV Röhre
7
8
99435000
99436000
99437000
99437000
99437000
9943800
0
9943900
0
9943800
0
Schaltkasten & Kabel
A
99450000
9945000
0
Verrohrung 2 fach kompl.
B
99455000
9945500
0
Verrohrung 4 fach kompl.
D
93403000
93403000
9340300
0
9340300
0
Kugelhahn 32mm
16
99451000
9945100
0
Verrohrung 2 fach
17
99452000
9945200
0
Verrohrung 2 fach
18
99456000
9945600
0
Verrohrung 4 fach
19
99457000
9945700
0
Verrohrung 4 fach
20
93043100
93043100
9304310
0
9304310
0
Überwurfmutter 32mm
21
93043200
93043200
9304320
0
9304320
0
Einsatzstück 32mm
22
93043400
93043400
9304340
0
9304340
0
O-Ring
23
93403200
93403200
9340320
0
9340320
0
Einsatzstück Kugelhahn
24
93403100
93403100
9340310
0
9340310
0
Überwurfmutter Kugelhahn
25
93403400
93403400
9340340
0
9340340
0
O-Ring Kugelhahn
26
93403500
93403500
9340350
0
9340350
0
Kugelhahn ohne 23-25

DeltecT5 UV Sterilizers
Deltec T5 UV Sterilizers are designed to be used for aquariums only. They are compact
in size and superior to conventional UV Sterilizers because both the T5 tube and the protective
tube are made of quartz. The electronic ballast and the T5 ensure an even radiation transmission,
highest efficiency and long life span (up to 9000hrs).
Installation
The sterilizer body itself is water proof to IP67, however the ballast box is not. It is therefore
most important to install the ballast box in a dry place. The UV Sterilizers can be simply placed in
a suitable location or screwed to a wall through slots provided in
item (9). When fitting the UV Sterilizer make sure
- that there is enough space to remove the tube.
- when placing it flat on the floor the outlets must point upwards to ease bleeding.
- when fitting it vertically the lead should come from the top. Direction of water flow
should be from bottom to top.
Assembly
The quartz sleeve No 4 is very sensitive to any kind of force. Therefore great care must be taken
when installing it into the body. Hold the body vertically with the open end at the top. Place the
quartz sleeve inside the body without any force until it is located in the fins (10) at the bottom.
Fit the viton seal over the end of the quartz sleeve and onto the seat (11) in the body. Please
make sure to connect the T5 tube correctly to the socket. The 4 pins are not equally spaced!
They form a rectangle and not, as it may appear, a square. Trying to force T5 tube and the
socket in the wrong way may lead to destruction. Feed the T5 tube into the quartz sleeve and
tighten first of all cap (12) and than tighten cap nut (13).
Important
Never look into the T5 UV tube when illuminated. If this should happen accidentally medical
advise should be taken. Exposure to UV radiation can cause serious damage to the eye.
When fitting the hose tail connectors use the seals provided with the unit.
The T-pieces on double and 4 fold units are not glued. The angle of these T-pieces can be chosen
to suit the installation of the unit (i.e. horizontally or vertically). Afterwards the T-pieces have to
be glued into position. The water flow must be regulated on the inlet side through a tap. The
water flow on the outlet side should not be restricted in any way or any other measures taken
witch may cause a pressure build up inside the unit. Before switching on the electricity, check the
UV sterilizer and all connections for leaks.
Regulate the water flow as per table, if in doubt reduce rather than in crease the flow. An
increased flow reduces the efficiency.
Maintenance
After app. 6 month clean the quartz sleeve with alcohol. Replace the T5 tube after app. 9000 hrs.
(1 year)
Safety
Never look into UV light with unprotected eyes. Should this happen accidentally, take
medical advise.
Ensure that the ballast box is kept away from water.

technical data
power consumption
water flow rate max
aquarium size
light stocking
aquarium size
normal stocking
Type 101
10Watt
500 ltr./h
500 ltr.
250 ltr.
Type 201
20Watt
1000 ltr./h
1000 ltr.
500 ltr.
Type 391
39Watt
2000 ltr./h
2000 ltr.
1000 ltr.
Type 392
2x39Watt
4000 ltr./h
4000 ltr.
2000 ltr.
Type 394
4x39Watt
8000 ltr./h
8000 ltr.
4000 ltr.
Type 801
80 Watt
3000 ltr./h
4000 ltr.
2000 ltr
Type 802
2x80 Watt
6000 ltr./h
8000 ltr.
4000 ltr.
Type 804
4x80 Watt
12000 ltr./h
16000 ltr.
8000 ltr.

Spare parts list
Art. No.
Typ 101
Art. No.
Typ 201
Art. No.
Typ 391
Art. No.
Typ 392
Art. No.
Typ 394
Art. No.
Typ 801
Art. No.
Typ 802
Art. No.
Typ 804
Description
99400000
99401000
99402000
99410000
99411000
99403000
99404000
99405000
Type 101 - 804
1
99431000
99432000
99433000
99433000
99433000
99433000
99433000
99433000
Body
2
99440000
99441000
99441000
99441000
99441000
99441000
99441000
99441000
Hose tail + Cap nut
3
99442000
99442000
99442000
99442000
99442000
99442000
99442000
99442000
Seal
4
99425000
99426000
99427000
99427000
99427000
99427000
99427000
99427000
Quartz sleeve
5
99443000
99443000
99443000
99443000
99443000
99443000
99443000
99443000
Viton Seal
6
99420000
99421000
99422000
99422000
99422000
99423000
99423000
99423000
Quartz T5 pipe
7
8
99435000
99436000
99437000
99437000
99437000
99438000
99439000
99438000
Ballast & cable
A
99450000
99450000
Pipeing 2 completely
B
99455000
99455000
Pipeing 4 completely
D
93403000
93403000
93403000
93403000
Shut-off-valve 32mm
16
99451000
99451000
Pipeing 2
17
99452000
99452000
Pipeing 2
18
99456000
99456000
Pipeing 4
19
99457000
99457000
Pipeing 4
20
93043100
93043100
93043100
93043100
Cap nut 32mm
21
93043200
93043200
93043200
93043200
Collar coupling 32mm
22
93043400
93043400
93043400
93043400
O-Ring 32mm
23
93403200
93403200
93403200
93403200
Collar Shut-off-valve
24
93403100
93403100
93403100
93403100
Cap nut Shut-off-valve
25
93403400
93403400
93403400
93403400
O-Ring Shut-off-valve
26
93403500
93403500
93403500
93403500
Shut-off-valve without 23-25

Deltec Sterilizzatori UV-T5
Gli Impianti UV-T5 Deltec sono apparecchi molto compatti la cui efficacia supera di gran lunga
quella degli apparecchi UV tradizionali. Grazie all’uso di speciali lampade T5 e guaine di
protezione al quarzo raggiungono la massima intensità di radiazione possibile.
L’impiego di alimentatori elettronici permette una radiazione regolare ed una maggiore durata
delle lampade T5 (ca. 9000 ore).
Montaggio
L’apparecchio UV è a tenuta stagna (IP 67); l’alimentatore, invece, non lo è; deve quindi essere
installato al riparo dall’acqua.
L’apparecchio UV può essere montato in posizione orizzontale o verticale mediante le 4 staffe di
fissaggio (n. 9), facendo attenzione a quanto segue:
d) Lasciare abbastanza spazio per consentire la sostituzione delle lampade T5.
e) Se l’apparecchio è montato in orizzontale, i collegamenti dell’acqua devono essere rivolti
verso l’alto per evitare aria nei tubi.
f) Se l’apparecchio è installato in posizione verticale, il collegamento elettronico deve
provenire dall’alto. L’acqua deve scorrere nell’apparecchio UV dal basso verso l’alto.
Assemblaggio
Importante: la guaina di protezione di vetro al quarzo è molto fragile e quindi da maneggiare con
estrema cura.
Durante il montaggio della guaina di vetro al quarzo tenere l’apparecchio UV in posizione
verticale, assicurandosi che l’estremità chiusa della guaina di vetro al quarzo venga inserita
completamente nella centratura inferiore (10) dell’apparecchio UV senza forzare. La guarnizione
Viton (5) della guaina al quarzo deve essere ben installata e inserita nell’apposita sede (11)
sull’apparecchio UV. Collegando la lampada T5 (6) con la spina di collegamento fare attenzione
alla giusta posizione di entrambe; vale a dire: un collegamento errato, con una forzatura, può
causare danni.
Inserire la lampada T5 con cautela nella guaina di protezione al quarzo. Serrare a mano dapprima
la calotta (12) e poi il collegamento a vite del cavo (13).
Attenzione: Non accendere mai le lampade UV prima di terminare il montaggio e non guardarne
la luce. La luce UV può causare seri danni agli occhi.
Nell’avvitare i raccordi dei tubi non dimenticare le guarnizioni piatte (3) in dotazione. Questo vale
solo per gli apparecchi singoli. Negli apparecchi doppi o quadrupli i collegamenti a vite devono
essere chiusi a tenuta con nastro di teflon e i collegamenti in PVC devono essere incollati nella
posizione desiderata con collante PVC. Regolare l’immissione di acqua mediante rubinetto sul lato
entrata. L’uscita del flusso non deve presentare strozzature.
Prima del collegamento alla rete elettrica verificare che l’apparecchio UV e i collegamenti idraulici
non presentino perdite. Solo quando tutto è in ordine, impostare le quantità di flusso max.
indicate nella tabella. Nel dubbio ridurre la quantità, poiché una quantità di flusso eccessiva
riduce la resa.
Manutenzione
Pulire il tubo al quarzo con alcool ca. ogni 6 mesi. Dopo ca. 9000 ore di funzionamento (ca. 1
anno) sostituire le lampade T5.
Norme di sicurezza
Mantenere lo stabilizzatore al riparo dall’acqua.
Non guardare mai una lampada UV accesa senza protezione.

Dati tecnici
Potenza
assorbita
Flusso
d’acqua max
Dimensioni acquario
con popolazione scarsa
Dimensioni acquario con
popolazione normale
Mod. 101
10Watt
500 l/h
500 l
250 l
Mod. 201
20Watt
1000 l/h
1000 l
500 l
Mod. 391
39Watt
2000 l/h
2000 l
1000 l
Mod. 392
2x39Watt
4000 l/h
4000 l
2000 l
Mod. 394
4x39Watt
8000 l/h
8000 l
4000 l
Mod. 801
80Watt
3000 l/h
4000 l
2000 l
Mod. 802
2x80Watt
6000 l/h
8000 l
4000 l
Mod. 804
4x80Watt
12000 l/h
16000 l
8000 l

Lista parti di ricambio
Art. Nr.
Typ 101
Art. Nr.
Typ 201
Art. Nr.
Typ 391
Art. Nr.
Typ 392
Art. Nr.
Typ 394
Art. Nr.
Typ 801
Art. Nr.
Typ 802
Art. Nr.
Typ 804
Descrizione
99400000
99401000
99402000
99410000
99411000
9940300
0
9940400
0
9940500
0
Mod. 101 - 804
1
99431000
99432000
99433000
99433000
99433000
9943300
0
9943300
0
9943300
0
Corpo apparecchio
2
99440000
99441000
99441000
99441000
99441000
9944100
0
9944100
0
9944100
0
Isolatore passante flessibile +
dado a risvolto
3
99442000
99442000
99442000
99442000
99442000
9944200
0
9944200
0
9944200
0
Guarnizione piatta
4
99425000
99426000
99427000
99427000
99427000
9942700
0
9942700
0
9942700
0
Guaina di protezione al
quarzo
5
99443000
99443000
99443000
99443000
99443000
9944300
0
9944300
0
9944300
0
Guarnizione Viton
6
99420000
99421000
99422000
99422000
99422000
9942300
0
9942300
0
9942300
0
Lampada T5 al quarzo
7
8
99435000
99436000
99437000
99437000
99437000
9943800
0
9943900
0
9943800
0
Quadro interruttore
A
99450000
9945000
0
Collettore 2 tubi –completo
B
99455000
9945500
0
Collettore 4 tubi – completo
D
93403000
93403000
9340300
0
9340300
0
Rubinetto 32mm
16
99451000
9945100
0
Collettore 2 tubi
17
99452000
9945200
0
Collettore 2 tubi
18
99456000
9945600
0
Collettore 4 tubi
19
99457000
9945700
0
Collettore 4 tubi
20
93043100
93043100
9304310
0
9304310
0
Raccordo 32mm
21
93043200
93043200
9304320
0
9304320
0
Ghiera 32mm
22
93043400
93043400
9304340
0
9304340
0
O-Ring
23
93403200
93403200
9340320
0
9340320
0
Raccordo rubinetto
24
93403100
93403100
9340310
0
9340310
0
Ghiera rubinetto
25
93403400
93403400
9340340
0
9340340
0
O-Ring rubinetto
26
93403500
93403500
9340350
0
9340350
0
Rubinetto senza 23-25

Deltec GmbH
Steller Straße 75
D-27755 Delmenhorst
Deutschland / Germany
www.deltec-aquaristic.com
-
 1
1
-
 2
2
-
 3
3
-
 4
4
-
 5
5
-
 6
6
-
 7
7
-
 8
8
-
 9
9
-
 10
10
-
 11
11


