BLACK DECKER GTC390 Benutzerhandbuch

Typ
Benutzerhandbuch
38cm GTC390
GTC390
All manuals and user guides at all-guides.com
38cm GTC390
38cm GTC390
38cm GTC390
A
C1
C2
D1
D2
E1
0-15°
E2
E4
E5
E3
B
1
2
6
9
7
8
10
12
11
11
4
3
5
11
11
All manuals and user guides at all-guides.com
1
English
Italiano
Deutsch
Français
Nederlands
Español
Português
Eλληνικά
®
All manuals and user guides at all-guides.com
2
Cordless hedgetrimmer
GTC390
Congratulations!
On your purchase of this hedgetrimmer from
Black & Decker. Your hedgetrimmer has the following
features for your benefit:
Full bale handle for comfort of use.
Safety lock off switch to prevent accidental starting.
Front guard for your safety.
Dual action blades for less vibration.
Description (Fig. A)
AFollowing is a list of parts that will be
mentioned in this leaflet and are shown in
the diagrams.
1. Body
2. Front handle switch
3. Handle trigger switch
4. Lock-off switch
5. Air slots
6. Guard
7. Battery release buttons
8. Charger
9. Battery
10. Blade sheath
11. Blade sheath wall mounting holes
Contents
1. Cordless hedgetrimmer
2. Battery
3. Charger
4. Blade sheath (wall mountable)
5. Parts pack (for wall mounted blade sheath
and charger)
4 of no. 8 x 31mm screws
4 of no. 8 x 31mm wall plugs
6. User manual
7. Guarantee card
8. Black & Decker service centres and parts diagram
Safety instructions
!
Warning! When using electric tools,
the following basic safety precautions
should always be taken to reduce the risk
of fire, electric shock and personal injury.
Read all these instructions before
attempting to operate this product and save
these instructions.
For safe operation
Keep the work area clean. Cluttered
areas and benches invite injuries.
Consider work area environment.
Do not expose power tools to rain and
do not use power tools in damp or wet
locations. Keep the work area well lit.
Do not use power tool where there is a
risk of causing fire or explosion.
Guard against electric shock. Avoid
body contact with earthed or grounded
surfaces (e.g. pipes, radiators, ranges,
refrigerators).
Keep children away. Do not let visitors
touch the tool. All visitors should be kept
away from work area.
Store idle tools. When not in use, tools
should be stored in a dry, high or locked
place, out of reach of children.
Do not force the tool. It will do the job
better and more safely at the rate for
which it was intended.
Use the right tool. Do not force small
tools or attachments to do the job of a
heavy duty tool. Do not use tools for
purposes not intended: for example,
do not use a circular saw to cut tree
limbs or logs.
Dress properly. Do not wear loose
clothing or jewellery as they can be
caught in moving parts. Rubber gloves
and non-skid footwear are recommended
when working outdoors. Make sure long
hair is kept out of the way.
Use safety glasses. Use a face or dust
mask as well if the cutting operation
is dusty.
Secure your work. Use clamps or a vice
to hold your work. It is safer than using
your hand and it frees both hands to
operate the tool.
Do not overreach. Keep proper footing
and balance at all times.
Maintain tools with care. Keep tools
sharp and clean for better and safer
performance. Follow instructions for
lubricating and changing accessories.
lnspect tool cords periodically and if
User manual
All manuals and user guides at all-guides.com
3
ENGLISH
damaged have repaired by an authorised
service facility. lnspect extension cords
periodically and replace if damaged.
Keep handles dry, clean and free from oil
and grease.
!
Disconnect tools. Disconnect when not
in use, before servicing and when
changing accessories such as blades,
bits and cutters. Unplug before carrying
out any adjustment, servicing or
maintenance.
Remove adjusting keys and wrenches.
Form the habit of checking to see that
keys and adjusting wrenches are
removed from the tool before switching
it on.
Avoid unintentional starting. Do not
carry a plugged-in tool with a finger on
the switch. Ensure the switch is off when
plugging in.
Use outdoor extension cords. When a
tool is used outdoors, use only extension
cords intended for outdoor use and so
marked.
Stay alert. Watch what you are doing.
Use common sense. Do not operate
when you are tired.
Connect dust extraction equipment.
lf devices are provided for the connection
of dust extraction and collection
facilities, ensure these are connected and
properly used.
Check damaged parts. Before further
use of the tool, a guard or other part that
is damaged should be carefully checked
to determine whether it will operate
properly and perform its intended
function. Check for alignment of moving
parts, binding of moving parts, breakage
of parts, mounting and any other
conditions that may affect its operation.
A guard or other part that is damaged
should be properly repaired or replaced
by an authorised service centre unless
otherwise indicated in this instruction
manual. Have defective switches
replaced by an authorised service centre.
Do not use the tool if the switch does not
turn it on and off.
!
Warning! The use of any accessory or
attachment, other than recommended in this
instruction manual, may present a risk of
personal injury.
Have your tool repaired by a qualified
person.
This electrical appliance is in accordance
with the relevant safety rules. Repairs
should only be carried out by qualified
persons using original spare parts,
otherwise considerable danger to the
user may result.
Training
Never allow children or persons who are
unfamiliar with this type of machine to
use it, nor anyone who has not read
this leaflet.
360˚
6m/20ft
Do not allow children, animals or other
persons near your machine when in use
- always keep them at least 6m (20ft)
away from the cutting area.
Remember that the operator/user
is responsible for accidents or
hazards occurring to other people or
their property.
We recommend a first time user should
get informed practical instruction on how
to use a hedgetrimmer as well as using
this manual.
Do not store your hedgetrimmer and
energy pack in locations where the
temperature may reach or exceed 40˚C,
such as greenhouses or metal sheds.
Do not attempt to charge your energy
pack with any charger other than those
specifically designed by Black & Decker
for use with Black & Decker chargers.
Do not incinerate the energy pack even if
it is severely damaged or completely
worn out. The energy pack can explode
in a fire.
A small leakage of liquid from the battery
cells may occur under extreme usage or
temperature conditions. This does not
indicate a failure. However, if the outer
case seal is broken and this leakage gets
on your skin:
Wash quickly with soap and water.
Neutralise with a mild acid such as
lemon juice or vinegar.
If battery liquid gets into your eyes,
flush them with clear water for a
minimum of 10 minutes and seek
immediate medical attention.
(Medical note: The liquid is a
25-35% solution of potassium
hydroxide).
!
Warning! Fire hazard! Avoid any possibility
of metal short circuiting the electrical
contacts of the energy pack (i.e. keys carried
in the same pocket as energy pack).
All manuals and user guides at all-guides.com
4
Always be sure of your footing,
particularly on slopes
Do not cut on excessively steep slopes
and always wear non-slip footwear.
Walk, never run. Do not force the machine.
Never operate the machine with
defective or missing guides or shields.
Maintenance and storage
Store your machine in a dry place when
not in use, out of the reach of children.
Do not use solvents or cleaning fluids to
clean your machine. Always remove the
battery pack before cleaning
Do not operate your machine if any parts
are defective; discard all defective parts
and fit new parts before use.
Keep all nuts, bolts and screws tight
to be sure your machine is in a safe
working condition.
Use only Black & Decker recommended
replacement parts and accessories.
Wall mounting the blade sheath (Fig. B)
BFor safer convenient storage of your
hedgetrimmer the blade sheath can be
permanently fixed to a wall via the two
mounting holes (11). Additionally, this
allows you to partially fill the blade sheath
with a mixture of 2 parts paraffin
(0.2 litres) to 1 part automotive oil to
standard SAE 20 (0.1 litres) to lubricate
the blades and protect against corrosion.
Simply drill two 6mm holes by 36mm
deep in the appropriate position, insert
wall plugs and secure the blade sheath
to the wall with the screws provided.
Energy pack (Fig. C)
Fitting the energy pack
Line up the energy pack with your
hedgetrimmer body. Now slide the energy
pack firmly into your hedgetrimmer until
you here the lock snap into place.
Removing the energy pack
C2 Press both release buttons (7) and at the
same time pulling the energy pack out of
your hedgetrimmer.
Operating your hedgetrimmer (Fig. D)
The energy pack (9) is supplied discharged
so you must charge it in preparation for
hedgetrimming. Refer to your charger
instruction section at the end of this section
and follow the charging procedure.
Preparation
Unpacking the unit - residual charge:
The energy pack (9) may contain some
residual charge. Should you insert the
pack into the unit, be aware that it is
capable of operation.
Please remove tie tag before use.
To protect your feet, always wear stout
shoes or boots.
Use protective equipment. Wear safety
spectacles or goggles and heavy duty
gloves whilst operating your machine.
Use ear protection if the sound level
seems uncomfortable when using your
machine.
Do not operate your machine barefoot or
in sandals.
Do not wear loose jewellery.
Clothes should be close fitting but not
restrict your movement.
Always be sure your machine is in a safe
operating condition.
Before using your machine, remove the
battery pack and visually check that the
blade fixings are secure. A damaged
blade or worn blades are major hazards
and must be replaced.
Ensure hedges etc. are free from foreign
objects such as railings or barbed wire
which may damage your machine.
Operation
Release switch lever to turn machine off
and remove battery pack:
Whenever you leave your machine
unattended.
Before checking, cleaning, adjusting, or
working on the machine.
Before clearing a blockage.
If the machine starts to vibrate
abnormally (check immediately).
After striking a foreign object. Inspect the
machine for damage and make repairs
as necessary.
Never attempt to stop the blades -
always allow them to stop on their own.
Do not put hands or feet near blades.
Start the machine carefully according to
the instructions and with your body well
away from the blades.
Do not use your machine in the rain and
do not allow it to get wet. Avoid using the
machine in wet conditions.
Use your machine only in daylight or
good artificial light.
All manuals and user guides at all-guides.com
5
Switching your hedgetrimmer on
For your safety, your hedgetrimmer is fitted
with the handle trigger switch (3) which has a
lock-off switch (4) to prevent inadvertent
switching on.
D1 Squeeze the front handle switch (2).
Push the lock-off switch (4) forward with
your thumb and squeeze the trigger
switch (3) to start your hedgetrimmer.
The lock-off switch can then be released
once the trigger switch (3) has been
squeezed.
Switching your hedgetrimmer off
D2 By releasing the front handle switch (2) or
the handle trigger switch (3) your
hedgetrimmer will stop immediately.
Cutting techniques for better results
(Fig. E)
E1 The blades will cut most effectively when
they are not exactly parallel with the line
of cut, but have the tips of the blades
pointing slightly towards the hedge. This
lateral tilt should not exceed 15˚ to the
line of cut.
E2 Most users trim the top of the hedge
first. Hold your hedgetrimmer at the
desired angle and move it steadily along
the line of cut. The double edged blade
enables you to cut in either direction or
with a side to side movement.
E3 For a very level finish a piece of string
can be stretched along the length of the
hedge at the required height to serve as
a guide line. The hedge may then be cut
just above the string.
E4 To keep the sides of the hedge flat, it is
better to cut upwards with the growth.
Younger stems move outwards when the
blade cuts downwards and can cause
shallow patches in the hedge.
E5 Take care to avoid hard objects such as
wire which could cause damage to the
cutting blades.
If your hedgetrimmer stalls, release the
trigger immediately. Stalling will reduce
cutting time and should be avoided. Before
removing obstructions from the blades
always remove the energy pack to prevent
inadvertent operation.
Remember that your hedgetrimmer is also
suitable for trimming most shrubs, brambles
or any neglected areas within your garden.
ENGLISH
Care and maintenance
Remove the battery before cleaning or adjusting
your hedgetrimmer.
For best performance, keep the blades and air
slots in the motor housing clean. Use a cloth or
brush to remove cutting, sap or other debris.
Prevent the blades from rusting by applying a film
of light machine oil after cleaning.
Plastic parts may be cleaned by using a non
abrasive cleaner and a cloth dampened with
warm water.
Do not immerse any part of your hedgetrimmer
in water.
Avoid all other types of detergents, cleaners or
solvents, These may contain chemicals that
could seriously damage the plastic. Do not spray
your hedgetrimmer with water, and do not allow
water to enter your hedgetrimmer.
Self lubricating bearings are used in the tool and
lubrication is not required.
What to do if your hedgetrimmer
needs repair
Information on how and where to send your
hedgetrimmer for repair or service is given on the
reverse of the parts diagram. We recommend you
keep this in a safe place.
Rechargeable batteries and the
environment
Cd
Black & Decker cordless tools and batteries
can be recharged many times and give long
life and repeatedly full power. Should you find
one day that your cordless hedgetrimmer or
battery needs replacement, or is of no further
use to you, think of the protection of our
environment.
Black & Decker authorised repair agents will
accept your old cordless hedgetrimmer and
battery and will dispose of any exhausted
rechargeable batteries in an environmentally
safe way.
Black & Decker lawn and garden
guarantee
This guarantee provides: 36 months parts cover and
12 months labour (UK), 24 months parts cover and
labour (Australia) and 12 months replacement
product cover (New Zealand).
All manuals and user guides at all-guides.com
6
Other Black & Decker products
Black & Decker has a full range of outdoor power
tools that make life easy in the garden. If you would
like further information on other products, please
contact the Black & Decker service information
centre at the address on the back cover, or contact
your Black & Decker stockist.
Lawnmowers String trimmers
Chainsaws Lawnrakers
Compost shredders Leafbusters
Blade trimmers Cordless brooms
Cordless trimsaws Cordless shrubbers
Cordless shears Hedgetrimmers
In all cases proof of purchase will be required.
lf your Black & Decker product becomes defective,
within the guarantee period, due to faulty materials
and workmanship, we guarantee to either replace all
defective parts, or at our discretion, replace the unit
free of charge, provided that:
The product is returned to us or our authorised
repairers with evidence of purchase.
The, product has been used within the
parameters of its consumer classification.
The product has not been used for hire purposes.
Repairs have not been attempted by anyone
other than our own service staff or authorised
repairers.
The failure represents normal wear and tear.
This guarantee is offered as an extra benefit and is
additional to your statutory rights.
The guarantee policy
Failures due to the following are not covered:
Replacing worn or damaged blades, nylon line
and chains, or cables damaged during storage
or use. These are regarded as replacement items
which wear during normal usage.
Failures as a result of sudden impact or obvious
abuse.
Failures due to usage not in accordance with
instructions and recommendations contained in
the instruction manual.
The use of other than genuine Black & Decker
accessories and parts may damage or reduce the
performance of your Black & Decker product and
may render the guarantee void.
Black & Decker after sales service
Black & Decker offers a nationwide after sales service
through company operated service centres. It is our
aim to offer excellent service, fast repairs, extensive
parts availability and full accessory support.
If you need any help or advice please contact your
local Black & Decker service centre manager.
Full details of our unique after sales service can
be obtained from any of our service centres
(a full directory is printed on the reverse of the parts
diagram included with your hedgetrimmer).
ENGLISH
EC Declaration of Conformity
We declare that units:
GTC390
conform to 89/392/EEC, 89/336/EEC,
EN55014, EN55104, 73/23/EEC
A weighted sound pressure 91dB (A)
A weighted sound power 104dB (A)
Hand/arm weighted vibration <2.5m/s2
Brian Cooke
Director of Engineering
Spennymoor, County Durham DL16 6JG, United Kingdom
All manuals and user guides at all-guides.com
7
Safety rules
This manual contains important safety and
operating instructions. Before using your
charger, read all instructions and cautionary
markings on your charger, your battery and
your hedgetrimmer.
!
Danger! 240 volts are present at the charging
terminals. Do not probe with any conductive
objects or you will risk an electric shock.
If the battery case is cracked or damaged,
do not insert it into your charger or you will
risk an electric shock.
Do not attempt to charge your battery
with any charger other than those
specifically designed by Black & Decker
for use with Black & Decker batteries.
Do not expose your charger to water.
Your charger is not intended for any uses
other than charging the products listed
under “Energy packs” in this manual. Any
other uses may result in the risk of fire or
electric shock.
Do not operate your charger if it has
received a sharp blow, been dropped, or
otherwise damaged in any way. Take it to
a Black & Decker service centre.
Do not take your charger apart; take it to
a Black & Decker service centre when
service or repair is required. Incorrect
reassembly may result in a risk of electric
shock or fire.
To reduce the risk of electric shock,
unplug your charger from the outlet before
attempting any cleaning. Removing your
battery will not reduce this risk.
Never attempt to connect two chargers
together.
Do not freeze or immerse your charger in
water or any other liquid.
!
Warning! Do not allow any liquid to get
inside your charger; electric shock may
result.
Do not store or use your hedgetrimmer
or battery in locations where the
temperature may reach or exceed 40˚C.
Your charger is designed to operate on
standard household electrical power
(240 volts). Do not attempt to use it on
any other voltage!
Plug and cable
Do not tug at the cable to pull the plug from
the socket.
Make sure the cord is located so that it will not
be stepped on, tripped over, or otherwise
subjected to damage or stress.
Keep the cable away from heat, oil, sharp edges
and rough surfaces and always ensure it is in
good condition.
An extension cord should not be used unless
absolutely necessary. Use of an improper
extension cord could result in a risk of fire and
electric shock. If an extension cord must be
used, make sure:
The extension cord is properly wired and in
good electrical condition.
The extension cord has a conductor cross
sectional area greater than or equal to
0.5mm2 and a length of less than 30 metres.
The extension cord classification is suitable for
the intended environment as specified; domestic
and light commercial application - HO5V V-F,
industrial application - HO5RR-F or HO5RN-F.
Electrical connection
Fit a
BS1363A
approved
plug
Connect blue
to N (neutral)
Make sure that the
outer sheath of the
cable is held firmly
by the clamp
Fit a 3 amp
fuse approved
to BS1362
Connect brown
to L (live)
240 volts AC only.
Never use a light
socket
General guide to fitting a plug
Ensure the lengths of wire inside the plug are
prepared correctly.
When preparing the cable ends take care not
to damage the outer sheath or the insulation
surrounding the inner conductors.
When all the conductor strands have been
entered into the terminal posts, secure
them firmly.
Tighten all screws.
Charger User manual
All manuals and user guides at all-guides.com
8
Electrical safety
Make sure that the voltage of your hedgetrimmer is
correct for your supply. The voltage of your charger is
on the rating plate.
Introduction
Your charger is designed to charge all Black & Decker
batteries from 8.4 volts to 12 volts in about three
hours. Your charger needs no adjustment and is
designed to be as easy as possible to operate.
Simply place your battery into the receptacle of your
plugged in charger and it will automatically charge.
Description (Fig. A)
A8. Charger
9. Battery
11. Wall and workbench mounting holes
Mounting your charger (Fig. C)
C1 Your charger is equipped with mounting
holes (12) to permanently fix it to a wall or
workbench. (It does not have to be mounted
to any surface in order to operate.)
Simply drill two 6mm holes by 36mm
deep in the appropriate position, insert
the wall plugs and secure the screws
provided.
If you are mounting the charger to a
hollow wall, use wall anchors.
Do not mount upside down.
Charging procedure (Fig. C)
C1 Insert your battery (9) into your charger.
Be sure that it is fully seated in your
charger.
Your battery will be fully charged in about
3 hours.
Your battery can be removed at any time.
Your charger and battery can be left
connected.
Your charger will keep your battery fresh
and fully charged.
Note: Your battery will slowly lose its charge
when kept out of a charger or if it is left in a
charger that is not plugged in. If your battery
has not been kept on charge, it may need to
be recharged before use.
Important charging notes
Longest life and best performance can be
obtained if your battery is charged when the air
temperature is about 24˚C. Do not charge your
battery in an air temperature below 4˚C, or
above 40˚C.
Whilst charging, your charger and battery may
become warm to touch. This is a normal
condition and does not indicate a problem.
If your battery does not charge properly,
proceed as follows:
Check the current at the socket by plugging in a
lamp or other appliance.
Move your charger and battery to a location
where the surrounding air temperature is about
24˚C. In an extremely warm environment your
battery may be too hot to permit charging.
If charging problems persist, take, or send, your
hedgetrimmer, battery and charger to your local
Black & Decker service centre.
Your battery should be recharged when it fails to
produce sufficient power on jobs which were
easily done previously. Do not continue to use
under these conditions. Follow the charging
procedure described previously. You may also
charge a partially used battery whenever you wish.
Batteries
Your charger will charge only Black & Decker
batteries. When ordering replacement batteries, be
sure to include the catalogue number and voltage.
Important!
Your charger is not user serviceable. There are no
user serviceable parts inside your charger. Servicing
at an authorised Black & Decker authorised repair
agent is required to avoid damage to static sensitive
internal components.
The Black & Decker after sales
service
All Black & Decker products are scrupulously tested
before leaving the factory. However, in the case of
your power tool being defective, please take it to your
nearest Black & Decker authorised repair agent.
All manuals and user guides at all-guides.com
9
ENGLISH
Rechargeable batteries and the
environment
Cd
Black & Decker cordless tools and batteries
can be recharged many times and give long
life and repeatedly full power. Should you find
one day that your cordless hedgetrimmer or
battery needs replacement, or is of no further
use to you, think of the protection of our
environment.
Black & Decker authorised repair agents will
accept your old cordless hedgetrimmer and
battery and will dispose of any exhausted
rechargeable batteries in an environmentally
safe way.
All products comply with legal requirements in force
relating to radio and television suppression.
All manuals and user guides at all-guides.com
10
Tagliasiepi a batteria
GTC390
d’incendio, di scosse elettriche e di lesioni
personali.
Leggete attentamente le seguenti istruzioni
prima di mettere in funzione l’utensile e
conservate questo manuale.
Per un utilizzo sicuro
Tenete pulita l’area di lavoro. Disordine
e detriti sono causa di incidenti.
Fate attenzione a dove lavorate. Non
esponete gli utensili alla pioggia e non
utilizzateli in luoghi umidi o bagnati.
Tenete l’area di lavoro ben illuminata.
Non usate gli utensili nei luoghi in cui vi
sia rischio di esplosione o di incendio.
Precauzioni per evitare scosse
elettriche. Evitate, ove possibile, contatti
del corpo con superfici con messa a
terra o collegati a terra (per esempio tubi,
termosifoni, frigoriferi, cucine)
Tenete lontani i bambini. Non lasciate
che estranei tocchino l’utensile o il cavo
elettrico. Tutti gli estranei vanno tenuti
lontani dall’area di lavoro.
Riponete gli utensili in luogo adatto.
Quando non vengono utilizzati, gli utensili
vanno riposti in un luogo asciutto, e in un
ambiente chiuso o in alto, fuori dalla
portata dei bambini.
Non sforzate l’utensile. Esso eseguirà
in modo migliore e con maggiore
sicurezza il compito per il quale è stato
progettato.
Utilizzate l’utensile adatto. Non forzate
strumenti o accessori sottodimensionati
per effettuare un lavoro gravoso. Non
utilizzate gli utensili per lavori diversi da
quelli per cui sono stati progettati: per
esempio non usate seghe circolari per
tagliare rami o tronchi d’albero.
Usate un abbigliamento corretto. Non
indossate abiti svolazzanti o gioielli
poichè possono incastrarsi nelle parti
mobili. Si raccomandano guanti di
gomma e scarpe anti-scivolo per lavorare
all’aperto. Tenete i capelli lunghi raccolti.
Utilizzate occhiali protettivi. Indossate
anche una mascherina per proteggere il
viso nelle operazioni in cui si crea polvere.
Bloccate il pezzo di lavoro. Utilizzate
una morsa per bloccare il pezzo. E’ più
sicuro che usare le mani e le lascia libere
di manovrare l’utensile.
Congratulazioni!
Avete acquistato un tagliasiepi Black & Decker.
Il vostro tagliasiepi ha le seguenti caratteristiche:
Impugnatura semicircolare per un maggiore
comfort nell’uso.
Interruttore di sicurezza con bloccaggio per
evitare accensioni accidentali.
Difesa anteriore per una maggiore sicurezza.
lame a doppia azione per ridurre le vibrazioni.
Descrizione (Fig. A)
ASegue un elenco dei componenti che
saranno considerati in questo manuale e che
sono mostrati nelle figure.
1. Corpo
2. Interruttore sull’impugnatura frontale
3. Interruttore sull’impugnatura
4. Interruttore di sicurezza
5. Prese d’aria
6. Difesa anteriore
7. Pulsante di sbloccaggio batteria
8. Caricatore
9. Batteria
10. Guaina di copertura della lama
11. Fori che permettono di appendere la
guaina a parete.
Contenuto
1. Tagliasiepi a batteria
2. Batteria
3. Caricabatteria
4. Guaina di copertura della lama appendibile a
parete
5. Contenitore accessori per appendere la guaina 4
viti con tasselli 6mm x 31mm
6. Manuale per l’utilizzatore
7. Garanzia
8. Filiali di assistenza Black & Decker e illustrazioni
dei componenti.
Per un corretto e sicuro utilizzo
!
Attenzione! Quando si utilizzano strumenti
elettrici vanno adottate le seguenti
precauzioni basilari per ridurre il rischio
Istruzioni per l’uso
All manuals and user guides at all-guides.com
11
Non sporgetevi. Tenete una posizione
equilibrata e salda.
Abbiate cura degli utensili. Tenete gli
utensili puliti per un funzionamento
migliore e più sicuro. Seguite le istruzioni
per lubrificare e cambiare gli accessori.
Controllate periodicamente i cavi degli
utensili e, se danneggiati, fateli riparare
da personale autorizzato. Controllate
periodicamente le prolunghe e
sostituitele se danneggiate. Tenete le
impugnature asciutte, pulite e non unte di
olio o grasso.
!
Disinserite l’utensile. Disinserite l’utensile
quando non viene utilizzato, prima della
manutenzione, e quando si cambiano gli
accessori, per esempio lame e punte.
Togliete le chiavi di servizio. Prendete
l’abitudine di controllare che le chiavi di
regolazione siano state rimosse
dall’utensile prima metterlo in funzione.
Evitate avviamenti accidentali. Non
trasportate un utensile con la spina
inserita tenendo il dito sull’interruttore.
Assicuratevi che l’interruttore sia su off
prima di attaccare la spina.
Utilizzate prolunghe per esterni. Se
l’utensile è utilizzato all’esterno, utilizzate
solo prolunghe da esterni e come tali
certificate.
Siate sempre accorti. State attenti a ciò
che fate. Agite secondo buon senso.
Non lavorate quando siete stanchi.
Collegate le parti per l’aspirazione
della polvere. Se vengono forniti gli
accessori per l’aspirazione e la raccolta
della polvere, assicuratevi che siano
collegati ed utilizzati correttamente.
Controllate le parti danneggiate. Prima
di procedere ad un nuovo utilizzo,
bisogna accuratamente controllare le
difese e ogni altra parte che possa
essere danneggiata, per stabilire se
funzionerà correttamente e se svolgerà
adeguatamente la sua funzione.
Controllate che le parti mobili siano
allineate e collegate.Controllate eventuali
rotture delle parti, il loro montaggio e
tutto ciò che possa pregiudicare il
corretto funzionamento.Ogni parte
danneggiata deve essere correttamente
sostituita o riparata nei centri di
assistenza autorizzati, a meno di diverse
indicazioni sul manuale delle istruzioni.
Fate sostituire gli interruttori difettosi nei
centri autorizzati. Non utilizzate l’utensile
se l’interruttore non funziona
correttamente.
!
Attenzione! L’uso di accessori diversi da
quelli raccomandati in questo manuale di
istruzioni può provocare incidenti.
Fate ripare l’utensile da personale
qualificato.
Questo utensile rispetta le principali
norme di sicurezza. Le riparazioni vanno
effettuate solo da personale qualificato
che utilizza pezzi di ricambio originali, in
caso contrario ne possono derivare
danni seri per l’utilizzatore.
Avvertenze
Non consentite l’uso dell’utensile a
bambini, a chi non lo abbia mai usato e a
chiunque non abbia letto questo manuale.
360˚
6m/20ft
Non consentite ad animali, bambini ed
altre persone di avvicinarsi all’utensile
quando è in funzione: tenerli ad una
distanza di almeno sei metri dall’area
di taglio.
Ricordate che l’utilizzatore/operatore è
responsabile di incidenti o danni alle
persone o agli oggetti di loro proprietà.
Si raccomanda a chi usa il tagliasiepi per
la prima volta di procurarsi informazioni
pratiche sul suo utilizzo oltre a servirsi di
questo manuale.
Non riponete il tagliasiepi e la batteria in
luoghi in cui la temperatura possa
arrivare a o superare i 40˚C, per esempio
serre o capannoni in metallo.
Non cercate di ricaricare la batteria con
caricatori diversi da quelli Black & Decker.
Non incenerite la batteria, anche se
gravemente danneggiata o completamente
eaurita: potrebbe esplodere bruciando.
Una piccola perdita di liquido dalla
batteria può verificarsi in condizioni
estreme di utilizzo o di temperatura.
Questo non indica un danno. Tuttavia se
l’involucro esterno è rotto e la perdita
raggiunge la pelle:
Lavatevi subito con acqua e sapone.
Neutralizzate con un acido blando
come aceto o succo di limone.
Se il liquido della batteria raggiunge
gli occhi, sciacquateli con acqua
corrente e pulita per almeno 10
minuti e cercate immediatamente
cure mediche (note mediche: il
liquido è una soluzione al 25-35% di
idrossido di potassio).
ITALIANO
All manuals and user guides at all-guides.com
12
!
Attenzione! Pericolo di incendio! Evitare
possibilità di corto circuito tra i contatti della
batteria (per es. tenendo delle chiavi nello
stesso contenitore della batteria.
Preparativi
Disimballate la macchina. La batteria (9)
può contenere una carica residua. Prima
di inserirla nella macchina assicuratevi
che possa funzionare.
Togliete il nastro prima dell’uso.
Per proteggere i piedi, indossate scarpe
o stivali robusti.
Utilizzate abbigliamento ed accessori
protettivi. Indossate occhiali protettivi e
guanti pesanti quando utilizzate l’utensile.
Proteggete le orecchie se il livello di
rumore risulta fastidioso durante l’utilizzo.
Non lavorate a piedi nudi o con sandali.
Non indossate gioielli penzolanti.
Assicuratevi sempre che la macchina sia
in uno stato sicuro per il funzionamento.
Prima di usare la macchina, rimuovete la
batteria e controllate che la lama sia
fissata correttamente. Lame danneggiate
o consumate sono più pericolose e
vanno sostituite.
Assicuratevi che le punte etc siano libere
da oggetti come fili di ferro che possono
danneggiare la macchina.
Funzionamento
Sbloccate la leva di accensione per spegnere
la macchina e rimuovere la batteria:
Ogni volta che si lascia la macchina
incustodita.
Prima di controllare, pulire, aggiustare o
lavorare sulla macchina.
Prima di eliminare un eventuale bloccaggio.
Se la macchina inizia a vibrare in modo
anomalo (controllare immediatamente).
Dopo aver urtato contro un oggetto
estraneo. Controllate se la macchina ha
subìto danni ed eseguite le riparazioni
necessarie.
Non tentate mai di fermare le lame:
aspettate sempre che si fermino da sole.
Non mettete mani o piedi vicino alle lame.
Avviate la macchina prestando
attenzione, seguendo le istruzioni e
tenendo il corpo ben lontano dalle lame.
Non utilizzate la macchina sotto la
pioggia e non fatela bagnare. Evitate di
usare la macchina in condizioni di umidità.
Tenetevi sempre ben saldi sui piedi, in
particolare in pendenza.
Non tagliate in presenza pendenze
troppo ripide e indossate sempre scarpe
non scivolose.
Non correte ma piuttosto camminate.
Non forzate la macchina.
Non utilizzate la macchina con guide o
difese mancanti o difettose.
Come conservare l’utensile
Conservate la macchina in un luogo
asciutto quando non viene utilizzata,
e fuori dalla portata dei bambini.
Non utilizzate solventi o liquidi detergenti
per pulire la macchina. Rimuovete
sempre la batteria prima della pulizia.
Non utilizzate la macchina se vi sono parti
difettose; prima dell’uso togliete tutte le
parti difettose e inserite quelle nuove.
Stringete bene tutti i dadi, i bulloni e le viti
puliti per avere un funzionamento sicuro.
Utilizzate solo pezzi di ricambio e
accessori Black & Decker.
Appendete le custodie delle lame al
muro (Fig. B)
BPer conservare in modo più sicuro il suo
tagliasiepi, le custodie delle lame
possono essere fissate ad una parete
attraverso fori. Questo permette inoltre di
riempirle parzialmente con una miscela di
due parti di paraffina (0,2 litri) e una parte
di olio standard per automobili SAE 20
(0,1 litri) per lubrificare le lame e
proteggerle dalla corrosione.
Fate col trapano due fori da 6mm per
36mm di profondità, inserite gli espansori
e fissate alla parete le custodie delle lame
con le viti fornite.
Batteria (Fig. C)
Inserimento della batteria
Allineate la batteria col corpo del tagliasiepi
e lasciatelo scivolare dentro con decisione
finchè non udite un rumore secco.
Rimozione della batteria
C2 Schiacciate i pulsanti di rilascio
spingendo contemporaneamente la
batteria fuori dal tagliasiepi.
Funzionamento del tagliasiepi (Fig. D)
La batteria (9) viene fornita scarica, quindi
dovete caricarla prima di utilizzare il
tagliasiepi. Fate riferimento alle istruzioni della
sezione sul caricabatteria alla fine di questa
sezione e seguite le procedure di carica.
All manuals and user guides at all-guides.com
13
ITALIANO
Accensione del tagliasiepi
Per una maggiore sicurezza il tagliasiepi è
fornito di un interruttore sull’impugnatura che
può essere bloccato sulla posizione off per
evitare accensioni inattese.
D1 Premere l’interruttore che si trova
sull’impugnatura frontale (2).
Spingete in avanti, col pollice, l’interruttore
di sicurezza (4) e premete l’interruttore (3)
per mettere in funzione il tagliasiepi.
L’interruttore di sicurezza può essere
sbloccato dopo che l’interruttore (3) è
stato premuto.
Spegnimento del tagliasiepi
D2 Rilasciare entrambi gli interruttori, quello
sull’impugnatura frontale (2) e quello
sull’impugnatura posteriore (3) cosi il
tagliasiepi si fermerà immediatamente.
Tecniche per un migliore taglio (Fig. E)
E1 Le lame taglieranno meglio se non sono
esattamente parallele alla linea di taglio
ma sono leggermente inclinate. L’angolo
non dovrebbe superare i 15^ rispetto alla
linea di taglio.
E2 La maggior parte degli utilizzatori tagliano
proma la parte superiore della siepe.
Inclinate il vostro tagliasiepi secondo
l’angolo desiderato e muovetelo
fermamente lungo la linea di taglio. La
lama a doppio taglio permette di tagliare
in un senso o con un movimento da
parte a parte.
E3 Per un taglio ben diritto potete stendere
un nastro lungo la siepe all’altezza di
taglio desiderata, che servirà da guida.
Potrete poi tagliare la siepe muovendovi
appena al di sopra del nastro.
E4 Per appiattire anche il lato della siepe è
meglio tagliare dal basso verso l’alto.
Infatti, i rami più giovani si sporgono
verso l’esterno quando le lame tagliano
dall’alto verso il basso, formando delle
leggere chiazze sulla siepe.
E5 Prestate attenzione ad evitare oggetti
duri, come fili di ferro, che possono
danneggiare le lame.
Se il tagliasiepi si blocca, lasciate
immediatamente l’interruttore. Il bloccaggio
riduce il tempo di taglio e va evitato. Prima di
rimuovere gli oggetti ingombranti dalle lame,
rimuovete sempre la batteria per evitare
un’accensione involontaria.
Ricordate che il tagliasiepi può essere usato
anche per potare arbusti, rovi e altre parti
trascurate del vostro giardino.
Come conservare l’utensile
Rimuovete la batteria prima di pulire o aggiustare
l’utensile.
Per ottenere migliori risultati tenete pulite e libere
le lame e le prese d’aria nel motore. Usate un
panno o una spazzola per rimuovere i residui
della potatura, linfa ed altri detriti.
Evitate che le lame si arrugginiscano applicando
uno strato di olio leggero per auto dopo la pulizia.
Le parti di plastica vanno pulite con detergenti non
abrasivi e con un panno inumidito con acqua calda.
Non immergete parti della macchina in acqua.
Evitate ogni tipo di detergente o solvente, poichè
possono contenere sostanze chimiche che
danneggiano la plastica. Non spruzzate il tagliasiepi
con acqua e non fatevi entrare acqua dentro.
Non è richiesta lubrificazione dell’utensile poichè
vengono usati cuscinetti auto-lubrificanti.
Cosa fare se il tagliasiepi necessita
di riparazioni
Le informazioni su come far riparare il vostro
tagliasiepi sono sul retro delle illustrazioni. Tenetele
in un posto sicuro.
Batterie ricaricabili ed ambiente
Cd
Gli utensili Black & Decker senza filo e le
batterie possono essere ricaricati più volte,
durano a lungo e a piena potenza. Se
doveste accorgervi che il vostro tagliasiepi o
la batteria devono essere sostituiti o non vi
servono più, pensate alla salvaguardia
dell’ambiente.
I centri di servizio Black & Decker
accetteranno il vostro vecchio tagliasiepi e la
batteria e li smaltiranno in modo sicuro.
Garanzia Black & Decker per il
giardinaggio
La durata della garanzia è di 24 mesi. Verrà richiesta
una prova dell’acquisto.
Se il vostro prodotto Black & Decker si danneggia
durante il periodo di garanzia, per difetti di materiali o
di funzionamento, Black & Decker si impegna alla
riparazione o alla sostituzione delle parti stanti le
seguenti condizioni:
Che il prodotto venga portato al centro di
assistenza con un documento che ne provi la
data di acquisto (bolla, fattura, scontrino fiscale).
All manuals and user guides at all-guides.com
14
Dichiarazione di conformitá EC
Si dichiara che i prodotti: GTC390
sono conformi a 89/392/EEC, 89/336/EEC,
EN55014, EN55104, 73/23/EEC
Pressione acustica ponderata 91dB (A)
Potenza acustica ponderata 104dB (A)
Vibrazioni mano-braccio <2.5m/s2
Brian Cooke
Direttore di Ricerca e Sviluppo
Spennymoor, County Durham DL16 6JG, Regno Unito
Che il prodotto non sia stato utilizzato in modo
incompatibile con la sua tecnologia.
Che il prodotto non sia stato noleggiato.
Che persone non facenti parte di un centro di
assistenza autorizzato Black & Decker non
abbiano tentato di riparare il prodotto.
Che il cedimento non rappresenti normale usura.
Questa garanzia viene offerta come ulteriore servizio
al cliente ed è più ampia di quanto richiesto dalle
attuali disposizioni in vigore.
Garanzia
Non sono coperti danni causati da:
Sostituzione di lame usurate o danneggiate, fili di
nylon o catene, cavi danneggiati durante l’uso o il
periodo in cui l’utensile viene riposto; queste
sono considerate parti che si usurano con un
utilizzo normale.
Danni che risultano da colpi improvvisi o
evidenti abusi.
Danni dovuti ad un uso discorde dalle istruzioni e
raccomandazioni contenute in questo manuale.
L’uso di parti ed accessori diversi da quelli con
marchio Black & Decker possono danneggiare o
peggiorare i risultati del prodotto ed invalidare la
garanzia.
Servizio Black & Decker post-vendita
Black & Decker offre un servizio post-vendita su tutto
il territorio nazionale attraverso una rete di centri di
assistenza. Il nostro intento è di offrire un servizio
ottimo, riparazioni veloci, completa disponibilità di
parti e accessori.
Se necessitate di riparazioni o consigli contattate il
centro di assistenza più vicino. Potete acquisire
dettagli sul nostro servizio post-vendita in uno
qualsiasi delle nostre filiali (un elenco completo è
riportato sul retro delle illustrazioni dei componenti
accluse al vostro tagliasiepi).
Altri prodotti Black & Decker
Black & Decker dispone di una gamma completa di
prodotti per esterni che facilitano i lavori di
giardinaggio. Se desiderate ulteriori informazioni sui
nostri prodotti contattate il centro informazioni Black
& Decker all’indirizzo stampato sul retro della
copertina, o contattate il vostro fornitore di prodotti
Black & Decker.
Tosaerba Elettroseghe
Trituratori Seghe circolari a batteria
Cesoie a batteria Tagliaerba a filo di nylon
Aspiratori Soffiatori a batteria
Tagliasiepi
ITALIANO
All manuals and user guides at all-guides.com
15
Norme di sicurezza
Questo manuale contiene fondamentali
istruzioni relative alla sicurezza ed al
funzionamento. Prima di utilizzare il
caricatore leggete tutte le istruzioni e le
avvertenze sul caricatore, la batteria e il
tagliasiepi.
!
Attenzione! Il terminale di carica arriva a
240 volts. Evitate di introdurre oggetti
metallici per non prendere scosse elettriche.
Se la batteria è rotta o danneggiata non
inseritela nel caricabatteria perchè si rischia
una scossa elettrica.
Non tentate di caricare la batteria con
un caricabatteria diverso da quello
Black & Decker.
Non esponete il caricabattria all’acqua.
Il caricabatteria può essere utilizzato solo
per i prodotti elencati sotto la voce
batteria in questo manuale. Ogni altro
uso può causare rischi di incendio o di
scosse elettriche.
Non utilizzare il caricabatteria se ha
ricevuto un forte colpo di aria, se è
caduto, o se è stato danneggiato in
qualsiasi altro modo. Portatelo allora ad
un centro di assistenza Black & Decker.
Non smontate il caricabatteria; se
necessita di riparazioni o manutenzione
portatelo in un centro di assistenza
Black & Decker. Rimontarlo in modo
scorretto può causare scintille o scosse.
Per ridurre il rischio di scosse
disinserite il caricabatteria prima di
pulirlo. Rimuovere solo la battteria non
ridurrà il rischio.
Non tentate mai di collegare due
caricabatteria.
Non congelate o immergete nell’acqua o
altro liquido il caricabatteria.
!
Attenzione! Non fate entrare alcun liquido
all’interno del caricabatteria per evitare
scosse elettriche.
Non coservate o usate il tagliasiepi o la
batteria in luoghi in cui la temperatura
possa raggiungere o superare i 40˚C.
Il caricabatteria è progettato per
funzionare con gli abituali voltaggi
presenti nelle abitazioni (240 volts). Non
tentate di utilizzarlo con altri voltaggi!
Spine e cavi
Non strattonate il cavo per estrarre la spina dalla
presa di corrente.
Assicuratevi che il cavo sia collocato in modo
che non venga calpestato, che non vi si inciampi
e che non venga danneggiato in altro modo.
Tenete il cavo lontano da fonti di calore, olio,
oggetti molto appuntiti e superfici ruvide e
assicuratevi sempre che sia in buone condizioni.
Evitate di utilizzare prolunghe a meno che non
siano strettamente necessarie. L’uso di una
prolunga inadeguata può causare rischi di
incendio e scosse elettriche. Se è necessario
utilizzare una prolunga assicuratevi che:
La prolunga sia in buone condizioni.
La prolunga abbia una sezione di
conduzione maggiore o uguale a 0.5mm2 e
una lunghezza inferiore ai 30 metri.
Sicurezza elettrica
Assicuratevi che il voltaggio del vostro tagliasiepi sia
adeguato alla vostra fornitura elettrica. Il voltaggio del
vostro caricabatteria è sulla targhetta.
Introduzione
Il vostro caricabatteria è progettato per caricare tutte
le batterie Black & Decker tra gli 8,4 e i 12 volts in tre
ore circa. Il caricabatteria non ha bisogno di
adattamenti ed è progettato per funzionare nel modo
più semplice possibile. E’ sufficiente posizionare la
batteria nel suo alloggiamento ed attaccare la spina
perchè abbia inizio la carica automatica.
Descrizione (Fig. A)
A8. Caricabatteria
9. Batteria
11. Fori per fissarlo a parete o al banco di
lavoro.
Come fissare il caricabatteria (Fig. C)
C1 Il vostro caricabatteria è dotato di (12) per
essere fissato a parete o ad un banco di
lavoro (non deve necessariamente essere
fissato ad una superfice per funzionare).
Fate col trapano due buchi da 6mm della
profondità di 36mm nella posizione
scelta e fissare le viti fornite.
Caricabatteria Istruzioni per l’uso
All manuals and user guides at all-guides.com
16
Se appendete il caricabatteria ad una
parete vuota usate viti ad ancora.
Non montatelo al contrario.
Procedura di caricamento (Fig. C)
C1 Inserite la batteria (9) nel caricabatteria.
Assicuratevi che sia completamente inserita.
La batteria sarà completamente carica in
circa 3 ore.
La batteria può essere rimossa in ogni
momento.
La batteria ed il caricabatteria possono
essere lasciati inseriti.
Il caricabatteria mantiene la batteria in
piena carica.
NB: La batteria perderà lentamente la sua
carica se lasciata fuori dal caricatore o se
lasciata in un caricabatteria non attaccato
alla spina. Se la batteria non è stata tenuta in
carica può essere necessario ricaricarla
prima di utilizzarla.
Avvertenze sul caricamento
Una durata maggiore ed un migliore risultato
possono essere ottenuti se la batteria viene
caricata in un ambiente con temperatura intorno
ai 24˚C. Non caricate la batteria se vi è una
temperatura inferiore ai 4˚C superiore ai 40˚C.
Durante la carica sia la batteria che il
caricabatteria possono scaldarsi. Ciò rientra nella
normalità e non crea problemi.
Se la batteria non si carica adeguatamente
procedete come segue:
Controllate che arrivi corrente alla spina
attaccandovi una lampada o un altro utilizzatore.
Portate il caricabatteria e la batteria in un
ambiente in cui la temperatura sia di circa 24˚C.
In un ambiente troppo caldo la batteria potrebbe
surriscaldarsi al punto di non caricarsi.
Se i problemi di carica persistono portate o
spedite il vostro tagliasiepi, la batteria ed il
caricabatteria al più vicino centro di assistenza
autorizzato.
La batteria va ricaricata quando non produce più
energia sufficiente per eseguire lavori che prima
svolgeva con facilità. Non continuate dunque
lavorare in queste condizioni. Seguite le
procedure di caricamento descritte in
precedenza. Potete anche ricaricare una batteria
già parzialmente carica.
Batterie
Il vostro caricabatteria carica solo batterie
Black & Decker. Quando ordinate una batteria di
ricambio ricordate di comunicare il numero di
catalogo e il voltaggio.
Importante!
Il vostro caricatore non è riutilizzabile: non vi sono
all’interno parti che possano essere riutilizzate.
L’assistenza nei centri autorizzati è necessaria per
evitare danni a componenti intern.
Assistenza Black & Decker post-
vendita
Tutti i prodotti Black & Decker sono scrupolosamente
testati prima di lasciare la fabbrica. Tuttavia, in caso
di utensili difettosi, vi preghiamo di portarli nel più
vicino centro di assistenza Black & Decker.
Batterie ricaricabili e ambiente
Cd
Gli utensili senza filo e le batterie
Black & Decker possono essere ricaricati più
volte, durano a lungo e con piena carica. Se
doveste accorgervi che il vostro tagliasiepi
senza filo o la batteria devono essere
sostituiti o non vi servono più pensate alla
salvaguardia dell’ambiente.
I centri di servizio Black & Decker
accetteranno il vostro vecchio tagliasiepi e la
batteria e li smaltiranno in modo sicuro.
Tutti i prodotti rispettano le norme legali relative
all’eliminazione di radio e televisori.
ITALIANO
All manuals and user guides at all-guides.com
17
Akku-Heckenschere
GTC390
Herzlichen Glückwunsch!
Mit dem Kauf dieser Akku-Heckenschere von
Black & Decker haben Sie sich für ein Gerät
entschieden, daß Ihnen viele Vorteile bietet:
Rundum-Sicherheitsschalter für eine verbesserte
Bedienerfreundlichkeit.
Sicherheitsentriegelungsschalter, um
unbeabsichtigtes Starten zu vermeiden.
Handschutz für erhöhte Sicherheit.
Doppeltes asymetrisches Messersystem für
vibrationsfreies Arbeiten.
Gerätebeschreibung (Abb. A)
ANachfolgend finden Sie eine Liste, die alle in
dieser Bedienungsanleitung und in den
Abbildungen erwähnten Teile umfaßt:
1. Gerätegehäuse
2. Zweithandgriff
3. Zweithandschalter
4. Betriebsschalter
5. Einschaltsperre
6. Lüftungsschlitze
7. Handschutz
8. Entriegelungsknöpfe für Akku-Block
9. Ladegerät
10. Excell Akku-Block
11. Messerschutz und
Aufbewahrungsköcher
12. Löcher zur Wandbefestigung des
Messerschutzes
Verpackungsinhalt
1. Akku-Heckenschere
2. Excell Akku-Block
3. Ladegerät
4. Messerschutz, zur Wandbefestigung geeignet
5. Einzelteile zur Wandbefestigung des
Messerschutzes
4 Stück Schrauben 8 x 31mm
4 Stück Dübel 8 x 31mm
6. Bedienungsanleitung
7. Garantiekarte
8. Ersatzteilübersicht
Sicherheitshinweise
!
Achtung! Bei der Benutzung von
Elektrowerkzeugen sollten immer
grundlegende Sicherheitsvorkehrungen
getroffen werden, um die Gefahr eines
Stromschlages, eine Überhitzung der
Maschine und die Verletzungsgefahr zu
reduzieren.
Bitte lesen Sie die Bedienungsanleitung
sorgfältig durch, bevor Sie die Heckenschere
in Betrieb nehmen.
Für Ihre Sicherheit
Entfernen Sie bereits geschnittenes
Material aus der Hecke.
Arbeiten Sie niemals bei Regen oder bei
Nässe. Schützen Sie Ihre Akku-
Heckenschere vor Feuchtigkeit.
Arbeiten Sie niemals in feuer- oder
explosionsgefährdeten Umgebungen.
Halten Sie Kinder und andere Personen
aus dem Arbeitsbereich der
Heckenschere fern.
Bewahren Sie die Akku-Heckenschere
an einem trockenen Ort außerhalb der
Reichweite von Kindern, möglichst im
Pflegeköcher auf.
Versuchen Sie nicht, den
Arbeitsfortschritt gewaltsam zu
beschleunigen. Ihre Akku-Heckenschere
arbeitet sicherer, wenn Sie in einem
gleichmäßigen Tempo schneiden.
Achten Sie auf die richtige
Arbeitskleidung. Tragen Sie keine lose
sitzenden Kleidungsstücke oder
Schmuck. Wir empfehlen Ihnen
Arbeitshandschuhe und rutschfestes
Schuhwerk. Achten Sie darauf, daß
lange Haare nicht in die Schneidmesser
gelangen können.
Tragen Sie beim Arbeiten mit der
Heckenschere immer eine Schutzbrille
und entsprechenden Atemschutz, wenn
die Arbeit sehr staubig ist.
Konzentrieren Sie sich auf Ihre Arbeit.
Seien sie stets vorsichtig und arbeiten
Sie nicht mit der Heckenschere, wenn
Sie müde sind.
Halten Sie Ihr Gerät sauber und in
einwandfreiem Zustand, um somit ein
besseres und sicheres Arbeiten zu
garantieren.
Bedienungsanleitung
All manuals and user guides at all-guides.com
18
Halten Sie alle Schalter und Griffe sauber
und sorgen Sie dafür, daß sich die
Schalter immer leicht bewegen lassen.
Entfernen Sie den Akku-Block aus der
Heckenschere, wenn Sie das Gerät
herumtragen oder Teile auswechseln
wollen.
!
Achtung! Verwenden Sie ausschließlich
original Black & Decker Ersatz- und
Zubehörteile. Andernfalls riskieren Sie die
Gefahr von Verletzungen.
Achten Sie darauf, daß Ihr Gerät nur von
einer authorisierten Person repariert wird.
Überlassen Sie eine Reparatur aus
Sicherheitsgründen ausschließlich
qualifizierten Personen, die original
Ersatzteile gebrauchen, anderfalls
riskieren sie die Gefahr von Verletzungen.
Arbeit mit dem Gerät
Erlauben Sie niemals Kindern oder
anderen Personen, die mit dem Gerät
nicht vertraut sind, bzw. Personen, die
diese Bedienungsanleitung nicht gelesen
haben, die Heckenschere zu benutzen.
360˚
6m/20ft
Halten Sie Kinder, Tiere, sowie andere
Personen aus dem Arbeitsbereich des
Gerätes fern Sorgen Sie stets für einen
ausreichenden Sicherheitsabstand.
Denken Sie daran, daß der Betreiber
bzw. Halter des Gerätes verantwortlich
für Unfälle bzw. Verletzungen gegenüber
anderen Personen ist.
Sollten Sie zum ersten Mal mit einer
Akku-Heckenschere arbeiten, informieren
Sie sich zunächst über den praktischen
Gebrauch eines solchen Gerätes und
lesen Sie besonders die
Bedienungsanleitung Ihres neuen
Gerätes sorgfältig durch.
Bewahren Sie die Akku-Heckenschere
und Akku-Block nicht an Orten auf, wo
Temperaturen von 40˚C und mehr
herrschen (z. B. Gewächshäuser, Metall-
Geräteschuppen o.ä.)
Der Akku-Block darf nur über ein dazu
passendes Ladegerät von Black & Decker
geladen werden.
Lassen Sie den Akku-Block nicht mit
offenem Feuer in Berührung kommen,
auch wenn er vollkommen unbrauchbar
geworden ist; er könnte explodieren oder
einen Brand verursachen.
In Ausnahmefällen können bei extremen
Temperaturen kleine Undichtigkeiten der
Akkuzellen auftreten. Dies ist kein Fehler.
Sollte jedoch Akku-Flüssigkeit auf Ihre Haut
gelangen, gehen Sie bitte wie folgt vor:
Flüssigkeit mit Wasser und Seife
abwaschen.
Mit Zitronensaft oder Essig
neutralisieren.
Ist Akku-Flüssigkeit ins Auge gelangt,
spülen Sie es mindestens 10 Minuten
mit klarem Wasser aus und suchen
Sie einen Arzt auf. (Medizinischer
Hinweis: Die Flüssigkeit ist eine 25-
35% Kaliumhydroxidlösung)
!
Achtung! Brandgefahr! Vermeiden Sie einen
Kurzschluß der Anschlußkontakte des Akku-
Blocks ( z. B. durch einen metallenen
Gegenstand (Schlüssel), der sich in derselben
Tasche befindet wie der Akku-Block)
Arbeitsvorbereitung
Auspacken des Gerätes - Restladung
Der Akku-Block (9) enthält unter
Umständen eine Restladung. Sollten Sie
den Akku-Block in die Heckenschere
einsetzen, beachten Sie bitte, daß das
Gerät betriebsbereit sein könnte.
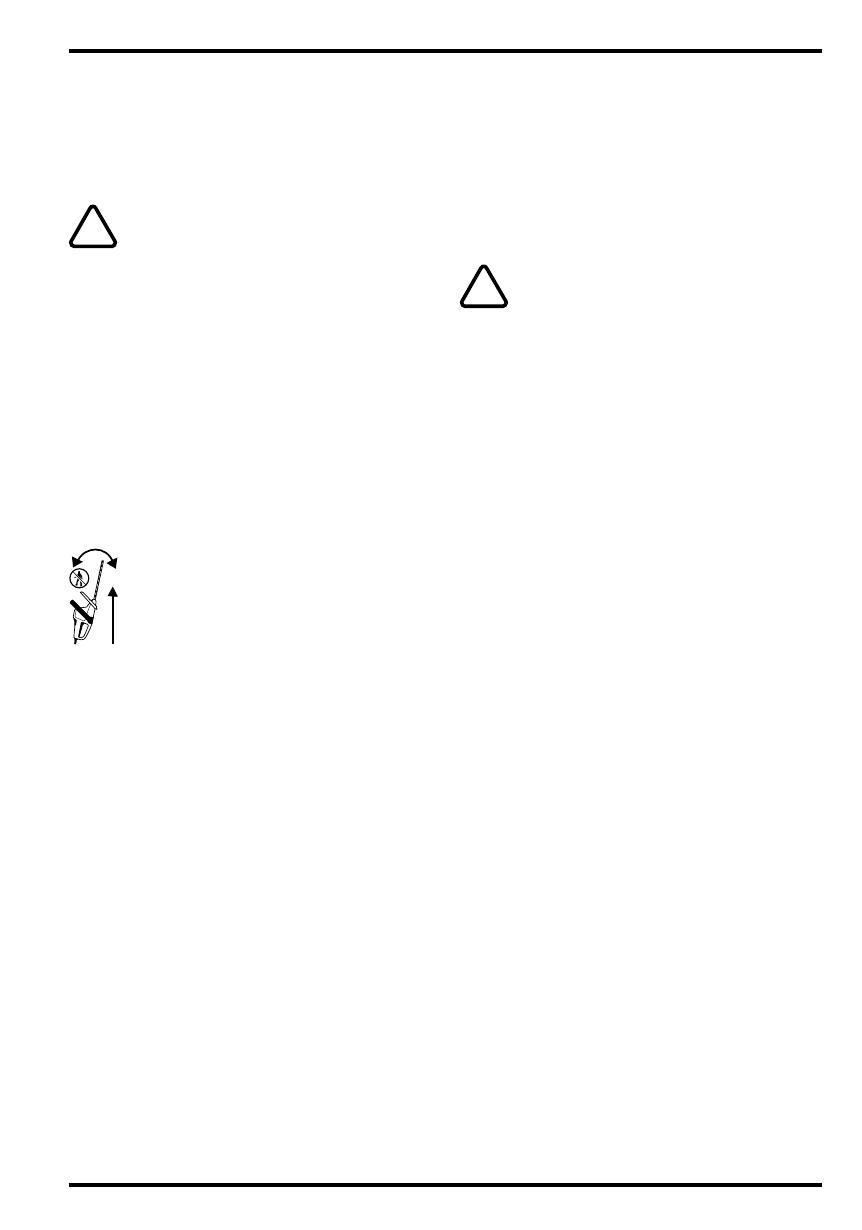
Tragen Sie beim Arbeiten mit der
Heckenschere immer eine Schutzbrille,
Handschuhe und Gehörschutz.
Tragen Sie immer festes Schuhwerk -
Die Akku-Heckenschere darf nicht barfuß
oder mit offenen Sandalen benutzt werden.
Tragen Sie keinen lose sitzenden Schmuck.
Tragen Sie eng anliegende Kleidung, die
Ihre Bewegungsfreiheit jedoch nicht
einschränken darf.
Achten Sie vor dem Arbeiten darauf, daß
sich die Akku-Heckenschere in
einwandfreiem Zustand befindet.
Bevor Sie mit der Akku-Heckenschere
arbeiten, entfernen Sie bitte den Akku-
Block und überprüfen Sie ob die
Schneidemesser in einwandfreiem
Zustand sind. Defekte Messer müssen
sofort ersetzt werden.
Achten Sie darauf, daß kein Draht oder
andere Fremdkörper in der Hecke
vorhanden sind.
Arbeiten mit der Akku-Heckenschere
Um ein unbeabsichtigtes Einschalten des
Gerätes zu vermeiden, entfernen Sie immer
den Akku-Block bevor Sie:
Das Gerät transportieren.
Das Gerät unbeaufsichtigt lassen.
Das Gerät überprüfen, säubern.
Versuchen, Gerätestörungen zu beheben.
Wenn das Gerät zu vibrieren beginnt.
Das Messer von blockierenden
Gegenständen befreien.
All manuals and user guides at all-guides.com
  • Page 1 1
  • Page 2 2
  • Page 3 3
  • Page 4 4
  • Page 5 5
  • Page 6 6
  • Page 7 7
  • Page 8 8
  • Page 9 9
  • Page 10 10
  • Page 11 11
  • Page 12 12
  • Page 13 13
  • Page 14 14
  • Page 15 15
  • Page 16 16
  • Page 17 17
  • Page 18 18
  • Page 19 19
  • Page 20 20
  • Page 21 21
  • Page 22 22
  • Page 23 23
  • Page 24 24
  • Page 25 25
  • Page 26 26
  • Page 27 27
  • Page 28 28
  • Page 29 29
  • Page 30 30
  • Page 31 31
  • Page 32 32
  • Page 33 33
  • Page 34 34
  • Page 35 35
  • Page 36 36
  • Page 37 37
  • Page 38 38
  • Page 39 39
  • Page 40 40
  • Page 41 41
  • Page 42 42
  • Page 43 43
  • Page 44 44
  • Page 45 45
  • Page 46 46
  • Page 47 47
  • Page 48 48
  • Page 49 49
  • Page 50 50
  • Page 51 51
  • Page 52 52
  • Page 53 53
  • Page 54 54
  • Page 55 55
  • Page 56 56
  • Page 57 57
  • Page 58 58
  • Page 59 59
  • Page 60 60
  • Page 61 61
  • Page 62 62

BLACK DECKER GTC390 Benutzerhandbuch

Typ
Benutzerhandbuch