POOLSTAR Poolex Q-Line Full Inverter Heat Pump Bedienungsanleitung

Typ
Bedienungsanleitung
Manuel de configuration et d’utilisation pour WiFi intégré
Configuration and Operation Manual for Integrated WiFi
Manual de configuración y funcionamiento para WiFi integrado
Manuale di configurazione e funzionamento per WiFi integrato
Konfigurations- und Bedienungshandbuch für Integrated WiFi
Configuratie en gebruikershandleiding voor geïntegreerde WiFi
www.poolstar.fr
Français / English / Español / Italiano / Deutsch / Nederlands
Wi-Fi
À propos de l’application Smart Life :
Le contrôle à distance de votre pompe à chaleur nécessite la création d’un compte «Smart Life».
L’application «Smart Life» permet de contrôler à distance vos appareils ménagers, où que vous soyez. Vous
pouvez ajouter et contrôler plusieurs appareils à la fois.
- Également compatible avec Amazon Echo et Google Home (en fonction des pays).
- Vous pouvez partager avec d’autres comptes «Smart Life» les appareils que vous avez paramétrés.
- Recevoir en temps réel des alertes de fonctionnement.
- Créer des scénarios avec plusieurs appareils, en fonction des données météo de l’application (géolocalisa-
tion indispensable).
Pour plus d’informations, rendez-vous dans la rubrique «Aide» de l’application «Smart Life»
L’application et les services «Smart Life» sont fournis par la société Hangzhou Tuya Technology. La
société Poolstar, propriétaire et distributeur de la marque Poolex, ne pourra être tenu responsable
du fonctionnement de l’application «Smart Life». La société Poolstar n’a aucune visibilité sur votre
compte «Smart Life».
1. Téléchargement & Installation de l’application «Smart Life»
Scannez ou recherchez «Smart Life» sur l’App Store an de télécharger l’application :
Scannez ou recherchez «Smart Life» sur Google Play an de télécharger l’application :
Smart Life
Télécharger sur
Smart Life
Télécharger sur
Attention, vériez bien la compatiblité de votre téléphone et la version de
votre OS avant d’installer l’application
Attention, vériez bien la compatiblité de votre téléphone et la version de
votre OS avant d’installer l’application
iOS :
Android :
3
FR
Wi-Fi
Le contrôle à distance de votre pompe à chaleur nécessite la création d’un compte «Smart Life». Si vous avez déjà un
compte «Smart Life», veuillez-vous connecter et passer directement à l’étape 3.
Étape 1 : Appuyez sur «Créer un nouveau compte» puis sélectionnez votre mode d’enregistrement «Email» ou «Télé-
phone», un code de vérication vous sera envoyé.
Saisissez votre adresse email ou votre numéro de téléphone puis cliquez sur «Obtenir le code de vérication».
Étape 2 : Saisissez le code de vérication reçu par email ou par téléphone an de valider votre compte.
Félicitations, vous faites maintenant partie de la communauté «Smart Life».
2. Paramétrage de l’application
ATTENTION : Avant de commencer, assurez vous d’avoir bien téléchargé l’application «Smart Life», d’être
connecté à votre réseau WiFi local et que votre pompe à chaleur est alimentée électriquement et en fonction.
4
Wi-Fi
Étape 3 (conseillé) : Ajoutez une pièce en appuyant sur «...», puis appuyez sur «Ajouter une piece», saisissez maintenant le
nom de la pièce à ajouter («Piscine» par exemple), puis appuyez sur «Terminé».
Étape 4 : Ajoutez maintenant un appareil à votre pièce «Piscine» :
Appuyez sur «Ajouter», ou sur le «+» puis «Gros appareils...» puis «Chaue-eau»,
à ce stade, laissez votre smartphone sur l’écan «Ajouter» et passez à l’étape d’appairage du boitier de commande,
soit en mode EZ, soit en mode AP.
54
FR
Wi-Fi
Appuyez sur + simultanément pendant 5s, le
voyant clignote rapidement, le boîtier de commande
est prêt à être appairé.
3. Appairage de la pompe à chaleur
3.1 Mode EZ
Note : Le clignotement s’arrête lorsque le boitier est connecté au WiFi
Étape 1 : Lancez maintenant l’appairage.
Choisissez le réseau WiFi de votre maison, saisissez le mot de passe WiFi et appuyez sur
«Conrmer».
Étape 2 : Activez le mode appairage sur votre pompe à chaleur selon la procédure
suivante :
La procédure dépend du modèle de votre boîtier de commande :
ECO
IN
OUT
SET
h
1ON
OFF
2
3
min
°C
%
A
h
min
°C
%
A
Appuyez sur + + simultanément pendant
5s, le voyant clignote rapidement, le boitier de
commande est prêt à être appairé.
ATTENTION L’application «Smart Life» ne supporte que les réseaux WiFi 2.4GHz.
Si votreseau WiFi utilise la fréquence 5GHz, rendez-vous dans l’interface de votre réseau WiFi
domestique pour créer un second réseau WiFi 2,4GHz (disponible pour la plu part des Box Internet,
routeurs et point d’accès WiFi).
6
Wi-Fi
Appuyez sur +
SET IN NO ROOM VALUE
OUT
1
2
ON
OFF
TEMP
HUM
h
MI N
%
F
AUTOFAN
h
MI N
%
F
simultanément pendant 3s, le
voyant clignote rapidement, le boîtier de com-
mande est prêt à être appairé.
Appuyez sur + simultanément pendant 5s, le
voyant clignote rapidement, le boîtier de commande
est prêt à être appairé.
Appuyez sur + simultanément pendant 5s, le
voyant clignote rapidement, le boîtier de commande
est prêt à être appairé.
Appuyez sur
SET IN NO ROOM VALUE
OUT
1
2
ON
OFF
TEMP
HUM
h
MI N
%
F
AUTOFAN
h
MI N
%
F
+
SET IN NO ROOM VALUE
OUT
1
2
ON
OFF
TEMP
HUM
h
MI N
%
F
AUTOFAN
h
MI N
%
F
simultanément pendant 3s, le
voyant clignote rapidement, le boîtier de com-
mande est prêt à être appairé.
SET IN NO ROOM VALUE
OUT
1
2
ON
OFF
TEMP
HUM
h
MIN
%
F
AUTO
FAN
h
MIN
%
F
Note : Le clignotement s’arrête lorsque le boitier est connecté au WiFi
76
FR
Wi-Fi
L’appairage réussi, vous pouvez renommer votre pompe à chaleur Poolex puis appuyez sur «Terminé».
Félicitation, votre pompe à chaleur est maintenant pilotable depuis votre smartphone.
Appuyez sur + simultanément pendant 5s,
le voyant clignote rapidement, le boîtier de
commande est prêt à être appairé.
Appuyez sur + simultanément pendant 5s,
le voyant clignote rapidement, le boîtier de
commande est prêt à être appairé.
8
Wi-Fi
Étape 1 : Créez une programmation horaire, choisissez l’heure, le ou les jours de la
semaine concernés, et l’action (allumer ou éteindre), puis sauvegarder.
Étape 2 : Pour supprimer une plage horaire, appuyez longtemps sur cette dernière.
Congurer les plages de fonctionnement de la pompe à chaleur
1 Température actuelle du bassin
2 Température de consigne
3 Mode de fonctionnement actuel
4 Allumer / éteindre la Pompe à chaleur
5 Changer la température
6 Changer de mode de fonctionnement
7 Paramètrage des plages de fonctionnement
Présentation de l’interface utilisateur
1
2
3
4
5
6
7
4. Pilotage
98
FR
Wi-Fi
Cas d’une pompe à chaleur On/O :
Vous pouvez choisir entre le Mode Auto-
matique (Auto), Chauage (Heating) ou
Refroidissement (Cooling)
Automatique
Refroidissement
Chauage
Chauage Inverter*
Refroidissement Inverter*
On/O (FIX)*
Eco Inverter*
*Certains modes peuvent changer en
fonction des machines
Cas d’une pompe à chaleur Inverter :
Vous pouvez choisir entre les modes Inverter Chauf-
fage (Heating), Refroidissement (Cooling), Eco (Silent)
ou le mode On/O (Manual Frequency)
Choix des modes de fonctionnement
Modes disponibles
Modes disponibles
Wi-Fi
About the Smart Life app:
You’ll need to create a «Smart Life» account to control your heat pump remotely.
The «Smart Life» app lets you control your home appliances from anywhere. You can add and control
multiple devices at once.
- Also compatible with Amazon Echo and Google Home (depending on the country).
- You can share your devices with other Smart Life accounts.
- Receive real-time operational alerts.
- Create scenarios with several devices, depending on the app’s weather data (geolocation required).
For more information, go to the «Help» section of the «Smart Life» app
The «Smart Life» app and services are provided by Hangzhou Tuya Technology. Poolstar, owner and
distributor of the Poolex brand, cannot be held responsible for the operation of the «Smart Life» app.
Poolstar has no visibility on your «Smart Life» account.
1. Downloading & Installing the «Smart Life» app
Search for «Smart Life» in the App Store to download the app:
Search for «Smart Life» on Google Play to download the app :
Smart Life
Télécharger sur
Smart Life
Télécharger sur
Check the compatibility of your phone and the version of your OS
before installing the application
Check the compatibility of your phone and the version of your OS
before installing the application
iOS :
Android :
11
Wi-Fi
EN
You’ll need to create a «Smart Life» account to control your heat pump remotely. If you already have a Smart Life
account, please log in and go directly to step 3.
Step 1 : Click on «Create new account» and choose to register by «Email» or «Phone,» where a verication code
will be sent to you.
Enter your email address or phone number and click «Send verication code».
Step 2 : Enter the verication code received by email or phone to validate your account.
Congratulations! You are now part of the «Smart Life» community.
2. Setting up the app
WARNING : Before you begin, make sure you have downloaded the «Smart Life» app, connected to your local
WiFi network, and that your heat pump is electrically powered and running.
12
Wi-Fi
Step 3 (Recommended): Add an object by clicking «...» and then «Add Object.» Enter its name («Pool» for example),
then click «Done.»
Step 4 : Now add a device to your «Pool»
Click «Add» or «+» and then «Large appliances...» followed by «Water heater
At this point, leave your smartphone on the «Add» screen and go to the pairing step for your control box.
1312
Wi-Fi
EN
Press + simultaneously for 5s, ashes quickly,
the control box is ready to be paired.
3. Pairing the heat pump
3.1 EZ Mode
Note: The ashing stops when the box is connected to WiFi
Step 1 : Now start the pairing.
Choose your home WiFi network, enter the WiFi password and press «Conrm».
Step 2 : Activate the pairing mode on your heat pump according to the following
procedure:
The procedure depends on the model of your control box:
ECO
IN
OUT
SET
h
1ON
OFF
2
3
min
°C
%
A
h
min
°C
%
A
Press + + simultaneously for 5s, ashes
quickly, the control unit is ready to be paired.
CAUTION The «Smart Life» application only supports 2.4GHz WiFi networks.
If your WiFi network uses the 5GHz frequency, go to the interface of your home WiFi network to create
a second 2.4GHz WiFi network (available for most Internet boxes, routers and WiFi access points).
14
Wi-Fi
Press +
SET IN NO ROOM VALUE
OUT
1
2
ON
OFF
TEMP
HUM
h
MI N
%
F
AUTOFAN
h
MI N
%
F
simultaneously for 3s, ashes
quickly, the control box is ready to be paired.
Press + simultaneously for 5s, ashes quickly,
the control box is ready to be paired.
Press + simultaneously for 5s, ashes quickly,
the control box is ready to be paired.
Press
SET IN NO ROOM VALUE
OUT
1
2
ON
OFF
TEMP
HUM
h
MI N
%
F
AUTOFAN
h
MI N
%
F
+
SET IN NO ROOM VALUE
OUT
1
2
ON
OFF
TEMP
HUM
h
MI N
%
F
AUTOFAN
h
MI N
%
F
simultaneously for 5s, ashes quickly,
the control box is ready to be paired.
SET IN NO ROOM VALUE
OUT
1
2
ON
OFF
TEMP
HUM
h
MIN
%
F
AUTO
FAN
h
MIN
%
F
Note: The ashing stops when the box is connected to WiFi
1514
Wi-Fi
EN
The pairing is successful, you can rename your Poolex heat pump then press «Done».
Congratulations, your heat pump can now be controlled from your smartphone.
Press + simultaneously for 5s, ashes
quickly, the control box is ready to be paired.
Press + simultaneously for 5s, ashes
quickly, the control box is ready to be paired.
16
Wi-Fi
1 Current pool temperature
2 Temperature setpoint
3 Current operating mode
4 Switch the heat pump on/o
5 Change the temperature
6 Change the operating mode
7 Set the operating range
Interface
1
2
3
4
5
6
7
4. Controlling
Step 1 : Create a schedule, choose the time, day(s) of the week(s), and the action
(turn on or o) and save.
Congure the operating ranges for the heat pump
Step 2 : To delete a time slot, press on it and hold.
1716
Wi-Fi
EN
Auto
Cooling
Heating
Inverter heating*
Inverter cooling*
On/O (FIX)*
Eco Inverter*
*Some modes may change depending
on the machines
Available modes
Available modes
For On/O heat pumps:
You can choose between Auto, Heating, or
Cooling modes.
For Inverter heat pumps :
You can choose between Inverter
Heating, Cooling, Eco (Silent) or On/ O
(Manual) modes.
Choice of operating modes
Wi-Fi
Sobre la aplicación Smart Life:
El control a distancia de su bomba de calor necesita la creación de una cuenta «Smart Life»
La aplicación «Smart Life» permite controlar a distancia sus electrodomésticos, esté donde esté. Puede
añadir y controlar varios aparatos al mismo tiempo.
- También compatible con Amazon Echo y Google Home (dependiendo de los países).
- Puede compartir con otras cuentas «Smart Life» los aparatos que tiene congurados.
- Recibir en tiempo real alertas de funcionamiento.
- Crear escenarios con varios aparatos, en función de los datos metereológicos de la aplicación (imprescin-
dible geolocalización).
Para más información, consulte el apartado «Ayuda» de la aplicación «Smart Life»
Pour plus d’informations, rendez-vous dans la rubrique «Aide» de l’application «Smart Life»
La aplicación y los servicios «Smart Life» son ofrecidos por la empresa Hangzhou Tuya Technology.
La sociedad Poolstar, propietaria y distribuidora de la marca Poolex, no podrá considerarse respon-
sable del funcionamiento de la aplicación «Smart Life». La sociedad Poolstar carece de visibilidad de
su cuenta «Smart Life».
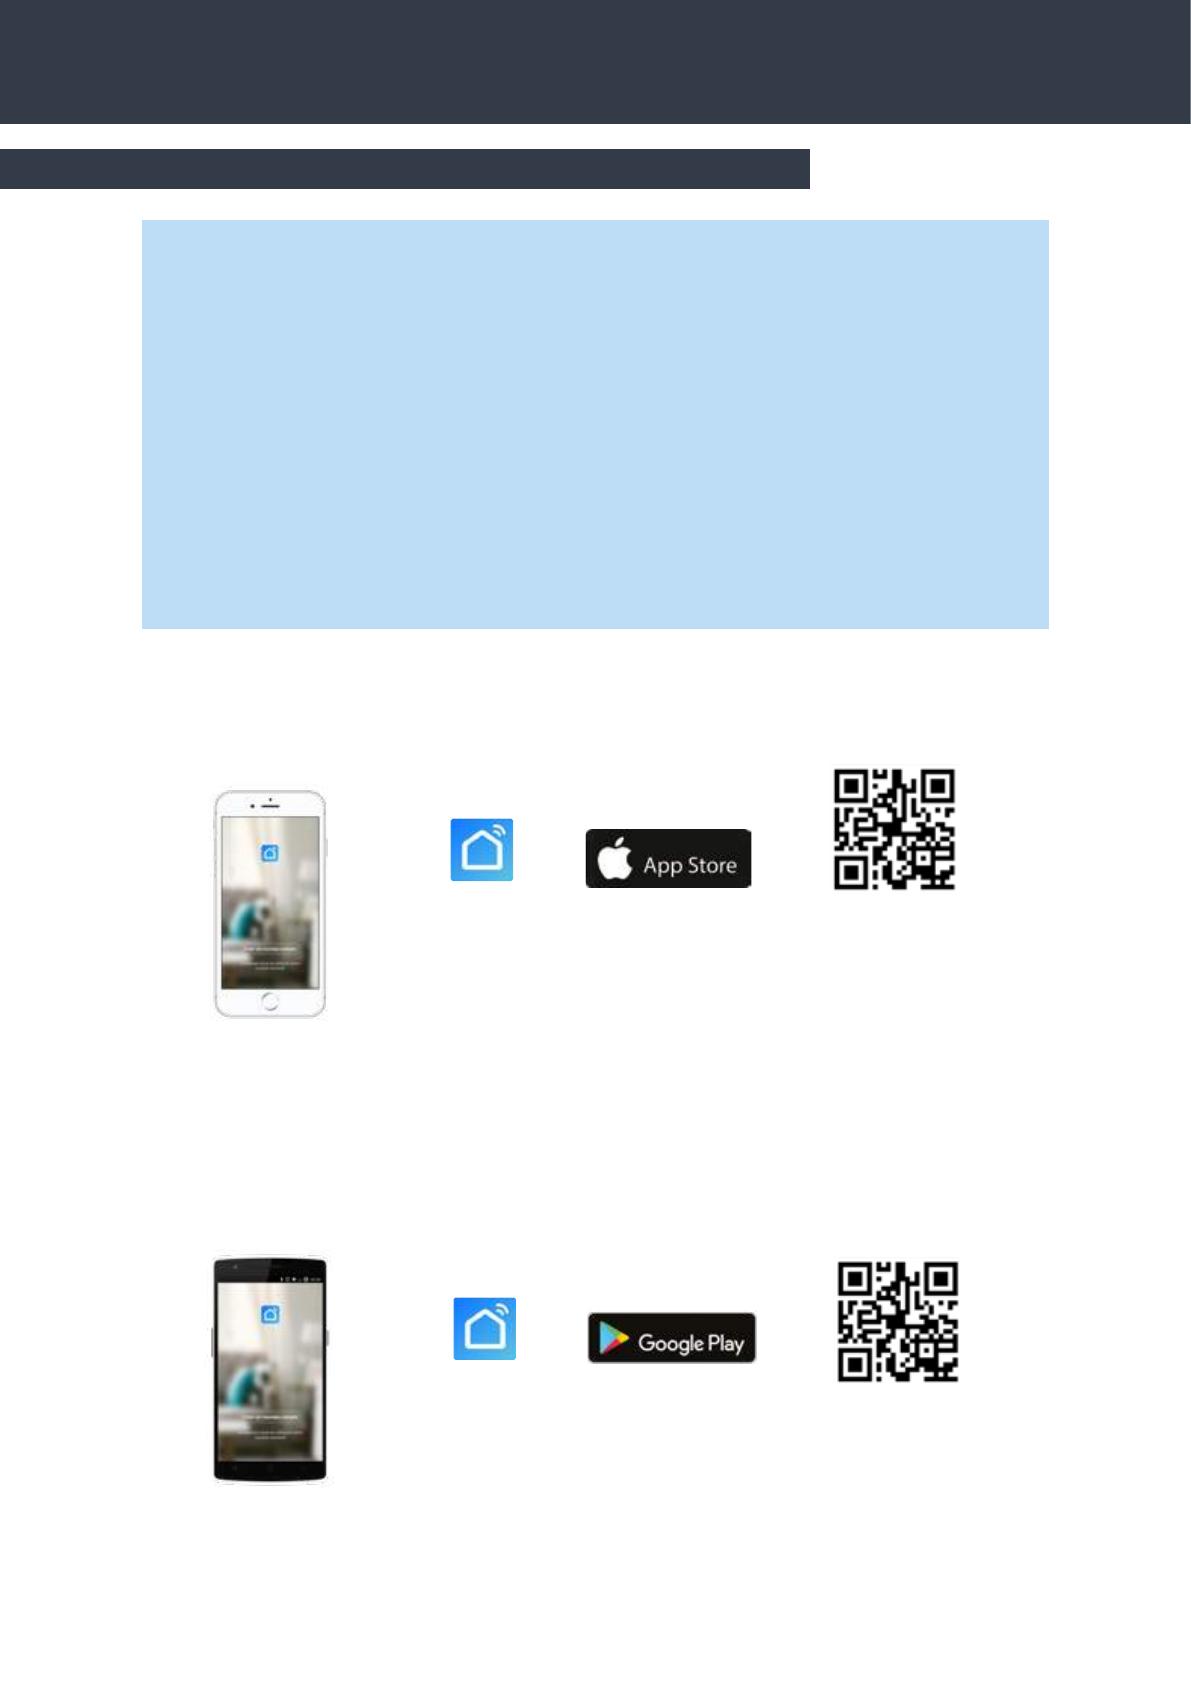
1. Descarga & Instalación de la aplicación «Smart Life»
Escanee o busque «Smart Life» en el App Store para descargar la aplicación:
Escanee o busque «Smart Life» en Google Play para descargar la aplicación:
Smart Life
Télécharger sur
Smart Life
Télécharger sur
Tenga cuidado, verique la compatibilidad de su teléfono y la versión de
su sistema operativo antes de instalar la aplicación
Tenga cuidado, verique la compatibilidad de su teléfono y la versión de
su sistema operativo antes de instalar la aplicación
iOS :
Android :
19
Wi-Fi
ES
El control a distancia de su bomba de calor necesita la creación de una cuenta «Smart Life» Si ya tiene una cuenta «Smart
Life» conéctese y vaya directamente al paso 3.
Paso 1 : Haga clic en «Crear una cuenta nueva» y seleccione su modo de registro «Email» o «Teléfono». Se le enviará un
código de vericación.
Indique su dirección email o su número de teléfono y haga clic en «Obtener el código de vericación»
Paso 2 : Introduzca el código de vericación, recibido por email o por teléfono, para validar su cuenta.
Felicidades, ya forma parte de la comunidad «Smart Life».
2. Conguración de la aplicación
ATENCIÓN : Antes de comenzar, asegúrese de haber descargado correctamente la aplicación «Smart Life»,
de estar conectado a su red WiFi local y de que su bomba de calor está enchufada a la red eléctrica y en
funcionamiento.
20
Wi-Fi
Paso 3 (recomendado) : Añada una estancia haciendo clic en «...» y haga clic en «Añadir una estancia». Grabe ahora el
nombre de la estancia a añadir («Piscina» por ejemplo) y haga clic en «Terminado»
Paso 4 : Añada ahora un aparato a su estancia «Piscina»:
Haga clic en «Añadir» o en el «+» y después «Aparatos grandes...» y «Calentador»,
En este paso, deje su smartphone en la pantalla «Añadir» y pase a la sincronización de la caja de mandos.
  • Page 1 1
  • Page 2 2
  • Page 3 3
  • Page 4 4
  • Page 5 5
  • Page 6 6
  • Page 7 7
  • Page 8 8
  • Page 9 9
  • Page 10 10
  • Page 11 11
  • Page 12 12
  • Page 13 13
  • Page 14 14
  • Page 15 15
  • Page 16 16
  • Page 17 17
  • Page 18 18
  • Page 19 19
  • Page 20 20
  • Page 21 21
  • Page 22 22
  • Page 23 23
  • Page 24 24
  • Page 25 25
  • Page 26 26
  • Page 27 27
  • Page 28 28
  • Page 29 29
  • Page 30 30
  • Page 31 31
  • Page 32 32
  • Page 33 33
  • Page 34 34
  • Page 35 35
  • Page 36 36
  • Page 37 37
  • Page 38 38
  • Page 39 39
  • Page 40 40
  • Page 41 41
  • Page 42 42
  • Page 43 43
  • Page 44 44
  • Page 45 45
  • Page 46 46
  • Page 47 47
  • Page 48 48
  • Page 49 49
  • Page 50 50

POOLSTAR Poolex Q-Line Full Inverter Heat Pump Bedienungsanleitung

Typ
Bedienungsanleitung