Silvercrest SRR 3.7 B2 Operating Instructions Manual
- Kategorie
- Rasierer für Männer
- Typ
- Operating Instructions Manual

ROTARY SHAVER SRR 3.7 B2
ROTARY SHAVER
Operating instructions
IAN 108312
ROTACYJNA MASZYNKA
DO GOLENIA
Instrukcja obsługi
KÖRKÉSES BOROTVA
Használati utasítás
ROTACIJSKI BRIVNIK
Navodila za uporabo
HOLICÍ STROJEK
Návod k obsluze
HOLIACI STROJČEK
Návod na obsluhu
ROTATIONSRASIERER
Bedienungsanleitung

GB Operating instructions Page 1
PL Instrukcja obsługi Strona 23
HU Használati utasítás Oldal 45
SI Navodila za uporabo Stran 67
CZ Návod k obsluze Strana 87
SK Návod na obsluhu Strana 109
DE / AT / CH Bedienungsanleitung Seite 131
Before reading, unfold both pages containing illustrations and familiarise
yourself with all functions of the device.
Przed przeczytaniem proszę rozłożyć obie strony z ilustracjami, a następnie
proszę zapoznać się z wszystkimi funkcjami urządzenia.
Olvasás előtt kattintson az ábrákat tartalmazó mindkét oldalra és végezetül
ismerje meg a készülék mindegyik funkcióját.
Pred branjem obe strani s slikami odprite navzven in se nato seznanite z
vsemi funkcijami naprave.
Před čtením si odklopte obě dvě strany s obrázky a potom se seznamte se
všemi funkcemi přístroje.
Pred čítaním si odklopte obidve strany s obrázkami a potom sa oboznámte
so všetkými funkciami prístroja.
Klappen Sie vor dem Lesen die beiden Seiten mit den Abbildungen aus und
machen Sie sich anschließend mit allen Funktionen des Gerätes vertraut.

A

B

1
SRR 3.7 B2
GB
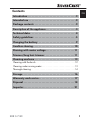
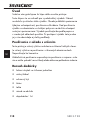
Contents
Introduction . . . . . . . . . . . . . . . . . . . . . . . . . . . . . . . . . . . 2
Intended use . . . . . . . . . . . . . . . . . . . . . . . . . . . . . . . . . . 2
Package contents . . . . . . . . . . . . . . . . . . . . . . . . . . . . . . 2
Description of the appliance . . . . . . . . . . . . . . . . . . . . . . 3
Technical data . . . . . . . . . . . . . . . . . . . . . . . . . . . . . . . . . 4
Safety guidelines . . . . . . . . . . . . . . . . . . . . . . . . . . . . . . 5
Charging the battery . . . . . . . . . . . . . . . . . . . . . . . . . . . 9
Cordless shaving . . . . . . . . . . . . . . . . . . . . . . . . . . . . . . 10
Shaving with mains voltage . . . . . . . . . . . . . . . . . . . . .11
Trimmer/long hair trimmer . . . . . . . . . . . . . . . . . . . . .11
Cleaning and care . . . . . . . . . . . . . . . . . . . . . . . . . . . . . 12
Cleaning with the brush . . . . . . . . . . . . . . . . . . . . . . . . . . . . . . . . .12
Cleaning under running water . . . . . . . . . . . . . . . . . . . . . . . . . . . .13
Thorough cleaning . . . . . . . . . . . . . . . . . . . . . . . . . . . . . . . . . . . . .14
Storage . . . . . . . . . . . . . . . . . . . . . . . . . . . . . . . . . . . . . 16
Warranty and service . . . . . . . . . . . . . . . . . . . . . . . . . . 17
Disposal . . . . . . . . . . . . . . . . . . . . . . . . . . . . . . . . . . . . . 18
Importer . . . . . . . . . . . . . . . . . . . . . . . . . . . . . . . . . . . . . 21
IB_108312_SRR3.7B2_LB4.indb 1 16.03.15 10:37

GB
2
SRR 3.7 B2
Introduction
Congratulations on the purchase of your new appliance.
You have selected a high-quality product. The operating instructions
are part of this product. They contain important information on safety,
usage and disposal. Before using the product, familiarise yourself
with all handling and safety guidelines. Use the product only as
described and for the range of applications specifi ed. Please also
pass these operating instructions on to any future owner(s).
Intended use
This appliance is intended exclusively for shaving and trimming hu-
man hair.
This appliance is intended solely for use in private households.
Do not use it for commercial applications.
All other uses are deemed to be improper and may result in property
damage or even in personal injury.
Package contents
♦ Shaver with cutting unit
♦ Power cable
♦ Protective cap
♦ Brush
♦ Case
♦ Operating instructions
♦ Order card
IB_108312_SRR3.7B2_LB4.indb 2 16.03.15 10:37

3
SRR 3.7 B2
GB
NOTE
Check contents for completeness and damage immediately
af
ter unpacking. Contact Customer Services if necessary.
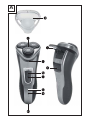
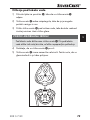
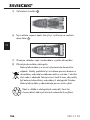
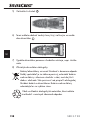
Description of the appliance
Figure A (front fold-out page):
1 Protective cap
2 Cutting unit
3 Long hair trimmer
4 Release button, cutting unit
5 Catch for the long hair trimmer
6 On/Off switch
7 On/Off switch lock
8 Green power light
9 Red charge indicator light
0 Mains connection
Figure B (rear fold-out page):
q Power plug
w Connector
e Brush
r Case
IB_108312_SRR3.7B2_LB4.indb 3 16.03.15 10:37

GB
4
SRR 3.7 B2
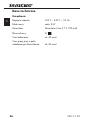
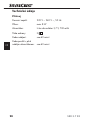
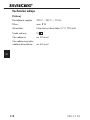
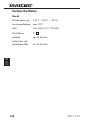
Technical data
Device
Operating voltage: 220V − 240 V
~
, 50 Hz
Power consumption: max. 8W
Battery: 3.7 V/700 mAh Li-ion battery
Protection class: II/
Charging time: approx. 60 minutes
Operating time with
fully charged battery: approx. 60 minutes
IB_108312_SRR3.7B2_LB4.indb 4 16.03.15 10:37

5
SRR 3.7 B2
GB
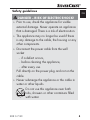
Safety guidelines
DANGER – RISK OF ELECTRIC SHOCK!
► Prior to use, check the appliance for visible
external damage. Never operate an appliance
that is damaged. There is a risk of electrocution.
► The appliance may no longer be used if there
is any damage to the cable, the housing or any
other components.
► Disconnect the power cable from the wall
socket
— if a defect occurs,
— before cleaning the appliance,
— after every use.
Pull directly on the power plug and not on the
cable.
► Never submerge the appliance or the cable in
water or other liquids.
Do not use this appliance near bath
tubs, showers or other containers fi lled
with water.
IB_108312_SRR3.7B2_LB4.indb 5 16.03.15 10:37

GB
6
SRR 3.7 B2
DANGER – RISK OF ELECTRIC SHOCK!
► If the appliance drops into water, pull the plug
out of the power socket before you reach into
the water!
► Never touch the power plug with wet hands,
especially when plugging it in or unplugging it.
Risk of electrocution!
► Check the power cable and appliance regularly
for possible mechanical defects.
► Ensure that the power cable does not get
jammed in cupboard doors and that it is never
laid on hot surfaces. If this occurs, the cable
insulation may be damaged.
► The installation of a residual current circuit
breaker with a rated tripping current of no
more than 30mA off ers further protection from
electric shocks. Have the installation carried out
only by a qualifi ed electrician.
► CAUTION! Keep the appliance dry.
IB_108312_SRR3.7B2_LB4.indb 6 16.03.15 10:37

7
SRR 3.7 B2
GB
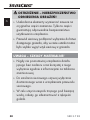
WARNING – RISK OF INJURY!
► This appliance may be used by children aged
8 years and above and by persons with limited
physical, sensory or mental capabilities or lack
of experience and knowledge, provided that
they are under supervision or have been told
how to use the appliance safely and are aware
of the potential risks.
► Children must not use the appliance as a play-
thing.
► Cleaning and user maintenance tasks may
not be carried out by children unless they are
supervised.
► All repairs must be carried out by authorised
specialist companies or by the Customer Service
department. Improper repairs can pose signifi -
cant risks to the user. It will also invalidate any
warranty claims.
► Do not use the appliance with a defective cutting
unit or long hair trimmer because these may
have sharp edges. There is a risk of personal
injury!
IB_108312_SRR3.7B2_LB4.indb 7 16.03.15 10:37

GB
8
SRR 3.7 B2
WARNING – RISK OF INJURY!
► Defective components must always be replaced
with original replacement parts. Compliance
with safety requirements can only be guaranteed
if original replacement parts are used.
► Only plug the power plug into an easily acces-
sible power socket so that you can pull it out of
the power socket quickly in an emergency.
CAUTION – PROPERTY DAMAGE!
► Never operate the appliance unsupervised,
and only in accordance with the information
on the nameplate.
► Use only the supplied power cable provided
when using mains power.
► Remove the cutting unit from the handset for
cleaning under running water.
IB_108312_SRR3.7B2_LB4.indb 8 16.03.15 10:37

9
SRR 3.7 B2
GB
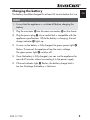
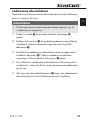
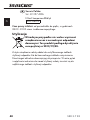
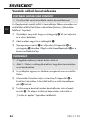
Charging the battery
The battery should be charged for at least 60 minutes before fi rst use.
NOTE
► Ensure that the appliance is switched off before charging the
batter
y.
1) Plug the connector w into the mains connection 0 on the shaver.
2) Plug the power plug q into a socket that is compatible with the
appliance specifi cations. While the battery is charging, the red
charge indicator 9 lights up.
♦ As soon as the battery is fully charged, the green power light 8
fl
ashes. Disconnect the appliance from the mains voltage.
The green power light 8 switches off .
♦ Once the battery is fully charged, you can use the appliance for
ar
ound 60 minutes without connecting it to the power supply.
♦ If the red indicator light 9 fl
ashes, the battery charge level is
too low. Recharge the battery in that case.
IB_108312_SRR3.7B2_LB4.indb 9 16.03.15 10:37

GB
10
SRR 3.7 B2
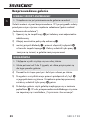
Cordless shaving
CAUTION! MATERIAL DAMAGE!
► This appliance is not suitable for wet shaving!
This shav
er can be used without the power cable. In this case, you
must charge the appliance before fi rst use (see section “Charging
the battery”).
1) Ensure the cutting unit 2 is attached and locked in place.
2) Remove the protective cap 1.
3) Press the switch lock 7 and push the on/off switch 6 towards
the cutting unit 2. The green power light 8 lights up and the
shaver starts.
NOTE
► The best results are achieved if used on dry skin.
► It can take 2 to 3 weeks until the skin is accustomed to the
dr
y shaving system.
4) Move the shaving heads with straight and circular motions over
the skin.
5) After you covered all the areas you want to shave, set the on/off
switch 6 back into its initial position. The appliance stops and
the green power light 8 switches off .
6) Clean the shaver after every use with the supplied brush e.
For a more thorough cleaning, read the section “Cleaning and
care”.
IB_108312_SRR3.7B2_LB4.indb 10 16.03.15 10:37

11
SRR 3.7 B2
GB
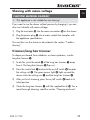
Shaving with mains voltage
CAUTION! MATERIAL DAMAGE!
► This appliance is not suitable for wet shaving!
If y
ou want to use the shaver without previously charging it, you can
also use it directly with mains voltage:
1) Plug the connector w into the mains connection 0 on the shaver.
2) Plug the power plug q into a mains socket that complies with
the appliance specifi cations.
You can then use the shaver as described in the section “Cordless
shaving”.
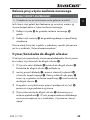
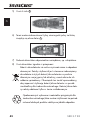
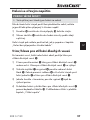
Trimmer/long hair trimmer
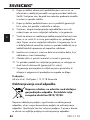
To shape your beard, form sideburns or shave eyebrows, use the
long hair trimmer 3.
1) To do this, push the catch 5 of the long hair trimmer 3 away
from it. The long hair trimmer 3 fl ips out.
2) Press the switch lock 7 and push the on/off switch 6 towards
the cutting unit 2. The green power light 8 lights up and the
shaver starts the cutting unit 2 and the long hair trimmer 3.
3) After you fi nish trimming, press the on/off switch 6 back to its
initial position.
4) Clean the long hair trimmer 3 with the supplied brush e. For a
more thorough cleaning, read the section “Cleaning and care”.
IB_108312_SRR3.7B2_LB4.indb 11 16.03.15 10:37

GB
12
SRR 3.7 B2
Cleaning and care
DANGER – ELECTRIC SHOCK!
► Before cleaning the device, disconnect the power plug q
fr
om the mains power socket! There is a risk of electric shock!
CAUTION! MATERIAL DAMAGE!
► Do not use abrasive, chemical or caustic cleaning agents
to clean this appliance. This will irr
eparably damage the
appliance.
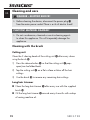
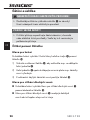
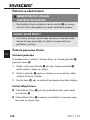
Cleaning with the brush
Cutting unit
Clean the 3 shaving heads of the cutting unit 2 after every shave
using the brush e.
1) Press the release button 4 so that the cutting unit 2 pops
open/can be folded back.
2) Tap the cutting unit 2 on a fl at surface or blow off the hair
cuttings.
3) Use the brush e to remove any remaining hair cuttings.
Long hair trimmer
■ Clean the long hair trimmer 3 af
ter every use with the supplied
brush e.
■ Oil the long hair trimmer 3 around every 6 months with a drop
of sewing machine oil.
IB_108312_SRR3.7B2_LB4.indb 12 16.03.15 10:37

13
SRR 3.7 B2
GB
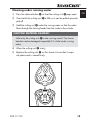
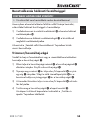
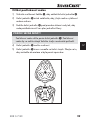
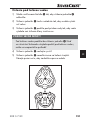
Cleaning under running water
1) Press the release button 4 so that the cutting unit 2 pops open.
2) Overstretch the cutting unit 2 a little so it can be pulled upwards
and off .
3) Hold the cutting unit 2 under the running water so that the water
fl ows through the shaving heads from the inside to the outside.
CAUTION! MATERIAL DAMAGE!
Hold only the cutting unit 2 under r
unning water! The shaver
handset can be damaged irreparably if it is held under running
water.
4) Allow the cutting unit 2 to dry.
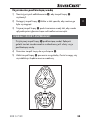
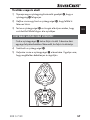
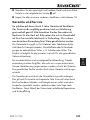
5) Replace the cutting unit 2 on the shaver. Ensure that it snaps
into place and is seated fi rmly:
IB_108312_SRR3.7B2_LB4.indb 13 16.03.15 10:37

GB
14
SRR 3.7 B2
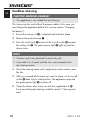
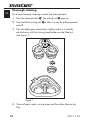
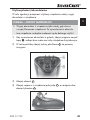
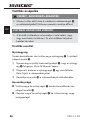
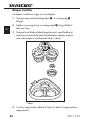
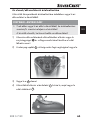
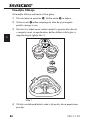
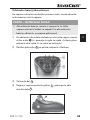
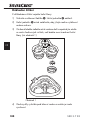
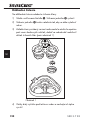
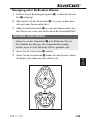
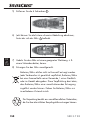
Thorough cleaning
For a more thorough cleaning, remove the shaving heads:
1) Press the release button 4. The cutting unit 2 pops up.
2) Overstretch the cutting unit 2 a little so it can be pulled upwards
and off .
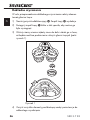
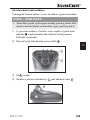
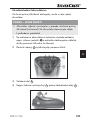
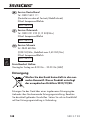
3) Press the black gear wheel down slightly and turn it carefully
anticlockwise until the shaving head holder can be lifted out
(see Figure 1).
Figure 1
4) Clean all parts under running water and then allow them to dry
fully.
IB_108312_SRR3.7B2_LB4.indb 14 16.03.15 10:37

15
SRR 3.7 B2
GB
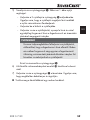
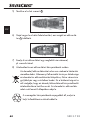
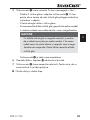
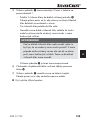
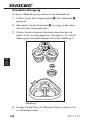
5) Replace the cutting unit 2. R
efer to fi gure 1 for assistance:
– Insert the 3 shaving heads in the recesses of the cutting
unit 2. Ensure that the notches on the edge of the shaving
heads rest on the catches in the opening.
– Place the round blades into the shaving heads.
– Replace the shaving head holder, press it down a little and
slightly turn the gear wheel clockwise.
NOTE
If the holder for the shaving heads cannot be reat-
tached, it may be that the gear wheel is a little sk
ew.
In this case, turn the gear wheel anticlockwise again
up to the stop. The holder for the shaving heads can
then be fi tted.
The cutting unit 2 is now installed again.
6) Remove loose hairs from the shaver with the brush e.
7) Replace the cutting unit 2 on the shaver. Ensure that it snaps
into place and is seated fi rmly.
■ Clean the housing with a moist cloth.
IB_108312_SRR3.7B2_LB4.indb 15 16.03.15 10:37

GB
16
SRR 3.7 B2
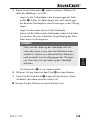
NOTE
If...
– ... the shaving result is noticeably poorer, ...
– ... you have to the shave the same spot repeatedly
to achie
ve a good result, ...
– ... the shave takes much longer than usual, ...
– ... there is visible damage to the shaving heads, ...
... the shaving heads/the cutting unit 2 must be replaced.
You can order the cutting unit 2, incl. shaving heads from
our customer service (see order card).
To replace the cutting unit 2 proceed as follows:
1) Press the release button 4 so that the cutting unit 2
pops open.
2) Overstretch the cutting unit 2 a little so it can be pulled
upwards and off .
3) Fit the new cutting unit 2 onto the shaver. Ensure that it
snaps into place and is seated fi rmly.
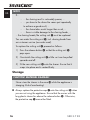
Storage
CAUTION! MATERIAL DAMAGE!
Never store the shaver in the case r while the appliance is
char
ging. Risk of overheating!
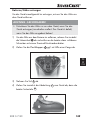
■ Always replace the protective cap 1 onto the cutting unit 2 when
you are not using the appliance. Ensure that the corner with the
long plastic sleeve lies above the release button 4. Otherwise,
the protective cap 1 cannot be fi tted.
IB_108312_SRR3.7B2_LB4.indb 16 16.03.15 10:37
Seite wird geladen ...
Seite wird geladen ...
Seite wird geladen ...
Seite wird geladen ...
Seite wird geladen ...
Seite wird geladen ...
Seite wird geladen ...
Seite wird geladen ...
Seite wird geladen ...
Seite wird geladen ...
Seite wird geladen ...
Seite wird geladen ...
Seite wird geladen ...
Seite wird geladen ...
Seite wird geladen ...
Seite wird geladen ...
Seite wird geladen ...
Seite wird geladen ...
Seite wird geladen ...
Seite wird geladen ...
Seite wird geladen ...
Seite wird geladen ...
Seite wird geladen ...
Seite wird geladen ...
Seite wird geladen ...
Seite wird geladen ...
Seite wird geladen ...
Seite wird geladen ...
Seite wird geladen ...
Seite wird geladen ...
Seite wird geladen ...
Seite wird geladen ...
Seite wird geladen ...
Seite wird geladen ...
Seite wird geladen ...
Seite wird geladen ...
Seite wird geladen ...
Seite wird geladen ...
Seite wird geladen ...
Seite wird geladen ...
Seite wird geladen ...
Seite wird geladen ...
Seite wird geladen ...
Seite wird geladen ...
Seite wird geladen ...
Seite wird geladen ...
Seite wird geladen ...
Seite wird geladen ...
Seite wird geladen ...
Seite wird geladen ...
Seite wird geladen ...
Seite wird geladen ...
Seite wird geladen ...
Seite wird geladen ...
Seite wird geladen ...
Seite wird geladen ...
Seite wird geladen ...
Seite wird geladen ...
Seite wird geladen ...
Seite wird geladen ...
Seite wird geladen ...
Seite wird geladen ...
Seite wird geladen ...
Seite wird geladen ...
Seite wird geladen ...
Seite wird geladen ...
Seite wird geladen ...
Seite wird geladen ...
Seite wird geladen ...
Seite wird geladen ...
Seite wird geladen ...
Seite wird geladen ...
Seite wird geladen ...
Seite wird geladen ...
Seite wird geladen ...
Seite wird geladen ...
Seite wird geladen ...
Seite wird geladen ...
Seite wird geladen ...
Seite wird geladen ...
Seite wird geladen ...
Seite wird geladen ...
Seite wird geladen ...
Seite wird geladen ...
Seite wird geladen ...
Seite wird geladen ...
Seite wird geladen ...
Seite wird geladen ...
Seite wird geladen ...
Seite wird geladen ...
Seite wird geladen ...
Seite wird geladen ...
Seite wird geladen ...
Seite wird geladen ...
Seite wird geladen ...
Seite wird geladen ...
Seite wird geladen ...
Seite wird geladen ...
Seite wird geladen ...
Seite wird geladen ...
Seite wird geladen ...
Seite wird geladen ...
Seite wird geladen ...
Seite wird geladen ...
Seite wird geladen ...
Seite wird geladen ...
Seite wird geladen ...
Seite wird geladen ...
Seite wird geladen ...
Seite wird geladen ...
Seite wird geladen ...
Seite wird geladen ...
Seite wird geladen ...
Seite wird geladen ...
Seite wird geladen ...
Seite wird geladen ...
Seite wird geladen ...
Seite wird geladen ...
Seite wird geladen ...
Seite wird geladen ...
Seite wird geladen ...
Seite wird geladen ...
Seite wird geladen ...
Seite wird geladen ...
Seite wird geladen ...
Seite wird geladen ...
Seite wird geladen ...
Seite wird geladen ...
Seite wird geladen ...
Seite wird geladen ...
Seite wird geladen ...
Seite wird geladen ...
Seite wird geladen ...
Seite wird geladen ...
Seite wird geladen ...
Seite wird geladen ...
-
 1
1
-
 2
2
-
 3
3
-
 4
4
-
 5
5
-
 6
6
-
 7
7
-
 8
8
-
 9
9
-
 10
10
-
 11
11
-
 12
12
-
 13
13
-
 14
14
-
 15
15
-
 16
16
-
 17
17
-
 18
18
-
 19
19
-
 20
20
-
 21
21
-
 22
22
-
 23
23
-
 24
24
-
 25
25
-
 26
26
-
 27
27
-
 28
28
-
 29
29
-
 30
30
-
 31
31
-
 32
32
-
 33
33
-
 34
34
-
 35
35
-
 36
36
-
 37
37
-
 38
38
-
 39
39
-
 40
40
-
 41
41
-
 42
42
-
 43
43
-
 44
44
-
 45
45
-
 46
46
-
 47
47
-
 48
48
-
 49
49
-
 50
50
-
 51
51
-
 52
52
-
 53
53
-
 54
54
-
 55
55
-
 56
56
-
 57
57
-
 58
58
-
 59
59
-
 60
60
-
 61
61
-
 62
62
-
 63
63
-
 64
64
-
 65
65
-
 66
66
-
 67
67
-
 68
68
-
 69
69
-
 70
70
-
 71
71
-
 72
72
-
 73
73
-
 74
74
-
 75
75
-
 76
76
-
 77
77
-
 78
78
-
 79
79
-
 80
80
-
 81
81
-
 82
82
-
 83
83
-
 84
84
-
 85
85
-
 86
86
-
 87
87
-
 88
88
-
 89
89
-
 90
90
-
 91
91
-
 92
92
-
 93
93
-
 94
94
-
 95
95
-
 96
96
-
 97
97
-
 98
98
-
 99
99
-
 100
100
-
 101
101
-
 102
102
-
 103
103
-
 104
104
-
 105
105
-
 106
106
-
 107
107
-
 108
108
-
 109
109
-
 110
110
-
 111
111
-
 112
112
-
 113
113
-
 114
114
-
 115
115
-
 116
116
-
 117
117
-
 118
118
-
 119
119
-
 120
120
-
 121
121
-
 122
122
-
 123
123
-
 124
124
-
 125
125
-
 126
126
-
 127
127
-
 128
128
-
 129
129
-
 130
130
-
 131
131
-
 132
132
-
 133
133
-
 134
134
-
 135
135
-
 136
136
-
 137
137
-
 138
138
-
 139
139
-
 140
140
-
 141
141
-
 142
142
-
 143
143
-
 144
144
-
 145
145
-
 146
146
-
 147
147
-
 148
148
-
 149
149
-
 150
150
-
 151
151
-
 152
152
-
 153
153
-
 154
154
-
 155
155
-
 156
156


Silvercrest SRR 3.7 B2 Operating Instructions Manual
- Kategorie
- Rasierer für Männer
- Typ
- Operating Instructions Manual
in anderen Sprachen
- slovenčina: Silvercrest SRR 3.7 B2
- polski: Silvercrest SRR 3.7 B2
Verwandte Artikel
-
Silvercrest SRR 3.7 A1 Operating Instructions Manual
-
Silvercrest SRR 3.7 D5 Bedienungsanleitung
-
Silvercrest 115785 Operating Instructions Manual
-
-
-
-
-
-
-