Hama 00104951 Bedienungsanleitung
- Kategorie
- Wecker
- Typ
- Bedienungsanleitung
Dieses Handbuch ist auch geeignet für

00104951/02.11
All listed brands are trademarks of the corresponding companies. Errors and omissions excepted,
and subject to technical changes. Our general terms of delivery and payment are applied.
Hama GmbH & Co KG
D-86651 Monheim/Germany
www.hama.com

THE SMART SOLUTION
00104951
Funkwecker »Fußball«
Radio Controlled
Alarm Clock

2
Funktionen:
* Funkgesteuert (über Zeitsignalsender DCF77)
* Großes LCD-Display
* Anzeige von Stunde, Minute, Sekunde; Monat, Datum, Wochentag, Weckzeit
* Zweite Zeitzone (-9 Stunden bis +9 Stunden)
* Automatische Sommer-/ Winterzeitumstellung
* 2 Alarmzeiten mit programmierbarer Weckwiederholung (Schlummerzeit)
* Unabhängige Weckzeiteinstellung – Ansteigendes Wecksignal (Alarm 1) & einfaches
Wecksignal (Alarm 2)
* Zeitanzeige im 12- oder 24-h-Format möglich
* Wochentagsanzeige in 5 Sprachen
* Batteriestandsanzeige
* Hintergrundbeleuchtung
* Betrieb mit 2 x 1,5V-Batterie
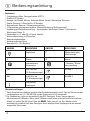
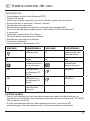
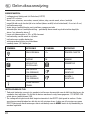
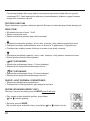
ANZEIGE BEDEUTUNG ANZEIGE BEDEUTUNG
Funksignal Z
z
Wiederholung der
Weckanzeige
DDatum MMonat
Internationale
Zeitanzeige
* Sommer-/ Winter-
zeitumstellung
PM P. M. (Nur bei
12-Stundenanzeige)
ALARM 1
AM A.M. (Nur bei
12-Stundenanzeige)
ALARM 2
schwaches
Funksignal
Uhrzeiteinstellungen
* Nach Einsetzen der Batterie leuchten alle Anzeigeelemente kurz auf. Zeit und Datum werden
vorübergehend auf 1 D 1 M WE 0:00 und die Alarmzeit auf 7:00 eingestellt.
* Der Funkwecker sucht nun automatisch das DCF-Zeitsignal. Dieser Vorgang dauert
üblicherweise 3-5 Minuten. Wenn nach 5 Minuten noch keine automatische Zeiteinstellung
erfolgt ist, stellen Sie die Uhrzeit über die MODE-Taste manuell ein. Der Wecker sucht
automatisch stündlich nach dem Zeitsignal. Nach erfolgreichem Empfang wird die manuell
eingestellte Zeit ersetzt.
d Bedienungsanleitung

3
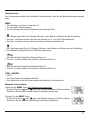
Funktionstasten
Der Funkwecker verfügt über 6 einfache Funktionstasten, über die der Betrieb gesteuert werden
kann.
MODE
• Zum Anzeigen von Alarm 1 und Alarm 2
• Zur manuellen Zeiteinstellung
• Zur Einstellung einer zweiten Zeitzone (internationale Zeit).
• Zum Steigern des Werts für Stunden, Minuten, Jahr, Monat und Datum bei der Einstellung
• Zum Hin- und Herwechseln zwischen der Anzeige im 12- und im 24-Stundenformat
• Zum Hin- und Herwechseln zwischen Ortszeit und internationaler Zeit.
• Zum Verringern des Werts für Stunden, Minuten, Jahr, Monat und Datum bei der Einstellung
• Zum Wählen der Sprache für die Wochentagsanzeige.
SET
• Zum Einstellen der täglichen Weckzeit (Alarm 1)
• Zum Ein- und Ausschalten der täglichen Weckzeit (Alarm 1).
SET
• Zum Einstellen der täglichen Weckzeit (Alarm 2)
• Zum Ein- und Ausschalten der täglichen Weckzeit (Alarm 2).
LIGHT • SNOOZE
• LICHT
• Zum Einschalten des Hintergrundlichts
• Zum Wechseln in den Schlummermodus bei aktivierter Alarmfunktion
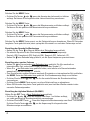
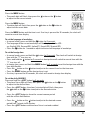
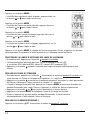
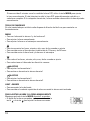
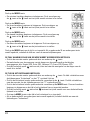
Manuelle Zeiteinstellung
Halten Sie die MODE-Taste drei Sekunden lang gedrückt.
• Drücken Sie Tasten oder , wenn die Stundenanzeige zu blinken anfängt.
So können Sie die gewünschte Stundeneinstellung vornehmen.
Drücken Sie die MODE-Taste:
• Drücken Sie Tasten oder , wenn die Minutenanzeige zu blinken anfängt.
So können Sie die gewünschte Minuteneinstellung vornehmen.

4
Drücken Sie die MODE-Taste:
• Drücken Sie Tasten oder , wenn die Anzeige der Jahreszahl zu blinken
anfängt. So können Sie die gewünschte Jahreseinstellung vornehmen.
Drücken Sie die MODE-Taste:
• Drücken Sie Tasten oder , wenn die Monatsanzeige zu blinken anfängt.
So können Sie die gewünschte Monatseinstellung vornehmen.
Drücken Sie die MODE-Taste:
• Drücken Sie Tasten oder , wenn die Datumsanzeige zu blinken anfängt.
So können Sie die gewünschte Datumseinstellung vornehmen.
Drücken Sie die MODE-Taste erneut, um die Zeiteinstellung zu akzeptieren. Wenn 30 Sekunden
lang keine Taste gedrückt wird, dann springt die Uhr wieder zur normalen Zeitanzeige zurück.
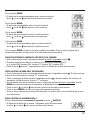
Einstellung der Sprache für Wochentage
• Halten Sie die Taste im Normal-Modus drei Sekunden lang gedrückt.
• Die aktuelle Sprache für die Wochentage wird im LCD-Display angezeigt:
Deutsch (GE), Französisch (FR), Englisch (EN), Spanisch (SP), Italienisch (IT).
• Halten Sie eine Sekunde lang gedrückt, um die Sprachanpassung vorzunehmen.
Einstellung einer zweiten Zeitzone
• Halten Sie im Normalmodus drei Sekunden lang gedrückt. Die Uhr wechselt zur
internationalen Zeit, und auf dem Display erscheint das Symbol „F“.
• Wenn Sie drei Sekunden lang gedrückt halten, wird wieder zum Normalzeitmodus
gewechselt, und das Symbol „F“ erlischt.
• Zum Einstellen der zweiten Zeitzone wechseln Sie wieder zur internationalen Zeit und halten
die MODE-Taste drei Sekunden lang gedrückt. Die Stundenanzeige fängt an zu blinken.
• Drücken Sie die Tasten oder , um für die zweite Zeitzone die Stundeneinstellung
vorzunehmen.
• Drücken Sie die MODE-Taste erneut, um diese Zeiteinstellung zu akzeptieren.
• Wenn 30 Sekunden lang keine Taste gedrückt wird, wechselt der Wecker wieder in den
normalen Zeitanzeigemodus.
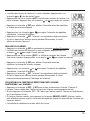
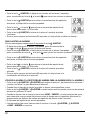
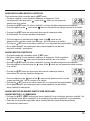
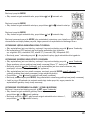
Einstellung der täglichen Weckzeit (ALARM 1)
Halten Sie die SET-Taste drei Sekunden lang gedrückt:
• Drücken Sie oder , wenn die Anzeige von Alarm 1 zu blinken anfängt,
um so die gewünschte Stundeneinstellung vorzunehmen.
• Drücken Sie die SET-Taste . Daraufhin beginnt die Minutenanzeige von Alarm 1 zu blinken.
Drücken Sie die Tasten oder , um die Anpassung für die gewünschte
Minutenanzeige vorzunehmen.

5
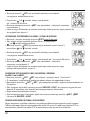
• Drücken Sie zum Anzeigen des aktuellen Schlummerzeitraums die
SET-Taste , wenn das Minutenfeld blinkt.
• Drücken Sie die Tasten oder , um die Schlummerzeit auf eine
gewünschte Länge zwischen 1 und 59 Minuten einzustellen.
• Drücken Sie die SET-Taste erneut, um die Zeiteinstellung für Alarm 1
zu akzeptieren und die Weckfunktion zu aktivieren.
• Wenn 30 Sekunden lang keine Taste gedrückt wird, dann übernimmt der Wecker die Anzeige
von Alarm 1.
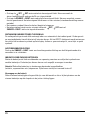
Einstellung der täglichen Weckzeit (ALARM 2)
• Halten Sie die SET-Taste drei Sekunden lang gedrückt.
• Drücken Sie die Tasten oder , wenn die Stundenanzeige von
Alarm 2 zu blinken anfängt, um so die gewünschte Stundeneinstellung vorzunehmen.
• Drücken Sie die SET-Taste . Daraufhin beginnt die Anzeige von Alarm 2 zu blinken.
• Drücken Sie dann die Tasten oder , um die gewünschte Minuteneinstellung
vorzunehmen.
• Drücken Sie zum Anzeigen des aktuellen Schlummerzeitraums die
SET-Taste , wenn das Minutenfeld blinkt.
• Drücken Sie die Tasten oder , um die Schlummerzeit auf die
Auf eine gewünschte Länge zwischen 1 und 59 Minuten einzustellen.
• Drücken Sie die SET-Taste erneut, um die Zeiteinstellung für Alarm 2
zu akzeptieren und die Weckfunktion zu aktivieren.
• Wenn 30 Sekunden lang keine Taste gedrückt wird, dann übernimmt der Wecker die Anzeige
von Alarm 2.
Verwendung der Weck- und Schlummerfunktion für ALARM 1 oder ALARM 2
• Zum Ein- und Ausschalten von Alarm 1 bzw. Alarm 2 drücken Sie die SET-Tasten oder .
• Wenn die aktivierte Weckzeit erreicht ist, ertönt das entsprechende Wecksignal.
• Durch Druck auf die SET-Taste / wird das Wecksignal für die nächsten 24 Stunden
beendet.
• Wenn Sie auf die Taste LIGHT • SNOOZE drücken, wird das Wecksignal unterbrochen, ertönt
aber nach Ablauf der Schlummerzeit erneut (werkseitig sind 4 Minuten voreingestellt).
• Die Alarmanzeige blinkt.
• Nach 4 Minuten endet das Wecksignal, wenn die Tasten oder oder LIGHT • SNOOZE
nicht gedrückt werden.

6
Empfang des Funksignals
Der Funkwecker empfängt automatisch jede Stunde das Funksignal. Der Empfangsvorgang
dauert etwa 3-5 Minuten. Während des Signalempfangs ist das DCF-Funkturmsymbol
im Display zu sehen. Sonst wird es nicht angezeigt.
Hintergrundbeleuchtung
Wenn Sie die Taste LIGHT • SNOOZE drücken, leuchtet das Hintergrundlicht für drei Sekunden.
Batteriestandsanzeige
Wenn die Batterieleistung unter das für den Weckerbetrieb notwendige Niveau fällt, dann
beginnt die Batteriestandanzeige zu leuchten. In diesem Fall sollte die Batterie schnellstmöglich
ausgetauscht werden.
Achtung! Leere Batterien sind umweltgerecht zu entsorgen.
Batteriewechsel:
Bitte verwenden Sie nur den für dieses Gerät zugelassenen Batterietyp und achten Sie beim
einlegen der neuen Batterien auf die korrekte Polung.

7
Features:
* Controlled by Radio Signal (German DCF77)
* Large LCD display
* Displays Hour, Minute, Second; Month, Date, Day of Week, Alarm Time
* Foreign Time Setting (-9 Hour to +9 Hour)
* Summer Time Indicator
* Dual Alarm with programmable snooze period
* Independent Alarm Time Setting - Crescendo Daily Alarm1 & Single Alarm 2
* 12 Hour or 24 Hour Display Format Selectable
* Weekday Indication in 5 Languages
* battery Low Indicator
* Backlight function
* Two Battery (1.5V) Operation
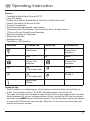
INDICATOR STANDING FOR INDICATOR STANDING FOR
Radio Signal Z
z
Repeat Alarm
Indication
DDate MMonth
Foreign Time
Indication
Summer Time
Indication
PM PM
(12 Hr Display only)
ALARM 1
AM AM
(12 Hr Display only)
ALARM 2
Radio Signal
WeAkly
Setting the time
* Once the battery is installed properly, all the displays on the face of the clock will light up
briey. The time & date will be: 1 D1 M WE 0:00 and the alarm1 time will be 7:00.
* Your radio-controlled clock will begin to seek out the DCF time signal automatically. This takes
typically between 3-5 minutes in good conditions. If after 5 minutes the DCF time has not been
received, use the MODE key to set the time manually. The clock will then automatically attempt
to receive the DCF time each hour every day. When this is successful, the received time will
override the manually set time.
g Operating Instruction

8
Function Keys
Your radio-controlled clock has 6 easy to use function keys that control operation:
MODE
• To view alarm1 time or alarm2 time
• To set the time manually
• To set the foreign time manually.
• To increase the hour, minute, year, month, date during time setting
• To switch between 12 hour display format and 24 hour display format.
• To switch between the local time and foreign time
• To decrease the hour, minute, year, month, date, during time setting
• To select the language of day of week.
SET
• To set the daily alarm1
• To turn on or turn off the daily alarm1
SET
• To set the daily alarm2
• To turn on or turn off the daily alarm2
LIGHT • SNOOZE
• To turn on the backlight
• To switch to snooze mode when the alarm is activated
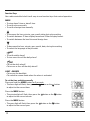
To set the time and date manually
Press and hold the MODE button for 3 seconds:
• The hour digit will ash, then press the button or the button
to adjust to the correct hour.
Press the MODE button:
• The minute digit will ash, then press the button or the button
to adjust to the correct minute.
Press the MODE button:
• The year digit will ash, then press the button or the button
to adjust to the correct year.

9
Press the MODE button:
• The month digit will ash, then press the button or the button
to adjust to the correct month.
Press the MODE button:
• The date digit will ash, then press the button or the button to
adjust to the correct date.
Press the MODE button and the time is set. If no key is pressed for 30 seconds, the clock will
revert to normal time display.
To set the language of weekdays
• In normal mode, press and hold the button for 3 seconds.
• The language of the current weekdays will be displayed in the LCD :
e.g. English (EN), German(GE), Italian(IT), French(FR), Spanish(SP).
• Press the button for 1 second to adjust to the correct language of weekdays.
To set the foreign time
• In normal mode, press and hold the button for 3 seconds. The clock will switch to foreign
time with the “F” icon turn on.
• Press and hold the button for 3 seconds in foreign time will switch to normal time with the
“F” icon turn off.
• In foreign time, press and hold the MODE button for 3 seconds to set the foreign time with the
hour digit ashes.
• Press the button or the button to adjust to the correct hour for the time zone.
• Press the MODE button and the foreign time is set.
• If no key is pressed for 30 seconds, the clock will revert to foreign time display.
To set the daily ALARM 1
Press and hold the SET button for 3 seconds:
• The alarm1 hour digit will ash, then press the button or the button
to adjust to the desired hour.
• Press the SET button, the alarm1 minute digit will ash, then press
the button or the button to adjust to the desired minute.
• Press the SET button to show the current snooze period
with the minute eld ashes.
• Press the button or the button to adjust to the desired snooze
period from 1 minute to 59 minutes.
• Press the SET button and the alarm1 time is set and enabled.

10
• If no key is pressed for 30 seconds, the clock will resume the alarm l display.
To set the ALARM 2
• Press and hold the SET button for 3 seconds:
• The Alarm 2 hour digit will ash, then press the button or the button
to adjust to the desired hour.
• Press the SET button, the alarm2 minute digit will ash, then press
the button or the button to adjust to the desired minute.
• Press the SET button to show the current snooze
period with the minute eld ashes.
• Press the button or the button to adjust to the desired snooze
period from 1 minute to 59 minutes.
• Press the SET button and the alarm2 time is set and enabled.
• If no key is pressed for 30 seconds, the clock will resume the alarm 2 display.
Using the Alarm and SNOOZE for daily ALARM 1 or ALARM 2
• Press the SET/ SET button to turn the alarm1 on, or the alarm1 off/ the alarm 2 on, or the
alarm2 off.
• When the current time reaches the alarm time that is enabled, the corresponding alarm is
activated.
• Press the SET/ SET button when the alarm is activated will stop the alarm for 24 hours.
• When the alarm is activated, press the SNOOZE • LIGHT button and the alarm stops but sounds
again after the snooze period (4 minutes snooze period is pre-programmed).
• The repeat alarm indicator will ash.
• The alarm will stop after 4 minutes if the SET/ SET button or SNOOZE • LIGHT button is
not pressed.
Receiving the radio control signal
The radio-controlled clock will automatically receive the radio signal every hour. It will take 3-5
minutes to receive the radio signal. If the DCF signal is received, the DCF tower will be visible on
the display, otherwise it will not.
Backlight
Press the SNOOZE • LIGHT button to light up the clock for 3 seconds.
Low battery level detection
Should the battery capacity drop to a level that is not sufcient to operate the clock, the low
battery indicator will light up. The battery should be replaced as soon as possible.

11
Attention! Please dispose of used batteries in an ecologically safe manner.
Replacing the battery:
Please use only the types of battery that are approved for this device and ensure that the polarity
is correct when inserting a new battery.

12
Caractéristiques:
* Réveil radio-piloté (émetteur allemand DCF77)
* Grand afchage LCD
* Afche les heures, les minutes, les secondes, le mois, la date, le jour de la semaine et l‘heure
d‘alarme
* Réglage de l‘heure à l‘étranger (décalage -9h à +9h)
* Symbole pour l‘heure d‘été
* Double alarme avec intervalle de répétition (snooze) programmable
* Réglage indépendant de l‘heure d‘alarme – Alarme quotidienne 1 allant en crescendo
et alarme simple 2
* Sélection du format d‘afchage 12 heures ou 24 heures
* Indication du jour de la semaine en 5 langues
* Indicateur de décharge des piles
* Fonction de rétroéclairage
* Fonctionnement avec deux piles (1,5 V)
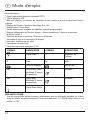
SYMBOLE SIGNIFICATION SYMBOLE SIGNIFICATION
Signal Radio Z
z
Répétition de
l‘alarme
DDate MMois
Heure à l‘étranger Heure d‘été
PM APRÈS-MIDI (pour
afchage 12 heures
Uniquement)
ALARME 1
AM Matin (pour
afchage 12 heures
Uniquement)
ALARME 2
Signal Radio Faible
RÉGLAGE DE L‘HEURE
* Une fois que les piles ont été insérées correctement, tous les afchages possibles sur la face
avant du réveil s‘allument brièvement. L‘heure et la date sont : 1 D1 M WE 0:00 et l‘alarme 1 est
réglée sur 7:00.
f Mode d‘emploi

13
* Votre réveil radio-piloté commence alors à rechercher automatiquement le signal horaire DCF.
Cela prend 3 à 5 minutes lorsque les conditions sont bonnes. Si le signal DCF n‘a pas été
reçu au bout de 5 minutes, utilisez la touche MODE pour régler l‘heure manuellement. Le réveil
réessaie automatiquement de capter le signal horaire DCF toutes les heures. Si cette tentative
a été fructueuse, l‘heure reçue remplace alors l‘heure réglée manuellement.
TOUCHES DE FONCTION
Votre réveil radio-piloté possède 6 touches de fonction simples à utiliser. Elles permettent
d‘exécuter les actions suivantes :
MODE
• Afcher l‘heure de l‘alarme 1 ou l‘heure de l‘alarme 2
• Régler l‘heure manuellement
• Régler l‘heure à l‘étranger manuellement
• Régler (avancer) l‘heure, les minutes, l‘année, le mois, la date en mode de réglage
• Passer du format d‘afchage 12 heures au format 24 heures et inversement
• Passer de l‘heure locale à l‘heure à l‘étranger et inversement
• Régler (retarder) l‘heure, les minutes, l‘année, le mois, la date en mode de réglage
• Sélectionner la langue du jour de la semaine
SET
• Régler l‘alarme quotidienne 1
• Activer ou désactiver l‘alarme quotidienne 1
SET
• Régler l‘alarme quotidienne 2
• Activer ou désactiver l‘alarme quotidienne 2
SNOOZE • LIGHT (répétition de l‘alarme/rétroéclairage)
• Allumer le rétroéclairage
• Passer au mode de répétition (snooze) lorsque l‘alarme est activée
RÉGLAGE MANUEL DE L‘HEURE ET DE LA DATE
Appuyez sur la touche MODE et maintenez-la enfoncée pendant 3 secondes :
• Le chiffre des heures se met à clignoter, appuyez alors sur la
touche ou pour régler l‘heure.

14
Appuyez sur la touche MODE :
• Le chiffre des minutes se met à clignoter, appuyez alors sur
la touche ou pour régler les minutes.
Appuyez sur la touche MODE :
• Le chiffre de l‘année se met à clignoter, appuyez alors sur
la touche ou pour régler l‘année.
Appuyez sur la touche MODE :
• Le chiffre du mois se met à clignoter, appuyez alors sur la
touche ou pour régler le mois.
Appuyez sur la touche MODE :
• Le chiffre de la date se met à clignoter, appuyez alors sur la
touche ou pour régler la date.
Appuyez sur la touche MODE, le réglage de l‘heure est terminé. Si vous n‘appuyez sur aucune
touche pendant 30 secondes, le réveil repassera sur l‘afchage normal de l‘heure.
SÉLECTION DE LA LANGUE D‘AFFICHAGE DES JOURS DE LA SEMAINE
• En mode normal, appuyez sur la touche pendant 3 secondes.
• La langue actuelle d‘afchage des jours se met à clignoter à l‘écran LCD :
p. ex. anglais (EN), allemand (GE), italien (IT), français (FR), espagnol (SP).
• Appuyez sur la touche pendant 1 seconde pour régler la langue d‘afchage que vous
désirez.
RÉGLAGE DE L‘HEURE À L‘ÉTRANGER
• En mode normal, appuyez sur la touche et maintenez-la enfoncée pendant 3 secondes. Le
réveil passera sur l‘heure à l‘étranger et le symbole « F » s‘afchera.
• Appuyez sur la touche et maintenez-la enfoncée pendant 3 secondes. Le réveil passe alors
de l‘heure à l‘étranger à l‘heure locale et le symbole « F » disparaît.
• L‘heure à l‘étranger étant afchée, appuyez sur la touche MODE et maintenez-la enfoncée
pendant 3 secondes pour régler l‘heure à l‘étranger, le chiffre des heures clignote alors.
• Appuyez sur la touche ou pour régler l‘heure pour ce fuseau horaire.
• Appuyez sur la touche MODE, le réglage de l‘heure à l‘étranger est terminé.
• Si vous n‘appuyez sur aucune touche pendant 30 secondes, le réveil retourne
automatiquement à l‘afchage de l‘heure à l‘étranger.
RÉGLAGE DE L‘ALARME QUOTIDIENNE 1
Appuyez sur la touche SET et maintenez-la enfoncée pendant 3 secondes :

15
• Le chiffre des heures de l‘alarme 1 se met à clignoter, appuyez alors sur
la touche ou an de régler l‘heure.
• Appuyez ensuite sur la touche SET, le chiffre des minutes de l‘alarme 1 se
met à clignoter. Appuyez alors sur la touche ou pour régler les minutes.
• Appuyez sur la touche SET pour afcher l‘intervalle actuel de répétition,
le champ des minutes clignote.
• Appuyez alors sur la touche ou pour régler l‘intervalle de répétition
souhaité de 1 minute à 59 minutes.
• Appuyez sur la touche SET , l‘alarme 1 est maintenant réglée et activée.
• Si vous n‘appuyez sur aucune touche pendant 30 secondes, le réveil
afche à nouveau l‘alarme 1.
RÉGLAGE DE L‘ALARME 2
• Appuyez sur la touche SET et maintenez-la enfoncée pendant 3 secondes :
• Le chiffre des heures de l‘alarme 2 se met à clignoter, appuyez alors sur
la touche ou pour régler l‘heure désirée.
• Appuyez ensuite sur la touche SET , le chiffre des minutes de l‘alarme
2 se met à clignoter. Appuyez alors sur la touche ou pour régler les minutes.
• Appuyez sur la touche SET pour afcher l‘intervalle actuel de
répétition, le champ des minutes clignote.
• Appuyez alors sur la touche ou pour régler l‘intervalle de répétition
souhaité de 1 minute à 59 minutes.
• Appuyez sur la touche SET , l‘alarme 2 est maintenant réglée et activée.
• Si vous n‘appuyez sur aucune touche pendant 30 secondes, le réveil
retourne automatiquement à l‘afchage de l‘alarme 2.
UTILISATION DE LA FONCTION DE RÉPÉTITION POUR L‘ALARME
QUOTIDIENNE 1 ou L‘ALARME 2
• Appuyez sur la touche SET / SET pour activer ou désactiver l‘alarme 1/l‘alarme 2.
• Lorsque l‘heure réglée pour l‘alarme est arrivée, l‘alarme correspondante retentit.
• Si vous appuyez sur la touche SET / SET alors que l‘alarme retentit, l‘alarme est arrêtée pour
les 24 prochaines heures.
• Si, lorsque l‘alarme retentit, vous appuyez sur la touche SNOOZE • LIGHT, l‘alarme s‘arrête
puis retentit à nouveau une fois l‘intervalle de répétition écoulé (un intervalle de 4 minutes est
réglé par défaut).
• Le symbole de répétition sera alors afché à l‘écran.

16
• L‘alarme s‘arrêtera au bout de 4 minutes si ni la touche SET / SET ni la touche
SNOOZE • LIGHT n‘est actionnée.
RÉCEPTION DU SIGNAL RaDII-PILOTÉ
Le réveil radio-piloté reçoit automatiquement le signal horaire toutes les heures. La procédure
de réception du signal radio dure 3-5 minutes. Si le signal DCF est capté, le symbole représen-
tant un émetteur DCF apparaît à l‘écran ; dans le cas contraire, il n‘apparaît pas.
RETROECLAIRAGE
Appuyez sur la touche SNOOZE • LIGHT an d‘allumer le rétroéclairage du réveil pendant 3
secondes.
INDICATEUR DE DÉCHARGE DES PILES
Si la capacité des piles baisse en dessous d‘un certain seuil ne permettant plus un fonctionne-
ment du réveil, l‘indicateur de décharge des piles s‘afche. Dans ce cas, remplacez les piles
dès que possible.
Attention ! Veuillez recycler les piles usagées conformément aux normes de protection de
l‘environnement.
Remplacement des piles :
Utilisez uniquement des piles appropriées pour cet appareil et insérez les piles neuves en
veillant à respecter la polarité.

17
CARACTERÍSTICAS:
* Controlado por señal de radio (Alemania DCF77)
* Pantalla LCD grande
* Indica horas, minutos, segundos; mes, fecha, día de la semana, hora de alarma
* Ajuste de hora en el extranjero (-9 horas a +9 horas)
* Indicador de horario de verano
* Alarma dual con periodo de repetición o retraso de alarma programable
* Ajuste de la hora de alarma independiente – Alarma diaria 1 & Alarma individual 2
in crescendo
* Formato de visualización de 12 ó 24 horas
* Indicación del día de la semana en 5 idiomas
* Indicador de carga baja de las baterías
* Función de luz de fondo
* Funcionamiento con dos baterías (1,5 V)
INDICADOR CORRESPONDE AINDICADOR CORRESPONDE A
señal de radio Z
z
indicación de repe-
tición de Alarma
Dfecha Mmes
indicación de hora
en el extranjero
indicación de
horario de verano
PM PM (sólo se ve
en formato de 12
horas)
ALARMA 1
AM AM (sólo se ve
en formato de 12
horas)
ALARMA 2
señal de radio
semanal
AJUSTE DE LA HORA
*
Una vez que las baterías se han instalado correctamente, todas las indicaciones que se
encuentran en el frontal del reloj se iluminan brevemente. La hora y la fecha serán: 1 D1 M WE
0:00 y la alarma 1 será 7:00.
* Su reloj controlado por señal de radio empezará a buscar la señal horaria DCF
automáticamente. Esto suele tardar entre 3 y 5 minutos bajo buenas condiciones.
e Instrucciones de uso

18
Si transcurridos 5 minutos no se ha recibido la hora DCF, utilice la tecla MODO para ajustar
la hora manualmente. El reloj intentará recibir la hora DCF automáticamente cada día y a
cada hora completa. Si la recepción tiene éxito, la hora recibida sobrescribirá la hora ajustada
manualmente.
TECLAS DE FUNCIONES
Su reloj controlado por señal de radio dispone de 6 teclas de fácil uso para controlar su
funcionamiento:
MODO
• Para ver la hora de la alarma 1 y de la alarma 2
• Para ajustar la hora manualmente
• Para ajustar la hora en el extranjero manualmente.
• Para incrementar las horas, minutos, año, mes, fecha cuando se ajusta
• Para cambiar entre el formato de visualización de 12 horas y de 24 horas.
• Para cambiar entre la hora local y la hora en el extranjero
• Para reducir las horas, minutos, año, mes, fecha cuando se ajusta
• Para seleccionar el idioma de los días de la semana.
AJUSTAR
• Para ajustar la alarma diaria 1
• Para activar o desactivar la alarma horaria 1
AJUSTAR
• Para ajustar la alarma diaria 2
• Para activar o desactivar la alarma horaria 2
LIGHT • SNOOZE
• Para encender la luz de fondo
• Para cambiar al modo de repetición de alarma cuando la alarma está activada
PARA AJUSTAR LA HORA Y LA FECHA MANUALMENTE
Mantenga pulsada la tecla MODO durante 3 segundos:
• El dígito de las horas parpadea, pulse a continuación la
tecla o la tecla para ajustar las horas correctas.

19
Pulse la tecla MODO:
• El dígito de los minutos parpadea, pulse a continuación la
tecla o la tecla para ajustar los minutos correctos.
Pulse la tecla MODO:
• El dígito del año parpadea, pulse a continuación la
tecla o la tecla para ajustar el año correcto.
Pulse la tecla MODO:
• El dígito del mes parpadea, pulse a continuación la
tecla o la tecla para ajustar el mes correcto.
Pulse la tecla MODO:
• El dígito de la fecha parpadea, pulse a continuación la
tecla o la tecla para ajustar la fecha correcta.
Pulse la tecla MODO y la hora y la fecha quedarán ajustadas. Si no se pulsa ninguna tecla
durante 30 segundos, el reloj vuelve a la indicación normal de la hora.
PARA SELECCIONAR EL IDIOMA DE LOS DÍAS DE LA SEMANA
• En el modo normal, pulse y mantenga pulsada durante 3 segundos la tecla .
• El idioma actual de los días de la semana se visualiza en la pantalla LCD :
p. ej, inglés (EN), alemán (GE), italiano (IT), francés (FR), español (SP).
• Pulse la tecla durante 1 segundo para ajustar el idioma de los días de la semana.
PARA AJUSTAR LA HORA EN EL EXTRANJERO
• En el modo normal, pulse y mantenga pulsada durante 3 segundos la tecla . El reloj conmuta
a la hora en el extranjero y el icono “F” se enciende.
• Pulse y mantenga pulsada durante 3 segundos la tecla si desea cambiar de la hora en el
extranjero a la hora normal, el icono “F” se apaga.
• En el modo de hora en el extranjero, pulse y mantenga pulsada durante 3 segundos la tecla
MODO para ajustar la hora en el extranjero, el dígito de las horas parpadea.
• Pulse la tecla o la tecla para ajustar la hora correcta de la zona horaria.
• Pulse la tecla MODO y la hora en el extranjero quedará ajustada.
• Si no se pulsa ninguna tecla durante 30 segundos, el reloj volverá a la visualización de la hora
en el extranjero.
PARA AJUSTAR LA ALARMA DIARIA 1
Pulse y mantenga pulsada durante 3 segundos la tecla AJUSTAR:
• El dígito de las horas de la alarma 1 parpadea, pulse a continuación
la tecla o la tecla para ajustar las horas que desee.
Seite laden ...
Seite laden ...
Seite laden ...
Seite laden ...
Seite laden ...
Seite laden ...
Seite laden ...
Seite laden ...
Seite laden ...
Seite laden ...
Seite laden ...
Seite laden ...
Seite laden ...
Seite laden ...
-
 1
1
-
 2
2
-
 3
3
-
 4
4
-
 5
5
-
 6
6
-
 7
7
-
 8
8
-
 9
9
-
 10
10
-
 11
11
-
 12
12
-
 13
13
-
 14
14
-
 15
15
-
 16
16
-
 17
17
-
 18
18
-
 19
19
-
 20
20
-
 21
21
-
 22
22
-
 23
23
-
 24
24
-
 25
25
-
 26
26
-
 27
27
-
 28
28
-
 29
29
-
 30
30
-
 31
31
-
 32
32
-
 33
33
-
 34
34


Hama 00104951 Bedienungsanleitung
- Kategorie
- Wecker
- Typ
- Bedienungsanleitung
- Dieses Handbuch ist auch geeignet für
in anderen Sprachen
- français: Hama 00104951 Le manuel du propriétaire
- español: Hama 00104951 El manual del propietario
- italiano: Hama 00104951 Manuale del proprietario
- Nederlands: Hama 00104951 de handleiding
- polski: Hama 00104951 Instrukcja obsługi
Verwandte Papiere
-
Hama 00186356 Bedienungsanleitung
-
Hama 00104958 Bedienungsanleitung
-
-
Hama EWS-870 Benutzerhandbuch
-
Hama 00186357 LCD Thermometer Bedienungsanleitung
-
-
-
-
-