Parkside KH 3135 PALM DETAIL SANDER Benutzerhandbuch
- Kategorie
- Power Sanders
- Typ
- Benutzerhandbuch
Dieses Handbuch eignet sich auch für

PMS 130
2004
manual PMS 130 03.12.2003 9:09 Uhr Seite 1

PARKSIDE
2D2
Kompernaß Handelsgesellschaft mbH
Burgstraße 21 · D-44867 Bochum (Germany)
Stand der Informationen 11/2003 · Ident.-No.: PMS130-112003-1
D Bedienungs- und Sicherheitshinweise Seite 4 - 9
GB Operating and safety instructions Page 10 - 15
F Mode d'emploi et instructions de sécurité Page 16 - 21
I Informazioni di sicurezza e istruzioni per l‘uso Pagina 22 - 27
E Instrucciones para el manejo y la seguridad Página 28 - 33
P Instruções de utilização e de segurança Página 34 - 39
NL Bedienings- en veiligheidsaanwijzingen Pagina 40 - 45
GR Àԉ›ÍÂȘ ¯ÂÈÚÈÛÌÔ‡ Î·È ·ÛÊ·Ï›·˜ ™ÂÏ›‰· 46 - 51
PL Wskazówki dotyczàce obs∏ugi i bezpieczeƒstwa Strona 52 - 57
CZ Pokyny k ovládání Strana 58 - 63
FIN Käyttö- ja turvaohjeet Sivu 64 - 68
S Användar- och Säkerhetsanvisning Sidan 70 - 74
Garantie/Warranty/Garantie/Garanzia/Garantía/Garantia/
Garantie/Garantie/
∂°°À∏™∏/Záruka/Takuu/Garanti 76 - 80
manual PMS 130 03.12.2003 9:09 Uhr Seite 2

PARKSIDE
3D
3D3
A B
C D
manual PMS 130 03.12.2003 9:10 Uhr Seite 3

Inhalt
Einleitung
· Bestimmungsgemäßer Gebrauch Seite 5
· Ausstattung Seite 5
· Technische Daten Seite 5
Sicherheit
· Spezifische Sicherheitshinweise
für Schleifgeräte Seite 6
· Wichtige Hinweise zum Schleifen
von bleihaltigen Farben Seite 6
· Schutzmaßnahmen Seite 6
Bedienung
· Hinweise zum Gebrauch
von Schleifpapier Seite 7
· Schleifpapier anbringen Seite 7
· Staubsauger anbringen Seite 7
· Inbetriebnahme Seite 7
Reinigung/Entsorgung
· Reinigung von Material,
Arbeitsplatz und Gerät Seite 8
· Entsorgung Seite 8
Informationen
· Konformitätserklärung Seite 9
PARKSIDE
4D
Inhalt
4D
4D4D
manual PMS 130 03.12.2003 9:10 Uhr Seite 4

PARKSIDE
Einleitung
D5
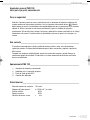
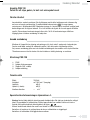
Handschleifer PMS 130
Ideal zum Schleifen, Polieren, Entrosten u.v.m.
Zu Ihrer Sicherheit
Machen Sie sich Bitte unbedingt vor der ersten Inbetriebnahme mit den Funktionen des Gerätes
vertraut und informieren Sie sich über den richtigen Umgang mit Elektrowerkzeugen. Lesen Sie hierzu
die nachfolgende Bedienungsanleitung . Zusätzlich müssen auch die allgemeinen Sicherheits-
hinweise
im beigefügten Heft strikt befolgt werden. Benutzen Sie das Gerät nur wie beschrieben
und für die angegebenen Einsatzbereiche. Nur so arbeiten Sie weitgehend gefahrlos und erzielen
bei Ihren Arbeiten bessere Ergebnisse. Bewahren Sie diese Anleitung gut auf. Händigen Sie alle
Unterlagen bei Weitergabe des Gerätes an Dritte ebenfalls mit aus.
Bestimmungsgemäßer Gebrauch
Das Gerät ist zum trockenen Schleifen und Polieren von Holz, Kunststoff, Metall, Spachtelmasse und
lackierten Oberflächen bestimmt. Es eignet sich besonders für Arbeiten an Profilen, in Ecken oder
schwer zugänglichen Stellen.
Jede andere Verwendung oder Veränderung des Gerätes gilt als nicht bestimmungsgemäß und birgt
erhebliche Unfallgefahren. Für aus bestimmungswidriger Verwendung entstandene Schäden über-
nimmt der Hersteller keine Haftung. Nicht für den gewerblichen Einsatz bestimmt.
Ausstattung PMS 130
Ein-/Ausschalter
Adapter für Staubabsaugung
Schleifplatte (360° drehbar)
Adapteranschluss
Technische Daten
Nennaufnahme: 130 Watt
Nennschleifzahl: n
o
11000 min
-1
(Leerlauf)
Schalldruck: dB (A)
Schalleistung: dB (A)
Hand-/Armvibration: < m/s
2
manual PMS 130 03.12.2003 9:10 Uhr Seite 5

PARKSIDE
Spezifische Sicherheitshinweise für Schleifgeräte
· Warnung: Gerät niemals mit beschädigter Netzleitung benutzen. Wenn die Netzleitung beschädigt
oder durchtrennt wird, Netzleitung nicht berühren. Ziehen Sie sofort den Netzstecker. Bei beschädigter
Netzleitung besteht Lebensgefahr durch elektrischen Schlag.
· Tragen Sie beim Schleifen immer eine Staubmaske und einen Gehörschutz.
· Asbesthaltiges und bleihaltiges Material und getränkte Hölzer dürfen nicht bearbeitet werden.
· Stellen Sie sicher, dass das Gerät ausgeschaltet ist, wenn Sie den Stecker in die Steckdose
einstecken.
· Führen Sie die Netzleitung immer nach hinten vom Gerät weg.
· Spannen Sie das zu bearbeitende Material immer gut fest. In keinem Fall das Werkstück mit der Hand
oder dem Fuß abstützen.
· Führen Sie das Gerät nur eingeschaltet gegen das zu bearbeitende Material.
· Das Gerät immer ausschalten und auslaufen lassen, bevor Sie es ablegen.
· Entfernen Sie unmittelbar nach dem Schleifen alle Staubreste.
· Benutzen Sie zur Staubabsaugung nur speziell geeignete Geräte. Fragen Sie im Heimwerker-
Fachhandel.
· Stellen Sie sicher, dass vor dem Einsatz des Gerätes bei Werkstücken aus Holz die Staubabsaugung
angebracht wurde.
· Verwenden Sie die Staubabsaugung nicht beim Bearbeiten von Metall.
· Verwenden Sie das Gerät niemals ohne Schleifpapier.
· Verwenden Sie das Gerät niemals ohne Schleifplatte.
· Niemals Kindern die Benutzung des Gerätes gestatten. Verwahren Sie das Gerät stets für Kinder
unzugänglich.
Wichtige Hinweise zum Schleifen von bleihaltigen Farben
Das Schleifen von bleihaltigen Farben oder anderen gesundheitsschädlichen Materialien wird generell
nicht empfohlen. Es ist äußerst schwierig, den Schmutzstaub unter Kontrolle zu halten.
Bleivergiftungen sind bei Kindern und Schwangeren besonders gefährlich.
Bei Gebäuden, die vor 1960 gebaut wurden, sind möglicherweise bleihaltige Farben eingesetzt
worden. Diese Farben können durchaus auch von weiteren Farbschichten überdeckt sein. Prüfen Sie
deshalb unbedingt vor der Bearbeitung die zu schleifende Fläche mit Hilfe eines entsprechenden
Test-Sets oder ziehen Sie einen Maler zu Rate.
Schutzmaßnahmen
1. Halten Sie Kinder und Schwangere unbedingt vom Arbeitsplatz fern.
2. Tragen Sie eine spezielle Maske zum Schutz vor bleihaltigem Farbstaub und Dämpfen. Stellen Sie
sicher, dass auch andere Personen die den Arbeitsplatz betreten entsprechend geschützt sind.
3. Bewahren Sie keine Lebensmittel/Getränke am Arbeitsplatz auf. Essen, trinken und rauchen Sie
nicht am Arbeitsplatz.
4. Waschen Sie sich nach Beendigung der Arbeiten äußerst gründlich, bzw. bevor Sie essen, trinken
oder rauchen.
Sicherheit
D6
manual PMS 130 03.12.2003 9:10 Uhr Seite 6

PARKSIDE
Sicherheit
D7
Hinweise zum Gebrauch von Schleifpapier
· Grobkörniges Schleifpapier: wird empfohlen zum schnellen Entfernen von Farbe, Lack und Rost
· Mittelkörniges Schleifpapier: Einsatzgebiet ist „normales“ Entfernen von Farbe, Lack und Rost
· Feinkörniges Schleifpapier: zur Oberflächenveredelung und Endbearbeitung
Schleifpapier anbringen
Achtung! Vergewissern Sie sich vor allen Arbeiten am Gerät, dass das Gerät ausgeschaltet
und der Netzstecker gezogen wurde.
1. Halten Sie den Handschleifer mit der Schleifplatte
nach oben, siehe auch Abb. C.
2. Bringen Sie das Schleifpapier passgenau auf der Schleifplatte an.
3. Stellen Sie sicher, dass die Löcher des Schleifpapiers mit den Löchern der Schleifplatte
übereinstimmen.
Wenn das Schleifblatt verschlissen ist, einfach von der Schleifplatte abnehmen und neues Schleifblatt
wie beschrieben anbringen.
Staubsauger anbringen
Achtung! Vergewissern Sie sich vor allen Arbeiten am Gerät, dass das Gerät ausgeschaltet
und der Netzstecker gezogen wurde.
Der Handschleifer ist mit einem Adapter zur Staubabsaugung ausgestattet. Verwenden Sie für Schleif-
arbeiten an Holz eine speziell geeignete Absaugvorrichtung zum Anschluss an die Staubabsaugung
.
1. Bringen Sie den Adapter für Staubabsaugung
am Adapteranschluss an der Rückseite
des Gerätes an.
2. Verbinden Sie den Schlauch des geeigneten Saugers mit dem Adapter
.
Inbetriebnahme
Die Spannung der Stromquelle muss mit den Angaben auf dem Typenschild des Gerätes
übereinstimmen. Mit 230 V gekennzeichnete Geräte können auch mit 220 V betrieben werden.
Achtung! Verdecken Sie beim Gebrauch nicht die Lüftungsschlitze.
Halten Sie den Handschleifer gemäß Abbildung A.
Stellen Sie sicher, dass die Schleifplatte
flach auf dem Werkstück aufliegt.
Der Handschleifer PMS 130 verfügt über eine 360° drehbare Schleifplatte
. Dies ermöglicht Ihnen
auch bei schwer zugänglichen Stellen eine optimale Haltung des Gerätes.
Arbeiten Sie so, dass die Staubmenge möglichst gering gehalten wird.
Bedienung
D7
manual PMS 130 03.12.2003 9:10 Uhr Seite 7

PARKSIDE
Ein- und Ausschalten:
Achtung! Vergewissern Sie sich vor dem Anschließen an die Stromversorgung, dass der Handschleifer
ausgeschaltet ist (Schalter
in Position 0).
Einschalten: Schieben Sie den Ein-/Ausschalter
nach unten, Position „1“.
Ausschalten: Schieben Sie den Ein-/Ausschalter
nach oben, Position „0“.
Reinigung von Material, Arbeitsplatz und Gerät
· Saugen Sie unmittelbar nach Beendigung der Arbeiten sämtliche Flächen im Arbeitsbereich ab
und reinigen Sie sie gründlich.
· Wechseln Sie regelmäßig den Staubbeutel und die Filter des speziellen Staubsaugers.
· Reinigen Sie mit Staub versehene Gegenstände gründlich, bevor Sie sie wieder benutzen.
Achtung! Vergewissern Sie sich vor allen Arbeiten am Gerät, dass das Gerät ausgeschaltet und
der Netzstecker gezogen wurde.
· Halten Sie das Gerät und die Lüftungsschlitze stets sauber.
Dies dient sowohl der Lebensdauer des Gerätes als auch Ihrer eigenen Sicherheit.
· Reinigen Sie das Gerät regelmäßig, am besten immer direkt nach Abschluss der Arbeit.
· Es dürfen keine Flüssigkeiten in das Innere des Gerätes gelangen. Verwenden Sie zum Reinigen
des Gehäuses ein weiches Tuch. Verwenden Sie niemals Benzin, Lösungsmittel oder Reiniger,
die Kunststoff angreifen.
Entsorgung
· Die Verpackung besteht ausschließlich aus umweltfreundlichen Materialien. Sie kann in den örtlichen
Recyclebehältern entsorgt werden.
· Möglichkeiten zur Entsorgung des ausgedienten Gerätes erfahren Sie bei Ihrer Gemeinde- oder
Stadtverwaltung.
Bedienung/Reinigung/Entsorgung
8D
manual PMS 130 03.12.2003 9:10 Uhr Seite 8

PARKSIDE
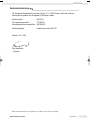
Konformitätserklärung
Wir, Kompernaß Handelsgesellschaft mbH, Burgstr. 21, D-44867 Bochum, Germany, erklären hiermit
für dieses Produkt die Übereinstimmung mit folgenden EG-Richtlinien:
Maschinenrichtlinie: (98/37 EC)
EG-Niederspannungsrichtlinie: (73/23/EEC)
Elektromagnetische Verträglichkeit: (89/336 EEC)
Maschinentyp/Type: Handschleifer PMS 130
Bochum, 30.11.2003
Hans Kompernaß
- Geschäftsführer -
Technische Änderungen im Sinne der Weiterentwicklung sind vorbehalten.
Informationen
D9
www.kompernass.com
manual PMS 130 03.12.2003 9:10 Uhr Seite 9

Introduction
· Proper use Page 11
· Features Page 11
· Technical information Page 11
Safety
· Specific safety advice
for sanding tools Page 12
· Important advice about the sanding
of paints containing lead Page 12
· Protection measures Page 12
Operation
· Advice on the use of sand paper Page 13
· Fitting the sanding sheets Page 13
· Attaching a suction device Page 13
· Preparing the sander for use Page 13
Cleaning/Disposal
· Cleaning of working materials,
the work place and tool Page 14
· Disposal Page 14
Informations
· Declaration of conformity Page 15
Contents
PARKSIDE
10 D10 GB
manual PMS 130 03.12.2003 9:10 Uhr Seite 10

PARKSIDE
Palm detail sander PMS 130
Ideal for sanding, polishing, de-rusting and much more
Your safety
Please make sure you familiarise yourself fully with the way the tool works before you use it for
the first time and that you understand how to handle electrical power tools correctly. Further details
can be found in the operating instructions . In addition to the above, you must also strictly observe
the general safety advice
contained in the accompanying booklet. Use the tool only as described
and for the indicated purposes. By doing this you will be able to work with a high level of safety and
produce better results. Keep these instructions in a safe place. If you pass the tool on to anyone else,
please ensure that you also pass on all the documentation.
Proper use
The sander is intended for dry sanding and polishing of wood, plastic, metal, filler and painted
surfaces. It is particularly suitable for working on profiles, sections, in corners or places where access
is difficult.
Any other use or modification to the tool shall be considered as improper use and could give rise
to considerable dangers. The manufacturer will not accept liability for loss or damage arising from
improper use.
Features of the PMS 130
On/Off switch
Dust extraction adapter
Backing plate (360° rotatable)
Adapter port
Technical information
Nom. power input: 130 watts
Nominal sanding speed: n
o
11,000 rpm (no load)
Sound pressure level: dB (A)
Sound power level: dB (A)
Hand/arm vibration: < m/s
2
Introduction
GB 11
manual PMS 130 03.12.2003 9:10 Uhr Seite 11

PARKSIDE
Specific safety advice for sanding tools
· Warning: Never use the tool if it has a damaged mains lead. If the mains lead becomes damaged
or severed, do not touch the mains lead. Pull out the mains plug from the socket immediately.
A damaged mains lead may result in loss of life by electric shock.
· When sanding, always use a dust mask and ear protectors.
· Do not sand materials containing asbestos or lead.
· Before you insert the mains plug into the socket, make sure that the tool is switched off.
· Always work with the mains cable leading away from the rear of the tool.
· Always ensure that the workpiece is firmly supported. In no circumstances should the workpiece
be held in place or supported by the hand or foot.
· Make sure that the tool is operating before you bring the sanding sheet into contact with
the workpiece.
· Do not put the tool down before it has been switched off and has reached a standstill.
· Remove all sanding debris and dust from the sander immediately after use.
· Use only vacuum or suction devices specially designed for dust extraction. You can find out about
this equipment at your local DIY shop.
· Before using the tool on a wooden workpiece, make sure that a dust extraction device is attached.
· Do not use vacuum dust extraction when working on metal.
· Never use the tool without a sanding sheet.
· Never use the tool without the backing plate.
· Never permit children to use the tool. Always keep the tool out of reach of children.
Important advice about the sanding of paints containing lead
The sanding of paints containing lead or other substances hazardous to health is generally not
recommended. It is extremely difficult to keep the dust under control.
Lead poisoning of children and expectant mothers is particularly dangerous.
Paint in buildings that were built before 1960 may well contain lead. These paints may have been
covered with additional layers of paint. Therefore you should always test the paint on the surface
to be sanded using a suitable testing kit or ask the advice of a decorator.
Protection measures
1. Keep children and expectant mothers away from where you are working.
2. Wear a special mask to protect yourself from dust and vapours arising from paint containing lead.
Make sure that anyone else near where you are working wears appropriate protection.
3. Do not keep any foodstuffs or drinks near where you are working. Do not eat, drink or smoke near
where you are working.
4. After finishing work be sure to wash thoroughly before eating, drinking or smoking.
Safety
12 GB
manual PMS 130 03.12.2003 9:10 Uhr Seite 12

PARKSIDE
Advice on the use of sand paper
· Coarse sand paper: is recommended for the quick removal of paint, varnish and rust.
· Medium sand paper: is most suitable for the ordinary removal of paint, varnish and rust.
· Fine sand paper: for smoothing surface coatings and finishing work.
Fitting the sanding sheets
Caution! Before starting any work on the palm detail sander, make sure that the tool is switched off
and the mains plug is out of the socket.
1. Hold the palm detail sander with the backing plate
upwards, refer to Fig. C.
2. Fit the sanding sheet exactly over the backing plate.
3. Make sure that the holes in the sanding sheet coincide with the holes in the backing plate.
When the sanding sheet becomes worn, simply remove it from the backing plate and fit a new one
as described above.
Attaching a suction device
Caution! Before starting any work on the palm detail sander, make sure that the tool is switched
off and the mains plug is out of the socket.
The palm detail sander is supplied with a dust extraction adapter. When sanding wood a suitable
suction device designed for that purpose should be attached to the dust extraction adapter
.
1. Attach the dust extraction adapter
to the adapter port at the back of the sander.
2. Connect the hose of the suitable suction device to the adapter
.
Preparing the sander for use
The mains voltage at the mains socket must match that shown on the rating plate on the tool.
Tools marked with 230 V can also be operated at 220 V.
Caution! When using the tool, never allow the ventilation slots to be covered.
Hold the sander as shown in figure A.
Ensure that the backing plate
lies flat on the workpiece.
The palm detail sander PMS 130 has a backing plate
that can rotate through 360 degrees.
This allows you to maintain the best grip on the tool even when working on difficult to access areas.
Work in such a way that creates as little dust as possible.
Operation
GB 13
manual PMS 130 03.12.2003 9:10 Uhr Seite 13

PARKSIDE
Switching on and off:
Caution! Before connecting to the electricity supply, ensure that the palm detail sander is switched
off (switch
is in position “0”).
Switching on: push the On/Off switch
downwards into position “1”.
Switching off: push the On/Off switch
upwards into position “0”.
Cleaning of working materials, the work place and tool
· Vacuum the all the surfaces in the working area immediately after finishing work and thoroughly
clean them.
· Change the dust bag and the filter on the special suction device regularly.
· Thoroughly clean any items covered with dust before you use them again.
Caution! Before starting any work on the palm detail sander, make sure that the tool is switched off
and the mains plug is out of the socket.
Always keep the tool and the ventilation slots clean.
This will maximise the service life of the tool and ensure your safety.
Clean the sander frequently; for best results, do this immediately after you have finished using it.
Do not allow any liquids to enter the sander. Use a soft cloth to clean the housing. Never use petrol,
solvents or cleaning agents that might attack plastic.
Disposal
· The packaging consists entirely of environmentally-friendly materials. It can be disposed of at your
local recycling facility.
· Contact your local refuse disposal authority for more details of how to dispose of your sander.
Operation/Cleaning/Disposal
14 GB
manual PMS 130 03.12.2003 9:10 Uhr Seite 14

PARKSIDE
Declaration of conformity
We, Kompernaß Handelsgesellschaft mbH, Burgstr. 21, D-44867 Bochum, Germany, declare that this
product complies with the following EU directives:
Machinery Directive: (98/37 EC)
EU Low Voltage Directive: (73/23/EEC)
Electromagnetic compatibility: (89/336/EEC)
Device type/Model: Palm detail sander PMS 130
Bochum, 30.11.2003
Hans Kompernaß
- Managing Director -
We reserve the right to make technical modifications in the course of further development.
Informations
GB 15
www.kompernass.com
manual PMS 130 03.12.2003 9:10 Uhr Seite 15

16 F
Table des matières
PARKSIDE
Introduction
· Utilisation conforme à l’usage prévu Page 17
· Equipement Page 17
· Données techniques Page 17
Sécurité
· Instructions de sécurité spécifiques
pour les ponceuses Page 18
· Avis important pour le ponçage
de peintures contenant du plomb Page 18
· Mesures de protection Page 18
Mode d'emploi
· Avis relatif à l’utilisation des abrasifs Page 19
· Mise en place de l’abrasif Page 19
· Mise en place de l’aspirateur Page 19
· Mise en service Page 19
Nettoyage/Elimination
· Nettoyage du matériau, du lieu
de travail et de l’appareil Page 20
· Elimination Page 20
Informations
· Déclaration de conformité Page 21
manual PMS 130 03.12.2003 9:10 Uhr Seite 16

PARKSIDE
Ponceuse vibrante PMS 130
Idéale pour poncer, polir, éliminer la rouille, et bien d’autres applications
Pour votre sécurité
Avant la première mise en service, familiarisez-vous obligatoirement avec les fonctions de l’appareil
et informez-vous sur la manipulation correcte des outils électriques. Pour ce faire, lisez le mode
d’emploi suivant . De plus, suivre également strictement les instructions générales de sécurité
du carnet ci-joint. N’utilisez l’appareil que comme il l’est décrit et pour les domaines d’utilisation
mentionnés. Ce n’est qu’ainsi que vous travaillerez pratiquement sans danger et obtiendrez les
meilleurs résultats. Conservez soigneusement le présent mode d’emploi. Si vous donnez l’appareil
à des tiers, remettez-leur également le mode d’emploi.
Utilisation conforme à l’usage prévu
L’appareil est conçu pour le ponçage à sec et le polissage de bois, de plastiques, de métaux,
de mastic et de surfaces peintes. Il est particulièrement adapté pour les travaux au niveau de profilés,
d’angles ou d’endroits difficilement accessibles.
Toute utilisation autre ou modification de la machine est considérée comme non-conforme à l’usage
prévu et implique des risques d’accident importants. Le fabricant n’assume aucune garantie ni
responsabilité pour les dommages résultant d’une utilisation non-conforme à l’usage prévu.
Equipement PMS 130
Commutateur Marche/Arrêt
Adaptateur pour l’aspiration des poussières
Plateau (pivotant 360°)
Raccordement de l’adaptateur
Données techniques
Puissance nominale: 130 watts
Vitesse nominale de ponçage: n
o
11000 tr./mn. (course à vide)
Pression acoustique: dB (A)
Puissance acoustique: dB (A)
Vibrations main/bras: < m/s
2
Introduction
F17
manual PMS 130 03.12.2003 9:10 Uhr Seite 17

PARKSIDE
Instructions de sécurité spécifiques pour les ponceuses
· Avertissement: Ne jamais utiliser l’appareil si le cordon est endommagé. Si le cordon est
endommagé ou coupé, ne pas le toucher. Débranchez immédiatement la prise. Il y a danger de
mort par électrocution en cas d’endommagement du cordon.
· Lors du travail, portez toujours un masque de protection des voies respiratoires et un casque
de protection acoustique.
· Ne pas travailler sur des matériaux contenant de l’amiante ou du plomb ni sur des bois trempés.
· Assurez-vous que l’appareil est bien éteint lorsque vous branchez la prise dans la prise murale.
· Faites toujours passer le cordon par derrière pour l’éloigner de l’appareil.
· Fixez toujours bien le matériel devant être traité. Ne jamais maintenir la pièce avec la main ou le pied.
· Ne placez l’appareil contre le matériau devant être traité que si l’appareil est en marche.
· Eteindre toujours l’appareil et le laisser se mettre à l’arrêt complet avant de le poser.
· Eliminez tous les résidus de poussière immédiatement après le travail.
· N’utilisez pour l’aspiration des poussières que des appareils spécialement adaptés. Informez-vous
auprès du commerce spécialisé dans le bricolage.
· Lors du travail sur des pièces en bois, assurez-vous avant d’utiliser l’appareil que l’aspiration des
poussières a été mise en place.
· N’utilisez pas l’aspiration des poussières pour le travail sur des métaux.
· N’utilisez jamais l’appareil sans abrasif.
· N’utilisez jamais l’appareil sans le plateau.
· Ne jamais permettre à des enfants d’utiliser l’appareil. Conservez toujours l’appareil hors de portée
des enfants.
Avis important pour le ponçage de peintures contenant du plomb
Le ponçage de peintures contenant du plomb ou d’autres matériaux toxiques est déconseillé
de manière générale. Il est extrêmement difficile de contrôler les poussières en résultant.
Les intoxications au plomb sont particulièrement dangereuses pour les enfants et les femmes
enceintes.
Dans les bâtiments construits avant 1960, il est possible que des peintures contenant du plomb aient
été utilisées. Ces peintures peuvent être recouvertes d’autres couches de peinture. Aussi, contrôlez
obligatoirement avant le travail la surface devant être poncée, à l’aide d’un set de test correspondant,
ou consultez un peintre.
Mesures de protection
1. Tenez les enfants et les femmes enceintes obligatoirement éloignés du lieu de travail.
2. Portez un masque spécial vous protégeant des poussières et des vapeurs chargées de plomb.
Assurez-vous que les personnes entrant dans le lieu de travail soient protégées en conséquence
elles aussi.
3. Ne gardez pas de produits alimentaires/boissons sur le lieu de travail. Ne mangez pas, ne buvez pas
et ne fumez pas sur le lieu de travail.
4. Les travaux terminés, ou avant de manger, de boire ou de fumer, lavez-vous avec le plus grand soin.
Sécurité
18 F
manual PMS 130 03.12.2003 9:10 Uhr Seite 18

PARKSIDE
Avis relatif à l’utilisation des abrasifs
· Abrasif de grain grossier: est recommandé pour l’élimination rapide de peintures et de la rouille
· Abrasif de grain moyen: son domaine d’utilisation est l’élimination „normale“ de peintures
et de la rouille
· Abrasif de grain fin: pour l’ennoblissement des surfaces et le traitement final
Mise en place de l’abrasif
Attention! Avant tous travaux au niveau de l’appareil, assurez-vous que l’appareil n’est pas en
marche et que la prise est débranchée.
1. Tenez la ponceuse le plateau
vers le haut, voir également ill. C.
2. Adaptez exactement l’abrasif sur le plateau.
3. Assurez-vous que les trous de l’abrasif correspondent aux trous du plateau.
Lorsque l’abrasif est usé, le retirer simplement du plateau et mettre l’abrasif neuf en place comme
il l’est décrit.
Mise en place de l’aspirateur
Attention! Avant tous travaux au niveau de l’appareil, assurez-vous que l’appareil n’est pas en
marche et que la prise est débranchée.
La ponceuse est munie d’un adaptateur pour l’aspiration des poussières. Pour les travaux de ponçage
sur du bois, utilisez un dispositif d’aspiration spécialement adapté pour le raccordement à l’aspiration
des poussières
.
1. Placez l’adaptateur pour l’aspiration des poussières
sur le raccordement d’adaptateur au dos
de l’appareil.
2. Raccordez à l’adaptateur
le tuyau flexible de l’aspirateur adapté.
Mise en service
La tension de la source de courant doit correspondre aux données mentionnées sur la plaque
signalétique de l’appareil. Les appareils marqués avec 230V~ peuvent également être utilisés
sur 220V~.
Attention! Ne recouvrez pas les fentes d’aération pendant l’utilisation.
Tenez la ponceuse comme le montre l’illustration A.
Assurez-vous que le plateau
repose bien à plat sur la pièce.
La ponceuse PMS 130 dispose d’un plateau
pivotant orientable à 360°. Ceci vous permet une
position toujours optimale de l’appareil même aux endroits difficilement accessibles.
Travaillez de telle sorte que la quantité de poussières soit la plus faible possible.
Mode d'emploi
F19
manual PMS 130 03.12.2003 9:10 Uhr Seite 19

PARKSIDE
Mise en marche et à l’arrêt:
Attention! Assurez-vous, avant de raccorder l’appareil à l’alimentation électrique, que la ponceuse
est bien éteinte (commutateur
en position 0).
Mise en marche: Poussez le commutateur Marche/Arrêt
vers le bas, position „1“.
Mise à l’arrêt: Poussez le commutateur Marche/Arrêt
vers le haut, position „0“.
Nettoyage du matériau, du lieu de travail et de l’appareil
· Immédiatement après le travail, passez l’aspirateur sur l’ensemble des surfaces du domaine de travail
et nettoyez-les à fond.
· Remplacez régulièrement le sac à poussière et les filtres de l’aspirateur spécial.
· Nettoyez à fond tous les objets comportant de la poussière avant de les réutiliser.
Attention! Avant tous travaux au niveau de l’appareil, assurez-vous que l’appareil n’est pas en
marche et que la prise est débranchée.
· Veillez à ce que l’appareil et les fentes d’aération soient toujours propres.
Ceci est favorable tant à la longévité de l’appareil qu’à votre propre sécurité.
· Nettoyez régulièrement l’appareil, de préférence toujours immédiatement après le travail.
· Veillez à ce qu’aucuns liquides ne pénètrent à l’intérieur de l’appareil. Pour le nettoyage du boîtier,
utilisez un chiffon doux. N’utilisez en aucun cas de l’essence, des solvants ou des produits nettoyants
attaquant le plastique.
Elimination
· L’emballage se compose exclusivement de matériaux écologiques. Ils peuvent être éliminés dans
les containers de recyclage locaux.
· Pour les possibilités d’élimination de l’appareil mis au rebut, renseignez-vous auprès de
l’administration de votre commune.
Mode d'emploi/Nettoyage/Elimination
20 F
manual PMS 130 03.12.2003 9:10 Uhr Seite 20
Seite wird geladen ...
Seite wird geladen ...
Seite wird geladen ...
Seite wird geladen ...
Seite wird geladen ...
Seite wird geladen ...
Seite wird geladen ...
Seite wird geladen ...
Seite wird geladen ...
Seite wird geladen ...
Seite wird geladen ...
Seite wird geladen ...
Seite wird geladen ...
Seite wird geladen ...
Seite wird geladen ...
Seite wird geladen ...
Seite wird geladen ...
Seite wird geladen ...
Seite wird geladen ...
Seite wird geladen ...
Seite wird geladen ...
Seite wird geladen ...
Seite wird geladen ...
Seite wird geladen ...
Seite wird geladen ...
Seite wird geladen ...
Seite wird geladen ...
Seite wird geladen ...
Seite wird geladen ...
Seite wird geladen ...
Seite wird geladen ...
Seite wird geladen ...
Seite wird geladen ...
Seite wird geladen ...
Seite wird geladen ...
Seite wird geladen ...
Seite wird geladen ...
Seite wird geladen ...
Seite wird geladen ...
Seite wird geladen ...
Seite wird geladen ...
Seite wird geladen ...
Seite wird geladen ...
Seite wird geladen ...
Seite wird geladen ...
Seite wird geladen ...
Seite wird geladen ...
Seite wird geladen ...
Seite wird geladen ...
Seite wird geladen ...
Seite wird geladen ...
Seite wird geladen ...
Seite wird geladen ...
Seite wird geladen ...
Seite wird geladen ...
Seite wird geladen ...
Seite wird geladen ...
Seite wird geladen ...
Seite wird geladen ...
Seite wird geladen ...
Seite wird geladen ...
Seite wird geladen ...
-
 1
1
-
 2
2
-
 3
3
-
 4
4
-
 5
5
-
 6
6
-
 7
7
-
 8
8
-
 9
9
-
 10
10
-
 11
11
-
 12
12
-
 13
13
-
 14
14
-
 15
15
-
 16
16
-
 17
17
-
 18
18
-
 19
19
-
 20
20
-
 21
21
-
 22
22
-
 23
23
-
 24
24
-
 25
25
-
 26
26
-
 27
27
-
 28
28
-
 29
29
-
 30
30
-
 31
31
-
 32
32
-
 33
33
-
 34
34
-
 35
35
-
 36
36
-
 37
37
-
 38
38
-
 39
39
-
 40
40
-
 41
41
-
 42
42
-
 43
43
-
 44
44
-
 45
45
-
 46
46
-
 47
47
-
 48
48
-
 49
49
-
 50
50
-
 51
51
-
 52
52
-
 53
53
-
 54
54
-
 55
55
-
 56
56
-
 57
57
-
 58
58
-
 59
59
-
 60
60
-
 61
61
-
 62
62
-
 63
63
-
 64
64
-
 65
65
-
 66
66
-
 67
67
-
 68
68
-
 69
69
-
 70
70
-
 71
71
-
 72
72
-
 73
73
-
 74
74
-
 75
75
-
 76
76
-
 77
77
-
 78
78
-
 79
79
-
 80
80
-
 81
81
-
 82
82


Parkside KH 3135 PALM DETAIL SANDER Benutzerhandbuch
- Kategorie
- Power Sanders
- Typ
- Benutzerhandbuch
- Dieses Handbuch eignet sich auch für
in anderen Sprachen
- English: Parkside KH 3135 PALM DETAIL SANDER User manual
- français: Parkside KH 3135 PALM DETAIL SANDER Manuel utilisateur
- español: Parkside KH 3135 PALM DETAIL SANDER Manual de usuario
- italiano: Parkside KH 3135 PALM DETAIL SANDER Manuale utente
- Nederlands: Parkside KH 3135 PALM DETAIL SANDER Handleiding
- português: Parkside KH 3135 PALM DETAIL SANDER Manual do usuário
- polski: Parkside KH 3135 PALM DETAIL SANDER Instrukcja obsługi
- čeština: Parkside KH 3135 PALM DETAIL SANDER Uživatelský manuál
- svenska: Parkside KH 3135 PALM DETAIL SANDER Användarmanual
- suomi: Parkside KH 3135 PALM DETAIL SANDER Ohjekirja
Verwandte Artikel
-
Parkside PHS 160 B2 Operation And Safety Notes Translation Of Original Operation Manual
-
Parkside 47123 Operation and Safety Notes
-
-
-
-
-
Parkside PKGA 20-Li B1 - IAN 315586 Bedienungsanleitung
-
-