Parkside PFBS 160 A1 Bedienungsanleitung
- Kategorie
- Elektrowerkzeuge
- Typ
- Bedienungsanleitung

IAN 96078
PRECISION MULTI-GRINDER
PFBS 160 A1
FEINBOHRSCHLEIFER
Bedienungs- und Sicherheitshinweise
Originalbetriebsanleitung
MAŞINĂ DE GĂURIT ŞI ŞLEFUIT FIN
Instrucţiuni de utilizare şi de siguranţă
Traducerea instrucţiunilor de utilizare originale
ΣΥΣΚΕΥΗ ΛΕΙΑΝΣΗΣ & ΔΙΑΤΡΗΣΗΣ
Υποδείξεις χειρισμού και ασφαλείας
Μετάφραση των αυθεντικών οδηγιών λειτουργίας
PRECISION MULTI-GRINDER
Operation and Safety Notes
Translation of original operation manual

GB Operation and Safety Notes Page 5
RO Instrucţiuni de utilizare şi de siguranţă Pagina 17
GR Υποδείξεις χειρισμού και ασφαλείας Σελίδα 29
DE / AT / CH Bedienungs- und Sicherheitshinweise Seite 43
Before reading, unfold both pages containing illustrations and familiarise yourself with all functions of the
device.
Înainte de a citi instrucţiunile, priviţi ambele pagini cu imagini şi familiarizaţi-vă cu toate funcţiile aparatului.
Πριν ξεκινήσετε την ανάγνωση, ανοίξτε τις δυο σελίδες με τις εικόνες και εξοικειωθείτε με όλες τις
λειτουργίες της συσκευής.
Klappen Sie vor dem Lesen die beiden Seiten mit den Abbildungen aus und machen Sie sich anschließend
mit allen Funktionen des Gerätes vertraut.

2
8
4 3
9 10
A
B
1
7
6 5
17 1211
13 b
13
14
15
16
18 19
24
23
21
22
24
343332
7
3129 302827
25
26
20

I
C
E F
G
D
H
15
16
3
13 b
13
17

5 GB
Table of contents
Introduction
Intended use ........................................................................................................................................ Page 6
Features ...............................................................................................................................................Page 6
Scope of delivery ................................................................................................................................Page 6
Technical Data ....................................................................................................................................Page 6
General power tool safety warnings
1. Work area safety............................................................................................................................Page 7
2. Electrical safety ............................................................................................................................... Page 7
3. Personal safety ................................................................................................................................Page 8
4. Power tool use and care ................................................................................................................Page 8
5. Service .............................................................................................................................................Page 8
Safety advice for all uses ....................................................................................................................Page 9
Safety advice relating to kickback ..................................................................................................... Page 10
Special safety advice relating to grinding and disc-cutting ..............................................................Page 10
Further special safety advice for disc-cutting ..................................................................................... Page 11
Special safety advice for abrading using sandpaper ......................................................................Page 11
Special safety advice for polishing ....................................................................................................Page 11
Special safety advice for working with wire brushes ........................................................................Page 11
Safety notices specific to rotary tools ................................................................................................Page 12
Original accessories / tools ................................................................................................................Page 12
Start-up
Attaching / changing the tool / collet ................................................................................................. Page 12
Bricks ....................................................................................................................................................Page 13
Installing sanding belts .......................................................................................................................Page 13
Attaching polishing tools ....................................................................................................................Page 13
Switching on and off / Adjusting the speed .......................................................................................Page 13
Information about processing materials / tool / speed range ..........................................................Page 13
Flexible shaft ........................................................................................................................................Page 14
Stretch stand for the multi- function tool ............................................................................................. Page 14
Base assembly .....................................................................................................................................Page 15
Cleaning, care and storage .............................................................................................Page 15
Warranty ......................................................................................................................................... Page 15
Disposal ............................................................................................................................................Page 15
Translation of the original declaration of conformity /
Manufacturer ............................................................................................................................... Page 16

6 GB
Introduction
Precision Multi-Grinder PFBS 160 A1
Introduction
We congratulate you on the purchase of your new
device. You have chosen a high quality product. The
instructions for use are part of the product. They
contain important information concerning safety,
use and disposal. Before using the product, please
familiarise yourself with all of the safety information
and instructions for use. Only use the unit as de
scribed
and for the specified applications. If you pass the
product on to anyone else, please ensure that you
also pass on all the documentation with it.
Intended use
The precision multi-grinder, hereafter also referred
to as tool, is intended for drilling, milling, engrav-
ing, polishing, cleaning, sanding, and cutting
wood, metal, plastic, ceramics or masonry in dry
areas. Any other uses, and / or modifications to the
tool are considered improper use and may result in
serious hazards. Not for commercial applications.
Features
Precision Multi-Grinder:
1
ON / OFF switch
2
Mains lead
3
Metal bracket
4
Louvres
5
Union nut
6
Clamping nut
7
Collet 3.2 mm
8
Spindle lock button
9
Carbon brushes
10
Variable speed control
Accessories (see Fig. A):
11
Locking screw
12
Base assembly
13
Flexible shaft
13 b
Union nut (Flexible shaft)
14
Collet chuck
15
Stand support
16
Stretch stand
17
Clamp
Accessory kit (42 pieces) (see Fig. B):
18
8 Cut-off discs
19
6 Grinding discs
20
5 Grinding bits, abrasive
21
2 Grinding discs, abrasive
22
3 Polishing attachments
23
1 Brick
24
5 Sanding belts
25
1 Clamping mandrel for polishing attachments
26
2 Engraving bits
27
1 Milling bit
28
1 Drill bit
29
1 Clamping mandrel for cut-off / grinding discs
30
2 Plastic brushes
31
1 Metal brush
32
1 Collet 2.4 mm
33
1 Combination wrench
34
1 Sanding belt clamping mandrel
Scope of delivery
1 Precision Multi-Grinder PFBS 160 A1
1 Plastic case
1 Flexible shaft
1 Stretch stand
1 Clamp
1 Base assembly
1 Accessory kit 42 pieces
1 Set of operating instructions
Technical Data
Rated power input: 160 W
Voltage: 230–240 V∼, 50 Hz
Idle speed (n
0
): 10,000–35,000 rpm
Tool holder: max. 3.2 mm
Protection class: II /
Noise and vibration data:
Measured values for noise are determined in accor-
dance with EN 60745. The A-weighted noise level
of the electrical power tool are typically:
Introduction / General power tool safety warnings

7 GB
Introduction Introduction / General power tool safety warnings
Sound pressure level: 80 dB(A)
Sound power level: 91 dB(A)
Uncertainty K: 3 dB
Wear ear protection!
Evaluated acceleration, typical:
Hand / arm vibration a
h
= 2.3 m / s
2
Uncertainty K = 1.5 m / s
2
The vibration level specified in
these instructions was measured in accordance with
an EN 60745 standardised measurement process
and can be used to compare equipment. The vibra-
tion emission value specified can also serve as a
preliminary assessment of the exposure.
The vibration level will change according to the ap-
plication of the electrical tool an in some cases may
exceed the value specified in these instructions. Re-
gularly using the electric tool in such a way may
make it easy to underestimate the vibration.
Note: If you wish to make an accurate assessment
of the vibration loads experienced during a particular
period of working, you should also take into account
the intervening periods of time when the device is
switched off or is running but is not actually in use.
This can result in a much lower vibration load over
the whole of the period of working.
General power tool
safety warnings
Read all safety warnings
and all instructions. Failure to follow the warn-
ings and instructions may result in electric shock, fire
and / or serious injury.
Save all warnings and instructions for
future reference.
The term “power tool” in the warnings refers to your
mains-operated (corded) power tool or battery-op-
erated (cordless) power tool.
1. Work area safety
a) Keep work area clean and well lit.
Cluttered or dark areas invite accidents.
b) D
o not operate power tools in explosive
atmospheres, such as in the presence
of flammable liquids, gases or dust.
Power tools create sparks which may ignite the
dust or fumes.
c) Keep children and bystanders away
while operating a power tool. Distractio
ns
can cause you to lose control.
2. Electrical safety
a) Power tool plugs must match the outlet.
Never modify the plug in any way. Do
not use any adapter plugs with earthed
(grounded) power tools. Unmodified plug
s
and matching outlets will reduce risk of electric
shock.
b) Avoid body contact with earthed or
grounded surfaces, such as pipes,
radiators, ranges and refrigerators.
There is an increased risk of electric shock if
your body is earthed or grounded.
c) Do not expose power tools to rain or
wet conditions. Water entering a power tool
will increase the risk of electric shock.
d) Do not abuse the cord. Never use the
cord for carrying, pulling or unplugging
the power tool. Keep cord away from
heat, oil, sharp edges or moving parts.
Damaged or entangled cords increase the risk
of electric shock.
e)
When operating a power tool outdo
ors,
use an extension cord suitable for out-
door use. Use of a cord suitable for outdoor
use reduces the risk of electric shock.
f) If operating a power tool in a damp
location is unavoidable, use a residual
current device (RCD) protected supply.
Use of an RCD reduces the risk of electric shock.

8 GB
General power tool safety warnings
3. Personal safety
a) Stay alert, watch what you are doing
and use common sense when operat-
ing a power tool. Do not use a power
tool while you are tired or under the
influence of drugs, alcohol or medica-
tion. A moment of inattention while operating
power tools may result in serious personal injury.
b) Use personal protective equipment.
Always wear eye protection. Protective
equipment such as dust mask, non-skid safety
shoes, hard hat, or hearing protection used for
appropriate conditions will reduce personal in-
juries.
c) Prevent unintentional starting. Ensure
the switch is in the off-position before
connecting to power source and / or
battery pack, picking up or carrying
the tool. Carrying power tools with your fing
er
o
n the switch or energising power tools that hav
e
the switch on invites accidents.
d) Remove any adjusting key or wrench
before turning the power tool on. A
wrench or a key left attached to a rotating part
of the power tool may result in personal injury.
e) Do not overreach. Keep proper foot-
ing and balance at all times. This enables
better control of the power tool in unexpected
situations.
f) Dress properly. Do not wear loose
clothing or jewellery. Keep your hair,
clothing and gloves away from mov-
ing parts. Loose clothes, jewellery or long
hair can be caught in moving parts.
g) If devices are provided for the connec-
tion of dust extraction and collection
facilities, ensure these are connected
and properly used. Use of dust collection
can reduce dust-related hazards.
4. Power tool use and care
a) Do not force the power tool. Use the
correct power tool for your applica
tion.
The correct power tool will do the job better
and safer at the rate for which it was designed.
b) Do not use the power tool if the switch
does not turn it on and off. Any power
tool that cannot be controlled with the switch is
dangerous and must be repaired.
c) Disconnect the plug from the power
source and / or the battery pack from
the power tool before making any ad-
justments, changing accessories, or
storing power tools. Such preventive safety
measures reduce the risk of starting the power
tool accidentally.
d) Store idle power tools out of the reach
of children and do not allow persons
unfamiliar with the power tool or these
instructions to operate the power tool.
Power tools are dangerous in the hands of un-
trained users.
e) Maintain power tools. Check for mis-
alignment or binding of moving parts,
breakage of parts and any other con-
dition that may affect the power tool’s
operation. If damaged, have the power
tool repaired before use. Many accidents
are caused by poorly maintained power tools.
f) Keep cutting tools sharp and clean.
Properly maintained cutting tools with sharp
cutting edges are less likely to bind and are
easier to control.
g) Use the power tool, accessories and
tool bits etc. in accordance with these
instructions, taking into account the
working conditions and the work to
be performed. Use of the power tool for
operations different from those intended could
result in a hazardous situation.
5. Service
a) Have your power tool serviced by a
qualified repair person using only
iden-
tical replacement parts. This will ensure
that the safety of the power tool is maintained.
General power tool safety warnings

9 GB
General power tool safety warnings General power tool safety warnings
Safety advice for all uses
General safety advice for grinding,
sanding (with sandpaper), wire brushing,
polishing and disc-cutting:
a) This electrical power tool is intended
for use as a grinding, sanding, wire-
brushing, and disc-cutting machine.
Observe all the safety advice, instruc-
tions, information in figures and all
other information you received with
this device. If you do not observe the follow-
ing advice it could lead to electric shock, fire
and / or serious injury.
b) Do not use any accessory not specifi-
cally intended by the manufacturer
for this electrical power tool. Although
an accessory may fit on your electrical power
tool, this does not on its own guarantee that it
can be safely used.
c) The maximum permitted speed of an
attachment must be at least as high as
the maximum speed indicated for the
electrical power tool. An accessory rotating
faster than its permitted speed could disintegrate
or fly off.
d) The external diameter and the thickness
of the attachment must be compatible
with the dimensions of your electrical
power tool. Attachments that are not dimen-
sionally compatible cannot be adequately
guarded or controlled.
e)
Grinding discs, flanges, grinding wheels
or other accessories must fit exactly on
to the spindle of your electrical power
tool. Attachments that do not exactly fit on the
spindle turn unevenly, vibrate severely and could
lead to loss of control.
f) Do not use damaged attachments.
Before every use check attachments
such as grinding discs for loose frag-
ments and cracks, grinding wheels for
cracks, deterioration or excessive
wear
and wire brushes for loose or broken
wires. If the electrical power tool or
attachment is dropped, inspect for
damage or change the attachment for
an undamaged one. When you have
inspected and inserted the attachment,
position yourself and bystanders away
from the plane of the rotating attach-
ment and run the device at maximum
speed for one minute. Damaged attach-
ments will usually break apart during this test.
g) Wear personal protective equipment.
Use a full face visor, safety goggles or
safety glasses, depending on the ap-
plication. Wear a dust mask, hearing
protectors, safety gloves or special
apron capable of stopping particles of
the grinding medium or workpiece,
as appropriate for the task. Eyes must
be protected from the flying debris which can
arise from some operations. Dust or breathing
masks must be capable of filtering out the dust
generated by the application. Prolonged expo-
sure to loud noise can lead to hearing loss.
h) Keep bystanders at a safe distance
from your work area. Anyone entering
the work area must wear personal
protective equipment. Fragments of the
workpiece or of a broken attachment could fly
off and cause injury beyond the immediate
working area.
i) Hold the device by the insulated han-
dle surfaces when you are undertak-
ing work where there is the danger of
the attachment striking hidden electric-
ity cables or the device’s mains lead.
Contact with a live wire could cause metal parts
of the device to become live and lead to elec-
tric shock.
j) Keep the mains lead away from rotat-
ing attachments. If you lose control of the
device the mains lead may become severed or
trapped and your hand or arm may be pulled
into the rotating attachment.
k) Never lay the electrical power tool
down until after the attachment has
come to a complete standstill. The rotat-
ing attachment may snag when it comes into
contact with the surface and cause you to lose
control of the device.
l) Do not have the electrical power tool
running while you are carrying it. Your

10 GB
General power tool safety warnings
clothing could become trapped by unintention-
al contact with the rotating attachment and the
tool could be pulled into your body.
m) Clean the ventilation slots on your elec-
trical power tool regularly. The motor’s
fan draws dust into the housing. A build-up of
metal dust could give rise to an electrical hazard.
n)
Never use the electrical power tool near
inflammable materials. Sparks could ignite
these materials.
o) Do not use attachments that require the
use of coolants. The use of water or other
liquid coolants could result in electric shock.
Safety advice
relating to kickback
Kickback is the sudden reaction to a pinched or
snagged rotating attachment, such as a grinding disc
,
grinding pad, wire brush etc. Pinching or snagging
results in the rotating attachment coming to an abrupt
stop. This causes the electrical power tool (if not
controlled) to move in the opposite direction to the
direction of rotation of the attachment at the point
of constraint.
If, for example, a grinding disc is pinched or snags
in a workpiece, this can cause the edge of the
grinding disc to penetrate the workpiece, become
trapped there and either free itself or kickback. The
grinding disc moves towards or away from the op-
erator, depending on the direction of movement of
the disc at the point of constraint. The grinding disc
could also break.
Kickback occurs as a result of incorrect use or mis-
use of the electrical power tool. It can be prevented
by taking the appropriate precautions as described
below.
a) Maintain a firm grip on the electrical
power tool and position your body
and arms to allow you to resist kick-
back forces. Always use the auxiliary
handle, if provided, to exercise the
greatest possible control over kick-
back forces or reaction torques as the
device builds up to full speed. By taking
suitable precautions the operator can control
kickback and reaction forces.
b) Do not place your hands near a rotat-
ing attachment. If kickback occurs the at-
tachment could move over your hand.
c) Avoid positioning your body in the
area into which the electrical power
tool would move in the event of a kick-
back. A kickback moves the electrical power
tool in the opposite direction to the direction of
movement of the grinding disc at the point of
constraint.
d) Work particularly carefully in the area
of corners, sharp edges etc. to avoid
the attachment bouncing or snagging
on the workpiece. Corners, sharp edges or
bouncing have a tendency to snag the rotating
attachment. This causes loss of control or kick-
back.
e) Do not use saw-chain woodcarving
discs or toothed discs. Such attachments
create frequent kickback and loss of control of
the electrical power tool.
Special safety advice relating
to grinding and disc-cutting
a) Always use the guard designed for the
type of abrasive consumable you are
using. Always use abrasive consuma-
bles approved for use with your elec-
trical power tool. Abrasive consumables not
approved for use with your electrical power tool
cannot be adequately guarded and are unsafe.
b) Abrasive consumables must be used
only for their recommended purposes,
For example: never grind with the side
face of a cutting disc. Cutting discs are in-
tended for removing material using the edge
of the disc. Sideways forces on these abrasive
consumables can cause them to break.
c) Always use an undamaged mounting
flange of the correct size and shape
for your selected grinding disc. Suitable
flanges support the grinding disc and reduce
the chance of it breaking. Flanges for cutting
General power tool safety warnings

11 GB
General power tool safety warnings General power tool safety warnings
discs are different from the flanges for other
abrasive discs.
d) Never use worn down abrasive con-
sumables intended for larger electrical
power tools. Abrasive consumables intended
for larger electrical power tools are not designed
for the faster rotational speeds of these smaller
electrical power tools and could break.
Further special safety
advice for disc-cutting
a) Avoid snagging the cutting disc and
do not use too much contact pressure.
Do not attempt to make excessively
deep cuts. Overloading the cutting disc in-
creases the load and the tendency of the disc
to twist or snag in the cut, making kickback or
disc breakage more likely.
b) Avoid the area in front of or behind
the rotating cutting disc. If the cutting disc
is moving away from you at the point of con-
straint in the workpiece, then, in the event of
a kickback, the electrical power tool and the
rotating disc may be thrown towards you.
c) If the cutting disc jams or you stop
work for a while, switch the device
off and hold it until the disc comes to
a complete stop. Never attempt to
pull the still rotating cutting disc out of
the cut as this could cause kickback.
Determine and rectify the reason for the jamming.
d) Do not switch on the device if the cut-
ting disc is in the workpiece. Allow the
cutting disc to reach full speed before
carefully continuing with the cut. Oth-
erwise the disc could snag, jump out of the
workpiece or cause a kickback.
e) Support boards or workpieces whilst
cutting to reduce the risk of kickback
caused by a jammed cutting disc. Large
workpieces may bend under their own weight.
The workpiece must be supported to both sides
of the cutting disc and particularly near the
cutting disc and at the workpiece edge.
f) B
e particularly careful when pocket
cutting in existing walls or other areas
where you cannot see what you are cut
-
t
ing into. The cutting disc plunged into the surface
could cut through gas or water pipes, electricity
cables or other objects and cause kickback.
Special safety advice for
abrading using sandpaper
Do not use over-sized sanding sheets.
Follow the manufacturer’s recommen-
dations for sanding sheet size. Sanding
sheets that project beyond the backing pad
could cause injury in addition to jamming,
tearing of the sheet or kickback.
Special safety
advice for polishing
Do not use the polishing bonnet if it
has any loose parts, in particular the
fastening cords. Tuck the fastening cords
away or trim them. Loose fastening cords rotat-
ing with the attachment could catch your fingers
or become trapped in the workpiece.
Special safety advice for
working with wire brushes
a) Bear in mind that wire brushes lose
pieces of wire during normal use. Do
not overload the wires by applying too
much pressure. Flying pieces of wire can very
easily penetrate thin clothing and / or skin.
b) Use a guard, if recommended, but
make sure that the wire brush does
not come into contact with the guard.
The diameters of disc brushes and cup brushes
can increase due to contact pressure and cen-
tripetal forces.

12 GB
General power tool safety warnings / Start-up
Safety notices specific to
rotary tools
When you use the drill / grinder wear the fol-
lowing protective equipment: safety glasses and
protective gloves.
CAUTION! RISK OF INJURY! The tool
continues to rotate after it has been switched
off! Avoid contact with rapidly rotating drill /
grinder components.
Securely support the work-
piece. Use clamps or a vice to grip the workpiece
firmly. This is much safer than holding it in your
hand.
RISK OF INJURY! Never
support yourself by placing your hands near or
in front of the device or the workpiece surface.
A slip can result in injury.
DANGER OF FIRE FROM FLYING
SPARKS!
Abrading metal creates flying sparks. For this
reason, always make sure that nobody is placed
in any danger and that there are no inflamma
ble
materials near the working area.
DUST HAZARD! Any
harmful / noxious dusts generated from machin-
ing represent a risk to the health of the person
operating the device and to anyone near the
work area.
Wear a dust mask!
NOXIOUS FUMES!
Ensure that there is adequate ventilation when
machining surfaces containing plastic or cov-
ered with paint, varnish etc.
Its use as a saw or the use of saw blades with
this device is prohibited.
Do not soak the materials or the surface you are
about to work on with liquids containing solvents.
Avoid abrading paints containing lead or other
substances hazardous to health.
Do not machine materials containing asbestos.
Asbestos is a known carcinogen.
Avoid contact with moving sanding or grinding tools.
Do not machine moist materials or damp surface
s.
NOTE! Do not allow the tool to come to a
standstill by overloading it!
RISK OF INJURY!
Switch the device off and allow it to come to a
standstill before you put it down.
Always keep the device
clean, dry and free of oil or grease.
Children or persons who lack the knowledge or
experience to use the device or whose physical,
sensory or intellectual capacities are limited
must never be allowed to use the device without
supervision or instruction by a person responsi-
ble for their safety. Children must never be
allowed to play with the device.
Original accessories / tools
Use only the accessories and attachments de-
t
ailed in the operating instructions, or those w
hich
are compatible with the tool.
Start-up
Attaching / changing the
tool / collet
Press and hold the spindle lock
8
.
Turn the clamping nut
6
until the lock catches.
Loosen the clamping nut
6
using the combi-
nation wrench
33
for the thread.
If applicable, remove the attached tool.
First slide the tool you wish to use through the
clamping nut
6
before inserting it into the
collet
7
fitting the tool shaft.
Press and hold the spindle lock
8
.
Insert the collet
7
into the threaded insert, then
tighten the clamping nut
6
using the combina-
tion wrench
33
on the thread.
Using a tool with clamping mandrel:
Use the screwdriver end of the combination
wrench
33
to loosen and tighten the screw on
the clamping mandrels.
Insert the clamping mandrel in the tool as de-
scribed.
Using the combination wrench
33
, loosen the
screw on the clamping mandrel.
Insert the attachment you wish to use onto the
screw between two washers.
Start-up

13 GB
General power tool safety warnings / Start-up Start-up
Use the combination wrench
33
to tighten the
screw on the clamping mandrel.
Bricks
Firmly secure the whetstone! Use a vice or equiv-
alent tool to prevent injuries.
When using the bricks for the first time, they
must
first be trimmed using the prismatic whetstone.
To do so, slowly bring the brick
23
to the whet-
stone with the tool switched on. Grinding the two
abrasive wheels together will remove uneven
areas in the contour of the brick. The whetstone
can further be used to shape the brick.
Installing sanding belts
Slide the grinding belt
24
onto the grinding
mandrel
34
from the top. Tighten the screw on
the grinding mandrel
34
to secure the grinding
belt
24
.
Attaching polishing tools
Screw the polishing tool
22
into the tip of the
mandrel for polishing attachments
25
.
Switching on and off / Adjusting
the speed
Switching on / adjusting the speed:
Set the ON / OFF switch
1
to position „I“ by
pressing down and sliding it forward.
Set the variable speed control
10
to a position
between „1“ and „6“.
Switching off:
Set the ON / OFF switch
1
to position „0“.
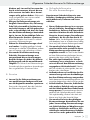
Information about processing
materials / tool / speed range
Use the router bits to process steel and iron at
maximum speed.
Determine the speed range for processing zinc,
zinc alloys, aluminium, copper and lead by
testing scrap pieces.
Process plastics and materials with a low melt-
ing point at a low speed.
Process wood at high speeds.
Clean, polish and buff at a medium speed.
The following information are non-binding recom-
mendations. When performing the actual work also
test yourself, which tools and settings are ideal for
the material you are working on.

14 GB
Start-up
Examples of use / selecting the correct tool
Function Accessory Application
Drilling Drill bit
28
Wood applications
(see Fig. C)
Milling Milling bit
27
Various applications; e.g. recessing, hollowing
out, shaping, grooving, or making slots
Engraving Engraving bits
26
Marking
(see Fig. D)
Polishing, rust
removal
CAUTION!
Only apply the tool
to the work piece
under light pressure.
Metal brush
31
Rust removal
(see Fig. E)
Polishing tools
22
Processing various metals and plastics, particularly
precious metals such as gold or silver
(see Fig. F)
Cleaning Plastic brushes
30
e.g. cleaning hard to reach plastic housings or
cleaning the area around a door lock
Metal brush
31
e.g. rust removal
(see Fig. E)
(The metal brush is softer than steel)
Grinding Grinding discs
19
,
21
Grinding stone
23
,
Grinding bits
20
Grinding stone, detail work on hard materials such
as ceramics or alloy steel (see Fig. G)
Sanding belts
24
Sanding wood
Cutting Cutting discs
18
Processing metal, plastic
(see Fig. H)
Flexible shaft
Never use the spindle lock with the motor on.
The tool or the flexible shaft could otherwise
be damaged.
Unscrew the union nut
5
from the tool, turning
counter-clockwise, and put aside.
Press and hold the spindle lock
8
.
Unscrew the clamping nut
6
from the tool,
turning counter-clockwise.
Attach the flexible shaft to the tool, inserting the
inner axle on the flexible shaft along with the
clamping nut
6
into the collet
7
.
First tighten the clamping nut
6
, then the union
nut
13 b
of the flexible shaft
13
to the tool, turn-
ing clockwise.
Now insert the accessory you wish to use into
the collet
7
of the flexible shaft.
To lock the spindle, slide back the black sleeve
on the flexible shaft.
Using the combination wrench
33
, open the
collet holder
14
on the flexible shaft, insert the
accessory and tighten the collet holder
14
.
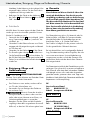
Stretch stand for the multi-
function tool (Fig. I)
Screw the stretch stand
16
into the clamp
17
.
Note: The stretch stand
16
can be screwed
into the clamp in two different positions, de-
pending on the whether you‘re attaching to a
horizontal or vertical surface.
Secure the clamp
17
at the edge of a work-
bench or a work table no thicker than 55 mm.
Start-up / Cleaning, care and storage / Warranty / Disposal

15 GB
Start-up Start-up / Cleaning, care and storage / Warranty / Disposal
The stretch stand
16
is height adjustable. Loosen
the upper tube of the stretch stand
16
by turning
to the left (–). Extend the tube to the maximum
height and secure by turning to the right (+).
The holder
15
is also height adjustable, simple
turn the black thread to the left. After adjusting
the holder to the correct height, turn the thread
in the opposite direction to tighten.
Secure the tool to the holder
15
of the stretch
stand
16
. This holder
15
rotates by 360°.
Base assembly
Using the attachment, the tool is particularly suited
for cutting special shapes (holes for sockets, etc.).
Attach the milling bit
27
as described in chapter
„Attaching / changing the tool / collet“.
Unscrew the union nut from the tool, turning
clockwise, and put aside.
Screw the base
12
onto the unit.
To set the correct working depth, loosen the
locking screw
11
and adjust the bottom of the
base assembly to the desired size.
Then tighten the locking screw
11
.
Cleaning, care and storage
RISK OF INJURY! Switch the
tool off and pull the plug out of the mains socket
before carrying out any work on the tool.
Always keep the tool clean, dry and free of oil
or grease.
Use a dry cloth to clean the housing.
If the connection cable needs to
be replaced, this repair must be performed by
the manufacturer or a representative to prevent
safety hazards.
Carefully store the tool and all parts in desig-
nated plastic case to prevent losing any parts.
Warranty
The warranty for this appliance is for 3
years from the date of purchase. The ap-
pliance has been manufactured with care
and meticulously examined before deliv-
ery. Please retain your receipt as proof
of purchase. In the event of a warranty
claim, please make contact by telephone
with our Service Department. Only in this
way can a post-free despatch for your
goods be assured.
The warranty covers only claims for material and
maufacturing defects, but not for transport damage,
for wearing parts or for damage to fragile compo-
nents, e.g. buttons or batteries. This product is for pri-
vate use only and is not intended for commercial use.
The warranty is void in the case of abusive and im-
proper handling, use of force and internal tampering
not carried out by our authorized service branch. Your
statutory rights are not restricted in any way by this
warranty.
The warranty period will not be extended by repairs
made unter warranty. This applies also to replaced
and repaired parts. Any damage and defects extant
on purchase must be reported immediately after
unpacking the appliance, at the latest, two days after
the purchase date. Repairs made after the expiration
of the warranty period are subject to payment.
GB
Service Great Britain
Tel.: 0871 5000 720
(0,10 GBP / Min.)
e-mail: [email protected]
IAN 96078
Disposal
The packaging is wholly composed of
environmentally-friendly materials that can
be disposed of at a local recycling centre.

16 GB
Disposal / Translation of the original declaration of conformity / Manufacturer
Do not dispose of electrical
appliances with your domestic
waste!
According to European Directive 2012 / 19 / EU,
used electrical devices must be collected and
recycled in an environmentally friendly manner.
Contact your local refuse disposal authority for
more details of how to dispose of your worn-out
devices.
Translation of the original
declaration of conformity /
Manufacturer
We, KOMPERNASS HANDELS GMBH, the person
responsible for documents: Mr Semi Uguzlu, BURG-
STRASSE 21, 44867 BOCHUM, GERMANY, hereby
declare that this product complies with the following
standards, normative documents and EU directives:
Machinery Directive
(2006 / 42 / EC)
EU Low Voltage Directive
(2006 / 95 / EC)
Electromagnetic Compatibility
(2004 / 108 / EC)
RoHS Directive
(2011 / 65 / EU)
Applicable harmonized standards
EN 60745-2-23:2013
EN 60745-1:2009+A11:2010
EN 55014-1:2006/+A1:2009/+A2:2011
EN 55014-2:1997/+A1:2001/+A2:2008
EN 61000-3-2:2006/+A1:2009/+A2:2009
EN 61000-3-3:2008
Type / Appliance Designation:
Precision Multi-Grinder PFBS 160 A1
Date of manufacture (DOM): 01–2014
Serial number: IAN 96078
Bochum, 31.01.2014
Semi Uguzlu
- Quality Manager -
We reserve the right to make technical modificat
ions
in the course of further development.
Cuprins

17 RO
Disposal / Translation of the original declaration of conformity / Manufacturer Cuprins
Introducere
Utilizare conform scopului .............................................................................................................. Pagina 18
Dotare .............................................................................................................................................. Pagina 18
Pachet de livrare ............................................................................................................................. Pagina 18
Date tehnice .................................................................................................................................... Pagina 18
Indicaţii generale de siguranţă pentru uneltele electrice
1. Siguranţa la locul de muncă ...................................................................................................... Pagina 19
2. Siguranţă electrică ...................................................................................................................... Pagina 19
3. Siguranţa persoanelor ................................................................................................................ Pagina 20
4. Utilizarea şi deservirea uneltei electrice .................................................................................... Pagina 20
5. Service ......................................................................................................................................... Pagina 21
Instrucţiuni de siguranţă pentru toate aplicaţiile ............................................................................ Pagina 21
Recul şi instrucţiuni de siguranţă corespunzătoare ....................................................................... Pagina 22
Instrucţiuni de siguranţă speciale pentru şlefuire şi tăiere ............................................................. Pagina 23
Alte instrucţiuni de siguranţă speciale pentru tăiere ..................................................................... Pagina 23
Instrucţiuni de siguranţă speciale pentru şlefuirea cu hârtie abrazivă ......................................... Pagina 24
Instrucţiuni de siguranţă speciale pentru polizare......................................................................... Pagina 24
Instrucţiuni de siguranţă speciale pentru lucrul cu periile de sârmă ............................................ Pagina 24
Indicaţii de siguranţă specifice pentru mașinile de frezat............................................................. Pagina 24
Accesorii originale / - aparate auxiliare ........................................................................................ Pagina 25
Punere în funcţiune
Schimbarea / introducerea sculei / bucșelor elastice de prindere ............................................... Pagina 25
Pietre de șlefuit ................................................................................................................................ Pagina 25
Benzi de șlefuit ................................................................................................................................ Pagina 25
Montarea capetelor de polișare .................................................................................................... Pagina 25
Pornire și oprire / reglarea intervalului de turaţie .......................................................................... Pagina 25
Indicaţii privind prelucrarea materialului / sculele / intervalul de turaţie ..................................... Pagina 26
Arbore flexibil .................................................................................................................................. Pagina 27
Trepiedul pentru unealta multifuncţională ..................................................................................... Pagina 27
Coșul de frezare.............................................................................................................................. Pagina 27
Curăţare, întreţinere, depozitare ........................................................................... Pagina 27
Garanţie ....................................................................................................................................... Pagina 27
Înlăturare .................................................................................................................................... Pagina 28
Traducerea declaraţie originale de conformitate / Producător .... Pagina 28

18 RO
Introducere / Indicaţii generale de siguranţă pentru uneltele electriceIntroducere
Maşină de găurit şi şlefuit fin
PFBS 160 A1
Q
Introducere
V
ă felicităm pentru achiziţia aparatului dumneavoastră.
Aţi ales un produs de înaltă calitate. Manualul de
utilizare reprezintă o parte integrantă a acestui pro-
dus. Acesta conţine informaţii importante referitoare
la siguranţă, la utilizare şi la eliminarea ca deşeu.
Înainte de utilizarea acestui produs, familiarizaţi-vă
mai întâi cu instrucţiunile de utilizare şi de siguranţă.
Folosiţi produsul numai în modul descris şi numai în
domeniile de utilizare indicate. Predaţi toate docu-
mentele aferente în cazul în care înstrăinaţi produsul.
Q
Utilizare conform scopului
Mașina de frezat, denumită în continuare aparat, se
foloseşte în încăperi uscate la găurirea, frezarea,
gravarea, polizarea, curăţarea, şlefuirea, debitarea
lemnului, a metalului, a plasticului, a ceramicii sau
a rocilor. Orice altă utilizare sau modificare a maşi-
nii este considerată necorespunzătoare scopului şi
reprezintă pericole de accidente grave. Produsul nu
este destinat uzului comercial.
Dotare
Mașina de frezat:
1
Întrerupător PORNIT / OPRIT
2
Cablu de reţea
3
Cadru metalic
4
Fante de aerisire
5
Piuliţă olandeză
6
Piuliţă de strângere
7
Mandrină 3,2 mm
8
Tastă pentru blocarea rotaţiei
9
Perie de carbon
10
Regulator nivel de rotaţii
Accesorii (vedeţi fig. A):
11
Șurub de fixare
12
Coș frezare
13
Arbore flexibil
13 b
Piuliţă olandeză (Arbore flexibil)
14
Suport ciocan tensionare
15
Suport trepied
16
Trepied
17
Dispozitiv de prindere
Set accesorii (42 piese) (vedeţi fig. B):
18
8 Discuri de debitat
19
6 Discuri de șlefuit
20
5 Vârfuri de șlefuit, abrazive
21
2 Discuri de șlefuit, abrazive
22
3 Capete de polișare
23
1 Piatră de șlefuit
24
5 Benzi de șlefuit
25
1
Dorn de prindere pentru accesoriile de polișare
26
2 Vârfuri gravură
27
1 Vârf freză
28
1 Burghiu
29
1 Dorn de prindere pentru discurile de tăiere /
șlefuire
30
2 Perii de plastic
31
1 Perie de metal
32
1 mandrină 2,4 mm
33
1 Cheie combinată
34
1 Dorn de prindere bandă de șlefuit
Pachet de livrare
1 Maşină de găurit şi şlefuit fin PFBS 160 A1
1 Trusă din material plastic
1 Arbore flexibil
1 Trepied
1 Dispozitiv de prindere
1 Coș frezare
1 Set de accesorii (42 de piese)
1 Manual de utilizare
Date tehnice
Consum nominal: 160 W
Tensiune: 230–240 V∼, 50 Hz
Turaţie la regim de
mers în gol (n
0
): 10.000–35.000 / min
-1
Preluare accesorii: max. 3,2 mm
Clasa de protecţie: II /

19 RO
Introducere / Indicaţii generale de siguranţă pentru uneltele electriceIntroducere
Informaţii privind emisiile de zgomot
şi vibraţii:
Valoare de măsurare determinată conform
EN 60745. Nivelul de zgomot A-determinat a
uneltei electrice este în mod tipic:
Nivel presiune acustică: 80 dB(A)
Nivel de putere acustică: 91 dB(A)
Coeficient de nesiguranţă K: 3 dB
Purtaţi căşti de protecţie!
Accelerare evaluată, în mod tipic:
Vibraţie mână / braţ a
h
= 2,3 m / s
2
Coeficient de nesiguranţă K = 1,5 m / s
2
Nivelul de vibraţii menţionat
în prezentele instrucţiuni a fost măsurat conform
unui procedeu de măsurare standardizat cuprins în
EN 60745 şi poate fi utilizat pentru compararea
aparatelor. Valorile de emisii de oscilaţii menţionate
pot fi utilizate și pentru o estimare introductivă a ex-
punerii.
Nivelul de oscilaţii se va modifica conform utilizării
uneltei electrice şi poate depăşi în unele cazuri va-
loarea menţionată în indicaţii. Solicitarea prin oscilaţii
s-ar putea subaprecia atunci când, unealta electrică
este folosită în mod regulat în asemenea mod.
Indicaţie: Pentru o evaluare precisă a solicitării
prin oscilaţii în timpul unei anumite perioade de
lucru trebuie luate în considerare şi timpii, în care
aparatul este oprit sau pornit dar nu este folosit.
Aceasta poate reduce considerabil solicitarea prin
oscilaţii pentru întreaga perioadă de lucru.
Indicaţii generale de siguranţă
pentru uneltele electrice
Citiţi toate indicaţiile
de siguranţă şi instrucţiunile. Nerespectarea
indicaţiilor şi intsrucţiunilor de siguranţă poate cau-
za electrocutarea, incendiu şi / sau acccidente grave.
Păstraţi toate indicaţiile de siguranţă şi
instrucţiunile pentru viitor!
Termenul de „Unealtă electrică”, utilizat în indicaţi-
ile de siguranţă se referă la uneltele electrice care
funcţionează conectate la reţea (cu cablu de reţea)
şi la cele care funcţionează cu acumulatoare (fără
cablu de reţea).
1. Siguranţa la locul de muncă
a) Ţineţi locul dvs. de muncă curat şi bine
iluminat. Dezordinea şi zone de lucru prost
iluminate pot cauza accidente.
b) Nu lucraţi cu unealta electrică în medii
cu pericol de explozie, în care se află
lichide, gaze sau prafuri inflamabile.
Uneltele electrice generează scântei, care pot
aprinde praful sau vaporii.
c) Ţineţi copii şi alte persoane la distanţă
atunci când, lucraţi cu unealta electrică.
Atunci când atenţia vă este distrasă puteţi
pierde
controlul asupra aparatului.
2. Siguranţă electrică
a) Ştecărul de conectare trebuie să cores-
pundă prizei. Ştecărul nu are voie să
fie modificat în niciun fel. Nu folosiţi
niciun ştecăr cu adaptor împreună cu
unelte electrice împământate. Ştecărele
nemodificate şi prizele corespunzătoare reduc
riscul unei electrocutări.
b) Evitaţi contactul cu suprafeţe împă-
mântate, cum ar fi ţevile, corpurile de
încălzire, cuptoarele şi frigiderele. Există
risc mărit de electrocutare atunci când, corpul
dvs. este în contact cu un obiect împământat.
c) Protejaţi uneltele electrice de ploaie şi
umiditate. Pătrunderea apei într-un aparat
electric măreşte riscul unei electrocutări.
d) Nu folosiţi cablul pentru a purta uneal-
ta electrică, pentru a o suspenda sau
pentru a scoate ştecărul din priză.
Protejaţi cablul de căldură, ulei, muchii
ascuţite sau componentele aparatului,
care se află în mişcare. Cablurile deterio-
rate sau răsucite măresc riscul unei electrocutări.

20 RO
Indicaţii generale de siguranţă pentru uneltele electriceIndicaţii generale de siguranţă pentru uneltele electrice
e) Atunci când lucraţi cu o unealtă electri-
că în aer liber, folosiţi numai cabluri de
prelungire, care sunt autorizate pentru
folosirea în aer liber. Utilizarea unui cablu
de prelungire autorizat pentru folosirea în aer
liber, reduce riscul unei electrocutări.
f) Atunci când folosirea uneltei electrice
într-un mediu umed nu se poate evita,
folosiţi un întrerupător de protecţie
contra curentului eronat. Utilizarea unui
întrerupător de protecţie contra curentului ero-
nat reduce riscul unei electrocutări.
3. Siguranţa persoanelor
a) Fiţi întotdeauna atent, aveţi grijă la
ceea ce faceţi şi procedaţi raţional în
timpul lucrului cu unealta electrică. Nu
folosiţi unelte electrice atunci când,
sunteţi obosit, vă aflaţi sub influenţa
drogurilor, alcoolului sau unui trata-
ment medical. Un moment de neatenţie în
timpul utilizării uneltei electrice poate cauza
accidente grave.
b) Purtaţi echipament personal de protec-
ţie şi întotdeauna ochelari de protecţie.
Purtarea echipamentului personal de protecţie
ca
şi masca, încălţăminte antiderapantă, cască sau
căşti de protecţie, în funcţie de tipul şi utilizarea
uneltei electrice reduce riscul unei accidentări.
c) Evitaţi o pornire neintenţionată a unel-
tei electrice. Asiguraţi-vă că, unealta
electrică este oprită înainte de a o co-
necta la alimentarea cu curent, a o ri-
dica sau purta. Atunci când aveţi degetul pe
întrerupător în timpul purtării aparatului sau atunci
când aparatul este conectat la alimentarea cu
curent în stare pornită, se pot întâmpla accident
e.
d) Înlăturaţi instrumentele de reglare sau
cheile franceze înainte de a porni uneal-
ta electrică. Un instrument sau o cheie, care
se află în partea aflată în rotaţie a aparatului,
poate cauza accidente.
e) Evitaţi o poziţie neobişnuită a corpului.
Asiguraţi o stabilitate corespunzătoare
şi menţineţi-vă tot timpul echilibrul.
Astfel puteţi controla mai bine unealta electrică
într-o situaţie neaşteptată.
f) Purtaţi îmbrăcăminte corespunzătoare.
Nu purtaţi îmbrăcăminte largă sau bi-
juterii. Menţineţi părul, îmbrăcămintea
şi mănuşile la distanţă faţă de piesele
aflate în mişcare. Îmbrăcămintea largă, bi-
juteriile sau părul lung pot fi prinse de piesele
ce se află în mişcare.
g) Atunci când se pot monta echipamente
de aspirare şi de colectare a prafului,
asiguraţi-vă că acestea sunt conectate
şi corect utilizate. Utilizarea unui echipament
de aspirare a prafului poate reduce periclita-
rea prin praf.
4. Utilizarea şi deservirea
uneltei electrice
a) Nu suprasolicitaţi aparatul. Folosiţi
pentru lucrul vostru unealta electrică
prevăzută pentru acesta. Cu unealta
electrică corespunzătoare lucraţi mai bine şi
mai sigur în domeniul de putere indicat.
b) Nu folosiţi o unealtă electrică al cărei
întrerupător este defect. O unealtă elec-
trică, care nu se mai poate porni sau opri, este
periculoasă şi trebuie reparată.
c) Scoateţi ştecărul din prizăînainte, de
a regla aparatul. Schimbarea acceso-
riilorsau depozitarea aparatului.
Aceastămăsură preventivă împiedică o pornire
neintenţionată a uneltei electrice.
d) Nu păstraţi uneltele electrice nefolosite
la îndemâna copiilor. Nu lăsaţi per-
soanele, care nu cunosc aparatul sau
nu au citit instrucţiunile, să folosească
aparatul. Uneltele electrice sunt periculoase
atunci când sunt folosite de persoane neexpe-
rimentate.
e) Întreţineţi uneltele electrice cu atenţie.
Controlaţi dacă, componentele mobile
funcţionează ireproşabil, dacă nu sunt
blocate sau dacă, unele componente
sunt rupte sau deteriorate astfel încât
funcţionarea uneltei electrice să fie
limitată. Dispuneţi repararea compo-
Seite laden ...
Seite laden ...
Seite laden ...
Seite laden ...
Seite laden ...
Seite laden ...
Seite laden ...
Seite laden ...
Seite laden ...
Seite laden ...
Seite laden ...
Seite laden ...
Seite laden ...
Seite laden ...
Seite laden ...
Seite laden ...
Seite laden ...
Seite laden ...
Seite laden ...
Seite laden ...
Seite laden ...
Seite laden ...
Seite laden ...
Seite laden ...
Seite laden ...
Seite laden ...
Seite laden ...
Seite laden ...
Seite laden ...
Seite laden ...
Seite laden ...
Seite laden ...
Seite laden ...
Seite laden ...
Seite laden ...
Seite laden ...
-
 1
1
-
 2
2
-
 3
3
-
 4
4
-
 5
5
-
 6
6
-
 7
7
-
 8
8
-
 9
9
-
 10
10
-
 11
11
-
 12
12
-
 13
13
-
 14
14
-
 15
15
-
 16
16
-
 17
17
-
 18
18
-
 19
19
-
 20
20
-
 21
21
-
 22
22
-
 23
23
-
 24
24
-
 25
25
-
 26
26
-
 27
27
-
 28
28
-
 29
29
-
 30
30
-
 31
31
-
 32
32
-
 33
33
-
 34
34
-
 35
35
-
 36
36
-
 37
37
-
 38
38
-
 39
39
-
 40
40
-
 41
41
-
 42
42
-
 43
43
-
 44
44
-
 45
45
-
 46
46
-
 47
47
-
 48
48
-
 49
49
-
 50
50
-
 51
51
-
 52
52
-
 53
53
-
 54
54
-
 55
55
-
 56
56


Parkside PFBS 160 A1 Bedienungsanleitung
- Kategorie
- Elektrowerkzeuge
- Typ
- Bedienungsanleitung
in anderen Sprachen
Verwandte Papiere
-
Parkside PFBS 160 A1 Operation and Safety Notes
-
Parkside PWS 230 A1 Operation and Safety Notes
-
-
Parkside PWS 125 A1 ANGLE GRINDER Operation and Safety Notes
-
-
-
Parkside PFBS 9.6 A1 Operation and Safety Notes
-
-
-