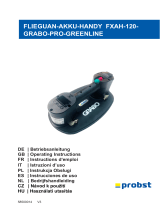
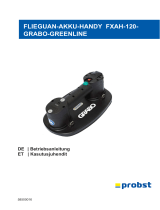
Grabo PRO-Lifter 20 Bedienungsanleitung

Typ
Bedienungsanleitung

Hier finden Sie kurze Informationen zum Vakuumheber Pro-Lifter 20. Der GRABO® Pro-Lifter 20 ist ein tragbares elektrisches Vakuum-Hebegerät, das zum Heben, Bewegen und Platzieren von Gegenständen wie Fliesen, Steinpflaster, Trockenbauwänden, Glas und Möbeln bestimmt ist. Der GRABO® Pro-Lifter 20 Pro verfügt über einen eingebauten Drucksensor mit automatischer Start/Stopp-Funktion und ist für den Einsatz mit trockenen, rauen und leicht porösen Materialien konzipiert.

Hier finden Sie kurze Informationen zum Vakuumheber Pro-Lifter 20. Der GRABO® Pro-Lifter 20 ist ein tragbares elektrisches Vakuum-Hebegerät, das zum Heben, Bewegen und Platzieren von Gegenständen wie Fliesen, Steinpflaster, Trockenbauwänden, Glas und Möbeln bestimmt ist. Der GRABO® Pro-Lifter 20 Pro verfügt über einen eingebauten Drucksensor mit automatischer Start/Stopp-Funktion und ist für den Einsatz mit trockenen, rauen und leicht porösen Materialien konzipiert.

November 2021 | version 1
By Nemo Power Tools - www.GRABO.com
EN PORTABLE ELECTRIC VACUUM LIFTING DEVICE
NL DRAAGBAAR ELEKTRISCH VACUÜM-HEFTOESTEL
DE TRAGBARES ELEKTRISCHES VAKUUMHEBEGERÄT
FR DISPOSITIF DE LEVAGE À VIDE ÉLECTRIQUE PORTABLE
ES ELEVADOR DE VACÍO ELÉCTRICO PORTÁTIL
IT DISPOSITIVO DI SOLLEVAMENTO SOTTOVUOTO
ELETTRICO PORTATILE
SE BÄRBAR ELEKTRISK VAKUUM LYFTANORDNING
DK BÆRBAR ELEKTRISK VAKUUM-SUGEKOP
AR 
RU 

TR TAŞINABİLİR ELEKTRİKLİ VAKUMLU KALDIRMA ALETİ
GRABO® PRO-LIFTER20
PORTABLE ELECTRIC VACUUM
LIFTING DEVICE
OPERATOR’S MANUAL
2
GRABO® Headquarters & locations
GRABO® tools are invented, developed, manufactured, and serviced by Nemo Power Tools and
distributed by various partners. Our wholly owned subsidiary companies are located in Las Vegas,
Hong Kong, Huizhou, Shenzhen, & Israel.
USA - Service & Headquarters: Hong Kong - Global distribution:
Nemo Power Tools LLC
Eastern Commerce Center
6000 S Eastern Ave, Unit 8B
Las Vegas, Nevada, 89119 USA
Website: www.GRABO.com
Phone: (+1) 844 430-0510
Nemo Power Tools Limited
21st Floor, CMA Building
64 Connaught Road Central
Hong Kong
Website: www.NemoPowerTools.com
Phone: (+852) 300 15741
Huizhou - The GRABO® factory Shenzhen - Logistics & Engineering
Nemo Power Tools (HuiZhou) Ltd
Fourth Industrial Area, Luokeng Village,
Xiaotie District, Xiaojinkou Town, Huicheng
District, Huizhou City, Guangdong Province,
China
Website: www.NemoGRABO®.cn
Phone: (+86) 0752-2369680
Nemo (Shenzhen) Ltd
Room 201, No.12 in the First Area, the Fifth
Industrial Area, Shangfen Community,
Minzhi Street, Longhua District, Shenzhen
City, Guangdong Province, China
Email: SZ@NemoPowerTools.com
Website: www.NemoGRABO®.cn
Phone: (+86) 0752-2369680
Israel - R@D & innovation center
NPT (Israel) LTD
Ha-Yarden St 1,
Ein Vered, Israel 42835
Website: www.GRABO.com
Phone: (+972) 03 376 9080
3
GRABO PRO-LIFTER 20 | Operator’s manual
GRABO® Ocial Importer/Distributors
GRABO® products are distributed globally by our professional partners. Among many other great
distribution partners, we’re proud to partner with the following global distributors:
Topspin Powertools B.V
Address: Stelmaker 12A 9502 KA Stadskanaal, Netherlands
+31 851 305 887
Russo Trading Company
N57 W13282, Carmen Ave, Menomonee Falls, WI 53051
Exordia Global Ltd
Address: The Mousery, Beeches Rd, Wickford SS11 8GH, United Kingdom
+44 1245 961166
Italy Tile
Address: 6 - 11, Eunbong-ro, 269 beon-gil, Namdong-gu, Incheon, 21649, South Korea
+82 10 9174 7019
Rutherford
Address: Unit 3A & 3B, City Deep Industrial Park, 36 Fortune Street, City Deep, Gauteng, GP2049,
South Africa
+27118782600
Hafele Japan K.K.
Address: Totsuka-ku Yokohama 14-17, Kanagawa, Kamishinano, 244-0806, Japan
+81 45 828 3120
CDK Stone Pty Ltd
Address: 1 Freighter Road, Moorabbin, Victoria, 3189, Australia
+61 414 625 501
For a full list of distribution partners please visit:
www.GRABO.com/GRABO®dealers
4
A
B
C
D
EF
G
H
1
3 42
5
GRABO PRO-LIFTER 20 | Operator’s manual
5
6
6
8
1
2
A
I
7
7
GRABO PRO-LIFTER 20 | Operator’s manual
10
9
K
J
8
NL
DK
DE
AR
FR
RU
ES
TR
IT
EN
SE
13
L
M
N
O
P
Q
11 12
9
GRABO PRO-LIFTER 20 | Operator’s manual
EN OPERATOR’S MANUAL ORIGINAL INSTRUCTIONS 10
NL BEDIENINGSVOORSCHRIFTEN VERTALING VAN DE ORIGINELE BEDIENINGSHANDLEIDING 24
DE BETRIEBSANLEITUNG ÜBERSETZUNG DER ORIGINALBETRIEBSANLEITUNG 38
FR MANUEL D'UTILISATEUR TRADUCTION DU MANUEL D'UTILISATEUR D'ORIGINE 52
ES MANUAL DE INSTRUCCIONES TRADUCCIÓN DEL ORIGINAL MANUAL DE INSTRUCCIONES 66
IT MANUALE DELLE ISTRUZIONI PER L’USO TRADUZIONE DELL’ORIGINALE MANUALE DELLE ISTRUZIONI PER L’USO 80
SE BRUKSANVISNING ÖVERSÄTTNING AV ORIGINAL BRUKSANVISNING 94
DK BETJENINGSVEJLEDNING OVERSÆTTELSE AF DEN OPRINDELIGE BETJENINGSVEJLEDNING 108
AR   
RU   136
TR KULLANIM KILAVUZU ORIJINAL BELGENIN ÇEVIRISI KULLANIM KILAVUZU 150
10
NL
DK
DE
AR
FR
RU
ES
TR
IT
EN
SE
GRABO® PRO-LIFTER20
INTRODUCTION
The GRABO® Pro-Lifter20 is a portable electric vacuum lifting device intended to lift, move,
and place objects such as tiles, stone pavers, drywall, glass and furniture. The GRABO® Pro-
Lifter20 Pro has a built-in pressure sensor with an automatic start/stop function. The GRABO®
Pro-Lifter20 is designed to work with dry, rough and slightly porous material. The GRABO®
Pro-Lifter20 Pro is not intended:
to be used for climbing or securing the human body in any way. This product is not
designed or intended for climbing or to support a person’s weight. Using this product for
climbing or any other unintended purpose may result in injury or death.
to lift, move, or place objects consisting of very porous, soft/exible, and crumbling
materials, such as simple cardboard boxes, styrofoam, dry cast pavers, compressed sand, or
bad quality concrete.
! Read this instruction manual carefully before use and save it for future reference
TECHNICAL SPECIFICATIONS
Electric vacuum lifting device 
Dimensions 300 x 184 x 118mm/11.8 x 7.2 x 4.7inches
Net weight (with battery) 1.5kg/3.2lbs
Battery
Battery type Li-ion 2600mAh/14.8V (4x cells 3.7V)
Battery rated capacity 2.6Ah
Nominal voltage/Charge voltage 14.8V/16.8V
Charge current 520mA
Rated power 16W
Overcharge protection 4.25V
Working time (full charge) 1.5hours
Operating temperature 0°C ... +45°C/+32°F ... +115°F Charge
-20°C ... +60°C/-4°F ... +140°F Discharge
Storage temperature battery -40°C ... +125°C/-40°F ... +257°F
Long-term storage battery (> 3 months) +5°C ... +20°C/+40°F ... +70°F
Charged to 14.4 – 15.6V (80 – 90% of full
charge)
11
GRABO PRO-LIFTER 20 | Operator’s manual
Battery charger
Charging output voltage 16.8V rated; 8 - 12V under load
Charging output current 200 - 400mA under load, 1.4A max
Charging input 100 - 240V AC; 50/60Hz; 1.5A max.
Rated power 23.52W
Operating temperature 0°C … +40°C/+32°F ... +105°F
Storage temperature -20°C ... +85°C/-4°F to +185°F
Working conditions Indoor use only; not waterproof (IP0)
GRABO® PRO-LIFTER20 lifting capacity
NOTICE: The GRABO® Pro-Lifter20 was tested up to 240kg (530lbs) at maximum lifting force
under ideal conditions. However, this gure is the breaking point under optimal lab testing
conditions and must never be reached in real-world applications!
Local regulations require dierent safety margins to be used and the ocial tool Working Load
Limit (WLL) is set to 120kg (265lbs) based on a 2:1 ratio on a non-porous surface. The Working
Load Limit of 120kg (265lbs) is one-half of the tested maximum lifting force under ideal
conditions (240kg/530lbs) and should be adhered to when working in countries where the 2:1
safety margin applies, regardless of the fact that the chart below shows a maximum lifting force
of 170kg (375lbs). In no case should the GRABO® Pro-Lifter20 be used to lift more than 170kg
(375lbs). Use the chart below to estimate safe lifting values:
WLL: 120kg (265lbs) on non-porous surfaces
IMPORTANT: The lifting force is highly dependent on the lifted surface and factors such as
temperature, altitude (ambient pressure), and other factors.
Always check the pressure displayed on the GRABO® Pro-Lifter20 LED display and do not rely
solely on the estimated maximum lifting forces chart when lifting dierent materials since
dierent factors related to your specic application may reduce lifting capabilities of the tool.
Vertical lifting of non-porous materials (-0.8 bar)
0 (kg)
0 (lbs)
120 (kg)
265 (lbs)
170 (kg)
375 (lbs)
SAFE LIFTING CAUTION DANGER!
12
NL
DK
DE
AR
FR
RU
ES
TR
IT
EN
SE

Perpendicular holding force Parallel holding force
Glass 170kg/375lbs 120kg/265lbs
Ceramic tile 170kg/375lbs 120kg/265lbs
Metal 110kg/242lbs 110kg/242lbs
Plastic 100kg/220lbs 100kg/220lbs
Wood 100kg/220lbs 65kg/143lbs
Rough concrete 80kg/176lbs 80kg/176lbs
Dry cast pavers 80kg/176lbs 80kg/176lbs
Drywall 75kg/165lbs 65kg/143lbs
NOTICE: When the vacuum level drops below -0.65 Bar (-65 kPa), the GRABO® Pro-Lifter20
will automatically restart the pump (when the pump is switched on), thereby achieving the
pressure required for use.

Running cycles (on full charge) 900 ON-OFF cycles of 10 seconds
Rated air ow 20 l/min (0.7cfm)
Applicable surface type Peak/valley heights less than 3mm/0.1inch,
arc less than
SCOPE OF DELIVERY
NOTICE: The exact scope of delivery may change, but it will always contain the items listed
below. If your delivery contains any additional items, these will be listed separately. See Spare
Parts for more information on ordering spare parts.
BASIC GRABO® Pro-Lifter20 SCOPE OF DELIVERY:
GRABO® Pro-Lifter20 (tool only)
• Battery
Operator’s manual
Multi-socket battery charger
Fabric bag OR Blow mold case
13
GRABO PRO-LIFTER 20 | Operator’s manual
SAFETY
GENERAL POWER TOOL SAFETY WARNINGS
WARNING: Read all safety warnings,

provided with this power tool. Failure to
follow all instructions listed below may result
in electric shock, re and/or serious personal
injury.
Save all warnings and instructions for future
reference.
The term ”power tool” in the warnings refers to
your mains-operated (corded) power tool or
battery-operated (cordless) power tool.
 
a) Keep your work area clean and well lit.
Cluttered benches and dark areas invite
accidents.
b) Do not operate power tools in an
explosive atmosphere, such as in the

dust. Power tools create sparks which may
ignite dust or fumes.
c) Keep children and bystanders away while
operating a power tool. Distractions can
cause you to lose control.
 
a) Power tool plugs must match the outlet.
Never modify the plug in any way. Do
not use any adapter plugs with earthed
(grounded) power tools. Unmodied plugs
and matching outlets will reduce risk of
electric shock.
b) Avoid body contact with earthed or
grounded surfaces such as pipes,
radiators, ranges and refrigerators. There
is an increased risk of electric shock if your
body is grounded.
c) Do not expose power tools to rain or wet
conditions. Water entering a power tool
will increase the risk of electric shock.
d) Do not abuse the cord. Never use the
cord for carrying, pulling or unplugging
the power tool. Keep cord away from
heat, oil, sharp edges or moving parts.
Damaged or entangled cords increase the
risk of electric shock.
 
use an extension cord suitable for
outdoor use. Use of a cord suitable for
outdoor use reduces the risk of electric
shock.
f) If operating a power tool in a damp
location is unavoidable, use a residual

Use of a RCD reduces the risk of electric
shock.
TOOL ELEMENTS ➊ ⓭
A. Battery
B. Red vacuum release button
 Green motor power button
D. Power ON/OFF switch
E. Digital display
F. Measurement unit selector
G. Run status indicator
H. Attachment rings (4x)
I. Rubber foam seal
J. Air lter pad
K. Air lter lock ring
L. Pressure in bar
M. Pressure in psi
N. Weight inkg
O. Weight inlbs
P. Value of pressure or weight
Q. Battery bar indicator
14
NL
DK
DE
AR
FR
RU
ES
TR
IT
EN
SE
3) PERSONAL SAFETY
a) Stay alert, watch what you are doing and
use common sense when operating a
power tool. Do not use a power tool while

drugs, alcohol or medication. A moment
of inattention while operating power tools
may result in serious personal injury.
 
Always wear eye protection. Protective
equipment such as a dust mask, non-
skid safety shoes, a hard hat, or hearing
protection used for appropriate conditions
will reduce personal injuries.
c) Prevent unintentional starting. Ensure

connecting to a power source and/or
battery and picking up or carrying the
tool. Carrying power tools with your nger
on the switch or energizing power tools
that have the switch on invites accidents.
d) Remove any adjusting key or wrench
before turning the power tool on. A
wrench or a key left attached to a rotating
part of the power tool may result in
personal injury.
e) Do not overreach. Keep proper footing
and balance at all times. This enables
better control of the power tool in
unexpected situations.
f) Dress properly. Do not wear loose
clothing or jewellery. Keep your hair and
clothing away from moving parts. Loose
clothes, jewellery or long hair can be
caught in moving parts.
g) If devices are provided for the connection
of dust extraction and collection facilities,
ensure these are connected and properly
used. Removal of dust can reduce dust-
related hazards.
h) Do not let familiarity gained from

become complacent and ignore tool
safety principles. A careless action can
cause severe injury within a fraction of a
second.
 
a) Do not force the power tool. Use the
correct power tool for your application.
The correct power tool will do the job
better and safer at the rate for which it
was designed.
b) Do not use the power tool if the switch
 Any
power tool that cannot be controlled
with the switch is dangerous and must be
repaired.
c) Disconnect the plug from the power
source and/or remove the battery, if
detachable, from the power tool before
making any adjustments, changing
accessories, or storing power tools.
Such preventive safety measures reduce
the risk of starting the power tool
accidentally.
d) Store idle power tools out of the reach
of children and do not allow persons
unfamiliar with the power tool or these
instructions to operate the power tool.
Power tools are dangerous in the hands
of untrained users.
 
misalignment or binding of moving
parts, breakage of parts and any other

tool’s operation. If damaged, have
the power tool repaired before use.
Many accidents are caused by poorly
maintained power tools.
f) Keep cutting tools sharp and clean.
Properly maintained cutting tools with
sharp cutting edges are less likely to bind
and are easier to control.
g) Use the power tool, accessories and
tool bits etc. in accordance with these
instructions, taking into account the
15
GRABO PRO-LIFTER 20 | Operator’s manual
working conditions and the work to be
performed. Use of the power tool for
operations dierent from those intended
could result in a hazardous situation.
h) Keep handles and grasping surfaces
dry, clean and free from oil and grease.
Slippery handles and grasping surfaces do
not allow for safe handling and control of
the tool in unexpected situations.
 
 
by the manufacturer. A charger that
is suitable for one type of battery may
create a risk of re when used with
another battery.
 
designated battery. Use of any other
battery may create a risk of injury and re.
 
from other metal objects, like paper
clips, coins, keys, nails, screws or other
small metal objects, that can make
a connection from one terminal to
another. Shorting the battery terminals
together may cause burns or a re.
 
be ejected from the battery; avoid
contact. If contact accidentally occurs,

additionally seek medical help. Liquid
ejected from the battery may cause
irritation or burns.
e) Do not use a battery or tool that
Damaged
or modied batteries may exhibit
unpredictable behaviour resulting in re,
explosion or risk of injury.
 
excessive temperature. Exposure to re
or temperature above 130°C/265 °F may
cause an explosion.
g) Follow all charging instructions and do
not charge the battery or tool outside

instructions. Charging improperly or at
temperatures outside the specied range
may damage the battery and increase the
risk of re.
 
a) Have your power tool serviced by

identical replacement parts. This will
ensure that the safety of the power tool is
maintained.
b) Never service a damaged battery. Service
of battery should only be performed by
the manufacturer or authorized service
providers.
VACUUM LIFTING DEVICE SAFETY WARNINGS
a) Do not deliberately try to rip the load
 There is a risk
of the load crushing feet and hands and
damaging the object and tool.
b) Do not lift objects weighing more than
 There is a risk the weight
can fall o.
c) Risk of load crushing feet and hands and
damaging the object and tool. Do not
shake the tool while lifting, moving and
placing objects. Do not swing or shake
the load while lifting, moving and placing
objects. Do not use the tool when the
seal is worn out. Lift and carry the load
with uniform speed without sudden sharp
and strong movements.
d) Do not use the tool while the battery is
low. There is a risk of injury and damage
to the materials being lifted.
e) If the sealing force begins to noticeably
decrease while the battery is fully
charged, check the rubber foam seal for
16
NL
DK
DE
AR
FR
RU
ES
TR
IT
EN
SE
wear and tear or damage. Do not attempt
to lift anything with the tool until you
have replaced the seal.
f) Use caution when lifting large thin

plastic, plywood, thin sheet metal
etc. Thin sheets bend and ex and can
unexpectedly change curvature above
their limit and detach.
g) Do not attach the tool to surfaces
with visible puddles of water. Internal
components are not waterproof. If water
is sucked into the air ducts it can cause
permanent damage to the tool. The
GRABO® Pro-Lifter20 is not waterproof
and therefore extreme caution should
be taken when using in the rain or wet
conditions.
h) Do not drop the tool from heights above

If dropped by accident, inspect the seal
side lips for damage.
i) Do not place heavy objects on top of the
tool.
j) Do not place the digital display in direct
sunlight or near strong heat sources for
prolonged periods. Extreme heat may
damage the display and it may become
unreadable. A damaged display does not
necessarily impact the functionality of the
tool.
k) To avoid overheating, do not cover the
tool.
 
before transporting the tool and when
in storage. Be mindful that the tool is not
switched on accidently.
! WARNING! Weight may drop without
warning if the safety precautions are not
met! The GRABO® Pro-Lifter20 creates a
strong vacuum. In case the seal is broken
or the allowed weight is exceeded or
any other factor that causes the negative
pressure to release spontaneously, this
kind of failure will happen suddenly and
absolutely without any sensory indication
or warning. You will not notice the weight
detaching and there will be no possibility
to stop or catch it. This is very dangerous,
especially with heavy loads. Therefore all
safety precautions should be kept to the
maximum.
RUBBER FOAM SEAL USAGE AND SAFETY
! The rubber foam seal is made of two
parts: black rubber foam and red silicon
seal. Black rubber foam is mostly used to
create initial vacuum. After it compresses,
the red seal holds the longest and
strongest seal. As long as the initial seal is
created to get suction, the “strong” seal
will also be created. The rubber foam
seal uses patented technology and is
one of the main components of the tool.
It should be handled with caution as it
directly impacts the overall performance
and safety.
 
compression cycles, depending on force
and duration of compression, without any
damage.
b) Avoid rubbing the seal over rough
surfaces. Seal material is very prone
to parallel wear (moving parallel to
rough surface in ironing motion). Lift
perpendicularly on very rough surfaces.
Rubbing the seal over a smooth surface
such as granite in the presence of thick
abrasives (thick sand) will damage the seal
and may cause unexpected detachment.
c) Surfaces with very sharp edges should
not be lifted in parallel hold. Edges
sharper than 45 degrees may damage the
seal and lead to sudden vacuum loss and
17
GRABO PRO-LIFTER 20 | Operator’s manual
sudden detachment. The motor should
always be on.
d) Always store the seal covered with a hard
cover. The seal can be easily damaged
by sharp corners and edges when in
storage. The seal should not be stored
with sharp tools or in contact with any
hard objects (e.g. inside a toolbox).
e) Do not dip the seal in water. The rubber
foam seal is slightly water absorbent.
Unless it is fully dipped in water and
soaking wet, slightly soaking the seal with
water will not damage its performance. If
it is soaked in water, it can be squeezed
by hand like a sponge to dry without
damage. It is advisable to use a dry seal to
avoid water getting sucked into air ducts
and inside the body.
! Do not dip or use the seal in the presence
of any oil-based products. Oil and oil
products (machine oil + lubricants) will
permanently damage the seal and cannot
be removed. If the seal has absorbed oil,
it should be disposed of safely, the base
should be cleaned, and the seal replaced.
! Do not use or store the seal in the
presence of chemical solvents. Kerosene,
acetone, turpentine, benzene, acids, etc.
and even their fumes in closed spaces
or thin layers on surfaces can melt the
seal and damage its structure and cause
failure.
EXPLANATION OF SYMBOLS USED ON TOOL
Read the operator’s manual before use
Wear protective shoes and gloves
Do not dispose of the tool together with household waste material
NOISE EMISSION/VIBRATION
A-weighted sound pressure level LpA=79.4 dB(A), uncertainty K=3 dB(A). A-weighted
sound power level LwA=71.4 dB(A), uncertainty K=3 dB(A).
Vibration total value=1.240 m/s2, uncertainty K=0.11 m/s2. The declared vibration total
value has been measured in accordance with a standard test method and may be used for
comparing one tool with another. The declared vibration total value may also be used in a
preliminary assessment of exposure.
! WARNING: The vibration emission during actual use of the power tool can dier from
the declared total value depending on the ways in which the tool is used. It’s necessary to
identify safety measures to protect the operator based on an estimation of exposure in the
actual conditions of use (under consideration of all parts of the operating cycle such as
the times when the tool is switched o and when it is running idle in addition to the trigger
time).
TRANSPORT
The lithium-equivalent content in the batteries is below applicable limit values. Regulations
governing hazardous goods may be relevant when transporting several batteries. In this case,
it may be necessary to comply with special conditions, such as those governing packaging.
Always make sure the national installation regulations are observed.
18
NL
DK
DE
AR
FR
RU
ES
TR
IT
EN
SE
ASSEMBLY
CONNECTING A STRAP TO THE GRABO® Pro-Lifter20
As an option, you can attach a strap to the GRABO® Pro-Lifter20 to carry the device
safely.
1. Locate the four attachment rings .
2. Connect a strap to any two of these attachment rings.
3. Secure each of the clips at the ends of a strap into an attachment ring.
OPERATION
LIFTING TECHNIQUES
Plan ahead. Know what you are lifting and how you will lift it. Be aware of the weight of the
object. Determine whether or not it is safe to lift on your own. Make sure the work area is
at, dry and clear of debris.
Check your path. Make sure the lift path is clear. Remove any tripping hazards or debris.
Check for any wet or slick surfaces.
Use ergonomic equipment. Use lift assists such as a forklift, dolly, cart, hand truck, or hoist.
Make sure you are trained before using the equipment.
Get help when needed. When lifting awkward or heavy loads, utilize a two person lift. Make
sure you lift at the same time and keep the load level.
Wear proper required protective shoes and gloves.
Basic diagonal lifting technique:
! Use this basic lifting technique for small objects when you can straddle the load and
use a wide stance.
1. Get as close to the object as possible.
2. Use a wide stance with one foot forward and to the side of the object for good
balance.
3. Keep your back straight, push your buttocks out. Use your legs and hips to lower
yourself down to the object.
4. Move the object as close to you as possible.
5. Put the hand (same side of your body as the forward foot) on the side of the object
farthest from you.
6. When lifting the load holding the GRABO® Pro-Lifter20 with one hand, secure the
load with your other hand.
7. Prepare for lifting, tighten your core muscles, look forward and upward, and maintain
a straight and strong back.
! Do not hold your breath while lifting. Do not bend or twist your waist. Do not use a
partial grip (1-2 ngers). Do not obstruct your vision when carrying. Do not jerk or lift
quickly. Do not pinch your ngers or toes.
8. Lift slowly and follow with your head and shoulders. Hold the load close to your body.
Lift by extending your legs with your back straight, and breathe out as you lift. Pivot
your feet to avoid twisting.
19
GRABO PRO-LIFTER 20 | Operator’s manual
CHARGING THE BATTERY BEFORE FIRST USE
The batteries are partially charged and must be charged to full capacity before using the
GRABO® Pro-Lifter20 for the rst time. When the batteries are fully charged, which takes
approximately twohours from the discharged state, the GRABO® Pro-Lifter20 motor can run
for up to 1.5hours. See CHARGING THE BATTERY.
OPERATING THE GRABO® Pro-Lifter20
1. Slide the power ON/OFF switch into the ON position. The run status indicator lights
up red and the digital display shows the amount of available charge and the current
pressure. NOTICE: If the last bar of the battery bar indicator ashes red, the battery needs
to be charged (see CHARGING AND CHANGING THE BATTERY).
! CAUTION: Using the GRABO® Pro-Lifter20 while the battery is low may result in injury
and damage to the materials being lifted. It is advisable to fully charge the battery before
using the GRABO® Pro-Lifter20.
2. As an option, press the measurement unit selector to change the pressure unit
measurement from bar to psi and weight units fromkg tolbs.
3. Position the GRABO® Pro-Lifter20 rmly against the surface of the object you want to lift.
4. Press the green motor power button . The run status indicator ashes red. A seal is
created within seconds. When the negative pressure reaches the maximum level, the run
status indicator turns green and the motor stops automatically.
5. Lift and move the object.
! When lifting materials with dusty, dirty, or moist surfaces, remove the dust and dirt as
much as possible. The GRABO® Pro-Lifter20 will automatically turn the pump on and o
to maintain the pressure necessary for safe lifting.
! For maximum safety, switch the display to weight units (kg /lbs) and compare the
displayed values with the weight being lifted, based on the “Maximum lifting force” table.
Do not try to lift any weights heavier than the value displayed.
TO END OPERATING THE GRABO® Pro-Lifter20
1. When you are done and the object is in a secure and stable position, press the green
motor power button to stop the vacuum pump. Press the red vacuum release button
to break the seal and release the object.
CHARGING AND CHANGING THE BATTERY
Charge the battery when the capacity is low or the battery is empty.
1. Slide the battery latch to unlock the battery .
2. Remove the battery.
3. Connect the battery with the multi socket battery charger to a wall socket.
4. When the battery is fully charged, the battery bar indicator turns green.
5. Disconnect the multi-socket battery charger from the wall socket and battery.
6. Put the battery in the battery compartment.
7. Press and slide the battery latch to lock the battery.
20
NL
DK
DE
AR
FR
RU
ES
TR
IT
EN
SE
! Charge only with the charger specied by the manufacturer.
! During the process of charging, the charger can become warm: this is normal.
! Only use the charger in a dry environment. The charger is not waterproof.
! Ensure that the power supply voltage corresponds to the data on the nameplate of the
battery charger.
! Keep away from ammable objects while charging.
EXPLANATION OF VISUAL INDICATORS

Signal Meaning
No light The GRABO® Pro-Lifter20 is turned o
Run status indicator is continuously red 1. The GRABO® Pro-Lifter20 is turned on
and ready for use
2. Pressure is building up and reaching its
maximum capacity
3. Pump is switched o
Run status indicator ashes red Pump is switched on; pressure is low and
building up
Run status indicator is continuously green Pump is switched on but the motor is o;
pressure has reached its maximum capacity
Bar indicator on display shows 5 green bars Battery is suciently charged
Last bar of bar indicator on display ashes red Battery capacity is low/empty
Bar indicator on display 1 Bar = 20% full
2 Bar = 40% full
3 Bar = 60% full
4 Bar = 80% full
5 Bar = 100% full

Signal Meaning
LED is continuously red Battery is charging
LED is continuously green Battery is fully charged
MAINTENANCE
WARNING: Changes to the tool and technical modications are not permitted. This can
lead to injury. If the tool fails despite the care taken in manufacturing and testing procedures,
repair shall be carried out by an after-sales service centre for the GRABO® Pro-Lifter20.
  • Page 1 1
  • Page 2 2
  • Page 3 3
  • Page 4 4
  • Page 5 5
  • Page 6 6
  • Page 7 7
  • Page 8 8
  • Page 9 9
  • Page 10 10
  • Page 11 11
  • Page 12 12
  • Page 13 13
  • Page 14 14
  • Page 15 15
  • Page 16 16
  • Page 17 17
  • Page 18 18
  • Page 19 19
  • Page 20 20
  • Page 21 21
  • Page 22 22
  • Page 23 23
  • Page 24 24
  • Page 25 25
  • Page 26 26
  • Page 27 27
  • Page 28 28
  • Page 29 29
  • Page 30 30
  • Page 31 31
  • Page 32 32
  • Page 33 33
  • Page 34 34
  • Page 35 35
  • Page 36 36
  • Page 37 37
  • Page 38 38
  • Page 39 39
  • Page 40 40
  • Page 41 41
  • Page 42 42
  • Page 43 43
  • Page 44 44
  • Page 45 45
  • Page 46 46
  • Page 47 47
  • Page 48 48
  • Page 49 49
  • Page 50 50
  • Page 51 51
  • Page 52 52
  • Page 53 53
  • Page 54 54
  • Page 55 55
  • Page 56 56
  • Page 57 57
  • Page 58 58
  • Page 59 59
  • Page 60 60
  • Page 61 61
  • Page 62 62
  • Page 63 63
  • Page 64 64
  • Page 65 65
  • Page 66 66
  • Page 67 67
  • Page 68 68
  • Page 69 69
  • Page 70 70
  • Page 71 71
  • Page 72 72
  • Page 73 73
  • Page 74 74
  • Page 75 75
  • Page 76 76
  • Page 77 77
  • Page 78 78
  • Page 79 79
  • Page 80 80
  • Page 81 81
  • Page 82 82
  • Page 83 83
  • Page 84 84
  • Page 85 85
  • Page 86 86
  • Page 87 87
  • Page 88 88
  • Page 89 89
  • Page 90 90
  • Page 91 91
  • Page 92 92
  • Page 93 93
  • Page 94 94
  • Page 95 95
  • Page 96 96
  • Page 97 97
  • Page 98 98
  • Page 99 99
  • Page 100 100
  • Page 101 101
  • Page 102 102
  • Page 103 103
  • Page 104 104
  • Page 105 105
  • Page 106 106
  • Page 107 107
  • Page 108 108
  • Page 109 109
  • Page 110 110
  • Page 111 111
  • Page 112 112
  • Page 113 113
  • Page 114 114
  • Page 115 115
  • Page 116 116
  • Page 117 117
  • Page 118 118
  • Page 119 119
  • Page 120 120
  • Page 121 121
  • Page 122 122
  • Page 123 123
  • Page 124 124
  • Page 125 125
  • Page 126 126
  • Page 127 127
  • Page 128 128
  • Page 129 129
  • Page 130 130
  • Page 131 131
  • Page 132 132
  • Page 133 133
  • Page 134 134
  • Page 135 135
  • Page 136 136
  • Page 137 137
  • Page 138 138
  • Page 139 139
  • Page 140 140
  • Page 141 141
  • Page 142 142
  • Page 143 143
  • Page 144 144
  • Page 145 145
  • Page 146 146
  • Page 147 147
  • Page 148 148
  • Page 149 149
  • Page 150 150
  • Page 151 151
  • Page 152 152
  • Page 153 153
  • Page 154 154
  • Page 155 155
  • Page 156 156
  • Page 157 157
  • Page 158 158
  • Page 159 159
  • Page 160 160
  • Page 161 161
  • Page 162 162
  • Page 163 163
  • Page 164 164

Grabo PRO-Lifter 20 Bedienungsanleitung

Typ
Bedienungsanleitung

Hier finden Sie kurze Informationen zum Vakuumheber Pro-Lifter 20. Der GRABO® Pro-Lifter 20 ist ein tragbares elektrisches Vakuum-Hebegerät, das zum Heben, Bewegen und Platzieren von Gegenständen wie Fliesen, Steinpflaster, Trockenbauwänden, Glas und Möbeln bestimmt ist. Der GRABO® Pro-Lifter 20 Pro verfügt über einen eingebauten Drucksensor mit automatischer Start/Stopp-Funktion und ist für den Einsatz mit trockenen, rauen und leicht porösen Materialien konzipiert.