Canon EF 35mm f/2 IS USM Benutzerhandbuch
- Kategorie
- Kameraobjektive
- Typ
- Benutzerhandbuch

Specifications Fiche technique Technische Daten Especificaciones Specifiche tecniche
Angle of view
Angle de champ
Bildwinkel
Augulo de visión
Angolo di campo
Lens construction
Construction
Aufbau
Construcción del objetivo
Struttura dell’obiettivo
Minimum aperture
Ouverture minimale
Kleinste Blende
Abertura mínima
Apertura minima
Max. magnification
Grossissement max.
Stärkste Vergrößerung
Ampliación máx.
Ingrandimento max.
Min. focusing distance
Distance de mise au point min.
Naheinstellgrenze
Distancia de enfoque mín.
Distanza minima di messa a fuoco
Filter diameter
Diamètre de filtre
Filtergewinde
Diámetro del filtro
Diametro del filtro
Max. diameter and length
Diamètre et longueur max.
Max. Durchmesser und Länge
Diámetro y longitud máx.
Diametro e lunghezza max.
Weight
Poids
Gewicht
Peso
Peso
Hood
Parasoleil
Gegenlichtblende
Parasol
Paraluce
Lens Cap
Bouchon d’objectif
Objektivdeckel
Tapa del objetivo
Coperchio obiettivo
Case
Boîtier
Behälter
Estuche
Custodia
Diagonal
Portée diagonale
Diagonal
Diagonal
Diagonale
Vertical
Verticale
Vertikal
Vertical
Verticale
Horizontal
Horizontale
Horizontal
Horizontal
Orizzontale
EF35mm f/2 IS USM 63° 38° 54° 8-10 22 0.24x 0.24m/0.79ft 67mm 77.9x62.6mm (3.1”x2.5”) 335g/11.8oz EW-72 E-67ll LP1116
Extension Tube Specifications
Spécifications du tube-allonge
Spezifikation des Zwischenrings
Especificaciones del tubo de extensión
Specifiche del tubo di prolunga
Magnification
Grossissement
Vergrößerung
Ampliación
Ingrandimento
(X)
Focusing Distance Range
Plage de mise au point
Einstellentfernungsbereich
Gama de distancia de enfoque
Gamma distanze di messa a fuoco
(mm) (inch)
EF35mm f/2 IS USM
EF12 II 0.60-0.36 168-197 (6.6-7.6)
EF25 II 1.04-0.79 158-160 (6.2-6.3)
2.3
0.7 2
6.5
22 2211 11
ft
m
Z
ER
O
FF
M
F
●❶
●❷
●❹
ON
STABILIZER
OFF
●❺
●❼
●❻
●❸
CT1-8586-002 1305SZ © CANON INC. 2012 PRINTED IN JAPAN
EF Lenses EF-Objektive
Instructions Bedienungsanleitung
EF35mm f/2 IS USM EF35mm 1:2 IS USM
Objectifs EF Obiettivi EFObjetivos EF
Mode d’emploi IstruzioniInstrucciones
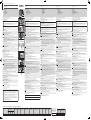
Nomenclature
●①
Distance scale
●②
Distance index
●③
Focusing ring
●④
Focus mode switch
●⑤
Image Stabilizer switch
●⑥
Lens mount index
●⑦
Contacts
Teilebezeichnungen
●①
Entfernungsskala
●②
Entfernungsindex
●③
Scharfstellring
●④
Fokus-Wahlschalter
●⑤
Bildstabilisator-Schalter
●⑥
Montageindex
●⑦
Kontakte
Nomenclature
●①
Echelle des distances
●②
Repère des distances
●③
Bague de mise au point
●④
Sélecteur de mode de mise au point
●⑤
Commande de stabilisateur d’image
●⑥
Repère de montage d’objectif
●⑦
Contacts
Nomenclatura
●①
Escala de distancias
●②
Índice de distancias
●③
Anillo de enfoque
●④
Interruptor del modo de enfoque
●⑤
Interruptor del estabilizador de imagen
●⑥
Indice de montura del objetivo
●⑦
Contactos
Nomenclatura
●①
Scala delle distanze
●②
Indice della distanza
●③
Ghiera di messa a fuoco
●④
Selettore modalità di messa a fuoco
●⑤
Interruttore dello stabilizzatore di immagine
●⑥
Indice attacco obiettivo
●⑦
Contatti
EF35mm f/2 IS USM EF35mm f/2 IS USMEF35mm f/2 IS USM
Thank you for purchasing a Canon product.
EF35mm f/2 IS USM is a wide-angle single focus lens that provide high image quality.
● “IS” stands for Image Stabilizer.
● “USM” stands for Ultrasonic Motor.
Safety Precautions
● Do not look at the sun or a bright light source through the lens or camera. Doing so could result in loss of
vision.
Looking at the sun directly through the lens is especially hazardous.
● Whether it is attached to the camera or not, do not leave the lens under the sun without the lens cap
attached. This is to prevent the lens from concentrating the sun’s rays, which could cause a fire.
Handling Cautions
● If the lens is taken from a cold environment into a warm one, condensation may develop on the lens
surface and internal parts. To prevent condensation in this case, first put the lens into an airtight plastic bag
before taking it from a cold to warm environment. Then take out the lens after
it has warmed gradually. Do the
same when taking the lens from a warm environment into a cold one.
● Do not leave the lens in excessive heat such as in a car in direct sunlight. High temperatures can cause the
lens to malfunction.
Conventions used in this instruction
Warning to prevent lens or camera malfunction or damage.
Supplementary notes on using the lens and taking pictures.
1. Mounting and Detaching the Lens
See your camera’s instructions for details on mounting and detaching the lens.
● After detaching the lens, place the lens with the rear end up to prevent the lens surface and contacts from
getting scratched.
● If the contacts get soiled, scratched, or have fingerprints on them, corrosion or faulty connections can result.
The camera and lens may not operate properly.
● If the contacts get soiled or have fingerprints on them, clean them with a soft cloth.
● If you remove the lens, cover it with the dust cap. To attach it properly, align the lens mount index and the ○
index of the dust cap, and turn clockwise ●❶. To remove it, reverse the order.
2. Setting the Focus Mode
To shoot in autofocus (AF) mode, set the focus mode switch to AF ❷.
To shoot in manual focus (MF) mode, set the focus mode switch to MF, and focus by turning the focusing ring. The
focusing ring always works, regardless of the focus mode ❸.
After autofocusing in ONE SHOT AF mode, focus manually by pressing the shutter button halfway and turning
the focusing ring. (Full-time manual focus)
3. Infinity Compensation Mark
To compensate for shifting of the infinity focus point that results from changes in temperature.
The infinity position at normal temperature is the point at which the vertical line of the distance scale L mark is aligned
with the distance index ❹.
For accurate manual focusing of subjects at infinity, look through the viewfinder or look at the magnified image*
on the LCD screen while rotating the focusing ring.
* For cameras with Live View shooting capability.
4. Image Stabilizer
You can use the Image Stabilizer in AF or MF mode.
This function provides optimal image stabilization depending on shooting conditions
(such as shooting still subjects and following shots).
1. Set the STABILIZER switch to ON ❺.
● If you are not going to use the image stabilizer function, set the switch to OFF.
2. When you press the shutter button halfway, the Image Stabilizer will start operating.
● Make sure the image in the viewfinder is stable, then press the shutter button the rest of the way down to take the
picture.
● The Image Stabilizer cannot compensate for a blurred shot caused by a subject that moved.
● The Image Stabilizer may not be fully effective if you shoot from a violently shaking vehicle or other
transportation.
● The Image Stabilizer consumes more power than normal shooting, so fewer shots can be taken if you use
the function.
● When shooting a still subject, it compensates for camera shake in all directions.
● It compensates for vertical camera shake during following shots in a horizontal direction, and compensates
for horizontal camera shake during following shots in a vertical direction.
● When you use a tripod, the Image Stabilizer should be turned off to save battery power.
● The stabilizer is equally effective for handheld photography and photography with a monopod. The Image
Stabilizer effect may be reduced, however, depending on the shooting environment.
●
The Image Stabilizer also operates when the lens is used with extension tube EF12 II or EF25 II.
● If you set the camera’s Custom Function to change the assigned button to operate the AF, the Image
Stabilizer will operate when you press the newly assigned AF button.
5. Hood (Sold Separately)
The EW-72 hood can keep unwanted light out of the lens, and also protects the lens from rain, snow, and dust.
To attach the hood, align the hood’s attachment position mark with the red dot on the front of the lens, then turn the
hood in the direction of the arrow until the lens’s red dot is aligned with the hood’s stop position mark ❻.
To remove the hood, hold down the button on the side and turn the hood in the direction of the arrow until the position
mark on the hood aligns with the red dot ❼.
The hood can be reverse-mounted on the lens for storage.
● Part of the picture may be blocked if the hood is not attached properly.
● When attaching or detaching the hood, grasp the base of the hood to turn it. To prevent deformation, do not
grasp the rim of the hood to turn it.
6. Filters (Sold Separately)
You can attach filters to the filter mounting thread on the front of the lens.
● Only one filter may be attached.
● Use a polarizing Canon filter (67mm).
● To adjust the polarizing filter, first remove the lens hood.
7. Extension Tubes (Sold Separately)
You can attach extension tube EF12 II or EF25 II for magnified shots. For shooting distance and magnification, see
the extension tube specifications.
MF mode is recommended for accurate focusing.
●The extenders cannot be used with this lens.
●The close-up lenses cannot be used with this lens.
●CASE (Sold Separately) LP1116
This device complies with Part 15 of the FCC Rules. Operation is subject to the following two conditions: (1) This
device may not cause harmful interference, and (2) this device must accept any interference received, including
interference that may cause undesired operation.
Do not make any changes or modifications to the equipment unless otherwise specified in the instructions. If such
changes or modifications should be made, you could be required to stop operation of the equipment.
This equipment has been tested and found to comply with the limits for a class B digital device, pursuant to part 15
of the FCC Rules.
These limits are designed to provide reasonable protection against harmful interference in a residential installation.
This equipment generates, uses and can radiate radio frequency energy and, if not installed and used in
accordance with the instructions, may cause harmful interference to radio communications.
However, there is no guarantee that interference will not occur in a particular installation. If this equipment does
cause harmful interference to radio or television reception, which can be determined by turning the equipment off
and on, the user is encouraged to try to correct the interference by one or more of the following measures:
• Reorient or relocate the receiving antenna.
• Increase the separation between the equipment and receiver.
• Consult the dealer or an experienced radio/TV technician for help.
Muchas gracias por la compra de un producto Canon.
El EF35mm f/2 IS USM es un lente de enfoque simple de ángulo amplio que ofrece una calidad elevada de imagen.
● “IS” significa estabilizador de imagen.
● “USM” significa motor ultrasónico.
Precauciones de seguridad
● No mire al sol o a una fuente de luz brillante a través del objetivo o de la cámara, pues podría provocarle
ceguera.
Mirar al sol directamente a través del objetivo es especialmente peligroso.
● El objetivo, esté o no instalado en la cámara,no debe dejarse expuesto a la luz del sol si está desprovisto
de su cubierta. De este modo se evita que el objetivo concentre los rayos solares y pueda causar un incendio.
Precauciones de uso
● Si se lleva el objetivo de un lugar frío a uno caliente, puede condensarse humedad en la superficie del
objetivo y piezas internas. Para evitar la condensación en este caso, primero ponga el objetivo en una bolsa de
plástico herméticamente cerrada antes de llevarlo de un lugar frío a otro caliente. Saque el objetivo después de
que se haya calentado gradualmente. Haga lo mismo cuando lleve el objetivo de un lugar caliente a otro frío.
● No deje el objetivo en lugares excesivamente calurosos, como el interior de un coche expuesto a la luz directa
del sol. Las altas temperaturas pueden causar fallos de funcionamiento del objetivo.
Convenciones empleadas en este manual
Advertencia para evitar un fallo de funcionamiento o daños a la cámara o al objetivo.
Notas complementarias sobre el uso del objetivo o cómo tomar las fotos.
1. Montaje y desmontaje del objetivo
Con respecto al montaje y desmontaje del objetivo, consulte las instrucciones entregadas con su cámara.
● Después de desmontar el objetivo, colóquelo con su parte posterior hacia arriba, para evitar que la
superficie del objetivo y los contactos se rayen.
● Si los contactos se ensucian, rayan o tienen huellas dactilares, puede producirse corrosión o conexiones
defectuosas. La cámara yel objetivo podrían funcionar inadecuadamente.
● Si los contactos se ensucian o tienen huellas dactilares, límpielos con un paño suave.
● Si quita el objetivo, cúbralo con la cubierta contra el polvo. Para colocarla adecuadamente, alinee el índice
de montura del objetivo con el índice ○ de la cubierta contra el polvo y gírela en sentido horario ●❶. Para
sacarla, invierta el orden.
2. Ajuste del modo de enfoque
Para seleccionar el modo de enfoque automático (AF), ajuste el interruptor del modo de enfoque a AF ❷
.
Para realizar tomas en el modo de enfoque manual (MF), ajuste el interruptor del modo de enfoque a MF, y enfoque
girando el anillo de enfoque. El anillo de enfoque funciona siempre, independientemente del modo de enfoque ❸.
Después de enfocar automáticamente en el modo ONE SHOT AF, enfoque manualmente oprimiendo el
disparador hasta la mitad y girando el anillo de enfoque. (Enfoque manual en todo momento)
3. Marca de Compensación de Infinito
Para compensar el desplazamiento del punto de enfoque infinito que ocurre debido a cambios de temperatura.
La posición de infinito a temperatura normal es el punto en que se alinea la línea vertical de la marca L de la escala
de distancias con el índice de distancias ❹.
Para un enfoque manual preciso de sujetos situados a una distancia de infinito, mire a través del visor o mire
la imagen ampliada* en la pantalla LCD mientras gira el anillo de enfoque.
* Para cámaras con posibilidades de fotografiado Live View.
4. Estabilizador de imagen
Podrá utilizar el estabilizador de imagen en el modo AF o MF.
Esta función brinda estabilización óptima de la imagen dependiendo de las condiciones de fotografiado
(como al fotografiar objetos inmóviles y al fotografiar siguiendo objetos en movimiento).
1. Ponga el interruptor STABILIZER en ON ❺.
● Cuando no esté usando la función de estabilizador de imagen, ajuste el interruptor en OFF.
2. Cuando usted oprima el disparador hasta la mitad del recorrido, el estabilizador de imagen comenzará a funcionar.
● Asegúrese de que la imagen en el visor sea estable, y luego oprima el disparador hasta el fondo para tomar la foto.
● El estabilizador de imagen no puede compensar una toma borrosa causada por un sujeto que se haya
movido.
● El estabilizador de imagen puede no resultar completamente efectivo si fotografía desde un vehículo u otro
medio de transporte moviéndose violentamente.
● El estabilizador de imagen consume más energía que el modo normal, por lo tanto, si se utiliza esta
función podrán realizarse menos tomas.
● Al fotografiar un objeto inmóvil, compensa la sacudida de la cámara en todas las direcciones.
● Compensa por la sacudida vertical de la cámara durante fotografiado siguiendo objetos en movimiento
en una dirección horizontal, y compensa por la sacudida horizontal de la cámara durante fotografiado
siguiendo objetos en movimiento en una dirección vertical.
● Cuando usa un trípode, debe apagar el estabilizador de imagen para ahorrar carga de la batería.
● El estabilizador es igualmente efectivo tanto para la fotografía cámara en mano como para la fotografía con
monopie. No obstante, el efecto del estabilizador de imagen podría reducirse en función del entorno de la
toma.
● El Image Stabilizer también funciona cuando el lente se usa con la tubo de extensión EF12 II o EF25 II.
● Si configura la función personalizada de la cámara para cambiar el botón asignado para el funcionamiento
de AF, el estabilizador de imagen funcionará cuando presione el botón AF recién asignado.
5. Parasol (en venta por separado)
El parasol EW-72 puede impedir que entre luz no deseada al objetivo, también protegerá al objetivo contra la lluvia,
nieve y polvo.
Para instalar el parasol, alinee la marca de posición del parasol con el punto rojo ubicado en la parte
delantera del objetivo y gire el parasol en la dirección de la flecha hasta que el punto rojo del objetivo quede alineado
con la marca de posición de detención del parasol ❻.
Para desinstalar el parasol, presione el botón en el costado y gire el parasol en la dirección de la flecha hasta que la
marca de posición del parasol esté alineada con el punto rojo ❼.
El parasol puede guardarse instalándolo en sentido inverso en el objetivo.
● Si el parasol no está instalado en forma correcta, parte de la imagen podrá ser bloqueada.
● Al instalar o desmontar el parasol, hágalo girar tomándolo por la base del mismo. Para evitar deformación,
no haga girar el parasol tomándolo por su borde.
6. Filtros (en venta por separado)
Instale los filtros en la rosca de montaje del filtro de la parte delantera del objetivo.
● Sólo puede instalarse un filtro.
● Utilice un filtro polarizador Canon (67mm).
● Para ajustar el filtro polarizador, primero quite el parasol del objetivo.
7. Tubos de extensión (en venta por separado)
Puede acoplar el tubo de extensión EF12 II o el EF25 II para fotografías ampliadas. Para ajustar la distancia y la
magnificación de la foto, consulte las especificaciones del tubo de extensión.
Para lograr un enfoque preciso se recomienda el modo MF.
●Los extensores no pueden usarse con este lente.
●Los objetivos para primeros planos no pueden usarse con este lente.
●Estuche (en venta por separado) LP1116
Wir danken Ihnen für das Vertrauen, das Sie Canon mit dem Kauf dieses Produkts
entgegengebracht haben.
Das EF35mm 1:2 IS USM von Canon ist ein Weitwinkelobjektiv mit Einzelfokus und hoher Bildqualität.
● “IS” steht für “Image Stabilizer” (Bildstabilisator).
● “USM” steht für “Ultrasonic Motor” (Ultraschallmotor).
Sicherheitsvorkehrungen
● Schauen Sie niemals durch das Objektiv oder die Kamera direkt in die Sonne oder in helles Licht. Dies
kann zu Erblindung führen!
Durch das abgenommene Objektiv direkt in die Sonne zu blicken, ist besonders gefährlich!
● Sowohl aufgesetzt als auch von der Kamera abgenommen darf das Objektiv ohne die schützenden
Objektivdeckel niemals direktem Sonnenlichteinfall ausgesetzt werden. Das Objektiv würde die
Sonnenstrahlen bündeln und könnte dadurch einen Brand verursachen!
Zur besonderen Beachtung
● Bei Wechsel von einem kalten an einen warmen Ort kann es an den Linsenoberflächen und internen
Teilen des Objektivs zu Kondensatbildung kommen. Um dies zu vermeiden, sollten Sie das Objektiv in einem
luftdichten Kunststoffbeutel verstauen und es dann von einem kalten an einen warmen Ort bringen. Packen Sie
das Objektiv erst aus, nachdem es sich der neuen Temperatur angepasst hat. Verfahren Sie genauso, wenn Sie
das Objektiv von einem warmen an einen kalten Ort bringen.
● Das Objektiv darf keinesfalls übermäßiger Wärmebelastung ausgesetzt werden, wie etwa in einem Kfz bei
direkter Sonneneinstrahlung. Durch hohe Temperaturen droht u. U. eine Fehlfunktion des Objektivs.
In dieser Anleitung verwendete Symbole
Warnhinweise zur Vermeidung von Objektivoder Kamerastörungen bzw. -schäden.
Zusätzliche Hinweise zum Umgang und Fotografieren mit dem Objektiv.
1. Ansetzen und Abnehmen des Objektivs
Anweisungen zum Ansetzen und Abnehmen des Objektivs entnehmen Sie bitte der Anleitung Ihrer Kamera.
● Stellen Sie das Objektiv nach dem Abnehmen hochkant mit der hinteren Seite nach oben ab, um eine
Beschädigung der Kontakte und der Linsenoberfläche durch Kratzer zu vermeiden.
● Verschmutzungen, Kratzer und Fingerabdrücke auf den Kontakten können zu Korrosion und
Wackelkontakten führen. Derartige Mängel beeinträchtigen u. U. die Funktionsfähigkeit von Kamera und
Objektiv.
● Verschmutzungen und Fingerabdrücke mit einem weichen Tuch von den Objektivkontakten entfernen.
●
Schützen Sie das abgenommene Objektiv mit dem Deckel gegen Staub. Zum richtigen Aufsetzen fluchten Sie
den Montageindex und den ○ Index am Objektivdeckel und drehen dann den Deckel im Uhrzeigersinn fest
●❶
.
Zum Abnehmen gegen Sie in umgekehrter Reihenfolge vor.
2. Einstellen der Scharfeinstellbetriebsart
Zum Fotografieren mit automatischer Scharfeinstellung (AF) stellen Sie den Fokus- Wahlschalter auf AF ❷
.
Für Aufnahmen mit manueller Scharfeinstellung (MF) stellen Sie den Fokus-Wahlschalter auf MF und fokussieren
mit dem Scharfstellring. Sie können unabhängig von der gewählten Scharfeinstellbetriebsart ❸ jederzeit mit dem
Scharfstellring fokussieren.
Nach automatischer Scharfeinstellung in der Betriebsart ONE SHOT AF drücken Sie für manuelle
Scharfeinstellung den Auslöser halb an und drehen dann am Scharfstellring. (Vollzeit-Manualfokus)
3. Unendlich-Markierung
Zum Ausgleich der temperaturbedingten Verschiebung des Unendlich-Brennpunkts.
Bei Normaltemperatur liegt Unendlich-Einstellung vor, wenn der senkrechte Arm der Markierung “L” der
Entfernungsskala mit dem Entfernungsindex fluchtet ❹.
Für optimale Bildschärfe bei der manuellen Einstellung auf Motive im Unendlich-Bereich müssen Sie durch
den Sucher blicken oder auf das vergrößerte Bild* auf dem LCD-Schirm und dabei den Scharfstellring
entsprechend drehen.
* Bei Kameras mit Live View-Aufnahmefunktion.
4. Bildstabilisator
Der Bildstabilisator kann in den Scharfeinstell-Betriebsarten AF oder MF verwendet werden.
Diese Funktion bietet je nach Aufnahmesituation (z. B. still stehende Motive und Folgeaufnahmen) eine optimale
Bildstabilisierung.
1. Stellen Sie den STABILIZER-Schalter auf ON ❺.
● Zum Fotografieren ohne Bildstabilisierung stellen Sie den Schalter auf OFF.
2. Durch Antippen des Auslösers wird der Bildstabilisator aktiviert.
● Vergewissern Sie sich, daß das Bild im Sucher nicht wackelt, und drücken Sie dann den Auslöser ganz durch, um
die Aufnahme zu machen.
● Unscharfe Aufnahmen aufgrund einer Bewegung des Motivs kann der Bildstabilisator nicht kompensieren.
● Der Bildstabilisator ist u. U. nicht voll wirksam bei Aufnahmen, die aus einem heftig rüttelnden Kraftfahrzeug
oder anderen Verkehrsmitteln gemacht werden.
● Der Einsatz des Bildstabilisators erfordert mehr Leistung als beim normalen Fotografieren, sodass bei
Aktivierung der Funktion weniger Aufnahmen als sonst möglich sind.
● Bei Aufnahmen stillstehender Motive wird Kameraverwackeln in allen Richtungen kompensiert.
● Kompensierung von vertikalem Kameraverwackeln bei Folgeaufnahmen in horizontaler Richtung und von
horizontalem Kameraverwackeln bei Folgeaufnahmen in vertikaler Richtung.
● Bei Aufnahmen mit Stativ sollte der Bildstabilisator ausgeschaltet werden, um die Batterie zu schonen.
● Der Bildstabilisator ist sowohl beim Fotografieren aus der Hand als auch mit einem Einbeinstativ
gleichermaßen effektiv. Der Bildstabilisatoreffekt kann sich abhängig von der Aufnahmeumgebung jedoch
verringern.
●
Die Bildstabilisator arbeitet auch bei Verwendung des Objektivs mit einem Zwischenring EF12 ll oder EF25 II.
● Ist über die CF-Funktionen der Kamera dem Autofokus eine andere Betriebstaste zugeordnet worden, so
wird der Bildstabilisator durch Drücken dieser neuen AF-Taste betätigt.
5. Gegenlichtblende (separat erhältlich)
Die Gegenlichtblende EW-72 verhindert unerwünschten Lichteinfall. Sie schützt die Frontlinse außerdem vor Regen,
Schnee und Staub.
Zum Aufsetzen fluchten Sie zunächst die Ansetzmarkierung der Gegenlichtblende mit dem roten Punkt vorn am
Objektiv. Drehen Sie dann die Blende so weit in der Pfeilrichtung, bis sich der rote Punkt mit der Anschlagmarkierung
❻ der Gegenlichtblende deckt.
Zum Abnehmen drücken Sie die Taste an der Seite der Gegenlichtblende und drehen sie dabei so weit in
Pfeilrichtung, bis sich ihre Anschlagsmarkierung ❼ mit dem roten Punkt deckt.
Zur Aufbewahrung lässt sich die Gegenlichtblende umgekehrt ausgerichtet auf das Objektiv aufsetzen.
● Wenn die Gegenlichtblende nicht richtig aufgesetzt wurde, kann ein Teil des Bilds verdeckt sein.
● Zum Anbringen oder Abnehmen der Gegenlichtblende fassen Sie sie an ihrem hinteren Ende, um sie zu
drehen. Damit die Gegenlichtblende nicht deformiert wird, darf sie zum Drehen keinesfalls am Rand gefasst
werden.
6. Filter (separat erhältlich)
Filter werden einfach in das Filtergewinde an der Vorderseite des Objektivs geschraubt.
● Es kann nur jeweils ein Filter gleichzeitig aufgesetzt werden.
● Wählen Sie ein Canon-Polfilter (67mm).
●
Beachten Sie, dass zur Einstellung des Polfilters zunächst die Gegenlichtblende abzunehmen ist.
7. Zwischenringe (separat erhältlich)
Mit dem Zwischenring EF12 II oder EF25 II sind Vergrößerungsaufnahmen möglich. Aufnahmedistanzen und
Vergrößerungswerte finden Sie in der Spezifikation des Zwischenrings.
Im Interesse präziser Fokussierung empfiehlt sich der MF-Modus.
● Die Telekonverter sind mit diesem Objektiv nicht verwendbar.
● Die Vorsatzlinsen sind mit diesem Objektiv nicht verwendbar.
● Behälter (separat erhältlich) LP1116
Vi ringraziamo per aver acquistato un prodotto Canon.
I modelli EF35mm f/2 IS USM sono obiettivi fissi grandangolari che offrono immagini di alta qualità.
● “IS” è l’acronimo di “Image Stabilizer” (stabilizzatore di immagini).
● “USM” è l’acronimo di “Ultrasonic Motor” (motore ultrasonico).
Precauzioni per la sicurezza
● Non guardare il sole o una fonte di luce intensa attraverso l’obiettivo o la fotocamera. Ciò potrebbe
arrecare seri danni alla vista.
L’osservazione diretta del sole attraverso l’obiettivo, in particolare, è estremamente pericolosa.
● Evitare di lasciare l’obiettivo esposto alla luce solare, sia che sia installato sulla fotocamera o meno, se
privo del relativo coperchio. Le lenti potrebbero concentrare i raggi solari,generando delle fiamme.
Precauzioni per l’utilizzo
● Quando si trasferisce l’obiettivo da un ambiente freddo ad un ambiente caldo, è possibile che si formi
della condensa sulla superficie dell’obiettivo e sui componenti interni. Per evitare che questo accada,
chiudere l’obiettivo in un sacchetto di plastica e attendere che si sia acclimatato alla nuova temperatura prima
di estrarlo dal sacchetto. La stessa procedura deve essere adottata quando l’obiettivo viene trasferito da un
ambiente caldo ad un ambiente freddo.
● Non lasciare l’obiettivo in un ambiente eccessivamente caldo, come in un’automobile esposta alla luce solare.
L’alta temperatura potrebbe causare il malfunzionamento dell’obiettivo.
Convenzioni utilizzate nel presente libretto di istruzioni
Indicazione di avvertimento per evitare danni o problemi di funzionamento dell’obiettivo o della fotocamera.
Informazioni supplementari sull’utilizzo dell’obiettivo e sulle modalità di scatto.
1. Montaggio e smontaggio dell’obiettivo
Per informazioni dettagliate sul montaggio e sullo smontaggio dell’obiettivo, consultare il manuale di
istruzioni della fotocamera.
● Dopo avere rimosso l’obiettivo dalla fotocamera, appoggiarlo con la parte posteriore rivolta verso l’alto in
modo da evitare graffi sulla superficie della lente o sui contatti.
● Graffi, sporco o impronte sui contatti elettrici possono dare luogo a problemi di collegamento e corrosione.
Ciò potrebbe compromettere il corretto funzionamento della fotocamera e dell’obiettivo.
● Se vi è sporco o impronte sui contatti elettrici, pulirli con un panno morbido.
● Quando l’obiettivo non è montato sulla fotocamera, coprirlo sempre con l’apposito coperchio antipolvere.
Per fissarlo correttamente, allineare il contrassegno presente sul coperchio ○ e quello presente
sull’obiettivo, e ruotare in senso orario ●❶. Per rimuovere il coperchio, ruotarlo in senso antiorario.
2. Impostazione della modalità di messa a fuoco
Se si intende scattare foto utilizzando la messa a fuoco automatica (AF), posizionare il selettore della modalità su AF ❷
.
Se si intende scattare foto utilizzando la messa a fuoco manuale (MF), impostare il selettore della modalità su MF e
ruotare la ghiera di messa a fuoco. La ghiera di messa a fuoco è sempre operativa, indipendentemente dalla modalità
di messa a fuoco utilizzata ❸.
Una volta effettuata la messa a fuoco automatica in modalità AF ONE SHOT, mettere a fuoco manualmente il
soggetto premendo a metà corsa il pulsante di scatto e ruotando la ghiera di messa a fuoco (messa a fuoco
manuale sempre disponibile).
3. Contrassegno compensazione infinito
Utile per compensare le variazioni del punto di messa a fuoco su infinito causate dalle variazioni di temperatura.
Il punto di infinito, in condizioni di temperatura normale, corrisponde al punto in cui la linea verticale del contrassegno
L della scala delle distanze è allineata all’indice della distanza ❹.
Per garantire una messa a fuoco corretta dei soggetti all’infinito, guardare attraverso il mirino oppure
osservare l’immagine ingrandita* sullo schermo LCD mentre si ruota la ghiera di messa a fuoco.
* Per fotocamere con possibilità di ripresa Live View.
4. Stabilizzatore di immagini
Lo stabilizzatore di immagini può essere utilizzato in modalità AF o MF.
Questa funzione fornisce un’ottima stabilizzazione dell’immagine in certe condizioni di ripresa (come la ripresa di
soggetti immobili e lo scatto ripetuto).
1. Impostare l’interruttore STABILIZER su ON ❺.
● Qualora non si intenda usare la funzione di stabilizzazione di immagini, impostare l’interruttore su OFF.
2. Lo stabilizzatore di immagini si attiva premendo a metà corsa il pulsante di scatto.
● Accertarsi che l’immagine visualizzata nel mirino sia stabile, quindi premere a fondo il pulsante di scatto per
scattare la foto.
● Lo stabilizzatore di immagini non è in grado di evitare fenomeni di sfocatura derivanti dal movimento del
soggetto ritratto.
● Lo stabilizzatore di immagini potrebbe non funzionare correttamente se si effettua la ripresa da un veicolo
soggetto a forti scosse o da un altro mezzo di trasporto.
● Lo stabilizzatore di immagini aumenta il consumo delle batterie rispetto alla normale ripresa, e riduce quindi
il numero di scatti possibili.
● Se si riprende un soggetto immobile, le oscillazioni della fotocamera vengono compensate in tutte le
direzioni.
● Compensa le oscillazioni verticali della fotocamera nel caso di scatto ripetuto in direzione orizzontale, e
compensa le oscillazioni orizzontali della fotocamera nel caso di scatto ripetuto in direzione verticale.
● Quando si utilizza un treppiede è opportuno disattivare lo stabilizzatore di immagini per risparmiare le
batterie.
● Lo stabilizzatore è efficace sia per la fotografia manuale che con un monopiede. Tuttavia l’effetto dello
stabilizzatore di immagini potrebbe ridursi in base all’ambiente in cui si effettua la ripresa.
● Lo stabilizzatore di immagini è attivo anche quando l’obiettivo viene usato assieme ad un tubo di prolunga
EF12 II o EF25 II.
● Se si desidera cambiare il pulsante di assegnazione della modalità AF, lo stabilizzatore si azionerà quando
verrà premuto il nuovo pulsante di assegnazione AF.
5. Paraluce (venduti separatamente)
Il paraluce EW-72 impedisce ai raggi di luce indesiderati di penetrare nell’obiettivo e protegge quest’ultimo da pioggia,
neve e polvere.
Per montare il paraluce, allineare il contrassegno del punto di attacco del paraluce al punto rosso sulla parte anteriore
dell’obiettivo e ruotare quindi il paraluce in direzione della freccia fino a che il punto rosso dell’obiettivo non è allineato
al contrassegno del punto di arresto del paraluce ❻.
Per rimuovere il paraluce, tenere premuto il pulsante laterale e ruotare il paraluce nel senso indicato dalla freccia fino
a che il punto rosso risulti allineato all’indicatore sul paraluce ❼.
Quando si ripone l’obiettivo, è possibile installare il paraluce al contrario sull’obiettivo stesso.
● Quando il paraluce non è montato correttamente, parti della fotografia possono essere bloccate.
● Durante il montaggio o lo smontaggio del paraluce, stringere la base del paraluce per ruotarlo. Per evitare
deformazioni, non stringere il bordo del paraluce quando lo si ruota.
6. Filtri (venduti separatamente)
È possibile fissare i filtri servendosi della filettatura per il montaggio del filtro sull’estremità anteriore dell’obiettivo.
● È possibile montare solo un filtro per volta.
● Utilizzare un filtro polarizzatore Canon (67mm).
● Per regolare il filtro polarizzatore, rimuovere il paraluce.
7. Tubi di prolunga (venduti separatamente)
I tubi di prolunga EF12 II o EF25 II possono essere installati per ottenere immagini ingrandite. Per conoscere la
distanza di ripresa e l’ingrandimento, consultare le specifiche del tubo di prolunga.
Per una messa a fuoco accurata si raccomanda la modalità MF.
● Con questo obiettivo non è possibile utilizzare prolunghe.
● Con questo obiettivo non è possibile utilizzare obiettivi per fotografia ravvicinata.
● Custodia (venduti separatamente) LP1116
Infinity compensation mark
Repère de compensation d’infini
Unendlich-Markierung
Marca de Compensación de Infinito
Contrassegno compensazione infinito
Distance index
Repère des distances
Entfernungsindex
Índice de distancias
Indice della distanza
Nous vous remercions d’avoir choisi un produit Canon.
L’objectif EF35mm f/2 IS USM est un grand angle à mise au point unique qui offre une image de haute qualité.
● “IS” signifie stabilisateur d’image (Image Stabilizer).
● “USM” signifie moteur ultrasonique (Ultrasonic motor).
Consignes de sécurité
● Ne jamais regarder le soleil ou une source de lumière puissante à travers l’objectif ou l’appareil. Il y a
risque de perte de la vision.
Regarder directement le soleil dans l’objectif est particulièrement dangereux.
● Que l’objectif soit ou non monté sur l’appareil, ne pas le laisser exposé au soleil sans le munir de son
capuchon. Ceci permettra d’éviter un effet de loupe et les risques d’incendie pouvant en résulter.
Précautions d’utilisation
● Si l’objectif est passé d’un endroit à basse température à un endroit à haute température, de la
condensation risque de se déposer sur la surface de l’objectif et sur les pièces internes. Pour éviter toute
formation de condensation, placer d’abord l’objectif dans une poche en plastique étanche avant de le placer dans
un environnement chaud. Sortir ensuite l’objectif quand il s’est peu à peu réchauffé. Procéder de même pour
passer l’objectif d’un endroit à haute température à un endroit à basse température.
● N’exposez pas l’objectif à une chaleur excessive, par exemple, au soleil, dans une voiture. Les hautes
températures peuvent entraîner un dysfonctionnement de l’objectif.
Conventions utilisées dans ce mode d’emploil
Avertissement pour éviter tout mauvais fonctionnement ou détérioration de l’objectif ou de l’appareil.
Remarques supplémentaires sur l’utilisation de l’objectif et la prise de vues.
1. Montage et enlèvement de l’objectif
Pour le montage et l’enlèvement de l’objectif, voir le mode d’emploi de l’appareil photo.
● Après avoir enlevé l’objectif, le placer haut en bas pour éviter de rayer la surface de l’objectif et les contacts.
●
Si les contacts sont encrassés, éraflés ou marqués par des traces de doigt, ils risquent de corroder ou de résulter en
contact défectueux. L’appareil et l’objectif risquent alors de ne pas fonctionner proprement.
● Si les contacts sont encrassés ou marqués de traces de doigt, les nettoyer avec un chiffon doux.
● Après avoir enlevé l’objectif, le recouvrir de son capuchon. Pour installer proprement le capuchon, aligner
le repère de montage d’objectif avec le repère ○ du capuchon et tourner dans le sens des aiguilles d’une
montre ●❶. Pour enlever le capuchon, tourner dans le sens contraire.
2. Sélection du mode de mise au point
Pour effectuer des prises de vue avec mise au point automatique (AF), régler le sélecteur de mode de mise au point
sur AF ❷.
Pour une prise de vue en mode mise au point manuelle (MF), régler sur MF et procéder par rotation de la bague de
mise au point. Cette bague de mise au point est toujours active, quel que soit le mode de mise au point choisi ❸.
Après avoir effectué la mise au point dans le mode ONE SHOT AF, procéder à une mise au point manuelle en
appuyant à moitié sur le déclencheur et en tournant la bague de mise au point. (Mise au point manuelle plein
temps)
3. Repère de compensation d’infini
Pour corriger le décalage de mise au point pouvant résulter d’un changement de température à la mise au point sur
l’infini. La position de l’infini à température normale est le point où la verticale du repère L de l’échelle des distances
est alignée avec l’indicateur de distance sur le repère des distances ❹.
Pour une mise au point manuelle sur des sujets situé à l’infini, regardez dans le viseur ou regardez l’image
agrandie* sur l’écran ACL tout en tournant la bague de mise au point.
* Pour des appareils photo disposant de la capacité Live View.
4. Stabilisateur d’image
Le stabilisateur d’image est utilisable en mode AF ou MF.
Cette fonction offre une stabilisation d’image optimale selon les conditions de prise de vue
(comme la prise de vue de sujets immobiles et la prise de vue en mouvement).
1. Réglez la commande du STABILIZER sur ON ❺.
● Si vous ne désirez pas utiliser le stabilisateur d’image, réglez sa commande sur OFF.
2. Lorsque vous enfoncez le bouton du déclencheur à mi-course, le stabilisateur d’image commence à fonctionner.
● Vérifiez que l’image dans le viseur est stabilisée avant d’enfoncer complètement le déclencheur pour effectuer la
prise de vue.
● Le stabilisateur d’image ne peut pas compenser un cliché flou dû à un sujet qui a bougé.
● Le stabilisateur d’image peut ne pas être efficace si vous prenez des photos depuis un véhicule ou un autre
moyen de transport subissant des secousses violentes.
● Le stabilisateur d’image consommant plus d’énergie qu’une prise de vue normale, le nombre de prises de
vue possibles avec cette fonction sera moindre.
● Lorsque vous photographiez un sujet immobile, elle compense les secousses de l’appareil photo dans
toutes les directions.
● Elle compense les secousses verticales de l’appareil photo lors d’une prise de vue en mouvement
horizontal et horizontalement lors d’une prise de vue en mouvement vertical.
● Lorsque vous utilisez un trépied, le stabilisateur d’image doit être coupé pour économiser les piles.
● Le stabilisateur d’image fonctionne parfaitement pour la photographie avec appareil tenu en mains et pour
la photographie avec appareil monté sur un pied. Cependant, l’effet du stabilisateur optique peut être réduit
en fonction de l’environnement de prise de vue.
● Le stabilisateur d’image fonctionne également quand l’objectif est utilisé avec le tube-allonge EF12 II ou
EF25 II.
● Si la fonction personnalisée de l’appareil photo est réglée sur un nouveau bouton de commande du mode
AF, le stabilisateur d’image entre en fonction quand le nouveau bouton d’AF est actionné.
5. Parasoleil (vendus séparément)
Le parasoleil EW-72 permet d’empêcher la lumière parasite de pénétrer dans l’objectif, et protège aussi l’objectif de la
pluie, la neige et la poussière.
Pour fixer le parasoleil, alignez son repère de position de fixation avec le point rouge à l’avant de l’objectif, puis faire
tourner le parasoleil dans la direction de la flèche jusqu’à ce que le point rouge soit aligné avec le repère de position
de butée du paresoleil ❻.
Pour retirer le parasoleil, maintenez enfoncé le bouton latéral et tournez le parasoleil dans la direction indiquée par la
flèche jusqu’à ce que le repère de position du parasoleil soit aligné avec le point rouge ❼.
Le parasoleil peut être monté à l’envers sur l’objectif quand l’appareil n’est pas en usage.
● Une partie de l’image risque d’être masquée si le parasoleil n’est pas fixé correctement.
● À l’installation ou à la dépose du parasoleil, le saisir par la base pour le faire tourner. Pour éviter toute
déformation, ne pas le saisir par le bord extérieur pour tourner.
6. Filtres (vendus séparément)
Le montage des filtres est possible sur le filetage de montage des filtres à l’avant de l’objectif.
● Il n’est possible de monter qu’un filtre à la fois.
● Utilisez un filtre polarisant Canon (67mm).
● Pour ajuster le filtre polarisant, ôtez d’abord le parasoleil.
7. Tubes-allonges (vendus séparément)
Il est possible d’utiliser un tube-allonge EF12 II ou EF25 II pour les prises de vue en maro. Pour la distance de prise
de vue et l’agrandissement, reportez-vous aux spécifications du tube-allonge.
Une mise au point en MF est recommandée pour plus de précision.
●Les multiplicateurs de focale ne peuvent pas être utilisés avec cet objectif.
●Les bonnettes d’approche ne peuvent pas être utilisées avec cet objectif.
●Boîtier (vendus séparément) LP1116
This Class B digital apparatus complies with Canadian ICES-003.
Cet appareil numérique de la classe B est conforme à la norme NMB-003 du Canada.
Button
Bouton
Taste
Botón
Pulsante
CT1-8586-002_euro_cs5_130603.indd 1 2013/06/03 19:14:57
Seite laden ...
-
 1
1
-
 2
2


Canon EF 35mm f/2 IS USM Benutzerhandbuch
- Kategorie
- Kameraobjektive
- Typ
- Benutzerhandbuch
in anderen Sprachen
- English: Canon EF 35mm f/2 IS USM User manual
- français: Canon EF 35mm f/2 IS USM Manuel utilisateur
- español: Canon EF 35mm f/2 IS USM Manual de usuario
- italiano: Canon EF 35mm f/2 IS USM Manuale utente
- русский: Canon EF 35mm f/2 IS USM Руководство пользователя
- Nederlands: Canon EF 35mm f/2 IS USM Handleiding
- dansk: Canon EF 35mm f/2 IS USM Brugermanual
- svenska: Canon EF 35mm f/2 IS USM Användarmanual
- suomi: Canon EF 35mm f/2 IS USM Ohjekirja
