Seite wird geladen ...

1/2
ZumSchutzvoreinemelektrischenSchlag
müssen die Bauteile bei der Montage oder De-
montage immer allseitig von der Stromversor-
gunggetrenntsein.
Die Bauteile dürfen erst dann an elektri-
sche Spannung gelegt werden, wenn Schutz-
massnahmengewährleisten,dasskeinePerso-
nen gefährdet sind. Metallgehäuse sind in die
Schutzmassnahmeeinzubeziehen.
Das Klemmen und Trennen von Gewinde-
bolzenhat generellin stromlosenZustand zuer-
folgen.
For protection against electric shock, parts
must be isolated from the power supply while
beingassembledordisassembled.
Parts may only then be connected
electrically when the enforced safety precau-
tionsguaranteethereisnodangertopersons.
Metal housings are to be incorporated in the
safetyprecautions.
Threaded bolts may not be connected or
disconnectedunderload.
MA041 (de_en_fr)
Instructions de montage
MA041 (de_en_fr)
Assembly instructions
MA041 (de_en_fr)
Montageanleitung
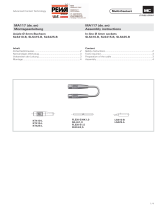
Einzelspannzange
ESZ456-B4 Single collet pliers
ESZ456-B4 Pince pour borniers de moteurs
ESZ456-B4
Notwendiges Werkzeug
Spann-Zangen-Einsatz
montieren
Kontaktierung Contact Connexion
Tools required
Collet assembly
Outillage nécessaire
Montage de l'embout
(ill.1)
MCKreuzschlüssel
ESZ-WZ
Bestell.-Nr. 10.0807
(ill.2)
Spann-Zangen-Einsatz bis
zumAnschlageinstecken.
(ill.3)
Im entspannten Zustand
an der Spannzangenhülse
festhalten und mit
Kreuzschlüssel ESZ-WZ
festdrehen bis zum
Anschlag.
(ill.4)
Passende Leitung mit
Steckerdurchmesser 4mm
(siehe Sicherheitsmesslei-
tungen im MC Katalog
T&Mline) in die
Einzelspann-zange
ESZ456-B4 einstecken.
(ill.4)
Insertasuitableleadwith
Ø 4mm plug (see Safety
Test Leads in MC Cata-
logue T&Mline) into the
single collet pliers ESZ456-
B4.
(ill.4)
Connecter le câble cor-
respondant avec fiche de
sécurité 4mm (voir
cordons de sécurité,
catalogue MC T&Mline)
sur la pince pour borniers
de moteurs ESZ456-B4.
(ill.5)
Griff zusammendrücken
und Einzelspannzange
aufstecken.
(ill.1)
MC Cross-slotted
screwdriver ESZ-WZ
Order No. 10.0807
(ill.2)
Push-in collet to the stop
position.
(ill.3)
With the pliers in the
released condition, hold
tightly and screw-in the
collet to the end position
with the cross-slotted
screwdriver ESZ-WZ.
(ill.5)
Press the grip together
and mount the plier.
(ill.1)
CléspécialeMCESZ-WZ
No.deCde10.0807
(ill.2)
Introduire l'embout jus-
qu'enbutée.
(ill.3)
A l'état relâché, tenir la
pince au niveau du
fourreau isolant et visser
l'embout à l'aide de la clé
spéciale ESZ-WZ jusqu'en
butée.
(ill.5)
Appuyer sur le bouton-
poussoir et connecter.
ill.1
ill.2
ill.3
ill.4
ill.5
En vue de garantir une protection contre
les chocs électrique, il est indispensable de
réaliser les opérations de montage et de
démontage hors tension, en veillant à
déconnecter les différents composants de
toutealimentationélectrique.
Les pièces ne peuvent être mises sous
tension que si des mesures de sécurité
appropriées permettent de garantir la sécurité
des personnes. Les boîtiers métalliques
doiventêtresoumisàcesmesuresdesécurité.
La pince ne doit pas être connectée ou
déconnectéesouscharge.
ESZ456-B4
Z6
ESZ-WZ
Advanced Contact Technology
Z4 Z5

ill.8
ill.7
ill.6
ill.9
ill.10
Spann-Zangen-Einsatz
demontieren To remove the collet Démontage de l'embout
(ill.6)
Loslassen.
(ill.7)
Zusammendrücken und
Kreuzschlüssel ESZ-WZ
bis zum Anschlag einste-
cken.
(ill.8)
Im entspannten Zustand
an der Spannzangenhülse
festhalten und mit Kreuz-
schlüssel ESZ-WZ den
Spann-Zangen-Einsatz los-
drehen.
(ill.8)
With the pliers in the re-
leased condition, hold
tightly and unscrew the
collet with the cross-
slotted screw-driver ESZ-
WZ.
(ill.8)
Al'étatrelâché,tenirlapin-
ce au niveau du fourreau
isolant et dévisser l'em-
bout à l'aide de la clé spé-
cialeESZ-WZ.
(ill.9)
Spann-Zangen-Einsatz
herausziehen.
(ill.10)
Die ESZ456-B4 wurde
werkseitig eingestellt und
justiert für einen optima-
len Klemmdruck.
Das Gewinde- und Lamel-
lenteil der Zangen-
Einsätze muss sauber ge-
halten und zeitweilig mit
einem dünnen Kontakt-
film versehen werden.
Schmiermittel:
Synthesin PDL 250/01
(10ml) Bestell-Nr. 73.1050
oder Kontasynth BA100
Kontaktspray (400ml) Be-
stell-Nr. 73.1051.
(ill.10)
The ESZ456-B4 has been
preset and adjusted to
the best clamping pressu-
re before leaving our
works..
The collet thread and mul-
tilam have to be kept cle-
an and from time to time
a thin film of contact lubri-
cant should be applied.
Suitable contact lubricant:
Synthesin PDL 250/01
(10ml) Order No. 73.1050
or Kontasynth BA100 con-
tact spray (400ml) Order
No. 73.1051.
(ill.10)
La pince ESZ456-B4 a été
règlée et ajustée en usine
de manière à produire
une pression de serrage
optimale.
Le contact à lamelles
monté sur les embouts
ainsi que la partie filetée
doivent être propres et en-
duits pé-riodiquement
d'une fine couche de
graisse de contact.
Graisse:
Synthesin PDL 250/01
(10ml) No. de Cde
73.1050 ou spray de con-
tact Kontasynth BA100
(400ml) No. de Cde
73.1051.
(ill.9)
Pull-outthecollet. (ill.9)
Retirerl'embout.
(ill.6)
Relâcher.
(ill.7)
Appuyer sur le bouton-
poussoiretintroduirelaclé
spéciale ESZ-WZ jusqu'en
butée.
(ill.6)
Release.
(ill.7)
Press the grip together
and fully insert the cross-
slotted screwdriver ESZ-
WZ.
Typ
Type
Type
Bestell.-Nr.
Order-No.
No. de Cde
Bezeichnung
Description
Désignation
Einzelspannzange mit Zangen-Einsatz M4
Single-collet pliers with collet M4
Pince pour borniers de moteurs avec embout M4
Einzelspannzange mit Zangen-Einsatz M5
Single-collet pliers with collet M5
Pince pour borniers de moteurs avec embout M5
Einzelspannzange mit Zangen-Einsatz M6
Single-collet pliers with collet M6
Pince pour borniers de moteurs avec embout M6
Set bestehend aus:
Set, consisting of:
Kit, composé comme suit:
ESZ4-B4 10.0811
10.0810 / 10.0804 / 10.0805 / 10.0806 / 10.0807
10.0812
10.0813
10.0814
ESZ5-B4
ESZ6-B4
ESZ-SET-B4
2/2
MA041 (de_en_fr) Änderungen vorbehalten / Subject to alterations / Modifications sous réserve
Copyright by Multi-Contact AG, Switzerland / Powe / 03.2001 / Index ar
line
Advanced Contact Technology
1/2