Seite wird geladen ...

Instruction manual
Инструкция по эксплуатации
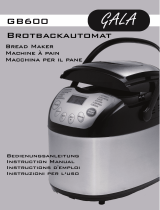
Bread maker BR2702
Хлебопечь BR2702
brayer.ru

СОДЕРЖАНИЕ
EN ......................................................................................................................................3
DE ....................................................................................................................................26
RU ...................................................................................................................................49
KZ ....................................................................................................................................74

3
EN
BREAD MAKER BR2702
The home bread maker is intended for bread and
cake baking, dough kneading and food cooking.
DESCRIPTION
1. Body
2. Baking form
3. Viewing window
4. Lid
5. Display
6. Control knob with the buttons «OK/Start-Stop»
7. Container for adding the ingredients
8. Container holder
9. Kneading paddle
10. Hook for extracting the paddle
11. Measuring cup
12. Measuring spoon
Display (5)
13. Program symbols
14. Crust color symbols « »
15. Product weight 500 g - 750 g - 900 g « »
16. Dough rising (fermentation) cycle indication « »
17. Dough kneading cycle indication « »
18. Ingredient adding indication « »
ATTENTION!
For additional protection it is reasonable to install a
residual current device (RCD) with nominal operation
current not exceeding 30 mA into the mains. To install
RCD, contact a specialist.
EN
19. Program operation time setting symbol « »
20. Time digital symbols
21. Delay time setting symbol « »
22. Keep warm funtcion indication « »
23. «Manual setting/DIY» program symbol « »
24. Baking mode indication « »

4
EN
1
8
10
11
12
2
7
9
3
4
5
6
13
13
14 18
19
20
21
22
23
24
17
16
15
Рiс. 1
Flour
Liquid ingredients
Yeast

5
EN
SAFETY MEASURES AND OPERATION
RECOMMENDATIONS
Read the operation instructions carefully before using
the Bread maker and keep it for future reference.
• Use the Bread maker for its intended purpose only, as it
is stated in this manual.
• Mishandling the Bread maker can lead to its breakage
and cause harm to the user or damage to his/her
property and it is not covered by warranty.
• Make sure that operating voltage of the Bread maker
indicated on the label corresponds to your home mains
voltage.
• The power plug is equipped with a grounding contact,
plug it into the socket with reliable grounding contact.
In case of short circuit the grounding reduces the risk of
electric shock.
• Contact an electrical technician, if you are not sure that
your sockets are installed properly and grounded.
• To prevent re do not use adapters designed for
connecting the plug to the mains socket without
grounding contact.
• In case of sparking in the mains socket and occurrence
of smell of burning, unplug the unit and apply to the
organization maintaining your home mains.
• If smoke appears from the body of the Bread maker,
unplug the unit and take measures to prevent re
spreading.
• Do not use the Bread maker outdoors.
• It is not recommended to use the unit during lightning
storms.
• Protect the unit from impacts, falling, vibrations and other
mechanical stress.
• Do not place the Bread maker next to the walls or close
to the kitchen furniture.
• Place the Bread maker keeping at least 20 cm gap
between the Bread maker body and the wall and at least
50 cm gap above the Bread maker .
• Never leave the plugged-in Bread maker unattended.
• Do not use the Bread maker in proximity to kitchen sink,
in bathrooms, near swimming pools or other containers
lled with water.
• Do not use the Bread maker near heating appliances,
heat sources or open ame.
• Do not use the Bread maker in places where aerosols
are used or sprayed, and in proximity to inammable
liquids.
• Place the Bread maker on a at stable surface; do not
place it on the edge of a table. Do not let the power cord
hang from the edge of the table and make sure it does
not touch hot surfaces or sharp edges of furniture.
• During the operation do not touch hot surfaces of the
bread maker.
• Do not close the ventilation openings on the bread maker
body.
• During the bread maker operation do not leave the lid
open.
• When taking the ready bread out, take hold of the handle
of the baking form, use heat-resistant kitchen potholders.

6
EN
• To prevent damage of the baking form non-stick
coating, when taking bread out, do not use metal
objects, turn the form upside down and shake the ready
bread out of it.
• In case of non-compliance with the recommendations
on baking, bread burning and smoke appearance are
possible.
• Before cleaning the bread maker, remove the baking
form and allow complete cooling-down of the unit.
• Unplug the Bread maker before cleaning or when you
are not using it. When unplugging the Bread maker
hold only the power cord plug and carefully remove it
from the mains socket, do not pull the power cord —
this can lead to damage of the power cord or the socket
or cause short circuit.
• To avoid electric shock do not immerse the Bread
maker into water or any other liquids.
• Do not wash the Bread maker in a dishwashing
machine.
• For children safety reasons do not leave polyethylene
bags, used as a packaging, unattended.
ATTENTION! Do not allow children to play with
polyethylene bags or packaging lm. Danger of
suocation!
• Place the unit out of reach of children during the
operation and cooling down.
• This unit is not intended for usage by physically or
mentally disabled persons (including children) or by
persons lacking experience or knowledge if they are not
under supervision of a person who is responsible for
their safety or if they are not instructed by this person on
the usage of the unit.
• Check the integrity of the power cord, the power plug
and the Bread maker body periodically.
• If the power cord is damaged, it should be replaced
by the manufacturer, a maintenance service or similar
qualied personnel to avoid danger.
• If the power cord is damaged, it should be replaced with
a power cord received from the manufacture or service.
• Transport the Bread maker in the original package.
• Keep the unit out of reach of children and disabled
persons.
BREAD MAKER IS INTENDED FOR HOUSEHOLD
USE ONLY, DO NOT USE THE COFFEE MAKER FOR
COMMERCIAL OR LABORATORY PURPOSES.
BEFORE USING THE BREAD MAKER
After unit transportation or storage at low temperature
keep it for at least 3 hours at room temperature before
switching on.
• Unpack the Bread maker and remove all the packaging
materials.
• Keep the original package.
• The Bread maker is not intended for usage by children.
• Do not leave children unattended to prevent using the
unit as a toy.
• Do not allow children to touch the unit and the power
cord during the Bread maker operation.

7
EN
• Read the safety measures and operating
recommendations.
• Check the delivery set.
• Examine the Bread maker for damages, in case of
damage do not plug it into the mains.
• Make sure that the specications of power supply
voltage specied on the label correspond to the
specications of your mains.
• Wipe the outer surface of the unit body (1) with a clean,
slightly damp cloth to remove dust.
• Open the lid (4).
• Take the handle of the baking form (2) and lift it slightly,
turn the handle counterclockwise and take the form (2)
out.
• Wash the form (2) and the container for adding the
ingredients (7) , the paddle (9), the measuring cup (11),
the hook (10), the measuring spoon (12) with warm
water using neutral detergent, rinse and dry them.
• Install the baking form (2) back to its place and turn it
clockwise as far as it will go, install the kneading paddle
(9) on the axle in the baking form (2).
• Install the container (7) into the holder (8).
• Close the lid (4).
• Place the bread maker so that the distance between
the bread maker and the wall or furniture is at least 20
cm and the free space above the bread maker is at
least 50 cm.
Note: the bread maker is intended for operation within a
wide range of temperatures, however, excessively high
or low temperature in the room aects the dough rise
process and consequently the size and density of bread.
The optimal room temperature shall be from +15 to +34°C.
THE FIRST SWITCHING-ON OF THE BREAD MAKER
• To remove foreign smells, it is recommended to switch
the bread maker on for the rst time without loading
ingredients and with the open lid (4).
• Insert the power plug into the mains socket, you will
hear a sound signal and digital symbols (20) «2:54»
will be shown on the display (5) you will hear a sound
signal, and the display (5) will show the program
«Classic/BASIC BREAD», separating dots will be
glowing constantly.
• Crust color indication (14) - medium « ».
• Weight indication (15): « » 750 g.
• These settings are set by default.
• Press the «START / STOP» button on the knob (6) to
start the default baking program, all program symbols
(13) on the display (5) will go out, except for the
«BASIC BREAD» program, the dividing points will be
ashing, the digital symbols (20) will show the time
remaining until the end of the program operation.
• After 10 minutes, press the «START/STOP» button
on the knob (6) to stop the baking program, the digital
symbols of the program operation time will be ashing,
press and hold the «START/STOP» button again.
Note: when switching the bread maker on for the rst time,
a foreign smell or some smoke from the heating element
can appear — this is acceptable and it is not covered by
warranty.

8
EN
• Take the handle of the baking form (2) and lift it slightly,
turn the handle counterclockwise and remove the form
(2).
• Wash the form (2), the paddle (9) with warm water
using neutral detergent, rinse and dry them.
• Install the baking form (2) back to its place and turn it
clockwise as far as it will go, install the kneading paddle
(9) on the axle in the baking form (2).
• Close the lid (4).
• The bread maker is ready for usage.
CONTROL KNOB (6)
Before using the bread maker, please get acquainted with
the buttons on the control panel (6), baking programs and
recommendations on selection of ingredients for baking.
• Turn the knob (6) to select one of 25 baking/cooking
programs and conrm the selection by pressing the
button «Ok» on the knob (6).
• Turn the knob (6) to continue selecting the program
settings.
• Select the crust color; the crust color is indicated on the
display (5) with the symbols (14) « ». Conrm your
choice by pressing the button «Ok» on the knob (6).
Note: the crust color selection is not available in the
programs: «QUICK», «PIZZA DOUGH», «ITALIAN
DOUGH», «DOUGH RISE», «FREMENT/DEFROST»,
«YOGHURT», «PICKLED VEGE», «DOUGH», «JAM»,
«BAKE», «ROAST NUT», «MEAT FLOSS», «RICE
VINEGAR», «CAKE», «ITALIAN CAKE».
• Set the product weight «500 g - 750 g - 900 g» by turning
the knob (6), the product weight will be shown on the
display (5) with the symbols (15) « ». Conrm your
choice by pressing the button «Ok» on the knob (6).
Note: the weight selection is not available in the programs:
• The digital symbols (20) will indicate the program
operation time.
• To switch the selected program on, press the button
«START/STOP» on the knob (6), the button «START/
STOP» lighting will light up.
• To switch the «pause» mode on, press the »START/
STOP” button once, the operation time digital symbols
(20) will be ashing, the «START/STOP» button lighting
will also start ashing. Press the «START/STOP» button
again to resume the program operation.
Note: if you switched the «pause» mode on and did not
switch the continuation of the baking program on, the bread
maker will automatically switch on after 10 minutes and
resume the baking program.
• If you need to reset the selected program or to switch
the bread maker o, press and hold the button «START/
STOP» on the knob (6).
BAKING/COOKING PROGRAMS
-1- «Classic/BASIC BREAD»
• It includes all the stages of bread making: dough
kneading, dough proong (rise) and baking.

9
EN
-2- «FRENCH /FRENCH BREAD»
• Bread making takes longer, the bread has large porous
crumb and crispy crust.
-3- «WHOLE-WHEAT BREAD»
• Bake healthy bread of ne and crude our. This baking
program provides for a longer time of preheating so
that crude our absorbs liquid better and swells better.
It is not recommended to use the delay function when
making this bread as that may cause undesirable
results.
-4- «SWEET»
• Add leaven or soda to sweet dough and make savory
pastry.
-5- «LOW SUGAR BREAD»
• Use this program to bake low carb bread.
-6- «SESAME BREAD»
• This bread has a higher proportion of protein and amino
acid and is easier to digest.
-7- «RICE FLOUR BREAD»
• Baking bread with addition of rice our. The size of the
ready bread is the same as in the «BASIC BREAD»
program, but with a better taste.
-8- «QUIK BREAD»
• Bread baking takes less time than in the «BASIC
BREAD» program, but the bread is usually smaller in
size and has denser texture.
ATTENTION! When selecting programs «QUIK
BREAD», pour water with the temperature of 48-50°C
into the baking form (2) (use cooking thermometer
for measuring water temperature precision). Water
temperature plays a crucial role in fast and superfast
bread making: too low water temperature will not
allow the dough to rise in time, and excessively high
temperature will result in yeast destruction.
-9- «ITALIAN BREAD»
• The ready bread is soft and has dense texture.
-10- «GLUTEN FREE BREAD»
• Bake bread of gluten free our. This baking program
provides for a longer time of preheating so that
our absorbs liquid better and swells better. It is not
recommended to use the delay function when making
this bread as that may cause undesirable results.
-11- «PIZZA DOUGH»
• Program for making the pizza dough. The program
operation time is 35 minutes. Take out the dough,
shape it into a suitable pizza shape.
-12- «ITALIAN DOUGH»
• Take out the dough and shape it into a suitable
dessert shape.
-13- «DOUGH RISE»
• The bread maker kneads dough and lets it rise. Use
the dough for making homemade pastry.

10
EN
-22- «RICE VINEGAR»
• Rice vinegar making program. If you want to make sushi
or rolls, rice vinegar is one of the essential ingredients for
rice dressing.
-23- «CAKE»
• In this cooking program it is recommended to add baking
soda or baking powder to the our.
-24- «ITALIAN CAKE»
• Cake making program.
-25- «Manual setting/DIY»
• The «Manual setting» program is intended for
experienced users who are familiar with the process of
making dough and baking bread. In accordance with
your own ideas, you can set the operation time cycles of
the bread baking program.
• Turn the knob (6) to select the symbol (23) « »
on the display (5) - the »Manual setting/DIY” program,
conrm the selected program by pressing the «OK»
button on the knob (6).
• Turn the knob (6) to continue to select the settings for
the operation cycles of the «Manual tuning/DIY» program
(23).
• Select the dough kneading cycle - the symbol (17) «
» on the display (5), conrm the choice by pressing the
button «Ok» on the knob (6).
• Turn the knob (6) to set the cycle operation time from
0 to 17 minutes, the default time is 15 minutes. The
-14- «FERMENT/DEFROST»
• Low temperature heating program for frozen dough.
-15- «YOGHURT»
• Program for making yoghurt (see the recipe book).
-16- «PICKLED VEGE»
• Program for making pickled vegetables.
-17- «DOUGH»
• The bread maker kneads dough and lets it rise. Use the
dough for making homemade pastry.
-18- «JAM»
• Use this program to make jam, conture, marmalade
or fruit jelly.
-19- «BAKE»
• The bread maker works as an ordinary electric oven.
The program excludes dough kneading and rise
modes. The program is used for baking ready dough or
for baked bread additional browning.
-20- «ROAST NUT»
• Before switching the program on, make sure that there
is no nutshells left.
-21- «MEAT FLOSS»
• Program for cooking meat (see the recipe book).

11
EN
operating time is shown on the display (5) with digital
symbols (20), conrm the set time by pressing the
«OK» button on the knob (6).
• Select the rst dough rising (fermentation) cycle - the
symbol (16) « » on the display (5), conrm the cycle
choice by pressing the button «Ok» on the knob (6).
• Turn the knob (6) to set the cycle operation time from
11 to 60 minutes, the default time is 30 minutes. The
operating time is shown on the display (5) with digital
symbols (20), conrm the set time by pressing the »OK”
button on the knob (6).
• Similar to the rst cycle of dough rising (fermentation),
select the second dough rising (fermentation) cycle
and set the cycle operation time from 0 to 60 minutes,
the default time is 45 minutes, conrm the set time by
pressing the «OK» button on the knob (6).
• Select the baking cycle - the symbol (24) « » on the
display (5), conrm the cycle choice by pressing the
button «Ok» on the knob (6).
• Turn the knob (6) to set the baking cycle operation time
from 0 to 60 minutes, the default time is 45 minutes.
The operating time is shown on the display (5) with
digital symbols (20), conrm the set time by pressing
the «OK» button on the knob (6).
• The set cycles of the program (23) «Manual setting/
DIY» « » will be saved in the bread maker’s
memory.

12
EN
Name
of the program Crust color Weight
Operation
time of the
program
Delayed start
time
Keep warm
time
Ingredients
adding
Classic
BASIC BREAD
Light 500g 2:42
13:00 0:60 +
Medium 750g 2:54
Dark 900g 3:07
French
FRENCH BREAD
Light 500g 3:18
13:00 0:60 +
Medium 750g 3:20
Dark 900g 3:33
Whole wheat
WHOLE WHEAT
BREAD
Light 500g 3:31
13:00 0:60 +
Medium 750g 3:35
Dark 900g 3:50
Sweet
SWEET BREAD
Light 500g 2:55
13:00 0:60 +
Mittler 750g 3:00
Dark 900g 3:07
Diet
LOW SUGAR BREAD
Light 500g 3:04
13:00 0:60 +
Medium 750g 3:08
Dark 900g 3:19
Sesame
SESAME BREAD
Light 500g 3:18
13:00 0:60 +
Medium 750g 3:23
Dark 900g 3:33
Rice
RICE FLOUR BREAD
Light 500g 3:21
13:00 0:60 +
Medium 750g 3:26
Dark 900g 3:28
Quick
QUIK BREAD - - 2:10 13:00 0:60 +

13
EN
Italian
ITALIAN BREAD
Light 500g 3:20
13:00 0:60 +
Medium 750g 3:22
Dark 900g 3:32
Gluten free
GLUTEN FREE BREAD
Light 500g 2:45
13:00 0:60 +
Medium 750g 2:50
Dark 900g 2:55
Pizza dough
PIZZA DOUGH - - 0:35 - 0
-
Italian dough
ITALIAN DOUGH - - 0:20 05 0 -
Hefenteig
DOUGH RISE - - 1:30 15:00 0
-
Yeasted dough
FERMENT/DEFROST - - 0:10 – 1:00
Default 1:00 - 0 -
Yoghurt
YOGHURT - - 6:00 – 12:00
Default 10:00 - 0 -
Vegetables
PICKLED VEGE - - 24:00 – 48:00
Default 36:00 - 0 -
Unyeasted dough
DOUGH - - 0:10 – 0:30
Default 0:10 - 0 -
Jam
JAM
- - 1:20 - 0-

14
EN
Baking
BAKE
- - 0:10 – 0:30
Default 0:10
-0-
Roasted nuts
ROAST NUT - - 0:45 – 1:30
Default 0:45
-0-
Meat
MEAT FLOSS - - 1:10 - 0 -
Rice vinegar
RICE VINEGAR - - 24:00 – 48:00
Default 32:00
-0-
Cake
CAKE - - 1:53 - 0:60 -
Kuchen
ITALIAN CAKE - - 1:53 - 0:60 -
Manual setting
DIY - - Default 2:15 13:00
0:00 - 0:60
Default
0:00
+

15
EN
DELAYED START FUNCTION
• If you want the bread maker not to start operating
immediately, you can use buttons to set the time of
delay of start of operation of the baking program.
• Please note that delay time shall include the baking
program operation time (see the table), i.e. upon the
expiry of the delay time the baking program will switch
on.
• Select the required program which will be shown on the
display (5) with the symbols (13) by turning the knob
(6), conrm the program choice by pressing the button
«Ok» on the knob (6).
• Turn the knob (6) to continue selecting the program
settings.
• Select the crust color; the crust color is indicated on the
display (5) with the symbols (14) « ». Conrm your
choice by pressing the button «Ok» on the knob (6).
• Set the product weight «500 g - 750 g - 900 g» by
turning the knob (6), the product weight will be shown
on the display (5) with the symbols (15) « ». Conrm
your choice by pressing the button «Ok» on the knob
(6).
• Select the delay symbol (21) « » on the display (5) by
turning the knob (6), conrm the choice by pressing the
button «Ok» on the knob (6).
• Turn the knob (6) to set the delay time (when setting
the delay time, take into account the operation time of
the baking program), the setting step is 10 minutes,
conrm the set time by pressing the «OK» button on
the knob (6).
• The maximal time of delay is 13 hours.
• The delay time will be shown on the display (14) with
digital indications (24).
Example:
It is 8.30 p.m. now, if you want to have your bread ready at
7 a.m. the next morning, i.e. in 10 hours and 30 minutes.
• Select the baking program, the pastry weight and the
crust color, by pressing buttons set the time 10.30 on the
display.
• Press the « » button (21) to switch the delay function
on, separating dots will be ashing on the display (14).
• To cancel the delay function, press and hold the «START/
STOP» button, you will hear a sound signal, and the
delay program will be switched o.
• Upon the expiry of the delay time, the set baking program
will switch on.
• If you do not take the ready bread immediately, the keep
warm function will switch on, the keep warm function
operation time is 60 minutes.
• To bake with the time delay, do not use perishable
ingredients, such as eggs, fresh milk, fruit, onion etc.
Note: the delay function is not available for the programs:
«Pizza dough / PIZZA DOUGH», «Sweet dough / ITALIAN
DOUGH», «Yeast dough / DOUGH RISE», «Defrosting
dough / FERMENT / DEFROST», «Yogurt / YOGHURT»,
«Vegetables / PICKLED VEGE », «Yeast dough / DOUGH»,
«Jam / JAM», «Baking / BAKE», «Roasted Nuts / ROAST
NUT», «Meat / MEAT FLOSS», «Rice Vinegar / RICE
VINEGAR», «Baking / CAKE «And» Cupcake / ITALIAN
CAKE».

16
EN
KEEP WARM FUNCTION
• After the operation time of the baking program is over,
the keep warm function will switch on and the display
(5) will show the symbol (22) « », the heating function
will run for 60 minutes.
• If you want to take the bread out, switch the keep
warm function o by pressing and holding the «START/
STOP» button on the knob (6).
Note: the keep warm function is not available for the
programs: «PIZZA DOUGH», «ITALIAN DOUGH»,
«DOUGH RISE», «FERMENT/DEFROST», «YOGHURT»,
«PICKLED VEGE», «DOUGH», «JAM», «BAKE»,
«ROAST NUT», «MEAT FLOSS», «RICE VINEGAR».
MEMORY FUNCTION
• In case of emergency power cuto during the bread
maker operation, the memory function with the duration
of up to 10 minutes is activated.
• If the power supply is restored within 10 minutes,
the bread maker will continue to perform the pre-set
program from the moment the program operation has
been stopped at.
• In case of absence of power supply for more than 10
minutes, it is necessary to load the ingredients again, to
set the program and to switch the bread maker on.
Note: if the moment of power cuto occurred during the
rst cycle of dough kneading, you can restart the cooking
program by pressing the «START/STOP» button on the
knob (6). BREAD MAKER OPERATION CYCLES
The bread maker has the following operation cycles the
operation cycles shown on the display (5):
• Kneading the dough to reach a homogeneous mass. The
dough kneading cycle is shown by the indication (17) «
».
• The dough rise cycle is shown by the indication (16) «
».
• The baking cycle is shown by the indication (24) « ».
• The keep warm function is shown by the indication (22) «
». After nishing the baking program, the keep warm
function will switch on, and will be operating during 60
minutes, if it is necessary to remove bread, switch the
keep warm function o by pressing and holding the
button «START/STOP».
IMPORTANT RECOMMENDATIONS ON
INGREDIENTS FOR BAKING
Flour
• Flour is the most important component of bread making.
• The characteristics of our are determined not only by
the sort but also by the conditions of grain cultivation,
processing method and storage. Try to bake bread of
our of dierent manufacturers and brands and nd the
one complying with your needs.
• The basic types of bread our are wheat and rye our.

17
EN
• Wheat our nds ever-growing use owing to nice
palatability traits and high nutritional value of wheat
our products.
Bread our
• Bread (rened) our made of inner part of grain only,
contains the maximal gluten quantity that provides the
crumb elasticity and prevents bread dropping.
• Pastry made of bread our is puer.
Whole-grain our (wholemeal)
• Whole-grain (wholemeal) our is obtained by grinding
whole wheat grains together with the membrane. This
sort of our is distinguished for its enhanced nutritional
value.
• Whole-grain bread is usually smaller in size. To improve
the consumer properties of bread, whole-wheat our is
often mixed with bread our.
Corn and oatmeal our
• To improve the texture of bread and to give it additional
avor properties, mix wheat or rye our with corn or
oatmeal one.
Sugar
• Sugar enriches the pastry in additional avors and
gives bread golden color.
• Sugar is a nutritional medium for yeast growth. Add to
pastry not only rened but also brown sugar and sugar
powder.
Yeast
• Yeast growth is accompanied by emission of carbon
dioxide that contributes to the formation of porous
crumb.
• Flour and sugar are a nutritional medium for yeast
growth. Add fresh compressed yeast or fast-acting
yeast powder. Dissolve fresh compressed yeast in
warm liquid (water, milk, etc.), add fast-acting yeast to
the our (it does not require preliminary activation, i.e.
adding of water).
• Follow the recommendations on the packing or observe
the following proportions:
• 1 tea spoon of fast-acting yeast powder is equal to 1.5
of tea spoon of fresh compressed yeast.
• Store fresh yeast in a refrigerator. Yeast is destructed
at high temperatures, and in this case the dough rises
poorly.
Salt
• Salt gives bread additional avor and color, but slows
down the yeast growth.
• Do not use excessive quantities of salt. Always use ne
salt (coarse salt can damage the baking form’s non-
stick coating).
Eggs
• Eggs improve the structure and volume of the pastry,
enrich avor.

18
EN
• Before adding eggs to the dough, it is recommended to
whip them thoroughly.
Animal and vegetable fats
• Animal and vegetable fats make the pastry softer and
increase storage life.
• Before adding butter, it should be cut into small cubes
and warm up to room temperature.
Baking powder and soda
• Soda and baking powder (leaven) shorten the time
necessary for dough rise.
• Use leaven or soda when using programs «Quick/QUIK
BREAD».
• It is necessary to mix soda with citric acid and a little
our beforehand (5 g of baking soda, 3 g of citric acid
and 12 g of our). This amount of powder (20 g) is rated
for 500 g of our.
• Do not use vinegar for soda slaking, use of vinegar
makes the crumb damper and less homogeneous.
• Baking powder (leaven) is just to be poured into the
form following recipe instructions.
Water
• Water temperature plays the crucial role in bread
baking.
• Optimal water temperature is from 20 to 25°C, and for
«Quick/QUIK BREAD» program is from 45 to 50°C.
• You may use milk instead of water or enrich bread
avor by adding some natural juice.
Dairy products
• Dairy products improve the nutritional value and avor of
the bread. The bread crumb will be more beautiful and
savory.
• Use fresh dairy products or powdered milk.
Weight of ingredients
• One of the important conditions for bread making is use
of precise quantity of ingredients.
• It is strongly recommended to use kitchen scale, the
measuring cup (11) and the measuring spoon (12) to
measure precise quantity of ingredients, otherwise the
ready bread may not comply with your need.
• Fill the measuring cup (11) with liquid to the appropriate
mark. Check dosage by placing the cup (11) on a at
surface.
• Clean the measuring cup (11) thoroughly from the
remaining previous ingredient.
• Do not compact dry ingredients when putting them into
the measuring cup (11).
• It is important to screen the our through the strainer
before the use to saturate it with air; this provides the
best baking result.
PROCEDURE FOR LOADING INGREDIENTS IN
THE BAKING FORM (PIC. 1)
• It is necessary to observe the sequence of loading of
ingredients in the baking form (2).

19
DE
• The following sequence is recommended:
- liquid ingredients, eggs, salt, vegetable oil or butter,
milk powder etc.;
- our; our should not be completely damped with
liquid ingredients;
- yeast may be put only on dry our, yeast should not
be in contact with salt;
- make a small cavity in the our and put the yeast in
the cavity.
INGREDIENTS ADDING
• To improve avor of the ready baking you can add the
necessary ingredients (nuts, dried fruits etc.) in the
container (7) and install it into the holder (8), at the right
moment the ingredients will be automatically added,
and the display (5) will show the symbol (18) « ».
• If you use the delay function for a long time, never add
perishable ingredients, such as eggs, fruit ingredients.
Note: ingredients adding function is available for the
programs: «BASIC BREAD», «FRENCH BREAD»,
«WHOLE WHEAT BREAD», «SWEET BREAD»,
«LOW SUGAR BREAD», «SESAME BREAD», «RICE
FLOUR BREAD», «QUIK BREAD», «ITALIAN BREAD»,
«GLUTEN FREE BREAD» and «Manual setting/DIY».
BREAD BAKING
• Before plugging the bread maker in make sure that the
operating voltage of the unit corresponds to the voltage
of your mains.
• Open the lid (4).
• Take the handle of the baking form (2) and lift it slightly,
turn the handle counterclockwise and take the form out
(2).
• Make sure that the paddle (9) is installed to its place.
Note: before installing the paddle (9) it is desirable to grease
it with butter, margarine or vegetable oil, it will facilitate its
removal from the fresh bread.
• Put the ingredients into the form (3) in the sequence
described in the recipe. Usually the ingredients are put in
the following order (pic. 1):
1. Liquid ingredients.
2. Flour, dry ingredients (sugar, salt).
3. Yeast and leaven. Make a small cavity in the our and
put the yeast or leaven in the cavity.
• Remove the crumbled products or spilled liquids from the
form (2) outer surface.
• Install the form (2) back to its place and turn it clockwise
as far as it will go.
• Close the lid (4).
• Insert the power plug into the mains socket, you will
hear a sound signal and the program «BASIC BREAD»
will be shown on the display (5), the digital symbols (20)
«2:54» will appear and the dividing points will be glowing
constantly.
• Crust color indication (14) - medium « ».
• Weight indication (15) « » 750 g.
• These settings are set by default.
• Turn the knob (6) to select another program. You can
select one of 25 baking/cooking programs and conrm the
selection by pressing the button «Ok» on the knob (6).

20
DE
• Turn the knob (6) to continue selecting the program
settings.
• Select the crust color; the crust color is indicated on the
display (5) with the symbols (14) « ». Conrm your
choice by pressing the button «Ok» on the knob (6).
• Set the product weight «500 g - 750 g - 900 g» by
turning the knob (6), the product weight will be shown
on the display (5) with the symbols (15) « ». Conrm
your choice by pressing the button «Ok» on the knob
(6).
• Press the «START/STOP» button on the knob (6)
to start the baking/cooking program, all program
symbols (13) on the display (5) will go out, except for
the selected and set program, the dividing points will
be ashing, the digital symbols (20) will show the time
remaining until the end of the program operation.
Note: if you want to start the preset baking program
performing immediately, skip delay time setting.
• The cycles of the bread maker are displayed on the
display (5) by the indication (13, 14, 15, 16, 17, 18, 20,
21, 22, 24) (the description of the symbols of the cycles
of the bread maker is given above).
• Recommendation: — after 5-minute dough kneading,
it is recommended to check its consistency. The dough
should form a soft glutinous lump, if the dough lump is
very dry, add some liquid to it, if the dough lump is too
damp, add some our (from 1/2 to 1 teaspoon or as
necessary).
• You can control the bread baking process through the
viewing window (3) in the lid (4).
ATTENTION! During the baking program operation,
never open the lid (4), in case of sudden change of
temperature, the dough can drop and will not rise any
more.
• After nishing of the baking program, you will hear
sound signals and the keep warm function will switch
on, the keep warm function operation time is 60
minutes.
• To cancel the keep warm function and to switch the
bread maker o, press and hold the «START/STOP»
button within 3 seconds.
• Remove the power plug from the mains socket.
• Open the lid (4) using heat-resistant kitchen
potholders, lift slightly and take the handle, turn the
baking form (3) counterclockwise and remove it from
the bread maker.
• Leave the form to cool, for approximately 10-15
minutes.
• Separate the pastry from the form (2) walls using a
plastic kitchen spatula.
• Do not use metal objects that can damage the non-
stick coating of the form (2).
• To remove the pastry turn the form (2) upside down
and shake it.
• Before cutting the bread, remove the paddle (9) with
the hook (10).
• Cut the bread with a sharp bread knife.
/