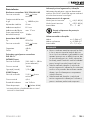
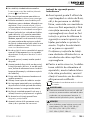
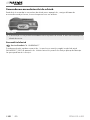
Parkside PPHA 20-Li B2 Benutzerhandbuch
- Kategorie
- Elektrowerkzeuge
- Typ
- Benutzerhandbuch

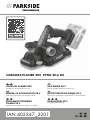
CORDLESS PLANER 20V PPHA 20-Li B2
AKKU-HOBEL 20 V
Originalbetriebsanleitung
IAN 402247_2201
CORDLESS PLANER 20V
Translation of the original instructions
АКУМУЛАТОРНО РЕНДЕ 20 V
Превод на оригиналното ръководство за експлоатация
RINDEA CU ACUMULATOR 20 V
Traducerea instrucţiunilor de utilizare original
ΕΠΑΝΑΦΟΡΤΙΖΟΜΕΝΗ
ΠΛΑΝΗ 20V
Μετάφραση των αυθεντικών οδηγιών λειτουργίας
AKU RENDE 20 V
Prevod originalnog uputstva za upotrebu

GB / CY Translation of the original instructions Page 1
RS Prevod originalnog uputstva za upotrebu Strana 17
RO Traducerea instrucţiunilor de utilizare original Pagina 33
BG Превод на оригиналното ръководство за експлоатация Cтраница 49
GR / CY Μετάφραση των αυθεντικών οδηγιών λειτουργίας Σελίδα 67
DE / AT / CH Originalbetriebsanleitung Seite 85
Before reading, unfold the page containing the illustrations and familiarise yourself with all functions of
the device.
Pre čitanja rasklopite obe strane sa slikama te se upoznajte sa svim funkcijama uređaja.
Înainte de a citi instrucţiunile, priviţi imaginile şi familiarizaţi-vă cu toate funcţiile aparatului.
Преди да прочетете отворете страницата с фигурите и след това се запознайте с всички функции
на уреда.
Πριν ξεκινήσετε την ανάγνωση, ανοίξτε τη σελίδα με τις εικόνες και εξοικειωθείτε με όλες τις λειτουργίες
της συσκευής.
Klappen Sie vor dem Lesen die Seite mit den Abbildungen aus und machen Sie sich anschließend mit allen
Funktionen des Gerätes vertraut.

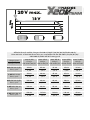
BA

H
C D
F
E
20a
G
28a
I

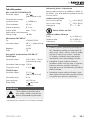
All Parkside tools and the chargers PLG20A1/A4/C1/A2/C2/A3/C3/PDSLG20A1/
PLGS2012A1 of the X20V Team series are compatible with the PAP 20 A1/A2/A3/B1/B3/
PAPS 204 A1/PAPS 208 A1 battery pack.
Charging times
Charging currents
max. 2,4 A
Charger
PLG 20 A1/A4/C1
max. 3,5 A
Charger
PLG 20 A2/C2
max. 4,5 A
Charger
PLG 20 A3/C3
max. 4,5 A
Charger
PDSLG 20 A1
max. 12,0 A
Charger
PLGS 2012 A1
2 Ah PAP 20 A1/B1
Battery pack
60 min
2,4 A
45 min
3,5 A
35 min
3,8 A
35 min
3,8 A
35 min
3,8 A
3 Ah PAP 20 A2
Battery pack
90 min
2,4 A
60 min
3,5 A
45 min
4,5 A
45 min
4,5 A
32 min
5,3 A
4 Ah PAP 20 A3/B3
Battery pack
120 min
2,4 A
80 min
3,5 A
60 min
4,5 A
60 min
4,5 A
35 min
7,8 A
4 Ah PAPS 204 A1
Battery pack
120 min
2,4 A
80 min
3,5 A
50 min
4,5 A
50 min
4,5 A
35 min
6,0 A
8 Ah PAPS 208 A1
Battery pack
210 min
2,4 A
165 min
3,5 A
120 min
4,5 A
120 min
4,5 A
45 min
12,0 A

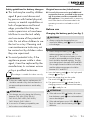
Smart battery supportv
This appliance supports advanced functions when using special smart batteries. For more infor-
mation, please refer to the accompanying material provided by the respective manufacturer.
If smart battery functions are supported, the Ready2Connect LEDv lights up in the following
manner:
Ready2Connect LED
Connect the battery pack
LED flashes 3 times
Connect to the app
LED stays on
Not connected to the app
LED stays off
Tool in update mode
LED flashes continuously
Tool update successful
The LED flashes for 5 seconds
Tool update failed
LED flashes rapidly alternately
Podrška za pametan akumulator v
Ovaj uređaj podržava proširene funkcije kod upotrebe specijalnih pametnih akumulatora.
Dodatne informacije preuzmete ćete pronaći u pratećem materijalu dotičnih proizvođača.
Ako su podržane funkcije pametnog akumulatora, Ready2Connect LED lampicav svetli
na sledeći način:
Ready2Connect LED lampica
Povezivanje akumulatorskog paketa
LED lampica treperi 3 puta
Povezivanje sa aplikacijom
LED lampica svetli
Nije povezano sa aplikacijom
LED lampica ne svetli
Alat u režimu ažuriranja
LED lampica treperi neprekidno
Ažuriranje alata uspešno
LED lampica treperi 5 sekundi
Ažuriranje alata neuspešno
LED lampica treperi naizmenično brzo

Acceptare acumulator Smartv
Acest aparat acceptă funcţii extinse la utilizarea acumulatorilor speciali Smart. Informaţii supli-
mentare pot fi consultate în materialele auxiliare ale producătorilor respectivi. În cazul în care
sunt acceptate funcţiile acumulatorului Smart, LED-ul Ready2Connectv luminează în modul
următor:
LED Ready2Connect
Conectarea setului de acumulatori
LED-ul luminează intermitent de 3 ori
Conectaţi cu aplicaţia
LED-ul rămâne aprins
Neconectat cu aplicaţia
LED-ul rămâne stins
Scula este în modul de actualizare
LED-ul luminează intermitent constant
Actualizare sculă reușită
LED-ul luminează intermitent timp de 5 secunde
Actualizare sculă eșuată
LED-ul luminează intermitent la o viteză alternantă
Поддръжка на акумулаторна батерия Smartv
Този уред поддържа разширени функции при използване на специални акумулаторни
батерии Smart. Моля, вижте допълнителна информация от съпроводителните материали
на съответния производител. Ако се поддържат функциите акумулаторна батерия Smart,
светодиодът Ready2Connectv свети по следния начин:
Светодиод Ready2Connect
Свързване на акумулаторния пакет
Светодиодът мига 3 пъти
Свързване с приложението
Светодиодът свети
Няма връзка с приложението
Светодиодът не свети
Инструмент в режим на актуализация
Светодиодът мига постоянно
Актуализация на инструмента успешна
Светодиодът мига в продължение на 5 секунди
Актуализация на инструмента неуспешна
Светодиодът мига непостоянно бързо

Υποστήριξη έξυπνου συσσωρευτήv
Η παρούσα συσκευή υποστηρίζει διευρυμένες λειτουργίες σε περίπτωση χρήσης ειδικών
έξυπνων συσσωρευτών. Για περισσότερες πληροφορίες, ανατρέξτε στο συνοδευτικό υλικό του
εκάστοτε κατασκευαστή. Όταν υποστηρίζονται οι λειτουργίες έξυπνου συσσωρευτή, η λυχνία
LED Ready2Connectv ανάβει με τον ακόλουθο τρόπο:
LED Ready2Connect
Σύνδεση συστοιχίας συσσωρευτών
Η λυχνία LED αναβοσβήνει 3 φορές
Σύνδεση με την εφαρμογή
Η λυχνία LED παραμένει αναμμένη
Δεν έχει γίνει σύνδεση με την εφαρμογή
Η λυχνία LED παραμένει σβηστή
Εργαλείο στη λειτουργία ενημέρωσης
Η λυχνία LED αναβοσβήνει συνεχώς
Επιτυχία ενημέρωσης εργαλείου
Η λυχνία LED αναβοσβήνει για 5 δευτερόλεπτα
Αποτυχία ενημέρωσης εργαλείου
Η λυχνία LED αναβοσβήνει εναλλάξ γρήγορα
Smart-Akku Unterstützungv
Dieses Gerät unterstützt erweiterte Funktionen bei Verwendung spezieller Smart-Akkus. Weitere
Informationen entnehmen Sie bitte den Begleitmateria lien der jeweiligen Hersteller. Wenn die
Smart-Akku-Funktionen unterstützt werden, leuchtet die Ready2Connect LEDv in nachfolgender
Weise:
Ready2Connect LED
Akkupack verbinden
LED blinkt 3 mal
Mit der App verbinden
LED bleibt an
Nicht mit der App verbunden
LED bleibt aus
Werkzeug im Update Modus
LED blinkt kontinuierlich
Werkzeug Update erfolgreich
Die LED blinkt 5 Sekunden lang
Werkzeug Update fehlgeschlagen
LED blinkt abwechselnd schnell

PPHA 20-Li B2 GB│CY │ 1 ■
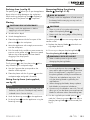
Contents
Introduction ............................................................2
Intended use ........................................................................2
Features ...........................................................................2
Package contents ....................................................................2
Technical details .....................................................................3
General power tool safety warnings .......................................4
1. Work area safety ..................................................................4
2. Electrical safety ...................................................................4
3. Personal safety ....................................................................4
4. Power tool use and care ............................................................5
5. Use and handling of the cordless electrical power tool .....................................5
6. Service ..........................................................................6
Appliance-specific safety instructions for power planers ......................................6
Safety guidelines for battery chargers ....................................................7
Original accessories/attachments .......................................................7
Before use ............................................................. 7
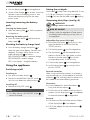
Charging the battery pack (see fig. I) ....................................................7
Inserting/removing the battery pack .....................................................8
Checking the battery charge level .......................................................8
Using the appliance .....................................................8
Switching on/off .....................................................................8
Setting the cut depth ..................................................................8
Vacuuming dust/chips (see fig. A) .......................................................8
Parking shoe (see fig. B) ...............................................................9
Planing ............................................................................9
Chamfering edges ...................................................................9
Fitting the rip fence (not supplied, seefig.G) ................................................ 9
Removing/fitting the planing blade (seefigs.C–D) .......................................9
Replacing the drive belt (see fig. F) .....................................................10
Maintenance and cleaning ...............................................10
Disposal ..............................................................11
Kompernass Handels GmbH warranty ....................................12
Service ............................................................... 13
Importer .............................................................13
Original declaration of conformity ........................................14
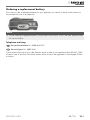
Ordering a replacement battery ..........................................15
Telephone ordering .................................................................15

PPHA 20-Li B2
■ 2 │ GB│CY
CORDLESS PLANER 20V
PPHA20-Li B2
Introduction
Congratulations on the purchase of your new
appliance. You have selected a high-quality product.
The operating instructions are part of this product.
They contain important information about safety,
usage and disposal. Before using the product, please
familiarise yourself with all operating and safety
instructions. Use the product only as described and
for the specified range of applications. Please also
pass these operating instructions on to any future
owner.
Intended use
The appliance is designed for planing workpieces
such as beams or planks that are firmly held in
place. The appliance is also suitable for chamfering
edges and for grooving. Any other uses of or
modifications to the appliance are deemed to be
improper usage and may result in serious physical
injury. The manufacturer accepts no responsibility
for damage(s) attributable to misuse. This appli-
ance is not intended for commercial use.
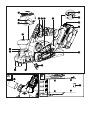
Features
Safety lock-out
ON/OFF switch
Chip ejector (optionally right/left)
Belt cover
Battery display LED
Battery charge level button
Release button for the battery pack
Screws for belt cover
Fastening screw for the rip fence/fold depth
stop
Plane sole
V grooves
Marking for cut depth scale
Cut depth scale
Dial for setting the cut depth (additional handle)
Adapter for external extraction
Parking shoe
Cutter block
Clamping element
Fastening screw for the planing blade
Planing blade
20a Tensioning plate groove
Hex screws
Lateral cutter block guard
Drive belt
Large belt wheel
Small belt wheel
Open-ended spanner
Hex key
Fold depth stop (not supplied)
28a Rip fence (not supplied)
Battery pack*
High-speed charger*
Red charge control LED
Green charge control LED
v Ready2Connect LED
b Accessory compartment
Package contents
1 cordless planer 20V
1 hex key (see fig. G)
1 open-ended spanner (see fig. G)
1 adapter for external extraction
1 carrying case
1 set of operating instructions

PPHA 20-Li B2 GB│CY │ 3 ■
Technical details
Cordless Planer 20V PPHA20-Li B2
Rated voltage 20 V (DC)
Rated idle speed n0 = 14000 rpm
Plane width 82 mm
Cut depth 0–2 mm
Fold depth max. 17 mm
Maximum high-frequency
output 10dBm
Battery PAP 20 B3*
Type LITHIUM ION
Rated voltage 20 V (DC)
Capacity 4.0 Ah
Cells 10
High-speed battery charger PLG 20 C3*
INPUT
Rated voltage 230–240 V ∼ 50 Hz (AC)
Rated power
consumption 120 W
Fuse (internal) 3.15 A T3.15A
OUTPUT
Rated voltage 21.5 V (DC)
Rated current 4.5 A
Charging time approx. 120 min.
Protection class II / (double insulation)
* BATTERY AND CHARGER ARE NOT SUPPLIED
Noise and vibration data
Noise measurement value determined in
accordance with EN62841. The A-rated
noise level of the power tool is typically:
Noise emission value
Sound pressure level LPA = 88.3 dB (A)
Sound power level LWA = 99.3 dB (A)
Uncertainty K = 3 dB
Wear ear muffs!
Total vibration value
Handle ah = 3.944 m/s2
Additional handle ah = 5.950 m/s2
Uncertainty K = 1.5 m/s2
NOTE
► For an accurate estimate of the vibration load
during a specific working period, the periods
during which the appliance is switched off or
is running but not actually being used must
also be taken into consideration. This can
significantly reduce the vibration load over
the total working period.
► The vibration emission values and the noise
emission values given in these instructions
have been measured in accordance with a
standardised test procedure and can be used
for comparison of the power tool with another
tool.
► The specified total vibration values and the
noise emission values can also be used to
make a provisional load estimate.
WARNING!
► Depending on the manner in which the power
tool is being used and, in particular, the kind
of workpiece being worked, the vibration and
noise emission values can deviate from the
values given in these instructions during actual
use of the power tool. Try to keep the vibra-
tion loads as low as possible. Measures to
reduce the vibration load are, e.g. wearing
gloves and limiting the working time. Wherein
all states of operation must be included (e.g.
times when the power tool is switched off and
times where the power tool is switched on but
running without load).

PPHA 20-Li B2
■ 4 │ GB│CY
General power
tool safety warnings
WARNING!
►Read all safety warnings, instructions,
illustrations and specifications provided
with this power tool. Failure to follow all
instructions listed below may result in electric
shock, fire and/or serious injury.
Save all warnings and instructions for future
reference.
The term "power tool" in the warnings refers to your
mains-operated (corded) power tool or battery-
operated (cordless) power tool.
1. Work area safety
a) Keep work area clean and well lit.
Cluttered or dark areas invite accidents.
b) Do not operate power tools in explosive atmos-
pheres, such as in the presence of flammable
liquids, gases or dust. Power tools create sparks
which may ignite the dust or fumes.
c) Keep children and bystanders away while
operating a power tool. Distractions can
cause you to lose control.
2. Electrical safety
a) Power tool plugs must match the outlet. Never
modify the plug in any way. Do not use any
adapter plugs with earthed (grounded) power
tools. Unmodified plugs and matching outlets
will reduce risk of electric shock.
b) Avoid body contact with earthed or grounded
surfaces, such as pipes, radiators, ranges and
refrigerators. There is an increased risk of
electric shock if your body is earthed or
grounded.
c) Do not expose power tools to rain or wet
conditions. Water entering a power tool will
increase the risk of electric shock.
d) Do not abuse the cord. Never use the cord
for carrying, pulling or unplugging the power
tool. Keep cord away from heat, oil, sharp
edges or moving parts. Damaged or entangled
cords increase the risk of electric shock.
e) When working outdoors with an electrical
power tool always use extension cords that
are also suitable for use outdoors. Use of a
cord suitable for outdoor use reduces the risk
of electric shock.
f) If operating a power tool in a damp location
is unavoidable, use a residual current device
(RCD) protected supply. Use of an RCD
re duces the risk of electric shock.
3. Personal safety
a) Stay alert, watch what you are doing and use
common sense when operating a power tool.
Do not use a power tool while you are tired
or under the influence of drugs, alcohol or
medication.
A moment of inattention while operating a power
tool may result in serious personal injury.
b) Use
personal protective equipment. Always
wear safety goggles. Protective equipment such
as a dust mask, non-skid safety shoes, hard hat or
hearing protection used for appropriate condi-
tions will reduce personal injuries.
c) Prevent unintentional starting. Ensure the
switch is in the off-position before connecting
to power source and/or battery pack, picking
up or carrying the tool. Carrying power tools
with your finger on the switch or energising
power tools that have the switch on invites
accidents.
d) Remove any adjusting key or wrench before
turning the power tool on. A wrench or a key
left attached to a rotating part of the power tool
may result in personal injury.
e) Do not overreach. Keep proper footing and
balance at all times. This enables better control
of the power tool in unexpected situations.
f) Dress properly. Do not wear loose clothing or
jewellery. Keep your hair and clothing away
from moving parts. Loose clothes, jewellery or
long hair can be caught in moving parts.
g) If devices are provided for the connection of
dust extraction and collection facilities, ensure
these are connected and properly used.
Use of dust collection can reduce dust-related
hazards.

PPHA 20-Li B2 GB│CY │ 5 ■
h) Do not allow yourself to get lulled into a false
sense of security and do not ignore the safety
regulations for power tools, even if you are
familiar with the power tool after repeated
use. A careless action can cause severe injury
within a fraction of a second.
4. Power tool use and care
a) Do not force the power tool. Use the correct
power tool for your application. The correct
power tool will do the job better and safer at
the rate for which it was designed.
b) Do not use the power tool if the switch does
not turn it on and off. Any power tool that
cannot be controlled with the switch is danger-
ous and must be repaired.
c) Disconnect the plug from the power source
and/or remove the battery pack, if detacha-
ble, from the power tool before making any
adjustments, changing accessories, or storing
power tools. Such preventive safety measures
reduce the risk of starting the power tool acci-
dentally.
d) Store idle power tools out of the reach of
children and do not allow persons unfamiliar
with the power tool or these instructions to
operate the power tool. Power tools are
dangerous in the hands of untrained users.
e) Maintain power tools and accessories. Check
for misalignment or binding of moving parts,
breakage of parts and any other condition
that may affect the power tool’s operation. If
damaged, have the power tool repaired
before use. Many accidents are caused by
poorly maintained power tools.
f) Keep cutting tools sharp and clean. Properly
maintained cutting tools with sharp cutting
edges are less likely to bind and are easier to
control.
g) Use the power tool, accessories and tool bits,
etc. in accordance with these instructions,
taking into account the working conditions
and the work to be performed. Use of the
power tool for operations different from those
intended could result in a hazardous situation.
h) Keep handles and grasping surfaces dry,
clean and free from oil and grease. Slippery
handles and grasping surfaces do not allow
for safe handling and control of the tool in
unexpected situations.
5. Use and handling of the cordless
electrical power tool
a) Only charge rechargeable batteries using the
chargers that are recommended by the manu-
facturer. Chargers are often designed for a
particular type of rechargeable battery unit.
There is a risk of fire if other types of rechargea-
ble battery units are used.
b) Only the rechargeable battery units supplied
are to be used with an electrical power tool.
The use of other rechargeable battery units may
lead to the danger of injury or fire.
c) When they are not being used, store
rechargeable battery units away from paper-
clips, coins, keys, nails, screws or other small
metal objects that could cause the contacts to
be bridged. Short-circuiting the contacts of a
rechargeable battery unit may result in heat
damage or fire.
d) Fluids may leak out of rechargeable battery
units if they are misused. If this happens,
avoid contact with the fluid. If contact occurs,
flush the affected area with water. Seek addi-
tional medical help if any of the fluid gets into
your eyes. Escaping battery fluid may cause
skin irritation or burns.
e) Do not use a damaged or modified battery.
Damaged or modified batteries may behave
unexpectedly and cause fires, explosions or
pose a risk of injury.
f) Do not expose a battery to fire or excessively
high temperatures. Fire or temperatures in excess
of 130°C (265°F) can cause an explosion.
g) Follow all instructions regarding charging
and never charge the battery or the cordless
tool outside the temperature range given in
the operating instructions. Incorrect charging
or charging outside of the permissible tempera-
ture range can destroy the battery and increase
the risk of fire.

PPHA 20-Li B2
■ 6 │ GB│CY
CAUTION! RISK OF EXPLOSION!
Never charge non-rechargeable
batteries.
Protect the recharge-
able battery from heat; for example, from
continuous exposure to sunlight, fire, water
and moisture. There is a risk of explosion.
6. Service
a) Have your power tool serviced by a qualified
repair person using only identical replace-
ment parts. This will ensure that the safety of
the power tool is maintained.
b) Never try to repair damaged batteries.
Batteries should only be maintained by the
manufacturer or an approved customer service
centre.
Appliance-specific safety instructions
for power planers
■Wait until the cutter block comes to a complete
standstill before putting down the power tool.
An exposed, rotating cutter block can catch in
the surface and cause a loss of control which
could result in serious injuries.
■Fix and secure the workpiece to a sturdy
work surface using clamps or other methods.
If you hold the workpiece only with your hand
or against your body, it will remain unstable.
This can lead to a loss of control.
■Do not insert your fingers into the chip
ejector . You can injure yourself on rotating
parts.
■Always switch the appliance on before
applying it to the workpiece. Otherwise,
there is a risk of a kickback if the planing blade
catches in the workpiece.
■The plane sole must lie flat on the work-
piece when working. Otherwise, there is a
risk of injury due to the plane jamming.
■Never plane over metal objects. Otherwise,
the planing blade/cutter block could be
damaged.
■Do not process materials containing asbestos.
Asbestos is a known carcinogen.
■Dusts can be produced while working that
are hazardous to health, inflammable or
explosive. Wear a dust mask and use a suitable
dust/chip extractor. Some dusts are carcinogenic.
■When working for extended periods of time
on wood and, in particular, materials that
produce dust which is hazardous to health,
connect the appliance to an appropriate
external dust extraction appliance. Do not
use the power planer if the battery is dam-
aged. Damaged cables increase the risk of
electric shock.
■Do not rest your hands next to or in front of
the appliance and the area being worked.
Otherwise, there is a risk of injury if you slip.
■In the event of danger, remove the mains
plug from the socket immediately.
■Always remove the plug from the power
socket in event of danger, during work
breaks, when working on the appliance
(e.g. when changing planing blade).
■Always route the power cord towards the
rear, away from the appliance.
■Use only sharp planing blades.
■Do not soak the materials or the area to be
processed with liquids containing solvents.
■Avoid all contact with rotating parts.
■Never use the appliance for purposes other
than those for which it was designed, and
only use original parts/accessories.
■Hold the appliance firmly while working.
Ensure that your stance is secure and stable.
■The appliance must always be kept clean,
dry and free from oil or grease.

PPHA 20-Li B2 GB│CY │ 7 ■
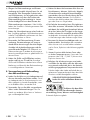
Safety guidelines for battery chargers
■ This tool may be used by children
aged 8 years and above and
by persons with limited physical,
sensory or mental capabilities or
lack of experience and knowl-
edge, provided that they are
under supervision or have been
told how to use the tool safely
and are aware of the potential
risks. Do not allow children to use
the tool as a toy. Cleaning and
user maintenance tasks may not
be carried out by children unless
they are supervised.
■ To avoid potential risks, if the
appliance power cable is dam-
aged, it must be replaced by the
manufacturer, its customer service
or by a qualified technician.
The charger is suitable for indoor use only.
WARNING!
■ If the mains cable requires replacement, this
should be carried out by the manufacturer or
an approved representative to avoid safety
hazards.
ATTENTION!
♦ This charger can only charge the following
batteries: PAP20A1/PAP20A2/
PAP20A3/PAP20B1/PAP20B3/
PAPS204A1/PAPS208A1.
♦ A current list of battery compatibility can
be found at www.Lidl.de/Akku.
Original accessories/attachments
■ Use only the accessories and additional
equipment that are specified in the operat-
ing instructions and are compatible with
the appliance. Using attachments or accessory
tools other than those recommended in the
operating instructions can lead to a risk of
injury.
Before use
Charging the battery pack (see fig. I)
CAUTION!
► Always unplug the charger before you
remove the battery pack from or connect it
to the charger.
NOTE
► Never charge the battery pack when the
ambient temperature is below 10°C or
above 40°C. If a lithium-ion battery is to be
stored for an extended period, the charge
level should be checked regularly. The opti-
mum charge level is between 50% and 80%.
The storage climate should be cool and dry,
and the ambient temperature should be
between 0°C and 50°C.
♦ Insert the battery pack into the high-speed
charger (see fig. I).
♦ Insert the power plug into the socket.
The control LED lights up red.
♦ The green control LED indicates that the
charging process is complete and the battery
pack is ready for use.
ATTENTION!
♦ If the red control LED flashes, this means
that the battery pack has overheated and
cannot be charged.
♦ If the red and green control LEDs both
flash, this means that the battery pack is
defective.

PPHA 20-Li B2
■ 8 │ GB│CY
♦ Push the battery pack into the appliance.
♦ Switch off the charger for at least 15 minutes
between successive charging sessions. Also
disconnect the power plug from the mains
power socket.
Inserting/removing the battery
pack
Inserting the battery pack
♦ Allow the battery pack to click into place in
the appliance.
Removing the battery pack
♦ Press the release button and remove the
battery pack .
Checking the battery charge level
♦ Press the battery charge level button to
check the status of the battery (see also main
diagram). The status will be shown on the
battery display LED as follows:
RED/ORANGE/GREEN = maximum charge
RED/ORANGE = medium charge
RED = low charge – charge the battery
Using the appliance
Switching on/off
Switching on
♦ First, press the safety lock-out .
♦ Then press and hold the ON/OFF switch .
You can now release the safety lock-out .
Switching off
♦ Release the ON/OFF switch .
NOTE
► For safety reasons, the ON/OFF switch
cannot be locked.
Setting the cut depth
Use the dial to adjust the cutting depth (0–2mm)
in 1/10 mm increments using the cutting depth
scale . This can then be read via the marking.
Vacuuming dust/chips (see fig. A)
WARNING!
Always wear a dust mask!
RISK OF INJURY!
► Always switch the appliance off and remove
the battery before carrying out any work on
the appliance.
Adjustable chip ejector (left/right)
♦ Unlock the chip ejector by turning it in the
opposite direction to the arrow (from the
"LOCK" position).
♦ Pull the chip ejector out of the appliance.
♦ The chip ejector can be attached to the
plane on the left or the right. Make sure that
the tab on the chip ejector fits into the
corresponding recess on the housing.
♦ Push the chip ejector into the appliance.
♦ Lock the chip ejector by turning it to the
position "LOCK".
External extraction
When using a workshop extractor, for example, it
may be necessary to use the adapter for external
extraction . The workshop vacuum cleaner must
be suitable for the material being processed.
Connection
♦ Push the adapter for external extraction
firmly onto the chip ejector .
♦ Push the hose of a suitable workshop vacuum
cleaner onto the chip ejector or the adapter
for external extraction , as applicable.
Removal
♦ Pull the hose of the workshop vacuum cleaner
off the chip ejector or the adapter.
♦ Pull off the adapter for external extraction ,
if attached.

PPHA 20-Li B2 GB│CY │ 9 ■
Parking shoe (see fig. B)
The parking shoe allows you to put the appliance
down without risking damage to the workpiece.
While working, the parking shoe is flipped up
and rear part of the plane sole is exposed.
Planing
CAUTION! RISK OF KICKBACK!
► Always switch the appliance on before
applying it to the workpiece.
♦ Set desired cut depth.
♦ Switch the appliance on.
♦ Place the appliance with the front part of the
plane sole on the workpiece.
♦ Move the appliance with straight, even motions
over the workpiece.
♦ Push forward slowly and do not exert excessive
pressure on the plane sole . Excessive speed
reduces the surface quality and can lead to
clogging of the chip ejector.
Chamfering edges
The V grooves in the front plane sole allow
easy chamfering of workpiece edges.
♦ Use the V groove that corresponds to the
chamfer width required.
♦ Place the planer with the V groove onto the
workpiece edge and guide it forwards.
Fitting the rip fence (not supplied,
seefig.G)
NOTE
► Replacement parts that are not listed (such as
batteries, rip fence or fold depth stop) can be
ordered via our Service Hotline.
♦ Undo the fastening screw on the appliance.
♦ Fit the rip fence onto the appliance using the
fastening screw .
Removing/fitting the planing
blade (seefigs.C–D)
RISK OF INJURY!
► Always switch the appliance off and remove
the battery before carrying out any work on
the appliance.
CAUTION!
► There is a risk of injury due to the cutting
edges of the planing blade !
► Never touch the cutting edges of the planing
blade .
The planing blade has two cutting edges and
can be turned.
♦ Replace the planing blade when both cut-
ting edges are blunt.
♦ Do not try to sharpen the planing blade .
Turn the planing blade or replace it
WARNING! RISK OF INJURY!
► Wear suitable protective gloves when
changing the planing blades.
NOTE
► Do not undo the two hex screws . They
are used for adjusting the height of the cutter
block. No adjustment is required if you use
the planing blades sold by the manufacturer.
Otherwise, an imbalance may occur. Use
only the planing blades supplied by the
manufacturer.
► When changing the blade, always replace
both blades to prevent an imbalance.
► Unscrew only one blade to start with. This will
allow you to use the factory-mounted second
blade for reference when reassembling later.
♦ Use the supplied open-ended spanner to
undo the 3 fastening screws a little way so
that the planing blade can be moved (see
fig. C).

PPHA 20-Li B2
■ 10 │ GB│CY
♦ Push the movable cutter block guard into the
slot in the housing.
♦ Push the planing blade sideways out of the
clamping element (see fig. D)
NOTE
► The planing blade may be factory-bonded
with protective lacquer. It is not necessary to
re-bond the blade.
♦ Fit either a new or turned blade in the reverse
order. Make sure that the notch on the planing
blade slides into the tensioning plate
groove 20a (see fig. E).
♦ Make sure that the planing blade protrudes
a little way (approx. 1 mm) from the cutter
block in the direction of the movable lateral
cutter block guard . Carefully turn the cutter
block to check that the planing blade does not
scrape anywhere.
♦ Also ensure that the clamping element closes
flush to the cutter block . The clamping ele-
ment must lie on the hex screws before
the fastening screws can be tightened.
♦ Planing blades can be purchased exclusively
from the address given below (see section
"Service"). Do not use planing blades from
other manufacturers.
Setting the planing blade height
♦ Set the cutting depth to 0 mm.
♦ Check the position of the planing blade at
both ends. Use a flat, straight object as a guide
strip over the plane sole .
♦ The tip of the planing blade must be flush
with the surface of the plane sole .
♦ The height of the planing blade can be
adjusted using the hex key via the two hex
screws . Adjust the two hex screws so that
the tip of the planing blade is flush with the
plane sole on both sides.
Replacing the drive belt (see fig. F)
RISK OF INJURY!
► Always switch the appliance off and remove
the battery pack before carrying out any
work on the appliance.
♦ Remove the screws and detach the drive
belt cover .
♦ Remove the worn drive belt .
♦ Fit the new drive belt onto the small belt
wheel first and then turn the drive belt
and pull it onto the large belt wheel .
♦ Replace the drive belt cover and fix it in
place using the screws .
Maintenance and cleaning
WARNING! RISK OF INJURY! Always
switch the appliance off and remove
the battery before carrying out any
work on the appliance.
♦ Keep the appliance and the ventilation slits
clean to ensure fault-free operation.
♦ Clean the chip ejector regularly.
♦ To clean a blocked chip ejector, use a suitable
tool (e.g. a piece of wood, compressed air, etc.).
♦ Use a dry cloth to clean the housing.
♦ Use a brush to remove any dust stuck to the
appliance.
♦ Never use sharp objects, petrol, solvents or
cleansers which can damage plastic. Do not
allow any liquids to get into the interior of the
appliance.
WARNING!
■ Do not use any accessories that are not
recommended by PARKSIDE. This can lead
to an electric shock and fire.
NOTE
► Replacement parts that are not listed (such as
batteries, rip fence or fold depth stop) can be
ordered via our Service Hotline.

PPHA 20-Li B2 GB│CY │ 11 ■
Disposal
Do not dispose of power tools
in your normal domestic waste!
The adjacent symbol of a crossed-out
dustbin means that this appliance is
subject to Directive 2012/19/EU. This directive
states that this appliance may not be disposed of in
the normal household waste at the end of its useful
life, but must be taken to specially set-up collection
locations, recycling depots or disposal companies.
The disposal is free of charge for the user.
Protect the environment and dispose of this
appliance properly.
If your old appliance has stored any personal data,
you are responsible for deleting it yourself before
returning it.
If it is possible to do so without destroying the old
appliance, remove the old batteries or rechargea-
ble batteries before returning the appliance for
disposal and take them to a separate collection
point. In the case of permanently installed
rechargeable batteries, you must indicate during
disposal that the appliance contains a battery.
Your local community or municipal
authorities can provide information on
how to dispose of the worn-out product.
Do not dispose of batteries in
your normal household waste!
Defective or worn-out rechargeable
batteries must be recycled according to
Directive 2006/66/EC. Batteries/rechargeable
batteries must be treated as hazardous waste and
must therefore be disposed of in an environmentally
sound manner by appropriate bodies (dealers,
specialist dealers, public municipal bodies, com-
mercial disposal companies). Batteries/recharge-
able batteries may contain toxic heavy metals.
For this reason, do not dispose of batteries/
rechargeable batteries in domestic waste. Take
them to a specialist collection point. Only return
batteries that are fully discharged.
The packaging is made from environ-
mentally friendly material and can be
disposed of at your local recycling plant.
Dispose of the packaging in an
environmentally friendly manner.
Note the labelling on the packaging
and separate the packaging material
components for disposal if necessary. The packag-
ing material is labelled with abbreviations (a) and
numbers (b) with the following meanings:
1–7: plastics, 20–22: paper and cardboard,
80–98: composites.

PPHA 20-Li B2
■ 12 │ GB│CY
Kompernass Handels GmbH
warranty
Dear customer,
This appliance comes with a 5-year warranty
valid from the date of purchase. In the event that
this product has any defects, you, the buyer, have
certain statutory rights. Your statutory rights are
not limited in any way by the warranty described
below.
Warranty conditions
The warranty period starts on the date of purchase.
Please keep your receipt in a safe place. This will
be required as proof of purchase.
If any material or manufacturing fault occurs within
5 years of the product’s date of purchase, we
will either repair or replace the product for you
or refund the purchase price (at our discretion).
This warranty service requires that you present
the defective appliance and the proof of pur-
chase (receipt) within the 5-year warranty period,
together with a brief written description of the fault
and of when it occurred.
If the defect is covered by the warranty, your
product will either be repaired or replaced by us.
The repair or replacement of a product does not
signify the beginning of a new warranty period.
The X 20 V Team Series battery pack comes with
a 3-year warranty valid from the date of purchase.
Warranty period and statutory claims
for defects
The warranty period is not prolonged by repairs
effected under the warranty. This also applies to
replaced and repaired components. Any damage
and defects present at the time of purchase must
be reported immediately after unpacking. Repairs
carried out after expiry of the warranty period shall
be subject to a fee.
Scope of the warranty
This appliance has been manufactured in accord-
ance with strict quality guidelines and inspected
meticulously prior to delivery.
The warranty covers material faults or production
faults. The warranty does not extend to product
parts subject to normal wear and tear or to fragile
parts which could be considered as consumable
parts such as switches or parts made of glass.
The warranty does not apply if the product has
been damaged, improperly used or improp-
erly maintained. The directions in the operating
instructions for the product regarding proper use
of the product are to be strictly followed. Uses
and actions that are discouraged in the operating
instructions or which are warned against must be
avoided.
This product is intended solely for private use and
not for commercial purposes. The warranty shall
be deemed void in cases of misuse or improper
handling, use of force and modifications / repairs
which have not been carried out by one of our
authorised Service centres.
The warranty period does not apply to
■ Normal reduction of the battery capacity
over time
■ Commercial use of the product
■ Damage to or alteration of the product by the
customer
■ Non-compliance with safety and maintenance
instructions, operating errors
■ Damage caused by natural hazards
Seite wird geladen ...
Seite wird geladen ...
Seite wird geladen ...
Seite wird geladen ...
Seite wird geladen ...
Seite wird geladen ...
Seite wird geladen ...
Seite wird geladen ...
Seite wird geladen ...
Seite wird geladen ...
Seite wird geladen ...
Seite wird geladen ...
Seite wird geladen ...
Seite wird geladen ...
Seite wird geladen ...
Seite wird geladen ...
Seite wird geladen ...
Seite wird geladen ...
Seite wird geladen ...
Seite wird geladen ...
Seite wird geladen ...
Seite wird geladen ...
Seite wird geladen ...
Seite wird geladen ...
Seite wird geladen ...
Seite wird geladen ...
Seite wird geladen ...
Seite wird geladen ...
Seite wird geladen ...
Seite wird geladen ...
Seite wird geladen ...
Seite wird geladen ...
Seite wird geladen ...
Seite wird geladen ...
Seite wird geladen ...
Seite wird geladen ...
Seite wird geladen ...
Seite wird geladen ...
Seite wird geladen ...
Seite wird geladen ...
Seite wird geladen ...
Seite wird geladen ...
Seite wird geladen ...
Seite wird geladen ...
Seite wird geladen ...
Seite wird geladen ...
Seite wird geladen ...
Seite wird geladen ...
Seite wird geladen ...
Seite wird geladen ...
Seite wird geladen ...
Seite wird geladen ...
Seite wird geladen ...
Seite wird geladen ...
Seite wird geladen ...
Seite wird geladen ...
Seite wird geladen ...
Seite wird geladen ...
Seite wird geladen ...
Seite wird geladen ...
Seite wird geladen ...
Seite wird geladen ...
Seite wird geladen ...
Seite wird geladen ...
Seite wird geladen ...
Seite wird geladen ...
Seite wird geladen ...
Seite wird geladen ...
Seite wird geladen ...
Seite wird geladen ...
Seite wird geladen ...
Seite wird geladen ...
Seite wird geladen ...
Seite wird geladen ...
Seite wird geladen ...
Seite wird geladen ...
Seite wird geladen ...
Seite wird geladen ...
Seite wird geladen ...
Seite wird geladen ...
Seite wird geladen ...
Seite wird geladen ...
Seite wird geladen ...
Seite wird geladen ...
Seite wird geladen ...
Seite wird geladen ...
Seite wird geladen ...
Seite wird geladen ...
Seite wird geladen ...
Seite wird geladen ...
Seite wird geladen ...
-
 1
1
-
 2
2
-
 3
3
-
 4
4
-
 5
5
-
 6
6
-
 7
7
-
 8
8
-
 9
9
-
 10
10
-
 11
11
-
 12
12
-
 13
13
-
 14
14
-
 15
15
-
 16
16
-
 17
17
-
 18
18
-
 19
19
-
 20
20
-
 21
21
-
 22
22
-
 23
23
-
 24
24
-
 25
25
-
 26
26
-
 27
27
-
 28
28
-
 29
29
-
 30
30
-
 31
31
-
 32
32
-
 33
33
-
 34
34
-
 35
35
-
 36
36
-
 37
37
-
 38
38
-
 39
39
-
 40
40
-
 41
41
-
 42
42
-
 43
43
-
 44
44
-
 45
45
-
 46
46
-
 47
47
-
 48
48
-
 49
49
-
 50
50
-
 51
51
-
 52
52
-
 53
53
-
 54
54
-
 55
55
-
 56
56
-
 57
57
-
 58
58
-
 59
59
-
 60
60
-
 61
61
-
 62
62
-
 63
63
-
 64
64
-
 65
65
-
 66
66
-
 67
67
-
 68
68
-
 69
69
-
 70
70
-
 71
71
-
 72
72
-
 73
73
-
 74
74
-
 75
75
-
 76
76
-
 77
77
-
 78
78
-
 79
79
-
 80
80
-
 81
81
-
 82
82
-
 83
83
-
 84
84
-
 85
85
-
 86
86
-
 87
87
-
 88
88
-
 89
89
-
 90
90
-
 91
91
-
 92
92
-
 93
93
-
 94
94
-
 95
95
-
 96
96
-
 97
97
-
 98
98
-
 99
99
-
 100
100
-
 101
101
-
 102
102
-
 103
103
-
 104
104
-
 105
105
-
 106
106
-
 107
107
-
 108
108
-
 109
109
-
 110
110
-
 111
111


Parkside PPHA 20-Li B2 Benutzerhandbuch
- Kategorie
- Elektrowerkzeuge
- Typ
- Benutzerhandbuch
in anderen Sprachen
Verwandte Artikel
-
Parkside PMKA 20-Li A1 Benutzerhandbuch
-
Parkside IAN 391008_2201 Benutzerhandbuch
-
Parkside PDSSA 20-Li A1 Benutzerhandbuch
-
Parkside PTS 20-Li A1 Translation Of The Original Instructions
-
-
Parkside PWSA 20-Li A1 Bedienungsanleitung
-
-
-
Parkside 339108 1910 Translation Of The Original Instructions
-
Parkside PSBSA 20-LI B2 Bedienungsanleitung