Seite wird geladen ...

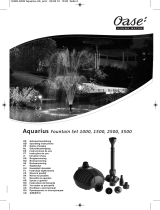
HAWAII
D/GB/F/NL/E/I/H/CZ
2 Jahre
Garantie
2 years
guarantee
2 ans de
garantie

1
11
9
12
2
1
3
4
5
8
7
11c
11b
11a
6
10
13

1
5
3 4
2
b
a
6

HAWAII
. . . . . . . . . . . . . . . . . . . . . . . . . . . . . . . . . . . . . . . . . .43 - 49
. . . . . . . . . . . . . . . . . . . . . . . . . . . . . . . . . . . . . . . . . .36 - 42
. . . . . . . . . . . . . . . . . . . . . . . . . . . . . . . . . . . . . . . . . .50 - 56
. . . . . . . . . . . . . . . . . . . . . . . . . . . . . . . . . . . . . . . . . .29 - 35
. . . . . . . . . . . . . . . . . . . . . . . . . . . . . . . . . . . . . . . . . .22 - 28
. . . . . . . . . . . . . . . . . . . . . . . . . . . . . . . . . . . . . . . . . .15 - 21
. . . . . . . . . . . . . . . . . . . . . . . . . . . . . . . . . . . . . . . . . . . 8 - 14
. . . . . . . . . . . . . . . . . . . . . . . . . . . . . . . . . . . . . . . . . . . .1 - 7
D
GB
F
NL
E
I
H
CZ

D
1
HAWAII
BBeeddiieennuunnggssaannlleeiittuunngg
Herzlichen Glückwunsch zum Erwerb Ihrers Solar Springbrunnen Sets von Wagner.
Lesen Sie vor Inbetriebnahme des Gerätes die Bedienungsanleitung genau durch und
beachten Sie die Sicherheitshinweise. Bewahren Sie die Bedienungsanleitung
sorgfältig auf.
HINWEIS: Ihr SOLAR SPRINGBRUNNEN SET ist witterungsbeständig und sollte
bei direkter Sonneneinstrahlung betrieben werden. Stellen Sie Ihre
Solarstation so auf, dass das Solarmodul möglichst starker
Sonneneinstrahlung ausgesetzt ist, da so deren Leistungsfähigkeit
gewährleistet wird.
Die Solarstation ist mit einem NiCd-Akku ausgestattet. Dieser Akku
wird in ungeladenem Zustand ausgeliefert. Laden Sie diesen vor der
ersten Benutzung zwei Tage lang bei direkter Sonneneinstrahlung
oder 24 h mit dem WAGNER-Netz-Ladegerät (Sonderzubehör) auf, um
die optimale Leistung zu erzielen. Bei diesem ersten Ladevorgang
muß der Hauptschalter auf „0“ stehen.
SICHERHEITSHINWEISE
● Pumpe niemals mit dem öffentlichen Wechselstrom-Netz in Verbindung bringen
(außer WAGNER-Ladegerät)
● Die Pumpe darf ausschließlich mit der Solarstatione Hawaii betrieben werden.
● Solarstation/Pumpe nicht in der Nähe von brennbaren Stoffen betreiben.
● Pumpe darf nie trocken (außerhalb von Wasser) betrieben werden. Trockenlauf
zerstört die Pumpe. Stecker erst einstecken wenn die Pumpe im Wasser ist.
● Vor allen Wartungsarbeiten an der Pumpe, diese von der Solarstation trennen.
● Ausschließlich für den Betrieb von Zierspringbrunnen im Süßwasser geeignet.
● Wassertemperatur min. 5° C, max. 35° C.
● Im Winter muss die kpl. Einheit an einem frostsicheren Ort gelagert werden.
● Sand und andere schmirgelnde Stoffe führen zu schnellerem Verschleiß und zu
Leistungsminderung, deshalb nach Einsetzen der Pumpe in den Teich, mit der
Inbetriebnahme der Pumpe warten bis sich aufgewirbelter Sand wieder gesetzt hat.
Geräte-Elemente
Legende zu Abbildung “A”
1 Abschlusskappe 9 Schirm
2 Abnehmbare Solarstation 10 Styropor-Schwimmkörper
3 Standpfahl 11 Pumpen Set
4 Erdspieß 11a Pumpengehäuse
5 Verbindungskabel für Solarspringbrunnen (5 m) 11b Laufrad
6 Düsenblende (3 Stück) 11c Ansaugdeckel
7 Düsenunterteil 12 Filtermatte
8 Rohrstück (3 Stück) 13 Filterträger

D
2
● Nicht am Kabel der Pumpe ziehen; die Pumpe könnte dadurch undicht werden.
● Die Pumpe muss eventuell bei ihrer Inbetriebnahme entlüftet werden (Luft in der
Pumpe führt zu starker Leistungsminderung), dies geschieht durch mehrfaches
Ein- und Ausstecken (jeweils ca. 3 sek.) des Pumpensteckers in der Solarstation.
Die Entlüftungswirkung ist bei Betrieb ohne Düsen am besten.
● max. Tauchtiefe von 0,5 m beachten.
FUNKTIONSWEISE
Solarstation mit Akku (Bild
햳햳
, Pfeil b):
a) Wahlschalter auf
❊❊
☞☞
automatischer Pumpenantrieb bei direkter Sonneneinstrahlung auf die
Solarstation.
b) Wahlschalter auf “0”
☞☞
Akku wird geladen, kein Pumpenbetrieb.
c) Wahlschalter auf
☞☞
Pumpe wird in Sparbetriebsweise gestartet und schaltet nach 3 h automatisch
ab.
Durch kurzzeitiges Umschalten auf
❊❊
oder “0” und erneutes Zurückschalten auf
wird die Pumpe erneut für 3 h aktiviert. In dieser Betriebsart wird die Pumpe
mit der Energie aus dem Akku gespeist.
HINWEIS! Nach Ablauf des 3-stündigen Sparbetriebs stellt die Solarstation
automatisch auf Ladebetrieb
um.
LEISTUNG
Die Leistung Ihres Solar Springbrunnen Sets ist von der Jahreszeit abhängig.
Die Leistung der Pumpe ist im Sommer größer als im Frühjahr und Herbst. Der
Pumpenantrieb mit Akkuenergie, ist von der Zeitspanne der Sonneneinstrahlung auf
das Solarmodul abhängig. Bei bedecktem Himmel zum Bsp.,
HAWAII
Technische Daten
Solarfeld Monokristallin
Grösse ca. 195 x 145 mm²
Leistung bei voller Sonneneinstrahlung ca. 1500 mW
Akku NiCd
Spannung 4,8 V
Pumpe
Fördermenge max. 280 l/h
Förderhöhe max. 115 cm
Fontänenhöhe nur im Akku-Betrieb ca. 35 cm
Fontänenhöhe bei Solarbetrieb max. 85 cm
Akkubetrieb max. 10 h

D
3
reicht die Sonnenenergie nicht aus, um den Akku voll aufzuladen. Die
Betriebsdauer Ihrer Pumpe ist daher geringer.
AUFSTELLUNG
● Wählen Sie für die Aufstellung der Solarstation einen Ort mit möglichst viel
Sonneneinstrahlung.
● Stellen Sie die Solarstation nicht im Schatten von Bäumen, Gebüschen und
Gebäuden auf, da sich ansonsten die Leistung Ihres Solar Springbrunnen Sets
enorm verringert (
햵햵
)
● Richten Sie die Solarstation nach Süden aus.
☞☞
Die Solarstation kann im Neigungswinkel verstellt werden (
햲햲
):
Sommer: flach
Frühjahr und Herbst: steil
MONTAGE SOLARSTATION
Vorsicht! Drücken Sie nicht auf das Solarfeld, da hierdurch das Modul
beschädigt werden könnte!
● Entnehmen Sie das Solar Springbrunnen Set vorsichtig aus dem Karton.
Hinweis: Das Anschlusskabel ist wasserdicht im Pumpengehäuse montiert.
WARNUNG! Beachten Sie beim Graben und Bohren von Löchern, dass Sie
auf keine verborgenen Leitungen treffen. Der Kontakt mit
verborgenen Leitungen kann zu schweren Verletzungen oder gar
zum Tod führen.
● Legen Sie die Pumpe, den Standpfahl und den Erdspieß seitlich vom Aufstellungsort
vorsichtig auf den Boden.
● Wickeln Sie das Anschlusskabel der Pumpe ab. Führen Sie das Kabel von unten in
den Erdspieß ein und ziehen Sie den Stecker aus der Öffnung in der Mitte des
Standpfahles (Bild A, 5, 4, 3).
● Treiben Sie den Erdspieß von Hand in den Boden.
● Schieben Sie den Standpfahl auf den Erdspieß. Ziehen Sie dabei das Kabel am
Erdspieß nach, um ein Einklemmen des Kabels zu vermeiden.
● Schieben Sie die Solarstation in die Führungsschiene am Standpfahl (Bild A, 2, 3).
● Verlegen Sie das Kabel so, dass es nicht beschädigt werden kann (z. B. durch einen
Rasenmäher usw.)
● Verstauen Sie das nicht benötigte Kabel durch Einschieben in den Erdspieß und den
Standpfahl (Bild A, 3, 4).
● Montieren Sie die Abschlusskappe (Bild A,1) auf den Standpfahl und richten Sie die
Solarstation nach Süden aus.
● Treiben Sie den Standpfahl durch Druck auf die Abschlusskappe in den Boden.
HAWAII

D
4
HAWAII
MONTAGE
Es bestehen zwei Möglichkeiten die Pumpe zu betreiben:
Montageart I: Schwimmbetrieb
Montageart II: Tauchbetrieb
Montageart I, Bild
햶햶
:
● Trennen Sie die Pumpe von der Solarstation (Stecker abziehen).
● Drücken Sie den Schirm von oben her auf den Filterträger (Schnappverschluss).
● Führen Sie den Styropor-Schwimmkörper von unten her in den Schirm ein.
● Sichern Sie die Pumpe gegen Wegschwimmen, indem Sie an der Ankeröse
(unterhalb des Filterträgers) einen Stein mit einer Schnur befestigen.
● Verbinden Sie den Stecker mit der Steckbuchse (Bild
햲햲
, Pfeil) der Solarstation.
Montageart II, Bild
햷햷
:
● Trennen Sie die Pumpe von der Solarstation (Stecker abziehen).
Hinweis: Je nach Teichtiefe können bis zu drei Verlängerungsrohre eingesetzt
werden, um die Düse über die Wasseroberfläche herausragen zu lassen.
Die Verlängerungsrohre und die drei Düsenblenden befinden sich im
Magazin (Bild
햴햴
) des Filterkörpers!
● Drücken Sie den Schirm von unten her auf den Filterträger (Schnappverschluß).
● Tauchen Sie den Schirm unter das Wasser.
● Legen Sie geeignete Steine als Ballast in den Schirm.
● Verbinden Sie den Stecker mit der Steckbuchse (Bild
햲햲
, Pfeil
) der Solarstation.
BETRIEB
1. Inbetriebnahme / Entlüften:
● Sollte Ihre Pumpe nach Anschließen an die Solarstation nicht die volle Leistung
bringen, so muss die Pumpe entlüftet werden. Dies geschieht durch mehrfaches
Ein- und Ausstecken (jeweils ca. 3 Sek.) des Pumpensteckers in der Solarstation
(Bild
햲햲
, Pfeil). Die Entlüftungswirkung ist bei Betrieb ohne Düse am besten.
● Entnehmen Sie aus dem Magazin (Bild
햴햴
) eine der Düsen;
grober Sprühstrahl, feiner Sprühstrahl oder einstrahlig.
● Montieren Sie die gewählte Düse auf das Düsenunterteil und setzen Sie die Düse
mit Düsenunterteil in die Pumpe ein.
● Verbinden Sie den Stecker mit der Steckbuchse (Bild
햲햲
, Pfeil) der Solarstation.
2. Inbetriebnahme / Erstaufladung “Hawaii”
● Betreiben Sie die Solarstation zunächst zwei Tage bei direkter Sonneneinstrahlung
oder 24 h mit dem WAGNER-Netz-Ladegerät (Sonderzubehör), um den Akku
aufzuladen. Dabei muss der Wahlschalter auf “0” stehen (Bild
햳햳
, Pfeil).

D
5
3. Schalter auf “0”:
● Beim Laden des Akkus mit dem WAGNER Netz-Ladegerät (Sonderzubehör),
Transport oder bei längerer Nichtbenutzung des Solar Springbrunnen Sets
(Lagerung) schalten Sie den Wahlschalter (Bild
햳햳
, Pfeil) auf “0”. Das Solar
Springbrunnen Set ist nicht mehr betriebsbereit.
Hinweis: Um den Akku zu schonen und eine längere Förderleistung der Pumpe zu
erreichen, besonders im Frühjahr und Herbst, empfehlen wir den Akku von
Zeit zu Zeit wieder aufzuladen. Stellen Sie den Wahlschalter der Solar-
station für die Ladezeit des Akkus ca. 2 Tage in Postition “0”.
ÜBERWINTERUNG
Bewahren Sie Ihr Solar Springbrunnen Set im Winter bei Temperaturen unter 5° C an
einem frostfreien Ort auf.
WARTUNG bei Nachlassen der Förderleistung
1. Reinigung der zwei Filtermatten (Bild A, 12)
● Trennen Sie die Pumpe von der Solarstation (Stecker abziehen).
● Demontieren Sie den Schirm vom Filterträger (Schnappverbinder).
● Demontieren Sie den Filterträger vom Pumpenoberteil (Schnappverbinder).
Benutzen Sie dazu z. B. einen Schraubendreher um den Schnappverbinder
aufzuhebeln.
● Entnehmen Sie die Filtermatten aus dem Filterträger.
● Spülen Sie die Filtermatten unter fließendem Wasser aus; ggf. neue Filtermatten
einbauen.
● Nehmen Sie die Düsen vom Düsenunterteil ab und reinigen Sie die
Düsenöffnungen von Schmutz, z. B. mit Hilfe eines Zahnstochers.
☞ Der Zusammbenbau erfolgt sinngemäß in umgekehrter Reihenfolge.
2. Reinigung des Pumpenlaufrades
● Trennen Sie die Pumpe von der Solarstation (Stecker abziehen).
● Demontieren Sie den Schirm vom Filterträger (Schnappverbinder).
● Demontieren Sie den Filterträger vom Pumpenoberteil (Schnappverbinder).
Benutzen Sie dazu z. B. einen Schraubendreher um den Schnappverbinder
aufzuhebeln.
● Drücken Sie den Schnappverbinder mit den Fingern zusammen und nehmen Sie
den Ansaugdeckel ab.
● Ziehen Sie mit Hilfe einer kleinen Flachzange das Laufrad heraus.
ACHTUNG! Laufrad nicht verkanten; verwenden Sie kein hartes / scharfes
Werkzeug!
● Reinigen Sie unter fließendem Wasser Laufrad, Laufradachse und
Pumpeninnenraum mit einer geeigneten Bürste / Pinsel.
ACHTUNG! Verwenden Sie kein hartes / scharfes Werkzeug!
HAWAII

D
6
● Setzen Sie das Laufrad wieder auf die Achse. Ist die Laufradlagerung zu stark
abgenutzt, so bauen Sie ein neues Laufrad ein.
HINWEIS: Eine defekte Laufradlagerung ist erkennbar, durch nachlassende
Förderleistung der Pumpe und Laufgeräusche.
Der Zusammenbau erfolgt sinngemäß in umgekehrter Reihenfolge.
AKKU HERAUSNEHMEN / WECHSELN
ACHTUNG! Beim Herausnehmen/Wechseln des Akkus muss sich der
Wahlschalter in der Stellung “0” befinden!
Verwenden Sie ausschließlich Original-WAGNER Akkus.
Vermeiden Sie Kurzschlüsse der Akkudrähte.
Achten Sie beim Auswechseln von Ersatzteilen oder Akkus auf
scharfe Kanten, an denen Sie sich verletzen, oder die Kabel
Schaden nehmen könnten.
Ziehen Sie nicht an den Kabeln des Solarmoduls.
● Bringen Sie den Wahlschalter (Bild
햳햳
, Pfeil a) in Stellung “0”. Ziehen Sie den
Stecker aus der Steckbuchse Ihrer Solarstation.
● Trennen Sie die Solarstation vom Standpfahl.
● Lösen Sie die vier Kreuzschlitz-Schrauben auf der Rückseite (Bild
햳햳
).
● Legen Sie den Abdeckrahmen mit Solarfeld, soweit es die Kabellänge zulässt,
vorsichtig zur Seite.
● Ziehen Sie die Plus- bzw. Minus-Pol-Verbindungen vorsichtig vom Akku ab.
● Nehmen Sie den Akku aus dem Gehäuse.
UMWELTSCHUTZ
Das Gerät samt Zubehör sollte einer umweltgerechten Wiederverwertung
zugeführt werden. Geben Sie den Akku bei der Entsorgung nicht in den Haus-
müll. Unterstützen Sie den Umweltschutz und bringen Sie deshalb Ihren Akku zu
einer örtlichen Entsorgungsstelle oder erkundigen Sie sich im Fachhandel
.
LADEGERÄT / SONDERZUBEHÖR
Zur Aufladung Ihres Solar Springbrunnen Sets während einer längeren Schlechtwetter-
periode oder zur Wiederinbetriebnahme nach der Überwinterung empfehlen wir das
WAGNER Netz-Ladegerät. Hiermit kann das Solar Springbrunnen Set direkt über das
Stromnetz aufgeladen werden. Ladedauer ca. 24 Stunden. Beachten Sie, dass der
Betriebsschalter auf “0” steht. Als Ladebuchse dient die Anschlussbuchse der
Solarstation.
HAWAII
Cd

D
7
HAWAII
ERSATZTEILE Art.-No.
Blockbatterie NiCd 4,8 V (nur für “Hawaii”) 1017 713
Solarstation-Hawaii 1017 228
Filtermattenset (2 St.) 1017 710
Laufrad 1017 233
WSP 280 kpl. Pumpe (Bild A, Pos. 6 - 13) 1017 230
Düsenset
(3 St. Düsenblende, 3 St. Rohrstück, 1 St. Düsenunterteil) 1017 711
Styropor-Schwimmkörper 1017 354
SONDERZUBEHÖR Art. No.
WAGNER Netz-Ladegerät Europa 3751 210
WAGNER Netz-Ladegerät GB 3751 211
WAGNER Netz-Ladegerät AUS 3751 212
2 Jahre Garantie
Die Garantie beträgt 2 Jahre, gerechnet vom Tag des Verkaufes (Kassenbon). Sie umfasst
und beschränkt sich auf die kostenlose Behebung der Mängel, die nachweisbar auf die
Verwendung nicht einwandfreien Materials bei der Herstellung oder Montagefehler
zurückzuführen sind oder kostenlosen Ersatz der defekten Teile. Verwendung oder
Inbetriebnahme, sowie selbständig vorgenommene Montagen oder Reparaturen, die nicht in
unserer Bedienungsanleitung angegeben sind, schließen eine Gewährleistung aus. Dem
Verschleiß unterworfene Teile sind ebenfalls von der Gewährleistung ausgeschlossen. Die
Gewährleistung schließt den gewerblichen Einsatz aus. Die Gewährleistung der Garantie
behalten wir uns ausdrücklich vor. Die Garantie erlischt, wenn das Gerät von anderen
Personen als dem WAGNER Service - Personal geöffnet wurde. Transportschäden,
Wartungsarbeiten sowie Schäden und Störungen durch mangelhafte Wartungsarbeiten fallen
nicht unter die Garantieleistungen. Der Nachweis über den Erwerb des Gerätes muss bei
Inanspruchnahme der Gewährleistung durch Vorlage des Originalbeleges geführt werden.
Soweit gesetzlich möglich, schließen wir jede Haftung für jegliche Personen,- Sach- oder
Folgeschäden aus, insbesondere, wenn das Gerät anders als für den in der
Bedienungsanleitung angegebenen Verwendungszweck eingesetzt wurde, nicht nach unserer
Bedienungsanleitung in Betrieb genommen oder instandgesetzt oder Reparaturen selbständig
von einem Nichtfachmann ausgeführt wurden. Reparaturen oder Instandsetzungsarbeiten, die
weitergehen als in dieser Bedienungsanleitung angegeben, behalten wir uns im Werk vor.
Im Garantie- oder Reparaturfall wenden Sie sich bitte an Ihre Verkaufsstelle.

GB
8
OOppeerraattiinngg iinnssttrruuccttiioonnss
Congratulations on the purchase of your WAGNER fountain set.
Before using the device, please read the operating instructions carefully and pay
attention to the safety warnings. Keep the operating instructions in a safe place.
NOTE: Your Solar Fountain Set is weatherproof and should be operated in
direct sunlight. Install your solar module in such a way that it is
exposed to as much direct sunlight as possible, as this ensures the
performance of the device.
The solar station is fitted with an NiCd rechargeable battery. This
rechargeable battery is delivered uncharged. Before using for the
first time, charge the battery for two days in direct sunlight or for 24
hours with the Wagner mains charging unit (accessory) in order to
achieve maximum performance. During this first charging process,
the main switch must be set to "0".
Safety and important information on your Solar Fountain Set
● Never connect the pump with the public AC mains supply (except for WAGNER
charging unit).
● The pump may only be operated with the solar stations Hawaii.
● Do not operate the solar station/pump near flammable material.
● The pump must never be operated dry (out of water), dry operation destroys the
pump. Insert plug and switch only when the pump is in the water
.
● Before carrying out any maintenance work on the pump, first disconnect it from the
solar station
● Only suitable for the operation of decorative fountains in fresh water
● Water temperature min. 5° C, max. 35° C.
● In winter, the whole unit must be stored in a frost-free place
● Sand and other abrasive materials lead to faster wear and a decrease in
performance. Therefore, after placing the pump in the pond, do not put
the pump into operation until any sand which has been stirred up has settled again
HAWAII
Equipment components
Key to figure “A”
1 Covering cap 9 Base
2 Removable solar station 10 Styrofoam float
3 Stand 11 Pump set
4 Earth spike 11a Pump housing
5 Connecting cable (5 m) for solar fountain 11b Impeller
6 Jet cover (3 pcs.) 11c Suction lid
7 Jet base 12 Filter mat
8 Piping 3 pieces 13 Filter holder

GB
9
● Do not pull on the cable of the pump; the pump could develop a leak
● It may be necessary to prime the pump before putting into operation (air in the pump
leads to a considerable decrease in performance). This is done by unplug
ging the pump from the solar station and plugging in again several times
(for approx. 3 secs. each time). The deaerating effect is greatest when operating
without jets
● Observe max. immersion depth of 0.5 m
MEANS OF OPERATION
Solar station with rechargeable battery (Fig.
햳햳
, arrow b):
a) Selection switch to
❊❊
☞☞
for automatic drive pumping from the solar station in direct sunlight.
b) Selection switch to “0”
☞☞
The rechargeable battery is charged, no pump operation
c) Selection switch on
☞☞
The pump is started in the economy operating mode this switches off auto-
matically after 3 hrs. By briefly switching to
❊❊
or “0” and back to
the pump is activated again for 3 hrs. In this operating mode, the pump is supplied
with the power from the rechargeable battery.
NOTE! After the 3-hour economy mode has expired, the solar station automatically
switches to charging mode
.
PERFORMANCE
The performance of your Solar Fountain Set is dependent on the season. The
performance of the pump is greater in summer than in spring or autumn. The battery-
powered pump drive is dependent to a large degree on the period of exposure of the
solar module to sunlight. In cloudy weather, for example, the solar energy is not
sufficient to charge the battery fully. The operating time of your pump is therefore
shorter.
HAWAII
Technical data
Solar panel Monokristallin
Size ca. 195 x 145 mm²
Output in direct sunlight ca. 1500 mW
Rechargeable battery NiCd
Voltage 4,8 V
Pump
Capacity max. 280 l/h
Lift max. 115 cm
Fountain height with rechargeable battery operation ca. 35 cm
Fountain height with solar power operation max. 85 cm
Rechargeable battery operation max. 10 h

GB
10
INSTALLATION
● Select a place with as much sunlight as possible for the installation of the solar station.
● Do not place the solar station in the shade of trees, bushes or buildings, as otherwise
the performance of your Solar Fountain Set will be greatly impaired (
햵햵
)
● Point the solar station facing south.
☞☞
The solar station can be set at an angle (
햲햲
):
Summer: flat
Spring and autumn: steep
ASSEMBLY SOLAR STATION
ATTENTION! Do not apply pressure to the solar panel as this could damage the solar
module!
● Remove the Solar Fountain Set carefully from the box.
NOTE: The connecting cable is fitted water-tight in the pump housing.
WARNING! When digging and drilling holes, ensure that you do not come into
contact with hidden supply lines. Contact with hidden supply lines
can lead to serious injury or even death.
● Carefully place the pump, stand and earth spike beside the installation site.
● Unwind the connecting cable of the pump. Feed the cable into the earth spike from
below and pull the plug out of the opening in the middle of the stand (Fig. A, 5, 4, 3).
● Drive the earth spike into the ground by hand.
● Push the stand onto the earth spike. Pull up any slack of the cable on the earth spike
in order to prevent the cable from becoming trapped.
● Push the solar station into the guide rail on the stand (Fig. A, 2, 3).
● Lay the cable in such a way that it cannot be damaged (e. g. by a lawn mower etc.)
● Stow away the unneeded length of cable by pushing it into the earth spike and stand
(Fig. A, 3, 4).
● Fit the covering cap (Fig. A,1) onto the stand and point the solar station facing south.
● Drive the stand into the ground by pressing on the covering cap.
ASSEMBLY
There ar two ways of operating the pump:
Assembly option I: Floating
Assembly option II: Immersed
HAWAII

GB
11
Assembly option I, Fig.
햶햶
:
● Disconnect the pump from the solar station (remove plug).
● Push the base from above onto the filter holder (snap lock).
● Push the polystyrene float into the base from below.
● Prevent the pump from floating away by attaching a stone to the anchor eye (below
the filter holder) with a piece of string.
● Insert the plug into the socket (Fig.
햲햲
, arrow) of the solar station.
Assembly option II, Fig.
햷햷
:
● Disconnect the pump from the solar station (remove plug).
Note: Depending on the depth of the pond, up to three extension pipes can be used
in order to make the jet potrude above the surface of the water.
The extension pipes and the three jet covers are located in the
magazine (Fig. c) of the filter body!
● Press the base onto the filter holder from below (snap lock).
● Submerge the base in the water.
● Place suitable stones in the base as ballast.
● Insert the plug into the socket (Fig.
햲햲
,
arrow) of the solar station.
OPERATION
1. Putting into operation / Priming the unit:
● If your pump does not work at full capacity after connection to the pump solar
station, the pump must be primed. This is done by unplugging the pump from the
solar station and plugging in again several times (for approx. 3 secs. each time)
(Fig.
햲햲
, arrow). The priming effect is greatest when operating without jets.
● Remove one of the jets from the magazine
햴햴
) coarse spray, fine spray or single jet.
● Mount the selected jet onto the base and push the jet with base into the pump.
● Insert the plug into the socket (Fig.
햲햲
, arrow) of the solar station.
2. Putting into operation / first charging
● First operate the solar station for two days in direct sunlight or 24 hours with the
Wagner mains charging unit (accessory) in order to charge the rechargeable
battery. For this, the selection switch must be set to "0" (Fig.
햳햳
, arrow).
3. Switch on “0”:
● For use when charging the battery with the Wagner mains charging unit (acces-
sory), and If the Solar Fountain Set is being transported or not used for long periods
of time (storage), turn the selection switch (Fig.
햳햳
‚ arrow) to "0". The Solar Fountain
Set will no longer be operational.
Note: In order to protect the rechargeable battery and achieve longer performance
of the pump, especially in spring and autumn, we recommend recharging the
battery from time to time fully discharged. Set the solar station for the loading
time of the battery to position "0".
HAWAII

GB
12
Winter storage
In winter, with temperatures under 5°C, keep your Solar Fountain Set in a dry frost-free
place.
MAINTENANCE in the case of a drop in performance
1. Cleaning of the two filter mats (Fig. A, 12)
● Disconnect the pump from the solar station (remove plug).
● Dismantle the base from the filter holder (snap connector).
● Dismantle the filter holder from the top of the pump (snap connector). For this, use
a screwdriver, for example, to prise the snap connector open.
● Remove the filter mats from the filter holder.
● Rinse the filter mats under running water, if necessary fit new filter mats.
● Remove the jets from the jet base and clean the jet openings of dirt e.g. with the aid
of a toothpick.
☞ For assembly, proceed in reverse order.
2. Cleaning the pump impeller
● Disconnect the pump from the solar station ( remove plug).
● Dismantle the base from the filter holder (snap connector).
● Dismantle the filter holder from the top of the pump (snap connector). For this, use
a screwdriver, for example, to prise the snap connector open.
● Press the snap connector together with your fingers and remove the suction lid.
● Extract the impeller with the aid of small flat pliers.
ATTENTION! Do not tilt; do not use hard / sharp tools!
● Clean the impeller, impeller spindle and pump interior with a suitable brush.
ATTENTION! Do not tilt; do not use hard / sharp tools!
● Place the impeller on the spindle again. If the impeller bearing is badly, fit a new
impeller (contact supplier)
Note: A defective impeller bearing is recognisable by a drop in pump performance
and running noises.
For assembly, proceed in reverse order.
REMOVING / REPLACING BATTERY
ATTENTION! When removing / replacing the battery, the selection switch must
be set to position “0”!
Use only original WAGNER batteries.
Avoid shorting the battery wires. When replacing spare parts or
batteries, be careful of sharp edges which can cause injury or
which can damage the cables.
Do not pull on the cable of the solar module.
HAWAII

GB
13
● Set the selection switch (Fig.
햳햳
, arrow a) to “0”. Remove the plug from the socket of
your solar station.
● Remove the solar station from the stand.
● Unscrew the four cross-head screws on the back (Fig.
햳햳
).
● Place the covering frame with solar panel carefully to one side, as far as this is
permitted by the length of cable.
● Carefully remove the plus and minus terminals from the battery.
● Remove the battery from the housing. A new battery is fitted in reverse order.
Environmental protection
Das Gerät samt Zubehör sollte einer umweltgerechten Wiederverwertung
zugeführt werden. Geben Sie den Akku bei der Entsorgung nicht in den Hausmüll.
Unterstützen Sie den Umweltschutz und bringen Sie deshalb Ihren Akku zu einer
örtlichen Entsorgungsstelle oder erkundigen Sie sich im Fachhandel
.
CHARGING UNIT / ACCESSORIES
To charge your Solar Fountain Set (only HAWAII version, with rechargeable battery)
during a long period of bad weather or when putting it into operation again after winter
storage, we recommend the optional WAGNER mains charging unit. With this you can
charge the Solar Fountain Set directly via the mains electricity supply. Charging time
approx. 24 hours. Ensure that the operating switch is set to "0". The connection socket
of the solar station serves as a charging socket.
Spare parts Item-No.
Block battery NiCd 4,8 V 1017 713
Solar station 1017 228
Set of filter mats (2 pcs.) 1017 710
Impeller 1017 233
WSP 280 cpl. pump (Fig. A, items. 6 - 13) 1017 230
Set of jets
(3 pcs. jet cover, 3 pcs. piping, 1 pc. jet base) 1017 711
Styrofoam floater 1017 354
Accessories Item-No.
WAGNER Mains charging unit Europe 3751 210
WAGNER Mains charging unit GB 3751 211
WAGNER Mains charging unit AUS 3751 212
HAWAII
Cd

GB
14
HAWAII
2 years guarantee
The guarantee runs for two years, counting from the date of sale (sales slip).
It covers and is restricted to free-of-charge rectification of faults which are
demonstrably attributable to the use of faulty materials in manufacture, or assembly
errors; or free-of-charge replacement of the defective parts. The guarantee does not
cover incorrect use or commissioning or fitting or repair work which is not stated in
our operating instructions. Wearing parts are also excluded from the guarantee. The
guarantee excludes commercial use. We expressly reserve the right to fulfil the
guarantee.
The guarantee expires if the tool is opened up by persons other than Wagner service
personnel.
Transport damage, maintenance work and loss and damage due to faulty
maintenance work are not covered by the guarantee. Under any guarantee claim,
there must be proof of purchase of the tool through submission of the original receipt.
Wherever legally possible, we exclude all liability for injury, damage or consequential
loss, especially if the tool has been used for a purpose other than that stated in the
operating instructions, commissioned or repaired other than in accordance with our
operating instructions or if repairs are performed by someone who is unqualified.
We reserve the right to perform any repairs in excess of those stated in our operating
instructions.
In case of guarantee or repair, please refer to your point of sale.

F
15
HAWAII
MMooddee dd’’eemmppllooii
Félicitations pour l'achat de votre jeu de jet d'eau solaire WAGNER.
Veuillez lire attentivement le mode d'emploi avant la mise en service de l'appareil et
respectez les consignes de sécurité. Conservez soigneusement le mode d'emploi.
REMARQUE: Votre jeu de jet d'eau solaire résiste aux conditions atmosphériques, il est
recommandé de le faire fonctionner lors d'un rayonnement solaire direct.
Positionnez votre station solaire de telle manière que le module solaire
soit exposé à un rayonnement solaire aussi fort que possible, puisque
vous en assurerez ainsi le rendement. La station solaire est équipée d'un
accumulateur NiCd. Cet accumulateur est livré non chargé. Avant la
première utilisation, chargez donc celui-ci pendant deux jours lors d'un
rayonnement solaire direct, ou 24 h avec le chargeur de ligne Wagner
(accessoire spécial), afin d'en obtenir une performance optimale. Lors de
ce premier processus de chargement, l'interrupteur principal doit être sur
“0”
.
Sécurité et informations importantes concernant votre jeu de
jet d’eau solaire
● Ne jamais raccorder la pompe au réseau à courant alternatif public
(sauf groupe-chargeur WAGNER)
● Il est permis de faire fonctionner la pompe uniquement avec le station solaire
Hawaii.
● Ne pas faire fonctionner la station solaire/pompe à proximité de matières combustibles
● Il est strictement interdit de faire fonctionner la pompe à sec (à l'extérieur de l'eau), le
fonctionnement à sec détruit la pompe. N'introduire la fiche dans la prise que lorsque la
pompe est dans l'eau.
● Avant tout travail d'entretien sur la pompe, couper celle-ci de la station solaire
● Convient uniquement au fonctionnement de jets d'eau décoratifs dans l'eau douce.
● Température de l'eau min. 5°C, max. 35°C
● En hiver, l'unité complète doit être rangée dans un endroit antigel.
● Le sable et autres matières abrasives entraînent une usure plus rapide et une
diminution de puissance; c'est pourquoi, après avoir posé la pompe dans l'étang, il faut
attendre que le sable remué se soit redéposé pour mettre la pompe en marche.
Eléments de l’appareil
Légende du dessin “A”
1 capot de recouvrement 9 écran
2 station solaire amovible 10 flotteur en polystyrène expansé
3 piquet de position 11 jeu de pompe
4 perche de mise à la terre 11a corps de pompe
5 câble de connexion de 5 m 11b roue de roulement
6 obturateur de tuyère 3 pièces 11c couvercle d’aspiration
7 partie inférieure de tuyère Filtermatte 12 matelas filtrant
8 tube 3 pièces 13 porte-filtre

F
16
HAWAII
● Ne pas tirer sur le câble de la pompe ; la pompe pourrait sinon se mettre à fuir.
● La pompe doit éventuellement être désaérée lors de sa mise en service (la présence
d'air dans la pompe entraîne une forte diminution du débit), cela s'effectue en bran chant et
en débranchant plusieurs fois (chaque fois env. 3 sec.) la fiche de la pompe dans la station
solaire. L'effet de purge de l'air est optimal lors d'un fonctionnement sans tuyère.
● Respecter une plongée max. de 0,5 m.
MODE DE FONCTIONNEMENT
Station solaire avec accu (image
햳햳
, flèche b):
a) commutateur sélecteur sur
❊❊
☞☞
actionnement auto matique de la pompe en cas d’ensoleillement direct de la
station solaire.
b) commutateur sélecteur sur “0”
☞☞
l’accu est chargé, aucun fonctionnement de la pompe.
c) commutateur sélecteur sur
☞☞
La pompe se met en marche en régime de consommation réduite et s’eteint
automatiquement au bout de 3 heures. En commutant momentanément sur
❊❊
ou
“0” et en revenant à nouveau sur
on active à nouveau la pompe pour 3 heures. Dans ce mode opératoire, la pompe
est alimentée par l’énergie de l’accu.
REMARQUE!
Après l'écoulement du régime de consommation réduite de 3 heures, la station
solaire se met automatiquement sur le régime de charge.
PUISSANCE
La puissance de votre jeu de jet d'eau solaire dépend de la saison. Le débit de la pompe est plus
important en été qu'au printemps ou en automne. L'actionnement de la pompe au moyen
d'énergie de l'accu dépend considérablement de la durée du rayonnement solaire sur le module
solaire. Si le ciel est couvert, par exemple, l'énergie solaire ne suffit pas à charger complètement
l'accu. La durée de fonctionnement de votre pompe est par conséquent plus courte.
Données techniques
Panneau solaire technique Si Monokristallin
Dimensions env. 195 x 145 mm²
Puissance en cas d’ensoleillement total ca. 1500 mW
Accumulateur NiCd
Tension 4,8 V
Pompe
Débit de refoulement max. 280 l/h
Hauteur de refoulement max. 115 cm
Hauteur de fontaine uniquement env. 35 cm
Hauteur de fontaine dans le mode solaire max. 85 cm
Mode d’accu uniquement max. 10 h
1/60