SIGURO SGR-MP-X600S Benutzerhandbuch

Typ
Benutzerhandbuch
SGR-MP-X600S
Multifunction Pressure Cooker
Multifunktionaler Schnellkochtopf
Multifunkční tlakový hrnec
Multifunkčný tlakový hrniec
Multifunkciós kukta
EN Translation of the operating instructions from the original language.
DE Übersetzung der Bedienungsanleitung aus der Originalsprache.
CZ Návodkpoužitívoriginálnímjazyce.
SK Prekladnávodunapoužitiezoriginálnehojazyka.
HU Ahasználatiutasításfordításaeredetinyelvről.
ENGLISH 5
Safety information 5
Use 11
Cleaning and maintenance 16
Troubleshooting 17
DEUTSCH 19
Sicherheitshinweise 19
Verwendung 27
Reinigung und wartung 33
Problemlösung 34
ČESKY 36
Bezpečnostní informace 36
Použití 43
Čištění a údržba 48
Řešení problémů 49
SLOVENSKY 51
Bezpečnostné informácie 51
Použitie 58
Čistenie a údržba 63
Riešenie problémov 64
MAGYAR 66
Biztonsági információk 66
Használat 72
Tisztítás és karbantartás 77
Problémamegoldás 78
2
3
4
5
7
8
16
A
B
C1 C2
EN
EN - 5 EN - 5
Thank you for purchasing a SIGURO appliance. We thank you for
your trust and are proud to introduce on the following pages the
device, its functions and uses.
We believe in a fair and responsible company, and therefore we only work
with suppliers who meet our strict criteria of protecting the interests of their
employees, preventing their abuse and providing fair working conditions.
If you need help with extensive maintenance or repair of the product, which
requires intervention in its internal parts, our authorized service is available
at the email address siguro@alza.cz or operators at the seller's info line. For
your convenience in solving any problems with the product, we have unied
these contact points and the above contacts can be used in the event of any
complaints or post-warranty service.
SAFETY INFORMATION
Please read this manual carefully before use and
keep it for future reference.
1. This appliance is not intended for use by children. Keep
the appliance and its power cord out of the reach of
children.
2. This appliance is intended for use by persons with
reduced physical, sensory or mental capabilities, or
lack of experience and knowledge, provided they have
been given supervision or instruction concerning use
of the appliance in a safe manner and understand the
potential hazards.
3. Children must not play with the device.
4. Cleaning and user maintenance must not be done by
children.
5. If the power cord is damaged, it must be replaced
by the manufacturer, its service agent or similarly
qualied persons in order to avoid a dangerous
situation.
6. Do not immerse the appliance, power cord or plug in
water or other liquids.
7. Wash the inner pot in warm water with a little kitchen
detergent. Rinse and wipe dry.
ENGLISH
EN
EN - 6
8. This appliance is intended for domestic and indoor
use. This appliance is not suitable for outdoor use.
9. Check the power cord regularly for signs of damage
and the appliance must not be used if it is damaged.
10. This appliance is not intended for operation via an
external timer or remote control.
11. This appliance is designed for home and light
commercial use, including:
kitchenettes in stores, ofces and other workplaces;
appliances used in agriculture;
guest use in hotels, motels and other residential
environments;
appliances used in bed and breakfast
establishments.
12. Place the appliance in a stable position with the
handles positioned to prevent hot liquids from spilling.
13. Lines in the pressure regulator that allow steam to
escape should be checked regularly to ensure that
they are not blocked.
14. Follow the instructions in this manual to open the
cooker safely.
15. The cooker must not be opened until the pressure has
been sufciently reduced.
16. WARNING: Do not pour water on the plug.
17. WARNING: There is a risk of injury if used incorrectly.
18. The surface of the heating element contains residual
heat after use.
19. Before connecting the plug to the electrical outlet, make sure that the
voltage indicated on the type plate of the appliance corresponds to the
voltage in your power outlet.
20. Plug the power cord into a properly grounded electrical outlet. We
recommend connecting the appliance to a separate electrical circuit. Do
not use extension cables.
21. Place the appliance on a at, dry, rm and heat-resistant surface. Do not
place the appliance near re or other heat sources. Place the appliance
away from heat - sensitive surfaces or objects.
22. Do not let the power cord hang over the edge of the counter or table. Do
not let the power cord touch the electric or gas plate or any hot surface.
23. Use the appliance only with the supplied accessories. The use of
EN
EN - 6 EN - 7
accessories that are not intended for this appliance or are not specied
by the manufacturer as suitable may cause a dangerous situation.
24. Always make sure that the appliance is properly assembled before
connecting it to the power supply.
25. Do not touch the appliance or the power supply with wet or damp hands.
26. Clean the appliance after each use. Always allow the appliance to cool
completely before cleaning it.
27. Always switch off the appliance and unplug the power cord from the
mains when you are not using the appliance, if you leave it unattended,
before cleaning, moving, folding or unfolding it.
28. Do not cover the appliance while it is in operation.
29. Do not leave the appliance unattended while it is in operation.
30. Always disconnect the power cord by grasping the plug, not by pulling
on the power cord.
31. Do not use the appliance if there are any signs of damage, the inner
pot or seal is damaged, the power cord or plug is damaged. Contact an
authorized service center if the appliance needs to be repaired, adjusted
or serviced that cannot be performed by the user.
32. Do not use the appliance in conditions other than those for which it was
designed.
33. This appliance is intended for food preparation. Do not use it for purposes
other than those for which it is intended.
34. This appliance is not intended for sterilizing containers.
35. Do not use this appliance empty, without the inner pot or without liquid
in the pot.
36. Always observe the minimum and maximum lines when lling the
inner pot. Never ll the inner pot above the maximum line. Follow the
instructions in this manual.
37. This appliance cooks food under pressure. There is a risk of burns or
scalding if used incorrectly.
38. The appliance heats up when in use. Do not touch the lid or external
walls. There is a risk of burns.
39. Make sure that the safety valve and pressure valve are clean, dry and
working properly before each use.
40. Do not insert any objects into the safety or pressure valve. It is forbidden
to manipulate the valves, to touch them while the appliance is in
operation. There is a risk of serious injury.
41. Always use heat-insulated handles and grip when handling the
appliance. Do not use the lid handle to carry the appliance.
42. Do not place any objects between the lid and the rim of the appliance.
Make sure that the lid seal is tted correctly.
43. Open the lid so that the steam is directed from your face or hands. The
steam is hot and there is a risk of serious scalding if handled incorrectly.
44. Never open the lid while the appliance is in operation. Never force the lid
open. Always wait until the pressure inside the appliance drops.
45. Do not place any objects on the lid.
46. Keep your hands and face away from the appliance when releasing
steam.
EN
EN - 8
47. Do not heat the inner pot in an oven or other heat source. Do not use the
inner pot with another appliance. Do not use other than the supplied
inner pot with appliance.
48. The inner pot has a non-stick surface nish. Use therefore wooden or
plastic utensils. Metal utensils can damage the nish.
49. Always pierce food with rind, skin or membrane before cooking. Such
foods may swell during cooking. If this happens, never pierce them
immediately after cooking.
50. Gently shake the appliance before opening the lid if you are cooking food
of a denser consistency (e.g. legumes) to relieve the pressure in the food.
51. If steam accumulates signicantly at the rim of the lid, immediately
disconnect the plug from the power supply and wait for the pressure
inside the pot to drop before opening the lid.
Safety instructions
DO NOT CARRY the pot by the lid handle. Use the pot handles to carry the pot.
DO NOT PUT your hands or face near the pressure valve, especially if steam is venting.
DO NOT FORCE the lid open until the lid is automatically released when the pressure
is fully equalized.
EN
EN - 8 EN - 9
The body of the appliance
1 Safety valve
2 Lid handle
3 Lid
4 Pressure cooker handles (located on both sides)
5 Pressure cooker body
6 Pressure valve
7 Control panel and display
8 Inner pot
9 Removable power cord (not shown)
10 Rice spoon (included, not shown)
11 Measuring cup (included, not shown)
Overview of the buttons on the control panel
WARM/CANCEL
Used to start heating
(WARM) and to cancel
cooking, a program, or
program settings (CANCEL)
/
+/- buttons
Used to set the tempera-
ture, cooking time, delayed
start time, etc.
PRODUCT SELECTION
used to select the type of
food being cooked: MEAT
(meat) – FISH (sh) – VEGE-
TABLES (vegetables)
START
Used to start the cooking
process
DELAYED START
Used to set the delayed
start function
TIME/TEMPERATURE
Switches between cooking
time and temperature to
allow their editing.
MENU
Used to select cooking
programs
CHEF
Allows editing of preset
cooking programs.
Cooking Modes List
MULTICOOK cooking pro-
gram
Cooking program SLOW-
STEW: suitable for slow
cooking
FRYING cooking program:
suitable for frying
JAM cooking program:
suitable for preparations of
jams and marmalades
CAKE cooking program:
suitable for making cakes
YOGHURT cooking pro-
gram: suitable for making
yogurt
3
EN
EN - 10
Pressure Cooking Modes List
SOUP cooking program:
suitable for making soups;
option to choose the type
of cooked food: MEAT
(meat) – FISH (sh) – VEGE-
TABLES (vegetables)
MILK PORRIDGE cooking
program: suitable for cook-
ing milk porridge
STEW cooking program:
suitable for preparing
stews; option to choose
the type of prepared food:
MEAT (meat) – FISH (sh) –
VEGETABLES (vegetables)
STEAM cooking program:
suitable for steaming food;
option to choose the type
of prepared food: FISH
(sh) – VEGETABLES (veg-
etables)
RICE cooking program:
suitable for cooking rice or
legumes
OMELET cooking program:
suitable for making egg
omelettes
RISOTTO cooking program:
suitable for preparing
risotto
NOODLES cooking pro-
gram: suitable for cooking
noodles or pasta
Display Icons & Meanings List
Buttons mute sound icon
The FISH icon indicates the
food type "sh"; available
for SOUP, STEAM and
STEW cooking programs
The HEAT icon indicates
heating to operating tem-
perature
The MEAT icon indicates
the food type "meat"; avail-
able for SOUP and STEW
cooking programs
The COOKING icon indi-
cates cooking in the pot
The VEGETABLES icon
indicates the food type
"vegetables"; available for
SOUP, STEAM and STEW
cooking programs
The WARM icon indicates
that the food is kept warm
after cooking
Cooking time / delayed
start icon
Temperature setting pro-
gram Numerical display
EN
EN - 10 EN - 11
Power 220–240 V~, 50/60 Hz
Input power 1000 W
Maximum volume 6 l
Operating pressure 0–70 kPa
Maximum pressure 90 kPa
Allowable pressure 1.05 bar
Temperature of the keep warm
function
60–80 °C
Dimensions 32 × 33.5 × 33.5 cm
Weight 5.2 kg
USE
Before First Use
Remove the appliance and its accessories from the packaging. Before disposing of the
packaging, be sure to remove all components. Check the appliance and accessories for
damage.
Wipe the outside of the appliance, the inside of the appliance and the lid with a soft
sponge slightly moistened with warm water. Wipe dry with a clean cloth.
Wash the inner pot in warm water with a little kitchen detergent. Rinse and wipe dry.
Make sure that all parts of the appliance are dry before use.
Opening and Closing the Lid
Opening the lid (Figures A)
Turn the lid handle clockwise until the symbol aligns with the symbol on the pot
handle. Then carefully lift the lid (see Figure A).
Closing the lid (Figures B)
Put the lid on the pot so that the grooves on the inside of the lid slot into the slots in
the pot rim and the symbol aligns with the symbol on the pot handle.
Turn the lid handle counterclockwise until it will turn no further and the symbol
aligns with the symbol on the pot handle.
Basic Use
1. Place the pot on a dry, level and rm surface at a sufcient distance from the
mains socket.
2. Open the lid and remove the inner pot.
3. Put the ingredients you want to cook in the pot. When lling the container, the
level of the liquid with food must not exceed the level 4/5, which represents
the maximum possible level and is marked on the inner wall of the pot. When
preparing foods that gain in volume during cooking, the pot may not be lled to
more than 3/5 of its height. When lling the pot, also observe the minimum line,
1/5.
EN
EN - 12
Warning:
Always follow the maximum and minimum food with liquid levels. Failure
to do so may result in damage to the appliance, property damage or
serious injury.
4. Wipe the bottom of the container with a dry cloth to remove water and dirt, then
place the lled inner pot in the outer pot.
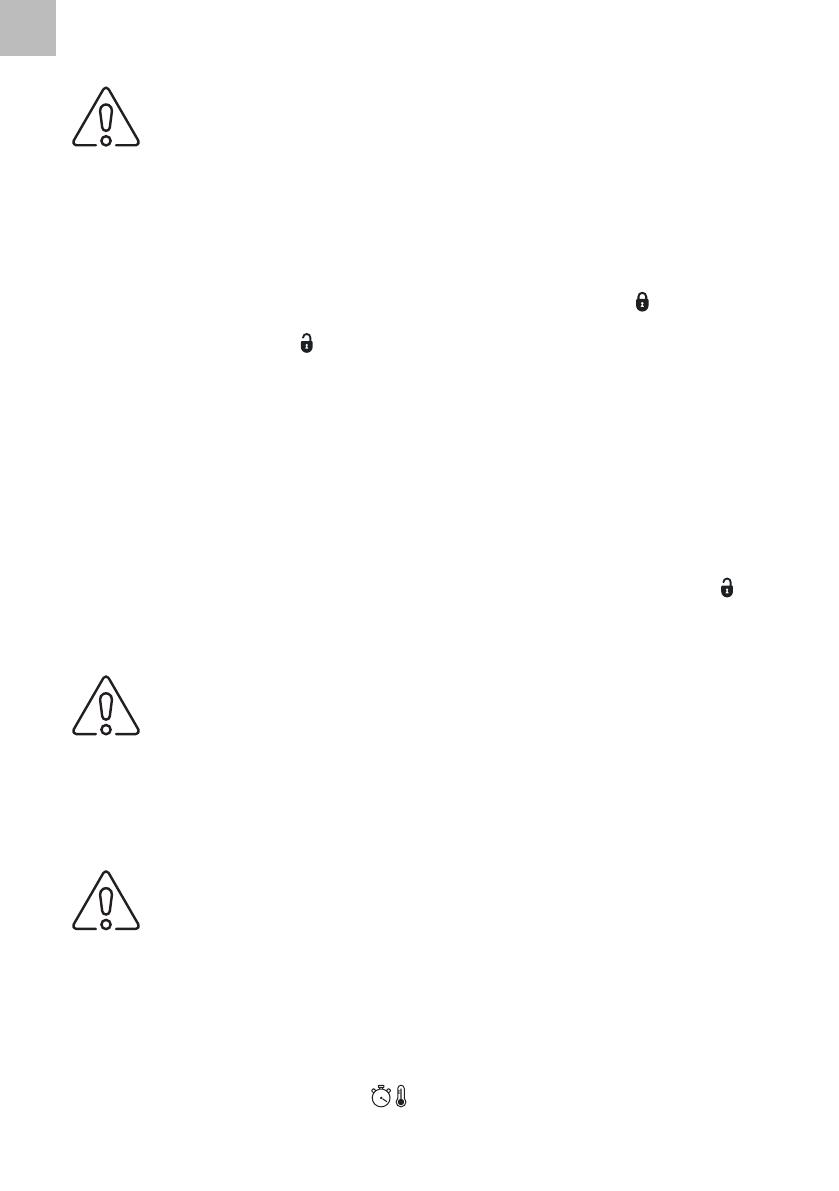
5. Insert and lock the lid Make sure that the lid is properly closed.
6. Check that the valves - safety and pressure, are clean and fully functional. The
safety valve should move freely.
7. When using a pressure cooking program (SOUP, MILK PORRIDGE, STEW, STEAM,
RICE, OMELET, RISOTTO, NOODLES), turn the pressure valve to the position.
8. For MULTICOOK, SLOWSTEW, FRYING, JAM, CAKE, and YOGHURT programs, turn
the pressure valve to the position.
9. Insert the power plug into the socket on the back of the cooker and plug the plug
into the mains socket.
10. Select the required cooking program, set cooking time and temperature to your
liking, then press START to begin cooking.
11. Icons and information about the ongoing preparation will appear on the display
one after the other. The lid HEAT icon means that the water is heating up and
building up pressure inside the pressure cooker. The lit COOKING icon means that
the pressure inside the pot has reached operating value and the cooking process
starts. A lit WARM icon means that the cooking process has ended and the cooker
switched to keep food warm mode.
12. If you want the cancel the cooking, press the WARM/CANCEL button.
13. Pressure cooking: Once you are done cooking, turn the pressure valve to the
position to vent the steam. As the steam is released from the pot, the pressure in
it will drop. As soon as the pressure drops sufciently, the safety valve drops, which
means that the lid can be opened safely.
Warning:
Keep your hands and face away from the appliance when releasing
steam.
14. Remove the plug from the mains socket and the plug from the socket at the back
of the pot.
15. Open the lid and remove the pot. We recommend using kitchen gloves when
handling the hot pot. Place the hot pot on a heat-resistant surface at a sufcient
distance from heat and steam sensitive materials.
Warning:
Be careful not to get scalded by the accumulated steam when opening
the lid. Not all steam in the pot is removed during steam release.
16. Allow the container and pot to cool down and clean them according to the
instructions in the "Cleaning and maintenance" section.
Setting the Temperature and Cooking Time
Repeatedly press MENU to select a cooking program to edit cooking time and temper-
ature: MULTICOOK, SLOWSTEW, FRYING, JAM, CAKE, or YOGHURT. Cooking time can
be edited for any program, while temperature can only be edited for MULTICOOK.
1. Short-press TIME/TEMPERATURE ; the t°C icon will appear on the display.
EN
EN - 12 EN - 13
2. Use the +/- buttons to set the desired temperature. To change the setting faster,
hold the + or - button. You can set the temperature from 30 ° C to 160 ° C. The
temperature can only be adjusted in the MULTICOOK program.
3. Short-press TIME/TEMPERATURE again to set the cooking time.
4. Use the +/- buttons to set the desired cooking time. To change the setting faster,
hold the + or - button. Cooking time can be set from 1 to 12 hours, depending on
the program. For details, see the program list in this manual. To set the minutes
part of the timer (only for programs allowing cooking time to be set to more than
60 minutes), wait for the hours display to stop ashing; the minutes display will
begin ashing instead.
5. Press the START button to begin the cooking process.
Pressure Cooking Modes
1. Use the MENU button to select a cooking program.
2. Press repeatedly the MENU button to select a cooking program. Each program has
a preset cooking time and additional functions - more in the table below.
3. For the SOUP, STEW,andNOODLES programs, you may further select the type
of food from MEAT, FISH, or VEGETABLES. Select the type of food by repeatedly
pressing the PRODUCT SELECTION button.
4. If you need to adjust the preset cooking time, press the CHEF button. Use the +/-
buttons to set the desired cooking time. To change the setting faster, hold the +
or - button. Cooking time can be set from 1 to 3 hours, depending on the program.
For details, see the program list in this manual. To set the minutes part of the timer,
wait for the hours display to stop ashing; the minutes display will begin ashing
instead.
5. Press START to start the cooking process.
Delayed start
The delayed start function allows you to start the pressure cooker at a time of your
choosing. Delayed start is only available for some cooking programs. For details, see
the program list in this manual.
1. Prepare the ingredients, put them in the pot and select the cooking program, or
adjust the cooking time.
2. Short-press DELAYED START, then use the +/- buttons to set the time after which
the pot will start automatically. To change the setting faster, hold the + or - button.
You can set a delayed start time from 1 to 24 hours. To set the minutes part of the
timer, wait for the hours display to stop ashing; the minutes display will begin
ashing instead.
3. Press START to begin counting down to the set time.
4. Once the set time has elapsed, the pot will turn on automatically.
Note:
Do not set a long delayed start time for perishable foods, such as eggs,
dairy products, fresh meat, sh, etc. There is a risk of spoiling the food
being cooked and possibly food poisoning.
EN
EN - 14
Cooking programs table
Coking program Default
cooking
time
Adjust-
ment of
cooking
time
Default
temper-
ature
Temper-
ature ad-
justment
t°C
Icon Cook-
ing in
pressure
cooker
Delayed
start
Keeping
warm
Lid position
MULTICOOK
10 min
10 min-
utes to 12
hours
30 °C 30 °C to
160 °C No Yes No Yes Yes Yes
SLOWSTEW (slow
cooking) 2 hours 1 to 12
hours 95 °C -- No Yes Yes Yes No No
FRYING (frying) 10 min 1 to 60
minutes 160 °C -- No No No No No Yes
JAM (jam) 30 min 1 to 60
minutes 100 °C -- No Yes No No Yes No
CAKE (cake) 25 min 1 to 3
hours 140 °C -- No No No Yes No No
YOGHURT (yoghurt) 1 hours 1 to 12
hours 40 °C -- No No No Yes No No
SOUP
(soup) MEAT 45 min
1 to 3
hours 155 °C -- Yes Yes Yes Yes No NoFISH 30 min
VEGETA-
BLES 25 min
MILK PORRIDGE (milk
porridge) 5 min 1 to 60
minutes 155 °C -- Yes Yes Yes Yes No No
EN
EN - 14 EN - 15
Coking program Default
cooking
time
Adjust-
ment of
cooking
time
Default
temper-
ature
Temper-
ature ad-
justment
t°C
Icon Cook-
ing in
pressure
cooker
Delayed
start
Keeping
warm
Lid position
STEW
(stew) MEAT 30 min
1 to 3
hours 155 °C -- Yes Yes Yes Yes No NoFISH 20 min
VEGETA-
BLES 15 min
STEAM (steam) 5 min 1 to 3
hours 155 °C -- Yes Yes Yes Yes No No
RICE (rice) 15 min 1 to 60
minutes 155 °C -- Yes Yes Yes Yes No No
OMELET (omelette) 20 min 1 to 60
minutes 155 °C -- Yes Yes Yes Yes No Yes
RISOTTO (risotto) 30 min 1 to 60
minutes 155 °C -- Yes Yes Yes Yes No No
NOODLES
(noodles) MEAT 20 min
1 to 3
hours 155 °C -- Yes Yes Yes Yes No NoFISH 10 min
VEGETA-
BLES 5 min
EN
EN - 16
WARM/CANCEL button
While the pot is on standby (no program set, display lit), press WARM/CANCEL to
begin heating.
If you press the WARM/CANCEL button while the cooker is in operation or your are
setting functions, the cooking or actions you performed are cancelled and the cooker
switches to standby mode.
Note:
After a brief time of inactivity, the display will turn off, and a chime will
sound. To reactivate the display, press any key.
Child Lock
Child Lock allows you to lock all the buttons on the control panel to prevent accidental
setting changes.
Press and hold DELAYED START for about 3 seconds, until the display shows “LOC”
(locked).
To cancel Child Lock, press and hold DELAYED START for about 3 seconds; the control
panel buttons will reactivate.
Mute the buttons
Each press of the button on the control panel is accompanied by a chime. To turn off
the chiming, press the +/- buttons simultaneously and hold until begins ashing.
To reactivate chiming, press the +/- buttons simultaneously and hold until stops
ashing and glows steadily.
CLEANING AND MAINTENANCE
Before cleaning or any maintenance, always switch off the appliance, unplug the pow-
er cord from the outlet and allow it to cool down completely.
Clean the pressure cooker after each use.
Warning:
Never immerse the appliance, the power cord or the plug of the power
cord in water or any other liquid.
Do not use plastic or metal scrapers, harsh cleaners, chemicals, petrol, solvents or
other similar substances to clean any parts of the appliance. The surface nish could
be seriously damaged.
Outer surface
Wipe the outside of the appliance and the inside of the appliance with a soft sponge
slightly moistened with warm water. Wipe dry with a clean cloth.
Inner pot
Wash the inner pot in warm water with a little kitchen detergent. Rinse and wipe dry.
Lid
The lid should be thoroughly cleaned after each use. The lid has three parts – the outer
lid, the inner lid, and the seal.
To remove the inner lid and seal, turn the outer lid upside down and grab the pin in
the center – see Figure C1. Carefully pull the pin to release the inner lid, then remove
EN
EN - 16 EN - 17
the inner lid – see Figure C2.
Carefully remove the silicone seal band from the inner lid edge.
Warning:
Check the silicone seal regularly. If it is damaged or worn, it must be re-
placed with a new one. It is forbidden to use the appliance with a dam-
aged or worn silicone seal. Contact an authorized service center.
Storage
Before storing, make sure that the appliance and its accessories are cool and clean.
Store the appliance and its accessories in a dry and well-ventilated place out of the
reach of children or pets.
Do not place any objects on the appliance.
TROUBLESHOOTING
Problem Cause Solution
It is difcult to close the lid. The silicone seal is inserted
incorrectly.
Install the silicone seal
correctly.
The safety valve is jammed. Push on it gently to release
it.
It is difcult to open the lid. The safety valve did not
drop yet after the steam
was released.
Carefully push the safety
valve with a longer skewer
or a Chinese chopstick.
Steam or water leaks from
the lid.
The silicone seal is not
installed correctly or is
entirely missing.
Install the silicone seal
correctly.
The silicone seal is dirty
and has food residue on it.
Clean the silicone seal. It
must be cleaned after each
use.
The silicone seal is worn. Replace the silicone seal.
Steam or water leaks from
the safety valve.
The safety valve seal is
dirty.
Clean the safety valve seal.
The safety valve seal is
worn.
Replace the seal.
The safety valve does not
rise to the top position.
There is not enough food
and water inside the pot.
Make sure there is at least
a minimum amount of
ingredients and water in
the pot.
The safety valve is dam-
aged or worn.
Contact an authorized
service center.
EO error message. The lid is not properly
closed.
Fit the lid correctly and
secure it.
Error message E1. Internal circuit damage. Contact an authorized
service center.
EN
EN - 18
Problem Cause Solution
Error message E2. Internal circuit damage. Contact an authorized
service center.
Error message E3. The inner pot temperature
is too high.
Allow the inner pot to cool.
Error message E4. Low pressure switch error. Contact an authorized
service center.
Error message E5. High pressure switch error. Contact an authorized
service center.
If a problem is not listed in the table above or if it persists, switch off the appliance,
unplug it from the mains, and contact an authorized service center.
DE
DE - 19 DE - 19
Wir bedanken uns für den Kauf des Geräts der Marke SIGURO.
Wir sind dankbar für Ihr Vertrauen und freuen uns, Ihnen das
Gerät auf den folgenden Seiten vorzustellen und Sie mit all seinen
Funktionen und Verwendungszwecken vertraut zu machen.
Wir glauben an ein faires und verantwortungsvolles Unternehmen und
arbeiten daher nur mit Lieferanten zusammen, die unsere strengen Kriterien
zum Schutz der Interessen der Mitarbeiter, zur Verhinderung von Missbrauch
und fairen Arbeitsbedingungen erfüllen.
Wenn Sie Hilfe bei der umfassenden Wartung oder Reparatur des Produkts
benötigen, die einen Eingriff in die Innenteile erfordert, stehen Ihnen unser
autorisierter Kundendienst unter der E-Mail-Adresse sigur[email protected]z oder die
Hotline des Verkäufers zur Verfügung. Bei der Lösung von Problemen mit
dem Produkt haben wir diese Kontaktstellen vereinheitlicht. Die oben gen-
annten Kontakte können auch bei Beschwerden oder Nachgarantieservice
genutzt werden.
SICHERHEITSHINWEISE
Lesen Sie vor der Anwendung sorgfältig dieses
Benutzerhandbuch durch und bewahren Sie es für
den künftigen Gebrauch auf.
1. Dieses Gerät darf nicht von Kindern bedient werden.
Bewahren Sie das Gerät und das Netzkabel außerhalb
der Reichweite von Kindern auf.
2. Dieses Gerät kann von Personen mit verminderten
physischen und mentalen Fähigkeiten oder
mangelnden Erfahrungen und Kenntnissen
verwendet werden, sofern diese beaufsichtigt sind
oder über die sichere Anwendung des Geräts belehrt
wurden und mögliche Gefahren verstehen.
3. Kinder dürfen nicht mit dem Gerät spielen.
4. Die Reinigung und Wartung durch den Benutzer darf
nicht von Kindern durchgeführt werden.
5. Wenn das Netzkabel beschädigt ist, muss es vom
Hersteller, seinem Servicetechniker oder einer
ähnlich qualizierten Person ersetzt werden, um eine
gefährliche Situation zu vermeiden.
6. Tauchen Sie das Gerät, das Netzkabel oder den Stecker
DEUTSCH
DE
DE - 20
nicht in Wasser oder andere Flüssigkeiten.
7. Waschen Sie den Innenbehälter in warmem Wasser
mit ein wenig Geschirrspülmittel. Spülen Sie ihn ab
und wischen Sie ihn trocken.
8. Dieses Gerät ist ausschließlich für den Gebrauch im
Haushalt und innerhalb von Gebäuden vorgesehen.
Dieses Gerät ist nicht für den Gebrauch im
Außenbereich vorgesehen.
9. Überprüfen Sie das Netzkabel regelmäßig auf
Anzeichen von Beschädigungen. Ist das Kabel
beschädigt, darf das Gerät nicht verwendet werden.
10. Das Gerät ist nicht für den Betrieb über eine externe
Zeitschaltuhr oder eine Fernbedienung vorgesehen.
11. Dieses Gerät ist für den Gebrauch im Haushalt und in
ähnlichen Bereichen vorgesehen, wie z.B.:
Küchenzeilen in Geschäften, Büros und anderen
Arbeitsplätzen;
Geräte, die in der Landwirtschaft verwendet werden;
Geräte, die von Gästen in Hotels, Motels und anderen
Beherbergungsbetrieben verwendet werden;
Geräte, die in Betrieben, die Übernachtung mit
Frühstück anbieten, verwendet werden.
12. Stellen Sie das Gerät in eine stabile Position, so dass
die Griffe so positioniert sind, dass keine heißen
Flüssigkeiten verschüttet werden können.
13. Die Leitungen im Druckregler, über die der Dampf
entweicht, sollten regelmäßig überprüft werden, um
sicherzustellen, dass sie nicht blockiert sind.
14. Um den Behälter sicher zu öffnen, befolgen Sie
die in dieser Bedienungsanleitung angeführten
Anweisungen.
15. Der Behälter darf erst geöffnet werden, wenn der
Druck ausreichend reduziert ist.
16. WARNUNG: Vermeiden Sie, dass Flüssigkeiten über
das Netzkabel gegossen werden.
17. WARNUNG: Bei unsachgemäßer Verwendung besteht
  • Page 1 1
  • Page 2 2
  • Page 3 3
  • Page 4 4
  • Page 5 5
  • Page 6 6
  • Page 7 7
  • Page 8 8
  • Page 9 9
  • Page 10 10
  • Page 11 11
  • Page 12 12
  • Page 13 13
  • Page 14 14
  • Page 15 15
  • Page 16 16
  • Page 17 17
  • Page 18 18
  • Page 19 19
  • Page 20 20
  • Page 21 21
  • Page 22 22
  • Page 23 23
  • Page 24 24
  • Page 25 25
  • Page 26 26
  • Page 27 27
  • Page 28 28
  • Page 29 29
  • Page 30 30
  • Page 31 31
  • Page 32 32
  • Page 33 33
  • Page 34 34
  • Page 35 35
  • Page 36 36
  • Page 37 37
  • Page 38 38
  • Page 39 39
  • Page 40 40
  • Page 41 41
  • Page 42 42
  • Page 43 43
  • Page 44 44
  • Page 45 45
  • Page 46 46
  • Page 47 47
  • Page 48 48
  • Page 49 49
  • Page 50 50
  • Page 51 51
  • Page 52 52
  • Page 53 53
  • Page 54 54
  • Page 55 55
  • Page 56 56
  • Page 57 57
  • Page 58 58
  • Page 59 59
  • Page 60 60
  • Page 61 61
  • Page 62 62
  • Page 63 63
  • Page 64 64
  • Page 65 65
  • Page 66 66
  • Page 67 67
  • Page 68 68
  • Page 69 69
  • Page 70 70
  • Page 71 71
  • Page 72 72
  • Page 73 73
  • Page 74 74
  • Page 75 75
  • Page 76 76
  • Page 77 77
  • Page 78 78
  • Page 79 79
  • Page 80 80
  • Page 81 81
  • Page 82 82
  • Page 83 83
  • Page 84 84

SIGURO SGR-MP-X600S Benutzerhandbuch

Typ
Benutzerhandbuch

in anderen Sprachen