
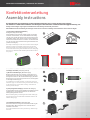
SENTIR EDGE KS4 KONFEKTION / SENTIR EDGE KS4 ASSEMBLY
.
.
ü
Konfektionieranleitung
Assembly instructions
1
L
L - 24
X X
2
1. Zuschnitt der Sicherheitskontaktleiste /
Cutting the safety-contact-edge
Die Kontaktleiste auf einer ebenen Fläche auslegen und auf Maß
schneiden. Dabei beachten, dass die Schnittächen rechtwinklig
und glatt sind, weshalb der Schnitt mit am Leistenkopf beginnend
durchgeführt werden sollte. Hierfür sind die von ASO angebotene
Schere oder Tischhebelschneide zu verwenden. Das Zuschnittsmaß
muss 24 mm kürzer als das Endmaß der fertigen Kontaktleiste sein
(Aufbau der Endkappen).
The safety-contact-edge is cut 24 mm shorter than the nal length
dimension to allow for the length of the end caps on each end.
Make sure that the cut surfaces are rectangular and clean, so the
cut should be made starting at the chamber side of the safety edge.
The scissors or table lever blade offered by ASO should be used for
this purpose.
2. Endkappe vorbereiten / Preparing end caps
a) Wasseraustrittsöffnungen / Water drain plugs
Wasseraustrittsöffnungen sind notwendig, solange nicht in Tro-
ckenbereichen agiert wird. Hierfür die markierten Stellen aus der
Endkappe heraustrennen. Bei senkrechter Befestigung die beiden
Markierungen in der unteren Kappe heraustrennen, bei waagerech-
ter Montage bei beiden Kappen.
For installations in contact with water, it is necessary to remove
water drain plugs. For vertical mounting, remove the two markings
in the lower end cap, for horizontal mounting, remove the two
markings in both end caps.
b) Aussparung für die Dichtlippe / Notch for the sealing lip
Für die Konfektionierung einer Kontaktleiste mit Dichtlippe müssen
die Endkappen an den markierten Stellen für den Austritt der
Dichtlippe freigeschnitten werden.
When assembling safety-contact-edges with weather-sealing lips,
the end caps have to be notched where indicated to allow for the
weather-sealing lip(s).
3
c) Anschlusskabel einfädeln / Connection cable
Das Anschlusskabel durch die gewünschte Kabeldurchführung der
Endkappe fädeln. Wenn nötig diese vorher mit einem Schrau-
bendreher durchstechen.
Choose desired cable exit of end cap. If necessary, stitch through
the marks.
Die Konfektionierung und Montage von Sicherheitskontaktleisten darf nur durch Fachpersonal erfolgen!
Für Schäden aus fehlerhafter Konfektion und Montage der Kontaktleisten schließt die ASO GmbH jegliche Haftung aus!
Safety contact edges may only be assembled and installed by authorized personnel!
ASO GmbH excludes all liability for damage caused of an incorrect assembly and installation of the contact edges!
4
1

SENTIR EDGE KS4 KONFEKTION / SENTIR EDGE KS4 ASSEMBLY
Konfektionieranleitung
Assembly instructions
3. Klemmstück einschieben / Insert lock cap
Den Stecker aus dem Klemmstück lösen und das Klemmstück
gerade in die Hohlkammern um die innenliegende Schaltkammer
eindrücken, bis es dicht an der Schnittäche des Prols anliegt.
Anschließend ist zu prüfen, ob die Außenwandung der Schaltkam-
mer am Klemmstück anliegt. Leichte Rotationsbewegungen des
Klemmstücks können dies ergänzend bewirken.
Release the plug from the clamp and press the clamp straight
into the hollow chambers around the internal switching chamber
until it is tightly against the cut surface of the prole. Then check
whether the outer wall of the switching chamber abuts the clamp.
Slight rotational movements of the clamp can additionally cause
this.
4. Kontaktstecker einschieben / Insert the contact plug
Für die erforderliche Dichtigkeit darf die Schaltkammer im Umfang
keine Wellen werfen. Den Kontaktstecker gerade und fest in die
Schaltkammer eindrücken, wobei der Anschlagpunkt am Stecker
möglichst nahe an der Stirnäche des Klemmstücks liegen sollte.
Anschließend den Stecker ein zweites Mal nachdrücken.
For the required sealing, the switching chamber must not throw
any waves. Press the contact plug straight and rmly into the
switching chamber, whereby the stop point on the plug should be
as close as possible to the end face of the clamp. Then press the
plug a second time.
5. Endkappe aufschieben / Put on end caps
Die Endkappe auf die Kontaktleiste aufschieben und mittels des
Befestigungsclip xieren, bis dieser in der vorgegebenen Ausspa-
rung der Endkappe anliegt und merklich im Klemmstück einrastet.
Anschließend ist der Befestigungsclips ein zweites Mal nachzu-
drücken. Für Kontaktleisten mit hohem Aufbau wird die Endkappe
durch einen zusätzlichen Befestigungsclip im Prol befestigt. Für
den sicheren Halt ein zweites Mal den Stecker nachdrücken.
ush the end cap onto the safety edge and x it with the clip until it
rests in the predetermined position of the end cap and noticeably
locks in the clamp. Then press the xation clip a second time.
For bigger safety edges, the end cap is xed in the prole bottom
by an additional xing clip.
6. Widerstandsmessung der Kontaktleiste /
Electrical testing of the safety contact edge
Die Kontaktleiste mit einem Widerstandsmessgerät ausmessen. Bei
unbetätigter Kontaktleiste muss der Widerstand 8,2 kΩ +/- 500 Ω
betragen. Bei betätigter Kontaktleiste darf der Widerstand 500 Ω
nicht überschreiten.
Measure the contact edge with a multimeter. In rest position, the
resistance value has to be 8,2 kΩ ± 500 Ω. When edge is activated,
the resistance should not exceed 500 Ω.
5 6
0
ü
X X
ü
X
7
2x
8
9
2x
10
11
min
ü
ü
.
15.DB.12.100 rev 00
as of March 09
th
,
2020
Technical changes reserved
2 2
-
 1
1
-
 2
2


ASO Safety Solutions SENTIR EDGE KS4 Assembly Instructions
- Typ
- Assembly Instructions
- Dieses Handbuch eignet sich auch für
in anderen Sprachen
- English: ASO Safety Solutions SENTIR EDGE KS4
Verwandte Artikel
-
ASO Safety Solutions SENTIR edge 35.55 Assembly Instructions
-
-
-
-
-
-
-
-