Zanussi ZRX51101WA Benutzerhandbuch
- Kategorie
- Gefrierschränke
- Typ
- Benutzerhandbuch

Koelkast
Refrigerator
Réfrigérateur
Kühlschrank
Gebruikershandleiding 2
User Manual 12
Notice d’utilisation 22
Benutzerhandbuch 33
NL
EN
FR
DE
ZRX51100WA
ZRX51101WA
USER
ZANUSSI
MANUAL

www.zanussi.com
2
Veiligheidsinformatie................................ 2
Veiligheidsvoorschriften .......................... 3
Bediening................................................. 4
Tips en advies ......................................... 5
Het eerste gebruik ................................... 5
Lees zorgvuldig de meegeleverde instructies voor installatie en
gebruik van het apparaat. De fabrikant is niet verantwoordelijk
voor letsel en schade veroorzaakt door een
foutieve installatie. Bewaar de instructies van het apparaat
voor toekomstig gebruik.
Veiligheid van kinderen en kwetsbare mensen
• Dit apparaat kan worden gebruikt door kinderen van 8 jaar en
ouder en door mensen met beperkte lichamelijke, zintuiglijke
of verstandelijke vermogens of een gebrek aan ervaring en
kennis, indien zij onder toezicht staan of instructies hebben
gekregen over het veilig gebruiken van het apparaat en indien
zij de eventuele gevaren begrijpen.
• Dit apparaat mag worden gebruikt door kinderen tussen
de 3 en 8 jaar oud en personen met zware en complexe
beperkingen, indien ze duidelijk zijn geïnstrueerd.
• Houd kinderen jonger dan 3 jaar uit de buurt of onder
permanent toezicht.
• Laat kinderen niet met het apparaat spelen.
• Kinderen mogen zonder toezicht geen reinigings-
en onderhoudswerkzaamheden aan het apparaat uitvoeren.
• Houd alle verpakking uit de buurt van kinderen en gooi het
op passende wijze weg.
Algemene veiligheid
• Dit apparaat is bedoeld voor huishoudelijk gebruik of
gelijksoortige toepassingen zoals:
– Boerderijen, personeelskeukens in winkels, kantoren
of andere werkomgevingen
– Door gasten in hotels, motels, bed&breakfasts en andere
woonomgevingen
Veiligheidsinformatie
Inhoud
Dagelijks gebruik ..................................... 5
Onderhoud en reiniging .......................... 6
Problemen oplossen ................................ 7
Installatie ................................................. 9
Technische informatie .............................11
Wijzigingen voorbehouden.

3
www.zanussi.com
• WAARSCHUWING: Houd de ventilatieopeningen altijd
vrij van obstructies; dit geldt zowel voor losstaande als
ingebouwde modellen.
• WAARSCHUWING: Gebruik geen mechanische of andere
middelen om het ontdooiproces te versnellen, behalve die
middelen die door de fabrikant zijn aanbevolen.
• WAARSCHUWING: Let op dat u het koelcircuit niet beschadigt.
• WAARSCHUWING: Gebruik geen elektrische apparaten in de
koelkast, tenzij deze door de fabrikant worden aanbevolen.
• Gebruik geen waterstralen of stoom om het apparaat te reinigen.
• Reinig het apparaat met een vochtige zachte doek.
Gebruik alleen neutrale reinigingsmiddelen. Gebruik geen
schuurmiddelen, schuursponsjes, oplosmiddelen of metalen
voorwerpen.
• Bewaar geen explosieve substanties zoals spuitbussen
met drijfgas in dit apparaat.
• Indien het netsnoer beschadigd is, moet het worden
vervangen door de fabrikant, zijn service agent of dergelijk
gekwaliceerd persoon om gevaar te voorkomen.
• Gebruik alleen drinkwater indien het apparaat is voorzien
van een ijsmaker of een waterdispenser.
• Sluit het apparaat alleen aan op de drinkwatervoorziening.
• De waterdruk (minimaal en maximaal) moet liggen tussen
1 bar (0,1 MPa) en 10 bar (1 MPa).
Installatie
WAARSCHUWING:
Alleen een erkende installatietechnicus
mag het apparaat installeren.
• Verwijder alle verpakkingsmaterialen.
• Installeer en gebruik geen beschadigd
apparaat.
• Volg de installatie-instructies op die zijn
meegeleverd met het apparaat.
• Wees voorzichtig met het verplaatsen
van het apparaat, het is zwaar. Draag altijd
veiligheidshandschoenen.
• Zorg ervoor dat rond het apparaat lucht
kan circuleren.
• Wacht ten minste 4 uur alvorens het apparaat
aan de netstroom aan te sluiten. Hierdoor
kan de olie terug in de compressor stromen.
• Installeer het apparaat niet in de nabijheid
van radiators, fornuizen, ovens of kookplaten.
• De achterzijde van het apparaat moet tegen
de muur worden geplaatst.
• Installeer het apparaat niet op een plaats
met direct zonlicht.
• Gebruik dit apparaat niet in ruimtes die te
vochtig of te koud zijn, zoals bijgebouwen,
garages of wijnkelders.
Aansluiting aan het elektriciteitsnet
WAARSCHUWING:
Gevaar voor brand en elektrische
schokken.
WAARSCHUWING:
Zorg er bij het plaatsen van het apparaat
voor dat het stroomsnoer niet klem zit of
wordt beschadigd.
WAARSCHUWING:
Gebruik geen meerwegstekkers
en verlengsnoeren.
Veiligheidsvoorschriften

www.zanussi.com
4
• Dit apparaat moet zijn geaard.
• Alle elektrische aansluitingen moeten door
een gediplomeerd elektromonteur worden
gemaakt.
• Controleer of de elektrische informatie
op het typeplaatje overeenkomt met de
stroomvoorziening. Zo niet, neem dan contact
op met een elektromonteur.
• Gebruik altijd een juist geïnstalleerd
schokbestendig stopcontact.
• Gebruik geen meerwegstekkers
en verlengsnoeren.
• Zorg dat u de elektrische onderdelen
(hoofdstekker, kabel, compressor)
niet beschadigt. Neem contact met
de Servicedienst of een elektrotechnicus
om de elektrische onderdelen te wijzigen.
• De stroomkabel moet lager blijven dan het
niveau van de stopcontact.
• Steek de stekker pas in het stopcontact als
de installatie is voltooid. Zorg ervoor dat het
netsnoer na installatie bereikbaar is.
• Trek niet aan het netsnoer om het apparaat
los te koppelen. Trek altijd aan de stekker.
Gebruik van het apparaat
WAARSCHUWING:
Gevaar op letsel, brandwonden
of elektrische schokken.
Het apparaat bevat een ontvlambaar
gas, isobutaan (R600a), een aardgas
dat milieuvriendelijk is. Wees voorzichtig
om geen schade te veroorzaken aan het
koelcircuit dat isobutaan bevat.
• De specicatie van dit apparaat niet wijzigen.
• Plaats geen elektrische apparaten (bijv.
ijsmachines) in het apparaat tenzij uitdrukkelijk
geschikt verklaard door de fabrikant.
• Als er schade aan het koelcircuit optreedt,
zorg er dan voor dat er zich geen vlammen
en andere ontstekingsbronnen in de kamer
bevinden. Ventileer de kamer goed.
• Zet geen hete items op de
kunststofonderdelen van het apparaat.
• Bewaar geen ontvlambare gassen en
vloeistoffen in het apparaat.
• Plaats geen ontvlambare producten of
gerechten die vochtig zijn gemaakt met
ontvlambare producten in, bij of op het
apparaat.
• Raak de compressor of condensator niet aan.
Ze zijn heet.
Binnenverlichting
WAARSCHUWING:
Gevaar voor elektrische schokken.
• De soort lamp die in dit apparaat
gebruikt wordt, is uitsluitend geschikt
voor huishoudelijke apparaten. Gebruik
deze niet voor verlichting in huis.
Onderhoud en reiniging
WAARSCHUWING:
Gevaar voor letsel of schade aan
het apparaat.
• Schakel het apparaat uit en trek
de stekker uit het stopcontact voordat
u onderhoudshandelingen verricht.
• Het koelcircuit van dit apparaat bevat
koolwaterstoffen. Enkel bevoegde personen
mogen de eenheid onderhouden en herladen.
• Controleer regelmatig de afvoer van het
apparaat en reinig het indien nodig. Indien
de afvoer verstopt is, zal er water op
de bodem van het apparaat liggen.
Afvalverwerking
WAARSCHUWING:
Gevaar voor letsel of verstikking.
• Haal de stekker uit het stopcontact.
• Snijd het netsnoer van het apparaat
af en gooi dit weg.
• Verwijder de deur om te voorkomen dat
kinderen en huisdieren opgesloten raken
in het apparaat.
• Het koelcircuit en de isolatiematerialen
van dit apparaat zijn ozonvriendelijk.
• Het isolatieschuim bevat ontvlambare
gassen. Neem contact met uw plaatselijke
overheid voor informatie m.b.t. correcte
afvalverwerking van het apparaat.
• Veroorzaak geen schade aan het deel
van de koeleenheid dat zich naast de
warmtewisselaar bevindt.
Bediening
Inschakelen
Steek de stekker in het stopcontact.
Draai de thermostaatknop naar rechts op een
gemiddelde stand.
Uitschakelen
Draai de thermostaatknop op de stand "0"
om het apparaat uit te schakelen.

5
www.zanussi.com
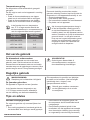
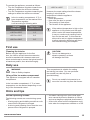
Temperatuurregeling
De temperatuur wordt automatisch geregeld.
geregeld.
Ga als volgt te werk om het apparaat in werking
te stellen:
• Draai de thermostaatknop op een lagere
stand om de minimale koude te verkrijgen.
• Draai de thermostaatknop op een hogere
stand om de maximale koude te verkrijgen.
In de ijsmaker kan een temperatuur
van -2 ºC of lager worden bereikt als
de thermostaatknop in overeenstemming
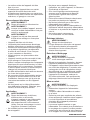
met de volgende tabel wordt ingesteld:
Omgevings-
temperatuur
Temperatuur
instelling
+10ºC tot +25ºC 1-2
+25ºC tot +32ºC 2-3
+32ºC tot +38ºC 3-5
De exacte instelling moet echter worden
gekozen rekening houdend met het feit dat de
temperatuur in het apparaat afhankelijk is van:
• Omgevingstemperatuur.
• Hoe vaak de deur wordt geopend.
• De hoeveelheid voedsel die wordt bewaard.
• De plaats van het apparaat.
Als de omgevingstemperatuur hoog is
of als het apparaat volledig gevuld is
en de thermostaatknop op de koudste
instelling staat, kan het apparaat continu
werken, waardoor er ijs op de achterwand
gevormd wordt. In dat geval moet de
knop op een hogere temperatuur gezet
worden om automatische ontdooiing
mogelijk te maken en zodoende het
energieverbruik te beperken.
+38ºC tot +43ºC 6
WAARSCHUWING:
Raadpleeg de hoofdstukken Veiligheid.
De ijsmaker gebruiken
Dit apparaat is uitgerust met een ijsmaker.
In de ijsmaker kan een temperatuur van
-2 ºC of lager worden bereikt, afhankelijk
van de instelling van de thermostaatknop.
Dit compartiment is geschikt om ijsblokjes
te maken en te bewaren. (Het benodigde
ijsblokbakje kunt u kopen in een
gescpecialiseerde winkel.)
Gebruik geen metalen voorwerpen
om het ijsblokbakje uit de vriezer
te verwijderen.
De binnenkant schoonmaken
Voordat u het apparaat voor de eerste keer
gebruikt, wast u de binnenkant en de interne
accessoires met lauwwarm water en een beetje
neutrale zeep om de typische geur van een nieuw
product weg te nemen. Droog daarna grondig af.
VOORZICHTIG!
Gebruik geen afwasmiddel of
schurende poeders, aangezien
deze deafwerking beschadigen.
Het eerste gebruik
Dagelijks gebruik
Tips en advies
Normale bedrijfsgeluiden:
De volgende geluiden zijn normaal tijdens het
gebruik:
• Een zacht gorgelend en borrelend geluid als
het koelmiddel door leidingen wordt gepompt.
• Een zoemend en kloppend geluid van
de compressor als het koelmiddel wordt
rondgepompt.
• Een plotseling krakend geluid uit de
binnenkant van het apparaat veroorzaakt
door thermische uitzetting (een natuurlijk
en ongevaarlijk natuurkundig fenomeen).

www.zanussi.com
6
• Een vaag klikgeluid van de temperatuurregelaar
wanneer de compressor in en uitschakelt.
Tips voor energiebesparing
• De deur niet vaker openen of open laten
staan dan strikt noodzakelijk.
• Als de omgevingstemperatuur hoog is, de
thermostaatknop op een lage temperatuur
staat en het apparaat volledig gevuld is, kan
de compressor continu aan staan waardoor er
ijs op de verdamper ontstaat. Als dit gebeurt,
zet u de thermostaatknop naar een warmere
instelling om de koelkast automatisch te
laten ontdooien en zo elektriciteitsverbruik
te besparen.
• Verwijder indien aangebracht de
koelelementen niet uit de vriesmand.
Tips voor het koelen van vers voedsel
Om de beste prestatie te verkrijgen:
• Zet geen warm voedsel of verdampende
vloeistoffen in de koelkast.
• Dek het voedsel af of verpak het, in het
bijzonder als het een sterke geur heeft.
• Plaats het voedsel zodanig dat de lucht
er vrij omheen kan circuleren.
Tips voor het koelen
Nuttige tips:
• Vlees (alle soorten): in plastic zakken
verpakken en op het glazen legplateau
leggen, boven de groentelade.
• Bewaar het, voor de veiligheid, slechts een
of maximaal twee dagen op deze manier.
• Gekookt voedsel, koude schotels, enz:
deze moeten afgedekt worden en mogen
op willekeurig plateau gezet worden.
• Fruit en groente: deze moeten zorgvuldig
schoongemaakt worden en in de speciaal
daarvoor bedoelde lade(n) geplaatst worden.
• Boter en kaas: dit moet in speciale luchtdichte
bakjes gelegd of in aluminiumfolie of plastic
zakjes gewikkeld worden om zoveel mogelijk
lucht in te sluiten.
• Flessen: deze hebben een dop nodig en
moeten op het plankje van de deur worden
bewaard.
• Bananen, aardappelen, uien en knoook,
indien niet verpakt, mogen niet in de koelkast
bewaard worden.
Onderhoud en reiniging
WAARSCHUWING:
Raadpleeg de hoofdstukken Veiligheid.
Algemene waarschuwingen
VOORZICHTIG!
Voordat u welke onderhoudshandeling
dan ook verricht, de stekker uit het
stopcontact trekken.
Dit apparaat bevat koolwaterstoffen in
de koeleenheid. Onderhoud en herladen
mag alleen uitgevoerd worden door
bevoegde technici.
De accvessoires en onderdelen van
het apparaat zijn niet geschikt om in de
vaatwasmachine te worden gewassen.
Periodieke reiniging
VOORZICHTIG!
Trek niet aan leidingen en/of kabels aan
de binnenkant van de kast en verplaats
of beschadig ze niet.
VOORZICHTIG!
Zorg ervoor dat u het koelsysteem
niet beschadigt. Til de voorkant van de
koelkast op als u hem wilt verplaatsen,
om krassen op de vloer te voorkomen.
Het apparaat moet regelmatig worden
schoongemaakt:
1. Maak de binnenkant en de accessoires
schoon met lauw water en wat neutrale zeep.
2. Controleer de afdichtingen regelmatig en
wrijf ze schoon om u ervan te verzekeren
dat ze schoon en vrij van restjes zijn.
3. Spoel ze af en maak ze grondig droog.
4. Maak indien toegankelijk de condensor
en de compressor aan de achterkant
van het apparaat schoon met een borstel.
Deze handeling zal de prestatie van het
apparaat verbeteren en het elektriciteitsverbruik
verminderen.
De ijsmaker reinigen
VOORZICHTIG!
Gebruik geen reinigingsmiddelen
of schurende pasta.

7
www.zanussi.com
Reinig indien nodig de oppervlakken van
de dispenser en ijscontainer die toegankelijk zijn
van buitenaf, alleen met een zachte doek en
warm water.
Zorg ervoor dat het ijsreservoir helemaal droog
is voordat u het weer terugplaatst.
Het ijsbereidingscompartiment
ontdooien
VOORZICHTIG!
Gebruik nooit scherpe metalen
hulpmiddelen om de rijp van de
verdamper te krabben, deze zou
beschadigd kunnen raken. Gebruik
geen mechanische of andere middelen
om het ontdooiproces te versnellen,
behalve die middelen die door de
fabrikant zijn aanbevolen.
Een zekere hoeveelheid rijp zal zich altijd
vormen rond het bovenste vak.
Een dikke laag rijp of ijs heeft een isolerend
effect, waardoor de koelprestatie verminderd
wordt aangezien de temperatuur in de
koelkamers stijgt en het energieverbruik
toeneemt.
Ontdooi de vriezer wanneer de rijplaag
een dikte van ongeveer 3-5 mm bereikt.
1. Schakel het apparaat uit en trek de stekker
uit het stopcontact.
2. Leeg het ijsvak.
3. Laat de deur van het apparaat en de
ijsmaker open staan. Ontdooien duurt
meestal een paar uur.
4. Als u klaar bent, giet u het verzamelde
dooiwater uit de bak en veegt u de
oppervlakken droog.
5. Steek de stekker weer in het stopcontact
en draai de thermostaatknop naar de
gemiddelde stand.
6. Leg het voedsel terug.
Periodes dat het apparaat niet
gebruikt wordt
Als het apparaat gedurende lange
Periodes niet gebruikt wordt, dient u de
volgende voorzorgsmaatregelen te treffen:
1. De ijsmaker uitzetten.
2. Draai de waterkraan dicht.
3. Het ijsreservoir legen.
4. Trek de stekker uit het stopcontact.
5. Verwijder al het voedsel.
6. Laat de deur/deuren open staan om
onaangename luchtjes te voorkomen.
Als de ijsmaker weer start, gebruik dan geen
ijs dat op de eerste dag is geproduceerd om
zeker te weten dat u een verse smaak heeft.
WAARSCHUWING:
Als uw apparaat aan blijft staan, vraag
dan iemand om het zo nu en dan te
controleren, om te voorkomen dat
het bewaarde voedsel bederft als
de stroom uitvalt.
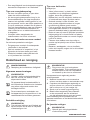
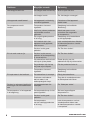
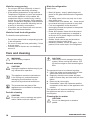
Problemen oplossen
WAARSCHUWING:
Raadpleeg de hoofdstukken Veiligheid.
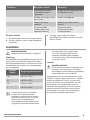
Wat moet ik doen als...
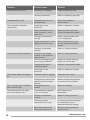
Probleem Mogelijke oorzaak Oplossing
Het apparaat werkt niet. Het apparaat is
uitgeschakeld.
Zet het apparaat aan.
De stekker zit niet goed
in het stopcontact.
Sluit de stekker aan op het
stopcontact.
Er staat geen spanning
op het stopcontact.
Sluit een ander elektrisch
apparaat op het stopcontact
aan. Neem contact op met een
gekwaliceerd elektricien.

www.zanussi.com
8
Probleem Mogelijke oorzaak Oplossing
Het lampje brandt niet. Het lampje staat in stand-by. Sluit en open de deur.
Het lampje is stuk. Zie ‘Het lampje vervangen’.
Het apparaat maakt lawaai. Het apparaat is niet stevig
en stabiel geplaatst.
Controleer of het apparaat
stabiel staat.
De compressor werkt
continu.
Temperatuur incorrect
ingesteld.
Raadpleeg het hoofdstuk
‘Bediening’.
Veel in te vriezen producten
op hetzelfde moment
geplaatst.
Wacht een paar uur en
controleer dan nogmaals
de temperatuur.
De omgevingstemperatuur
is te hoog.
Raadpleeg de klimaatsklasse
op het typeplaatje.
Het voedsel dat in het
apparaat werd geplaatst,
was te warm.
Laat voedselproducten afkoelen
tot kamertemperatuur voordat
u ze opslaat.
De deur is niet goed
gesloten.
Zie "De deur sluiten".
Er is te veel vorst en ijs. De deur is niet correct
gesloten of de deurpakking
is vervormd/vies.
Zie "De deur sluiten".
De waterafvoer bevindt zich
niet op de juiste plaats.
Plaats de plug van de
waterafvoer op de juiste manier.
De producten zijn niet op
de juiste wijze verpakt.
Pak de producten beter in.
Temperatuur incorrect
ingesteld.
Raadpleeg het hoofdstuk
‘Bediening’.
Er loopt water in de koelkast. De waterafvoer is verstopt. Reinig de waterafvoer.
Producten verhinderen
dat het water in de
wateropvangbak loopt.
Zorg dat de voedselproducten
de achterplaat niet raken.
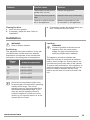
De deur is verkeerd uitgelijnd of
komt tegen het ventilatierooster
aan.
Het apparaat staat niet
waterpas.
Zie ‘Waterpas zetten’.
De temperatuur in het apparaat
is te laag/hoog
De temperatuurknop is niet
goed ingesteld.
Stel een hogere/lagere
temperatuur in.
De deur is niet goed
gesloten.
Zie "De deur sluiten".
De temperatuur
van de voedingsproducten
is te hoog.
Laat de temperatuur van het
voedselproduct dalen naar
de kamertemperatuur voordat
u ze opslaat.

9
www.zanussi.com
WAARSCHUWING:
Raadpleeg de hoofdstukken Veiligheid.
Plaatsing
Het apparaat moet geïnstalleerd worden op een
droge, goed geventileerde plaats binnen waar
de omgevingstemperatuur overeenkomt met de
klimaatklasse die vermeld is op het typeplaatje
van het apparaat:
Klimaat
klasse
Omgevingstemperatuur
SN +10ºC tot +32ºC
N +16ºC tot +32ºC
ST +16ºC tot +38ºC
T +16ºC tot +43ºC
Voor sommige typen of modellen
kunnen zich enige functionele
problemen voordoen als ze worden
gebruikt buiten dit bereik. De juiste
werking van het apparaat kan
enkel gegarandeerd worden als het
opgegeven temperatuurbereik wordt
gerespecteerd. Als u vragen hebt
m.b.t. de montagelocatie van het
apparaat, raadpleeg dan de dealer,
uw klantenservice of de dichtstbijzijnde
technische dienst
Locatie
WAARSCHUWING:
De stroomtoevoer aan het apparaat moet
verbroken kunnen worden; de stekker
moet daarom na de installatie gemakkelijk
toegankelijk zijn na de installatie.
Het apparaat moet ver van hittebronnen, zoals
radiatoren, boilers, direct zonlicht enz., vandaan
worden geïnstalleerd. Zorg er voor dat lucht
vrij kan circuleren aan de achterkant van het
keukenkastje. Als het apparaat onder een
wandkast wordt geplaatst, moet de minimale
afstand tussen de bovenkant van de kast en
de wandkast ten minste 100 mm bedragen
om optimale prestaties te garanderen.
De deur sluiten
1. De afdichtingen van de deur schoonmaken.
2. De deur afstellen, indien nodig. Raadpleeg
“Installatie”.
Probleem Mogelijke oorzaak Oplossing
Veel producten worden
op hetzelfde moment
opgeslagen.
Bewaar minder voedselproducten
op hetzelfde moment.
De dikte van de rijp is meer
dan 4-5 mm.
Ontdooi het apparaat.
De deur is te vaak
geopend.
Open de deur alleen als het
nodig is.
Er is geen koude
luchtcirculatie in het
apparaat aanwezig.
Zorg ervoor dat er
koudeluchtcirculatie
in het apparaat is.
Installatie
3. Vervang, indien nodig, de defecte
deurafdichtingen. Naam contact op met het
Service Center.

www.zanussi.com
10
Voor de beste prestatie kunt u het apparaat
echter beter niet onder een wandkast zetten.
De afstelbare voetjes aan de onderkant van
het apparaat garanderen een nauwkeurig
horizontale uitlijning.
Het is raadzaam dat er 75 mm is tussen
de achterkant van de koelkast en de muur,
aan beide zijden ten minste 100 mm ruimte,
een hoogte van meer dan 100 mm vanaf de
bovenkant en een vrije ruimte vooraan om
de deuren 160° te openen
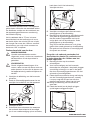
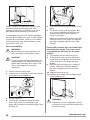
Omkeerbaarheid van de deur
WAARSCHUWING:
Voordat werkzaamheden worden
uitgevoerd, moet u zich ervan verzekeren
dat de stekker uit het stopcontact is
getrokken.
VOORZICHTIG!
Om de volgende bewerkingen uit te
voeren, raden we aan dit samen met een
ander persoon te doen die de deuren van
het apparaat stevig vasthoudt tijdens de
werken.
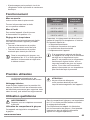
1. Verwijder de afdekking van het bovenste
scharnier.
2. Draai de 2 bevestigingsschroeven los en
verwijder het scharnier van het apparaat.
haal deze niet uit het scharnier).
Verwijder de deur.
5. Verwijder vervolgens de linkervoet zoals
weergegeven op de afbeelding.
6. Bevestig het deurscharnier (de bijbehorende
voet) aan de tegenoverliggende kant en
dan de andere losgemaakte voet op de
vorige plek van het deurscharnier, zoals
weergegeven op de afbeelding.
Zorg ervoor dat de schroeven in de juiste
gaten zitten zoals getoond op de afbeelding.
De rand van het scharnier is evenwijdig aan
de zijkant van de kast.
Zorg dat u de onderste voetonder het
deurscharnier plaatst. De onderste voet
is herkenbaar aan de 4 ribben aan het
buiten-oppervlak.
7. Bevestig de deur op de onderste
scharnierpen.
8. Voor het bevestigen van het bovenste
deurscharnier verwijdert u de plastic pluggen
voorzichtig en brengt u ze aan in de gaten
die door de bevestigingsschroeven van het
scharnier zijn achtergelaten.
9. Plaats het bovenscharnier terug met behulp
van de 2 bevestigingsschroeven, waarbij
u ervoor zorgt dat de rand van de deur
parallel loopt met de zijkant van de kast.
10. Breng de afdekking van het scharnier
weer aan.
11. Plaats de hendel en de plastic pluggen
op de tegenoverliggende zijde.
1
1
2
3
4
1
2
1
2
3
3. Verwijder de deur.
4. Schroef de twee schroeven los waarmee
het onderste deurscharnier is bevestigd
(er zit een voetbevestiging op het scharnier,

11
www.zanussi.com
WAARSCHUWING:
Zet het apparaat op zijn plaats, zet het
waterpas, wacht minstens vier uur en
steek dan de stekker in het stopcontact.
Voer een eindcontrole uit en verzeker
u ervan dat:
• alle schroeven zijn aangedraaid.
• De magnetische afdichtstrip vast zit
aan de kast.
• De deur goed open en dicht gaat.
Als de omgevingstemperatuur laag is (bijv. in
de winter), kan het zijn dat het deurrubber niet
precies op de kast past. Wacht in dat geval
tot de afdichting zich op een natuurlijke wijze
zet. Als u bovenstaande handelingen liever
niet zelf uitvoert, neem dan contact op met de
dichtstbijzijnde klantenservice. Een vakman
van de klantenservice zal de draairichting van
de deuren op uw kosten veranderen.
Aansluiting aan het elektriciteitsnet
• Zorg er vóór het aansluiten voor dat het
voltage en de frequentie op het typeplaatje
overeenkomen met de stroomtoevoer in uw
huis.
• Dit apparaat moet zijn geaard.
De netsnoerstekker is voorzien van een
contact voor dit doel. Als het stopcontact niet
geaard is, sluit het apparaat dan aan op een
afzonderlijk aardepunt, in overeenstemming
met de geldende regels. Raadpleeg hiervoor
een gekwaliceerd elektricien.
• De fabrikant kan niet aansprakelijk gesteld
worden als bovenstaande veiligheidsvoorschriften
niet opgevolgd worden.
• Dit apparaat voldoet aan de EEG-richtlijnen.
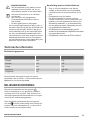
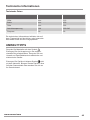
Technische gegevens
De technische informatie bevindt zich op het
typeplaatje, aan de buiten - of binnenkant van het
apparaat en niet het energielabel.
Hoogte mm 510
Breedte mm 439
Diepte mm 532
Spanning Volt 220-240
Frequentie Hz 50
Technische informatie
Recycle de materialen met het symbool .
Gooi de verpakking in een geschikte verzamel-
container om het te recyclen. Help het milieu en
menselijke gezondheid te beschermen en recycle
het afval van elektrische apparaten.
Gooi apparaten gemarkeerd met het symbool
niet weg met het huishoudelijk afval. Breng het
product naar het milieustation bij u in de buurt of
neem contact op met de gemeente.
MILIEUBESCHERMING

www.zanussi.com
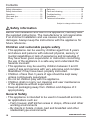
12
Before the installation and use of the appliance, carefully read
the supplied instructions. The manufacturer is not responsible
if an incorrect installation and use causes injuries and
damages. Always keep the instructions with the appliance for
future reference.
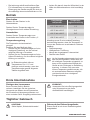
Children and vulnerable people safety
• This appliance can be used by children aged from 8 years
and above and persons with reduced physical, sensory or
mental capabilities or lack of experience and knowledge if
they have been given supervision or instruction concerning
the use of the appliance in a safe way and understand the
hazards involved.
• This appliance may be used by children between 3 and 8
years of age and persons with very extensive and complex
disabilities, if they have been properly instructed.
• Children of less than 3 years of age should be kept away
unless continuously supervised.
• Do not let children play with the appliance.
• Children shall not carry out cleaning and user maintenance
of the appliance without supervision.
• Keep all packaging away from children and dispose of it
appropriately.
General Safety
• This appliance is intended to be used in household and simi-
lar applications such as:
– Farm houses; staff kitchen areas in shops, ofces and other
working environments
– By clients in hotels, motels, bed and breakfast and other
residential type environments
Safety information
Contents
Daily use ................................................ 15
Care and cleaning ................................ 16
Troubleshooting ..................................... 17
Installation ............................................. 19
Technical information ............................. 21
Subject to change without notice.
Safety information.................................. 12
Safety Instructions ................................ 13
Operation ............................................... 14
Hints and tips ......................................... 15
First use ................................................. 15

13
www.zanussi.com
• WARNING: Keep ventilation openings, in the appliance enclo-
sure or in the built-in structure, clear of obstruction.
• WARNING: Do not use mechanical devices or other means
to accelerate the defrosting process, other than those recom-
mended by the manufacturer.
• WARNING: Do not damage the refrigerant circuit.
• WARNING: Do not use electrical appliances inside the food
storage compartments of the appliance, unless they are of the
type recommended by the manufacturer.
• Do not use water spray and steam to clean the appliance.
• Clean the appliance with a moist soft cloth. Only use neutral
detergents. Do not use abrasive products, abrasive cleaning
pads, solvents or metal objects.
• Do not store explosive substances such as aerosol cans with
a ammable propellant in this appliance.
• If the supply cord is damaged, it must be replaced by the
manufacturer, its service agent or similarlyqualied persons in
order to avoid a hazard.
• If the appliance is equipped with an Ice maker or a water dis-
penser, ll them with potable water only.
• If the appliance requires a water connection, connect it to
potable water supply only.
• The inlet water pressure (minimum and maximum)must be
between 1 bar (0,1 MPa) and 10 bar (1 MPa)
Installation
WARNING!
Only a qualied person must install this
appliance.
• Remove all the packaging.
• Do not install or use a damaged appliance.
• Obey the installation instruction supplied with
the appliance.
• Always be careful when you move the appli-
ance because it is heavy. Always wear safety
gloves.
• Make sure the air can circulate around the
appliance.
• Wait at least 4 hours before connecting the
appliance to the power supply. This is to allow
the oil to ow back in the compressor.
• Do not install the appliance close to radiators
or cookers, oven or hobs.
• The rear of the appliance must stand against
the wall.
• Do not install the appliance where there is
direct sunlight.
• Do not install this appliance in areas that
are too humid or too cold, such as the
construction appendices, garages or wine
cellars.
Electrical connection
WARNING!
Risk of re and electrical shock.
WARNING!
When positioning the appliance, ensure
the supply cord is not trapped or dam-
aged.
WARNING!
Do not use multi-plug adapters and
extension cables.
• The appliance must be earthed.
• All electrical connections should be made by
a qualied electrician.
Safety Instructions

www.zanussi.com
14
• Make sure that the electrical information on
the rating plate agrees with the power supply.
If not, contact an electrician.
• Always use a correctly installed shockproof
socket.
• Do not use multi-plug adapters and extension
cables.
• Make sure not to cause damage to the
electrical components (e.g. mains plug, mains
cable, compressor). Contact the Service or an
electrician to change the electrical compo-
nents.
• The mains cable must stay below the level of
the mains plug.
• Connect the mains plug to the mains socket
only at the end of the installation. Make sure
that there is access to the mains plug after the
installation.
• Do not pull the mains cable to disconnect the
appliance. Always pull the mains plug.
Use
WARNING!
Risk of injury, burns, electrical shock or
re.
The appliance contains ammable gas,
isobutane (R600a), a natural gas with a
high level of environmental compatibility.
Be careful not to cause damage to the
refrigerant circuit containing isobutane.
• Do not change the specication of this appli-
ance.
• Do not put electrical appliances (e.g. ice
cream makers) in the appliance unless they
are stated applicable by the manufacturer.
• If damage occurs to the refrigerant circuit,
make sure that there are no ames and sourc-
es of ignition in the room. Ventilate the room.
• Do not let hot items to touch the plastic parts
of the appliance.
• Do not store ammable gas and liquid in the
appliance.
• Do not put ammable products or items that
are wet with ammable products in, near or
on the appliance.
• Do not touch the compressor or the condens-
er. They are hot.
Internal lighting
WARNING!
Risk of electric shock.
• The type of lamp used for this appliance is for
household appliances only. Do not use it for
house lighting.
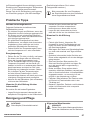
Care and cleaning
WARNING!
Risk of injury or damage to the appliance.
• Before maintenance, deactivate the appli-
ance and disconnect the mains plug from the
mains socket.
• This appliance contains hydrocarbons in the
cooling unit. Only a qualied person must do
the maintenance and the recharging of the
unit.
• Regularly examine the drain of the appli-
ance and if necessary, clean it. If the drain
is blocked, defrosted water collects in the
bottom of the appliance.
Disposal
WARNING!
Risk of injury or suffocation.
• Disconnect the appliance from the mains
supply.
• Cut off the mains cable and discard it.
• Remove the door to prevent children and pets
to be closed inside of the appliance.
• The refrigerant circuit and the insulation ma-
terials of this appliance are ozone-friendly.
• The insulation foam contains ammable gas.
Contact your municipal authority for informa-
tion on how to discard the appliance correctly.
• Do not cause damage to the part of the cool-
ing unit that is near the heat exchanger.
Operation
Switching on
Insert the electrical plug into a wall
socket.
Turn the Temperature regulator clockwise to a
medium setting.
Switching off
To turn off the appliance, turn the Temperature
regulator to the “0” position.
Temperature regulation
The temperature is automatically
regulated.

15
www.zanussi.com
To operate the appliance, proceed as follows:
• Turn the Temperature regulator toward lower
settings to obtain the minimum coldness.
• Turn the Temperature regulator toward higher
settings to obtain the maximum coldness.
In the ice-making compartment -2 ºC or
lower temperature can be reached if the
Temperature regulator
is set according to following table:
Ambient
temperature
Temperature
regulatorsetting
+10ºC to +25ºC 1-2
+25ºC to +32ºC 2-3
+32ºC to +38ºC 3-5
However, the exact setting should be chosen
keeping in mind that the
temperature inside the appliance
depends on:
• Room temperature.
• How often the door is opened.
• The quantity of food stored.
• The location of the appliance.
If the ambient temperature is high or the
appliance is fully loaded, and the appli-
ance is set to the lowest temperatures,
it may run continuously causing frost to
form on the rear wall. In this case the
dial must be set to a higher temperature
to allow automatic defrosting and there-
fore reduced energy consumption.
+38ºC to +43ºC 6
WARNING!
Refer to Safety chapters.
Using of the ice-maker comparment
This appliance is equipped with an icemaker
compartment.
In the ice-maker compartment -2 °C or lower
temperature can be reached depending on set-
ting of the thermostat control.
This compartment is suitable for making
and storing ice-cubes. (You can purchase
the needed ice-cube tray from a
specialist shop.)
Do not use metallic instruments to re-
move the ice-cube tray from the freezer.
Hints and tips
Normal operating sounds
The following sounds are normal during opera-
tion:
• A faint gurgling and bubbling sound from coils
sound when refrigerant is pumped.
• A whirring and pulsating sound from the com-
pressor when refrigerant is pumped.
• A sudden cracking noise from inside appli-
ance caused by thermic dilatation (a natural
and not a dangerous physical phenomenon).
• A faint click noise from the temperature regu-
lator when the compressor switches on or off.
Cleaning the interior
Before using the appliance for the rst
time, the interior and all internal accessories
should be washed with lukewarm water and
some neutral soap to remove the typical smell of
a brandnew product, then dried thoroughly.
CAUTION!
Do not use detergents or
abrasive powders, as these
will damage the nish.
First use
Daily use

www.zanussi.com
16
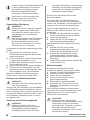
Hints for energy saving
• Do not open the door frequently or leave it
open longer than absolutely necessary.
• If the ambient temperature is high and the
Temperature Regulator is set to low tempera-
ture and the appliance is fully loaded, the
compressor may run continuously, causing
frost or ice on the evaporator. If this happens,
set the Temperature Regulator toward warmer
settings to allow automatic defrosting and so
a saving in electricity consumption.
• If foreseen, do not remove the cold accumu-
lators from the freezer basket.
Hints for fresh food refrigeration
To obtain the best performance:
• Do not store warm food or evaporating liquids
in the refrigerator.
• Do cover or wrap the food, particularly if it has
a strong odour.
• Position food so that air can circulatefreely
around it.
Hints for refrigeration
Useful hints:
• Meat (all types) : wrap in plastic bags and
place on the glass shelf above the vegetable
drawer.
• For safety, store in this way only one or two
days at the most.
• Cooked foods, cold dishes, etc.: these should
be covered and may be placed on any shelf.
• Fruit and vegetables: these should be
thoroughly cleaned and placed in the special
drawer(s) provided.
• Butter and cheese: these should be placed
in special airtight containers or wrapped in
aluminium foil or plastic bags to exclude as
much air as possible.
• Bottles: these need a cap and should be
stored on the door bottle shelf.
• Bananas, potatoes, onions and garlic, if not
packed, must not be kept in the refrigerator.
Care and cleaning
WARNING!
Refer to Safety chapters.
General warnings
CAUTION!
Unplug the appliance before carrying out
any maintenance operation.
This appliance contains hydrocarbons
in its cooling unit; maintenance and
recharging must therefore only be
carried out by authorized technicians.
The accessories and parts of the
appliance are not suitable for washing in
a dishwasher.
Periodic cleaning
CAUTION!
Do not pull, move or damage any pipes
and/or cables inside the cabinet.
CAUTION!
Take care of not to damage the cooling
system. When moving the cabinet, lift it
by the front edge to avoid scratching the
oor.
The equipment has to be cleaned regularly:
1. Clean the inside and accessories with luke-
warm water and some neutral soap.
2. Regularly check the door seals and wipe
clean to ensure they are clean and free from
debris.
3. Rinse and dry thoroughly.
4. If accessible, clean the condenser and the
compressor at the back of the appliance with
a brush.
This operation will improve the performance of
the appliance and save on electricity
consumption.
Cleaning the ice maker
CAUTION!
Do not use detergents or abrasive
pastes.

17
www.zanussi.com
When necessary, clean the surfaces of the
dispenser and the ice container that are
accessible from the outside, using only a soft
cloth and warm water.
Ensure that the ice container is thoroughly dry
before being retted.
Defrosting the ice-makercompartment
CAUTION!
Never use sharp metal tools to scrape off
frost from the evaporator as you could
damage it. Do not use a mechanical
device or any articial means to speed
up the thawing process other than those
recommended by the manufacturer.
A certain amount of frost will always form
around the ice-maker compartment.
Thick frost and ice has an insulating
effect, so it reduces cooling efciency as
the temperature increases, it needs more
energy.
Defrost the freezer when the frost layer
reaches a thickness of about 3-5 mm.
1. Switch off the appliance and disconnect the
mains plug from the mains socket.
2. Empty the ice compartment.
3. Leave the door of the appliance and ice-
maker compartment open.
Defrosting usually takes several hours.
4. When nished, pour defrost water gath-
ered out of the tray and wipe the surfaces
dry.
5. Insert the plug into the wall socket and
turn the thermostat control to a medium
setting.
6. Put food taken out back to its place.
Periods of non-operation
When the appliance is not in use for long
periods, take the following precautions:
1. Switch off the ice maker.
2. Turn off the water connection.
3. Empty the ice container.
4. Disconnect the appliance from electricity
supply.
5. Remove all food.
6. Leave the door/doors open to prevent
unpleasant smells.
When the ice maker starts again, do not
use ice produced during the rst day to
ensure fresh taste.
WARNING!
If the cabinet will be kept on,
ask somebody to check it
once in a while to prevent
the food inside from spoiling
in case of a power failure.
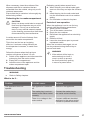
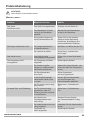
Troubleshooting
WARNING!
Refer to Safety chapters.
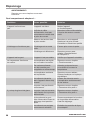
What to do if...
Problem Possible cause Solution
The appliance does not
operate.
The appliance is switched
off.
Switch on the appliance.
The mains plug is not con-
nected to the mains socket
correctly.
Connect the mains plug to
the mains socket correctly.
There is no voltage in the
mains socket.
Connect a different electrical
appliance to the mains socket.
Contact a qualied electrician.

www.zanussi.com
18
Problem Possible cause Solution
The lamp does not work. The lamp is in stand-by. Close and open the door.
The lamp is defective. Refer to “Replacing the lamp”.
The appliance is noisy. The appliance is not sup-
ported properly.
Check if the appliance
stands stable.
The compressor operates
continuously.
Temperature is set
incorrectly.
Refer to “Operation” chapter.
Many food products to be
frozen were put in at the
same time.
Wait some hours and then
check the temperature again.
The room temperature is
too high.
Refer to climate class chart
on the rating plate.
Food products placed in the
appliance were too warm.
Allow food products to cool
to room temperature before
storing.
The door is not closed
correctly.
Refer to “Closing the door”.
There is too much frost and ice. The door is not closed
correctly or the gasket is
deformed/dirty.
Refer to “Closing the door”.
The water drainage plug is
not correctly positioned.
Position the water drainage
plug in the correct way.
Food products are not
wrapped properly.
Wrap the food products better.
Temperature is set
incorrectly.
Refer to “Operation” chapter.
Water ows inside the refrigera-
tor.
The water outlet is clogged. Clean the water outlet.
Food products prevent that
water ows into the water
collector.
Make sure that food products
do not touch the rear plate.
Door is misaligned or interferes
with ventilation grill.
The appliance is not
levelled.
Refer to “Levelling”.
The temperature in the appli-
ance is too low/too high
The temperature regulator
is not set correctly.
Set a higher/lower
temperature.
The door is not closed
correctly.
Refer to “Closing the door”.
The food products’
temperature is too high.
Let the food products tempera-
ture decrease to room
temperature before storage.
Many food products are
stored at the same time.
Store less food products at
the same time.

19
www.zanussi.com
WARNING!
Refer to Safety chapters.
Positioning
This appliance should be installed in a dry, well
ventilated indoor climate where the ambient
temperature corresponds to the climate class
indicated on the rating plate of the appliance:
Climate
class
Ambient temperature
SN +10ºC to +32ºC
N +16ºC to +32ºC
ST +16ºC to +38ºC
T +16ºC to +43ºC
Some functional problems might occur
for some types of models when operating
outside of that range. The correct
operation can only be guaranteed within
the specied temperaturerange. If you
have any doubts regarding where to
install the appliance, please turn to the
vendor, to our customer service or to the
nearest Service Centre
Location
WARNING!
It must be possible to disconnect the
appliance from the mains power
supply; the plug must therefore be
easily accessible after installation.
The appliance should be installed well
away from sources of heat such as radiators,
boilers, direct sunlight etc. Ensure that air can
circulate freely around the back of the cabinet.
To ensure best performance, if the appliance is
positioned below an overhanging wall unit, the
minimum distance between the top of the
cabinet and the wall unit must be at least 100
mm.
Closing the door
1. Clean the door gaskets.
2. If necessary, adjust the door. Refer to
“Installation”.
Problem Possible cause Solution
The thickness of the frost is
greater than 4-5 mm.
Defrost the appliance.
The door has been opened
often.
Open the door only if necessary.
There is no cold air circula-
tion in the appliance.
Make sure that there is cold
air circulation in the appliance.
Installation
3. If necessary, replace the defectivedoor gas-
kets. Contact the ServiceCenter.

www.zanussi.com
20
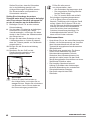
Ideally, however, the appliance should not be
positioned below overhanging wall units.
Accurate levelling is ensured by one or more
adjustable feet at the base of the cabinet.
It is advisable for there to be 75mm separating
the back of the fridge to the wall, at least 100mm
of space at its two sides, height of over 100mm
from its top and a clear space upfront to allow
the doors to open 160°
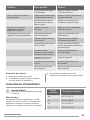
Door reversibility
WARNING!
Before carrying out any operations, re-
move the plug from the power socket.
CAUTION!
To carry out the following operations, we
suggest that this be made with another
person that will keep a rm hold on the
doors of the appliance during the
operations.
1. Remove the top hinge cover.
2. Unscrew the 2 retaining screws, and remove
the hinge from the appliance.
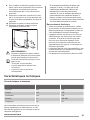
5. Then remove the left foot as shown in the
gure.
6. Fix the door hinge (with the original foot
on it) on the opposite side and then the
loosened foot at the former place as
shown in the gure.
Make sure to place the screws in the right
holes as shown in the gure.The edge of
the hinge is parallel with the side of the
cabinet.
Please make sure to place the lower foot
below the door hinge. The lower foot is
recognizable by its 4 ribs on the outer
surface.
7. Fix the door onto the lower hinge pin.
8. To t top door hinge, remove the plastic
screw hole cover carefully, and ret them
in the holes left by the hinge retaining
screws.
9. Ret the top hinge using the 2 retaining
screws, making sure that the edge of
the door is parallel with the side of the
cabinet.
10. Replace the hinge cover.
11. Relocate the handle and the plastic plugs
to the opposite side.
3. Take the door off.
4. Unscrew the two screws xing the lower
door hinge (there is a foot xing on the
hinge, do not remove it from the hinge). Take
the door off.
WARNING!
Reposition, level the appliance, wait for
at least four hours and then connect it to
the power socket.
1
1
2
3
4
1
2
1
2
3
Seite wird geladen ...
Seite wird geladen ...
Seite wird geladen ...
Seite wird geladen ...
Seite wird geladen ...
Seite wird geladen ...
Seite wird geladen ...
Seite wird geladen ...
Seite wird geladen ...
Seite wird geladen ...
Seite wird geladen ...
Seite wird geladen ...
Seite wird geladen ...
Seite wird geladen ...
Seite wird geladen ...
Seite wird geladen ...
Seite wird geladen ...
Seite wird geladen ...
Seite wird geladen ...
Seite wird geladen ...
Seite wird geladen ...
Seite wird geladen ...
Seite wird geladen ...
Seite wird geladen ...
-
 1
1
-
 2
2
-
 3
3
-
 4
4
-
 5
5
-
 6
6
-
 7
7
-
 8
8
-
 9
9
-
 10
10
-
 11
11
-
 12
12
-
 13
13
-
 14
14
-
 15
15
-
 16
16
-
 17
17
-
 18
18
-
 19
19
-
 20
20
-
 21
21
-
 22
22
-
 23
23
-
 24
24
-
 25
25
-
 26
26
-
 27
27
-
 28
28
-
 29
29
-
 30
30
-
 31
31
-
 32
32
-
 33
33
-
 34
34
-
 35
35
-
 36
36
-
 37
37
-
 38
38
-
 39
39
-
 40
40
-
 41
41
-
 42
42
-
 43
43
-
 44
44


Zanussi ZRX51101WA Benutzerhandbuch
- Kategorie
- Gefrierschränke
- Typ
- Benutzerhandbuch
in anderen Sprachen
- English: Zanussi ZRX51101WA User manual
- français: Zanussi ZRX51101WA Manuel utilisateur
- Nederlands: Zanussi ZRX51101WA Handleiding
Verwandte Artikel
-
Zanussi ZRX51101WA Benutzerhandbuch
-
Zanussi ZRG416IW Benutzerhandbuch
-
-
-
-
-
-
-
-