Samsung DVD-L100W Benutzerhandbuch

Kategorie
DVD Spieler
Typ
Benutzerhandbuch

Dieses Handbuch ist auch geeignet für

GER NL FRE
AK68-00052H
DVD-PLAYER
DVD-L100W
ENG
3
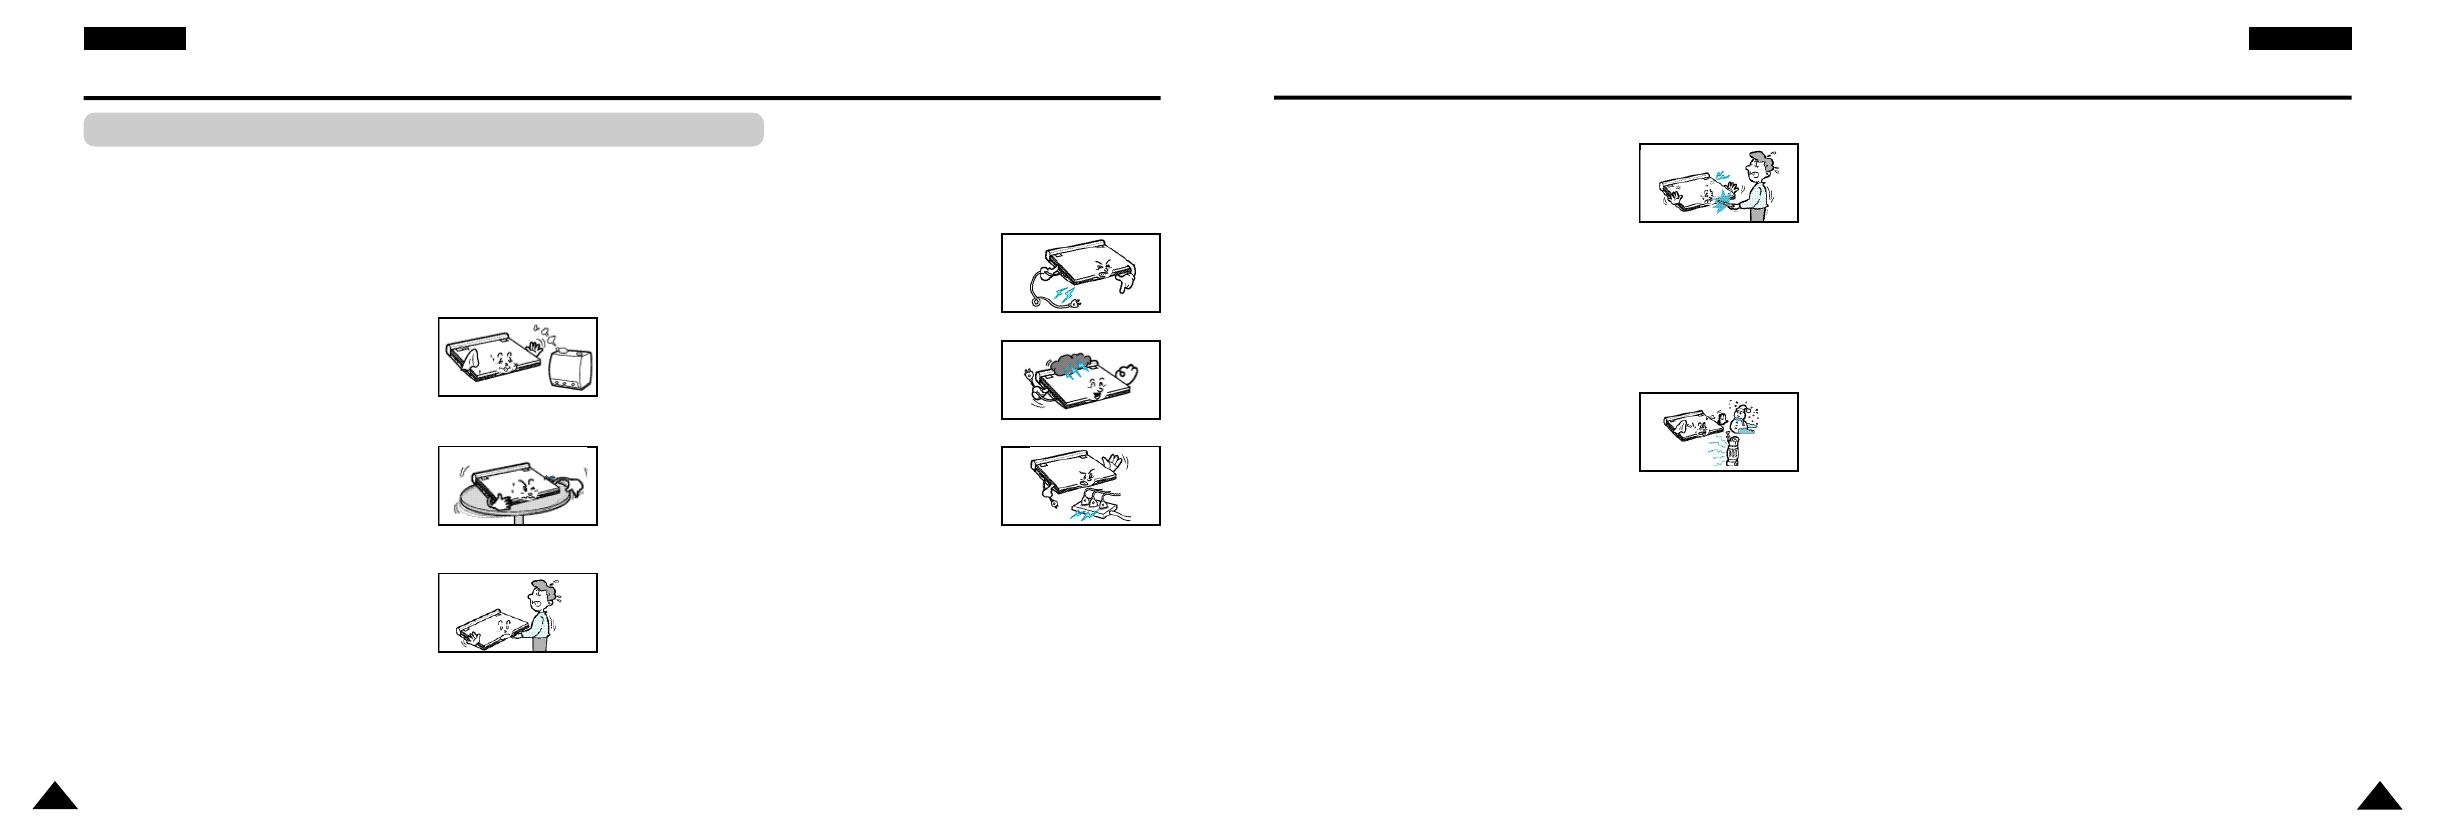
11. Do not attempt to service the unit yourself by
opening or removing the covers.
You may be exposed to high voltage and other
h a z a r d s.
Refer all servicing to qualified service personnel.
12. When replacement of the AC adapter is necessary, purchase
and use the same type of adapter.
13. Make sure the service technician uses replacement parts
specified by the manufacturer or parts that have the same
characteristics as the original. Unauthorised substitutions may result
in fire, electrical shock, or other hazards.
14. Do not place this unit near a radiator, heater,
stove, or any other heat-emitting equipment
(including amplifiers).
15. Do not view the video on the LCD screen while moving.
Do not play the DVD player or do not view the video while driving or
walking.
Doing so may result in a risk of personal injury.
16. Do not apply voltage exceeding the upper limit of the rated voltage
for this DVD player.
- Do not apply voltage outside the voltage range indicated on this
DVD player.
- Using this unit with incorrect voltage can cause fire and/or electric
shock.
17. Do not apply excessive force on the display.
- The outer surface of the screen is made of glass. The glass may
break if a strong force is applied.
18. Do not use the DVD player on your lap for a long period of time.
-You may get a minor burn due to the heat produced by the DVD
player.
Notices and Safety Instructions
2
1. Unplug the power cord from the AC outlet before cleaning the unit.
Do not use liquid cleaner or aerosol cleaner. Wipe with a damp cloth.
2. Do not use accessories or attachments not recommended by the
manufacturer. They may cause hazards.
3. Do not place this unit near water - for example,
near a bathtub, kitchen sink or laundry tub, in a
wet basement or near a swimming pool.
4. Do not place the unit on an unstable stand, rack or
t a b l e .
The unit may fall, causing serious personal injury or
damage to the unit.
Use only a table recommended by the
m a n u f a c t u r e r, or sold with the unit.
Be sure to install according to the instructions,
using the recommended installation
accessories.
5. The unit should be moved with care. Quick
stops, excessive force, and uneven surfaces
may cuase the unit and cart combination to
overturn.
6. Operate the unit using only the type of power source indicated
on the marking label. If you are not certain of your voltage
requirement, please contact the authorised dealer from whom you
purchased the product.
If you want to operate the unit with batteries or other type of power
source, please refer to the manual.
7. Route the power cord so that it is not likely to be
walked on or pinched by objects placed upon or
against it. Pay particular attention to the cord at
the plug and the point where it exits from the unit.
8. During an electrical storm, or when the unit is
unused for a long period of time, unplug the
power cord from the AC outlet and disconnect
the lines between the unit and the antenna.
This is to prevent damage caused by lightning
and serious injury from electric shock.
9. Do not overload wall outlets or extension cords.
This may cause fire or electrical shock.
10. Do not let foreign objects fall into the unit. If a
foreign object touches internal parts or some
areas inside the unit which are subject to high
voltage, this can result in a risk of fire or
electrical shock.
Do not spill any liquid into the unit.
Notices and Safety Instructions
Safety Instructions
E N G L I S H E N G L I S H
Be sure to read the safety and operating instructions before using this product.
Keep this manual in a safe place for future reference.
Be sure to adhere to all warnings on the product.
5
E N G L I S H
4
Notices and Safety Instructions
E N G L I S H
Copy Protection
This product is designed with the latest technology to provide trouble-free operation.
If the pick-up lens or disk drive gets dirty, the video quality will decrease.
Condensation may form inside this player under following conditions:
• If warm air comes in contact with any cold parts inside the player;
• If the player is located in a room with high humidity; and
• If the player is exposed to sudden temperature changes from cold to hot.
When condensation forms inside the player, the player may not operate correctly.
If this occurs, leave the player at room temperature until the inside of the player becomes dry
and operational.
Safety Information
Assuring the Finest Performance
Moisture Condensation
Laser Safety
Caution
This product utilizes a laser. Use of controls or adjustments or
performance of procedures other than those specified herein may
result in hazardous radiation exposure. Do not open covers and do
not look inside the product if interlock mechanism is damaged.
Warning
Be careful not to damage the interlock mechanism.
Many DVD discs are encoded with copy protection. Because of this, you should only connect your DVD
player directly to your TV, not to a VCR. Connecting to a VCR results in a distorted picture from copy-protected
DVD discs.
This product incorporates copyright protection technology that is protected by methods claims of certain U.S.
patents and other intellectual property rights owned by Macrovision Corporation and other rights owners.
Use of this copyright protection technology must be authorized by Macrovision Corporation, and is intended for
home and other limited viewing uses only unless otherwise authorized by Macrovision Corporation. Reverse
engineering or disassembly is prohibited.
7
E N G L I S HE N G L I S H
6
Table of Contents Table of Contents
Features 8
Accessories 9
Disc Type and Characteristics 10
Description-Front Panel 12
Tour of the Remote Control 15
Connecting Headphones to the DVD 16
Connecting to an External Component (Input Select) 17
Connecting to a TV 18
Connecting to a Stereo Component 19
Using the AC adapter 22
Using the battery pack 24
Battery level display 25
Loading a DVD Disc 26
Using the Remote Control Unit 27
Viewing a Video from an External Component 28
Using the Search & Skip Functions 29
Using the Display Function 30
Repeat Play 31
Selecting the Audio Language 32
Selecting the Subtitle Language 33
Changing the Camera Angle 34
Using the Bookmark Function 35
Using the Zoom & 3D Sound Functions 36
MP3 Play 37
Memory Stick 39
DAM (Digital Audio Manager) Playback 43
Memory Stick Removal 44
DPM (Digital Photo Manager) Playback 45
Slide Show 46
Slide Show Order 47
Photo View 48
Edit Photo 49
Using the Setup Menu 50
Setting Up the Language Features 51
Setting Up the Parental Control 53
Setting Up the Audio Options 54
Setting Up the Display Options 55
Cautionary Notes 56
Troubleshooting 61
Specifications 64
E N G L I S H
8
9
Accessories
E N G L I S H
Plays DVD discs and audio CDs
CD-R/RW discs containing MP3 files can be played.
10 in. LCD display and built-in stereo speakers
With the built-in 10 in. LCD display and stereo speakers, you
can enjoy a DVD movie without requiring a separate TV.
Convenient 2-Way power supply
You can use your DVD player virtually anywhere by using the
supplied AC adapter indoors and the battery pack
outdoors.
Compact size/light-weight design
Compact and lightweight design makes the player easy to carry.
High-resolution image and high quality sound
High-resolution LCD screen with 384,000 pixels provides a clear
picture.
*
1
Phantom Virtual Surround Sound provides a fuller sound via two
built-in speakers.
AV input/output, optical digital output jack
*
2
Dolby Digital 5.1-CH audio and *
3
DTS digital audio can be
output throught the optical digital output jack. You can enjoy
unsurpassed surround sound when a Dolby Digital/DTS digital
surround processor or amplifier is connect to this jack.
You can connect a VCR or camcorder to your DVD player
using the AV input/output jacks. or, you can connect to a TV for a
larger screen.
*
1
Is a registered trademark of LSI Logic, Inc.
*
2
Manufactured under license from Dolby Laboratories. “Dolby”,
“Pro Logic”, and the double-D symbol ( ) are trademarks of
Dolby Laboratories. Confidential unpublished works © 1992-1997.
Dolby Laboratories. Inc. All rights reserved.
*
3
“DTS” and “DTS Digital Out” are trademarks of Digital
Theater Systems, Inc.
Memory Stick
“Memory Stick” is a new compact, portable and versatile IC
(Integrated Circuit) recording medium with a data capacity that
exceeds a floppy disk.
AV-IN : For viewing a video from an external component such as a
VCR, camcorder etc...
Please be advised to watch an external video at normal play
back speed, otherwise you may experience screen noise.
Features
If disc features differ from the explanation in the manual
• Some functions or operations are disc-dependent and may not work in all cases.
Follow the instructions shown on the screen. This manual only covers basic disc operations.
may appear during some operations. This mark indicates that the disc in use does not currently support operations
explained in this manual.
Lithium battery
Remocon
AC Cord
Users Manual
Battery pack Audio cable
AC power AdapterCarry Case Video cable
11
E N G L I S HE N G L I S H
10
Disc Type and Characteristics Disc Type and Characteristics
Play Region Number
This DVD player is capable of playing the following types of discs with the corresponding logos:
DIGITAL
SOUND
STEREO
• Play
Region
Number
* Caution 1
• Dolby
Digital
disc
Memory
Stick
• Stereo
disc
• Digital
Audio
disc
DTS disc
Both the DVD player and the discs are coded by region. These regional codes must
match in order for the disc to play. If the codes do not match, the disc will not play.
The Region Number for this player is described on the housing bottom of the
player.
• MP3
disc
VIDEO-CD
AUDIO-CD
Disc Types
(Logos)
Recording
Types
Disc
Size
Max.
Playing Time
Characteristics
DVD
Audio
+
Video
Audio
+
Video
Audio
12cm
8cm
12cm
8cm
12cm
8cm
Single-sided
240 min.
Double-sided
480 min.
Single-sided
80 min.
Double-sided
160 min.
74 min.
20 min.
74 min.
20 min.
DVD contains excellent
sound and video due to
Dolby Digital and
MPEG-2 system.
• Various screen and audio
functions can be easily
selected through the
on-screen menu.
• Video with CD sound, VHS
quality & MPEG-1 com-
pression technology.
CD is recorded as a Digital
Signal with better audio
quality, less distortion and
less deterioration of audio
quality over time.
* Caution 2
Some playback functions of a DVD or VIDEO CD vary by manufacturer.
This DVD player reproduces the disc data according to guidelines provided by the disc manufacturer. If appears
during disc operations, the disc manufacturer has placed a limit on that function.
* Caution 3
The LCD display does not support Closed Captions. However, you can view captions by connecting this unit
to a TV with the caption function.
Discs that cannot be played
1. Illegally manufactured discs
2. Disc with scratches; and
3. Disc with fingerprints, dirt, and debris.
If the disc surface has dirt or scratches, NO DISC will be displayed and the disc will not
be played correctly. (Refer to page 5 and clean the surface of the disc.)
If the player encounters dirt or scratches while playing, video playback may be interrupted.
(Some block-like patterns appear. When this occurs, your player will restore the image in 2~3 seconds.)
About Copyrights
Any kind of unauthorised and commercial duplication, public performance, broadcasting, renting, copying and
making transmissions of the content of discs is strictly prohibited by law.
This product is equipped with anti-copy protection device and connecting to a VCR for recording purpose results
in a distorted picture.
This product incorporates copyright protection technology that is protected by method claims of certain U.S.
patents and other intellectual property rights owned by Macrovision
Corporation and other rights owners. Use of this copyright protection technology must be authorised by
Macrovision Corporation, and is intended for home and other limited viewing uses only unless otherwise autho-
rised by Macrovision Corporation. Reverse engineering or disassembly is prohibited.
Manufactured under licence from Dolby Laboratories.
“Dolby”, “Dolby Digital”, “Dolby Pro Logic”, and the double-D symbol ( ) are trademarks of Dolby
Laboratories.
“DTS” is a trademark of Digital Theater System, Inc.
Phantom Surround Sound is a trademark of LSI Logic, Inc.
* Discs which cannot be played with this player:
• DVD-ROM • DVD-RAM
• CD-ROM • CDV
• CDI • SVCD, CVD
• HD layer of super Audio CD
• CDGs play audio only, not graphics.
* Ability to play back may depend on recording
conditions:
• DVD-R • CD - RW
• DVD+RW, -RW
• Picture CD
~
PAL
• PA L
b r o a d c a s t
system in
U.K, France,
G e r m a n y, etc.
13
E N G L I S HE N G L I S H
12
1. MEMORY STICK
2. POWER
Press the POWER button for 1 second to power off.
3. OPEN
4. DISC COVER
5. LCD
6. SPEAKER
7. REVERSE DISPLAY
8. DVD/M.STICK/AV-IN
9. MENU
10. DISPLAY
11. CURSOR (UP/DOWN/LEFT/RIGHT), ENTER ( )
12. PLAY etc...
PLAY( ), PAUSE( )/STEP, STOP( ), REV-SKIP(
I
),
FWD-SKIP(
I
)
13. BRIGHT
1
2
3
4
5
6
13
7
8
9
10
11
12
1. VIDEO IN/OUT / S-VIDEO OUT
2. AUDIO IN/OUT / DIGITAL OPTICAL OUT
3. HEAD PHONES 1, 2
4. VOLUME
5. REMOTE SENSOR
6. OPEN
1
2
3
4
6
5
1
2
3
1. MEMORY STICK SLOT
2. DC IN 8.4V
3. BATTERY PACK
Description-Front Panel Description-Front Panel
Front View Right View
Left View
15
E N G L I S HE N G L I S H
14
1. BATTERY PACK
2. RELEASE
3. OPEN
2
3
1
Description-Front Panel
1
2
3
4
5
6
7
8
9
10
11
12
13
14
15
16
17
18
19
20
21
22
23
1. DVD POWER Button
2. SETUP Button
Brings up the DVD player’s Setup menu.
3. RETURN Button
• Returns to the previous menu.
4. DVD/M.STICK/AV-IN Button
5. ENTER/DIRECTION Buttons
(UP/DOWN or LEFT/RIGHT buttons)
This button functions as a toggle switch.
6. DISPLAY Button
• Displays the current disc mode.
7. STOP
• STOPdisc play
8. SKIP Buttons
• Use to skip the title, chapter, or track.
9. CLEAR Button
Use to remove menus or status displays
from the screen.
10. ANGLE Button
Use to access various camera angles
on a DVD.
11. 3D Button
12. ZOOM Button
13. BOOKMARK Button
14. LCD ON/OFF Button
• Change the LCD display status.
(Wide 4:3 Off)
15. TOPMENU Button
Takes you to the menu of the DVD disc.
When pressing the TOP MENU button with a
CD; the unit enters the INTRO mode. INTRO
lets you listen to the beginning of each track
for about 10 seconds.
16. MENU Button
• Brings up the Disc menu.
17. PLAY Button
• Starts disc play.
18. PAUSE/STEP Button
• Pauses disc play.
19. SEARCH Buttons
Allows you to search forward/backward
through a disc.
20. AUDIO Button
Use this button to access various audio
functions on a disc.
21. SUBTITLE Button
22. REPEAT A-B Button
Use to mark a segment to repeat between
A and B.
23. REPEAT Button
Allows you to repeat play a title,
chapter, track, or disc.
Tour of the Remote Control
Bottom View
17
E N G L I S HE N G L I S H
16
Connecting to an External Component (Input Select)
You can enjoy video from your VCR or camcorder on your DVD player.
Important!
Always turn off the DVD Player and other components before you connect any cables.
• Refer to owners manual of the components you are connecting for more information on those particular components.
In the AV-IN mode, the video input must be the standard PAL or NTSC.
Otherwise LCD screen may be occured flicker or noise etc.
When connecting to an external component
Jack/Plug Color
Video: Yellow
Audio (left): White
Audio (right): Red
VCR or other component equipped with external output connectors
You can attach headphones with a stereo mini-jack plug (not supplied) to the
PHONES jack for private listening. There are two jacks available.
Connecting Headphones to the DVD
How to use headphones
1.Insert headphones into the PHONES jack.
This jack is a stereo mini-jack.
Important!
• Turn the headphone volume down to the minimum setting before connecting.
Caution
• Once you connect headphones to the DVD, your DVD Player’s speakers will be disconnected.
2.Adjust the volume level by using the VOLUME control dial.
Not supplied
19
E N G L I S HE N G L I S H
18
Connecting to a Stereo Component
When you connect the DVD player to an audio system, you can listen to higher quality sound.
Analog Connection
• When connecting to an audio component, set the “Dynamic Comp.” to “Off”. (see page 54)
2-CH Audio Playback
Jack/Plug Color
Audio (left): White
Audio (right): Red
Audio Cable
Audio Amplifier
Connect to input jack
You can enjoy high-resolution video using an S-VIDEO cable when connecting your DVD player
to a TV equipped with an S-VIDEO input jack.
Always turn off the DVD Player and TV before you connect any cables.
Caution
If you wish to view video on your TV only, close the display panel of your DVD player.
Playback will continue and audio to the speakers will be cut off.
• With the display panel shut, use the remote to control the DVD player.
For power saving, press the LCD ON/OFF button to power off the LCD display.
To view video with a TV
1. Turn on the TV.
2.Adjust the TV input to the one that your DVD player is connected to (“AV”, “VIDEO”).
3. Turn on the DVD player, and start playback.
Connecting to a TV
Jack/Plug Color
Video: Yellow
Audio (left): White
Audio (right): Red
Connect to a TV equipped with external connection jacks
Digital Connection
Digital Output (optical)
After the completion of above connections;
1.Set the “Digital Output” to “PCM” (see page 54) in “AUDIO SETUP”.
Digital connection to audio component or MD player without Dolby Digital decoder
Audio CD or Video CD
Play the disc, with the audio mode set to “Left” or “Right”. When connecting digitally,
DTS-encoded audio tracks will produce distorted sound.
DVD Disc
When playing a Linear PCM Audio encoded disc, you must use the digital connection
method shown above.
CD recording using digital connection to a MD
When digitally connecting to an MD to record the content of a CD, track numbers on the MD
and the CD may not match.
Only use an optical Digital Cable which has been designed for use with portable DVD.
21
E N G L I S H
20
Connecting to a Stereo Component Connecting to a Stereo Component
E N G L I S H
Optical Digital Cable
Audio component equipped with
optical digital input jack
Connect to optical digital input jack
Playing Dolby Digital (5.1-CH) and DTS Audio
You can enjoy full and dynamic surround sound by connecting a Dolby Digital/DTS
digital surround processor or amplifier equipped with a Dolby Digital/DTS surround decoder
to the optical digital jack on the DVD player.
When using DTS digital surround, select the DTS audio by using the disc menu screen
or function adjustment screen.
After making the connections shown above;
1. Set the “Digital Output” to “Bitstream” (see page 54) in “AUDIO SETUP”.
Caution
To play a DTS disc, you need a DTS processor or amplifier.
If the DTS processor or amplifer you want to use does not have an optical digital input jack,
digital connection is not possible.
Refer to owners manual of the processor or amplifier for details on connections.
Optical Digital Cable
(Sold Separately)
Connect to an Optical Digital Input Jack
Dolby Digital (5.1-Channel)/DTS
processor or amplifier
23
E N G L I S HE N G L I S H
22
Using the AC adapter
AC adapter (included)
Power outlet
To home power outlet
DC output
plug
Important!
Always turn off the DVD player before connecting or disconnecting the AC cord.
Be sure to use the supplied AC adapter. Using a different type of adapter may cause
malfunction or damage to the product.
When the AC adapter is used for prolonged periods of time, the adapter may heat up.
This is normal and is not a cause for concern.
When not using the adapter, unplug it from the wall outlet.
Keep the AC adapter free from moisture, cold, and dust. Otherwise, this can result in
a risk of fire or electric shock.
Warning
Only use the AC adapter supplied with this player.
Be sure to unwind the AC adapter cable (DC output cable) before using, as
electromagnetic interference may cause problems with other devices.
Using the AC adapter
Important!
Always turn off the DVD player when inserting or removing the AC adapter.
While the DVD player is turned on, the battery pack in the DVD player will be not be recharged. Turn off
the DVD player when recharging.
Before storing the battery pack, make sure it is completely drained. Recharge the stored
battery pack in about every six months before using.
Caution
When charging or using the battery pack, it heats up. This is normal and is not a cause
for concern.
If power charge lamp flashes quickly or does not light red, it is not a cause for concern.
Connecting the battery pack to the AC Adapter;
You can recharge the battery pack in the DVD player by turning off the player and connecting the AC
adapter to the player.
Charge Time: Approx. 3.5 hours
Charge time may be longer when using the battery pack in a cold environment.
DVD Continuous Playing Time with a Fully charged Battery pack (with speaker): Approx. 2.5 hours
DVD continuous playing time is a reference indicating the maximum playing time at average screen
brightness.
The playback time may be shortened depending on the disc, surrounding
temperature, battery pack conditions, and speaker volume.
DC Output Cable
25
E N G L I S H
24
E N G L I S H
Battery level display
• The battery level display indicates the amount of power remaining in the battery pack.
a. Fully charged
b. 20~40% used
c. 40~80% used
d. Completely used (flickers)
(The DVD will turn off soon, change the battery as soon as possible)
The playing times is affected by environmental temperature and conditions.
The playing times becomes very short in a cold environment. The continuous playing times in the operating instructions are
measured using a fully charged battery pack at 25°C. As the environmental temperature and conditions may differ when
you actually use the DVD, the remaining battery time may not be the same as the approximate continuous
playing times given in these instructions.
...........................a
...........................b
...........................c
...........................d
Using the battery pack
Important!
When inserting the battery pack, make sure that it is inserted correctly.
Otherwise, your DVD player may malfunction.
Use the AC adapter (included) to charge the battery pack.
Before charging, make sure that the battery pack is correctly seated.
1. Connect the AC cord to the jack on the AC adapter ( ).
2. Plug the other end of the AC cord into an AC outlet ( ).
3. Connect the DC cord to the DC IN jack on the left side of the DVD player ( ).
Charging the battery pack
Power Charge Lamp
-Green light will flash while charging.
-When the battery pack is charged, the light will stop blinking and remains green.
Blinking time Charging rate
Once per second Less than 50%
Twice per second 50%~75%
Three times per second 75%~90%
Blinking stops and stays on 90%~100%
On for a second and Error-Reset the battery pack and
off for a second the DC cable
27
E N G L I S H
26
Using the Remote Control Unit
Installing the Battery in the Remote
Operating Range of Remote Control Unit
1. Remove the battery compartment in the direction of the arrow. 2. Place the lithium battery in the battery compartment and put
the battery compartment cover back on the remote.
Match the polarities (+ and -) on the battery with the marks
in the battery compartment. If the battery is inserted in the
wrong direction, your remote control may not work correclty.
Important!
Do not subject the remote control unit to strong vibration or shock.
Keep the remote control unit free from moisture and water.
Caution
After battery replacement, your remote control unit may not work. If this occurs,
remove the battery and re-insert in about 5 minutes.
It may be difficult to operate the remote control unit if the remote control sensor on
the DVD player is exposed to direct sunlight or strong artificial light.
Try operating the remote away from such light sources.
Remove the battery when not planning to use the remote control unit for a long
period of time.
Remote Control Sensor
Hole
(Back of the remote control)
E N G L I S H
Loading a DVD Disc
1. After plugging in the player, the first time you press the POWER button, this screen comes up:
Press the UP/DOWN buttons to select the language, and then press the ENTER button.
(This screen will only appear the very first time you plug in the player. )
2. Press the OPEN button to open the disc lid.
The disc lid opens up to around a 60-degree angle.
Do not attempt to open the lid to an angle beyond this range. The lid may become damaged.
3. Place a disc gently into the tray.
You should hear and feel the disc snap firmly into place.
Caution
Place a disc into the tray with the disc’s label facing up.
4. Close the disc lid and then press the part marked “PUSH” until it clicks shut.
Important!
Make sure that the disc is correctly placed. Otherwise, the disc and/or the DVD player
may be damaged.
If the disc is placed upside down in the disc tray or the region number of the DVD is not
supported, NO DISC will appear on the screen.
You don’t take out a disc until the disc entirely stoped.
• Press the POWER button for 1 second to power off.
29
E N G L I S H
28
Viewing a Video from an External Component
Use the procedure below to view a video from a VCR or camcorder on your DVD player.
1. Connect the external component according to the procedure outlined on page 17.
2. Turn on the external component.
3. Turn on the DVD player.
4. Press the DVD/M.STICK/AV-IN button to set the AV-IN mode.
5. Press the PLAY button on the external component.
Caution
Power is not supplied from this device to the connected DVD player.
When not using your DVD player, always remove all connecting cables from the video or
audio input/output jacks.
If no signal is input for more than 5 minutes while in the input mode, this unit enters
the standby mode.
If the player is left in pause mode
If the ‘PA U S E ’ mode continues for more than 5 minutes, the unit will automatically switch to ‘STO P ’ .
If the ‘STO P ’ mode continues for more than 1 minute, it will automatically switch to
‘ FADE IN FADE OUT’.
If the ‘FADE IN FADE OUT’ mode continues for more than 4 minutes, the power will be shut off auto
m a t i c a l l y.
To view a video from an external component
AV-IN
E N G L I S H
Using the Search & Skip Functions
DVD 2X, 4X, 8X, 16X, 32X, 128X
VCD/CD 2X, 4X
Searching through a Chapter or Track
Skipping Tracks
During play, you can search quickly through a chapter or track or use the skip function to jump
to the next selection.
1.During play, press the FWD SEARCH ( ) or REV SEARCH ( ) button on the
remote.
Press the REVERSE or FORWARD SEARCH button on the remote and press again to
search at a faster speed on a DVD, VCD, CD.
1.During play, press the NEXT SKIP (
I
) or BACK SKIP (
I
) button.
When playing a DVD, if you press the NEXT SKIP button, it moves to the next chapter.
If you press the BACK SKIP button, it moves to the beginning of the chapter.
One more press makes it move to the beginning of the previous chapter.
When playing a VCD 2.0, a VCD 1.1 or a CD, if you press the
NEXT SKIP button, it moves to the next track. If you press the BACK SKIP button, it
moves to the beginning of the track.
One more press makes it move to the beginning of the previous track.
If a track exceeds 15 minutes when playing a VCD and you press the NEXT SKIP
button, it moves forward 5 minutes. If you press the BACK SKIP button, it moves
backward 5 minutes.
31
E N G L I S H
30
Using the Display Function
When Playing a DVD
1.During play, press the DISPLAY button on the remote.
- Current title, chapter number, elapsed time, audio, Subtitle, Angle and Repeat will be displayed.
Use the UP/DOWN buttons to select desired item, then press ENTER button.
Use the UP/DOWN buttons to enter a chapter number, then press the ENTER button.
To enter the time from which you want to start, use the UP/DOWN/LEFT/RIGHT buttons to
select, then press the ENTER button.
Use the UP/DOWN buttons to change the values of the current audio, Subtitle, Angle and
Repeat.
• To make the screen disappear, press the DISPLAY button again.
1.During play, press the DISPLAY button on the remote.
Current title, track number, elapsed time, audio and Repeat will be displayed.
Use the UP/DOWN buttons to select desired items then press ENTER button.
To enter the time from which you want to start, use the UP/DOWN/LEFT/RIGHT buttons to
select, then press the ENTER button.
• Use the UP/DOWN buttons to change the values of the current audio, Repeat.
- To make the screen disappear, press the DISPLAY button again.
What is a Chapter?
Each Title on a DVD is usually divided into chapters (similar to tracks on an audio CD).
What is a Title?
A DVD may contain several different titles. For example, if a disc contains four different movies, each
might be considered a title.
When Playing a VCD/CD
E N G L I S H
Repeat Play
Repeat the current track, chapter, title, a chosen section (A-B), or all of the disc.
1.Press the REPEAT button on the remote. Repeat screen appears.
2.Select Title or Chapter using the LEFT/RIGHT buttons.
3.Press ENTER.
4. To return to normal play, press REPEAT again, then press the LEFT/RIGHT buttons to
select Off and press ENTER.
-
REPEAT A-B button
Press the REPEAT (A-B) button to select the point where the function starts. (A)
Press the REPEAT (A-B) button to select the point where the function ends. (B)
To terminate the function, press the 'CLEAR' button or the 'REPEAT (A-B)' button again.
Then press play to resume normal playback.
A-B REPEAT does not allow you to set point (B) until at least 5 seconds has
elapsed after point (A) has been set.
• DVD repeats play by chapter or title, CD and VCD repeat play by disc or track.
See page 37 to MP3 disc repeat play.
• Depending on the disc, the Repeat function may not work.
• If the title or track is completed before marking the end (B), the end of title or track becomes B
automatically.
When playing a DVD
DVD
VCD/CD
33
E N G L I S H
32
E N G L I S H
Selecting the Audio Language
You can select a desired language quickly and easily with the AUDIO button.
1.Press the AUDIO button.
2.Use the LEFT/RIGHT buttons to select the desired language on a DVD.
- The audio languages are represented by abbreviations.
3.Use the LEFT/RIGHT buttons to select Stereo, Right or Left. (On VCD/CD)
This function depends on what languages are encoded on the disc and may not work with all
DVDs.
• A DVD disc can contain up to 8 audio languages.
How to have the same audio language come up whenever you play a DVD;
Refer to “Setting Up the Language Features” on page 52.
Using the Audio button
DVD
VCD/CD
Selecting the Subtitle Language
You can select a desired subtitle quickly and easily with the SUBTITLE button.
1.Press the SUBTITLE button.
2.Use the LEFT/RIGHT buttons to select the desired subtitle language.
3.Use the UP/DOWN buttons to determine whether or not the subtitle will be displayed.
- Initially, the subtitling will not appear on screen.
- The subtitle languages are represented by abbreviations.
This function depends on what languages are encoded on the disc and may not work with all
DVDs.
• A DVD disc can contain up to 32 subtitle languages.
• How to have the same subtitle language come up whenever you play a DVD;
Refer to “Setting Up the Language Features” on page 52.
Using the SUBTITLE button
35
E N G L I S H
34
E N G L I S H
Changing the Camera Angle
When a DVD contains multiple angles of a particular scene, you can select the Angle function.
Press the ANGLE button to see if an ANGLE ( ) mark is present at the upper left hand
corner of the screen.
1.When an ANGLE mark is shown, press the ANGLE button, then an ANGLE select icon
will appear at the upper left hand corner of the screen.
2.Use the LEFT/RIGHT buttons to select the desired screen angle.
3. To turn off the display, press the ANGLE button again.
Using the ANGLE button
The Bookmark function lets you select parts of a DVD or VCD so that you can quickly find the
section at a later time.
1.During play, press the BOOKMARK button on the remote.
The Bookmark icons will be displayed.
2.Use the LEFT/RIGHT buttons to move to the desired bookmark icon.
3.When you reach the scene you want to mark, press the ENTER button.
The icon will change to a number (1, 2, or 3).
4.Press the BOOKMARK button to turn off the display.
1.During play, press the BOOKMARK button on the remote.
2.Use the LEFT/RIGHT buttons to select a marked scene.
3.Press the PLAY button to skip to the marked scene.
1.During play, press the BOOKMARK button on the remote.
2.Use the LEFT/RIGHT buttons to select the bookmark number you want to delete.
3.Press the CLEAR button to delete a bookmark number.
Press the BOOKMARK button to turn off display.
Up to three scenes may be marked at a time.
• Depending on the disc, the Bookmark function may not work.
Using the Bookmark Function
Using the Bookmark Function (DVD/VCD)
Clearing a Bookmark
Recalling a Marked Scene
37
E N G L I S H
36
E N G L I S H
Using the Zoom & 3D Sound Functions
1.During play or pause mode, press the ZOOM button on the remote. A square will be
displayed on screen.
2.Use the UP/DOWN or LEFT/RIGHT button to select the part of the screen you want to
zoom in on.
3.Press the ENTER button.
- Press ENTER to zoom in 2X/4X/2X/Normal in order.(DVD)
- Press ENTER to zoom in 2X/Normal in order.(VCD)
The simulated surround effect depends on the disc contents. If you connect the unit to your
stereo system, you can enhance sound quality and produce a greater surround effect.
This feature is useful when you are using the DVD player with a two channel stereo through
the analogue outputs.
(Discs which are recorded with LPCM or DTS will not work. When the DIGITAL OUTPUT or
MPEG-2 is set to BITSTREAM in the SETUP MENU, the 3D
Sound function will not work.)
1.During play, press the 3D button. The 3D SOUND mark will be displayed on screen.
(Be sure the DIGITAL OUTPUT is set to PCM.)
2.Press the UP/DOWN buttons to turn the 3D Sound feature on or off.
3D Sound is possible only on discs recorded using DOLBY SURROUND or DOLBY
DIGITAL. However, some of these discs do not contain rear channel sound signals.
Depending on the disc, the Zoom and 3D Sound function may not work.
Using the Zoom Function (DVD/VCD)
Using the 3D Sound Function
When an MP3 Disc is inserted into the DVD PLAYER, the first song file of the first folder plays.
1.Press STOP to stop playback of the first song file, then press LEFT to display the music
folder menu on the right side of the screen. Up to 7 music folders can be displayed at a time.
If you have more than 7 folders on a disc, press the UP/DOWN buttons to bring them up on the
screen.
2.Use the UP/DOWN buttons to select the desired music folder, then press ENTER. Use the
UP/DOWN buttons again to select a song file. Press ENTER to begin playback of the song file.
Press the REPEAT button to hear a song file repeatedly.
Press the REPEAT button one more time to hear all song files repeatedly.
• Press Repeat again to release the Repeat mode.
MP3 Play
MP3 Play Function
39
E N G L I S H
38
E N G L I S H
MP3 Play
CD-R/MEMORY STICK/MP3 requirements
When playing CD-R/MP3 discs, please follow the recommendations below:
• Your MP3 files should be ISO 9660 or JOLIET format.
ISO 9660 format and Joliet MP3 files are compatible with Microsoft's DOS and Windows, and with Apple's Mac. These two formats are the
most widely used.
When naming your MP3 files do not exceed 8 characters, and place ".mp3" as the file extension.
General name format of: Title.mp3. When composing your title, make sure that you use 8 characters or less, have no spaces in the name,
and avoid the use of special characters including: (.,/,\,=,+).
• Use a decompression transfer rate of at least 128 Kbps when recording MP3 files.
Sound quality with MP3 files basically depends on the rate of compression/decompression you choose. Getting audio CD quality sound
requires an analogue/digital sampling rate (conversion to MP3 format) of at least 128 Kbps and up to 160 Kbps. However, choosing higher
rates, like 192 Kbps or more, only rarely give better sound quality.
Conversely, files with sampling rates below 128 Kbps will not be played properly.
Do not try recording copyright protected MP3 files.
Certain "secured" files are encrypted and code protected to prevent illegal copying. These files are of the following types: Windows
Media™ (registered trade mark of Microsoft Inc) and SDMI™ (registered trade mark of The SDMI Foundation). You cannot copy such files.
Your DVD player only accepts one level of file directory.
Consequently you must choose:
-either to save all your MP3 recording files at the root of the disc;
-and/or create folders in the directory for each artist or music type (e.g. classical, rock, jazz, etc)
Important: The above recommendations cannot be taken as a guarantee that the DVD player will play MP3 recordings, or as an assur-
ance of sound quality.
You should note that certain technologies and methods for MP3 file recording on CD-Rs prevent optimal
playback of these files on your DVD player (degraded sound quality and in some cases, inability of the player to read the files).
Memory Stick
What is a Memory Stick?
"Memory Stick" is a new compact, portable and versatile IC (Integrated Circuit) recording medium with a data capacity that exceeds a floppy disk.
"Memory Stick" is specially designed for digital data exchange among "Memory Stick" compatible devices.
Because it is removable, the "Memory Stick" can also be used for external data storage.
There are two types of "Memory Sticks".
One is the regular "Memory Stick" and the other is the "MagicGate Memory Stick" equipped with "MagicGate" copyright protection technology.
"MagicGate" is a copyright protection technology that uses encryption.
1. MagicGate Memory Stick
Can be used for both copyright-protected and regular data.
2. Memory Stick
Can be used for regular data only.
MagicGate Memory Sticks with copyright-protected data cannot be used in this unit.
  • Page 1 1
  • Page 2 2
  • Page 3 3
  • Page 4 4
  • Page 5 5
  • Page 6 6
  • Page 7 7
  • Page 8 8
  • Page 9 9
  • Page 10 10
  • Page 11 11
  • Page 12 12
  • Page 13 13
  • Page 14 14
  • Page 15 15
  • Page 16 16
  • Page 17 17
  • Page 18 18
  • Page 19 19
  • Page 20 20
  • Page 21 21
  • Page 22 22
  • Page 23 23
  • Page 24 24
  • Page 25 25
  • Page 26 26
  • Page 27 27
  • Page 28 28
  • Page 29 29
  • Page 30 30
  • Page 31 31
  • Page 32 32
  • Page 33 33
  • Page 34 34
  • Page 35 35
  • Page 36 36
  • Page 37 37
  • Page 38 38
  • Page 39 39
  • Page 40 40
  • Page 41 41
  • Page 42 42
  • Page 43 43
  • Page 44 44
  • Page 45 45
  • Page 46 46
  • Page 47 47
  • Page 48 48
  • Page 49 49
  • Page 50 50
  • Page 51 51
  • Page 52 52
  • Page 53 53
  • Page 54 54
  • Page 55 55
  • Page 56 56
  • Page 57 57
  • Page 58 58
  • Page 59 59
  • Page 60 60
  • Page 61 61
  • Page 62 62
  • Page 63 63
  • Page 64 64
  • Page 65 65
  • Page 66 66
  • Page 67 67
  • Page 68 68
  • Page 69 69
  • Page 70 70
  • Page 71 71
  • Page 72 72
  • Page 73 73
  • Page 74 74
  • Page 75 75
  • Page 76 76
  • Page 77 77
  • Page 78 78
  • Page 79 79
  • Page 80 80
  • Page 81 81
  • Page 82 82
  • Page 83 83
  • Page 84 84
  • Page 85 85
  • Page 86 86
  • Page 87 87
  • Page 88 88
  • Page 89 89
  • Page 90 90
  • Page 91 91
  • Page 92 92
  • Page 93 93
  • Page 94 94
  • Page 95 95
  • Page 96 96
  • Page 97 97
  • Page 98 98
  • Page 99 99
  • Page 100 100
  • Page 101 101
  • Page 102 102
  • Page 103 103
  • Page 104 104
  • Page 105 105
  • Page 106 106
  • Page 107 107
  • Page 108 108
  • Page 109 109
  • Page 110 110
  • Page 111 111
  • Page 112 112
  • Page 113 113
  • Page 114 114
  • Page 115 115
  • Page 116 116
  • Page 117 117
  • Page 118 118
  • Page 119 119
  • Page 120 120
  • Page 121 121
  • Page 122 122
  • Page 123 123
  • Page 124 124
  • Page 125 125
  • Page 126 126
  • Page 127 127
  • Page 128 128
  • Page 129 129

Samsung DVD-L100W Benutzerhandbuch

Kategorie
DVD Spieler
Typ
Benutzerhandbuch
Dieses Handbuch ist auch geeignet für