Samsung PS50C6500TW Benutzerhandbuch

Kategorie
Plasmafernseher
Typ
Benutzerhandbuch

Dieses Handbuch ist auch geeignet für

Contact SAMSUNG WORLDWIDE
If you have any questions or comments relating to Samsung products, please contact the SAMSUNG customer care centre.
Country
Customer Care Centre
Web Site
AUSTRIA 0810 - SAMSUNG (7267864, € 0.07/min) www.samsung.com/at
BELGIUM 02-201-24-18 www.samsung.com/be (Dutch)
www.samsung.com/be_fr (French)
CZECH 800 - SAMSUNG (800-726786) www.samsung.com/cz
Samsung Zrt., česká organizační složka, Oasis Florenc, Sokolovská394/17, 180 00, Praha 8
DENMARK 70 70 19 70 www.samsung.com/dk
FINLAND 030 - 6227 515 www.samsung.com/
FRANCE 01 48 63 00 00 www.samsung.com/fr
GERMANY 01805 - SAMSUNG (726-7864 € 0,14/Min) www.samsung.de
HUNGARY 06-80-SAMSUNG (726-7864) www.samsung.com/hu
ITALIA 800-SAMSUNG (726-7864) www.samsung.com/it
LUXEMBURG 261 03 710 www.samsung.com/lu
NETHERLANDS 0900-SAMSUNG (0900-7267864) (€ 0,10/Min) www.samsung.com/nl
NORWAY 815-56 480 www.samsung.com/no
POLAND 0 801 1SAMSUNG (172678)
022-607-93-33
www.samsung.com/pl
PORTUGAL 80820-SAMSUNG (726-7864) www.samsung.com/pt
SLOVAKIA 0800-SAMSUNG (726-7864) www.samsung.com/sk
SPAIN 902 - 1 - SAMSUNG (902 172 678) www.samsung.com/es
SWEDEN 0771 726 7864 (SAMSUNG) www.samsung.com/se
TURKEY 444 77 11 www.samsung.com/tr
U.K 0845 SAMSUNG (7267864) www.samsung.com/uk
EIRE 0818 717100 www.samsung.com/ie
SWITZERLAND 0848 - SAMSUNG (7267864, CHF 0.08/min) www.samsung.com/ch
www.samsung.com/ch_fr/(French)
LITHUANIA 8-800-77777 www.samsung.com/lt
LATVIA 8000-7267 www.samsung.com/lv
ESTONIA 800-7267 www.samsung.com/ee
© 2010 Samsung Electronics Co., Ltd. All rights reserved.
BN68-02807A-0
Plasma TV user manual
Plasma TV
user manual
imagine the possibilities
Thank you for purchasing this Samsung product.
To receive more complete service, please register
your product at
www.samsung.com/register
Model _____________ Serial No. _____________
0_BN68-02807A-Cover.indd 1 2010-10-12 오후 6:58:53
3
ENGLISH
English
Contents
Getting Started
4
4 Accessories
5 Viewing the Control Panel
6 Viewing the Remote Control
7 Connecting to an Antenna
7 Plug & Play (Initial Setup)
Connections
8
8 Connecting to an AV Device
9 Connecting to an Audio Device
10 Changing the Input Source
Basic Features
11
11 How to Navigate Menus
11 Using the INFO button (Now & Next guide)
11 Planning Your Viewing
13 Channel Menu
15 Picture Menu
18 Sound Menu
20 Setup Menu
22 Support Menu
Advanced Features
24
24 Connecting to a PC
25 Network Connection
32 Media Play
39 Anynet+
42 Internet@TV
45 AllShare
Other Information
47
47 Analogue Channel Teletext Feature
48 Assembling the Cables
48 Installing the Wall Mount
50 Securing the Installation Space
50 Securing the TV to the wall
51 Troubleshooting
55 Specifications
56 Index
Check the Symbol!
t
This function can be used by pressing the
TOOLS button on the remote control.
Note One-Touch Button
An administration fee may be charged if either
(a) an engineer is called out at your request and there is no defect in the product
(i.e. where you have failed to read this user manual)
(b) you bring the unit to a repair centre and there is no defect in the product
(i.e. where you have failed to read this user manual).
The amount of such administration charge will be advised to you before any work or home visit is carried out.
TOOLS
1_BN68-02807A-Eng.indd 3 2010-10-12 오후 7:00:36
4
English
Getting Started
Accessories
Please make sure the following items are included with your PDP TV. If any items are missing, contact your dealer.
The items’ colours and shapes may vary depending on the models.
Cables not included in the package contents can be purchased separately.
y Remote Control & Batteries (AAA x 2)
y Owner’s Instructions
y Warranty Card / Safety Guide (Not available in some locations)
y Cleaning Cloth
y Blanking Bracket y Holder-Ring (4EA) (58 inch model only) y Holder-Wire stand
y Cable Tie y Holder-Wire (3EA) y SCART Adapter
y Component Adapter y AV Adapter y Ferrite Core (2EA) y Ferrite Core (1EA)
Ferrite Core: The ferrite cores are used to shield
the cables from interference. When connecting
a cable, open the ferrite core and clip it around
the cable near the plug as shown in the figure.
Distance between the ferrite core and one end
of the cord put into the TV set.
A
y A : below 50 mm
For best cable connection to this product, be sure to use cables with a maximum thickness as below:
y Maximum thickness - 0.55 inches (14mm)
(M4 X L10)
[PC6500_XC]BN68-02807A-02L09.indb 4 2010-09-29 오전 9:47:57
5
01 Getting Started
English
Viewing the Control Panel
The product colour and shape may vary depending on the model.
Remote control sensor Aim the remote control towards this spot on the TV.
SOURCE
Toggles between all the available input sources. In the on-screen menu, use this
button as you would use the ENTER
button on the remote control.
MENU Displays an on-screen menu, the OSD (on screen display), of your TV’s features.
Adjusts the volume. In the OSD, use the
buttons as you would use the
and buttons on the remote control.
Changes the channels. In the OSD, use the
buttons as you would use the
and buttons on the remote control.
Power Indicator Blinks and turns off when the power is on and lights up in standby mode.
(Power)
Turns the TV on or off.
Standby mode
Do not leave your TV in standby mode for long periods of time (when you are away on a holiday, for example). A small amount
of electric power is still consumed even when the power button is turned off. It is best to unplug the power cord.
Speakers
Power Indicator
Remote control sensor
[PC6500_XC]BN68-02807A-02L09.indb 5 2010-09-29 오전 9:47:58
6
Getting Started
English
Viewing the Remote Control
This is a special remote control for the visually impaired persons and has Braille points on the Power, Channel and
Volume buttons.
Installing batteries (Battery size: AAA)
NOTE
x
Use the remote control within 23 feet from the TV.
x
Bright light may affect the performance of the remote control.
Avoid using nearby special fluorescent light or neon signs.
x
The colour and shape may vary depending on the model.
CH LIST
MUTE
POWER
SOURCE
PRE-CH
MENU
TOOLS
RETURN
AD
P.SIZE
SUBT.
DUAL
EXIT
INFO
TTX/MIX
A B C D
INTERNET
MEDIA.P
CONTENT
GUIDE
ON/OFF
I-II
@ T V
Turns the TV on and off.
Displays and selects the available video
sources (p. 10).
Turns the remote control light on or
off. When on, the buttons become
illuminated for a moment when pressed.
(Using the remote control with this button
set to ON will reduce the battery usage
time.)
Returns to the previous channel.
Cuts off the sound temporarily.
Changes channels.
Displays channel lists on the screen
(p. 13).
Displays the EPG (Electronic Programme
Guide) (p.11).
Displays information on the
TV screen.
Exits the menu.
Have direct access to channels.
Adjusts the volume.
Alternately select Teletext ON, Double,
Mix or OFF.
Opens the OSD.
Quickly select frequently used functions.
Displays the Content View, which
includes Guide, Internet@TV, Media
Play, and AllShare.
Returns to the previous menu.
Selects the on-screen menu items and
changes the values seen on the menu.
These buttons are for the Channel
Manager, Internet@TV, Media Play
menu, etc.
Use these buttons in Media Play
and Anynet+ modes (p. 32, 39).
(
: Controls recording for Samsung
recorders that have the Anynet+ feature)
MEDIA.P: Displays Media Play (p. 32).
INTERNET@TV: Link to various internet
services (p. 42).
Dual
-
: Sound effect selection (p. 19).
AD: Turns the audio description on and
off (p. 18). This is not available in some
locations.
P.SIZE: Selects the picture size (p. 16).
SUBT.: Displays digital subtitles (p. 21).
[PC6500_XC]BN68-02807A-02L09.indb 6 2010-09-29 오전 9:47:59
9
English
02 Connections
Using a Component (up to 1080p) or Audio/Video (480i only) and Scart Cable
Available devices: DVD, Blu-ray player, cable box, STB satellite receiver, VCR
In Ext. mode, DTV Out supports MPEG SD Video and Audio only.
To obtain the best picture quality, the Component connection is recommended over the A/V connection.
Connecting to an Audio Device
Using an Optical (Digital) or Audio (Analogue) Cable or Headphone Connections
Available devices: digital audio system, amplifier, DVD home theatre
DIGITAL AUDIO OUT (OPTICAL)
x
When a digital audio system is connected to the DIGITAL AUDIO OUT (OPTICAL) jack, decrease the volume
of both the TV and the system.
x
5.1 CH (channel) audio is available when the TV is connected to an external device supporting 5.1 CH.
x
When the receiver (home theatre) is set to on, you can hear sound output from the TV’s optical jack. When the
TV is receiving a DTV signal, the TV will send 5.1 CH sound to the home theatre receiver. When the source is
a digital component such as a DVD / Blu-ray player / cable box / STB (Set-Top-Box) satellite receiver and is
connected to the TV via HDMI, only 2 CH audio will be heard from the home theatre receiver. If you want to
hear 5.1 CH audio, connect the digital audio out jack from your DVD / Blu-ray player / cable box / STB satellite
receiver directly to an amplifier or home theatre.
Headphones
: You can connect your headphones to the headphones output on your set. While the
headphones are connected, the sound from the built-in speakers will be disabled.
x
Sound function may be restricted when connecting headphones to the TV.
x
Headphone volume and TV volume are adjusted separately.
PR PB Y
COMPONENT OUT
VIDEO OUTAUDIO OUT
R-AUDIO-L
AUDIO OUT
R-AUDIO-L
EXT
Y
W
R
W
R
R
G
B
R
G
B
W R
Y
W R
R
B
G
Y
WRWR
VCR
DVDBlu-ray player
RedRed WhiteWhite YellowRed Blue Green
OPTICAL
Digital Audio System
[PC6500_XC]BN68-02807A-02L09.indb 9 2010-09-29 오전 9:48:02
11
English
03 Basic Features
Basic Features
How to Navigate Menus
Before using the TV, follow the steps below to learn how to
navigate the menu and select and adjust different functions.
1 ENTER
/ Direction button: Move the cursor and
select an item. Confirm the setting.
2 RETURN button: Returns to the previous menu.
3 MENU button: Displays the main on-screen menu.
4 EXIT button: Exits the on-screen menu.
How to Operate the OSD (On Screen Display)
The access step may differ depending on the selected menu.
1
MENU
The main menu options appear on
the screen:
Picture, Sound, Channel, Setup,
Input, Application, Support.
2
/ Select an icon with the or
button.
3
ENTER
Press ENTER
to access the
sub-menu.
4
/
Select the desired submenu with
the or button.
5
/
Adjust the value of an item with the
or button. The adjustment in
the OSD may differ depending on
the selected menu.
6
ENTER
Press ENTER
to complete the
configuration.
7
EXIT
Press EXIT.
Using the INFO button (Now & Next guide)
The display identifies the current channel
and the status of certain audio-video
settings.
The Now & Next guide shows daily TV
programme information for each channel
according to the broadcasting time.
y Scroll , to view information for a
desired programme while watching the
current channel.
y Scroll , to view information for other channels. If you
want to move to the currently selected channel, press
the ENTER
button.
DTV Air
15
DEF
18:00 ~ 6:00
Life On Venus Avenue
Unclassified
No Detaild Information
E
Planning Your Viewing
Guide
The EPG (Electronic Programme Guide)
information is provided by broadcasters.
Using programme schedules provided
by broadcasters, you can specify
programmes you want to watch in
advance so that the channel automatically
changes to the selected programme
channel at the specified time. Programme
entries may appear blank or out of date depending on a
channel status.
Using Channel View
C
H LI
S
T
MUTE
P
O
WE
R
SOU
R
CE
PRE-CH
MENU
L
RETURN
AD
P
.SIZE
SU
BT
.
DUA
L
EXIT
I
NF
O
T
TX
/
MI
X
A
B
C
D
INTERNET
@
T V
MEDIA.P
CO
NTEN
T
G
UIDE
O
N/
O
F
F
I
-
II
3
4
2
1
INFO
GUIDE
18:11 Thu 6 Jan
Watch
Information
DTV Air 800 five
Home and Away
18:00 - 18:30
Drama
Dani is devastated when scott makes clear his views on marriage...
27
28
800
24
16
6
Discovery
DiscoveryH&L
five
price-drop.tv
QVC
R4DTT
American Chopper
Programmes resume at 06:00
Home and...
No Information
QVC Selection
No Information
Tine Team
Fiv...
18:00 - 19:00 19:00 - 20:00
)
Family Affairs
)
Dark Angel
800 five
View Mode +24 Hours Ch. Mode Information
Page

Watch
2:10 Tue 1 Jun
Guide
Channel View - TV
1 2 3 4 5 6
Today
[PC6500_XC]BN68-02807A-02L09.indb 11 2010-09-29 오전 9:48:05
13
English
03 Basic Features
3. After you have changed the settings, the channel list
for each group can be viewed in my channels.
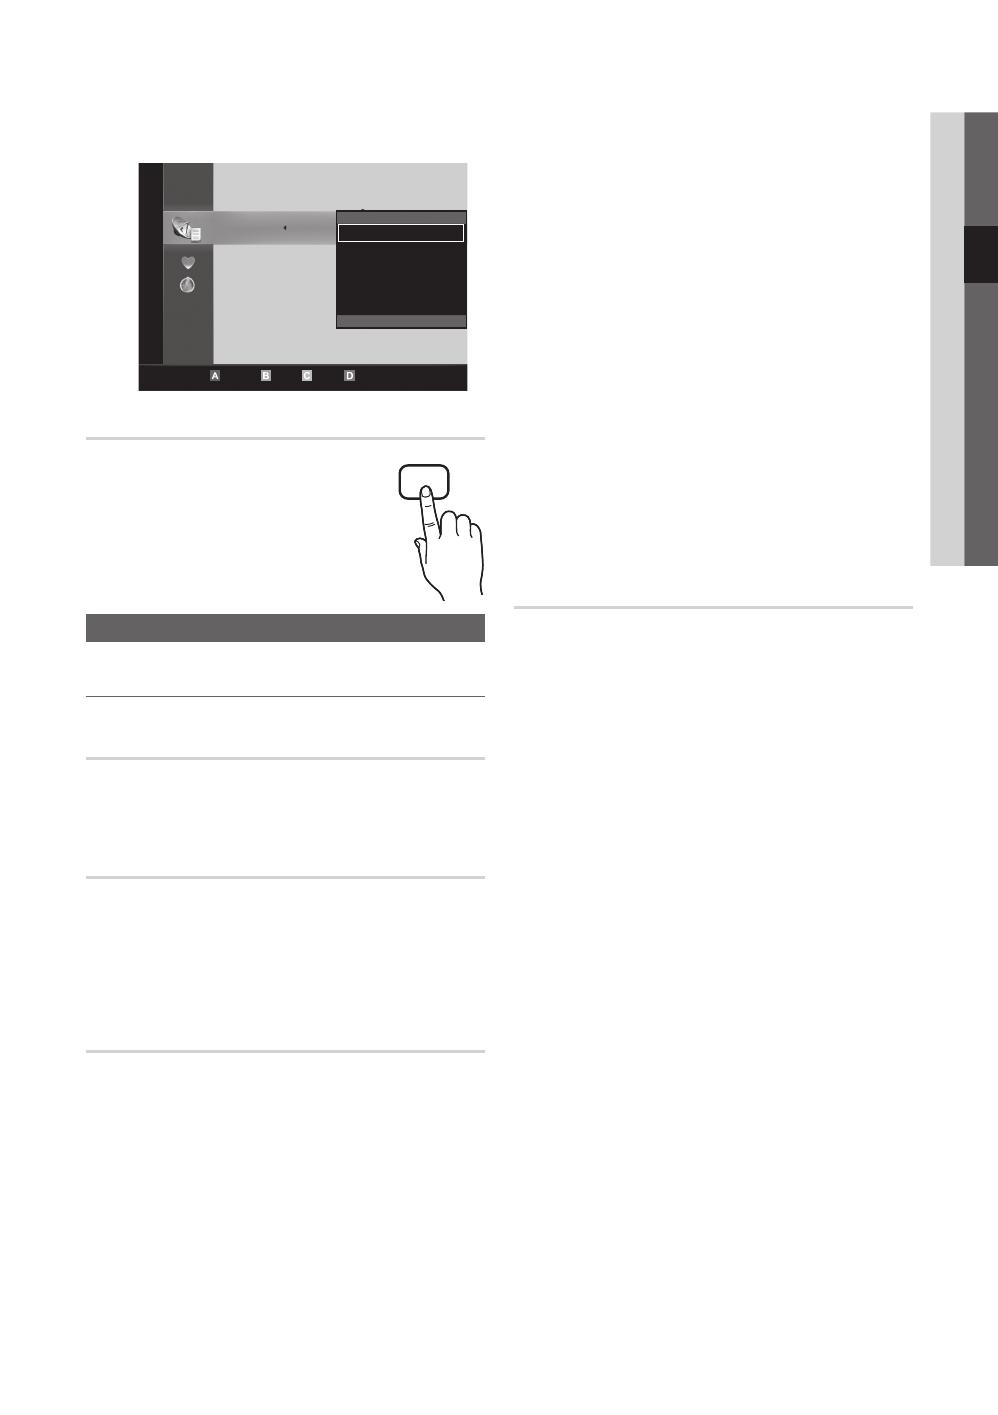
Channel List
You can see all the channels searched.
Channel Menu
Retuning Channels
Antenna (Air / Cable)
Before your television can begin memorizing the available
channels, you must specify the type of signal source that is
connected to the TV (i.e. an Air or a Cable system).
Country
The PIN input screen appears. Enter your 4 digit PIN number.
Digital Channel: Change the country for digital
channels.
Analogue Channel: Change the country for analogue
channels.
Auto Store
Scans for a channel automatically and stores in the TV.
Automatically allocated programme numbers may not
correspond to actual or desired programme numbers. If
a channel is locked using the Child Lock function, the
PIN input window appears.
Antenna Source (Air / Cable)
: Select the
antenna source to memorise.
Channel Source (Digital & Analogue / Digital /
Analogue): Select the channel source to memorise.
When selecting Cable Digital & Analogue or Digital:
Provide a value to scan for cable channels.
Search Mode (Full / Network / Quick): Scans for all
channels with active broadcast stations and stores them
in the TV.
If you select Quick, you can set up the Network,
Network ID, Frequency, Modulation and
Symbol Rate manually by pressing the button on
the remote control.
Network (Auto / Manual): Selects the Network ID
setting mode among Auto or Manual.
Network ID: When Network is Manual, you can set up
Network ID using the numeric buttons.
Frequency: Displays the frequency for the channel.
(differs in each country)
Modulation: Displays available modulation values.
Symbol Rate: Displays available symbol rates.
Manual Store
Scans for a channel manually and stores in the TV.
If a channel is locked using the Child Lock function,
the PIN input window appears.
Digital Channel: When scanning has finished, channels
are updated in the channel list.
When selecting Antenna Air: Channel,
Frequency, Bandwidth
When selecting Antenna Cable: Frequency,
Modulation, Symbol Rate
Analogue Channel (Programme, Colour System,
Sound System, Channel, Search): If there is abnormal
sound or no sound, reselect the sound standard
required.
Channel mode
x
P (programme mode): When tuning is complete,
the broadcasting stations in your area have been
assigned to position numbers from P0 to P99. You
can select a channel by entering the position number
in this mode.
x
C (aerial channel mode) / S (cable channel mode):
These two modes allow you to select a channel
by entering the assigned number for each aerial
broadcasting station or cable channel.
CH LIST
c 1 1futech
2 * 24ore.tv
15 abc1
3 BBC World
23 bid-up.tv
33 Boonerang
32 Cartoon Nwk
5 Class News
4 \ Coming Soon
27 Discovery
r
Air Antenna Zoom Select Sort
Page

Tools
Channels
Edit My Channels
Lock
Timer Viewing
Edit Channel Number
Delete
Deselect All
All
TV
Radio
Data/Other
Analogue
[PC6500_XC]BN68-02807A-02L09.indb 13 2010-09-29 오전 9:48:08
22
English
Basic Features
1. Purchase a CI CAM module at your nearest dealer or by
phone.
2. Firmly insert the “CI or CI+ CARD” into the CAM in the
direction of the arrow.
3. Insert the CAM with the “CI or CI+ CARD” into the
common interface slot, in the direction of the arrow so
that it aligns parallel with the slot.
4. Check if you can see a picture on a scrambled signal
channel.
Wireless Remote Control
Turn wireless remote controls on or off or give permission to
wireless remote controls.
Picture In Picture (PIP)
PIP
You can watch the TV tuner and one external video source
simultaneously. PIP (Picture-in-Picture) does not function in
the same mode.
NOTE
x
For PIP sound, refer to the Sound Select
instructions.
x
If you turn the TV off while watching in PIP mode, the
PIP window will disappear.
x
You may notice that the picture in the PIP window
becomes slightly unnatural when you use the main
screen to view a game or karaoke.
x
While Internet@TV is in operation, the PIP function
cannot be used.
x
PIP settings
Main picture Sub picture
Component, HDMI1/DVI,
HDMI2, HDMI3, HDMI4,
PC
TV
PIP (Off / On): Activate or deactivate the PIP function.
Channel: Select the channel for the sub-screen.
Size (
/
): Select a size for the sub-picture.
Position (
/
/
/
): Select a position for the
sub-picture.
Sound Select (Main / Sub): You can choose the
desired sound (Main / Sub) in PIP mode.
Support Menu
Self Diagnosis
Self Diagnostic might take few seconds, this is part of
the normal operation of the TV.
Picture Test (Yes / No): Use to check for picture
problems.
Sound Test (Yes / No): Use the built-in melody sound to
check for sound problems.
If you hear no sound from the TV’s speakers,
before performing the sound test, make sure
Speaker Select is set to TV Speaker in the
Sound menu.
The melody will be heard during the test even if
Speaker Select is set to External Speaker or the
sound is muted by pressing the MUTE button.
Signal Information: (digital channels only) HDTV
channel’s reception quality is either perfect or the
channels are unavailable. Adjust your antenna to
increase signal strength.
Troubleshooting: If the TV seems to have a problem,
refer to this description.
If none of these troubleshooting tips apply, contact
the Samsung customer service centre.
Software Upgrade
Software Upgrade can be performed via a broadcasting
signal or by network connection or downloading the latest
firmware from “www.samsung.com,” to a USB memory
device.
Current Version the software already installed in the TV.
Software is represented as “Year/Month/Day_Version”.
Software Upgrade
By USB
By Online
By Channel
Standby Mode Upgrade : Off
Alternative Software 2010/01/15_00000
Move

Enter

Return
Current Version 2010/01/18_000001
[PC6500_XC]BN68-02807A-02L09.indb 22 2010-09-29 오전 9:48:15
24
English
Advanced Features
Connecting to a PC
Using an HDMI/DVI Cable / a D-sub Cable
Display Modes (D-Sub and HDMI/DVI Input)
Optimal resolution is 1920 X 1080 @ 60 Hz.
Mode Resolution
Horizontal Frequency
(KHz)
Vertical Frequency
(Hz)
Pixel Clock Frequency
(MHz)
Sync Polarity
(H / V)
IBM
640 x 350
720 x 400
31.469
31.469
70.086
70.087
25.175
28.322
+/-
-/+
MAC
640 x 480
832 x 624
1152 x 870
35.000
49.726
68.681
66.667
74.551
75.062
30.240
57.284
100.000
-/-
-/-
-/-
VESA CVT
720 x 576
1152 x 864
1280 x 720
1280 x 960
35.910
53.783
56.456
75.231
59.950
59.959
74.777
74.857
32.750
81.750
95.750
130.000
-/+
-/+
-/+
-/+
VESA DMT
640 x 480
640 x 480
640 x 480
800 x 600
800 x 600
800 x 600
1024 x 768
1024 x 768
1024 x 768
1152 x 864
1280 x 1024
1280 x 1024
1280 x 720
1280 x 800
1280 x 800
1280 x 960
1360 x 768
1440 x 900
1440 x 900
1600 x 1200
1680 x 1050
31.469
37.861
37.500
37.879
48.077
46.875
48.363
56.476
60.023
67.500
63.981
79.976
45.000
49.702
62.795
60.000
47.712
55.935
70.635
75.000
65.290
59.940
72.809
75.000
60.317
72.188
75.000
60.004
70.069
75.029
75.000
60.020
75.025
60.000
59.810
74.934
60.000
60.015
59.887
74.984
60.000
59.954
25.175
31.500
31.500
40.000
50.000
49.500
65.000
75.000
78.750
108.000
108.000
135.000
74.250
83.500
106.500
108.000
85.500
106.500
136.750
162.000
146.250
-/-
-/-
-/-
+/+
+/+
+/+
-/-
-/-
+/+
+/+
+/+
+/+
+/+
-/+
-/+
+/+
+/+
-/+
-/+
+/+
-/+
VESA GTF
1280 x 720
1280 x 1024
52.500
74.620
70.000
70.000
89.040
128.943
-/+
-/-
VESA DMT / DTV CEA
1920 x 1080p 67.500 60.000 148.500 +/+
NOTE
x
For HDMI/DVI cable connection, you must use the HDMI IN 1(DVI) jack.
x
The interlace mode is not supported.
x
The set might operate abnormally if a non-standard video format is selected.
x
Separate and Composite modes are supported. SOG(Sync On Green) is not supported.
AUDIO OUT
PC OUT
AUDIO OUT
DVI OUT
[PC6500_XC]BN68-02807A-02L09.indb 24 2010-09-29 오전 9:48:19
26
English
Advanced Features
Network Setup (Auto)
Use the Automatic Network Setup when connecting your
TV to a network that supports DHCP. To set up your TV’s
cable network connection automatically, follow these steps:
How to set up automatically
1. Connect your TV to your LAN as described in the
previous section.
2. Turn on your TV, press the MENU button on your
remote, use the or button to select Setup, and
then press the ENTER
button.
3. Use the or button to select Network in the Setup
menu, and then press the ENTER
button. The
Network screen appears.
4. On the Network screen, select Network Type.
5. Set Network Type to Wired.
6. Select Network Setup. The Network Setup screen
appears.
7. Set Internet Protocol Setup to Auto.
8. Auto acquires and enters the needed Internet values
automatically.
9. When done, press the RETURN button on your remote.
10. If the Network Function has not acquired the network
connection values, go to the directions for Manual.
Network Setup (Manual)
Use the Manual Network Setup when connecting your TV to
a network that requires a Static IP address.
Getting the Network Connection Values
To get the Network connection values on most Windows
computers, follow these steps:
1. Right click the Network icon on the bottom right of the
screen.
2. In the pop-up menu that appears, click Status.
3. On the dialog that appears, click the Support tab.
4. On the Support Tab, click the Details button. The
Network connection values are displayed.
How to set up manually
To set up your TV’s cable network connection manually,
follow these steps:
1. Follow Steps 1 through 6 in the “How to set up
automatically” procedure.
2. Set Internet Protocol Setup to Manual.
3. Press the button on your remote to go to the first
entry field.
4. Enter the IP Address, Subnet Mask, Gateway, and
DNS Server values. Use the number buttons on your
remote to enter numbers and the arrow buttons to move
from one entry field to another.
5. When done, press the RETURN button on your remote.
6. Select Network Test to check the Internet connectivity.
Network Setup
IP Address :
Subnet Mask :
Gateway :
DNS : Auto
DNS Server :
Move

Enter

Return
Internet Protocol Setup : Auto
Network
Move

Enter

Return
Network Type : Wired
Network Setup
Network Test
SWL(Samsung Wireless Link) : Off
SWL connect
[PC6500_XC]BN68-02807A-02L09.indb 26 2010-09-29 오전 9:48:23
28
English
Advanced Features
Network Setup (Samsung Auto
Configuration)
This function is available in APs (Access Points) that support
Samsung Auto Configuration. If your AP does not, you can
connect through PBC (WPS), auto, or manually.
This function is available when SWL(Samsung
Wireless Link) is set to Off.
You can check for equipment that supports Samsung
Auto Configuration on www.samsung.com.
How to set up using Auto Configuration
1. Place the AP and TV next to each other and turn them
on.
Because the booting times of applications differ,
you may have to wait for approximately 2 minutes.
If the LAN cable connected the WAN port of AP
during Samsung Auto Configuration, you are able
to complete until internet connection test. If you
do not connect, Samsung Auto Configuration will
check only device connecting of AP (Not check
internet).
2. After 2 minutes, connect the Samsung Wireless LAN
Adapter to the TV. When the Samsung Wireless LAN
Adapter is established, the pop-up window appears.
3. As soon as a connection is established, place the AP in
parallel with the Samsung Wireless LAN Adapter giving a
gap no larger than 25cm.
4. Wait until the connection is automatically established.
If Samsung Auto Configuration does not connect
your TV to your AP, a pop-up window appears
on the screen notifying you of the failure. Reset
the AP, and then try again. If the connection fails
again, choose one of the other connection setup
methods, PBC (WPS), auto, or manual.
5. After the connection is established, locate the sharer at
the desired location.
If the AP settings have been changed or it is the
first time you use the new AP after purchase, you
need to set up again beginning from Step 1.
Notice
The picture may appear corrupted or have static for some channels when the TV is connected to the Samsung Wireless LAN
Adapter. In such a case, connect the Samsung Wireless LAN Adapter using a USB cable in a place that is not affected by
radio interference.
The Samsung Wireless LAN Adapter should be installed
in an interference-free area in order to avoid interference
between the adapter and tuner.
Method: Connect via an extension cable
or
[PC6500_XC]BN68-02807A-02L09.indb 28 2010-09-29 오전 9:48:26
32
English
Advanced Features
Media Play
Connecting a USB Device
1. Turn on your TV.
2. Connect a USB device containing photo, music and/or movie fi les to the USB 1
(HDD) or USB 2 port on the back or side panel of the TV.
3. When USB is connected to the TV, popup window appears. Then you can select
Media Play.
Connecting to the PC through network
You can play pictures, music and videos saved on your PC through a network connection in the Media Play mode.
If you use Media Play through saved file on your PC, you should download “PC Share Manager” and users manual from
“www.samsung.com.
1. For more information on how to confi gure your network, refer to “Network Connection (p. 25)”
You are recommended to locate both TV and PC in same subnet. The fi rst 3 parts of the subnet address of the TV and
the PC IP addresses should be the same and only the last part (the host address) should be changed. (e.g. IP Address:
123.456.789.**)
2. Using a LAN cable, connect between the external modem and the PC onto which the Samsung PC Share Manager
programme will be installed.
You can connect the TV to the PC directly without connecting it through a Sharer (Router).
Enjoy photos, music and/or movie fi les saved on
a USB Mass Storage Class (MSC) device and/
or your PC.
LAN Cable
PC
External Modem
(ADSL/VDSL/Cable TV)
LAN
Samsung
Wireless
LAN
Adapter
Wireless IP sharer
TV Rear Panel
or
LAN Cable Modem Cable
LAN CableLAN Cable
SUM
Change Device
View Devices

Enter

Return
MediaPlay
Videos
USB Drive
TV Rear Panel
or
MEDIA.P
[PC6500_XC]BN68-02807A-02L09.indb 32 2010-09-29 오전 9:48:31
34
English
Advanced Features
Screen Display
Move to the file you desired using the up/down/right/left buttons and then press the ENTER
or
(Play) button. The file is
played.
Supports the View Devices and Home in Media Play homepage.
Videos
Playing Video
1. Press the or button to select Videos, then press the ENTER
button in the Media Play menu.
2. Press the /// button to select the desired file in the file list.
3. Press the ENTER
button or
(Play) button.
The selected file is displayed on the top with its playing time.
If video time information is unknown, play time and progress bar are not displayed.
During playing the video, you can search using the and button.
In this mode, you can enjoy movie clips contained on a Game,
but you cannot play the Game itself.
y Supported Subtitle Formats
Name File extension Format
MPEG-4 time-based text .ttxt XML
SAMI .smi HTML
SubRip .srt string-based
SubViewer .sub string-based
Micro DVD .sub or .txt string-based
Jan.10.2010
Jan.10.2010
Jan.10.2010
Jan.10.2010
Jan.10.2010
Jan.10.2010
Jan.10.2010
Jan.10.2010
Jan.10.2010
Jan.10.2010
/Movie 01.avi 1/1
Movie 01.avi
SUM
Movie 03.avi
Movie 05.avi
Movie 07.avi
Movie 09.avi
Movie 02.avi
Movie 04.avi
Movie 06.avi
Movie 08.avi
Movie 10.avi
Select Sorting

Tools
Information:
You can ascertain the selected
file name and the number of files
and page.
Sort List Section:
Displays sorting standard.
Sorting standard is
different depending on the
contents.
Operation Buttons
Red (Change Device): Selects a connected device.
Green (Preference): Sets the file preference. (not supported in Basic view)
Yellow (Select): Selects multiple files from file list. Selected files are marked with a symbol.
Blue (Sorting): Selects the sort list.
Tools: Displays the option menu.
Using the
(REW) or
(FF) button, file list can move to next or previous page.
File List Section:
You can confirm the files
and groups that is sorted by
each category.
Videos
Page
Change Device
Movie 01.avi
00:04:03 / 00:07:38 1/1
SUM
Chaptering

Jump

Tools

Return
[PC6500_XC]BN68-02807A-02L09.indb 34 2010-09-29 오전 9:48:34
35
English
04 Advanced Features
y Supported Video Formats
File Extention Container Video Codec Resolution
Frame rate
(fps)
Bit rate
(Mbps)
Audio Codec
*.avi
*.mkv
AVI
MKV
Divx 3.11 / 4.x / 5.1 / 6.0 1920x1080 6 ~ 30 8
MP3 / AC3 / LPCM /
ADPCM / DTS Core
XviD 1920x1080 6 ~ 30 8
H.264 BP / MP / HP 1920x1080 6 ~ 30 25
MPEG4 SP / ASP 1920x1080 6 ~ 30 8
Motion JPEG 800x600 6 ~ 30 8
*.asf ASF
Divx 3.11 / 4.x / 5.1 / 6.0 1920x1080 6 ~ 30 8
MP3 / AC3 / LPCM /
ADPCM / WMA
XviD 1920x1080 6 ~ 30 8
H.264 BP / MP / HP 1920x1080 6 ~ 30 25
MPEG4 SP / ASP 1920x1080 6 ~ 30 8
Motion JPEG 800x600 6 ~ 30 8
*.wmv ASF Window Media Video v9 1920x1080 6 ~ 30 25 WMA
*.mp4 MP4
H.264 BP / MP / HP 1920x1080 6 ~ 30 25
MP3 / ADPCM / AACMPEG4 SP / ASP 1920x1080 6 ~ 30 8
XVID 1920x1080 6 ~ 30 8
*.3gp 3GPP
H.264 BP / MP / HP 1920x1080 6 ~ 30 25
ADPCM / AAC / HE-AAC
MPEG4 SP / ASP 1920x1080 6 ~ 30 8
*.vro
VRO
VOB
MPEG1 1920x1080 24 / 25 / 30 30
AC3 / MPEG / LPCM
MPEG2 1920x1080 24 / 25 / 30 30
*.mpg
*.mpeg
PS
MPEG1 1920x1080 24 / 25 / 30 30
AC3 / MPEG / LPCM / AACMPEG2 1920x1080 24 / 25 / 30 30
H.264 1920x1080 6 ~ 30 25
*.ts
*.tp
*.trp
TS
MPEG2 1920x1080 24 / 25 / 30 30
AC3 / AAC / MP3 / DD+ /
HE-AAC
H.264 1920x1080 6 ~ 30 25
VC1 1920x1080 6 ~ 30 25
Other Restrictions
NOTE
x
If there are problems with the contents of a codec, the codec will not be supported.
x
If the information for a Container is incorrect and the file is in error, the Container will not be able to play
correctly.
x
Sound or video may not work if the contents have a standard bitrate/frame rate above the compatible Frame/sec
listed in the table above.
x
If the Index Table is in error, the Seek (Jump) function is not supported.
Video Decoder Audio Decoder
Supports up to H.264, Level 4.1
H.264 FMO / ASO / RS, VC1 SP / MP / AP L4 and AVCHD are not
supported.
XVID, MPEG4 SP, ASP:
Below 1280 x 720: 60 frame max
Above 1280 x 720: 30 frame max
GMC 2 over is not supported.
Only Samsung Techwin MJPEG is supported.
H.263 is not supported.
Supports up to WMA 7, 8, 9, STD
WMA 9 PRO does not support 2 channel excess multi channel or
lossless audio.
WMA sampling rate 22050Hz mono is not supported.
[PC6500_XC]BN68-02807A-02L09.indb 35 2010-09-29 오전 9:48:35
36
English
Advanced Features
Playing movie file continuously (Resume Play)
If you exit the playing Videos function, it can be played later from the point where it was stopped.
If you press the ENTER
button (Chaptering) during playing the file, you can explore scene divided into 5 chapters
you want.
1. Select the movie file you want to play continuously by pressing
the or button to select it from the file list section.
2. Press the
(Play) / ENTER
button.
3. Select Play Continuously (Resume Play) by pressing the Blue
button. The Movie will begin to play from where it was stopped.
The Blue button is available when resuming play.
If the Cont. movie play help function is set to On in the
Settings menu, a pop-up message will appear when you
resume play a movie file.
Music
Playing Music
1. Press the or button to select Music, then press the
ENTER
button in the Media Play menu.
2. Press the /// button to select the desired file in the file
list.
3. Press the ENTER
button or
(Play) button.
During playing the music, you can search using the and
button.
(REW) and
(FF) buttons do not function during play.
Only displays the files with MP3 and PCM file extension. Other
file extensions are not displayed, even if they are saved on the
same USB device.
If the sound is strange when playing MP3 files, adjust the Equalizer in the Sound menu. (An over-modulated MP3 file
may cause a sound problem.)
You can create My Playlist selecting the desired music in the file, and can play My Playlist.
Photos
Viewing a Photo (or Slide Show)
1. Press the or button to select Photos, then press the
ENTER
button in the Media Play menu.
2. Press the /// button to select the desired file in the file
list.
3. Press the ENTER
button or
(Play) button.
While a photo list is displayed, press the
(Play) /
ENTER
button on the remote control to start slide show.
All files in the file list section will be displayed in the slide show.
During the slide show, files are displayed in order from
currently being shown.
Music files can be automatically played during the Slide Show if
the Background Music is set to On.
The BGM Mode cannot be changed until the BGM has finished
loading.
Image1024.jpg 1024x768 2010/2/1 3/15
SUM
Pause

Previous/Next

Tools

Return
Normal
Movie 01.avi
00:04:03 / 00:07:38 1/1
SUM
Play continuously

Chaptering

Jump

Tools

Return
Resumes playing from the last viewed
scene.
Play continuously
3/15
I Love you
Jhon
Music 1
No Singer
Music 2
No Singer
Music 3
No Singer
Music 4
No Singer
Music 5
No Singer
I Love You
Jhon
1st Album
Pop
2010
4.2MB
01:10 / 04:02
SUM
Pause

Jump

Tools

Return
Playlist
[PC6500_XC]BN68-02807A-02L09.indb 36 2010-09-29 오전 9:48:37
39
English
04 Advanced Features
Anynet+
What is Anynet+?
Anynet+ is a function that enables you to control all connected Samsung devices that support Anynet+ with your Samsung
TV’s remote. The Anynet+ system can be used only with Samsung devices that have the Anynet+ feature. To be sure your
Samsung device has this feature, check if there is an Anynet+ logo on it.
To connect to a Samsung Home Theatre
1. Connect the HDMI IN (1(DVI), 2, 3 or 4) jack on the TV and the HDMI OUT jack of the corresponding Anynet+ device
using an HDMI cable.
2. Connect the HDMI IN jack of the home theatre and the HDMI OUT jack of the corresponding Anynet+ device using an
HDMI cable.
NOTE
x
Connect the Optical cable between the DIGITAL AUDIO OUT (OPTICAL) jack on your TV and the Digital Audio Input
on the Home Theatre.
x
When following the connection above, the Optical jack only outputs 2 channel audio. You will only hear sound from
the Home Theatre’s Front, Left and Right speakers and the subwoofer. If you want to hear 5.1 channel audio, connect
the DIGITAL AUDIO OUT (OPTICAL) jack on the DVD / Satellite Box (i.e. Anynet Device 1 or 2) directly to the
Amplifier or Home Theatre, not the TV.
x
You can connect only one Home Theatre.
x
You can connect an Anynet+ device using the HDMI cable. Some HDMI cables may not support Anynet+ functions.
x
Anynet+ works when the AV device supporting Anynet+ is in the standby or on status.
x
Anynet+ supports up to 12 AV devices in total. Note that you can connect up to 3 devices of the same type.
TV Rear Panel
Home Theatre
Anynet+
Device 1
Anynet+ Device
2, 3, 4
HDMI Cable
HDMI Cable
HDMI Cable
Optical Cable
[PC6500_XC]BN68-02807A-02L09.indb 39 2010-09-29 오전 9:48:40
42
English
Advanced Features
Internet@TV
Getting Started with Internet@TV
NOTE
x
Configure the network settings before using Internet@TV. For more information, refer to “Network Connection”
(p. 25).
x
Unsupported fonts within the provider’s content will not display normally.
x
Slow responses and/or interruptions may occur, depending on your network conditions.
x
English may be only supported in application service depending on region.
x
This feature is not available in some locations.
x
If you experience a problem using a application, please contact the content provider.
x
According to circumstances of the contents provider, an application’s updates or the application itself may be
discontinued.
x
Depending on your country’s regulations, some applications may have limited service or not be supported.
Screen Display
Internet@TV brings useful and entertaining
contents and services directly from the web to
your TV.
INTERNET
@ TV
Recommended
Samsung Apps Settings
My Applications
Login Mark as Favourite Sort by

Return
by Date 1/1
Recommended Applications:
Displays the recommended service by
Samsung. You are not able to add or
delete a service in this list.
Downloaded Applications:
Displays the downloaded applications
through the Samsung Apps.
TV Screen:
Displays the current channel.
Information:
Displays notices, new
applications, and
advertisements brought to
you by Samsung product
introductions.
Application service:
You can experience
various service by provided
samsung.
Internet@TV Settings:
Edit and confi gure applications
and Internet@TV settings.
Controls:
Red (Login): To log in to Internet@TV.
Green (Mark as Favourite): To mark the applications as a favourite.
Blue (Sort by): To sort the applications.
Return: To return to the previous menu.
The colour buttons may work differently depending on the application.
Login Mark as Favourite Sort by

Return
My Applications
Recommended
by Date 1/1
Settings
Samsung Apps
[PC6500_XC]BN68-02807A-02L09.indb 42 2010-09-29 오전 9:48:43
48
English
Other Information
Assembling the Cables
Stand Type
Enclose the cables in the Cable Tie so that the cables are not visible through the transparent stand.
3
1
2
1
2
3
Wall-Mount Type
Do not pull the cables too hard when arranging them. This may cause damage to the product’s connection terminals.
Installing the Wall Mount
Assembling the Blanking Bracket
When installing the TV onto a wall, attach the Blanking Bracket as shown.
Blanking Bracket
[PC6500_XC]BN68-02807A-02L09.indb 48 2010-09-29 오전 9:48:52
55
English
05 Other Information
Specifications
Display Resolution 1920 x 1080
Environmental Considerations
Operating Temperature
Operating Humidity
Storage Temperature
Storage Humidity
10°C to 40°C (50°F to 104°F)
10% to 80%, non-condensing
-20°C to 45°C (-4°F to 113°F)
5% to 95%, non-condensing
TV System Analogue: B/G, D/K, L, I (Depending on your country selection)
Digital: DVB-T/DVB-C
Colour/Video System Analogue: PAL, SECAM, NTSC-4.43, NTSC-3.58, PAL60
Digital: MPEG-2 MP@ML, MPEG-4, H.264/AVC MP@L3, [email protected], [email protected]
Sound System BG. OK NICAM. MPEGl
HDMI IN 1 ~ 4 Video: 1080 24p, 1080p, 1080i, 720p, 576p, 576i, 480p, 480i
Audio: 2Ch Linear PCM 32/44.1/48kHz, 16/20/24bits.
Analogue audio input (HDMI IN1 only)
PC input (HDMI IN1 only)
Stand Swivel (Left / Right) -20˚ ~ 20˚
Model Name PS50C6500 PS58C6500
Screen Size
(Diagonal) 50 inches 58 inches
Sound
(Output) 10 W X 2 15 W X 2
Dimensions (WxDxH)
Body
With stand
1212.0 x 36.8 x 743.5 mm
1212.0 x 290.0 x 808.0 mm
1390.5 x 36.8 x 844.5 mm
1390.5 x 335.0 x 911.0 mm
Weight
Without Stand
With Stand
24.5 kg
28.8 kg
32.5 kg
39.3 kg
Design and specifications are subject to change without prior notice.
For information about power supply, and more about power consumption, refer to the label attached to the product.
Correct Disposal of This Product (Waste Electrical & Electronic Equipment)
(Applicable in the European Union and other European countries with separate collection systems)
This marking on the product, accessories or literature indicates that the product and its electronic accessories (e.g. charger,
headset, USB cable) should not be disposed of with other household waste at the end of their working life. To prevent possible
harm to the environment or human health from uncontrolled waste disposal, please separate these items from other types of waste
and recycle them responsibly to promote the sustainable reuse of material resources. Household users should contact either the
retailer where they purchased this product, or their local government office, for details of where and how they can take these items
for environmentally safe recycling. Business users should contact their supplier and check the terms and conditions of the purchase
contract. This product and its electronic accessories should not be mixed with other commercial wastes for disposal.
Correct disposal of batteries in this product
(Applicable in the European Union and other European countries with separate battery return systems)
This marking on the battery, manual or packaging indicates that the batteries in this product should not be disposed of with other
household waste at the end of their working life. Where marked, the chemical symbols Hg, Cd or Pb indicate that the battery
contains mercury, cadmium or lead above the reference levels in EC Directive 2006/66. If batteries are not properly disposed of,
these substances can cause harm to human health or the environment. To protect natural resources and to promote material
reuse, please separate batteries from other types of waste and recycle them through your local, free battery return system.
[PC6500_XC]BN68-02807A-02L09.indb 55 2010-09-29 오전 9:48:59
  • Page 1 1
  • Page 2 2
  • Page 3 3
  • Page 4 4
  • Page 5 5
  • Page 6 6
  • Page 7 7
  • Page 8 8
  • Page 9 9
  • Page 10 10
  • Page 11 11
  • Page 12 12
  • Page 13 13
  • Page 14 14
  • Page 15 15
  • Page 16 16
  • Page 17 17
  • Page 18 18
  • Page 19 19
  • Page 20 20
  • Page 21 21
  • Page 22 22
  • Page 23 23
  • Page 24 24
  • Page 25 25
  • Page 26 26
  • Page 27 27
  • Page 28 28
  • Page 29 29
  • Page 30 30
  • Page 31 31
  • Page 32 32
  • Page 33 33
  • Page 34 34
  • Page 35 35
  • Page 36 36
  • Page 37 37
  • Page 38 38
  • Page 39 39
  • Page 40 40
  • Page 41 41
  • Page 42 42
  • Page 43 43
  • Page 44 44
  • Page 45 45
  • Page 46 46
  • Page 47 47
  • Page 48 48
  • Page 49 49
  • Page 50 50
  • Page 51 51
  • Page 52 52
  • Page 53 53
  • Page 54 54
  • Page 55 55
  • Page 56 56
  • Page 57 57
  • Page 58 58
  • Page 59 59
  • Page 60 60
  • Page 61 61
  • Page 62 62
  • Page 63 63
  • Page 64 64
  • Page 65 65
  • Page 66 66
  • Page 67 67
  • Page 68 68
  • Page 69 69
  • Page 70 70
  • Page 71 71
  • Page 72 72
  • Page 73 73
  • Page 74 74
  • Page 75 75
  • Page 76 76
  • Page 77 77
  • Page 78 78
  • Page 79 79
  • Page 80 80
  • Page 81 81
  • Page 82 82
  • Page 83 83
  • Page 84 84
  • Page 85 85
  • Page 86 86
  • Page 87 87
  • Page 88 88
  • Page 89 89
  • Page 90 90
  • Page 91 91
  • Page 92 92
  • Page 93 93
  • Page 94 94
  • Page 95 95
  • Page 96 96
  • Page 97 97
  • Page 98 98
  • Page 99 99
  • Page 100 100
  • Page 101 101
  • Page 102 102
  • Page 103 103
  • Page 104 104
  • Page 105 105
  • Page 106 106
  • Page 107 107
  • Page 108 108
  • Page 109 109
  • Page 110 110
  • Page 111 111
  • Page 112 112
  • Page 113 113
  • Page 114 114
  • Page 115 115
  • Page 116 116
  • Page 117 117
  • Page 118 118
  • Page 119 119
  • Page 120 120
  • Page 121 121
  • Page 122 122
  • Page 123 123
  • Page 124 124
  • Page 125 125
  • Page 126 126
  • Page 127 127
  • Page 128 128
  • Page 129 129
  • Page 130 130
  • Page 131 131
  • Page 132 132
  • Page 133 133
  • Page 134 134
  • Page 135 135
  • Page 136 136
  • Page 137 137
  • Page 138 138
  • Page 139 139
  • Page 140 140
  • Page 141 141
  • Page 142 142
  • Page 143 143
  • Page 144 144
  • Page 145 145
  • Page 146 146
  • Page 147 147
  • Page 148 148
  • Page 149 149
  • Page 150 150
  • Page 151 151
  • Page 152 152
  • Page 153 153
  • Page 154 154
  • Page 155 155
  • Page 156 156
  • Page 157 157
  • Page 158 158
  • Page 159 159
  • Page 160 160
  • Page 161 161
  • Page 162 162
  • Page 163 163
  • Page 164 164
  • Page 165 165
  • Page 166 166
  • Page 167 167
  • Page 168 168
  • Page 169 169
  • Page 170 170
  • Page 171 171
  • Page 172 172
  • Page 173 173
  • Page 174 174
  • Page 175 175
  • Page 176 176
  • Page 177 177
  • Page 178 178
  • Page 179 179
  • Page 180 180
  • Page 181 181
  • Page 182 182
  • Page 183 183
  • Page 184 184
  • Page 185 185
  • Page 186 186
  • Page 187 187
  • Page 188 188
  • Page 189 189
  • Page 190 190
  • Page 191 191
  • Page 192 192
  • Page 193 193
  • Page 194 194
  • Page 195 195
  • Page 196 196
  • Page 197 197
  • Page 198 198
  • Page 199 199
  • Page 200 200
  • Page 201 201
  • Page 202 202
  • Page 203 203
  • Page 204 204
  • Page 205 205
  • Page 206 206
  • Page 207 207
  • Page 208 208
  • Page 209 209
  • Page 210 210
  • Page 211 211
  • Page 212 212
  • Page 213 213
  • Page 214 214
  • Page 215 215
  • Page 216 216
  • Page 217 217
  • Page 218 218
  • Page 219 219
  • Page 220 220
  • Page 221 221
  • Page 222 222
  • Page 223 223
  • Page 224 224
  • Page 225 225
  • Page 226 226
  • Page 227 227
  • Page 228 228
  • Page 229 229
  • Page 230 230
  • Page 231 231
  • Page 232 232
  • Page 233 233
  • Page 234 234
  • Page 235 235
  • Page 236 236
  • Page 237 237
  • Page 238 238
  • Page 239 239
  • Page 240 240
  • Page 241 241
  • Page 242 242
  • Page 243 243
  • Page 244 244
  • Page 245 245
  • Page 246 246
  • Page 247 247
  • Page 248 248
  • Page 249 249
  • Page 250 250
  • Page 251 251
  • Page 252 252
  • Page 253 253
  • Page 254 254
  • Page 255 255
  • Page 256 256
  • Page 257 257
  • Page 258 258
  • Page 259 259
  • Page 260 260
  • Page 261 261
  • Page 262 262
  • Page 263 263
  • Page 264 264
  • Page 265 265
  • Page 266 266
  • Page 267 267
  • Page 268 268
  • Page 269 269
  • Page 270 270
  • Page 271 271
  • Page 272 272
  • Page 273 273
  • Page 274 274
  • Page 275 275
  • Page 276 276
  • Page 277 277
  • Page 278 278
  • Page 279 279
  • Page 280 280
  • Page 281 281
  • Page 282 282
  • Page 283 283
  • Page 284 284
  • Page 285 285
  • Page 286 286
  • Page 287 287
  • Page 288 288
  • Page 289 289
  • Page 290 290
  • Page 291 291
  • Page 292 292
  • Page 293 293
  • Page 294 294
  • Page 295 295
  • Page 296 296
  • Page 297 297
  • Page 298 298
  • Page 299 299
  • Page 300 300
  • Page 301 301
  • Page 302 302
  • Page 303 303
  • Page 304 304
  • Page 305 305
  • Page 306 306
  • Page 307 307
  • Page 308 308
  • Page 309 309
  • Page 310 310
  • Page 311 311
  • Page 312 312
  • Page 313 313
  • Page 314 314
  • Page 315 315
  • Page 316 316
  • Page 317 317
  • Page 318 318
  • Page 319 319
  • Page 320 320
  • Page 321 321
  • Page 322 322
  • Page 323 323
  • Page 324 324
  • Page 325 325
  • Page 326 326
  • Page 327 327
  • Page 328 328
  • Page 329 329
  • Page 330 330
  • Page 331 331
  • Page 332 332
  • Page 333 333
  • Page 334 334
  • Page 335 335
  • Page 336 336
  • Page 337 337
  • Page 338 338
  • Page 339 339
  • Page 340 340
  • Page 341 341
  • Page 342 342
  • Page 343 343
  • Page 344 344
  • Page 345 345
  • Page 346 346
  • Page 347 347
  • Page 348 348
  • Page 349 349
  • Page 350 350
  • Page 351 351
  • Page 352 352
  • Page 353 353
  • Page 354 354
  • Page 355 355
  • Page 356 356
  • Page 357 357
  • Page 358 358
  • Page 359 359
  • Page 360 360
  • Page 361 361
  • Page 362 362
  • Page 363 363
  • Page 364 364
  • Page 365 365
  • Page 366 366
  • Page 367 367
  • Page 368 368
  • Page 369 369
  • Page 370 370
  • Page 371 371
  • Page 372 372
  • Page 373 373
  • Page 374 374
  • Page 375 375
  • Page 376 376
  • Page 377 377
  • Page 378 378
  • Page 379 379
  • Page 380 380
  • Page 381 381
  • Page 382 382
  • Page 383 383
  • Page 384 384
  • Page 385 385
  • Page 386 386
  • Page 387 387
  • Page 388 388
  • Page 389 389
  • Page 390 390
  • Page 391 391
  • Page 392 392
  • Page 393 393
  • Page 394 394
  • Page 395 395
  • Page 396 396
  • Page 397 397
  • Page 398 398
  • Page 399 399
  • Page 400 400
  • Page 401 401
  • Page 402 402
  • Page 403 403
  • Page 404 404
  • Page 405 405
  • Page 406 406
  • Page 407 407
  • Page 408 408
  • Page 409 409
  • Page 410 410
  • Page 411 411
  • Page 412 412
  • Page 413 413
  • Page 414 414
  • Page 415 415
  • Page 416 416
  • Page 417 417
  • Page 418 418
  • Page 419 419
  • Page 420 420
  • Page 421 421
  • Page 422 422
  • Page 423 423
  • Page 424 424
  • Page 425 425
  • Page 426 426
  • Page 427 427
  • Page 428 428
  • Page 429 429
  • Page 430 430
  • Page 431 431
  • Page 432 432
  • Page 433 433
  • Page 434 434
  • Page 435 435
  • Page 436 436
  • Page 437 437
  • Page 438 438
  • Page 439 439
  • Page 440 440
  • Page 441 441
  • Page 442 442
  • Page 443 443
  • Page 444 444
  • Page 445 445
  • Page 446 446
  • Page 447 447
  • Page 448 448
  • Page 449 449
  • Page 450 450
  • Page 451 451
  • Page 452 452
  • Page 453 453
  • Page 454 454
  • Page 455 455
  • Page 456 456
  • Page 457 457
  • Page 458 458
  • Page 459 459
  • Page 460 460
  • Page 461 461
  • Page 462 462
  • Page 463 463
  • Page 464 464
  • Page 465 465
  • Page 466 466
  • Page 467 467
  • Page 468 468
  • Page 469 469
  • Page 470 470
  • Page 471 471
  • Page 472 472
  • Page 473 473
  • Page 474 474
  • Page 475 475
  • Page 476 476
  • Page 477 477
  • Page 478 478
  • Page 479 479
  • Page 480 480
  • Page 481 481
  • Page 482 482
  • Page 483 483
  • Page 484 484
  • Page 485 485
  • Page 486 486
  • Page 487 487
  • Page 488 488
  • Page 489 489
  • Page 490 490
  • Page 491 491
  • Page 492 492
  • Page 493 493
  • Page 494 494
  • Page 495 495
  • Page 496 496
  • Page 497 497
  • Page 498 498
  • Page 499 499

Samsung PS50C6500TW Benutzerhandbuch

Kategorie
Plasmafernseher
Typ
Benutzerhandbuch
Dieses Handbuch ist auch geeignet für