Samsung le40b750 Benutzerhandbuch
- Kategorie
- LCD-Fernseher
- Typ
- Benutzerhandbuch

BN68-02327L-03
Contact SAMSUNG WORLDWIDE
If you have any questions or comments relating to Samsung products, please contact the SAMSUNG customer care centre.
Country Customer Care Centre Web Site
AUSTRIA 0810 - SAMSUNG (7267864, € 0.07/min) www.samsung.com/at
BELGIUM
02 201 2418 www.samsung.com/be
www.samsung.com/be_fr
CZECH REPUBLIC
800 - SAMSUNG (800-726786) www.samsung.com/cz
Distributor pro Českou republiku:
Samsung Zrt., česká organizační složka, Oasis Florenc, Sokolovská394/17, 180 00, Praha 8
DENMARK 8 - SAMSUNG (7267864) www.samsung.com/dk
EIRE 0818 717 100 www.samsung.com/ie
FINLAND 30 - 6227 515 www.samsung.com/
FRANCE 01 4863 0000 www.samsung.com/fr
GERMANY 01805 - SAMSUNG (7267864, € 0.14/Min) www.samsung.de
HUNGARY 06 - 80 - SAMSUNG (7267864) www.samsung.com/hu
ITALIA 800 - SAMSUNG (7267864) www.samsung.com/it
LUXEMBURG 02 261 03 710 www.samsung.com/lu
NETHERLANDS 0900-SAMSUNG (0900-7267864) (€ 0,10/Min) www.samsung.com/nl
NORWAY 3 - SAMSUNG (7267864) www.samsung.com/no
POLAND
0 801 1SAMSUNG(172678)
022 - 607 - 93 - 33
www.samsung.com/pl
PORTUGAL 808 20 - SAMSUNG (7267864) www.samsung.com/pt
SLOVAKIA 0800 - SAMSUNG (7267864) www.samsung.com/sk
SPAIN 902 - 1 - SAMSUNG (902 172 678) www.samsung.com/es
SWEDEN 0771 726 7864 (SAMSUNG) www.samsung.com/se
SWITZERLAND 0848 - SAMSUNG (7267864, CHF 0.08/min) www.samsung.com/ch
U.K 0845 SAMSUNG (7267864) www.samsung.com/uk
BELARUS 810-800-500-55-500 -
TURKEY 444 77 11 www.samsung.com/tr
ESTONIA 800-7267 www.samsung.com/ee
LATVIA 8000-7267 www.samsung.com/lv
LITHUANIA 8-800-77777 www.samsung.com/lt
BELARUS 810-800-500-55-500 -
KAZAHSTAN 8-10-800-500-55-500 www.samsung.com/kz_ru
KYRGYZSTAN 00-800-500-55-500 -
RUSSIA 8-800-555-55-55 www.samsung.ru
TADJIKISTAN 8-10-800-500-55-500 -
UKRAINE 8-800-502-0000
www.samsung.com/ua
www.samsung.com/ua_ru
UZBEKISTAN 8-10-800-500-55-500 www.samsung.com/kz_ru
LCD TV
user manual
imagine the possibilities
Thank you for purchasing this Samsung product.
To receive more complete service, please register
your product at
www.samsung.com/register
Model Serial No.
BN68-02327L-03L09-Cover.indd 1 2009-10-08 �� 10:42:07
License
TruSurround HD, SRS and symbol are trademarks of SRS Labs, Inc. TruSurround HD technology is
incorporated under license from SRS Labs, Inc.
Manufactured under license from Dolby Laboratories. Dolby and the double-D symbol are trademarks of
Dolby Laboratories.
DivX® Certified to play DivX® video, including premium content.
ABOUT DIVX VIDEO: DivX® is a digital video format created by DivX,Inc. This is an official DivX Certified device that plays
DivX video. Visit www.divx.com for more information and software tools to convert your files into DivX video.
ABOUT DIVX VIDEO-ON-DEMAND: This DivX Certified® device must be registered in order to play DivX Video-on-Demand
(VOD) content. To generate the registration code, locate the DivX VOD section in the device setup menu. Go to vod.divx.com
with this code to complete the registration process and learn more about DivX VOD.
Digital TV Notice
1. Functionalities related to Digital TV(DVB) are only available in countries/areas where DVB-T (MPEG2 and MPEG4 AVC) digital
terrestrial signals are broadcasted or where you are able to access to a compatible DVB-C(MPEG2 and MPEG4 AAC) cable-
TV service. Please check with your local dealer the possibility to receive DVB-T or DVB-C signal.
2.
DVB-T is the DVB European consortium standard for the broadcast transmission of digital terrestrial television and DVB-
C is that for the broadcast transmission of digital TV over cable. However, some differentiated features like EPG (Electric
Programme Guide), VOD (Video on Demand) and so on, are not included in this specification. So, they cannot be workable at
this moment.
3.
Although this TV set meets the latest DVB-T and DVB-C standards, as of [August, 2008], the compatibility with future DVB-T
digital terrestrial and DVB-C digital cable broadcasts cannot be guaranteed.
4.
Depending on the countries/areas where this TV set is used some cable-TV providers may charge an additional fee for such a
service and you may be required to agree to terms and conditions of their business.
5.
Some Digital TV functions might be unavailable in some countries or regions and DVB-C might not work correctly with some
cable service providers.
6.
For more information, please contact your local Samsung customer care centre.
Precautions When Displaying a Still Image
A still image may cause permanent damage to the TV screen
Do not display still image and partially still on the LCD panel for more than 2 hours as it can cause screen image retention.
This image retention is also known as screen burn. To avoid such image retention, reduce the degree of brightness and
contrast of the screen when displaying a still image.
Watching the LCD TV in 4:3 format for a long period of time may leave traces of borders displayed on the
left, right and centre of the screen caused by the difference of light emission on the screen. Playing a DVD or
a game console may cause a similar effect to the screen. Damages caused by the above effect are not
covered by the Warranty.
Displaying still images from Video games and PC for longer than a certain period of time may produce partial after-images. To
prevent this effect, reduce the ‘brightness’ and ‘contrast’ when displaying still images.
© 2009 Samsung Electronics Co., Ltd. All rights reserved.
❑
❑
❑
●
●
●
Figures and illustrations in this User Manual are provided for reference only and may differ from actual product appearance.
Product design and specications may be changed without notice.
BN68-02327L-03Eng.indb 1 2009-10-08 �� 10:28:42
Seite wird geladen ...

English - 2
SETTING UP YOUR TV
Accessories
Remote Control & Batteries (AAA x 2) Power Cord Cover-Bottom Cleaning Cloth
Warranty Card / Safety Guide
(Not available in all locations)
Owner’s Instructions Programme CD
Holder-Wire Cable
(Depending on the model)
Please make sure the following items are included with your LCD TV. If any items are missing, contact your dealer.
The items colour and shape may vary depending on the model.
Viewing the Control Panel
The product colour and shape may vary depending on the model.
The front panel buttons can be activated by touching it with your finger.
8
8
6 5 4 37 21
1
P
(POWER): Press to turn the TV on and off.
2
POWER INDICATOR: Blinks and turns off when the power is on and lights up in stand-by mode.
3
z
: Press to change channels. In the on-screen menu, use the
z
buttons as you would use the ▼ and ▲
buttons on the remote control.
4
Y
: Press to increase or decrease the volume.
In the on-screen menu, use the
Y
buttons as you would use the ◄ and ► buttons on the remote control.
5
MENU: Press to see an on-screen menu of your TV’s features.
6
SOURCE
E
: Toggles between all the available input sources. In the on-screen menu, use this button as you would use the
ENTER
E
button on the remote control.
7
REMOTE CONTROL SENSOR: Aim the remote control towards this spot on the TV.
8
SPEAKERS
¦
N
N
¦
N
N
BN68-02327L-03Eng.indb 2 2009-10-08 �� 10:28:44
Seite wird geladen ...
Seite wird geladen ...
Seite wird geladen ...

English - 6
Installing Batteries in the Remote Control
1. Lift the cover at the back of the remote control upward as shown in the figure.
2.
Install two AAA size batteries.
Make sure to match the ‘+’ and ‘–’ ends of the batteries with the diagram inside the
compartment.
3.
Replace the cover.
Remove the batteries and store them in a cool, dry place if you won’t be using the
remote control for a long time.
If the remote control doesn’t work, check the following:
Is the TV power on?
Are the plus and minus ends of the batteries reversed?
Are the batteries drained?
Is there a power outage or is the power cord unplugged?
Is there a special fluorescent light or neon sign nearby?
OPERATION
Viewing the menus
Before using the TV, follow the steps below to learn how to navigate the menu in order to select and adjust different functions.
How to operate the OSD (On Screen Display)
The access step may differ depending on the selected menu.
1.
Press the MENU button.
2.
The main menu appears on the screen. The menu’s left side has icons : Picture, Sound,
Channel, Setup, Input, Application, Support.
3. Press the ▲ or ▼ button to select one of the icons.
4.
Then press the ENTER
E
button to access the icon’s sub-menu.
5.
Press the ▲ or ▼ button to select the icon’s submenu.
6.
Press the ◄ or ► button to decrease or increase the value of a particular item. The
adjustment OSD may differ depending on the selected menu.
7.
Press the ENTER
E
button to complete the configuration. Press the EXIT button to exit.
¦
N
N
N
•
•
•
•
•
¦
❑
INFO
GUIDE
CH LIST
AD
MENU Button
Display the main on-screen menu.
ENTER
E
/ DIRECTION Button
Move the cursor and select an item.
Select the currently selected item.
Confirm the setting.
RETURN Button
Return to the previous menu.
EXIT
Exit the on-screen menu.
INFO
GUIDE
CH LIST
AD
INFO
GUIDE
CH LIST
AD
Mode :Standard ▶
Backlight :7
Contrast :95
Brightness :45
Sharpness :50
Colour :50
Tint(G/R) :G50/R50
AdvancedSettings
Picture
Mode :Standard
Backlight :7 ▶
Contrast :95
Brightness :45
Sharpness :50
Colour :50
Tint(G/R) :G50/R50
AdvancedSettings
PictureOptions
Picture
7
U
Move
L
Adjust
E
Enter
R
Return
▲
Backlight
▼
Help icon
BN68-02327L-03Eng.indb 6 2009-10-08 �� 10:28:46
Seite wird geladen ...
Seite wird geladen ...

English - 9
Manual Store
Scans for a channel manually and stores it in the TV’s memory.
If a channel is locked using the Child Lock function, the PIN input window appears.
Digital Channel
Manual store for digital channels.
Digital Channel is only available in DTV mode.
Channel: Set the Channel number using the ▲, ▼ or number (0~9) buttons.
Frequency: Set the frequency using the number buttons.
Bandwidth: Set the bandwidth using the ▲, ▼ or number (0~9) buttons.
When it has finished, channels are updated in the channel list.
Analogue Channel
Manual store for analogue channel.
Programme (Programme number to be assigned to a channel): Sets the programme number using the ▲, ▼ or number (0~9)
buttons.
ColourSystem→Auto/PAL/SECAM/NTSC4.43: Sets the colour system value using the ▲ or ▼ button.
SoundSystem→BG/DK/I/L: Sets the sound system value using the ▲ or ▼ button.
Channel (When you know the number of the channel to be stored): Press the ▲ or ▼ button to select C (Air channel) or
S (Cable channel). Press the ► button, then press the ▲, ▼ or number (0~9) buttons to select the required number.
You can also select the channel number directly by pressing the number (0~9) buttons.
If there is abnormal sound or no sound, reselect the sound standard required.
Search (When you do not know the channel numbers): Press the ▲ or ▼ button to start the search. The tuner scans the
frequency range until the first channel or the channel that you selected is received on the screen.
Store (When you store the channel and associated programme number): Set to OK by pressing the ENTER
E
button.
Channel mode
P (Programme mode): When completing tuning, the broadcasting stations in your area have been assigned to position
numbers from P00 to P99. You can select a channel by entering the position number in this mode.
C (Air channel mode): You can select a channel by entering the assigned number to each air broadcasting station in this
mode.
S (Cable channel mode): You can select a channel by entering the assigned number for each cable channel in this mode.
Cable Search Option (depending on the country)
Sets additional search options such as the frequency and symbol rate for cable network searches.
Freq.Start (Frequency Start): Set the start frequency (Differs in each country)
Freq.Stop (Frequency Stop): Set the stop frequency (Differs in each country)
Modulation: Displays available modulation values.
Symbol Rate: Displays available symbol rates.
Full Guide / Mini Guide
The EPG (Electronic Programme Guide) information is provided by the broadcasters. Programme entries may appear blank or out
of date as a result of the information broadcast on a given channel. The display will dynamically update as soon as new information
becomes available.
You can also display the guide menu simply by pressing the GUIDE button. (To configure the Default Guide, refer to the
descriptions.)
Full Guide
Displays the programme information as time ordered One hour segments. Two hours of programme information is displayed which
may be scrolled forwards or backwards in time.
Mini Guide
The information of each programme is displayed by each line on the current channel Mini Guide screen from the current
programme onwards according to the programme starting time order.
❑
N
N
■
N
●
●
●
N
■
●
●
●
●
N
N
●
●
N
❑
●
●
●
●
❑
O
■
■
BN68-02327L-03Eng.indb 9 2009-10-08 �� 10:28:47
Seite wird geladen ...

English - 11
Managing Channels
Using this menu, you can add / delete or set favourites channels and use the programme guide for digital broadcasts.
All Channels
Shows all currently available channels.
Added Channels
Shows all added channels.
Favourites
Shows all favourite channels.
To select the favourites channels you have set up, press the FAV.CH button on the remote
control.
Programmed
Shows all current reserved programmes.
Select a channel in the All Channels, Added Channels or Favourites screen by pressing the ▲ / ▼ buttons, and pressing
the ENTER
E
button. Then you can watch the selected channel.
Using the Colour buttons with the Channel List
Red (Channel Type): Toggle between your TV, Radio, Data / Other and All.
Green (Zoom): Enlarges or shrinks a channel number.
Yellow (Select): Selects multiple channel lists. You can perform the add/delete or add to favourites/delete from favourites
function for multiple channels at the same time. Select the required channels and press the Yellow button to set all the
selected channels at the same time. The
c
mark appears to the left of the selected channels.
TOOLS (Tools): Displays the Delete (or Add), Add to Favourite (or Delete from Favourite), Lock (or Unlock),
Timer Viewing, Edit Channel Name, Edit Channel Number, Sort, Select All (or Deselect All), Auto Store menu. (The
Options menus may differ depending on the situation.)
Channel Status Display Icons
A
: An Analogue channel.
c
: A channel selected by pressing the Yellow button.
*
: A channel set as a Favourite.
(
: A programme currently being broadcast.
\
: A locked channel.
)
: A reserved programme
Channel List Option Menu (in All Channels / Added Channels / Favourites)
Press the TOOLS button to use the option menu.
Option menu items may differ depending on the channel status.
Add / Delete
You can delete or add a channel to display the channels you want.
All deleted channels will be shown on All Channels menu.
A gray-coloured channel indicates the channel has been deleted.
The Add menu only appears for deleted channels.
You can also delete a channel to the Added Channels or Favourites menu in the same
manner.
Add to Favourite / Delete from Favourite
You can set channels you watch frequently as favourites.
Press the TOOLS button to display the Tools menu. You can also set the add to (or delete from) Favourite by selecting Tools
→AddtoFavourite (or Delete from Favourite).
The “
*
” symbol will be displayed and the channel will be set as a favourite.
All favourite channels will be shown on Favourites menu.
¦
■
■
■
O
■
N
N
N
•
•
•
•
•
•
N
N
■
N
N
N
N
■
T
N
N
AddedChannels
824UKTVGold
825UKTVstyle
A
1C--
A
2C--
A
3C--
A
4C--
A
5C--
A
6C--
A
7C--
A
8C--
All ChannelType Zoom Select
T
Tools
AllChannels
824UKTVGold
825UKTVstyle
A
1C--
A
2C--
A
3C--
A
4C--
A
5C--
A
6C--
A
7C--
A
8C--
All ChannelType Zoom Select
T
Tools
Delete
AddtoFavourite
Lock
TimerViewing
EditChannelName
Sort
BN68-02327L-03Eng.indb 11 2009-10-08 �� 10:28:48
Seite wird geladen ...
Seite wird geladen ...
Seite wird geladen ...
Seite wird geladen ...

English - 16
200HzMotionPlus→Off/Clear/Standard/Smooth/Custom/Demo
Removes drag from fast scenes with a lot of movement to provide a clearer picture.
If you enable 200Hz Motion Plus, noise may appear on the screen. If this occurs, set 200Hz Motion Plus to Off.
Off: Switches 200Hz Motion Plus off.
Clear: Sets 200Hz Motion Plus to minimum.
Standard: Sets 200Hz Motion Plus to medium.
Smooth: Sets 200Hz Motion Plus to maximum.
Custom: Adjusts the blur and judder reduction level to suit your preference.
Blur Reduction: Adjusts the blur reduction level from video sources.
Judder Reduction: Adjusts the judder reduction level from video sources when playing films.
Reset: Reset the custom settings.
Demo: Displays the difference between 200Hz Motion Plus on and off modes.
BlueOnlyMode→Off/On
This function is for AV device measurement experts. This function displays the blue signal only by removing the red and green
signals from the video signal so as to provide a Blue Filter effect that is used to adjust the Colour and Tint of video equipment such
as DVD players, Home Theatres, etc. Using this function, you can adjust the Colour and Tint to preferred values appropriate to
the signal level of each video device using the Red / Green / Blue / Cyan / Magenta / Yellow Colour Bar Patterns, without using an
additional Blue Filter.
Blue Only Mode is available when the picture mode is set to Movie or Standard.
PictureReset→ResetPictureMode/Cancel
Resets all picture settings to the default values.
Reset Picture Mode: Current picture values return to default settings.
Viewing Picture-in-Picture
You can use the PIP feature to simultaneously watch the TV tuner and one external video
source. This product has one built-in tuner, which does not allow PIP to function in the same
mode. Please see ‘PIP Settings’ below for details.
Press the TOOLS button to display the Tools menu. You can also configure PIP related
settings by selecting Tools→PIP.
If you select the PIP picture sound, refer to the ‘Configuring the Sound Menu’ instructions.
PIP Settings
Main picture Sub picture
Component
HDMI1, HDMI2, HDMI3/DVI, HDMI4
PC
TV
If you turn the TV off while watching in PIP mode and turn it on again, the PIP window will disappear.
You may notice that the picture in the PIP window becomes slightly unnatural when you use the main screen to view a game
or karaoke.
While Internet@TV is in operation, the PIP function cannot be used.
PIP→Off/On
You can activate or deactivate the PIP function.
Size→
Õ
/
Ã
/
À
/
Œ
You can select a size of the sub-picture.
Position→
Ã
/
–
/
—
/
œ
You can select a position of the sub-picture.
In Double (
Œ
,
À
) mode, Position cannot be selected.
Channel
You can select the channel for the sub-screen.
■
N
●
●
●
●
●
●
■
N
❑
N
¦
T
N
N
N
N
N
❑
❑
❑
N
❑
PIP :On ▶
Size :
Õ
Position :
Ã
Channel :ATV4
U
Move
E
Enter
R
Return
PIP
GameMode :Off
BDWise :On
EnergySaving :Off
MenuTransparency :Bright
Melody :Medium
LightEffect :WatchingTV
PIP ▶
U
Move
E
Enter
R
Return
General
BN68-02327L-03Eng.indb 16 2009-10-08 �� 10:28:49

English - 17
Using Your TV as a Computer (PC) Display
Setting Up Your PC Software (Based on Windows XP)
The Windows display-settings for a typical computer are shown below. The actual screens on
your PC will probably be different, depending upon your particular version of Windows and
your particular video card. However, even if your actual screens look different, the same basic
set-up information will apply in almost all cases. (If not, contact your computer manufacturer or
Samsung Dealer.)
1.
First, click on ‘Control Panel’ on the Windows start menu.
2.
When the control panel window appears, click on ‘Appearance and Themes’ and a display
dialog-box will appear.
3.
When the control panel window appears, click on ‘Display’ and a display dialogbox will
appear.
4.
Navigate to the ‘Settings’ tab on the display dialog-box.
The correct size setting (resolution) - Optimum: 1920 X 1080 pixels
If a vertical-frequency option exists on your display settings dialog box, the correct
value is ‘60’ or ‘60 Hz’. Otherwise, just click ‘OK’ and exit the dialog box.
Display Modes
If the signal from the system equals the standard signal mode, the screen is adjusted automatically. If the signal from the system
doesn’t equal the standard signal mode, adjust the mode by referring to your videocard user guide; otherwise there may be no
video. For the display modes listed on the next page, the screen image has been optimized during manufacturing.
D-Sub and HDMI/DVI Input
Mode Resolution
Horizontal Frequency
(KHz)
Vertical Frequency
(Hz)
Pixel Clock Frequency
(MHz)
Sync Polarity
(H / V)
IBM
640 x 350 31.469 70.086 25.175 +/-
720 x 400 31.469 70.087 28.322 -/+
MAC
640 x 480 35.000 66.667 30.240 -/-
832 x 624 49.726 74.551 57.284 -/-
1152 x 870 68.681 75.062 100.000 -/-
VESA CVT
720 x 576 35.910 59.950 32.750 -/+
1152 x 864 53.783 59.959 81.750 -/+
1280 x 720 44.772 59.855 74.500 -/+
1280 x 720 56.456 74.777 95.750 -/+
1280 x 960 75.231 74.857 130.000 -/+
VESA DMT
640 x 480 31.469 59.940 25.175 -/-
640 x 480 37.861 72.809 31.500 -/-
640 x 480 37.500 75.000 31.500 -/-
800 x 600 37.879 60.317 40.000 +/+
800 x 600 48.077 72.188 50.000 +/+
800 x 600 46.875 75.000 49.500 +/+
1024 x 768 48.363 60.004 65.000 -/-
1024 x 768 56.476 70.069 75.000 -/-
1024 x 768 60.023 75.029 78.750 +/+
1152 x 864 67.500 75.000 108.000 +/+
1280 x 1024 63.981 60.020 108.000 +/+
1280 x 1024 79.976 75.025 135.000 +/+
1280 x 800 49.702 59.810 83.500 -/+
1280 x 800 62.795 74.934 106.500 -/+
1280 x 960 60.000 60.000 108.000 +/+
1360 x 768 47.712 60.015 85.500 +/+
1440 x 900 55.935 59.887 106.500 -/+
1440 x 900 70.635 74.984 136.750 -/+
1680 x 1050 65.290 59.954 146.250 -/+
VESA GTF
1280 x 720 52.500 70.000 89.040 -/+
1280 x 1024 74.620 70.000 128.943 -/-
VESA DMT /
DTV CEA
1920 x 1080p 67.500 60.000 148.500 +/+
When using an HDMI / DVI cable connection, you must use the HDMI IN 3(DVI) jack.
The interlace mode is not supported.
The set might operate abnormally if a non-standard video format is selected.
Separate and Composite modes are supported. SOG is not supported.
Too long or low quality VGA cable can cause picture noise at high resolution modes (1920x1080).
¦
•
•
■
N
N
N
N
N
BN68-02327L-03Eng.indb 17 2009-10-08 �� 10:28:49

English - 18
Setting up the TV with your PC
Preset: Press the SOURCE button to select PC mode.
Auto Adjustment
Use the Auto Adjust function to have the TV automatically adjust the video signals it receives.
The function also automatically fine-tunes the settings and adjusts the frequency values and
positions.
Press the TOOLS button to display the Tools menu. You can also set the Auto Adjustment
by selecting Tools→AutoAdjustment.
This function does not work in DVI-HDMI mode.
Screen
Coarse / Fine
The purpose of picture quality adjustment is to remove or reduce picture noise. If the noise is
not removed by Fine-tuning alone, then adjust the frequency as best as possible (Coarse) and
Fine-tune again. After the noise has been reduced, readjust the picture so that it is aligned on
the centre of screen.
PC Position
Adjust the PC’s screen positioning if it does not fit the TV screen.
Press the ▲ or ▼ button to adjusting the Vertical-Position. Press the ◄ or ► button to adjust
the Horizontal-Position.
Image Reset
You can replace all image settings with the factory default values.
¦
N
❑
T
N
❑
■
■
■
SOUND
Configuring the Sound Menu
Mode→Standard/Music/Movie/ClearVoice/Custom
Press the TOOLS button to display the Tools menu. You can also set the sound mode by
selecting Tools→SoundMode.
Standard: Selects the normal sound mode.
Music: Emphasizes music over voices.
Movie: Provides the best sound for movies.
Clear Voice: Emphasizes voice over other sounds.
Custom: Recalls your customized sound settings.
Equalizer
The sound settings can be adjusted to suit your personal preferences.
Mode: Selects the sound mode among the predefined settings.
Balance L/R: Adjusts the balance between the right and left speaker.
100Hz / 300Hz / 1KHz / 3KHz / 10KHz (Bandwidth Adjustment): To adjust the level of different bandwidth frequencies.
Reset: Resets the equalizer settings to the default values.
SRSTruSurroundHD→Off/On
SRS TruSurround HD is a patented SRS technology that solves the problem of playing 5.1 multichannel content over two
speakers. TruSurround delivers a compelling, virtual surround sound experience through any two-speaker playback system,
including internal television speakers. It is fully compatible with all multichannel formats.
Press the TOOLS button to display the Tools menu. You can also set the SRS TruSurround HD by selecting Tools→
SRS TS HD.
¦
❑
T
●
●
●
●
●
❑
●
●
●
●
❑
T
Brightness :45
Sharpness :50
AutoAdjustment ▶
Screen
AdvancedSettings
PictureOptions
PictureReset
Picture
Coarse 50
Fine 0
PCPosition
ImageReset
U
Move
E
Enter
R
Return
Screen
Mode :Custom ▶
Equalizer
SRSTruSurroundHD :Off
AudioLanguage :----
AudioFormat :----
AudioDescription
AutoVolume :Off
SpeakerSelect :TVSpeaker
Sound
BN68-02327L-03Eng.indb 18 2009-10-08 �� 10:28:49
Seite wird geladen ...

English - 20
Selecting the Sound Mode
You can set the sound mode in the Tools menu. When you set to Dual l ll, the current sound mode is displayed on the screen.
Audio Type Dual 1 / 2 Default
A2 Stereo
Mono MONO
Automatic change
Stereo STEREO ↔ MONO
Dual DUAL 1 ↔ DUAL 2 DUAL 1
NICAM
Stereo
Mono MONO
Automatic change
Stereo MONO ↔ STEREO
Dual
MONO ↔ DUAL 1
DUAL 2
DUAL 1
If the stereo signal is weak and an automatic switching occurs, then switch to the mono.
This function is only activated in stereo sound signal. It is deactivated in mono sound signal.
This function is only available in TV mode.
¦
N
N
N
SETUP
Configuring the Setup Menu
Menu Language
You can set the menu language.
Time
For detailed procedures on setting up options, refer to the ‘Setting the Time’ instructions.
Broadcast
Subtitle
You can activate and deactivate the subtitles. Use this menu to set the Subtitle Mode. Normal under the menu is the basic subtitle
and Hard of hearing is the subtitle for a hearing-impaired person.
Subtitle→Off/On
Switches subtitles on or off.
Mode→Normal/Hardofhearing
Sets the subtitle mode.
Subtitle Language
Set the subtitle language.
If the programme you are watching does not support the Hard of hearing function, Normal automatically is activated
even though Hard of hearing mode is selected.
English is the default in cases where the selected language is unavailable in the broadcast.
You can select these options simply by pressing the SUBT. button on the remote control.
DigitalText→Disable/Enable (UK only)
If the programme broadcasts with digital text, this feature is enabled.
MHEG (Multimedia and Hypermedia Information Coding Experts Group)
An International standard for data encoding systems used in multimedia and hypermedia. This is at a higher level than the
MPEG system which includes data-linking hypermedia such as still images, character service, animation, graphic and video
files as well as multimedia data. MHEG is user runtime interaction technology and is being applied to various fields including
VOD (Video-On-Demand), ITV (Interactive TV), EC (Electronic Commerce), tele-education, tele-conferencing, digital libraries
and network games.
¦
❑
❑
❑
■
●
●
●
N
N
O
■
N
Plug&Play
MenuLanguage :English ▶
Time
Broadcast
Security
Network
General
Setup
BN68-02327L-03Eng.indb 20 2009-10-08 �� 10:28:50
Seite wird geladen ...
Seite wird geladen ...

English - 23
Setting the Time
Clock
Setting the clock is necessary in order to use the various timer features of the TV.
The current time will appear every time you press the INFO button.
If you disconnect the power cord, you have to set the clock again.
Clock Mode
You can set up the current time manually or automatically.
Auto: Set the current time automatically using the time from the digital broadcast.
Manual: Set the current time to a manually specified time.
Depending on the broadcast station and signal, the auto time may not be set correctly. If
this occurs, set the time manually.
The Antenna or cable must be connected in order to set the time automatically.
Clock Set
You can set the current time manually.
This function is only available when Clock Mode is set to Manual.
You can set the day, month, year, hour and minute directly by pressing the number buttons
on the remote control.
Sleep Timer
The sleep timer automatically shuts off the TV after a preset time (30, 60, 90, 120, 150 and 180
minutes).
Press the TOOLS button to display the Tools menu. You can also set the sleep timer by
selecting Tools→SleepTimer.
To cancel the Sleep Timer function, select Off.
Timer 1 / Timer 2 / Timer 3
Three different on / off timer settings can be made.
You must set the clock first.
On Time: Set the hour, minute, and activate / inactivate. (To activate timer with the setting you’ve chosen, set to Activate.)
Off Time: Set the hour, minute, and activate / inactivate. (To activate timer with the setting you’ve chosen, set to Activate.)
Volume: Set the desired volume level.
Source: You can select the TV or USB device content to be played when the TV is turned on automatically. Select TV or USB.
(Make sure that an USB device is connected to your TV.)
Antenna (when Source is set to TV): Select ATV or DTV.
Channel (when Source is set to TV): Select the desired channel.
Contents (when Source is set to USB): You can select a folder on the USB Device with music or photo files to be played
when the TV turns on automatically.
If there is no music file on the USB or the folder containing a music file is not selected, Timer function does not operate
correctly.
When there is only one photo file in the USB, the Slide Show will not play.
If the folder name is too long, the folder can not be selected.
If you are using two of the same type USB device, be sure the folder names are different so the correct USB is read.
Repeat: Select Once, Everyday, Mon~Fri, Mon~Sat, Sat~Sun or Manual.
When Manual is selected, press the ► button to select the desired day of the week. Press the ENTER
E
button over the
desired day and the
c
mark will appear.
You can set the hour, minute and channel by pressing the number buttons on the remote control.
Auto Power Off:
When you set the timer on, the TV will be eventually turned off, if no controls are operated for 3 hours
after the TV was turned on by the timer. This function is only available in timer on mode and prevents overheating, which
may occur if a TV is on for too long time.
¦
❑
N
N
■
●
●
N
N
■
N
N
❑
T
N
❑
●
●
●
●
●
●
●
N
N
N
N
●
N
N
N
Clock :--:-- ▶
SleepTimer :Off
Timer1 :Inactivated
Timer2 :Inactivated
Timer3 :Inactivated
U
Move
E
Enter
R
Return
Time
Plug&Play
MenuLanguage :English
Time ▶
Broadcast
Security
Network
General
Setup
OnTime
L
Move
U
Adjust
E
Enter
R
Return
Timer1
OffTime
Volume
00 00 Inactivate
00 00 Inactivate
10
Source Antenna Channel
TV ATV 0
Repeat
Once
Sun Mon Tue Wed Thu Fri Sat
BN68-02327L-03Eng.indb 23 2009-10-08 �� 10:28:50
Seite wird geladen ...
Seite wird geladen ...

English - 26
Select a channel for the wireless IP sharer that is not currently being used. If the channel set for the wireless IP sharer is
currently being used by another device nearby, this will result in interference and communications may fail.
If you apply a security system other than the systems listed blow, it will not work with the TV.
When applying the security key for the AP (wireless IP sharer), only the following is supported.
1) Authentication Mode : OPEN, SHARED, WPAPSK, WPA2PSK
2) Encryption Type : WEP, TKIP, AES
When applying the security key for the Ad-hoc mode, only the following is supported.
1) Authentication Mode : SHARED, WPANONE
2) Encryption Type : WEP, TKIP, AES
If your AP supports WPS(Wi-Fi Protected Setup), you can connect to the network via PBC (Push Button Configuration) or
PIN (Personal Indentification Number). WPS will automatically configure the SSID and WPA key in either mode.
If the device isn’t certified, it may not connect to the TV via the ‘Samsung Wireless LAN Adapter’.
Setting the Network
Network Type
Select Cable or Wireless as the method to connect to the network.
The menu is activated only if the ‘Samsung Wireless LAN Adapter’ is connected.
Cable
Connect to the network using a cable.
Wireless
Connect to the network wirelessly.
Network Setup
Cable Network Setup
(when Network Type is set to Cable)
Please check if the LAN cable is connected.
InternetProtocolSetup→Auto/Manual
Network Test: You can test or confirm the network connection status after setting up the network.
When unable to connect to a wired network
If your Internet service provider has registered the MAC address of the device used to connect to the Internet for the first time
and authenticates the MAC address each time you connect to the Internet, your TV may not be able to connect to the Internet
as the MAC address differs from that of the device (PC).
In this case, ask your Internet service provider about the procedures to connect devices other than your PC (such as your TV)
to the Internet. If your Internet service provider requires an ID or password to connect to the Internet (network), your TV may
not be able to connect to the Internet. In this case, you have to enter your ID or password when connecting to the Internet
using an Internet Sharer (Router).
The internet connection may fail due to a firewall problem. In this case, contact your Internet service provider. If you cannot
connect to the Internet even if you have followed the procedures of your Internet service provider, please contact Samsung
Electronics.
Cable Network Setup-Auto
If you connect the LAN cable and it supports DHCP, the Internet Protocol (IP) Settings are
automatically configured.
1.
Set Network Type to Cable.
2.
Select Cable Network Setup.
3.
Set Internet Protocol Setup to Auto.
The Internet Protocol is set automatically.
4.
Select Network Test to check the network connectivity.
N
N
N
N
¦
❑
N
■
■
❑
■
N
●
●
N
N
InternetProtocolSetup :Auto ▶
NetworkTest
U
Move
E
Enter
R
Return
CableNetworkSetup
IPAddress :
SubnetMask :
Gateway :
DNSServer :
Broadcast
Security
Network ▶
General
Setup
BN68-02327L-03Eng.indb 26 2009-10-08 �� 10:28:53
Seite wird geladen ...

English - 28
If Security Key is not set: When the security setting of AP that supports WPS is NONE,
you can select PBC, PIN, None Security. None Security is capable of connecting to AP
directly without using WPS function.
Process of PBC, PIN is same as above. Refer to if Security Key is already set.
Try again if connecting operation doesn’t work.
Ad-hoc: You can connect to a mobile device without an access point through the
‘Samsung Wireless LAN Adapter’ by using a peer to peer network.
How to connect to new Ad-hoc
1. Choose Select a network, then a device list is displayed.
2.
While in the device list, press the Blue button on the remote or select
Ad-hoc.
The message The existing network system may have limited
functionality. Do you want to change the network connection? is
displayed.
3.
Input the generated Network Name(SSID) and Security Key into the
device you want to connect.
N
How to connect an existing Ad-hoc device
1. Choose Select a network, the device list is displayed.
2.
Select the device you want in the Device list.
3.
If security key was applied, input the security key again.
If network doesn’t operate normally, please check the
Network Name(SSID) and Security Key again. If the Security Key is
incorrect, it may be the reason for the malfunction.
N
Wireless Network Setup-Auto
If you want to connect AP, AP should support DHCP. Only devices which support Ad-hoc mode
can be connected without DHCP.
1.
Set Network Type to Wireless.
2.
Select Wireless Network Setup.
3.
Set Internet Protocol Setup to Auto.
The Internet Protocol is set automatically.
4.
Select a network through Select a network.
5.
Select Network Test to check the network connectivity.
Wireless Network Setup-Manual
1. Set Network Type to Wireless.
2.
Select Wireless Network Setup.
3.
Set Internet Protocol Setup to Manual.
4.
Set up IP Address, Subnet Mask, Gateway and DNS Server.
Press the number buttons on the remote control when you set the Network manually.
5.
Select a network through Select a network.
6.
Select Network Test to check the network connectivity.
●
N
N
N
N
WirelessNetworkSetup
U
Move
E
Enter
R
Return
Selectanetwork 3/9
Search
Ad-hoc
sson
jee
AP_1
Ap_2
PBC
PIN
NoneSecurity
InternetProtocolSetup :Auto ▶
NetworkTest
Selectanetwork :AP1
U
Move
E
Enter
R
Return
WirelessNetworkSetup
IPAddress :
SubnetMask :
Gateway :
DNSServer :
InternetProtocolSetup :Manual ▶
NetworkTest
Selectanetwork :AP1
U
Move
E
Enter
R
Return
WirelessNetworkSetup
IPAddress :
0
0
0
0
SubnetMask :
0
0
0
0
Gateway :
0
0
0
0
DNSServer :
0
0
0
0
Theexistingnetworksystemmayhavelimited
functionality.Doyouwanttochangethenetwork
connection?
Yes No
BN68-02327L-03Eng.indb 28 2009-10-08 �� 10:28:55

English - 29
INPUT / SUPPORT
Input Menu
Source List
Use to select TV or other external input sources such as DVD / Blu-ray players / Cable Box /
Satellite receivers (Set-Top Box) connected to the TV. Use to select the input source of your
choice.
Press the SOURCE button on the remote control to view an external signal source. TV
mode can be selected by pressing the TV button.
TV / Ext.1 / Ext.2 / AV / Component / PC / HDMI1 / HDMI2 / HDMI3/DVI / HDMI4 / USB 1 /
USB 2
You can choose only those external devices that are connected to the TV. In the
Source List, connected inputs will be highlighted and sorted to the top. Inputs that are not
connected will be sorted to the bottom.
If USB devices are connected to the USB 1 (HDD) and USB 2 jacks, they are displayed as
USB1 and USB 2 in order.
Ext. and PC always stay activated.
Using the Colour buttons on the remote with the Source list
Red (Refresh): Refreshes the connected external devices. Press this if your Source is
on and connected, but does not appear in the list.
TOOLS (Tools): Displays the Edit Name and Information menus.
Edit Name
VCR / DVD / Cable STB / Satellite STB / PVR STB / AV Receiver / Game / Camcorder / PC / DVI / DVI PC / TV / IPTV / Blu-ray
/ HD DVD / DMA
Name the device connected to the input jacks to make your input source selection easier.
When a PC with a resolution of 1920 x 1080@60Hz is connected to the HDMI IN 3(DVI) port, you should set the HDMI3/DVI
mode to DVI PC in the Edit Name of the Input mode.
When connecting an HDMI/DVI cable to the HDMI IN 3(DVI) port, you should set the HDMI3/DVI mode to DVI or DVI PC in
the Edit Name of the Input mode. In this case, a separate sound connection is required.
Support Menu
Legal Notice
View the Legal Notice and General Disclaimer regarding Third Party Contents and Service.
The General Disclaimer may differ depending on the country.
Product Guide
The Product Guide gives you information on the most important features of this TV.
The descriptions provided by this function are in English only.
¦
❑
O
■
N
N
N
N
❑
■
N
N
¦
❑
N
❑
LegalNotice ▶
ProductGuide
SelfDiagnosis
SoftwareUpgrade
HDConnectionGuide
ContactSamsung
Support
SourceList
EditName
Input
Refresh
T
Tools
SourceList
TV
Ext.1 :----
Ext.2 :----
PC :----
AV :----
Component :----
BN68-02327L-03Eng.indb 29 2009-10-08 �� 10:28:56
Seite wird geladen ...
Seite wird geladen ...
Seite wird geladen ...

English - 33
Media Play Function
This function enables you to view and listen to photo, music and/or movie files saved on a USB Mass Storage Class (MSC) device.
It might not work properly with unlicensed multimedia files.
Entering the Media Play (USB & DLNA) Menu
1. Press the MENU button. Press the ▲ or ▼ button to select Application, then
press the ENTER
E
button.
2.
Press the ▲ or ▼ button to select Media Play (USB & DLNA), then press the
ENTER
E
button.
The Media Play (USB & DLNA) menu is displayed.
Press the MEDIA.P button on the remote control to display the Media Play
menu.
Press the SOURCE button on the remote control to view the source list. Then
Press the ▲ or ▼ button to select USB.
3.
Press the Red button, then press the ▲ or ▼ button to select the USB Memory.
Press the ENTER
E
button.
This function differs depending on the USB Memory Device / DLNA device.
The selected USB device name appears at the bottom left of the screen.
4.
Press the ◄ or ► button to select an icon (Photo, Music, Movie, Setup), then
press the ENTER
E
button.
To exit Media Play mode, press the MEDIA.P button on the remote control.
Removing a USB Memory Device Safely
You can remove the device safely from the TV.
1.
Press the TOOLS button in the Media Play file list screen, or while a Slide Show,
music or movie is being played.
2.
Press the ▲ or ▼ button to select Remove Safely, then press the ENTER
E
button.
3.
Remove the USB device from the TV.
Screen Display
Move to either ‘Sort key List Section’, ‘Group List Section’ or ‘File List Section’ using the Up and Down buttons. After selecting a
section, press the ◄ or ► buttons to select an item.
1 Current Sort key: This field shows the current standard for sorting files. Press the ◄ or ► button to change the standard for
sorting files.
2 View Groups: Shows the detailed groups of the files sorted according the selected Sort key. The sort group where the
currently selected file is contained is highlighted.
3 Currently selected file: The selected file is the file you can now control. Photo and movie files are displayed as thumbnail
images.
4 Current Device: Shows the currently selected device name. Press the Red button to select a device.
Red (Device) button: Selects a connected device.
¦
N
N
O
O
N
N
N
•
INFO
GUIDE
CH LIST
AD
INFO
GUIDE
CH LIST
AD
851.86MB/993.02MBFree
Photo
SUM
SUM
Device
PHOTO
R
Return
Music Movie Setup
SUM Device
FavouritesSettings Select
T
Tools
R
Return
Preference
BasicView
Timeline
Folder
Colour
1234.jpg
1235.jpg
1236.jpg
1237.jpg
1233.jpg
1232.jpg
1231.jpg
SlideShow
PlayCurrentGroup
Information
RemoveSafely
5/15
SUM Device
FavouritesSettings Select
T
Tools
R
Return
Preference
BasicView
Timeline
Folder
Colour
5/15
3
2
1234.jpg
1235.jpg
1236.jpg
1237.jpg
1233.jpg
1232.jpg
1231.jpg
1File(s)Selected
1
4 5
6
Sort key List Section
Group List Section
File List Section
c
BN68-02327L-03Eng.indb 33 2009-10-08 �� 10:29:01

English - 34
5 Help Items
Green (Favourites Settings) button: Changes the Favourites Settings for the selected file. Press this button repeatedly
until the desired value appears.
Yellow (Select) button: Selects file from the file list. Selected files are marked with a symbol
c
. Press the Yellow button
again to cancel a file selection.
TOOLS (Tools) button: Displays the option menus. (The option menu changes according to the current status.)
6 Item Selection Information: Shows the number of files that are selected by pressing the Yellow button.
Sorting the Photo / Music / Movie List
Basic View
Shows the folders on the USB memory device. If you select a folder and press the
ENTER
E
button, corresponding files (Photo / Music / Movie) contained in the selected
folder are displayed.
When sorted according to the Basic View, you cannot set Favourites files.
Folder
Sorts the files by folder. If there are many folders in USB, the photos files are shown in
order in each folder. The file in the Root folder is shown first and the others are shown
in alphabetical order by name.
Preference→
FFF
/
FFF
/
FFF
/
FFF
Sorts the files by preference (Favourites).
Changing the Favourites Settings
Select the desired photo in the file list, then press the Green button repeatedly until
the desired setting appears.
The stars are for grouping purposes only. For example, the 3 star setting does not
have any priority over the one star setting.
Timeline (Photo / Movie)
Sorts and displays the music or movie titles in symbol/number/alphabet/special order.
Title (Music / Movie)
Sorts the music titles in symbol/number/alphabet/special order, and shows the music
file.
Photo
Colour→Red/Yellow/Green/Blue/Magenta/Black/Gray/Unclassified
Sorts photos by colour. You can change the photo colour information.
You should set the Use Colour View to on in the Setup menu before sorting photos by colour.
Music
Artist
Sorts the music file by artist in symbol/number/alphabet/special order.
Mood→Energetic/Rhythmical/Sad/Exciting/Calm/Unclassified
Sorts music files by the mood. You can change the music mood information.
Genre
Sorts music files by the genre.
•
•
•
¦
❑
N
❑
❑
N
N
❑
❑
❑
N
❑
❑
❑
SUM Device
FavouritesSettings Select
T
Tools
R
Return
Preference
BasicView
Timeline
Folder
Colour
1234.jpg
1235.jpg
1236.jpg
1237.jpg
1233.jpg
1232.jpg
1231.jpg
5/15
SUM Device
FavouritesSettings Select
T
Tools
R
Return
Preference
BasicView
Title
Folder
Genre
ILoveYou
HaHaHa
Gold
Shine
Way
WantMe
Lies
GlenHans
OnceOst
2007
Soundtrack
3/37Energetic
SUM Device
FavouritesSettings Select
T
Tools
R
Return
Preference
BasicView
Timeline
Folder
Title
ABCD.avi
1235.avi
1236.avi
1237.avi
1233.avi
1232.avi
1231.avi
5/15
BN68-02327L-03Eng.indb 34 2009-10-08 �� 10:29:05

English - 35
Photo / Music / Movie List Option Menu
1. Press the MEDIA.P button.
2.
Press the ◄ or ► button to select Photo, Music or Movie then press the
ENTER
E
button.
3.
Press the ◄ or ► button to select the desired file.
Selecting Multiple Files
Press the ◄ or ► button to select the desired file. Then press the Yellow
button.
Repeat the above operation to select multiple files.
The mark
c
appears to the selected file.
4.
Press the TOOLS button.
The option menu changes according to the current status.
Play Current Group
Using this menu, you can play a SlideShow using only the photo files in the currently
selected sorting group.
Deselect All (When at least one file is selected)
You can deselect all files.
The
c
mark indicating the corresponding file is selected is hidden.
Information
The photo / music / movie file information is displayed. You can view the information of
files during a SlideShow using the same procedures.
Press the INFO button to viewing the information.
Remove Safely
You can remove the device safely from the TV.
Photo
Slide Show
Using this menu, you can play a SlideShow using the photo files on the USB memory device.
Change Group (When the Sort key is the Colour)
You can change a selected photo file’s (or group of files) colour information in order to move it from one colour group to another.
This does not change the actual colour of the photo.
The group information of the current file is updated and the photos are moved to the new colour group.
To change the information of multiple files, select the files you want by pressing the Yellow button.
Music
Change Group (When the Sort key is Mood)
You can change the mood information of music files. The group information of the current file is updated and the file is moved to
the new group. To change the information of multiple files, select files by pressing the Yellow button.
¦
N
N
❑
❑
N
❑
O
❑
❑
❑
N
N
N
❑
INFO
GUIDE
CH LIST
AD
SUM Device
FavouritesSettings Select
T
Tools
R
Return
Colour
Folder
Preference
Timeline
BasicView
1234.jpg
1235.jpg
1236.jpg
1237.jpg
1233.jpg
1232.jpg
1231.jpg
SlideShow
PlayCurrentGroup
ChangeGroup
Information
RemoveSafely
5/15
SUM Device
FavouritesSettings Select
T
Tools
R
Return
Preference
BasicView
Title
Folder
Genre
HaHaHa
Gold
Shine
Way
WantMe
Lies
ILoveYou
GlenHans
OnceOst
2007
Soundtrack
3/37Energetic
PlayCurrentGroup
Information
RemoveSafely
SUM Device
FavouritesSettings Select
T
Tools
R
Return
Preference
BasicView
Timeline
Folder
Title
ABCD.avi
1235.avi
1236.avi
1237.avi
1233.avi
1232.avi
1231.avi
5/15
PlayCurrentGroup
Information
RemoveSafely
BN68-02327L-03Eng.indb 35 2009-10-08 �� 10:29:09
Seite wird geladen ...

English - 37
Viewing a Photo or Slide Show
Viewing a Slide Show
All files in the File List Section will be used for the Slide Show.
During the slide show, files are displayed in order from the currently shown file.
The Slide Show progresses in the order sorted in the File List Section.
Music files can be automatically played during the Slide Show if the
Background Music is set to On.
While a photo list is displayed, press the
∂
(Play)/ENTER
E
button on the
remote control to start slide show.
SlideShow Control Buttons
Button Operations
ENTER
E
Play/Pause the Slide Show.
∂
Play the Slide Show.
∑
Pause the Slide Show.
∫
Exit Slide Show and return to the photo list.
π
/
μ
Change the SlideShow playing speed.
TOOLS Run various functions from the Photo menus.
Playing current group
1. Press the ▲ button to move to the Sort key Section.
2.
Press the ◄ or ► button to select a sorting standard.
3.
Press the ▼ button to move to the Group List Section.
4.
Select a group using the ◄ and ► buttons.
5.
Press the
∂
(Play) button. A slideshow begins with the files of the selected
group.
Alternatively
1.
Select a Sort key and then in the File List Section, select the photos contained in
the desired group.
To move to the previous/next group, press the
π
(REW) or
μ
(FF) button.
2.
Press the TOOLS button.
3.
Press the ▲ or ▼ button to select Play Current Group, then press the ENTER
E
button.
Only the photos in the sorting group including the selected files will be used for the Slide Show.
ToperformaSlideShowwithonlytheselectedles
1. Press the ▼ button to select the File List Section.
2.
Press the ◄ or ► button to select the desired photo in the File List Section.
3.
Press the Yellow button.
4.
Repeat the above operation to select multiple photos.
The
c
mark appears to the left of the selected photo.
If you select one file, the Slide Show will not be performed.
To deselect all selected files, press the TOOLS button and select Deselect All.
5.
Press the
∂
(Play)/ENTER
E
button.
The selected files will be used for the Slide Show.
Alternatively
1. In the File List Section, press the Yellow buttons to select the desired photos.
2.
Press the TOOLS button.
3.
Press the ▲ or ▼ button to select Slide Show, then press the ENTER
E
button.
The selected files will be used for the Slide Show.
¦
N
N
N
N
O
N
●
N
N
N
N
N
N
●
N
INFO
GUIDE
CH LIST
AD
SUM Device
FavouritesSettings Select
T
Tools
R
Return
BasicView
Timeline
Folder
Colour
1234.jpg
1235.jpg
1236.jpg
1237.jpg
1233.jpg
1232.jpg
1231.jpg
SlideShow
PlayCurrentGroup
Information
RemoveSafely
5/15
Preference
E
Pause◀▶Previous/Next
T
Tools
R
Return
SUM
1234.jpg
580x7652009/01/025/15
▶Normal
SUM Device
FavouritesSettings Select
T
Tools
R
Return
BasicView
Timeline
Folder
Colour
1234.jpg
1235.jpg
1236.jpg
1237.jpg
1233.jpg
1232.jpg
1231.jpg
5/15
Preference
BN68-02327L-03Eng.indb 37 2009-10-08 �� 10:29:15
Seite wird geladen ...

English - 39
Playing a Movie File
Playingamoviele
1. Press the ▼ button to select the File List Section.
2.
Pressing the ◄ or ► button to select a movie file to be played.
3.
Press the
∂
(Play)/ENTER
E
button.
The selected file is played.
The selected file is displayed at the top with its playing time.
The playing duration of a movie file may be displayed as ‘00:00:00’ if its
playing time information is not found at the start of the file.
You can watch exciting gaming multimedia files, but the gaming function is not
supported.
Supported Subtitle Formats
Name File extension Format
MPEG-4 time-based text .ttxt XML
SAMI .smi HTML
SubRip .srt string-based
SubViewer .sub string-based
Micro DVD .sub or .txt string-based
Supported Video Formats
File extension Container Video Decoder Audio codec Resolution
*.avi AVI
Divx 3.11 / 4.x / 5.1 / 6.0
MP3
AC3
LPCM
ADPCM
720x576
XviD 1920x1080
H.264 BP / MP / HP 1920x1080
MPEG4 SP / ASP 1920x1080
Motion JPEG 800x600
*.mkv MKV
Divx 3.11 / 4.x / 5.1 / 6.0
MP3
AC3
LPCM
ADPCM
720x576
XviD 1920x1080
H.264 BP / MP / HP 1920x1080
MPEG4 SP / ASP 1920x1080
Motion JPEG 800x600
*.asf ASF
Divx 3.11 / 4.x / 5.1 / 6.0
MP3
AC3
LPCM
ADPCM
WMA
720x576
XviD 1920x1080
H.264 BP / MP / HP 1920x1080
MPEG4 SP / ASP 1920x1080
Motion JPEG 800x600
*.wmv ASF VC1 WMA 1920x1080
*.mp4
MP4
(SMP4)
H.264 BP / MP / HP
MP3
ADPCM
AAC
1920x1080
MPEG4 SP / ASP 1920x1080
XVID 1920x1080
*.3gp 3GPP
H.264 BP / MP / HP
ADPCM
AAC
1920x1080
MPEG4 SP / ASP 1920x1080
*.vro
VRO
VOB
MPEG2
AC3
MPEG
LPCM
1920x1080
MPEG2 1920x1080
*.mpg
*.mpeg
PS
MPEG1
AC3
MPEG
LPCM
1920x1080
MPEG2 1920x1080
*.ts
*.tp
*.trp
TS
MPEG2
AAC
MP3
1920x1080
H.264 1920x1080
VC1 1920x1080
¦
N
N
N
N
N
N
E
Pause◀▶Jump
T
Tools
R
Return
SUM
ABC.avi
▶00:00:01/00:05:303/37
BN68-02327L-03Eng.indb 39 2009-10-08 �� 10:29:16
Seite wird geladen ...
Seite wird geladen ...
Seite wird geladen ...
Seite wird geladen ...
Seite wird geladen ...
Seite wird geladen ...

English - 46
Setting Up Anynet
+
Press the TOOLS button to display the Tools menu. You can also display Anynet
+
menu by
selecting Tools→Anynet
+
(HDMI-CEC).
Setup
Anynet
+
(HDMI-CEC)→Off/On
To use the Anynet
+
Function, Anynet
+
(HDMI-CEC) must be set to On.
When the Anynet
+
(HDMI-CEC) function is disabled, all the Anynet+ related operations are
deactivated.
AutoTurnOff→No/Yes
Setting an Anynet
+
Device to turn Off automatically when the TV is turned Off.
The active source on the TV remote must be set to TV to use the Anynet
+
function.
If you set Auto Turn Off to Yes, connected external devices are also turned off when the
TV is turned off. If an external device is still recording, it may or may not turn off.
Switching between Anynet
+
Devices
1. Press the TOOLS button. Press the ENTER
E
button to select Anynet
+
(HDMI-CEC).
2.
Press the ▲ or ▼ button to select Device List, then press the ENTER
E
button.
Anynet
+
devices connected to the TV are listed.
If you cannot find a device you want, press the red button to scan for devices.
3.
Press the ▲ or ▼ button to select a particular device and press the ENTER
E
button. It
is switched to the selected device.
Only when you set Anynet
+
(HDMI-CEC) to On in the Application menu, the
Device List menu appears.
Switching to the selected devices may take up to 2 minutes. You cannot cancel the
operation during the switching operation.
The time required to scan for devices is determined by the number of connected devices.
When the device scan is complete, the number of devices found are not displayed.
Although the TV automatically searches the device list when the TV is turned on via the power button, devices connected to
the TV may not always be automatically displayed in the device list. Press the red button to search for the connected device.
If you have selected external input mode by pressing the SOURCE button, you cannot use the Anynet
+
function. Make sure to
switch to an Anynet
+
device by using the Device List.
Anynet
+
Menu
The Anynet
+
menu changes depending on the type and status of the Anynet
+
devices connected to the TV.
Anynet
+
Menu Description
View TV Anynet
+
mode changes to TV broadcast mode.
Device List Shows the Anynet
+
device list.
(device_name) MENU
Shows the connected device menus. E.g. If a DVD recorder is connected, the disc
menu of the DVD recorder will appear.
(device_name) INFO
Shows the play menu of the connected device. E.g. If a DVD recorder is connected,
the play menu of the DVD recorder will appear.
Recording: (*recorder)
Starts recording immediately using the recorder. (This is only available for devices that
support the recording function.)
Stop Recording: (*recorder) Stops recording.
Receiver Sound is played through the receiver.
If more than one recording device is connected, they are displayed as (*recorder) and if only one recording device is
connected, it will be represented as (*device_name).
¦
T
❑
■
N
■
N
N
¦
N
N
N
N
N
N
N
N
N
U
Move
E
Enter
R
Return
Anynet
+
(HDMI-CEC) :On▶
Setup
AutoTurnOff :Yes
MediaPlay(USB&DLNA)
Anynet
+
(HDMI-CEC)
ContentLibrary
Internet@TV
HomeNetworkCentre
Application
U
Move
E
Enter
R
Return
Anynet
+
(HDMI-CEC) :On
Setup
AutoTurnOff :Yes▶
U
Move
E
Enter
R
Return
ViewTV
DeviceList
Recording:DVDR
DVDRMENU
DVDRINFO
Receiver:Off
Setup
BN68-02327L-03Eng.indb 46 2009-10-08 �� 10:29:20
Seite wird geladen ...
Seite wird geladen ...
Seite wird geladen ...
Seite wird geladen ...
Seite wird geladen ...
Seite wird geladen ...
Seite wird geladen ...
Seite wird geladen ...
Seite wird geladen ...
Seite wird geladen ...
Seite wird geladen ...
Seite wird geladen ...
Seite wird geladen ...
Seite wird geladen ...
Seite wird geladen ...
Seite wird geladen ...
Seite wird geladen ...
Seite wird geladen ...
Seite wird geladen ...
Seite wird geladen ...
Seite wird geladen ...
Seite wird geladen ...
Seite wird geladen ...
Seite wird geladen ...
Seite wird geladen ...
Seite wird geladen ...
Seite wird geladen ...
Seite wird geladen ...
Seite wird geladen ...
Seite wird geladen ...
Seite wird geladen ...
Seite wird geladen ...
Seite wird geladen ...
Seite wird geladen ...
Seite wird geladen ...
Seite wird geladen ...
Seite wird geladen ...
Seite wird geladen ...
Seite wird geladen ...
Seite wird geladen ...
Seite wird geladen ...
Seite wird geladen ...
Seite wird geladen ...
Seite wird geladen ...
Seite wird geladen ...
Seite wird geladen ...
Seite wird geladen ...
Seite wird geladen ...
Seite wird geladen ...
Seite wird geladen ...
Seite wird geladen ...
Seite wird geladen ...
Seite wird geladen ...
Seite wird geladen ...
Seite wird geladen ...
Seite wird geladen ...
Seite wird geladen ...
Seite wird geladen ...
Seite wird geladen ...
Seite wird geladen ...
Seite wird geladen ...
Seite wird geladen ...
Seite wird geladen ...
Seite wird geladen ...
Seite wird geladen ...
Seite wird geladen ...
Seite wird geladen ...
Seite wird geladen ...
Seite wird geladen ...
Seite wird geladen ...
Seite wird geladen ...
Seite wird geladen ...
Seite wird geladen ...
Seite wird geladen ...
Seite wird geladen ...
Seite wird geladen ...
Seite wird geladen ...
Seite wird geladen ...
Seite wird geladen ...
Seite wird geladen ...
Seite wird geladen ...
Seite wird geladen ...
Seite wird geladen ...
Seite wird geladen ...
Seite wird geladen ...
Seite wird geladen ...
Seite wird geladen ...
Seite wird geladen ...
Seite wird geladen ...
Seite wird geladen ...
Seite wird geladen ...
Seite wird geladen ...
Seite wird geladen ...
Seite wird geladen ...
Seite wird geladen ...
Seite wird geladen ...
Seite wird geladen ...
Seite wird geladen ...
Seite wird geladen ...
Seite wird geladen ...
Seite wird geladen ...
Seite wird geladen ...
Seite wird geladen ...
Seite wird geladen ...
Seite wird geladen ...
Seite wird geladen ...
Seite wird geladen ...
Seite wird geladen ...
Seite wird geladen ...
Seite wird geladen ...
Seite wird geladen ...
Seite wird geladen ...
Seite wird geladen ...
Seite wird geladen ...
Seite wird geladen ...
Seite wird geladen ...
Seite wird geladen ...
Seite wird geladen ...
Seite wird geladen ...
Seite wird geladen ...
Seite wird geladen ...
Seite wird geladen ...
Seite wird geladen ...
Seite wird geladen ...
Seite wird geladen ...
Seite wird geladen ...
Seite wird geladen ...
Seite wird geladen ...
Seite wird geladen ...
Seite wird geladen ...
Seite wird geladen ...
Seite wird geladen ...
Seite wird geladen ...
Seite wird geladen ...
Seite wird geladen ...
Seite wird geladen ...
Seite wird geladen ...
Seite wird geladen ...
Seite wird geladen ...
Seite wird geladen ...
Seite wird geladen ...
Seite wird geladen ...
Seite wird geladen ...
Seite wird geladen ...
Seite wird geladen ...
Seite wird geladen ...
Seite wird geladen ...
Seite wird geladen ...
Seite wird geladen ...
Seite wird geladen ...
Seite wird geladen ...
Seite wird geladen ...
Seite wird geladen ...
Seite wird geladen ...
Seite wird geladen ...
Seite wird geladen ...
Seite wird geladen ...
Seite wird geladen ...
Seite wird geladen ...
Seite wird geladen ...
Seite wird geladen ...
Seite wird geladen ...
Seite wird geladen ...
Seite wird geladen ...
Seite wird geladen ...
Seite wird geladen ...
Seite wird geladen ...
Seite wird geladen ...
Seite wird geladen ...
Seite wird geladen ...
Seite wird geladen ...
Seite wird geladen ...
Seite wird geladen ...
Seite wird geladen ...
Seite wird geladen ...
Seite wird geladen ...
Seite wird geladen ...
Seite wird geladen ...
Seite wird geladen ...
Seite wird geladen ...
Seite wird geladen ...
Seite wird geladen ...
Seite wird geladen ...
Seite wird geladen ...
Seite wird geladen ...
Seite wird geladen ...
Seite wird geladen ...
Seite wird geladen ...
Seite wird geladen ...
Seite wird geladen ...
Seite wird geladen ...
Seite wird geladen ...
Seite wird geladen ...
Seite wird geladen ...
Seite wird geladen ...
Seite wird geladen ...
Seite wird geladen ...
Seite wird geladen ...
Seite wird geladen ...
Seite wird geladen ...
Seite wird geladen ...
Seite wird geladen ...
Seite wird geladen ...
Seite wird geladen ...
Seite wird geladen ...
Seite wird geladen ...
Seite wird geladen ...
Seite wird geladen ...
Seite wird geladen ...
Seite wird geladen ...
Seite wird geladen ...
Seite wird geladen ...
Seite wird geladen ...
Seite wird geladen ...
Seite wird geladen ...
Seite wird geladen ...
Seite wird geladen ...
Seite wird geladen ...
Seite wird geladen ...
Seite wird geladen ...
Seite wird geladen ...
Seite wird geladen ...
Seite wird geladen ...
Seite wird geladen ...
Seite wird geladen ...
Seite wird geladen ...
Seite wird geladen ...
Seite wird geladen ...
Seite wird geladen ...
Seite wird geladen ...
Seite wird geladen ...
Seite wird geladen ...
Seite wird geladen ...
Seite wird geladen ...
Seite wird geladen ...
Seite wird geladen ...
Seite wird geladen ...
Seite wird geladen ...
Seite wird geladen ...
Seite wird geladen ...
Seite wird geladen ...
Seite wird geladen ...
Seite wird geladen ...
Seite wird geladen ...
Seite wird geladen ...
Seite wird geladen ...
Seite wird geladen ...
Seite wird geladen ...
Seite wird geladen ...
Seite wird geladen ...
Seite wird geladen ...
Seite wird geladen ...
Seite wird geladen ...
Seite wird geladen ...
Seite wird geladen ...
Seite wird geladen ...
Seite wird geladen ...
Seite wird geladen ...
Seite wird geladen ...
Seite wird geladen ...
Seite wird geladen ...
Seite wird geladen ...
Seite wird geladen ...
Seite wird geladen ...
Seite wird geladen ...
Seite wird geladen ...
Seite wird geladen ...
Seite wird geladen ...
Seite wird geladen ...
Seite wird geladen ...
Seite wird geladen ...
Seite wird geladen ...
Seite wird geladen ...
Seite wird geladen ...
Seite wird geladen ...
Seite wird geladen ...
Seite wird geladen ...
Seite wird geladen ...
Seite wird geladen ...
Seite wird geladen ...
Seite wird geladen ...
Seite wird geladen ...
Seite wird geladen ...
Seite wird geladen ...
Seite wird geladen ...
Seite wird geladen ...
Seite wird geladen ...
Seite wird geladen ...
Seite wird geladen ...
Seite wird geladen ...
Seite wird geladen ...
Seite wird geladen ...
Seite wird geladen ...
Seite wird geladen ...
Seite wird geladen ...
Seite wird geladen ...
Seite wird geladen ...
Seite wird geladen ...
Seite wird geladen ...
Seite wird geladen ...
Seite wird geladen ...
Seite wird geladen ...
Seite wird geladen ...
Seite wird geladen ...
Seite wird geladen ...
Seite wird geladen ...
Seite wird geladen ...
Seite wird geladen ...
Seite wird geladen ...
Seite wird geladen ...
Seite wird geladen ...
Seite wird geladen ...
Seite wird geladen ...
Seite wird geladen ...
Seite wird geladen ...
Seite wird geladen ...
Seite wird geladen ...
Seite wird geladen ...
Seite wird geladen ...
Seite wird geladen ...
Seite wird geladen ...
Seite wird geladen ...
Seite wird geladen ...
Seite wird geladen ...
Seite wird geladen ...
Seite wird geladen ...
Seite wird geladen ...
Seite wird geladen ...
Seite wird geladen ...
Seite wird geladen ...
Seite wird geladen ...
Seite wird geladen ...
Seite wird geladen ...
Seite wird geladen ...
Seite wird geladen ...
Seite wird geladen ...
Seite wird geladen ...
Seite wird geladen ...
Seite wird geladen ...
Seite wird geladen ...
Seite wird geladen ...
Seite wird geladen ...
Seite wird geladen ...
Seite wird geladen ...
Seite wird geladen ...
Seite wird geladen ...
Seite wird geladen ...
Seite wird geladen ...
Seite wird geladen ...
Seite wird geladen ...
Seite wird geladen ...
Seite wird geladen ...
Seite wird geladen ...
Seite wird geladen ...
Seite wird geladen ...
Seite wird geladen ...
Seite wird geladen ...
Seite wird geladen ...
Seite wird geladen ...
Seite wird geladen ...
Seite wird geladen ...
Seite wird geladen ...
Seite wird geladen ...
Seite wird geladen ...
Seite wird geladen ...
Seite wird geladen ...
Seite wird geladen ...
Seite wird geladen ...
Seite wird geladen ...
Seite wird geladen ...
Seite wird geladen ...
Seite wird geladen ...
Seite wird geladen ...
Seite wird geladen ...
Seite wird geladen ...
Seite wird geladen ...
Seite wird geladen ...
Seite wird geladen ...
Seite wird geladen ...
Seite wird geladen ...
Seite wird geladen ...
Seite wird geladen ...
Seite wird geladen ...
Seite wird geladen ...
Seite wird geladen ...
Seite wird geladen ...
Seite wird geladen ...
Seite wird geladen ...
Seite wird geladen ...
Seite wird geladen ...
Seite wird geladen ...
Seite wird geladen ...
Seite wird geladen ...
Seite wird geladen ...
Seite wird geladen ...
Seite wird geladen ...
Seite wird geladen ...
Seite wird geladen ...
Seite wird geladen ...
Seite wird geladen ...
Seite wird geladen ...
Seite wird geladen ...
Seite wird geladen ...
Seite wird geladen ...
Seite wird geladen ...
Seite wird geladen ...
Seite wird geladen ...
Seite wird geladen ...
Seite wird geladen ...
Seite wird geladen ...
Seite wird geladen ...
Seite wird geladen ...
Seite wird geladen ...
Seite wird geladen ...
Seite wird geladen ...
Seite wird geladen ...
Seite wird geladen ...
Seite wird geladen ...
Seite wird geladen ...
Seite wird geladen ...
Seite wird geladen ...
Seite wird geladen ...
Seite wird geladen ...
Seite wird geladen ...
Seite wird geladen ...
Seite wird geladen ...
Seite wird geladen ...
Seite wird geladen ...
Seite wird geladen ...
Seite wird geladen ...
Seite wird geladen ...
Seite wird geladen ...
Seite wird geladen ...
Seite wird geladen ...
Seite wird geladen ...
Seite wird geladen ...
Seite wird geladen ...
Seite wird geladen ...
Seite wird geladen ...
Seite wird geladen ...
Seite wird geladen ...
Seite wird geladen ...
Seite wird geladen ...
Seite wird geladen ...
Seite wird geladen ...
Seite wird geladen ...
Seite wird geladen ...
Seite wird geladen ...
Seite wird geladen ...
Seite wird geladen ...
Seite wird geladen ...
Seite wird geladen ...
Seite wird geladen ...
Seite wird geladen ...
Seite wird geladen ...
Seite wird geladen ...
Seite wird geladen ...
Seite wird geladen ...
Seite wird geladen ...
Seite wird geladen ...
Seite wird geladen ...
Seite wird geladen ...
Seite wird geladen ...
Seite wird geladen ...
Seite wird geladen ...
Seite wird geladen ...
Seite wird geladen ...
Seite wird geladen ...
Seite wird geladen ...
Seite wird geladen ...
Seite wird geladen ...
Seite wird geladen ...
Seite wird geladen ...
Seite wird geladen ...
Seite wird geladen ...
Seite wird geladen ...
Seite wird geladen ...
Seite wird geladen ...
Seite wird geladen ...
Seite wird geladen ...
Seite wird geladen ...
Seite wird geladen ...
Seite wird geladen ...
Seite wird geladen ...
Seite wird geladen ...
Seite wird geladen ...
Seite wird geladen ...
Seite wird geladen ...
Seite wird geladen ...
Seite wird geladen ...
Seite wird geladen ...
Seite wird geladen ...
Seite wird geladen ...
Seite wird geladen ...
Seite wird geladen ...
Seite wird geladen ...
Seite wird geladen ...
Seite wird geladen ...
Seite wird geladen ...
Seite wird geladen ...
Seite wird geladen ...
Seite wird geladen ...
Seite wird geladen ...
Seite wird geladen ...
Seite wird geladen ...
Seite wird geladen ...
Seite wird geladen ...
Seite wird geladen ...
Seite wird geladen ...
Seite wird geladen ...
Seite wird geladen ...
Seite wird geladen ...
Seite wird geladen ...
Seite wird geladen ...
Seite wird geladen ...
Seite wird geladen ...
Seite wird geladen ...
Seite wird geladen ...
Seite wird geladen ...
Seite wird geladen ...
Seite wird geladen ...
Seite wird geladen ...
Seite wird geladen ...
Seite wird geladen ...
Seite wird geladen ...
Seite wird geladen ...
Seite wird geladen ...
Seite wird geladen ...
Seite wird geladen ...
Seite wird geladen ...
Seite wird geladen ...
Seite wird geladen ...
Seite wird geladen ...
Seite wird geladen ...
Seite wird geladen ...
Seite wird geladen ...
Seite wird geladen ...
Seite wird geladen ...
Seite wird geladen ...
Seite wird geladen ...
Seite wird geladen ...
Seite wird geladen ...
Seite wird geladen ...
Seite wird geladen ...
Seite wird geladen ...
Seite wird geladen ...
Seite wird geladen ...
Seite wird geladen ...
Seite wird geladen ...
Seite wird geladen ...
Seite wird geladen ...
Seite wird geladen ...
Seite wird geladen ...
Seite wird geladen ...
Seite wird geladen ...
Seite wird geladen ...
Seite wird geladen ...
Seite wird geladen ...
Seite wird geladen ...
Seite wird geladen ...
Seite wird geladen ...
Seite wird geladen ...
Seite wird geladen ...
Seite wird geladen ...
Seite wird geladen ...
Seite wird geladen ...
Seite wird geladen ...
Seite wird geladen ...
Seite wird geladen ...
Seite wird geladen ...
Seite wird geladen ...
Seite wird geladen ...
Seite wird geladen ...
Seite wird geladen ...
Seite wird geladen ...
Seite wird geladen ...
Seite wird geladen ...
Seite wird geladen ...
Seite wird geladen ...
Seite wird geladen ...
Seite wird geladen ...
Seite wird geladen ...
Seite wird geladen ...
Seite wird geladen ...
Seite wird geladen ...
Seite wird geladen ...
Seite wird geladen ...
Seite wird geladen ...
Seite wird geladen ...
Seite wird geladen ...
Seite wird geladen ...
Seite wird geladen ...
Seite wird geladen ...
Seite wird geladen ...
Seite wird geladen ...
Seite wird geladen ...
Seite wird geladen ...
Seite wird geladen ...
Seite wird geladen ...
Seite wird geladen ...
Seite wird geladen ...
Seite wird geladen ...
Seite wird geladen ...
Seite wird geladen ...
Seite wird geladen ...
Seite wird geladen ...
Seite wird geladen ...
Seite wird geladen ...
Seite wird geladen ...
Seite wird geladen ...
Seite wird geladen ...
Seite wird geladen ...
Seite wird geladen ...
Seite wird geladen ...
Seite wird geladen ...
Seite wird geladen ...
Seite wird geladen ...
Seite wird geladen ...
Seite wird geladen ...
Seite wird geladen ...
Seite wird geladen ...
Seite wird geladen ...
Seite wird geladen ...
Seite wird geladen ...
Seite wird geladen ...
Seite wird geladen ...
-
 1
1
-
 2
2
-
 3
3
-
 4
4
-
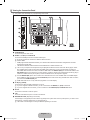 5
5
-
 6
6
-
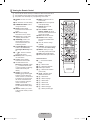 7
7
-
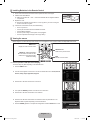 8
8
-
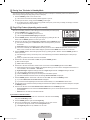 9
9
-
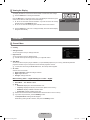 10
10
-
 11
11
-
 12
12
-
 13
13
-
 14
14
-
 15
15
-
 16
16
-
 17
17
-
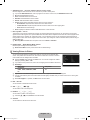 18
18
-
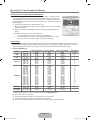 19
19
-
 20
20
-
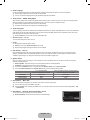 21
21
-
 22
22
-
 23
23
-
 24
24
-
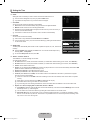 25
25
-
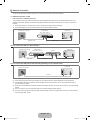 26
26
-
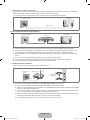 27
27
-
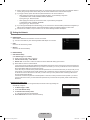 28
28
-
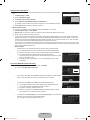 29
29
-
 30
30
-
 31
31
-
 32
32
-
 33
33
-
 34
34
-
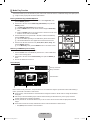 35
35
-
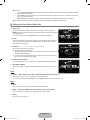 36
36
-
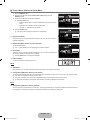 37
37
-
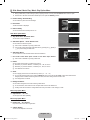 38
38
-
 39
39
-
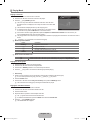 40
40
-
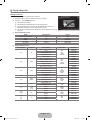 41
41
-
 42
42
-
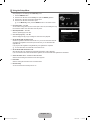 43
43
-
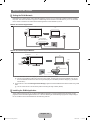 44
44
-
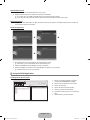 45
45
-
 46
46
-
 47
47
-
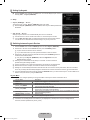 48
48
-
 49
49
-
 50
50
-
 51
51
-
 52
52
-
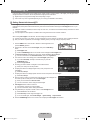 53
53
-
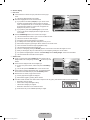 54
54
-
 55
55
-
 56
56
-
 57
57
-
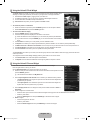 58
58
-
 59
59
-
 60
60
-
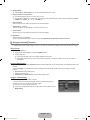 61
61
-
 62
62
-
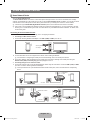 63
63
-
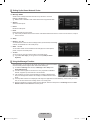 64
64
-
 65
65
-
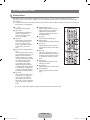 66
66
-
 67
67
-
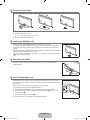 68
68
-
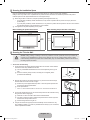 69
69
-
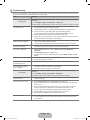 70
70
-
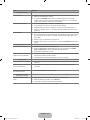 71
71
-
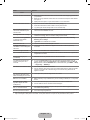 72
72
-
 73
73
-
 74
74
-
 75
75
-
 76
76
-
 77
77
-
 78
78
-
 79
79
-
 80
80
-
 81
81
-
 82
82
-
 83
83
-
 84
84
-
 85
85
-
 86
86
-
 87
87
-
 88
88
-
 89
89
-
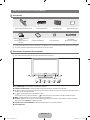 90
90
-
 91
91
-
 92
92
-
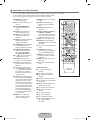 93
93
-
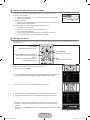 94
94
-
 95
95
-
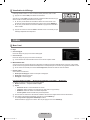 96
96
-
 97
97
-
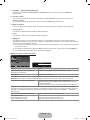 98
98
-
 99
99
-
 100
100
-
 101
101
-
 102
102
-
 103
103
-
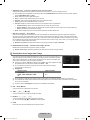 104
104
-
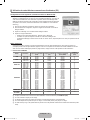 105
105
-
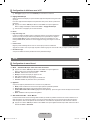 106
106
-
 107
107
-
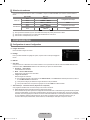 108
108
-
 109
109
-
 110
110
-
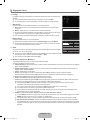 111
111
-
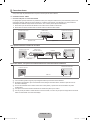 112
112
-
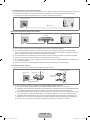 113
113
-
 114
114
-
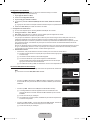 115
115
-
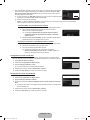 116
116
-
 117
117
-
 118
118
-
 119
119
-
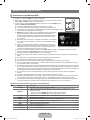 120
120
-
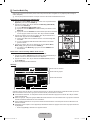 121
121
-
 122
122
-
 123
123
-
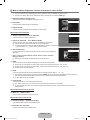 124
124
-
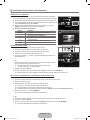 125
125
-
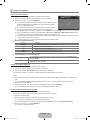 126
126
-
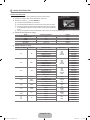 127
127
-
 128
128
-
 129
129
-
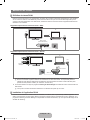 130
130
-
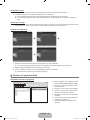 131
131
-
 132
132
-
 133
133
-
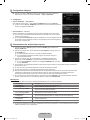 134
134
-
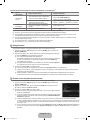 135
135
-
 136
136
-
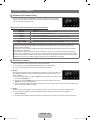 137
137
-
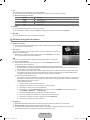 138
138
-
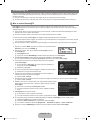 139
139
-
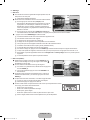 140
140
-
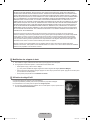 141
141
-
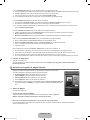 142
142
-
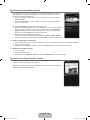 143
143
-
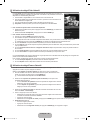 144
144
-
 145
145
-
 146
146
-
 147
147
-
 148
148
-
 149
149
-
 150
150
-
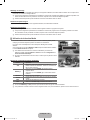 151
151
-
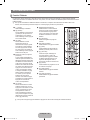 152
152
-
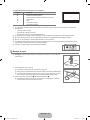 153
153
-
 154
154
-
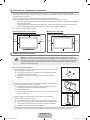 155
155
-
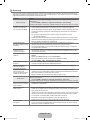 156
156
-
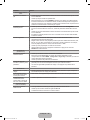 157
157
-
 158
158
-
 159
159
-
 160
160
-
 161
161
-
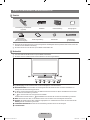 162
162
-
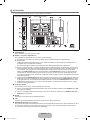 163
163
-
 164
164
-
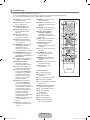 165
165
-
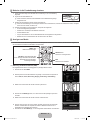 166
166
-
 167
167
-
 168
168
-
 169
169
-
 170
170
-
 171
171
-
 172
172
-
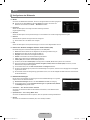 173
173
-
 174
174
-
 175
175
-
 176
176
-
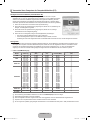 177
177
-
 178
178
-
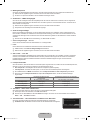 179
179
-
 180
180
-
 181
181
-
 182
182
-
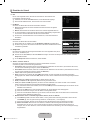 183
183
-
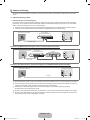 184
184
-
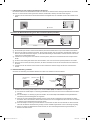 185
185
-
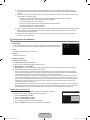 186
186
-
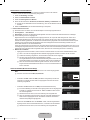 187
187
-
 188
188
-
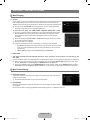 189
189
-
 190
190
-
 191
191
-
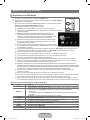 192
192
-
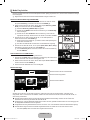 193
193
-
 194
194
-
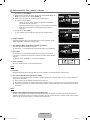 195
195
-
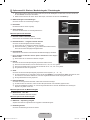 196
196
-
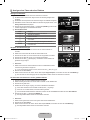 197
197
-
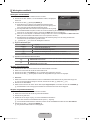 198
198
-
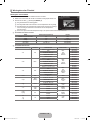 199
199
-
 200
200
-
 201
201
-
 202
202
-
 203
203
-
 204
204
-
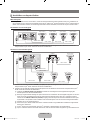 205
205
-
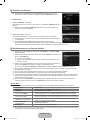 206
206
-
 207
207
-
 208
208
-
 209
209
-
 210
210
-
 211
211
-
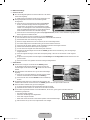 212
212
-
 213
213
-
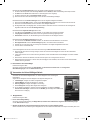 214
214
-
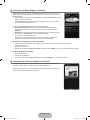 215
215
-
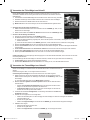 216
216
-
 217
217
-
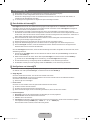 218
218
-
 219
219
-
 220
220
-
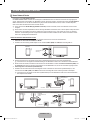 221
221
-
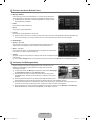 222
222
-
 223
223
-
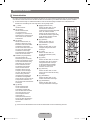 224
224
-
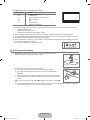 225
225
-
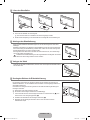 226
226
-
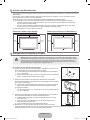 227
227
-
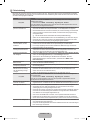 228
228
-
 229
229
-
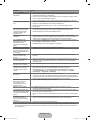 230
230
-
 231
231
-
 232
232
-
 233
233
-
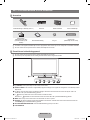 234
234
-
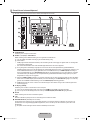 235
235
-
 236
236
-
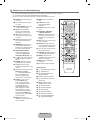 237
237
-
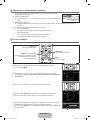 238
238
-
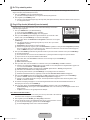 239
239
-
 240
240
-
 241
241
-
 242
242
-
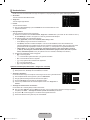 243
243
-
 244
244
-
 245
245
-
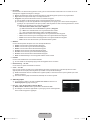 246
246
-
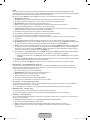 247
247
-
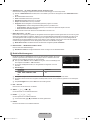 248
248
-
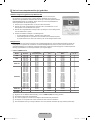 249
249
-
 250
250
-
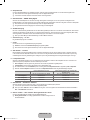 251
251
-
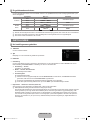 252
252
-
 253
253
-
 254
254
-
 255
255
-
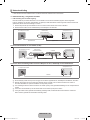 256
256
-
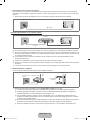 257
257
-
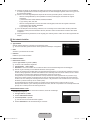 258
258
-
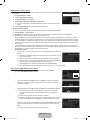 259
259
-
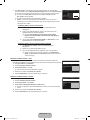 260
260
-
 261
261
-
 262
262
-
 263
263
-
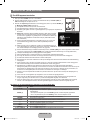 264
264
-
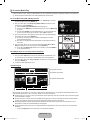 265
265
-
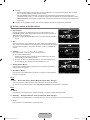 266
266
-
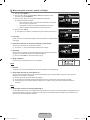 267
267
-
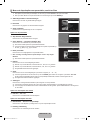 268
268
-
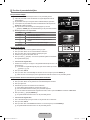 269
269
-
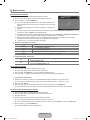 270
270
-
 271
271
-
 272
272
-
 273
273
-
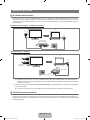 274
274
-
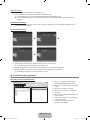 275
275
-
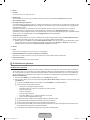 276
276
-
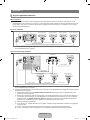 277
277
-
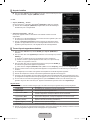 278
278
-
 279
279
-
 280
280
-
 281
281
-
 282
282
-
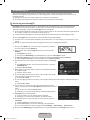 283
283
-
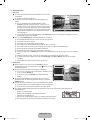 284
284
-
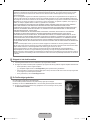 285
285
-
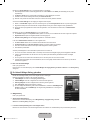 286
286
-
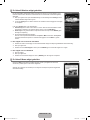 287
287
-
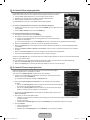 288
288
-
 289
289
-
 290
290
-
 291
291
-
 292
292
-
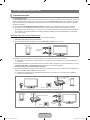 293
293
-
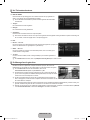 294
294
-
 295
295
-
 296
296
-
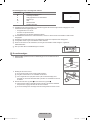 297
297
-
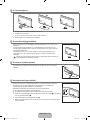 298
298
-
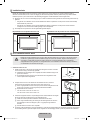 299
299
-
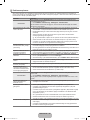 300
300
-
 301
301
-
 302
302
-
 303
303
-
 304
304
-
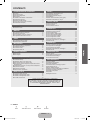 305
305
-
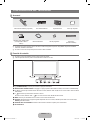 306
306
-
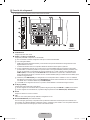 307
307
-
 308
308
-
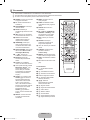 309
309
-
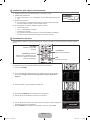 310
310
-
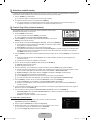 311
311
-
 312
312
-
 313
313
-
 314
314
-
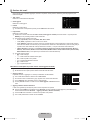 315
315
-
 316
316
-
 317
317
-
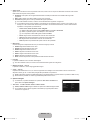 318
318
-
 319
319
-
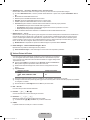 320
320
-
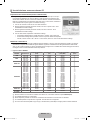 321
321
-
 322
322
-
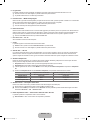 323
323
-
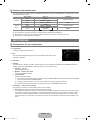 324
324
-
 325
325
-
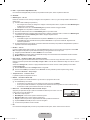 326
326
-
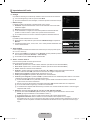 327
327
-
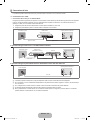 328
328
-
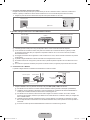 329
329
-
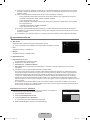 330
330
-
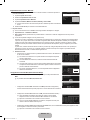 331
331
-
 332
332
-
 333
333
-
 334
334
-
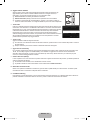 335
335
-
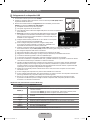 336
336
-
 337
337
-
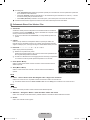 338
338
-
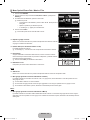 339
339
-
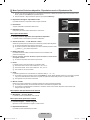 340
340
-
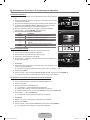 341
341
-
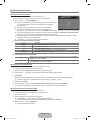 342
342
-
 343
343
-
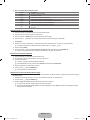 344
344
-
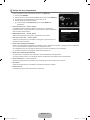 345
345
-
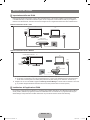 346
346
-
 347
347
-
 348
348
-
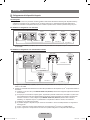 349
349
-
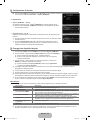 350
350
-
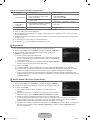 351
351
-
 352
352
-
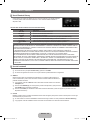 353
353
-
 354
354
-
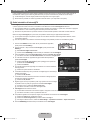 355
355
-
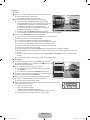 356
356
-
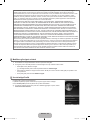 357
357
-
 358
358
-
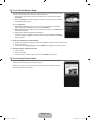 359
359
-
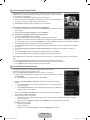 360
360
-
 361
361
-
 362
362
-
 363
363
-
 364
364
-
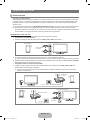 365
365
-
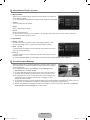 366
366
-
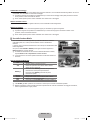 367
367
-
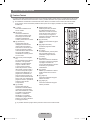 368
368
-
 369
369
-
 370
370
-
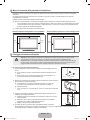 371
371
-
 372
372
-
 373
373
-
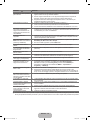 374
374
-
 375
375
-
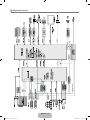 376
376
-
 377
377
-
 378
378
-
 379
379
-
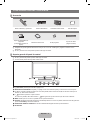 380
380
-
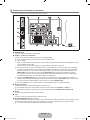 381
381
-
 382
382
-
 383
383
-
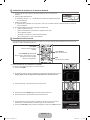 384
384
-
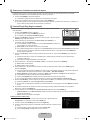 385
385
-
 386
386
-
 387
387
-
 388
388
-
 389
389
-
 390
390
-
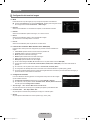 391
391
-
 392
392
-
 393
393
-
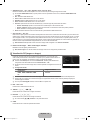 394
394
-
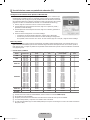 395
395
-
 396
396
-
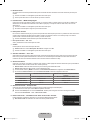 397
397
-
 398
398
-
 399
399
-
 400
400
-
 401
401
-
 402
402
-
 403
403
-
 404
404
-
 405
405
-
 406
406
-
 407
407
-
 408
408
-
 409
409
-
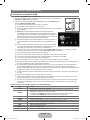 410
410
-
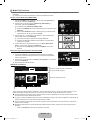 411
411
-
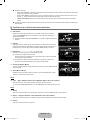 412
412
-
 413
413
-
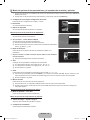 414
414
-
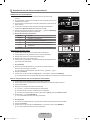 415
415
-
 416
416
-
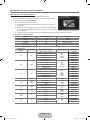 417
417
-
 418
418
-
 419
419
-
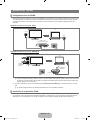 420
420
-
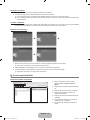 421
421
-
 422
422
-
 423
423
-
 424
424
-
 425
425
-
 426
426
-
 427
427
-
 428
428
-
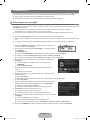 429
429
-
 430
430
-
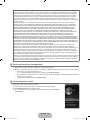 431
431
-
 432
432
-
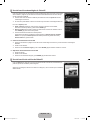 433
433
-
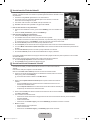 434
434
-
 435
435
-
 436
436
-
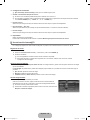 437
437
-
 438
438
-
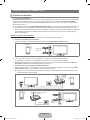 439
439
-
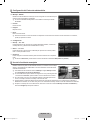 440
440
-
 441
441
-
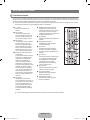 442
442
-
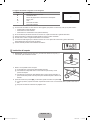 443
443
-
 444
444
-
 445
445
-
 446
446
-
 447
447
-
 448
448
-
 449
449
-
 450
450
-
 451
451
-
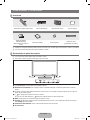 452
452
-
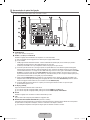 453
453
-
 454
454
-
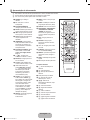 455
455
-
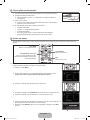 456
456
-
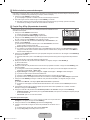 457
457
-
 458
458
-
 459
459
-
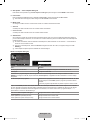 460
460
-
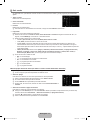 461
461
-
 462
462
-
 463
463
-
 464
464
-
 465
465
-
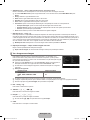 466
466
-
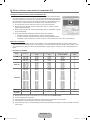 467
467
-
 468
468
-
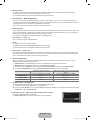 469
469
-
 470
470
-
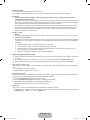 471
471
-
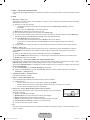 472
472
-
 473
473
-
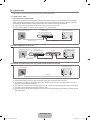 474
474
-
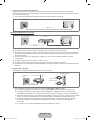 475
475
-
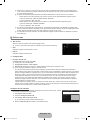 476
476
-
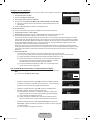 477
477
-
 478
478
-
 479
479
-
 480
480
-
 481
481
-
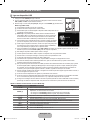 482
482
-
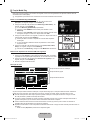 483
483
-
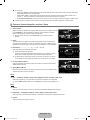 484
484
-
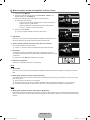 485
485
-
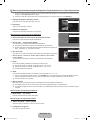 486
486
-
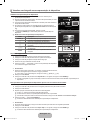 487
487
-
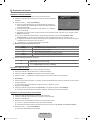 488
488
-
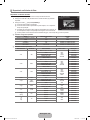 489
489
-
 490
490
-
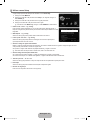 491
491
-
 492
492
-
 493
493
-
 494
494
-
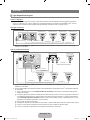 495
495
-
 496
496
-
 497
497
-
 498
498
-
 499
499
-
 500
500
-
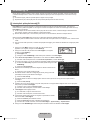 501
501
-
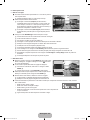 502
502
-
 503
503
-
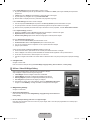 504
504
-
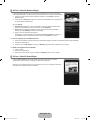 505
505
-
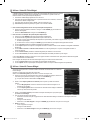 506
506
-
 507
507
-
 508
508
-
 509
509
-
 510
510
-
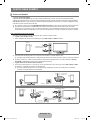 511
511
-
 512
512
-
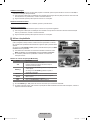 513
513
-
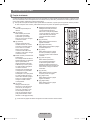 514
514
-
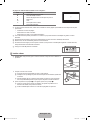 515
515
-
 516
516
-
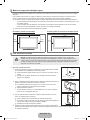 517
517
-
 518
518
-
 519
519
-
 520
520
-
 521
521
-
 522
522
-
 523
523
-
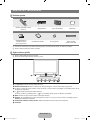 524
524
-
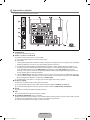 525
525
-
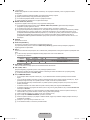 526
526
-
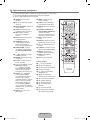 527
527
-
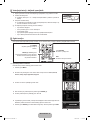 528
528
-
 529
529
-
 530
530
-
 531
531
-
 532
532
-
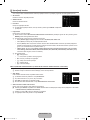 533
533
-
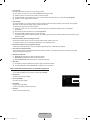 534
534
-
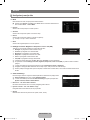 535
535
-
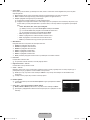 536
536
-
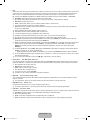 537
537
-
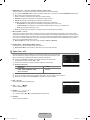 538
538
-
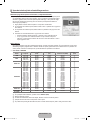 539
539
-
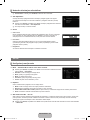 540
540
-
 541
541
-
 542
542
-
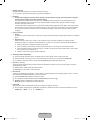 543
543
-
 544
544
-
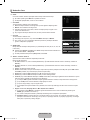 545
545
-
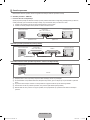 546
546
-
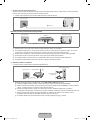 547
547
-
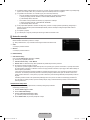 548
548
-
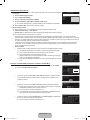 549
549
-
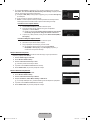 550
550
-
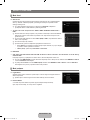 551
551
-
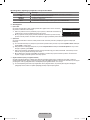 552
552
-
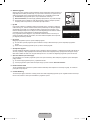 553
553
-
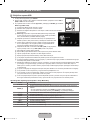 554
554
-
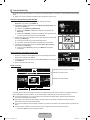 555
555
-
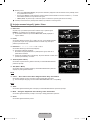 556
556
-
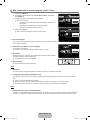 557
557
-
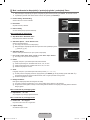 558
558
-
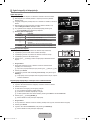 559
559
-
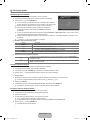 560
560
-
 561
561
-
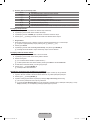 562
562
-
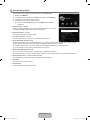 563
563
-
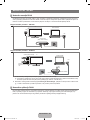 564
564
-
 565
565
-
 566
566
-
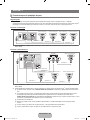 567
567
-
 568
568
-
 569
569
-
 570
570
-
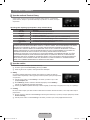 571
571
-
 572
572
-
 573
573
-
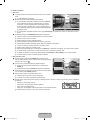 574
574
-
 575
575
-
 576
576
-
 577
577
-
 578
578
-
 579
579
-
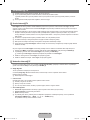 580
580
-
 581
581
-
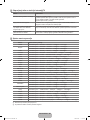 582
582
-
 583
583
-
 584
584
-
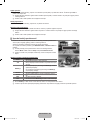 585
585
-
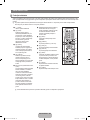 586
586
-
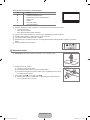 587
587
-
 588
588
-
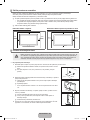 589
589
-
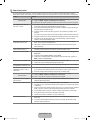 590
590
-
 591
591
-
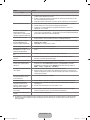 592
592
-
 593
593
-
 594
594
-
 595
595
-
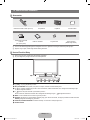 596
596
-
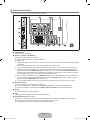 597
597
-
 598
598
-
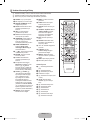 599
599
-
 600
600
-
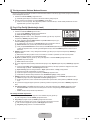 601
601
-
 602
602
-
 603
603
-
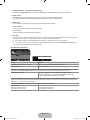 604
604
-
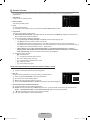 605
605
-
 606
606
-
 607
607
-
 608
608
-
 609
609
-
 610
610
-
 611
611
-
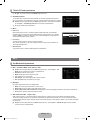 612
612
-
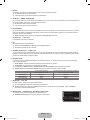 613
613
-
 614
614
-
 615
615
-
 616
616
-
 617
617
-
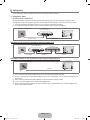 618
618
-
 619
619
-
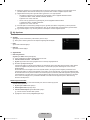 620
620
-
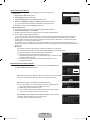 621
621
-
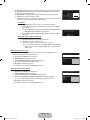 622
622
-
 623
623
-
 624
624
-
 625
625
-
 626
626
-
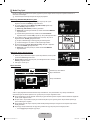 627
627
-
 628
628
-
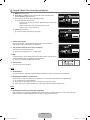 629
629
-
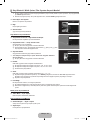 630
630
-
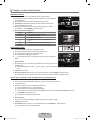 631
631
-
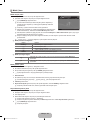 632
632
-
 633
633
-
 634
634
-
 635
635
-
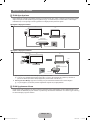 636
636
-
 637
637
-
 638
638
-
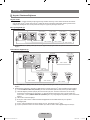 639
639
-
 640
640
-
 641
641
-
 642
642
-
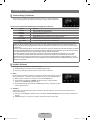 643
643
-
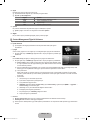 644
644
-
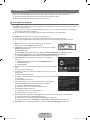 645
645
-
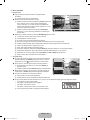 646
646
-
 647
647
-
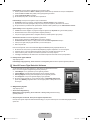 648
648
-
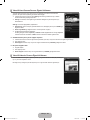 649
649
-
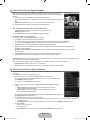 650
650
-
 651
651
-
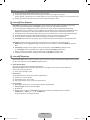 652
652
-
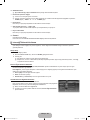 653
653
-
 654
654
-
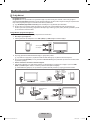 655
655
-
 656
656
-
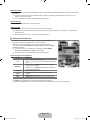 657
657
-
 658
658
-
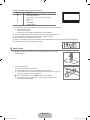 659
659
-
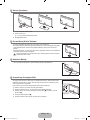 660
660
-
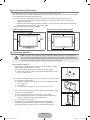 661
661
-
 662
662
-
 663
663
-
 664
664
-
 665
665
-
 666
666
-
 667
667
-
 668
668
-
 669
669
-
 670
670
-
 671
671
-
 672
672
-
 673
673
-
 674
674


Samsung le40b750 Benutzerhandbuch
- Kategorie
- LCD-Fernseher
- Typ
- Benutzerhandbuch
in anderen Sprachen
- English: Samsung le40b750 User manual
- français: Samsung le40b750 Manuel utilisateur
- español: Samsung le40b750 Manual de usuario
- italiano: Samsung le40b750 Manuale utente
- Nederlands: Samsung le40b750 Handleiding
- português: Samsung le40b750 Manual do usuário
- Türkçe: Samsung le40b750 Kullanım kılavuzu

