Miniland digital camera 3.5" plus Benutzerhandbuch
- Kategorie
- Smarte Uhren
- Typ
- Benutzerhandbuch
Dieses Handbuch eignet sich auch für

digital camera plus
minilandbaby.com
Español
English
Português
Français
Deutsch
Italiano
Polski
Русский
5
14
22
31
40
49
58
66

2

3

4
2
I
III IIIV
V
VIIVI
XII
XI
IX
VIII
X

5
ESPAÑOL
ÍNDICE
1. Introducción
2. Contenido
3. Instrucciones de seguridad
4. Características y funciones del producto
5. Instrucciones de uso
6. Mantenimiento
7. Identicación y resolución de problemas
8. Especicaciones técnicas
9. Información sobre la retirada del producto
1. INTRODUCCIÓN
Le felicitamos por haber adquirido la cámara adicional del vigilabebés digimonitor 3.5” plus, con
monitor inalámbrico a color, que incorpora la tecnología más avanzada. Estamos seguros de
que quedará totalmente satisfecho con la calidad y las características de este producto, aunque
le recomendamos no obstante, que lea cuidadosamente estas instrucciones para obtener los
mejores resultados de su compra.
Una de las principales características de este vigilabebés, es que le permite visualizar hasta 4
cámaras, eligiendo cuál de ellas ver en cada momento o, si lo preere, seleccionando la opción
por la que el monitor mostrará la imagen de cada cámara durante unos segundos de forma
cíclica.
NOTA: Las características descritas en este manual de usuario están sujetas a
modicaciones sin previo aviso.
2. CONTENIDO
1 Cámara (unidad del bebé)
1 Adaptador de CA/CC
1 Trípode
Manual de Instrucciones y garantía
• Si faltara cualquiera de los elementos arriba indicados, póngase en contacto con su
distribuidor.
3. INSTRUCCIONES DE SEGURIDAD
Lea cuidadosamente este manual de instrucciones antes de utilizar su vigilabebés por primera
vez y consérvelo para poder utilizarlo como referencia en el futuro.
3.1. INSTRUCCIONES DE SEGURIDAD GENERALES:
Cuando se utilicen aparatos eléctricos es necesario cumplir algunas precauciones de seguridad
básicas en todo momento:
1. Es necesario extremar las precauciones cuando niños o ancianos utilicen cualquier producto,
o cuando se utilice cerca de ellos. Mantenga el aparato lejos del alcance de los niños mientras
no se esté utilizando.
2. Este producto no debe utilizarse como el único medio de vigilancia, no siendo en ningún caso
un sustituto de la supervisión responsable de los niños, adultos o propiedades por parte de los
adultos.
3. Utilice el vigilabebés sólo con los adaptadores de CA incluidos con la unidad (5.0 V, 800 mA).
4. Este producto contiene piezas de pequeño tamaño. Es necesario proceder con cuidado a la
hora de desempaquetar y montar el producto.
5. NO permita que los niños jueguen con los materiales de embalaje, como por ejemplo bolsas de
plástico. Es necesario proceder con cuidado a la hora de desempaquetar y montar el producto.

6
ESPAÑOL
6. NO utilice el aparato si el cable o el enchufe estuvieran dañados. Si el funcionamiento de su
monitor de vigilancia de bebés no fuera correcto o si tuviera cualquier tipo de daños, póngase
en contacto con el centro de servicio autorizado de Miniland para solicitar la inspección y la
reparación del mismo con el n de evitar cualquier posible riesgo.
7. NO intente reparar o ajustar ninguna de las funciones eléctricas o mecánicas de la unidad, ya
que en ese caso la garantía quedaría anulada.
8. Compruebe el voltaje de su vivienda con el n de asegurarse de que corresponda al régimen
del aparato indicado en las especicaciones del mismo.
9. Si no va a utilizar el vigilabebés durante un período de tiempo prolongado, desenchufe
siempre el adaptador de corriente. Para desconectar el aparato de la red eléctrica, sujete el
transformador y retire el enchufe de la toma. No tire nunca directamente del cable.
10. Este producto está diseñado exclusivamente para el uso en interiores. La unidad no debe
exponerse a la lluvia, humedad o goteos o salpicaduras de líquidos. No coloque nunca ningún
objeto lleno de líquido, como por ejemplo un vaso o un jarrón, encima o al lado de su vigilabebés.
El monitor de vigilancia de bebés no debe utilizarse cerca del agua.
PRECAUCIÓN
• Este vigilabebés está diseñado para proporcionar tranquilidad a los padres cuando no les
es posible estar en la misma habitación que el bebé. Este producto no debe reemplazar la
supervisión responsable de un adulto. Es necesario que uno de los padres permanezca cerca
del monitor mientras se esté utilizando. El vigilabebés no es un dispositivo médico y no debe
conarse a él el bienestar del bebé. Es importante que visite periódicamente la habitación del
bebé con el n de asegurarse de que todo esté bien.
• No utilice nunca este vigilabebés en aquellos casos en los que la vida o la salud del bebé u
otras personas, o la integridad de un inmueble, dependan de su funcionamiento. El fabricante no
aceptará ninguna responsabilidad o reclamación alguna por fallecimiento, lesiones personales o
daños materiales resultantes del malfuncionamiento o del uso indebido del producto.
• El uso indebido de este vigilabebés inalámbrico podría dar lugar a acciones legales.
• Utilice este producto de manera responsable.
IMPORTANTE: Tenga en cuenta que cualquier cambio o modicación en el equipo no
efectuada por el servicio técnico de Miniland no estará cubierta por la garantía del
producto.
3.2. CONSEJOS PARA LAS RADIO INTERFERENCIAS
Este equipo ha sido sometido a pruebas y cumple con los requisitos de la Directiva R&TTE
1995/5/CE. Estos requisitos están diseñados para ofrecer una protección razonable contra las
interferencias dañinas en una instalación residencial. Si la unidad no se instala y utiliza de
acuerdo con las instrucciones, podría causar interferencias dañinas en las radiocomunicaciones.
Tenga en cuenta, sin embargo, que no es posible garantizar que no vayan a producirse
interferencias en una instalación especíca. Si el vigilabebés provocara interferencias en la
recepción de la radio o la televisión, lo cual puede determinarse apagándolo y encendiéndolo,
se recomienda al usuario que intente subsanar la interferencia tal como se indica a continuación:
• Reoriente o cambie el receptor de posición.
• Aumente la distancia entre el equipo en cuestión y el vigilabebés.
• Enchufe el equipo en un enchufe diferente del utilizado para el receptor.
• Consulte con el departamento de Atención del Cliente de Miniland.
Con el n de asegurar el cumplimiento de la Directiva R&TTE 1995/5/CE, este equipo tiene
cables blindados especiales. La operación con un equipo no aprobado o con cables no blindados
probablemente provocará interferencias en la recepción radiofónica o televisiva.

7
ESPAÑOL
3.3. ELECCIÓN DE UN LUGAR ADECUADO
• Coloque el dispositivo electrónico en un lugar alejado de los niños con el n de evitar posibles
accidentes.
• Los niños podrían enredarse en los cables. La unidad del bebé debe situarse a una distancia
de aproximadamente 1 – 1.5 metros de la cuna del bebé. No coloque nunca la unidad del bebé
en el interior de la cuna, la cama o el corralito. Asegúrese de que la unidad, los cables y el
adaptador estén lejos del alcance del bebé y de otros niños de corta edad.
• Coloque el vigilabebés en un lugar en el que el aire pueda circular libremente. No lo coloque
sobre edredones o mantas blandas ni en las esquinas de armarios, estanterías, etc.
• Coloque el vigilabebés en un lugar alejado de las fuentes de calor como radiadores, chimeneas,
cocinas y la luz solar directa.
• Coloque la unidad del bebé alejada de aparatos de televisión, repetidores y radios. Las señales
de radio intensas generadas por estos elementos podrían causar ruidos o incluso la aparición de
sonidos e imágenes en el monitor. Si esto ocurriera, traslade la cámara a otro lugar.
4. CARACTERÍSTICAS Y FUNCIONES DEL PRODUCTO
4.1. FUNCIONES Y CONTROLES DEL MONITOR (FIGURA 1)
MONITOR (FIGURA 1.1)
1. Indicador LED de encendido/enlace
2. Micrófono
3. LED indicador de carga
4. Pantalla LCD
5. Botón de encendido/apagado
6. Altavoz
7. Enganche para cinta del cuello
8. Botón de ajuste ▲
9. Botón zoom/menú
DISPLAY
Iconos de la pantalla (FIGURA 1.2)
a. Cobertura
b. Volumen seleccionado en el monitor
c. Visión nocturna
d. Nanas
e. Modo VOX
f. Cámara seleccionada
Iconos del Menú (FIGURA 1.3)
A. Menú selección/añadir/eliminar cámara
B. Menú de ajustes de cámara
C. VOX/Standby
D. Nivel de transmisión
4.2. FUNCIONES Y CONTROLES DE LA CÁMARA (FIGURA 2)
I. Antena retráctil
II. Sensor de luz
III. Botón de encendido
IV. Accesorio para colgar
V. Altavoz
VI. Botón de emparejamiento
5. INSTRUCCIONES DE USO
10. Botón de ajuste ▼
11. Botón aceptar/modo Scan
12. Botón para hablar con el bebé
13. Conector salida AV
14. Conector mini USB alimentación/PC
15. Soporte abatible
16. Tapa del compartimento de la batería
17. Antena retráctil
g. Luz de compañía
h. Nivel de transmisión
i. Nivel de batería
j. Icono hablar con el bebé
k. Icono alerta activada
VII. Conector de alimentación Mini USB
VIII. Micrófono
IX. LED de encendido / Emparejamiento
X. Lente de la cámara
XI. Infrarrojo
XII. Accesorio de trípode
E. Alarma
F. Función Vibración
G. Brillo de pantalla

8
ESPAÑOL
5.1. ANTES DEL USO
5.1.1. ALIMENTACIÓN DE LA UNIDAD DEL BEBÉ
La cámara o unidad del bebé, de este vigilabebés está diseñada para utilizarse con el adaptador
de CA/CC suministrado.
1. Localice la toma del conector (VII) en la parte posterior de la unidad del bebé.
2. Conecte el cable del adaptador a la toma mini USB de la cámara. Utilice sólo el adaptador
suministrado.
3. Enchufe el adaptador a la red eléctrica.
Advertencia: Peligro de Estrangulación – Mantenga el cable lejos del alcance del bebé.
NO coloque NUNCA una cámara con cables a menos de 1 metro de la cuna. No utilice
nunca cables alargadores con adaptadores de CA. Utilice sólo los adaptadores de CA
suministrados.
5.2. OPERACIÓN
5.2.1. ENCENDIDO/APAGADO DE LA CÁMARA
Para encender o apagar la cámara, mantenga pulsado el botón de encendido (III) durante
dos segundos. El LED de alimentación (IX) se iluminará o apagará dependiendo de si usted
enciende o apaga la unidad.
Cuando haya instalado y encendido la cámara, podrá ver las imágenes y escuchar los sonidos
captados en la habitación de su bebé a través del monitor.
5.2.2. VISIÓN NOCTURNA INFRARROJA (AUTOMÁTICA)
La función de visión nocturna infrarroja permite a la cámara captar imágenes de su bebé o del
área monitorizada en condiciones de oscuridad o de poca luz.
En este modo sólo se mostrarán imágenes en blanco y negro en el monitor y sólo podrán verse
los objetos situados a menos de 2 metros de distancia.
La cámara monitoriza constantemente el nivel de luz y cambia automáticamente al modo
infrarrojo cuando la luz es insuciente para la visión normal.
5.2.3. SELECCIÓN DE LA CÁMARA
El dispositivo está diseñado para permitir la observación de diferentes zonas con hasta
cuatro cámaras. Para seleccionar la cámara que desee ver, siga los pasos que se indican a
continuación:
1. Pulse la tecla Menú/Atrás
durante tres segundos para hacer aparecer el menú.
2. Pulse la tecla ARRIBA
o la tecla ABAJO hasta que el icono de cámara se resalte y
pulse a continuación la tecla
para entrar en el sub-menú.
3. Pulse la tecla ARRIBA
o la tecla ABAJO hasta que el icono de VER cámara se
resalte y pulse a continuación la tecla
.
4. Pulse la tecla ARRIBA
o la tecla ABAJO para seleccionar la cámara que desee visualizar
y pulse a continuación la tecla
para conrmar la selección.
Nota 1: Solo se podrán visualizar las cámaras que hayan sido emparejadas al monitor.
Nota2: Hay una manera más rápida de cambiar la cámara a visualizar. Pulse directamente la
tecla
para ir viendo cíclicamente las cámaras que estén emparejadas: CAM1/CAM2/CAM3/
CAM4/MODO SCAN.
5.2.4. MODO SCAN
Esta función le permite ver de manera consecutiva y cíclica los canales de cámara emparejados,
mostrando las imágenes de cada cámara durante 12 segundos. Esta función solo puede utilizarse

9
ESPAÑOL
cuando hay más de una unidad de cámara emparejada. Para entrar en este modo:
1. Pulse la tecla Menú/Atrás
durante tres segundos para hacer aparecer el menú.
2. Pulse la tecla ARRIBA
o la tecla ABAJO hasta que el icono de cámara se resalte y
pulse a continuación la tecla
para entrar en el sub-menú.
3. Pulse la tecla ARRIBA
o la tecla ABAJO hasta que el icono de VER cámara se
resalte y pulse a continuación la tecla
.
4. Pulse la tecla ARRIBA
o la tecla ABAJO y seleccione el icono de SCAN .
5. Pulse la tecla
para conrmar.
Nota 1: Si una de las cámaras está fuera de alcance o si no está encendida, el monitor le
avisará de ello y el modo Scan se detendrá.
Nota 2: El modo Scan puede activarse o desactivarse pulsando la tecla
mientras se visualiza
la pantalla principal si tiene más de una cámara conectada a su monitor.
5.2.5. AÑADIR CÁMARA
Este producto está diseñado para permitir la observación de distintas zonas con hasta 4
cámaras (canal 1, 2, 3 ó 4 asignado a distintas cámaras). El monitor y la cámara original salen
de fábrica con el canal 1 programado. Si necesita añadir una cámara extra, deberá seguir el
siguiente proceso.
1. Pulse la tecla Menú/Atrás
durante tres segundos para hacer aparecer el menú.
2. Pulse la tecla ARRIBA
o la tecla ABAJO hasta que el icono de cámara se resalte y
pulse a continuación la tecla
para entrar en el sub-menú.
3. Pulse la tecla ARRIBA
o la tecla ABAJO hasta que el icono de añadir cámara se
resalte y pulse a continuación la tecla
.
4. Pulse la tecla ARRIBA
o la tecla ABAJO para seleccionar el canal dónde desea añadir
la nueva cámara y conrme la selección pulsando la tecla
.
5. Mientras el indicador LED de encendido/enlace (1) esté parpadeando, pulse el botón de
emparejamiento en la cámara (VI).
6. Una vez emparejada, el indicador LED dejará de parpadear y las imágenes de la cámara se
mostrarán inmediatamente en la pantalla de la unidad de monitor.
7. Si el emparejamiento no se hubiera efectuado correctamente, repita los pasos arriba
indicados.
Nota 1: Sólo podrás seleccionar los canales en los que no se haya emparejadas aún ninguna
cámara.
Nota 2: No es posible acceder a este submenú si 4 cámaras han sido ya emparejadas.
Puede que, por diversos motivos, se pierda la conexión entre el monitor y una cámara ya
enlazada. En ese caso, repita el proceso explicado anteriormente para enlazar de nuevo la
cámara con el monitor.
5.2.6. ELIMINAR CÁMARA
Para eliminar una de las cámaras conectadas, siga los pasos que se indican a continuación:
1. Pulse la tecla Menú/Atrás
durante tres segundos para hacer aparecer el menú.
2. Pulse la tecla ARRIBA
o la tecla ABAJO hasta que el icono de cámara se resalte y
pulse a continuación la tecla
para entrar en el sub-menú.

10
ESPAÑOL
3. Pulse la tecla ARRIBA o la tecla ABAJO hasta que el icono de eliminar cámara
se resalte y pulse a continuación la tecla
.
4. Pulse la tecla ARRIBA
o la tecla ABAJO para seleccionar la cámara que desea eliminar
y conrme la selección pulsando la tecla
.
Nota 1: Si solo tiene una cámara emparejada con el monitor, no podrá eliminarla ni acceder a
este menú.
Nota 2: Es necesario eliminar un canal antes de emparejarlo a una nueva unidad de cámara.
5.2.7. VOLUMEN DE LA CÁMARA
Este menú le permitirá congurar el nivel de volumen con el que se reproducirá en la cámara
la voz de los padres, al emplear la función bidireccional y el volumen al que se escucharán las
nanas.
Para congurar el volumen de la cámara siga los siguientes pasos:
1. Pulse la tecla Menú/Atrás
durante tres segundos para hacer aparecer el menú;
2. Pulse la tecla ARRIBA
o la tecla ABAJO hasta que el icono de menú de ajustes de
cámara
se resalte y pulse a continuación la tecla para entrar en el sub-menú.
3. Pulse la tecla ARRIBA
o la tecla ABAJO hasta que el icono de volumen de cámara
se resalte y pulse a continuación la tecla
.
4. Pulse la tecla ARRIBA
o la tecla ABAJO para seleccionar una de los tres niveles de
volumen disponibles (LOW/MID/HIGH) en función de sus necesidades.
5. Conrme la selección pulsando la tecla
.
Tenga en cuenta que la conguración del volumen se llevará a cabo únicamente para la cámara
cuya imagen se esté visualizando en el monitor en ese momento.
5.2.8. LUZ DE COMPAÑÍA
La unidad del bebé tiene una suave luz de compañía que proporcionará confort al bebé y le
permitirá ver en una habitación oscura.
Para activar la luz de compañía, siga los siguientes pasos:
1. Pulse la tecla Menú/Atrás
durante tres segundos para hacer aparecer el menú;
2. Pulse la tecla ARRIBA
o la tecla ABAJO hasta que el icono de menú de ajustes de
cámara
se resalte y pulse a continuación la tecla para entrar en el sub-menú.
3. Pulse la tecla ARRIBA
o la tecla ABAJO hasta que el icono de luz de compañía se
resalte y pulse a continuación la tecla
.
4. Pulse la tecla ARRIBA
o la tecla ABAJO y selecciona ON u OFF dependiendo de si
desea activar o desactivar esta función.
5. Conrme la selección pulsando la tecla
.
Tenga en cuenta que la conguración de la luz de compañía se llevará a cabo únicamente para
la cámara cuya imagen se esté visualizando en el monitor en ese momento.
5.2.9. NIVEL DE TRANSMISIÓN
Puede modicar desde este menú el nivel de potencia emitido por la cámara, eligiendo entre las
opciones alta/baja. Cuando se sitúa en la posición alta (HI), la cobertura cubrirá una distancia
de 250 metros en campo abierto con la potencia original. Cuando se sitúa en la posición baja
(LOW), la distancia máxima de transmisión se reduce a aproximadamente 120 metros en campo

11
ESPAÑOL
abierto, al disminuir la potencia de emisión.
Para congurar el nivel de transmisión siga los siguientes pasos:
1. Pulse la tecla Menú/Atrás
durante tres segundos para hacer aparecer el menú.
2. Pulse la tecla ARRIBA
o la tecla ABAJO hasta que el icono de nivel de transmisión se
resalte y pulse a continuación la tecla
.
3. Pulse la tecla ARRIBA
o la tecla ABAJO y seleccione del nivel de transmisión deseado:
HIGH o LOW.
4. Conrme la selección pulsando la tecla
.
5. Presione la tecla Menú/Atrás
para volver a la pantalla principal.
6. MANTENIMIENTO
• Limpie las supercies de la cámara y del monitor con un trapo suave que no deje pelusas.
• Si las unidades se ensuciaran, utilice un trapo ligeramente húmedo para limpiar las supercies,
teniendo cuidado de evitar la entrada de agua por ninguna de las aperturas.
• No utilice nunca productos de limpieza o disolventes.
7. IDENTIFICACIÓN Y RESOLUCIÓN DE PROBLEMAS
Problema Causa posible Solución
No hay recepción
en el monitor
La cámara no está
encendida
Pulse y mantenga pulsado el Botón
de encendido (III) durante 2 segundos
El monitor no está
encendido
Pulse y mantenga pulsado el botón de
encendido (5)
Cámara: no se ha enchufado
el adaptador de corriente
Enchufe el adaptador de corriente
Monitor: No se ha enchufado
el adaptador de corriente
Enchufe el adaptador de corriente
El monitor está fuera de su
campo de alcance
Acerque el monitor a la cámara
Se ha perdido la conexión
entre el monitor y una
cámara ya emparejada
Empareje de nuevo la cámara con el
monitor.
Consulte la sección 5.2.5.
Se ha seleccionado una
cámara que no es la
correcta
Cambie el número de cámara que
está visualizando.
Consulte la sección 5.2.3.
Sólo se muestran
imágenes en
blanco y negro
Compruebe si la cámara
está en el modo de visión
nocturna/infrarroja
Para ver las imágenes en color,
aumente el nivel de luz en el lugar
en el que se encuentre la cámara y
asegúrese de que nada está tapando
el sensor de luz de la cámara (II).

12
ESPAÑOL
No es posible
escuchar la voz de
los padres en la
unidad del bebé
El ajuste del volumen
de la unidad parental es
demasiado bajo
Ajuste el volumen en el nivel más alto
La cámara no
transmite
No se ha encendido la
cámara
Pulse y mantenga pulsado el botón
(III) durante 2 segundos
Cámara: no se ha enchufado
el adaptador de corriente
Enchufe el adaptador de corriente
El modo VOX o el modo de
ahorro de energía (Standby)
está activado
Para ver el área vigilada continuamente,
desconecte el modo VOX o el modo
de ahorro de energía en el monitor
Interferencias o
recepción
insatisfactoria
Es posible que otros
dispositivos electrónicos estén
interriendo con la señal
Aléjelos del dispositivo
La cámara y el monitor podrían
estar a una distancia excesiva
Acerque el monitor a la cámara
Acerque el monitor a la
cámara
Enchufe el adaptador de corriente
La cámara o el monitor podrían
estar demasiado cerca de
muchos objetos de metal
Aléjelos del dispositivo
Si la unidad del
bebé ha perdido
la conexión con la
unidad parental
La cámara y el monitor
podrían estar a una
distancia excesiva
Acerque el monitor a la cámara
Se ha perdido
momentáneamente la
conexión entre las dos
unidades
Restablezca las unidades
desconectándolas de la alimentación
eléctrica.
Espere unos 15 segundos antes de
conectarlas de nuevo.
Deje pasar un minuto para que la
unidad del bebé y la unidad parental
se sincronicen
Se ha perdido la conexión
entre las dos unidades
Empareje de nuevo la cámara y el
monitor.
Consulte la sección 5.2.5.
8. ESPECIFICACIONES TÉCNICAS
Frequencia 2.4GHz FHSS
Cobertura 250m (línea recta y espacio abierto)
Nº de canales congurables 4

13
ESPAÑOL
Alimentación (unidad del bebé)
Input: 100-240 VCA 50/60Hz
Output: 5V 800mA
9. INFORMACIÓN SOBRE LA RETIRADA DEL PRODUCTO
• Es necesario desechar el producto de manera responsable.
• No se deshaga de los productos que muestren el símbolo del contenedor de basura
tachado junto con el resto de los residuos domésticos.
• Una vez nalizada su vida de servicio, estos productos deben desecharse llevándolos
a un centro de recogida y tratamiento designado por las autoridades locales.
También puede ponerse en contacto con el establecimiento en el que adquirió el producto.
Por medio de la presente Miniland S.A. declara que el “89176 digital camera plus”
cumple con los requisitos esenciales y cualesquiera otras disposiciones aplicables
o exigibles de la Directiva 1999/5/CE.

14
ENGLISH
INDEX
1. Introduction
2. Contents
3. Safety instructions
4. Product characteristics
5. Usage instructions
6. Maintenance
7. Troubleshooting
8. Technical specications
9. Product disposal information
1. INTRODUCTION
Congratulations on purchasing the digimonitor 3.5” plus baby monitor additional camera with a
wireless colour monitor which is tted with state-of-the-art technology. We are sure that you will
be fully satised with the quality and characteristics of this product, though we would recommend
you to read these instructions carefully to obtain the best results from your purchase.
One of the main characteristics of this baby monitor is that it enables you to simultaneously view
up to 4 cameras, choosing the one you want at any time or, should you prefer, selecting the
option whereby the monitor will show the image of each camera for a few seconds in cyclical
fashion.
NOTE: the features described in this user manual may be subject to change without
notice.
2. CONTENTS
1 Camera (baby unit)
1 AC/DC Adapter
1 Tripod
Guarantee card and Instructions' Manual
• If any of the aforementioned elements is missing, get in touch with your distributor.
3. SAFETY INSTRUCTIONS
Read this instruction manual carefully before using your baby monitor for the rst time and keep
it for reference use in the future.
3.1. GENERAL SAFETY INSTRUCTIONS:
When using electrical equipment it is necessary to take certain basic safety precautions at all
times:
1. It is necessary to exercise caution when any product is used by or in the vicinity of children or
elderly persons. Keep the appliance out of reach of children.
2. This product should not be used as the sole means of surveillance, not being under any
circumstances a substitute for responsible supervision of children, elderly persons or property
by adults.
3. This unit should only be used with the AC power adapters included in this package (rated
5.0V, 800mA).
4. This product contains small parts. Exercise care when unpacking and assembling the product.
5. DO NOT allow children to play with the packaging materials such as plastic bags. Exercise
care when unpacking and assembling the product.
6. DO NOT use the appliance if the cord or plug is damaged. If your baby monitor is not operating
properly or has suffered any damage, contact the authorized Miniland service center to request
inspection and repair of the appliance in order to avoid any possible risk.

15
7. DO NOT attempt to repair or adjust any of the electrical or mechanical functions of the unit
since, if you do, the guarantee will be made void.
8. Check the voltage of your home in order to ensure that it matches the voltage indicated in the
specications of the appliance.
9. If you are not going to use the baby monitor for a long period of time, always unplug the power
adapter. To disconnect the appliance from the mains, hold the transformer and remove the plug
from the socket. Never pull on the cord itself.
10. This product is designed for indoor use only. The unit should not be exposed to rain,
moisture, dripping or splashing. No objects lled with liquid should be placed on top of, or beside
the product, such as a glass or vase. This item should not be used near water.
CAUTION
• This baby monitor is designed to give parents peace of mind when they are unable to be in the
same room as their baby. This product is not a substitute for supervision by adults. It is necessary
for one parent to stay near the monitor when in use. The baby monitor is not a medical device
and you should not entrust the welfare of your baby to it. It is important that you regularly visit the
baby’s room in person to ensure that everything is in order.
• Never use this baby monitor in cases in which the life or health of the baby or other people,
or the integrity of a building, depend on its operation. The manufacturer accepts no liability or
claim for death, personal injury or property damage resulting from the malfunction or misuse of
the product.
• Misuse of this Wireless Baby Monitor could result in legal action.
• Use this product responsibly.
IMPORTANT: Please note that any change or modication to the equipment not performed
by the Miniland technical service will not be covered by the product guarantee.
3.2. RADIO INTERFERENCE TIPS
This equipment has been subjected to tests and complies with the requirements of the R&TTE
Directive 1999/5/EC. These requirements are designed to provide reasonable protection from
harmful interference at residential premises. If the unit is not installed and used in line with the
instructions, this could cause harmful interference to the radio communications. However, bear
in mind that it is not possible to ensure that interferences are not going to occur at a specic
installation. If the baby monitor causes interferences to radio or TV reception, which may be
determined by turning it off and on, the user is recommended to try and rectify the interference
in the manner indicated below
• Reorient or change the position receiver.
• Increase the distance between the equipment in question and the baby monitor.
• Connect the equipment to a different socket from that used for the receiver.
• Consult the Customer Care department.
To ensure compliance with the R&TTE Directive 1999/5/EC, this equipment has special shielded
cables. Operating with unapproved equipment or using unshielded cables will probably cause
interference to radio or TV reception.
3.3. CHOOSING THE RIGHT PLACE
• Place the electronic device somewhere out of the reach of children so as to avoid accidents.
• The baby unit must be situated at least 1 and 1.5 meters away from the baby’s cot. Never place
the baby unit inside the cot, bed or playpen, nor secure the tripod to them. Make sure that the
unit, the cables and the adapter are well out of the reach of the baby and other young children.
• Put the baby monitor in a place where the air can circulate freely. Do not place it on duvets or
soft blankets nor in the corners of cupboards, shelves etc.
ENGLISH

16
• Place the baby monitor well away from heat sources like radiators, chimneys, kitchens and
direct sunlight.
• Keep the Camera away from TV appliances, repeaters and radios. The intense radio signals
generated by these elements could cause noise or even sounds or images to be broadcast on
the monitor. Should this occur, move the camera somewhere else.
4. PRODUCT CHARACTERISTICS
4.1. MONITOR CONTROLS AND FUNCTIONS (FIGURE 1)
MONITOR (FIGURE 1.1)
1. ON/pairing LED indicator
2. Microphone
3. Charge indicator
4. LCD Screen
5. ON/OFF button
6. Loudspeaker
7. Neck strap hook
8. Set button▲
9. Zoom/Menu/Back button
DISPLAY
Screen Icons (FIGURE 1.2)
a. Signal level
b. Volume selected on the monitor
c. Night vision
d. Lullabies
e. VOX Mode
f. Selected camera
Menu Icons (FIGURE 1.3)
A. Select/Add/Remove camera menu
B. Camera Settings Menu
C. VOX/Standby
D. Transmission level
4.2. CAMERA CONTROLS AND FUNCTIONS (FIGURE 2)
I. Retractable antenna
II. Photo sensor
III. Power button
IV. Hanging attachment
V. Speaker
VI. Link button
5. USAGE INSTRUCTIONS
5.1. BEFORE USE
5.1.1. BABY UNIT POWER SUPPLY
The camera or baby unit of this baby monitor is designed for use with the AC/DC adapter
supplied.
1. Place the connector socket (VII) at the rear of the baby unit.
2. Connect the adapter cable to the mini-USB socket of the camera. Only use the adapter
supplied.
10. Set button ▼
11. OK/Scan
12. Baby talk button
13. AV output connector
14. Mini USB power/PC connector
15. Folding support
16. Battery compartment cover
17. Retractable antenna
g. Night light
h. Transmission level
i. Battery level
j. Talk to the baby
k. Alert ON
E. Alert
F. Vibration
G. Screen conguration: luminosity
VII. Mini USB power connector
VIII. Microphone
IX. ON/link LED
X. Camera lens
XI. Infrared
XII. Tripod attachment
ENGLISH

17
ENGLISH
3. Plug in the adapter to the mains.
Warning: Danger of Strangulation – Keep the cable out of reach of the baby. NEVER place
a camera with cables less than 1 metre away from the cot. Never use extension cables
with AC adapters. Only use the AC adapters supplied.
5.2. OPERATION
5.2.1. TURNING THE CAMERA ON/OFF
To turn the camera on or off, keep the on button (III) pressed in for two seconds. The power
LED (IX) will go on and off depending on whether you turn the unit on or off.
When you have installed the camera and turned it on, you can see the images and listen to the
sounds captured in your baby’s room via the monitor.
5.2.2. INFRARED NIGHT VISION (AUTOMATIC)
The infrared night vision function enables the camera to capture images of your baby or of the
monitored area when it is dark or there is little light.
In this mode images will only be shown on the monitor in black and white and you will only be
able to see images situated less than 2 meters away.
The camera constantly monitors the light level and automatically switches to infrared mode when
there is not enough light for normal vision.
5.2.3. CHOOSING THE CAMERA
This product is designed to allow the observation of different areas with up to 4 cameras.
To choose the camera you want to see, follow the next steps:
1. Press for 3 seconds the Menu/Back
button and the menu will pop up;
2. Press the UP
key or DOWN key until the camera icon is highlighted then press the
key enter into the sub-menu.
3. Press the UP
key or DOWN key until the SEE camera icon is highlighted and then
press the
key.
4. Press the UP
key or DOWN key to select the camera that you want to see and conrm
the selection with the
key.
Note 1: You will only be able to select the cameras that have already been paired with the
monitor.
Note 2: There is a faster way to change the camera you are viewing. Directly press
key to
cycle through paired cameras: CAM1 / CAM2 / CAM3 / CAM4 / SCAN MODE.
5.2.4. SCAN MODE
This function automatically cycles through your paired camera channels to display each camera
for 12 seconds. This function can be used only when you have more than 1 camera unit paired.
To enter in this mode:
1. Press for 3 seconds the Menu/Back
key and the menu will pop up.
2. Press the UP
key or DOWN key until the camera icon is highlighted then press the
key enter into the sub-menu.
3. Press the UP
key or DOWN key until the SEE camera icon is highlighted and then
press the
key.
4. Press the UP
key or DOWN key and select the SCAN icon .
5. Press the
key to conrm.

18
Note 1: When one of the cameras is out of range or is not switch on, the monitor will warn you
and the Scan Mode will stop.
Note 2: The Scan mode can be turned on or off by pressing the
button while viewing the
main screen.
5.2.5. PAIRING CAMERA
This product is designed to allow the observation of different areas with up to 4 cameras
(channels 1, 2, 3 or 4 assigned to different cameras). The monitor and the original camera leave
the factory with channel 1 programmed. If you need to add an extra camera, follow the process
set out below.
1. Press for 3 seconds the Menu/Back
key and the menu will pop up.
2. Press the UP
key or DOWN key until the camera icon is highlighted then press the
key enter into the sub-menu.
3. Press the UP
key or DOWN key until the add camera icon is highlighted and then
press the
key.
4. Press the UP
key or DOWN key to select the channel where you want to add the new
camera and conrm the selection with the
key.
5. While the ON/pairing LED indicator (1) is ashing in green, press the link button on the camera
(VI).
6. Once paired, the LED indicator will stop ashing and the image of the camera will show
immediately on the monitor unit screen.
7. If unsuccessful, please repeat above steps.
Note 1: You will only be able to select the channels where no camera has been paired yet.
Note 2: It is not possible to enter this submenu if 4 cameras have already been paired.
For various reasons you may lose the connection between the monitor and a camera which is
already connected. Should this be the case, repeat the process explained above to connect the
camera with the monitor again.
5.2.6. DELETE CAMERA
To delete one of the cameras connected, follow the next steps:
1. Press for 3 seconds the Menu/Back
key and the menu will pop up.
2. Press the UP
key or DOWN key until the camera icon is highlighted then press the
key enter into the sub-menu.
3. Press the UP
key or DOWN key until the remove camera icon is highlighted and
then press the
key.
4. Press the UP
key or DOWN key to select the camera you want to delete and conrm
the selection with the
key.
Note 1: If you only have one camera paired to the monitor, you won’t be able to remove it and
you won’t be allowed to enter this submenu.
Note 2: A channel needs to be deleted before pairing to a new camera unit.
5.2.7. CAMERA VOLUME
This menu will allow you to congure the volume level at which the parents’ voices will be
reproduced on the camera by using the two-way function and the volume at which the lullabies
will be heard.
ENGLISH

19
In order to congure the camera volume, follow the next steps:
1. Press for 3 seconds the Menu/Back
key and the menu will pop up.
2. Press the UP
key or DOWN key until the camera settings menu icon is highlighted.
Then press the
key enter into the sub-menu.
3. Press the UP
key or DOWN key until the camera volume icon is highlighted. Then,
press the
key;
4. Press the UP
key or DOWN key, choose whichever of the three camera volume levels
available (HIGH/MID/LOW) you prefer.
5. Conrm the selection pressing the
key.
Bear in mind that the volume will only be congured for the camera whose image you are viewing
on the monitor at that time.
5.2.8. NIGHT LIGHT
The baby unit has a nightlight which emits a soft light, providing your baby with comfort and
allowing it to see in a dark room.
To activate the night light, please, follow the next steps:
1. Press for 3 seconds the Menu/Back
key and the menu will pop up.
2. Press the UP
key or DOWN key until the camera settings menu icon is highlighted.
Then press the
key enter into the sub-menu.
3. Press the UP
key or DOWN key until the nightlight icon is highlighted. Then, press
the
key;
4. Press the UP
key or DOWN key, select ON/OFF to activate or deactivate this function.
5. Conrm the selection pressing the
key.
Bear in mind that the volume will only be congured for the camera whose image you are viewing
on the monitor at that time.
5.2.9. TRANSMISSION LEVEL
On this menu you can change the power level transmitted by the camera, choosing from amongst
the high/low options. When at the high position (HI), coverage will extend 250 meters in open
country with the original power. When at the low position (LOW), the maximum transmission
distance is reduced to around 120 meters in open country as the transmitting power is reduced.
To congure the transmission level, follow the next steps:
1. Press for 3 seconds the Menu/Back
key and the menu will pop up.
2. Press the UP
key or DOWN key until the transmission level menu icon is highlighted.
Then press the
key.
3. Using the UP
key or DOWN key, select the transmission level desired: HIGH or LOW.
4. Conrm the selection pressing the
key.
5. Press the Menu/Back
key to return to the main screen.
6. MAINTENANCE
• Clean the surfaces of the camera and monitor with a soft, lint-free cloth.
• If the units become dirty, use a lightly dampened cloth to wipe surfaces, taking care to not allow
water into any openings.
• Never use cleaning agents or solvents.
ENGLISH

20
7. TROUBLESHOOTING
Problem Possible Cause Solution
No reception on the
monitor
Camera not turned on
Press and hold down button (III) for 2
seconds
Monitor not turned on
Press and hold down the power button
(5)
Camera: not plugged in to the
power adapter
Plug in the power adapter
Monitor: The power adapter
is not plugged
Plug in the power adapter
Monitor out or range Move the monitor closer to the camera
Connection lost between
the monitor and a camera
already linked
Link the camera with the monitor again.
See section 5.2.5.
A wrong camera has been
selected
Change the camera number you are
watching. See section 5.2.3.
Only black and white
images are displayed
Check whether the camera is
in night vision/infrared mode
In order to view the images in colour,
increase the level of light in the room
the camera is in or check there is
nothing covering the camera´s light
sensor (II).
You cannot hear the
parents’ voice in the
baby unit
The volume setting of the
baby unit is too low
Set the volume to the highest level
The camera does
not transmit
The camera is not turned on
Press and hold down button (III) for 2
seconds
Camera: the power adapter is
not plugged in
Plug in the power adapter
VOX mode or Standby mode
are active
To see the monitored area continuously,
disconnect the VOX or Standby mode on
the Monitor
Interference or poor
reception
Other electronic devices may
be interfering with the signal
Move them away from the device
The camera and monitor may
be too far apart
Move the monitor closer to the camera
The battery power may be
too low
Plug in the power adapter
The camera or monitor may be
placed too close to many metal
objects
Move them away from the device
ENGLISH
Seite wird geladen ...
Seite wird geladen ...
Seite wird geladen ...
Seite wird geladen ...
Seite wird geladen ...
Seite wird geladen ...
Seite wird geladen ...
Seite wird geladen ...
Seite wird geladen ...
Seite wird geladen ...
Seite wird geladen ...
Seite wird geladen ...
Seite wird geladen ...
Seite wird geladen ...
Seite wird geladen ...
Seite wird geladen ...
Seite wird geladen ...
Seite wird geladen ...
Seite wird geladen ...
Seite wird geladen ...
Seite wird geladen ...
Seite wird geladen ...
Seite wird geladen ...
Seite wird geladen ...
Seite wird geladen ...
Seite wird geladen ...
Seite wird geladen ...
Seite wird geladen ...
Seite wird geladen ...
Seite wird geladen ...
Seite wird geladen ...
Seite wird geladen ...
Seite wird geladen ...
Seite wird geladen ...
Seite wird geladen ...
Seite wird geladen ...
Seite wird geladen ...
Seite wird geladen ...
Seite wird geladen ...
Seite wird geladen ...
Seite wird geladen ...
Seite wird geladen ...
Seite wird geladen ...
Seite wird geladen ...
Seite wird geladen ...
Seite wird geladen ...
Seite wird geladen ...
Seite wird geladen ...
Seite wird geladen ...
Seite wird geladen ...
Seite wird geladen ...
Seite wird geladen ...
Seite wird geladen ...
Seite wird geladen ...
Seite wird geladen ...
Seite wird geladen ...
-
 1
1
-
 2
2
-
 3
3
-
 4
4
-
 5
5
-
 6
6
-
 7
7
-
 8
8
-
 9
9
-
 10
10
-
 11
11
-
 12
12
-
 13
13
-
 14
14
-
 15
15
-
 16
16
-
 17
17
-
 18
18
-
 19
19
-
 20
20
-
 21
21
-
 22
22
-
 23
23
-
 24
24
-
 25
25
-
 26
26
-
 27
27
-
 28
28
-
 29
29
-
 30
30
-
 31
31
-
 32
32
-
 33
33
-
 34
34
-
 35
35
-
 36
36
-
 37
37
-
 38
38
-
 39
39
-
 40
40
-
 41
41
-
 42
42
-
 43
43
-
 44
44
-
 45
45
-
 46
46
-
 47
47
-
 48
48
-
 49
49
-
 50
50
-
 51
51
-
 52
52
-
 53
53
-
 54
54
-
 55
55
-
 56
56
-
 57
57
-
 58
58
-
 59
59
-
 60
60
-
 61
61
-
 62
62
-
 63
63
-
 64
64
-
 65
65
-
 66
66
-
 67
67
-
 68
68
-
 69
69
-
 70
70
-
 71
71
-
 72
72
-
 73
73
-
 74
74
-
 75
75
-
 76
76
Miniland digital camera 3.5" plus Benutzerhandbuch
- Kategorie
- Smarte Uhren
- Typ
- Benutzerhandbuch
- Dieses Handbuch eignet sich auch für
in anderen Sprachen
- English: Miniland digital camera 3.5" plus User manual
- français: Miniland digital camera 3.5" plus Manuel utilisateur
- español: Miniland digital camera 3.5" plus Manual de usuario
- italiano: Miniland digital camera 3.5" plus Manuale utente
- русский: Miniland digital camera 3.5" plus Руководство пользователя
- português: Miniland digital camera 3.5" plus Manual do usuário
- polski: Miniland digital camera 3.5" plus Instrukcja obsługi
Verwandte Artikel
-
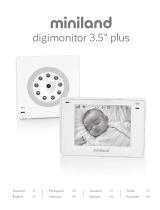 Miniland digimonitor 3.5" plus Benutzerhandbuch
-
 Miniland digital camera 1.8" Benutzerhandbuch
-
 Miniland digital camera 2.4" gold Benutzerhandbuch
-
 Miniland digital camera 2.4" Benutzerhandbuch
-
 Miniland digimonitor 1.8" Benutzerhandbuch
-
 Miniland digimonitor 2.4" gold Benutzerhandbuch
-
 Miniland digital camera 5'' Benutzerhandbuch
-
 Miniland digital camera 3.5" touch Benutzerhandbuch
-
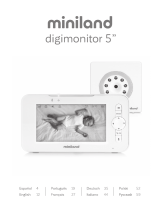 Miniland digimonitor 5 Benutzerhandbuch
-
 Miniland digitalk luxe Schnellstartanleitung
Andere Dokumente
-
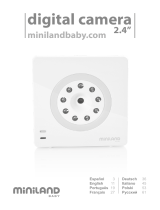 Miniland Baby digital camera 2.4" Benutzerhandbuch
-
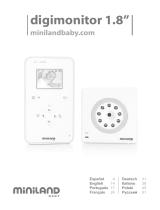 Miniland Baby digimonitor 1.8" Benutzerhandbuch
-
 Miniland Baby digimonitor 2.4" plus Benutzerhandbuch
-
 Miniland Baby 89093 Benutzerhandbuch
-
 Miniland Baby DIGIMONITOR Benutzerhandbuch
-
Beaba Ecoute bébé avec vidéo Zen+ 930294 Bedienungsanleitung
-
 Miniland Baby 89067 Spezifikation
-
SWITEL BCF930 Bedienungsanleitung
-
Samsung SEW-3037W Benutzerhandbuch


