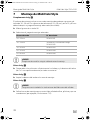
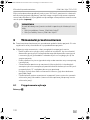
Dometic Midi Heki Style 700 x 500 Installationsanleitung
- Typ
- Installationsanleitung

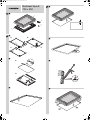
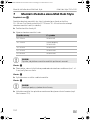
1
1 – 2 mm
A
B
700 mm
500 mm
A
C
B
12 mm
12 mm
Ø 24 mm
1.
2.
W
1
4
3
2
Midi Heki Style B
700 x 500
1
2
5
6
7
3
4
8
Midi-Heki-700x500--IO-16s.book Seite 1 Freitag, 23. Februar 2018 6:26 18

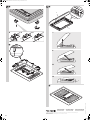
2
≤1,5 Nm
I
IV
II
III
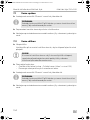
ABC
3
2
4
1
9 a
b
0
4445101885 08/2019 MO1135I02
Midi-Heki-700x500--IO-16s.book Seite 2 Freitag, 23. Februar 2018 6:26 18
YOUR LOCAL DEALER
dometic.com/dealer
A complete list of Dometic companies, which comprise the Dometic Group, can be found in the public filings of:
DOMETIC GROUP AB Hemvärnsgatan 15 SE-17154 Solna Sweden
YOUR LOCAL SUPPORT
dometic.com/contact
YOUR LOCAL SALES OFFICE
dometic.com/sales-offices

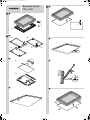
1
1 – 2 mm
A
B
700 mm
500 mm
A
C
B
12 mm
12 mm
Ø 24 mm
1.
2.
W
1
4
3
2
Midi Heki Style K
700 x 500
1
2
5
6
7
3
4
8
Midi-Heki-700x500--IO-16s.book Seite 1 Freitag, 23. Februar 2018 6:27 18

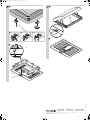
2
≤1,5 Nm
ABC
1
3
2
a
0
b
9
4445101884 08/2019 MO1134I02
Midi-Heki-700x500--IO-16s.book Seite 2 Freitag, 23. Februar 2018 6:27 18
YOUR LOCAL DEALER
dometic.com/dealer
A complete list of Dometic companies, which comprise the Dometic Group, can be found in the public filings of:
DOMETIC GROUP AB Hemvärnsgatan 15 SE-17154 Solna Sweden
YOUR LOCAL SUPPORT
dometic.com/contact
YOUR LOCAL SALES OFFICE
dometic.com/sales-offices

Midi Heki Style 700 x 500
Roof light
Installation and Operating Manual. . . . . . . . 3
Dachfenster
Montage- und Bedienungsanleitung . . . . . 13
Dôme de toit
Instructions de montage
et de service . . . . . . . . . . . . . . . . . . . . . . . . .23
Claraboya
Instrucciones de montaje y de uso . . . . . . .34
Clarabóia
Instruções de montagem e manual de
instruções . . . . . . . . . . . . . . . . . . . . . . . . . . .45
Oblò
Istruzioni di montaggio e d’uso . . . . . . . . .56
Dakraam
Montagehandleiding en
gebruiksaanwijzing . . . . . . . . . . . . . . . . . . .67
Ta gvindue
Monterings- og betjeningsvejledning . . . .77
Ta kfönst er
Monterings- och bruksanvisning . . . . . . . . 87
Ta kvin du
Monterings- og bruksanvisning. . . . . . . . . 97
Kattoikkuna
Asennus- ja käyttöohje . . . . . . . . . . . . . . . 107
Окно для крыши
Инструкция по монтажу и эксплуатации 117
Okno dachowe
Instrukcja montażu i obsługi. . . . . . . . . . . 127
Strešné okno
Návod na montáž a uvedenie
do prevádzky. . . . . . . . . . . . . . . . . . . . . . . 138
Střešní okno
Návod k montáži a obsluze . . . . . . . . . . . 148
Tető abla k
Szerelési és használati útmutató . . . . . . . 158
EN
DE
FR
ES
PT
IT
NL
DA
SV
NO
FI
RU
PL
SK
CS
HU
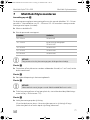
WINDOWS & DOORS
WINDOWS
Midi-Heki-700x500--IO-16s.book Seite 1 Freitag, 23. Februar 2018 6:18 18

Midi-Heki-700x500--IO-16s.book Seite 2 Freitag, 23. Februar 2018 6:18 18

EN
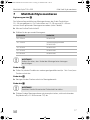
Midi Heki Style 700 x 500 Explanation of symbols
3
Please read this instruction manual carefully before installation and first
use, and store it in a safe place. If you pass on the product to another
person, hand over this instruction manual along with it.
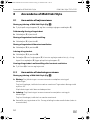
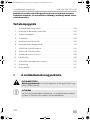
Table of contents
1 Explanation of symbols. . . . . . . . . . . . . . . . . . . . . . . . . . . . . . . . . . . . . . . . . . .3
2 Safety and installation instructions . . . . . . . . . . . . . . . . . . . . . . . . . . . . . . . . . .4
3 Scope of delivery . . . . . . . . . . . . . . . . . . . . . . . . . . . . . . . . . . . . . . . . . . . . . . .5
4 Accessories . . . . . . . . . . . . . . . . . . . . . . . . . . . . . . . . . . . . . . . . . . . . . . . . . . . .5
5 Intended use . . . . . . . . . . . . . . . . . . . . . . . . . . . . . . . . . . . . . . . . . . . . . . . . . . .5
6 Instructions before installation . . . . . . . . . . . . . . . . . . . . . . . . . . . . . . . . . . . . .6
7 Installing the Midi Heki Style . . . . . . . . . . . . . . . . . . . . . . . . . . . . . . . . . . . . . .7
8 Using the Midi Heki Style . . . . . . . . . . . . . . . . . . . . . . . . . . . . . . . . . . . . . . . .10
9 Opening and closing the roller blinds . . . . . . . . . . . . . . . . . . . . . . . . . . . . . . 11
10 Troubleshooting . . . . . . . . . . . . . . . . . . . . . . . . . . . . . . . . . . . . . . . . . . . . . . . 11
11 Maintaining and cleaning the Midi Heki Style . . . . . . . . . . . . . . . . . . . . . . . .12
12 Warranty . . . . . . . . . . . . . . . . . . . . . . . . . . . . . . . . . . . . . . . . . . . . . . . . . . . . .12
13 Disposal . . . . . . . . . . . . . . . . . . . . . . . . . . . . . . . . . . . . . . . . . . . . . . . . . . . . . .12
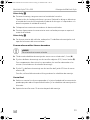
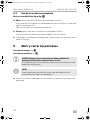
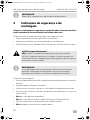
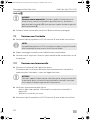
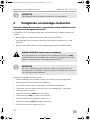
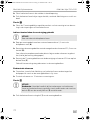
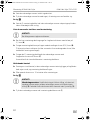
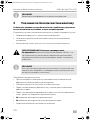
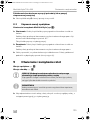
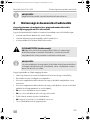
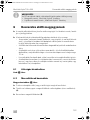
1 Explanation of symbols
!
A
WARNING!
Safety instruction: Failure to observe this instruction can cause fatal or
serious injury.
NOTICE!
Failure to observe this instruction can cause material damage and impair
the function of the product.
Midi-Heki-700x500--IO-16s.book Seite 3 Freitag, 23. Februar 2018 6:18 18

EN
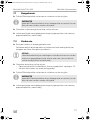
Safety and installation instructions Midi Heki Style 700 x 500
4
I
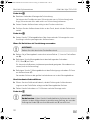
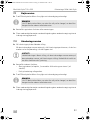
2 Safety and installation instructions
Please observe the prescribed safety instructions and stipulations from the
vehicle manufacturer and service workshops.
The manufacturer accepts no liability for damage in the following cases:
• Damage to the product resulting from mechanical influences
• Alterations to the product without express permission from the manufacturer
• Use for purposes other than those described in the operating manual
!
I
Please note the following:
• If faults or disturbances occur, consult a specialist workshop immediately.
• Risk of breakage! Do not tread on the glass dome.
• Before starting your journey, check that the roof window is locked properly.
• Before starting your journey, check the roof window for damage (such as tension
cracks in the acrylic glass).
•Do not open the roof window while driving.
•Do not open the window in strong wind or rain.
• Close the roof window if it rains or snows.
•Do not leave the vehicle with the roof window open.
• Keep the roof window free of snow and ice.
NOTE
Supplementary information for operating the product.
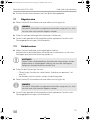
WARNING! Beware of injury
Do not exceed the maximum allowable driving speed of 160 km/h,
because this can damage the roof light. Parts that come loose may injure
people in the vicinity.
NOTE
If you do not have sufficient technical knowledge for installing the
components in vehicles, you should have a specialist install the roof
window in your vehicle.
Midi-Heki-700x500--IO-16s.book Seite 4 Freitag, 23. Februar 2018 6:18 18

EN
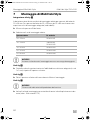
Midi Heki Style 700 x 500 Scope of delivery
5
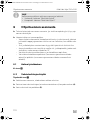
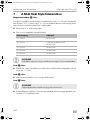
3Scope of delivery
4Accessories
5 Intended use
The Midi Heki Style roof light is suitable for installation in motorhomes or caravans:
• Temple version
– with forced ventilation: Ref. no. 9104116341
– with forced ventilation and Glazing Dome: Ref. no. 9104120057
– without forced ventilation: Ref. no. 9104116342
– without forced ventilation, with Glazing Dome: Ref. no. 9104120058
• Geared version
– with forced ventilation: Ref. no. 9104116339
– with forced ventilation and Glazing Dome: Ref. no. 9104120059
– without forced ventilation: Ref. no. 9104116340
– without forced ventilation, with Glazing Dome: Ref. no. 9104120060
The maximum travel speed permitted is 160 km/h, as noise or damage could occur
depending on the vehicle design or installation position. In case of excessive noise,
a spoiler (accessory) can be used.
No. in
fig. 1
Quantity Description
1 1 Outer frame with glass dome
2 1 Inner frame
311
22
Fastening bolt ∅ 4
Fastening bolt ∅ 3.5
4 11 Mounting supports
Description Ref. no.
Spoiler, 800 mm 9104100236
Insect protective frames 9104100259
Midi-Heki-700x500--IO-16s.book Seite 5 Freitag, 23. Februar 2018 6:18 18

EN
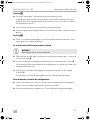
Instructions before installation Midi Heki Style 700 x 500
6
I
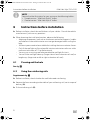
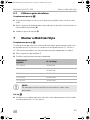
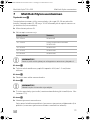
6 Instructions before installation
➤ Before installation, check the roof thickness of your vehicle. Consult the vehicle
manufacturer if you have any questions.
➤ When choosing the installation location, observe the following:
– Adjoining components (roof rack or attachment and reinforcing parts), cables
and cabinets in the vehicle interior must not get damaged when sawing the
hole.
– Sufficient space needs to be available for installing the inner and outer frames.
– Only fit the roof light on flat and parallel interior and exterior roof areas with a
maximum inclination of 15° to the horizontal.
– You may use an existing roof hole provided the roof light fits into it.
– You can fit the roof light sideways (hinge-side at front in direction of travel) or
lengthways (hinge-side on left or right in direction of travel).
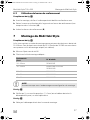
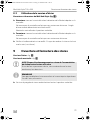
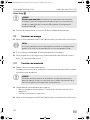
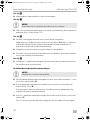
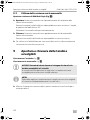
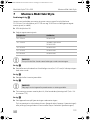
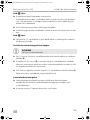
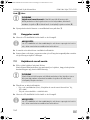
6.1 Pressing out the hole
See fig. 2
6.2 Using the reinforcing rails
Supplements fig. 3
➤ Before installation, check whether the roof hole needs reinforcing.
➤ Remove the foam according to the width of your reinforcing rails (not in scope of
delivery) (A).
➤ Fit the reinforcing rails (B).
NOTE
You can find the illustrations for your version on the following leaflets:
• Temple version: “Midi Heki Style B” leaflet
• Geared version: “Midi Heki Style K” leaflet
Midi-Heki-700x500--IO-16s.book Seite 6 Freitag, 23. Februar 2018 6:18 18

EN
Midi Heki Style 700 x 500 Installing the Midi Heki Style
7
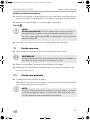
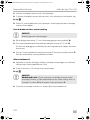
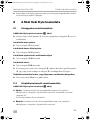
7 Installing the Midi Heki Style
Supplements fig. 4
The scope of delivery includes a mounting frame, which is suitable for a roof
thickness of 30 – 34 mm. For a roof thickness of 25 – 29 mm and 35 – 60 mm,
you need to have a suitable mounting set (see table).
➤ Measure your roof thickness W.
➤ Choose a suitable mounting set:
A
See fig. 5
➤ Check that the roof light has sufficient space around it (approx.1 to 2 mm) in the
wall section.
See
fig. 6
➤ Clean the roof opening in the mounting area.
See
fig. 7
A
➤ Seal the mounting frame with a flexible non-hardening sealing compound (e.g.
SikaLastomer-710).
See
fig. 8
➤ Check the direction of travel when installing.
You can fit the roof light sideways (hinge-side at front in direction of travel) or
lengthways (hinge-side on left or right in direction of travel).
Roof thickness Ref. no.
25 – 29 mm 9104100261
30 – 34 mm Included in the scope of delivery
9104100262
35 – 42 mm 9104100263
43 – 52 mm 9104100264
53 – 60 mm 9104100265
NOTICE!
Make sure that you do not damage any cables during installation.
NOTICE!
Observe the sealant manufacturer's instructions.
Midi-Heki-700x500--IO-16s.book Seite 7 Freitag, 23. Februar 2018 6:18 18

EN
Installing the Midi Heki Style Midi Heki Style 700 x 500
8
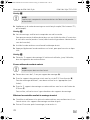
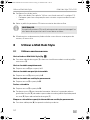
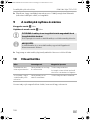
➤ Place the outer frame in the middle of the roof opening.
➤ Press the outer frame in the roof slightly so that the packing compound spreads
out.
See
fig. 9
➤ Place the 11 mounting supports on the inside of the vehicle all the way into the
recess of the outer frame.
If you use wooden rails as reinforcement
A
➤ Pre-drill two 2.2 mm holes for each mounting support in the roof
construction (A).
➤ Fix the mounting supports on the roof with the ∅ 3.5 mm screws included (B).
For other constructions, suitable screws must be used (not in scope of delivery).
➤ Fix the 11 mounting supports with the ∅ 4 mm fixing screws to the outer
frame (C).
To do this use the large holes in the mounting supports.
Making a final check
➤ Check visually whether the seal all round the outer frame is against the roof
surface and the mounting supports are aligned.
➤ Tighten the screws about 10 minutes after installation.
See
fig. 0
A
➤ Press the inner frame into the groove (1) on the mounting supports.
NOTICE!
Do not drill through the roof construction.
NOTICE!
Geared version: Hold the hand crank in the closed position when
placing the inner frame on the outer frame, otherwise the position of the
hand crank (2) will be misaligned with the hexagon part (3).
Midi-Heki-700x500--IO-16s.book Seite 8 Freitag, 23. Februar 2018 6:18 18

EN
Midi Heki Style 700 x 500 Installing the Midi Heki Style
9
7.1 Temple version
➤ Remove the protective film from both sides of the acrylic glass.
I
➤ After installing, check the roof light works properly.
➤ If necessary, enter the new vehicle height and weight in the vehicle documents.
7.2 Geared version
➤ Put the hand crank to the closed position.
When setting up the inner frame, position the crank in such a way that when
folded, a light pre load is noticeable.
A
➤ Check the functions of the window:
– Open the roof light (see chapter “Using the temple version” on page 10).
– Adjust the insect and the black roller blind.
➤ Remove the protective film from both sides of the acrylic glass.
I
➤ If necessary, enter the new vehicle height and weight in the vehicle documents.
NOTE
If the protective film is exposed to sunlight for too long, it cannot be
taken off without leaving a residue.
NOTICE!
Hold the hand crank in the open position when placing the inner frame
on the outer frame, otherwise the position of the hand crank will be mis-
aligned with the hexagon part.
NOTE
If the protective film is exposed to sunlight for too long, it cannot be
taken off without leaving a residue.
Midi-Heki-700x500--IO-16s.book Seite 9 Freitag, 23. Februar 2018 6:18 18

EN
Using the Midi Heki Style Midi Heki Style 700 x 500
10
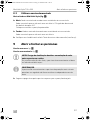
8 Using the Midi Heki Style
8.1 Using the temple version
Opening and closing the Midi Heki Style (fig. a)
➤ Press the release button (1), and open the roof hood with the bracket at the same
time (2).
Opening the roof light completely
➤ Slide the bracket (2) into theI position.
Opening the roof light to the half-way position
➤ Slide the bracket (2) into theII position.
Opening the roof light to the continuous ventilation position
➤ Slide the bracket (2) into the III position.
Closing the roof light
➤ Slide the bracket (2) into the lV position.
➤ Guide the bracket (2) with slight pressure to the left and right via the catches (3)
so that the roof hood is locked and the bracket (2) is on the release button (1).
Locking the roof light in intermediate position or continuous ventilation
➤ Push the lock (4) left and then down and to the right.
8.2 Using the temple version
Opening and closing the Midi Heki Style (fig. a)
➤ To open: turn the hand crank according to the direction of the arrow on the
crank.
Turn the hand crank until you feel its resistance. The opening angle of the roof
light is approx. 65°.
Fold the hand crank into the desired position.
➤ To close: turn the hand crank according to the direction of the arrow on the
crank.
Turn the hand crank until you feel its resistance.
➤ Check whether the roof light is locked properly: Try to push up the pane of glass
with your hand (without using force).
Midi-Heki-700x500--IO-16s.book Seite 10 Freitag, 23. Februar 2018 6:18 18

EN
Midi Heki Style 700 x 500 Opening and closing the roller blinds
11
9 Opening and closing the roller blinds
Temple version: fig. b
Geared version: fig. b
A
I
➤ Hold the recessed handle of the roller blind and pull it into the required position.
10 Troubleshooting
If you are unable to rectify the fault, get in touch with a specialist workshop.
NOTICE! Risk of damage due to a build-up of heat between the
roller blind and the window.
In strong sunlight, only close the blackout roller blind two thirds of the
way.
NOTE
You can adjust the blackout roller blind and the flyscreen separately.
Fault Possible cause Suggested remedy
The roof light does not
close completely.
Dirt between the glass and
frame
Clean the window.
Remove any leaves and twigs
between the glass and frame.
The flyscreen or black-
out roller blind cannot
be moved.
Dirt on the side guides Clean the side guides.
Midi-Heki-700x500--IO-16s.book Seite 11 Freitag, 23. Februar 2018 6:18 18

EN
Maintaining and cleaning the Midi Heki Style Midi Heki Style 700 x 500
12
11 Maintaining and cleaning the
Midi Heki Style
A
➤ Clean the roller blind with mild soap and plenty of water.
➤ Put talcum powder on the rubber seal.
12 Warranty
The statutory warranty period applies. If the product is defective, please contact the
service partner in your country (addresses on the back on the instruction manual).
Our experts will be happy to help you and will discuss the warranty process with you
in more detail.
13 Disposal
➤ Place the packaging material in the appropriate recycling waste bins wherever
possible.
M
If you wish to finally dispose of the product, ask your local recycling centre
or specialist dealer for details about how to do this in accordance with the
applicable disposal regulations.
NOTICE!
Do not use any sharp or hard objects for cleaning since they may
damage the acrylic glass.
Only use cleaning agents that are approved by the manufacturer. Acrylic
glass polish (ref. no. 9600000128), special polishing cloth (ref. no.
9600000130) and acrylic glass cleaning agent (ref. no. 9600000129).
Midi-Heki-700x500--IO-16s.book Seite 12 Freitag, 23. Februar 2018 6:18 18

DE
Midi Heki Style 700 x 500 Erklärung der Symbole
13
Bitte lesen Sie diese Anleitung vor Einbau und Inbetriebnahme sorgfältig
durch und bewahren Sie sie auf. Geben Sie sie im Falle einer Weitergabe
des Produktes an den Nutzer weiter.
Inhaltsverzeichnis
1 Erklärung der Symbole . . . . . . . . . . . . . . . . . . . . . . . . . . . . . . . . . . . . . . . . . .13
2 Sicherheits- und Einbauhinweise . . . . . . . . . . . . . . . . . . . . . . . . . . . . . . . . . .14
3 Lieferumfang . . . . . . . . . . . . . . . . . . . . . . . . . . . . . . . . . . . . . . . . . . . . . . . . . .15
4 Zubehör. . . . . . . . . . . . . . . . . . . . . . . . . . . . . . . . . . . . . . . . . . . . . . . . . . . . . .15
5 Bestimmungsgemäßer Gebrauch . . . . . . . . . . . . . . . . . . . . . . . . . . . . . . . . .15
6 Hinweise vor dem Einbau. . . . . . . . . . . . . . . . . . . . . . . . . . . . . . . . . . . . . . . .16
7 Midi Heki Style montieren . . . . . . . . . . . . . . . . . . . . . . . . . . . . . . . . . . . . . . .17
8 Midi Heki Style benutzen . . . . . . . . . . . . . . . . . . . . . . . . . . . . . . . . . . . . . . . 20
9 Rollos öffnen und schließen . . . . . . . . . . . . . . . . . . . . . . . . . . . . . . . . . . . . . .21
10 Störungsbeseitigung . . . . . . . . . . . . . . . . . . . . . . . . . . . . . . . . . . . . . . . . . . .21
11 Midi Heki Style pflegen und reinigen. . . . . . . . . . . . . . . . . . . . . . . . . . . . . . 22
12 Gewährleistung. . . . . . . . . . . . . . . . . . . . . . . . . . . . . . . . . . . . . . . . . . . . . . . 22
13 Entsorgung . . . . . . . . . . . . . . . . . . . . . . . . . . . . . . . . . . . . . . . . . . . . . . . . . . 22
1 Erklärung der Symbole
!
A
WARNUNG!
Sicherheitshinweis: Nichtbeachtung kann zu Tod oder schwerer
Verletzung führen.
ACHTUNG!
Nichtbeachtung kann zu Materialschäden führen und die Funktion des
Produktes beeinträchtigen.
Midi-Heki-700x500--IO-16s.book Seite 13 Freitag, 23. Februar 2018 6:18 18

DE
Sicherheits- und Einbauhinweise Midi Heki Style 700 x 500
14
I
2 Sicherheits- und Einbauhinweise
Beachten Sie die vom Fahrzeughersteller und vom Kfz-Handwerk vorge-
schriebenen Sicherheitshinweise und Auflagen!
Der Hersteller übernimmt in folgenden Fällen keine Haftung für Schäden:
• Beschädigungen am Produkt durch mechanische Einflüsse
• Veränderungen am Produkt ohne ausdrückliche Genehmigung vom Hersteller
• Verwendung für andere als die in der Anleitung beschriebenen Zwecke
!
I
Beachten Sie folgende Hinweise:
• Suchen Sie umgehend eine Fachwerkstatt auf, wenn Fehler oder Störungen auf-
treten.
• Einbruchgefahr! Betreten Sie die Glaskuppel nicht.
• Kontrollieren Sie vor Fahrtantritt, ob das Dachfenster ordnungsgemäß verriegelt
ist.
• Kontrollieren Sie vor Fahrtantritt das Dachfenster auf Beschädigungen (z. B.
Spannungsrisse im Acrylglas).
• Öffnen Sie das Dachfenster nicht während der Fahrt.
• Öffnen Sie das Dachfenster nicht bei starkem Wind oder Regen.
• Schließen Sie das Dachfenster bei Regen und Schneefall.
• Verlassen Sie das Fahrzeug nicht bei geöffnetem Dachfenster.
• Halten Sie das Dachfenster schnee- und eisfrei.
HINWEIS
Ergänzende Informationen zur Bedienung des Produktes.
WARNUNG! Verletzungsgefahr!
Überschreiten Sie nicht die maximal erlaubte Fahrgeschwindigkeit von
160 km/h, weil dadurch das Dachfenster beschädigt werden kann. Sich
lösende Teile können Personen in der Umgebung verletzen.
HINWEIS
Wenn Sie nicht über ausreichende technische Kenntnisse zum Einbauen
von Komponenten in Fahrzeugen verfügen, sollten Sie sich das Dach-
fenster von einem Fachmann ins Fahrzeug einbauen lassen.
Midi-Heki-700x500--IO-16s.book Seite 14 Freitag, 23. Februar 2018 6:18 18

DE
Midi Heki Style 700 x 500 Lieferumfang
15
3 Lieferumfang
4Zubehör
5 Bestimmungsgemäßer Gebrauch
Das Dachfenster Midi Heki Style ist geeignet zum Einbau in Wohnmobile oder
Wohnwagen:
•Bügelversion
– mit Zwangsbelüftung: Art-Nr. 9104116341
– mit Zwangsbelüftung und Glazing Dome: Art-Nr. 9104120057
– ohne Zwangsbelüftung: Art-Nr. 9104116342
– ohne Zwangsbelüftung, mit Glazing Dome: Art-Nr. 9104120058
•Kurbelversion
– mit Zwangsbelüftung: Art-Nr. 9104116339
– mit Zwangsbelüftung und Glazing Dome: Art-Nr. 9104120059
– ohne Zwangsbelüftung: Art-Nr. 9104116340
– ohne Zwangsbelüftung, mit Glazing Dome: Art-Nr. 9104120060
Die maximal erlaubte Fahrgeschwindigkeit beträgt 160 km/h, da je nach Fahr-
zeugaufbau oder Einbauposition Geräuschentwicklungen oder Beschädigungen
auftreten können. Bei erhöhter Geräuschentwicklung können Sie einen Spoiler
verwenden (Zubehör).
Nr. in
Abb. 1
Menge Bezeichnung
1 1 Außenrahmen mit Glaskuppel
2 1 Innenrahmen
311
22
Befestigungsschraube ∅ 4
Befestigungsschraube ∅ 3,5
4 11 Montageböcke
Bezeichnung Artikel-Nr.
Spoiler, 800 mm 9104100236
Insektenschutzrahmen 9104100259
Midi-Heki-700x500--IO-16s.book Seite 15 Freitag, 23. Februar 2018 6:18 18

DE
Hinweise vor dem Einbau Midi Heki Style 700 x 500
16
I
6 Hinweise vor dem Einbau
➤ Prüfen Sie vor der Montage die Dachstärke lhres Fahrzeugs. Bei Fragen wenden
Sie sich an den Fahrzeughersteller.
➤ Beachten Sie bei der Wahl des Einbauortes:
– Angrenzende Bauteile (Dachreling oder Befestigungs- und Verstär-
kungsteile), Leitungen und Einbauschränke im Fahrzeuginnenraurn dürfen
beim Sägen des Ausschnitts nicht beschädigt werden.
– Es muss ausreichend Platz zum Montieren von Innen- und Außenrahmen vor-
handen sein.
– Montieren Sie das Dachfenster nur an planen und parallelen Innen- und
Außendachflächen mit einer maximalen Schrägstellung von 15° gegenüber
der Horizontalen.
– Sie können einen vorhandenen Dachauschnitt verwenden, wenn das Dach-
fenster hinein passt.
– Sie können das Dachfenster quer (Scharnierseite vorn in Fahrtrichtung) oder
längs (Scharnierseite links oder rechts zur Fahrtrichtung) einbauen.
6.1 Ausschnitt ausarbeiten
Siehe Abb. 2
6.2 Verstärkungsleisten verwenden
Ergänzung zu Abb. 3
➤ Klären Sie vor dem Einbau, ob der Dachausschnitt verstärkt werden muss.
➤ Entfernen Sie die Ausschäumung entsprechend der Breite Ihrer Verstärkungs-
leisten (nicht im Lieferumfang) (A).
➤ Passen Sie die Verstärkungsleisten ein (B).
HINWEIS
Sie finden die Abbildungen für Ihre Version auf folgenden Faltblättern:
• Bügelversion: Faltblatt „Midi Heki Style B“
• Kurbelversion: Faltblatt „Midi Heki Style K“
Midi-Heki-700x500--IO-16s.book Seite 16 Freitag, 23. Februar 2018 6:18 18
Seite laden ...
Seite laden ...
Seite laden ...
Seite laden ...
Seite laden ...
Seite laden ...
Seite laden ...
Seite laden ...
Seite laden ...
Seite laden ...
Seite laden ...
Seite laden ...
Seite laden ...
Seite laden ...
Seite laden ...
Seite laden ...
Seite laden ...
Seite laden ...
Seite laden ...
Seite laden ...
Seite laden ...
Seite laden ...
Seite laden ...
Seite laden ...
Seite laden ...
Seite laden ...
Seite laden ...
Seite laden ...
Seite laden ...
Seite laden ...
Seite laden ...
Seite laden ...
Seite laden ...
Seite laden ...
Seite laden ...
Seite laden ...
Seite laden ...
Seite laden ...
Seite laden ...
Seite laden ...
Seite laden ...
Seite laden ...
Seite laden ...
Seite laden ...
Seite laden ...
Seite laden ...
Seite laden ...
Seite laden ...
Seite laden ...
Seite laden ...
Seite laden ...
Seite laden ...
Seite laden ...
Seite laden ...
Seite laden ...
Seite laden ...
Seite laden ...
Seite laden ...
Seite laden ...
Seite laden ...
Seite laden ...
Seite laden ...
Seite laden ...
Seite laden ...
Seite laden ...
Seite laden ...
Seite laden ...
Seite laden ...
Seite laden ...
Seite laden ...
Seite laden ...
Seite laden ...
Seite laden ...
Seite laden ...
Seite laden ...
Seite laden ...
Seite laden ...
Seite laden ...
Seite laden ...
Seite laden ...
Seite laden ...
Seite laden ...
Seite laden ...
Seite laden ...
Seite laden ...
Seite laden ...
Seite laden ...
Seite laden ...
Seite laden ...
Seite laden ...
Seite laden ...
Seite laden ...
Seite laden ...
Seite laden ...
Seite laden ...
Seite laden ...
Seite laden ...
Seite laden ...
Seite laden ...
Seite laden ...
Seite laden ...
Seite laden ...
Seite laden ...
Seite laden ...
Seite laden ...
Seite laden ...
Seite laden ...
Seite laden ...
Seite laden ...
Seite laden ...
Seite laden ...
Seite laden ...
Seite laden ...
Seite laden ...
Seite laden ...
Seite laden ...
Seite laden ...
Seite laden ...
Seite laden ...
Seite laden ...
Seite laden ...
Seite laden ...
Seite laden ...
Seite laden ...
Seite laden ...
Seite laden ...
Seite laden ...
Seite laden ...
Seite laden ...
Seite laden ...
Seite laden ...
Seite laden ...
Seite laden ...
Seite laden ...
Seite laden ...
Seite laden ...
Seite laden ...
Seite laden ...
Seite laden ...
Seite laden ...
Seite laden ...
Seite laden ...
Seite laden ...
Seite laden ...
Seite laden ...
Seite laden ...
Seite laden ...
Seite laden ...
Seite laden ...
Seite laden ...
Seite laden ...
Seite laden ...
-
 1
1
-
 2
2
-
 3
3
-
 4
4
-
 5
5
-
 6
6
-
 7
7
-
 8
8
-
 9
9
-
 10
10
-
 11
11
-
 12
12
-
 13
13
-
 14
14
-
 15
15
-
 16
16
-
 17
17
-
 18
18
-
 19
19
-
 20
20
-
 21
21
-
 22
22
-
 23
23
-
 24
24
-
 25
25
-
 26
26
-
 27
27
-
 28
28
-
 29
29
-
 30
30
-
 31
31
-
 32
32
-
 33
33
-
 34
34
-
 35
35
-
 36
36
-
 37
37
-
 38
38
-
 39
39
-
 40
40
-
 41
41
-
 42
42
-
 43
43
-
 44
44
-
 45
45
-
 46
46
-
 47
47
-
 48
48
-
 49
49
-
 50
50
-
 51
51
-
 52
52
-
 53
53
-
 54
54
-
 55
55
-
 56
56
-
 57
57
-
 58
58
-
 59
59
-
 60
60
-
 61
61
-
 62
62
-
 63
63
-
 64
64
-
 65
65
-
 66
66
-
 67
67
-
 68
68
-
 69
69
-
 70
70
-
 71
71
-
 72
72
-
 73
73
-
 74
74
-
 75
75
-
 76
76
-
 77
77
-
 78
78
-
 79
79
-
 80
80
-
 81
81
-
 82
82
-
 83
83
-
 84
84
-
 85
85
-
 86
86
-
 87
87
-
 88
88
-
 89
89
-
 90
90
-
 91
91
-
 92
92
-
 93
93
-
 94
94
-
 95
95
-
 96
96
-
 97
97
-
 98
98
-
 99
99
-
 100
100
-
 101
101
-
 102
102
-
 103
103
-
 104
104
-
 105
105
-
 106
106
-
 107
107
-
 108
108
-
 109
109
-
 110
110
-
 111
111
-
 112
112
-
 113
113
-
 114
114
-
 115
115
-
 116
116
-
 117
117
-
 118
118
-
 119
119
-
 120
120
-
 121
121
-
 122
122
-
 123
123
-
 124
124
-
 125
125
-
 126
126
-
 127
127
-
 128
128
-
 129
129
-
 130
130
-
 131
131
-
 132
132
-
 133
133
-
 134
134
-
 135
135
-
 136
136
-
 137
137
-
 138
138
-
 139
139
-
 140
140
-
 141
141
-
 142
142
-
 143
143
-
 144
144
-
 145
145
-
 146
146
-
 147
147
-
 148
148
-
 149
149
-
 150
150
-
 151
151
-
 152
152
-
 153
153
-
 154
154
-
 155
155
-
 156
156
-
 157
157
-
 158
158
-
 159
159
-
 160
160
-
 161
161
-
 162
162
-
 163
163
-
 164
164
-
 165
165
-
 166
166
-
 167
167
-
 168
168
-
 169
169
-
 170
170
-
 171
171
-
 172
172


Dometic Midi Heki Style 700 x 500 Installationsanleitung
- Typ
- Installationsanleitung
in anderen Sprachen
Verwandte Papiere
-
Dometic Mini Heki Style Roof Light Benutzerhandbuch
-
-
Dometic Midi Heki B Bedienungsanleitung
-
-
-
-
-
-
-
Sonstige Unterlagen
-
Fiamma Vent 28 F Benutzerhandbuch
-
Fiamma Vent 160 Benutzerhandbuch
-
Fiamma Turbo Vent Premium Rooflight Benutzerhandbuch
-
Fiamma 80005576 Benutzerhandbuch
-
Fiamma Vent 40 Benutzerhandbuch
-
Hama 00041814 Bedienungsanleitung
-
-
LIVARNO 383951 Bedienungsanleitung
-
Abus ConHasp 230 Installationsanleitung
-
Site RWL085 Benutzerhandbuch