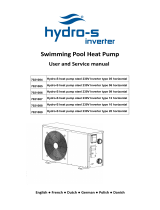
EXIT 8720289691561 Benutzerhandbuch

Typ
Benutzerhandbuch

User manual
Gebrauchsanweisung
Gebruikshandleiding
Mode d’emploi
Swimming
pool mini
heat pump
Important safety rules: Before installing and using this product read, understand,
follow all instructions carefully and keep it for future reference!
Wichtige sicherheitsregeln:

bezugnahme aufbewahren!
Belangrijke veiligheidsvoorschriften:
instructies aandachtig leest, begrijpt, naleeft en bewaar dit document voor latere inzage.
Règles importantes de sécurité: Lisez, comprenez et suivez attentivement toutes
les instructions avant d’installer et dútiliser ce produit! Conserver pour consultation
ultérieure!
3
English
4
Deutsch
5
Nederlands
20
35
50
Français
4

1.0 Part reference
NOTE: Drawing for illustration purpose only. Actual product may
vary. Not to scale. Before assembling your p, layout and review
the contents to become familiar with all the parts you will be using
during the assembly:
HINWEIS: Die Zeichnungen dienen nur der Illustration. Das
tatsächliche Produkt könnte etwas anders aussehen. Nicht
maßstabsgetreu.Bevor Sie Ihren Pool zusammenbauen, breiten Sie
den angelieferten Inhalt aus und überprüfen Sie ihn, um sich mit
allen Teilen, die Sie während der Montage benötigen, vertraut zu
machen:
OPMERKING: de tekening is uitsluitend bedoeld voor illustratie-
doeleinden. Het werkelijke product kan verschillen. Niet volgens
schaal. Voordat u het zwembad monteert, moet u de inhoud open-
leggen en controleren zodat u de onderdelen die u bij de montage
zult gebruiken, leert kennen:
REMARQUE : Dessin à but d’illustration uniquement. Le produit
réel peut varier. N’est pas à l’échelle. Avant de monter votre pis-
cine, disposez et passez en revue le contenu pour vous familiariser
avec toutes les pièces que vous utiliserez pendant le montage.hIN
HP1002 x2
HP1003 x1HP1001 x2
5
2.0 Introduction
Congratulations on choosing an EXIT Toys mini heat pump!
Have fun, be active and play outdoors......
That’s what keeps driving us to develop innovative, quality toys for cool kids and
parents.
We do everything possible to develop safe products for children. As our products are
classed as toys, we comply with the toughest consumer safety regulations. Before
launching our products onto the market, we have independent tests carried out for
certication. We also continuously test our production runs and periodically have
independent tests performed again as a further check. Only products which live up to
the highest EXIT Toys standard are marked with and recognized by the EXIT-brand.
“We want to thank you for your custom and your condence in this product. We’re
sure your kids will have as much fun as we did during development. Being open-
minded, we really appreciate all comments and ideas which will help us improve
our products or develop new ones. You are invited to send your ideas to us at info@
exittoys.com”
Please visit www.exittoys.com and discover more cool new products.
The EXIT Toys team
6

3.0 Guidelines for safe use
Attention: This manual includes all the necessary
information with the use and the installation of your heat
pump.The installer must read carefully this manual and
attentively follow the instructions during the implementation
and maintenance.The installer is responsible for the
installation of this heat pump and should follow all the
instructions that the manufacturer regulates in actual
application. Improper installation against the manual
might cause severe safety accidents and cause your
heat pump out of guarantee provided by your supplier.
The manufacturer declines any responsibilities for the
damages caused by the users, objects and the errors due
to installation that disobeys the manual’s guidance. Any use
that without conformity with the origin of its manufacturing
will be regarded as dangerous.
1). Please always keep the heat pump at the places that well ventilated and away
from anything which could cause re.
2). Don’t weld the pipe if there is refrigerant inside. Please keep the heat pump out of
the conned space when make gas charge.
3). Please always empty the water in your heat pump during winter time or when
the ambient temperature drops below zero, or else the titanium exchanger will be
damaged because of being frozen, in such case, your warranty will be lost.
4). Please always cut o the power supply, when opening cabinet of the heat pump
for maintenance or repairmen.
5). Please well keep the display controller in a dry area to protect it from being
damaged by water or moisture.
6). Action of gas charge must be conducted by the professional with R32 operating
license.
WARNING: These product warnings, instructions and safety rules provided with the
product represent some common risks of water recreation devices and do not cover
all instances of risk and danger. Please use common sense and good judgment when
enjoying any water activity.
7
4.0 Installation and connection
ATTENTION: Please pay attention to the following rules when installing the heat
pump:
1). Any addition of chemicals must be carried out at the piping located downstream
from the heat pump.
2). Always hold the heat pump upright. If it has been held at certain angle more than
30°, wait at least 24 hours before starting the heat pump.
4.1 Location of your heat pump
The heat pump will work properly in any desired location as long as the following
three factors are present:
1). Fresh air;
2). Electricity;
3). Swimming pool water
The unit may be installed in virtually any outdoor location as long as the specied
minimum distances to other objects are maintained (see drawing below). Please
consult your installer for installation with an indoor pool. Installation at a windy
location does not present any problem at all, unlike the situation with a gas heater.
ATTENTION: Never install the heat pump in a closed room with limited air volume
in which the air discharged from the heat pump will be reused, or close to shrubbery
that might block the air inlet. Such locations impair the continuous supply of fresh air,
8

may reduce the running eciency and possibly prevent sucient heat output.
4.2 Initial operation
Note: In order to heat your pool water, the water pump must run rstly to make the
water circulated through the heat pump. Your heat pump will not start up if the water
is not circulating.
4.3 Hose connection
Note:
The upper connection port at heat pump’s right side is for water outlet, and the lower
port is for water inlet.
4.4 Electrical connection
Before connecting the heat pump, make sure that the supply voltage matches the
operating heat pump’s voltage. There’s RCD plug that equipped with power cable, it
help to oer a full electrical protection.
When all connections have been completed and checked, carry out the following
procedure:
1). Switch on the water pump. Check for leakage and verify that water is owing
incoming and outgoing to the swimming pool.
9
2). Connect power to the heat pump and press the ON/OFF button on the control
panel. The heat Pump will start up after the time delay expires (see below).
3). After a few minutes, check whether the air blowing out of the unit is cool (The
mini heat pump can only make heating, when starts up, the running mode is heating
as default).
4). When turn o the water pump, the unit should also turn o automatically.
Depending on the initial temperature of the pool water and ambient air temperature,
it may take long time to heat the water to your desired temperature. An appropriate
10

swimming pool cover can dramatically reduce the heating time and preserve the heat
from losing;
Time delay - The heat pump has a built-in 3-minute start-up delay to protect the
circuitry and avoid excessive restarting. The unit will restart automatically after this
time delay expires.
4.5 Condensation
The air suctioned into the heat pump will be cooled to be a very low temperature
by the evaporation process of your heat pump’s refrigerant, at its heating mode.
This may cause condensation on ns of the evaporator, which might be as much as
several litters per hour at high relative humidity. Sometimes users may treat this
phenomenon as water leakage, while this is quite normal and no need to do anything.
5.0 Operation of the controller
5.1 Buttons of the controller
When the heat pump is running, the LED display shows the water outlet temperature.
LED 1 is on when compressor is running. LED 2 is on if the keys are locked to avoid
children’s mis-operation. When the heat pump is switched o, it displays “OFF” on
the controller LED display. When the heat pump is switched o, it shows “OFF” on the
LED display.
5.2 Turn on/o the heat pump
Press ON/OFF for 3 seconds to turn on the heat pump, on the LED display it shows
your setting water temperature for 5s, then show outlet water’s temperature. Fan
motor will start to run rstly, after 15 seconds, the compressor starts to run.
Press ON/OFF for 3 seconds again to turn o the heat pump, compressor stops
rstly, after 30 seconds the fan motor stops.
At the rst time of power on, the heat pump will run to heat directly if the outgoing
temp.(Tout)≤setting temp.(Tset), without considering the parameter “Temp.
dierence for restart activation”.
Up or down
11 
When the outgoing temp. (Tout)> setting temp.(Tset) + 1 °C, the heat pump will
stop to run; Till Tout≤Tset Temp. dierence for restart activation (2 °C), the heat
pump will restart. Once the compressor starts to run, it has to continue for 2 minutes
before turned o; But if any error appears, there’s no 2 minutes restrict.
Once the compressor is turned o, there’s a 3 minutes delay before next start.
Press ON/OFF and SETTINGS at the same time for 3 seconds to lock the keys; And
on the contrary, to unlock the keys.
Press ON/OFF and DOWN at the same time for 3 seconds to return to factory’s
default settings
5.3 Water temperature setting
At running status, press DOWN or UP directly to adjust your desired water
temperature (range: 10—42 °C). Press ON/OFF shortly to save the setting then exit.
NOTE: the heat pump can run only if the water circle/ltration system is running.
5.4 Fan motor defrosting
5.4.1 At defrosting, the compressor stops and fan motor keeps running, based on the
regular time duration (Factory’s default seting is 12 min.)
5.4.2 Defrosting logic:
When system detects ambient temp. ≤13C, (default value: 13C), and compressor
total running time for heating (counted from the second of compressor starts, default
value: 60 min.) reaches 60 min., it will enter regular defrosting mode: compressor
stops andfan motor keeps running 12 min. (default value: 12 min.).
Once nished, the compressor will restart to heat, counting for total heating time will
be returned to zero. During fan motor defrosting:
1). If the heat pump is switched o, it will stop to run immediately;
2). If any error occurs and activates system protection, it will quit defrosting and stop
to run;
3). The system will not detect low pressure protection.
5.5 Parameter query
Press SETTINGS it will enter the parameter query, press UP or DOWN to choose
the code d0 to d8, press SETTINGS again, it will show current value. And press
SETTINGS again to return to parameter query interface. When fnished, shortly press
ON/OFF to save & exit.
Notice:
1). For the parameter c0 to c8, it is not authorized to set at end-users side, if actually
needed, please contact your supplier;
2). The required sensor’s spec.: 50K for discharge temp. sensor and 5K for others,
12

please note if users need to replace a new one, the same spec must be selected,
otherwise it will not be matched with the PCB.
5.6 System protection
5.6.1 Compressor discharge over high protection
When the compressor runs, the system will check discharge temp., if detects it≥
105 C within 5S continuously (parameter c3 as above form displays), the system will
judge it as discharge error, stop compressor and fan motor, show “E03” error code.
When discharge temp. < parameter c3 - 10 °C, it will start fan motor and compressor
(if remains stopped more than 3 minutes).
If this error appears 3 times within 30 minutes, the system will lock on it, the 2
indication LED lights will ash together, and show error code “E03”, it can be only
recovered by turning o the power supply.
5.6.2 Low pressure protection
When the compressor runs for 5 minutes, if the system detects low pressure switch
o within 10S continuously, it will enter this protection and show “EL” error code.
When it detects low pressure switch connected, then quites this protection.
If this error appears 3 times within 30 minutes, the system will lock on it, the
indication LED light “Running” will ash, and show error code “EL, it can be only
recovered by turning o the power supply.
5.6.3 Outgoing water temp. sensor failure
If the system detects this temp. sensor in short circuit or disconnected, it will judge
this failure and show “E01” error code, then stop the heat pump for protection.
5.6.4 Ambient temp. sensor failure
If the system detects this temp. sensor in short circuit or disconnected, it will judge
this failure and show “E02” error code, then stop the heat pump for protection.
5.6.5 Discharge temp. sensor failure
If the system detects this temp. sensor in short circuit or disconnected, it will judge
this failure and show “E04” error code, then stop the heat pump for protection.
5.6.6 Ambient temp. over low or over high protection
When the ambient temp. < 8 Centi-degree (C) or < 60 C, the heat pump will stop to
enter protection and dispaly E00 error code.
When ambient temp. ≥ 11C or ≤ 57C (3C dierence), the heat pump will restart.
5.6.6 Auto restart
13 
This parameter can be pre-set, the system will save it always;
If the heat pump power supply is cut o at an accidence, when power on again, the
heat pump will automatically run at the settings before power o.
6.0 Troubleshooting
6.1 Error code on the LED controller
6.2 Other malfunctions and solutions (no display on LED wire controller)
11°C 57°C
14

7.0 Maintenance
1). The users should check the water supply system regularly to avoid the air to enter
the system and to cause low water ow, because it would reduce the performance
and reliability of your heat pump unit.
2). Clean your pools and ltration system regularly to avoid the damage caused to
your heat unit as a result of the dirty of clogged lter.
3). The users should drain away the water inside titanium heat exchanger of your
heat pump if it remains not running for a long period (especially during the winter
season).
4). When you use again the heat pump after a long period, please check if the water
pipeline at proper condition and make the water pump run rstly before startup the
unit.
5). When your heat pump is running, there will be always some little water discharge
under the unit, it is normal.
6). This heat pump should not be put into the domestic waste throughout the EU,
at the end of its useful life, but must be disposed at a central point for recycling
of electrical and electronic domestic applications. To prevent possible harm to the
environment or human health from uncontrolled waste disposal, recycle it responsibly
to promote the sustainable reuse of material resources. To return your used electrical
devices, please use the return or collection system or contact the retailer where
your heat pump was purchased, they can take this product for environmental safe
recycling.By doing this you will help to preserve the environment, and thank you for
your eorts.
8.0 Service & warranty
8.1 Limited warranty
We guarantee that all parts are free of defects in materials and workmanship for a
period of two years from the date of purchase (please amend it according to acual).
The warranty covers only material or manufacturing defects that prevent the product
from being able to be installed or operated in a normal way. Defective parts will be
replaced or repaired.
The warranty does not cover transportation damage, any use other than what is
intended, damage caused by incorrect assembly or improper use, damage caused by
impact or other error, damage caused by frost cracking or by improper storage. The
warranty becomes void if the user modies the product.
The warranty does not include product-related damage, property damage or general
operational loss.
The warranty is limited to the initial retail purchase and cannot be transferred and it
15 
does not apply to products moved from their original location.
The manufacturer’s liability cannot exceed the repair or replacement of defective
parts and does not include labour costs to remove and reinstall the defective part,
transportation costs to and from the service centre, and all other materials necessary
to carry out the repair.
This warranty does not cover failure or malfunction as a result of the
following:
1). Lack of proper installation, operation or maintenance of the unit in accordance
with our published “User’s Guide” supplied with the unit.
2). The workmanship of any installation of the unit.
3). Not maintaining a proper chemical balance in your pool [pH level between 7.0
and 7.4. Free chlorine between 0.5 - 1.5 mg/l. Total dissolved solids (TDS) less than
1,200 ppm. Salt maximum 8 g/l]
4). Misuse, alteration, accident, re, ood, lightning strike, rodents, insects,
negligence or unforeseen actions.
5). Scaling, freezing up or other conditions that cause insucient water circulation.
6). Operation of the device without complying with the published minimum and
maximum ow specications.
7). Use of non-factory authorized parts or accessories in conjunction with the
product.
8). Chemical contamination of combustion air or improper use of water care products,
such as the supply of water care products upstream of the heater and the hose or
through the skimmer.
9). Overheating, improper wiring, improper power supply, indirect damage caused by
the failure of O-rings, sand lters or cartridge lters, or damage caused by running
the pump with inadequate amounts of water.
Limitation of liability
This is the only warranty provided by the manufacturer. No one is authorized to make
any other warranties on our behalf. This warranty is in lieu of all other warranties,
expressed or implied, including but not limited to any implied warranty of tness for a
particular purpose and saleability. We expressly disclaim all liability for consequential
damage, accidental damage, indirect loss or loss related to a breach of the expressed
or implied warranty. This warranty gives you specic legal rights, which may vary by
country.
16

2.0 Einführung
Glückwunsch zur Wahl des EXIT Toys mini heat pump!
Amüsier dich, sei aktiv und spiele im Freien!
Für diesen Spaß entwickeln wir innovative und hochwertige Spielzeuge für coole Kids.
Wir tun alles in unserer Macht stehende, um sichere Produkte für Kinder zu
entwickeln. Da unsere Produkte als Spielzeuge klassiziert werden, erfüllen wir die
strengsten Sicherheitsvorschriften. Bevor unsere Produkte auf dem Markt kommen,
veranlassen wir die Dürchführung von unabhängigen Prüfungen zur Zertizierung.
Außerdem kontrollieren wir selbst ständig unsere Produktionsabläufe und lassen diese
als weitere Kontrolle regelmäßig durch unabhängige Stellen überprüfen. Nur Produkte,
die den höchsten EXIT Toys Standards gerecht werden, werden mit dem EXIT Toys
label gekennzeichnet.
Wir danken Ihnen für Ihr Vertrauen in dieses Produkt. Und wir sind sicher, dass Ihre
Kinder genau viel Spaß haben werden wie wir ihn während der Entwicklung hatten.
Da wir aufgeschlossen sind, schätzen wir wirklich all Ihre Kommentare und Ideen, die
uns bei der Verbesserung unserer Produkte bzw. bei der Entwicklung neuer Spiel-
zeuge helfen. Sie sind herzlich eingeladen, uns Ihre Ideen unter [email protected] zu
senden.
Besuchen Sie www.exittoys.com und entdecken Sie weitere tolle neue Produkte.
Das EXIT Toys Team
17 
3.0 Sicherheitshinweis
ACHTUNG: 



Hinweise des Herstellers und die Anwendung von


Hinweise wird die völlige Garantie entfallen. Der Hersteller


Installation verursacht werden, wobei die Hinweise in dieser



1). Nichtbeachtung der Sicherheitshinweise kann zu Stromschlägen, Wasserschäden,
Feuer, Schäden an der Wärmepumpe oder anderen Produkten, ernsthafte
Verletzungen zur Folge haben oder sogar zum Tod führen.
2). Dies ist kein SPIELZEUG. Lassen Sie Kinder nicht alleine und ohne Aufsicht in der
Nähe des Geräts.
3). Nur qualizierte Personen sollen diese Wärmepumpe installieren.
4). Diese Wärmepumpe soll nicht durch Personen mit eingeschränkten körperlichen,
sensorischen oder geistigen Fähigkeiten, oder die nicht über ausreichende Erfahrung
und Kenntnisse verfügen, benutzt werden, es sei denn, sie wurden von einer für ihre
Sicherheit verantwortlichen Person im Gebrauch der Wärmepumpe unterwiesen und
beaufsichtigt.
5). Der Freiraum der Wärmepumpe ist so zu wählen, dass es ausreichende
Belüftungsmöglichkeiten gibt und dass das Gerät weit entfernt ist von alles, dass
möglicherweise einen Brand verursachen kann.
6). Stellen oder benutzen Sie die Wärmepumpe nicht in der Nähe von giftigen
Stoen, entzündlichen oder
brennbaren Flüssigkeiten wie Benzin, oder explosionsfähigen oder brennbaren
Dämpfen.
7). Das Gerät muss so installiert werden, dass der Stecker immer erreichbar ist.
8). Vor der Installation, und wiederholt vor der ersten Inbetriebnahme, ist das ganze
18

Produkt zu überprüfen, bevor die Wärmepumpe anzuschalten.
9). Bei der Installation des Geräts müssen die nationalen Verdrahtungsvorschriften
eingehalten werden.
10). Wenn das Netzkabel beschädigt ist, muss es durch den Hersteller oder einer
seiner Servicevertreter oder eine ähnlich qualizierte Person ausgetauscht werden,
um Gefahren vorzubeugen.
11). Benutzen Sie die Wärmepumpe nicht bei Feststellung einer Beschädigung. Wenn
Sie bemerken, dassdie Wärmepumpe nicht ordnungsgemäß funktioniert oder
einen merkwürdigen Geruch verströmt, schalten Sie sofort die Wärmepumpe aus
und wenden Sie sich an einen qualizierten Techniker.
12). Versuchen Sie nicht die Wärmepumpe selbst zu reparieren oder zu zerlegen,
ansonsten erlischt dieGarantie.
13). Schalten Sie immer die Stromversorgung zur Wärmepumpe ab, bevor Sie die
Wärmepumpe oder das Wassersystem warten oder reinigen.
14). Lassen Sie im Winter, oder wenn die Umgebungstemperatur unter 0 °C
sinkt, immer das Wasser aus der Wärmepumpe ab. Frost wird Schäden am Titan-
Wärmetäuscher verursachen. Das macht die Garantie ungültig.
15). Lagern Sie die Wärmepumpe trocken, um Feuchtigkeitsschäden vorzubeugen.
16). Dieses Gerät enthält uorierte Treibhausgase in einem hermetisch
geschlossenen System. Die Installation, Instandhaltung, Reparatur oder
Entsorgung sind nur von professionellen und qualizierten Technikern durchzuführen,
entsprechend der zugehörigen Kapiteln in dieser Bedienungsanleitung.
17). Nachfüllen des Gases darf nur durch eine Fachkraft mit einem R32
Betriebserlaubnis geschehen.
18). Schweißen Sie die Rohrleitung nicht, wenn es noch Kältemittel in der
Wärmepumpe gibt. Stellen Sie sicher, dass es ausreichend Freiraum und Belüftung
gibt, wenn das Gas nachgefüllt wird.
19). Schalten Sie immer die Stromversorgung ab, wenn Sie das Gehäuse önen, um
den Innern zu erreichen, wegen der Hochspannung innendrin. 2. Installation und
19 
4.0 Anschluss
ACHTUNG!
Bitte beachten Sie folgende Punkte bei der Installation der Wärmepumpe:
1). Jede Verteilung von Chemikalien muss in der Rohrleitung, die die Wärmepumpe
nachgeschaltet ist, erfolgen. (Also hinter dem Wasserauslass der Wärmepumpe.)
2). Die Wärmepumpe immer aufrecht halten. Wenn das Gerät schräg gehalten wurde,
warten Sie dann mindesten 24 Stunden vor Inbetriebnahme der Wärmepumpe.
4.1 Standort der Wärmepumpe
Die Wärmepumpe wird auf jedem gewünschten Standort einwandfrei funktionieren,
solange es die folgenden Gegenstände gibt: Frische Luft, Elektrizität und
Poollteranlage
Die Wärmepumpe kann in so gut wie jedem Außenbereich installiert werden,
solange die vorgeschriebenen Mindestabstände zu anderen Objekten eingehalten
werden (siehe Zeichnung unten). Wenden Sie sich an Ihren Poolinstallateur für
die Installation der Wärmepumpe mit einem Innenbecken. Installation auf einem
windigenStandort ist kein Problem, im Gegensatz zu gasbetriebene Wärmepumpen
(in Bezug auf die Zündamme).
ACHTUNG! Die Wärmepumpe nie in einem geschlossenen Raum mit einer
beschränkten Luftmenge installieren, wobei die Abluft erneut genutzt wird.
Die Wärmepumpe auch nicht in der Nähe von Gebüsch, die den Lufteinlass
blockieren kann, installieren. Solche Standorte beeinussen die kontinuierliche
Frischluftversorgung, was zu einer geringeren Ezienz führt und möglicherweise
ausreichende Wärmeabgabe vorbeugt.
20

4.2. Inbetriebnahme
Um das Wasser im Pool erwärmen zu können, muss die Filterpumpe betrieben
werden, damit das Wasser durch die Wärmepumpe zirkuliert. Ohne Zirkulation wird
die Wärmepumpe nicht starten.
4.3. Schlauchanschluss
Schritt 1: Installieren Sie die Schlauchklemmen.
Schritt 2: Schließen Sie die Schläuche an die
Wärmepumpe an.
Die zwei Schwimmbadschläuche und zwei Schlauchklemmen sind im Lieferumfang
der Wärmepumpe enthalten. Der Anschluss oben rechts der Wärmepumpe ist für
Wasserauslass, der Anschluss unten ist für Wassereinlass.
4.4. Elektrischer Anschluss
Prüfen Sie vor Anschluss des Gerätes, ob die Netzspannung mit der Betriebsspannung
der Wärmepumpe übereinstimmt. Der RCD-Stecker wird zum Netzkabel mitgeliefert,
und kann gegen einen Stromschlag, der durch einen möglichen Kurzschluss in der
Wärmepumpe verursacht werden kann, schützen.
21 
Nachdem alle Verbindungen angeschlossen und kontrolliert wurden, befolgen Sie
folgende Schritte:
1. Schalten Sie die Filterpumpe ein. Untersuchen Sie auf Undichtigkeiten und prüfen
Sie, ob das Wasser von und zu dem Pool ießt.
2. Versorgen Sie die Wärmepumpe mit Strom und drücken Sie die On/O- Taste auf
dem elektronischen
Bedienfeld. Das Gerät startet nach dem Ablauf der Einschaltverzögerung (siehe
unten).
3. Prüfen Sie nach einigen Minuten, ob die Luft, die aus dem Gerät austritt kühler ist.
4. Wenn Sie die Filterpumpe ausschalten, schaltet sich die Wärmepumpe ebenfalls
  • Page 1 1
  • Page 2 2
  • Page 3 3
  • Page 4 4
  • Page 5 5
  • Page 6 6
  • Page 7 7
  • Page 8 8
  • Page 9 9
  • Page 10 10
  • Page 11 11
  • Page 12 12
  • Page 13 13
  • Page 14 14
  • Page 15 15
  • Page 16 16
  • Page 17 17
  • Page 18 18
  • Page 19 19
  • Page 20 20
  • Page 21 21
  • Page 22 22
  • Page 23 23
  • Page 24 24
  • Page 25 25
  • Page 26 26
  • Page 27 27
  • Page 28 28
  • Page 29 29
  • Page 30 30
  • Page 31 31
  • Page 32 32
  • Page 33 33
  • Page 34 34
  • Page 35 35
  • Page 36 36
  • Page 37 37
  • Page 38 38
  • Page 39 39
  • Page 40 40
  • Page 41 41
  • Page 42 42
  • Page 43 43
  • Page 44 44
  • Page 45 45
  • Page 46 46
  • Page 47 47
  • Page 48 48
  • Page 49 49
  • Page 50 50
  • Page 51 51
  • Page 52 52

EXIT 8720289691561 Benutzerhandbuch

Typ
Benutzerhandbuch