
Impact Drill
Schlagbohrmaschine
Perceuse percussion
Trapano a percussione
Klop-boormachine
Taladro de percusión
Berbequim com percussão
Read through carefully and understand these instructions before use.
Diese Anleitung vor Benutzung des Werkzeugs sorgfältig durchlesen und verstehen.
Lire soigneusement et bien assimiler ces instructions avant usage.
Prima dell’uso leggere attentamente e comprendere queste istruzioni.
Deze gebruiksaanwijzing s.v.p. voor gebruik zorgvuldig doorlezen.
Leer
cuidadosamente y comprender estas instrucciones antes del uso.
Antes de usar, leia com cuidado para assimilar estas instruções.
Handling instructions
Bedienungsanleitung
Mode d’emploi
Istruzioni per l’uso
Gebruiksaanwijzing
Instrucciones de manejo
Instruções de uso
VTP-16A
•
VTV-16
VTV-16
001Cover_VTP-16A_WE 08/10/31, 09:311

1
3
2
1
1
2
3
4
5
6
7
8
b mm
a mm
8
43
73
a
17
17
b
6
7
9
0
1
2
1
2
00Table_VTP-16A_WE 08/10/31, 09:311

2
English Deutsch Français Italiano
1
2
3
4
5
6
7
8
9
0
Gear Cover Getriebekasten Capot de l'engrenage
Coperchio degliingranaggi
Shift Lock Umschaltfeststeller
Pièce de blocage
Chiavetta a cursore
(Push and Slide) (eindrücken und schieben)
coulissante (Pousser et
(Premere e spostare)
faire coulisser)
Change Ring Stellring Bague de Commutation Anello del cambio
Gear Cover Getriebekasten Capot de l'engrenage
Coperchio degliingranaggi
Rotation Reine Bohrfunktion Rotation Rotazione
Rotation + Impact Schlagbohrfunktion Rotatdon Percussion Rotazione e impatto
Wear limit Verschleißgrenze Limite d’usure Limite d’usura
No. of carbon brush Nr. der kohlebürste No. de balai en carbone
Numero delle spazzole
di carbone
Usual carbon brush
Gewöhnliche Balai en carbone Spazzola di
Kohlebürste ordinaire carbonecomune
Auto-stop carbon brush Auto-Stop Kohlebürest
Balai en carbone à arrêt Spazzola di carbone ad
automatique arresto automatico
Nederlands Español Português
1
2
3
4
5
6
7
8
9
0
Aandrijfkast Caja de engranaje Tampa das velocidades
Vastzetknop Cierre de traslación Bloqueio de controlo
(indrukken en schuiven) (presionar y correr) (Empurre e deslize)
Stelring Anillo de alteración Anel selector
Aandrijpast Caja de engranaje Tampa das velocidades
Normale boorfunctie Rotación Rotação
Slagboorfunctie Rotación + Impacto Rotação + Impacto
Slijtage-limiet Límite de desgaste Limite de desgaste
Nr. van koolborstel No. de contacto de carbón Nº de escova de carvão
Normale koolborstel Escobilla de carbón usual Escova de carvão comum
Auto-stop koolborstel
Escobilla de carbón de Escova de carvão de
parada automática parada automática
00Table_VTP-16A_WE 08/10/31, 09:312

3
Symbols
WARNING
The following show
symbols used for the
machine. Be sure that
you understand their
meaning before use.
Symbole
WARNUNG
Die folgenden Symbole
werden für diese Maschine
verwendet. Achten Sie
darauf, diese vor der
Verwendung zu verstehen.
Symboles
AVERTISSEMENT
Les symboles suivants
sont utilisés pour l’outil.
Bien se familiariser avec
leur signification avant
d’utiliser l’outil.
Simboli
AVVERTENZA
Di seguito mostriamo i
simboli usati per la
macchina. Assicurarsi di
comprenderne il
significato prima dell’uso.
Read all safety
warnings and all
instructions.
Failure to follow the
warnings and
instructions may result
in electric shock, fire
and/or serious injury.
Lesen Sie sämtliche
Sicherheitshinweise und
Anweisungen durch.
Wenn die Warnungen und
Anweisungen nicht befolgt
werden, kann es zu
Stromschlag, Brand und/
oder ernsthaften
Verletzungen kommen.
Lire tous les avertissements
de sécurité et toutes les
instructions.
Tout manquement à observer
ces avertissements et
instructions peut engendrer
des chocs électriques, des
incendies et/ou des blessures
graves.
Leggere tutti gli avvertimenti
di sicurezza e tutte le
istruzioni.
La mancata osservanza degli
avvertimenti e delle istruzioni
potrebbe essere causa di
scosse elettriche, incendi e/o
gravi lesioni.
Symbolen
WAARSCHUWING
Hieronder staan symbolen
afgebeeld die van toepassing
zijn op deze machine. U
moet de betekenis hiervan
begrijpen voor gebruik.
Símbolos
ADVERTENCIA
A continuación se muestran
los símbolos usados para la
máquina. Asegúrese de
comprender su significado
antes del uso.
Símbolos
AVISO
A seguir aparecem os
símbolos utilizados pela
máquina. Assimile bem
seus significados antes
do uso.
Lees alle waarschuwingen en
instructies aandachtig door.
Nalating om de
waarschuwingen en
instructies op te volgen kan in
een elektrische schok, brand
en/of ernstig letsel resulteren.
Lea todas las instrucciones y
advertencias de seguridad.
Si no se siguen las
advertencias e instrucciones,
podría producirse una
descarga eléctrica, un
incendio y/o daños graves.
Leia todas as instruções e
avisos de segurança.
Se não seguir todas as
instruções e os avisos, pode
provocar um choque eléctrico,
incêndio e/ou ferimentos
graves.
Only for EU countries
Do not dispose of electric tools
together with household waste
material!
In observance of European
Directive 2002/96/EC on waste
electrical and electronic
equipment and its
implementation in accordance
with national law, electric tools
that have reached the end of
their life must be collected
separately and returned to an
environmentally compatible
recycling facility.
Nur für EU-Länder
Werfen Sie Elektrowerkzeuge
nicht in den Hausmüll!
Gemäss Europäischer
Richtlinie 2002/96/EG über
Elektro- und Elektronik-
Altgeräte und Umsetzung in
nationales Recht müssen
verbrauchte Elektrowerkzeuge
getrennt gesammelt und einer
umweltgerechten
Wiederververtung zugeführt
werden.
Pour les pays européens
uniquement
Ne pas jeter les appareils
électriques dans les ordures
ménagères!
Conformément à la directive
européenne 2002/96/EG relative
aux déchets d’équipements
électriques ou électroniques
(DEEE), et à sa transposition dans
la législation nationale, les
appareils électriques doivent être
collectés à part et être soumis à
un recyclage respectueux de
l’environnement.
Solo per Paesi UE
Non gettare le
apparecchiature elettriche tra i
rifiuti domestici.
Secondo la Direttiva Europea
2002/96/CE sui rifiuti di
apparecchiature elettriche ed
elettroniche e la sua
attuazione in conformità alle
norme nazionali, le
apparecchiature elettriche
esauste devono essere
raccolte separatamente, al fine
di essere reimpiegate in modo
eco-compatibile.
Alleen voor EU-landen
Geef elektrisch gereedschap niet
met het huisvuil mee!
Volgens de Europese richtlijn
2002/96/EG inzake oude
elektrische en elektronische
apparaten en de toepassing
daarvan binnen de nationale
wetgeving, dient gebruikt
elektrisch gereedschap
gescheiden te worden
ingezameld en te worden
afgevoerd naar een recycle
bedrijf dat voldoet aan de
geldende milieu-eisen.
Sólo para países de la Unión
Europea
¡No deseche los aparatos eléctricos
junto con los residuos domésticos!
De conformidad con la Directiva
Europea 2002/96/CE sobre residuos
de aparatos eléctricos y electrónicos
y su aplicación de acuerdo con la
legislación nacional, las
herramientas eléctricas cuya vida útil
haya llegado a su fin se deberán
recoger por separado y trasladar a
una planta de reciclaje que cumpla
con las exigencias ecológicas.
Apenas para países da UE
Não deite ferramentas
eléctricas no lixo doméstico!
De acordo com a directiva
europeia 2002/96/CE sobre
ferramentas eléctricas e
electrónicas usadas e a
transposição para as leis
nacionais, as ferramentas
eléctricas usadas devem ser
recolhidas em separado e
encaminhadas a uma
instalação de reciclagem dos
materiais ecológica.
00Table_VTP-16A_WE 08/10/31, 09:313

4
English
GENERAL POWER TOOL SAFETY WARNINGS
WARNING
Read all safety warnings and all instructions.
Failure to follow the warnings and instructions may result in
electric shock, fire and/or serious injury.
Save all warnings and instructions for future reference.
The term “power tool” in the warnings refers to your mains-
operated (corded) power tool or battery-operated (cordless)
power tool.
1) Work area safety
a) Keep work area clean and well lit.
Cluttered or dark areas invite accidents.
b) Do not operate power tools in explosive atmospheres,
such as in the presence of flammable liquids, gases
or dust.
Power tools create sparks which may ignite the dust
or fumes.
c) Keep children and bystanders away while operating
a power tool.
Distractions can cause you to lose control.
2) Electrical safety
a) Power tool plugs must match the outlet.
Never modify the plug in any way.
Do not use any adapter plugs with earthed (grounded)
power tools.
Unmodified plugs and matching outlets will reduce
risk of electric shock.
b) Avoid body contact with earthed or grounded surfaces,
such as pipes, radiators, ranges and refrigerators.
There is an increased risk of electric shock if your
body is earthed or grounded.
c) Do not expose power tools to rain or wet conditions.
Water entering a power tool will increase the risk of
electric shock.
d) Do not abuse the cord. Never use the cord for carrying,
pulling or unplugging the power tool.
Keep cord away from heat, oil, sharp edges or moving
parts.
Damaged or entangled cords increase the risk of
electric shock.
e) When operating a power tool outdoors, use an
extension cord suitable for outdoor use.
Use of a cord suitable for outdoor use reduces the
risk of electric shock.
f) If operating a power tool in a damp location is
unavoidable, use a residual current device (RCD)
protected supply.
Use of an RCD reduces the risk of electric shock.
3) Personal safety
a) Stay alert, watch what you are doing and use common
sense when operating a power tool.
Do not use a power tool while you are tired or under
the influence of drugs, alcohol or medication.
A moment of inattention while operating power tools
may result in serious personal injury.
b) Use personal protective equipment. Always wear eye
protection.
Protective equipment such as dust mask, non-skid
safety shoes, hard hat, or hearing protection used for
appropriate conditions will reduce personal injuries.
c) Prevent unintentional starting. Ensure the switch is
in the off-position before connecting to power source
and/or battery pack, picking up or carrying the tool.
Carrying power tools with your finger on the switch
or energising power tools that have the switch on
invites accidents.
d) Remove any adjusting key or wrench before turning
the power tool on.
A wrench or a key left attached to a rotating part of
the power tool may result in personal injury.
e) Do not overreach. Keep proper footing and balance
at all times.
This enables better control of the power tool in
unexpected situations.
f) Dress properly. Do not wear loose clothing or
jewellery. Keep your hair, clothing and gloves away
from moving parts.
Loose clothes, jewellery or long hair can be caught
in moving parts.
g) If devices are provided for the connection of dust
extraction and collection facilities, ensure these are
connected and properly used.
Use of dust collection can reduce dust related hazards.
4) Power tool use and care
a) Do not force the power tool. Use the correct power
tool for your application.
The correct power tool will do the job better and safer
at the rate for which it was designed.
b) Do not use the power tool if the switch does not
turn it on and off.
Any power tool that cannot be controlled with the
switch is dangerous and must be repaired.
c) Disconnect the plug from the power source and/or
the battery pack from the power tool before making
any adjustments, changing accessories, or storing
power tools.
Such preventive safety measures reduce the risk of
starting the power tool accidentally.
d) Store idle power tools out of the reach of children
and do not allow persons unfamiliar with the power
tool or these instructions to operate the power tool.
Power tools are dangerous in the hands of untrained
users.
e) Maintain power tools. Check for misalignment or
binding of moving parts, breakage of parts and any
other condition that may affect the power tool's
operation.
If damaged, have the power tool repaired before use.
Many accidents are caused by poorly maintained
power tools.
f) Keep cutting tools sharp and clean.
Properly maintained cutting tools with sharp cutting
edges are less likely to bind and are easier to control.
g) Use the power tool, accessories and tool bits etc. in
accordance with these instructions, taking into
account the working conditions and the work to be
performed.
Use of the power tool for operations different from
those intended could result in a hazardous situation.
5) Service
a) Have your power tool serviced by a qualified repair
person using only identical replacement parts.
This will ensure that the safety of the power tool is
maintained.
PRECAUTION
Keep children and infirm persons away.
When not in use, tools should be stored out of reach of children and
infirm persons.
01Eng_VTP-16A_WE 08/10/31, 09:324

English
5
PRIOR TO OPERATION
1. Power source
Ensure that the power source to be utilized conforms
to the power requirements specified on the product
nameplate.
2. Power switch
Ensure that the power switch is in the OFF position. If
the plug is connected to a receptacle while the power
switch is in the ON position, the power tool will start
operating immediately, inviting serious accident.
3. Extension cord
When the work area is removed from the power
source, use an extension cord of sufficient thickness
and rated capacity. The extension cord should be
kept as short as practicable.
4. Fitting the drill bit
Fit the drill bit into the chuck and use the chuck
wrench to secure it, tightening the chuck by each
of the three holes in turn.
5. Selecting the appropriate drill bit
䡬 When boring concrete or stone
Use the drill bits specified in the Optional Accessories.
䡬 When boring metal or plastic
Use an ordinary metalworking drill bit.
䡬 When boring wood
Use an ordinary woodworking drill bit.
However, when drilling 6.5 mm or smaller holes, use
a metalworking drill bit.
6. High-speed/Low-speed changeover:
Prior to changing speed, ensure that the switch is in
the OFF position, and the drill has come to a complete
stop. To change speed, depress the shift Iock and
slide it in the appropriate direction, as indicated by
the arrow in Fig. 1. The numeral “1” engraved in the
drill body denotes low speed, the numeral “2” denotes
high speed.
7. IMPACT to ROTATION changeover: (Fig. 2)
The Impact Drill can be switched from IMPACT (impact
plus rotation) to ROTATION (rotation only) by simply
turning the change ring.
Model VTP-16A VTV-16
Voltage (by areas)* (110V, 115V, 120V, 127V, 220V, 230V, 240V)
Power input 800 W*
Speed change 1212
No load speed 700 min
-1
1400 min
-1
0-700 min
-1
0-1400 min
-1
Capacity
Steel 16 mm 10 mm 16 mm 10 mm
Concrete 35 mm 16 mm 35 mm 16 mm
Weight (without cord) 3.8 kg
STANDARD ACCESSORIES
(1) Chuck wrench ............................................................ 1
(2) Side handle ................................................................ 1
(3) Depth stopper ............................................................ 1
Standard accessories are subject to change without
notice.
OPTIONAL ACCESSORIES (sold separately)
䡬 Drill Bit for concrete
O.D Length Code No.
6.5mm 100mm 931851
8.0 100 931852
9.5 120 931853
10.0 120 931854
12.0 160 971704
13.0 160 931855
14.3 160 931776
16.0 160 971670
19.0 160 931856
Optional accessories are subject to change without notice.
APPLICATIONS
䡬 By combined actions of ROTATION and IMPACT:
Boring holes in hard materials (concrete, marble,
granite, tiles, etc.)
䡬 By ROTATIONAL action:
Boring holes in metal, wood and plastic.
SPECIFICATIONS
*Be sure to check the nameplate on product as it is subject to change by areas.
IMPACT DRILL SAFETY WARNINGS
1. Wear ear protectors with impact drills.
Exposure to noise can cause hearing loss.
2. Use auxiliary handles supplied with the tool.
Loss of control can cause personal injury.
3. Before drilling into a wall, floor or ceiling, thoroughly
confirm that no items such as electric cables or
conduits are buried inside.
01Eng_VTP-16A_WE 08/10/31, 09:325

6
English
When boring concrete, stone, tile or similar hard
materials, turn the change ring fully clockwise. The
drill head impacts against the material while
continuing to rotate.
When boring metal, wood or plastic, turn the change
ring fully counterclockwise. The drill simply rotates
as an ordinary electric drill.
CAUTION
Do not use the Impact Drill in the IMPACT function if
the material can be bored by rotation only. Such
action will not only reduce drill efficiency, but may
also damage the drill tip.
When changing over, ensure that the change ring is
turned as far as it will go.
8. Fixing the side handle.
Loosen the glip on the side handle, and attach the
side handle to the gear cover in a position convenient
for drilling. Match the projecting part of the handle to
the groove on the gear cover, and firmly tighten the
glip.
To remove the side handle, loosen the glip, and
rotate the handle.
To attach a depth stopper on the side handle, insert
the stopper into the hexagon hole groove on the side
handle, adjust the position of the depth stopper in
accordance with the desired depth of the hole, and
firmly tighten the glip.
PRACTICAL HANDLING PROCEDURES
1. Pressure:
Drilling will NOT be accelerated by placing heavy
pressure on the drill. Such action will only result in a
damaged drill bit, decreased drilling efficiency and/
or shortened service life of the drill.
2. Using a large diameter drill bit:
The larger the drill bit diameter, the larger the reactive
force on your arm. Be careful not to lose control of
the drill because of this reactive force. To maintain
firm control, establish a good foothold, hold the drill
tightly with both hands, and ensure that the drill is
vertical to the material being drilled.
3. When drilling completely through the material:
When the drill bit bores completely through the
material, careless handling often results in a broken
drill bit or damage to the drill body itself due to the
sudden movement of the drill.
Always be alert and ready to release the pushing
force when drilling through the material.
4. Switch operation:
(1) VTP-16A:
By pulling the trigger switch and depressing the
stopper, the switch is held in the ON position for
continuous operation. To turn the drill OFF, pull the
trigger switch again and release.
(2) VTV-16:
The rotational speed of the drill bit can be controlled
by varying the amount that the trigger switch is pulled.
Speed is low when the trigger switch is pulled slightly
and increases as the switch is pulled more. Continuous
operation may be attained by pulling the trigger switch
and depressing the stopper. To turn the switch OFF,
pull the trigger switch again to disengage the stopper,
and release the trigger switch to its original position.
5. Precautions on boring
The drill may become overheated during operation;
however, it is sufficiently operable. Do not cool the
drill bit in water or oil.
6. Caution concerning immediately after use
Immediately after use, while it is still revolving, if the
Drill is placed on a location where considerable
ground chips and dust have accumulated, dust may
occasionally be absorbed into the Drill mechanism.
Always pay attention to this possibility.
MAINTENANCE AND INSPECTION
1. Inspection the drill bit
Continued use of a worn and/or damaged drill bit will
result in reduced drilling efficiency and may seriously
overload the drill motor. Inspect the drill bit often and
replace it with a new bit as necessary.
2. Inspecting the mounting screws
Regularly inspect all mounting screws and ensure
that they are properly tightened. Should any of the
screws be loose, retighten them immediately. Failure
to do so could result in serious hazard.
3. Inspecting the carbon brushes (Fig. 3)
The Motor employs carbon brushes which are
consumable parts. When they become worn to or
near the “wear limit”, it could result in motor trouble.
When an auto-stop carbon brush is equipped, the
motor will stop automatically.
At that time, replace both carbon brushes with new
ones which have the same carbon brush Numbers
shown in the figure. In addition, always keep carbon
brushes clean and ensure that they slide freely within
the brush holders.
4. Replacing carbon brushes
Disassemble the brush caps with a slotted-head
screwdriver. The carbon brushes can then be easily
removed.
5. Maintenance of the motor
The motor unit winding is the very “heart” of the
power tool. Exercise due care to ensure the winding
does not become damaged and/or wet with oil or
water.
6. Service parts list
A: Item No.
B: Code No.
C: No. Used
D: Remarks
CAUTION
Repair, modification and inspection of Hitachi Power
Tools must be carried out by an Authorized Service
Center.
This Parts List will be helpful if presented with the
power tool to the Authorized Service Center when
requesting repair or other maintenance.
In the operation and maintenance of power tools, the
safety regulations and standards prescribed in each
country must be observed.
MODIFICATIONS
Hitachi Power Tools are constantly being improved
and modified to incorporate the latest technological
advancements.
Accordingly, some parts (i.e. code numbers and/or
design) may be changed without prior notice.
01Eng_VTP-16A_WE 08/10/31, 09:326

English
7
GUARANTEE
We guarantee Hitachi Power Tools in accordance with
statutory/country specific regulation. This guarantee does
not cover defects or damage due to misuse, abuse, or
normal wear and tear. In case of complaint, please send
the Power Tool, undismantled, with the GUARANTEE
CERTIFICATE found at the end of this Handling
instruction, to a Hitachi Authorized Service Center.
NOTE
Due to HITACHI’s continuing program of research and
development, the specifications herein are subject to
change without prior notice.
IMPORTANT
Correct connection of the plug
The wires of the mains lead are coloured in accordance
with the following code:
Blue:- Neutral
Brown:- Live
As the colours of the wires in the mains lead of this tool
may not correspond with the coloured markings
identifying the terminals in your plug proceed as follows:
The wire coloured blue must be connected to the terminal
marked with the letter N or coloured black.
The wire coloured brown must be connected to the
terminal marked with the letter L or coloured red.
Neither core must be connected to the earth terminal.
NOTE
This requirement is provided according to BRITISH
STANDARD 2769: 1984.
Therefore, the letter code and colour code may not be
applicable to other markets except United Kingdom.
Information concerning airborne noise and vibration
The measured values were determined according to
EN60745 and declared in accordance with ISO 4871.
Measured A-weighted sound power level: 116 dB (A)
Measured A-weighted sound pressure level: 103 dB (A)
Uncertainty KpA: 3 dB (A).
Wear ear protection.
The typical weighted root mean square acceleration
value: 14 m/s
2
.
01Eng_VTP-16A_WE 08/10/31, 09:327

8
Deutsch
ALLGEMEINE SICHERHEITSHINWEISE FÜR
ELEKTROGERÄTE
WARNUNG
Lesen Sie sämtliche Sicherheitshinweise und Anweisungen durch
Wenn die Warnungen und Anweisungen nicht befolgt werden,
kann es zu Stromschlag, Brand und/oder ernsthaften Verletzungen
kommen.
Bitte bewahren Sie alle Warnhinweise und Anweisungen zum
späteren Nachschlagen auf.
Der Begriff „Elektrowerkzeug“ bezieht sich in den Warnhinweisen
auf Elektrowerkzeuge mit Netz- (schnurgebunden) oder Akkubetrieb
(schnurlos).
1) Sicherheit im Arbeitsbereich
a) Sorgen Sie für einen sauberen und gut ausgeleuchteten
Arbeitsbereich.
Zugestellte oder dunkle Bereiche ziehen Unfälle förmlich
an.
b) Verwenden Sie Elektrowerkzeuge niemals an Orten, an
denen Explosionsgefahr besteht – zum Beispiel in der
Nähe von leicht entflammbaren Flüssigkeiten, Gasen
oder Stäuben.
Bei der Arbeit mit Elektrowerkzeugen kann es zu
Funkenbildung kommen, wodurch sich Stäube oder
Dämpfe entzünden können.
c) Sorgen Sie bei der Arbeit mit Elektrowerkzeugen dafür,
dass sich keine Zuschauer (insbesondere Kinder) in der
Nähe befinden.
Wenn Sie abgelenkt werden, können Sie die Kontrolle
über das Werkzeug verlieren.
2) Elektrische Sicherheit
a) Elektrowerkzeuge müssen mit passender
Stromversorgung betrieben werden.
Nehmen Sie niemals irgendwelche Änderungen am
Anschlussstecker vor.
Verwenden Sie bei Elektrowerkzeugen mit Schutzkontakt
(geerdet) niemals Adapterstecker.
Stecker im Originalzustand und passende Steckdosen
reduzieren das Stromschlagrisiko.
b) Vermeiden Sie Körperkontakt mit geerdeten
Gegenständen wie Rohrleitungen, Heizungen, Herden
oder Kühlschränken.
Bei Körperkontakt mit geerdeten Gegenständen besteht
ein erhöhtes Stromschlagrisiko.
c) Setzen Sie Elektrowerkzeuge niemals Regen oder
sonstiger Feuchtigkeit aus.
Wenn Flüssigkeiten in ein Elektrowerkzeug eindringen,
erhöht sich das Stromschlagrisiko.
d) Verwenden Sie die Anschlussschnur nicht missbräuchlich.
Tragen Sie das Elektrowerkzeug niemals an der
Anschlussschnur, ziehen Sie es nicht damit heran und
ziehen Sie den Stecker nicht an der Anschlussschnur aus
der Steckdose.
Halten Sie die Anschlussschnur von Hitzequellen, Öl,
scharfen Kanten und beweglichen Teilen fern.
Beschädigte oder verdrehte Anschlussschnüre erhöhen
das Stromschlagrisiko.
e) Wenn Sie ein Elektrowerkzeug im Freien benutzen,
verwenden Sie ein für den Außeneinsatz geeignetes
Verlängerungskabel.
Ein für den Außeneinsatz geeignetes Kabel vermindert
das Stromschlagrisiko.
f) Falls sich der Betrieb des Elektrowerkzeuges in feuchter
Umgebung nicht vermeiden lässt, verwenden Sie eine
Stromversorgung mit Fehlerstromschutzeinrichtung
(Residual Current Device, RCD).
Durch den Einsatz einer Fehlerstromschutzeinrichtung
wird das Risiko eines elektrischen Schlages reduziert.
3) Persönliche Sicherheit
a) Bleiben Sie wachsam, achten Sie auf das, was Sie tun,
und setzen Sie Ihren Verstand ein, wenn Sie mit
Elektrowerkzeugen arbeiten.
Benutzen Sie keine Elektrowerkzeuge, wenn Sie müde
sind oder unter Einfluss von Drogen, Alkohol oder
Medikamenten stehen.
Bei der Arbeit mit Elektrowerkzeugen können bereits
kurze Phasen der Unaufmerksamkeit zu schweren
Verletzungen führen.
b) Benutzen Sie eine persönliche Schutzausrüstung. Tragen
Sie immer einen Augenschutz.
Schutzausrüstung wie Staubmaske, rutschsichere
Sicherheitsschuhe, Schutzhelm und Gehörschutz senken
das Verletzungsrisiko bei angemessenem Einsatz.
c) Vermeiden Sie unbeabsichtigten Anlauf. Achten Sie
darauf, dass sich der Schalter in der Aus- (Off-) Position
befindet, ehe Sie das Gerät mit der Stromversorgung
und/oder Batteriestromversorgung verbinden, es
aufheben oder herumtragen.
Das Herumtragen von Elektrowerkzeugen mit dem Finger
am Schalter oder das Herstellen der Stromversorgung bei
betätigtem Schalter zieht Unfälle regelrecht an.
d) Entfernen Sie sämtliche Einstellwerkzeuge
(Einstellschlüssel), ehe Sie das Elektrowerkzeug
einschalten.
Ein an einem beweglichen Teil des Elektrowerkzeugs
angebrachter Schlüssel kann zu Verletzungen führen.
e) Sorgen Sie für einen festen Stand. Achten Sie jederzeit
darauf, sicher zu stehen und das Gleichgewicht zu
bewahren.
Dadurch haben Sie das Elektrowerkzeug in unerwarteten
Situationen besser im Griff.
f) Kleiden Sie sich richtig. Tragen Sie keine lose Kleidung
oder Schmuck. Halten Sie Haar, Kleidung und Handschuhe
von beweglichen Teilen fern.
Lose Kleidung, Schmuck oder langes Haar kann von
beweglichen Teilen erfasst werden.
g) Wenn Anschlüsse für Staubabsaug- und -
sammelvorrichtungen vorhanden sind, sorgen Sie dafür,
dass diese richtig angeschlossen und eingesetzt werden.
Durch Entfernen des Staubes können staubbezogene
Gefahren vermindert werden.
4) Einsatz und Pflege von Elektrowerkzeugen
a) Überanspruchen Sie Elektrowerkzeuge nicht. Benutzen
Sie das richtige Elektrowerkzeug für Ihren Einsatzzweck.
Das richtige Elektrowerkzeug erledigt seine Arbeit bei
bestimmungsgemäßem Einsatz besser und sicherer.
b) Benutzen Sie das Elektrowerkzeug nicht, wenn es sich
nicht am Schalter ein- und ausschalten lässt.
Jedes Elektrowerkzeug, das nicht mit dem Schalter betätigt
werden kann, stellt eine Gefahr dar und muss repariert
werden.
c) Stecken Sie den Stecker der Stromversorgung oder
Batteriestromversorgung vom Gerät ab, ehe Sie
Einstellarbeiten vornehmen, Zubehörteile tauschen oder
das Elektrowerkzeug verstauen.
Solche präventiven Sicherheitsmaßnahmen verhindern
den unbeabsichtigten Anlauf des Elektrowerkzeugs und
die damit verbundenen Gefahren.
d) Lagern Sie nicht benutzte Elektrowerkzeuge außerhalb
der Reichweite von Kindern, lassen Sie nicht zu, dass
Personen das Elektrowerkzeug bedienen, die nicht mit
dem Werkzeug selbst und/oder diesen Anweisungen
vertraut sind.
Elektrowerkzeuge in ungeschulten Händen sind gefährlich.
e) Halten Sie Elektrowerkzeuge in Stand. Prüfen Sie auf
Fehlausrichtungen, sicheren Halt und Leichtgängigkeit
beweglicher Teile, Beschädigungen von Teilen und auf
jegliche andere Zustände, die sich auf den Betrieb des
Elektrowerkzeugs auswirken können.
02Ger_VTP-16A_WE 08/10/31, 09:328

Deutsch
9
TECHNISCHE DATEN
STANDARDZUBEHÖR
(1) Bohrfutterschlüssel ................................................... 1
(2) Handgriff .................................................................... 1
(3) Tiefenanschlag .......................................................... 1
Das Standardzubehör kann ohne vorherige
Bakanntmachung jederzeit geändert werden.
SONDERZUBEHÖR (separat zu beziehen)
䡬 Bohrer für Beton
Außendurchmesser
Länge Kennziffer
6,5mm 100mm 931851
8,0 100 931852
9,5 120 931853
10,0 120 931854
12,0 160 971704
13,0 160 931855
14,3 160 931776
16,0 160 971670
19,0 160 931856
*Vergessen Sie nicht, die Produktangaben auf dem Typenschild zu überprüfen, da sich diese je nach Verkaufsgebiet
ändern.
Das sonderzubehör kann ohne vorherige
Bekanntmachung jederzeit geändert werden.
ANWENDUNGEN
䡬 Kombinierter Betrieb von DREHUNG und STOSS:
Bohren von Löchern in harten Flächen (Beton,
Marmor, Granit, Kachel, etc.)
䡬 Betrieb durch einfache DREHUNG:
Bohren von Löchern in Metall, Holz und plastisches
Material.
VOR INBETRIEBNAHME
1. Netzspannung
Prüfen, daß die zu verwendende Netzspannung der
Angabe auf dem Typenschild entspricht.
2. Netzschalter
Prüfen, daß der Netzschalter auf “AUS” steht. Wenn
der Stecker an das Netz angeschlossen ist, Während
der Schalter auf “EIN” steht, beginnt das Werkzeug
sofort zu laufen und bedeutet ernsthafte Gefahr.
Bei Beschädigungen lassen Sie das Elektrowerkzeug
reparieren, ehe Sie es benutzen.
Viele Unfälle mit Elektrowerkzeugen sind auf schlechte
Wartung zurückzuführen.
f) Halten Sie Schneidwerkzeuge scharf und sauber.
Richtig gewartete Schneidwerkzeuge mit scharfen
Schneidkanten bleiben weniger häufig hängen und sind
einfacher zu beherrschen.
g) Benutzen Sie Elektrowerkzeuge, Zubehör,
Werkzeugspitzen und Ähnliches in Übereinstimmung mit
diesen Anweisungen – beachten Sie dabei die jeweiligen
Arbeitsbedingungen und die Art und Weise der
auszuführenden Arbeiten.
Der Gebrauch des Elektrowerkzeuges für andere als die
vorgesehenen Anwendungen kann zu gefährlichen
Situationen führen.
5) Service
a) Lassen Sie Elektrowerkzeuge durch qualifizierte
Fachkräfte und unter Einsatz passender, zugelassener
Originalteile warten.
Dies sorgt dafür, dass die Sicherheit des Elektrowerkzeugs
nicht beeinträchtigt wird.
VORSICHT
Von Kindern und gebrechlichen Personen fernhalten.
Werkzeuge sollten bei Nichtgebrauch außerhalb der Reichweite
von Kindern und gebrechlichen Personen aufbewahrt werden.
SICHERHEITSHINWEISE FÜR DIE BENUTZUNG
DES SCHLAGBOHRMASCHINE
1. Tragen Sie bei der Arbeit mit Schlagbohrmaschinen
einen Gehörschutz.
Starke und/oder dauerhafte Lärmbelastung kann zu
Gehörverlust führen.
2. Benutzen Sie die mit dem Werkzeug gelieferten
Zusatzgriffe.
Wenn Sie die Kontrolle über das Werkzeug verlieren,
kann es zu Verletzungen kommen.
3. Stellen Sie vor Bohren in eine Wand, einen Boden
oder eine Decke sicher, daß keine elektrischen Kabel
oder Leitungen eingebettet sind.
Modell VTP-16A VTV-16
Spannung (je nach Gebiet)* (110V, 115V, 120V, 127V, 220V, 230V, 240V)
Leistungsaufnahme 800 W*
Geschwindigkeitsstufen 1212
Leerlaufdrehzahl 700 min
-1
1400 min
-1
0-700 min
-1
0-1400 min
-1
Kapazität
Stahl 16 mm 10 mm 16 mm 10 mm
Beton 35 mm 16 mm 35 mm 16 mm
Gewicht (ohne Kabel) 3,8 kg
02Ger_VTP-16A_WE 08/10/31, 09:329

10
Deutsch
3. Verlängerungskabel
Wenn der Arbeitsbereicht nicht in der Nähe des
Netzanschlusses liegt, ist ein Verlängerungskabel
ausreichenden Querschnitts und ausreichender
Nennleistung zu verwenden. Das Verlängerungskabel
sollte so kurz wie möglich gehalten werden.
4. Einsetzen des Bohrers:
Der Bohrer wird in das Bohrfutter eingesetzt und der
Bohrfutterschlüssel zum Festziehen benutzt. Zum
Festziehen der Backen wird zweckmäßigerweise der
Bohrfutterschlüssel nacheinander in jedes der drei
Löcher gesteckt.
5. Wahl das geeigneten Bohrers
䡬 Beim Bohren von Beton oder Stein
Die unter Sonderzubehör aufgeführten Bohrer
verwenden.
䡬 Beim Bohren von Metall oder Kunststoff
Einen normalen Metallbohrer verwenden.
䡬 Beim Bohren von Holz
Einen normalen Holzspiralbohrer verwenden. Für
Löcher von 6,5 mm oder kleiner wird ein Metallbohrer
verwendet.
6. Umschalten von hoher Drehzahl auf niedriger
Drehzahl:
Vor dei Veränderung der Drehzahl muß man sich
überzeugen, daß der Schalter auf “AUS” steht und
sich der Bohrer nicht mehr bewegt. Zum Umschalten
wird det Umschaltfeststeller eingedrückt und in die
gewünschte Richtung geschoben, wie in Abb. 1 durch
den Pfeil angegeben ist. Die auf dem Gehäuse
eingeprägte Zifter “1” bedeutet niedrige Drehzahl,
die Ziffer “2“ bedeutet hohe Drehzahl.
7. Umstellung von Schlagbohrfunktion auf reine
Bohrfunktion: (Abb. 2)
Die Schlagbohrmaschine kann durch einfaches
Drehen des Stellrings von Schlagbohrfunktion auf
reine Bohrfunktion umgestellt werden.
Beim Bohren von Beton, Stein, Ziegel, und ähnlichen
harten Materialien wird der Stellring im Uhrzeigersinn
bis zum Anschlag gedreht.
Der Bohrkopf schlägt gegen das Material, während
er sich gleichzeitig dreht.
Beim Bohren von Metall, Holz oder Kunststoff wird
der Stellring gegen den Uhzeigersinn bis zum
Anschlag gedreht. Die Bohrmaschine dreht sich dann
wie eine normale Elektro-Bohrmaschine.
ACHTUNG
Die Schlagbohrmaschine nicht mit
Schlagbohrfunktion verwenden, wenn sich das
Material in reiner Bohrfunktion bohren läßt. Dadurch
wird nicht nur die Leistung des Bohrers vermindert,
es kann auch die Bohrspitze beschädigt werden.
Beim Umschalten ist darauf zu achten, daß der
Stellring bis zum Anschlag gedreht wird.
8. Anbringen des Sejtengriffes
Der Griff des Handgriffs wird losgedreht und der
Griff am Gehäuse in einer für das Bohren geeigneten
Stellung befestigt. Der Vorsprung des Griffs wird auf
die Rille des Gehäuses ausgerichtet, und der Griff
wird fest angezogen.
Zum Abnehmen des Handgriffs wird der Griff
losgedreht und der Handgriff gedreht.
Zum Anbringen des Tiefenstopfen am Handgriff wird
der Stopfen in das sechskantige Loch des Handgriffs
eingesetzt, der Tiefenstopfen des Stopfens auf die
gewünschte Tiefe des Lochs eingestellt und der Griff
fest angezogen.
PRAKTISCHE ARBEITSWEISE
1. Druck:
Das Bohren wird durch Ausübung eines starken
Drucks auf den Bohrer nicht beschleunigt. Zusätzlicher
Druck führt nur zu einem beschädigten Bohrer,
verminderter Bohrleistung und/oder verkürzter
Lebensdauer der Bohrmaschine.
2. Verwendung eines Bohrers mit großem
Durchnmesser:
Je größer der Bohrerdurchmesser um so stärker ist
die auf den Arm rückwirkende Kraft. Man muß darauf
achten, daß man aufgrund dieser rückwirkenden Kraft
nicht die Kontrolle über die Bohrmaschine verliert.
Für eine gute Kontrolle ist ein sicherer Stand
erforderlich. Man muß die Bohrmaschine mit beiden
Händen festhalten und dafür sorgen, daß die
Bohrmaschine senkrecht zum Material steht, in das
gebohrt wird.
3. Beim Durchbohren durch das Material:
Wenn der Bohrer ganz durch das Material bohrt,
führt eine unachtsame Handhabung oft zu einem
abgebrochenen Bohrer oder einer Beschädigung des
Bohrgehäuses selbst aufgrund der plötzlichen
Bewegung der Bohrmaschine. Man muß immer
darauf gefaßt und bereit sein, den Druck beim
Durchbohren des Materials zu verringern.
4. Betätigung des Schalters:
(1) VTP-16A:
Durch Betätigung des Drückerschalters und
Eindrükken der Arretierung wird der Schalter für
kontinuierlichens Bohren auf “Ein” gehalten. Für das
Ausschalten wird der Drückerschalter erneut betätigt
und losgelassen.
(2) VTV-16:
Die Drehzahl des Bohrers kann durch Veränderung
des Drucks auf den Drückerschalter gesteuert werden.
Die Geschwindigkeit ist gering, wenn der
Drückerschalter nur leicht gezogen ist, und erhörht
sich, wenn der Schalter weiter durchgezogen wird.
Kontinuierlicher Betrieb läßt sich durch das Ziehen
des Drückerschalters und Eindrücken des
Arretierknopfes erreichen. Zum Ausschalten wird der
Drückerschalter erneut gezogen und der Arretierknopf
gelöst. Nach dem Loslassen kehrt der Drückerschalter
in seine ursprüngliche Stellung zurück.
5. Vorsichtsmaßnahmen beim Bohren:
Der Bohrer kann während des Betriebs überhitzt
werden, er ist jedoch noch hinreichend funktions-
fähig. Den Bohrer nicht in Wasser oder Öl kühlen.
6. Vorsichtsmaßnahmen unmittelbar nach der
Benutzung:
Unmittelbar nach der Benutzung kann, wenn sich die
Bohrmaschine noch dreht und an eine Stelle gelegt
wird, wo sich erhebliche Mengen Bohrspäne und
Staub angesammelt haben, Staub in den
Bohrmechanismus gesaugt werden. Auf diese
unerwünschte Möglichkeit ist immer zu achten.
02Ger_VTP-16A_WE 08/10/31, 09:3210

Deutsch
11
WARTUNG UND INSPEKTION
1. Inspektion des Bohrers
Fortgesetzte Verwendung eines stumpfen oder
beschädigten Bohrers führt zu verminderter
Bohrleistung und kann den Motor der Bohrmaschine
erheblich überlasten. Den Bohrer regelmäßig prüfen
und erforderlichenfalls durch einen neun Bohrer
ersetzen.
2. Inspektion der Befestigungsschraube
Alle Befestigungsschrauben werden regelmäßig
inspiziert und geprüft, daß sie richtig angezogen sind.
Wenn sich eine der Schrauben lockert, maß sie sofort
wieder angezogen Werden. Geschieht das nicht, kann
das zu erheblicher Gefahr führen.
3. Inspektion der Kohlebürsten (Abb. 3)
Im Motor sind Kohlebürsten verwendet, die
Verbrauchsteile sind. Wenn sie abgenützt sind, kann
es zu Motorschäden führen. Wenn der Motor mit
einer Auto-Stop Kohlebürste ausgestattet ist, wird er
automatisch anhalten. Beide Kohlebürsten sollen
dann durch neue ersetzt werden, die dieselbe
Bürstennummer tragen, wie auf der Abbildung.
Darüberhinaus müssen die Kohlebürsten immer
sauber gehalten werden und müssen sich in der
Bürstenhalterung frei bewegen können.
4. Austausch einer Kohlebürste
Der Bürstendeckel wird mit einem Steckschlüssel
abmontiert. Dann kann die Kohlebürste leicht ent
fernt werden.
5. Wartung des Motors
Die Motorwicklung ist das “Herz“ des
Elektrowerkzeugs. Daher ist besonders sorgfältig
darauf zu achten, daß die Wicklung nicht beschädigt
und/oder mit Öl oder Wasser benetzt wird.
6. Liste der Wartungsteile
A: Punkt Nr.
B: Code Nr.
C: Verwendete Anzahl
D: Bemerkungen
ACHTUNG
Reparatur, Modifikation und Inspektion von Hitachi-
Elektrowerkzeugen müssen von einer autorisierten
Hitachi-Kundendienststelle durchgeführt werden.
Diese Teileliste ist hilfreich, wenn sie bei der
Anforderung von Reparatur- oder Wartungsarbeiten
zusammen mit dem Elektrowerkzeug der autorisierten
Kundendienststelle ausgehändigt wird.
Bei Betrieb und Wartung von Elektrowerkzeugen
müssen die Sicherheitsvorschriften und Normen
beachtet werden.
MODIFIKATIONEN
Hitachi-Elektrowerkzeuge werden fortwährend
verbessert und modifiziert, um die neuesten
technischen Fortschritte einzubauen.
Dementsprechend ist es möglich, daß einige Teile
(z.B. Codenummern bzw. Entwurf) ohne vorherige
Benachrichtigung geändert werden.
GARANTIE
Auf Hitachi-Elektrowerkzeuge gewähren wir eine Garantie
unter Zugrundelegung der jeweils geltenden gesetzlichen
und landesspezifischen Bedingungen. Dieses Garantie
erstreckt sich nicht auf Gehäusedefekte und nicht auf
Schäden, die auf Missbrauch, bestimmungswidrigen
Einsatz oder normalen Verschleiß zurückzuführen sind.
Im Schadensfall senden Sie das nicht zerlegte
Elektrowerkzeug zusammen mit dem GARANTIESCHEIN,
den Sie am Ende der Bedienungsanleitung finden, an
ein von Hitachi autorisiertes Servicecenter.
HINWEIS
Aufgrund des ständigen Forschungs - und Entwicklung
programms von HITACHI sind Änderungen der hierin
gemachten technischen Angaben vorbehalten.
Information über Betriebslärm und Vibration
Die gemessenen Werte wurden entsprechend EN60745
bestimmt und in Übereinstimmung mit ISO 4871
ausgewiesen.
Gemessener A-gewichteter Schallpegel: 116 dB (A)
Gemessener A-gewichteter Schalldruck: 103 dB (A)
Messunsicherheit KpA: 3 dB (A)
Bei der Arbeit immer einen Ohrenschutz tragen.
Der typische gewogene quadratische Mittelwert für die
Beschleunigung ist 14 m/s
2
.
02Ger_VTP-16A_WE 08/10/31, 09:3211

12
Français
Pendant l'utilisation d'outils électrique, un instant
d'inattention peut entraîner des blessures graves.
b) Utiliser un équipement de protection individuelle.
Toujours porter des verres de protection.
L'utilisation d'équipements de protection tels que les
masques anti-poussière, les chaussures de sécurité anti-
dérapantes, les casques ou les protections auditives
dans des conditions appropriées réduisent les risques
de blessures.
c) Empêcher les démarrages intempestifs. Veiller à ce
que l'interrupteur soit en position d'arrêt avant de
brancher à une source d'alimentation et/ou une
batterie, de ramasser l'outil au sol ou de le transporter.
Transporter les outils électriques avec le doigt sur
l'interrupteur ou brancher les outils électriques avec
l'interrupteur en position de marche peut entraîner des
accidents.
d) Retirer toute clé de sécurité ou clé avant de mettre
l'outil électrique en marche.
Laisser une clé ou une clé de sécurité sur une partie
mobile de l'outil électrique peut engendrer des
blessures.
e) Ne pas trop se pencher. Toujours garder une bonne
assise et un bon équilibre pendant le travail.
Cela permet un meilleur contrôle de l'outil électrique
dans des situations imprévisibles.
f) Porter des vêtements adéquats. Ne pas porter de
vêtements amples ni de bijoux. Maintenir les cheveux,
les vêtements et les gants loin des pièces mobiles.
Les vêtements amples ou les cheveux longs peuvent
se prendre dans les pièces mobiles.
g) En cas de dispositifs destinés au raccordement
d'installations d'extraction et de recueil de la poussière,
veiller à ce qu'ils soient correctement raccordés et
utilisés.
L'utilisation d'un dispositif de collecte de la poussière
peut réduire les dangers associés à la poussière.
4) Utilisation et entretien d'un outil électrique
a) Ne pas forcer sur l'outil électrique. Utiliser l'outil
électrique adapté à vos travaux.
Le bon outil électrique fera le travail mieux et en toute
sécurité au régime pour lequel il a été conçu.
b) Ne pas utiliser l'outil électrique si l'interrupteur ne le
met pas en position de marche et d'arrêt.
Tout outil ne pouvant être contrôlé par l'interrupteur
est dangereux et doit être réparé.
c) Débrancher la prise et/ou la batterie avant de procéder
à des réglages, au remplacement des accessoires ou
au stockage des outils électriques.
Ces mesures préventives de sécurité réduisent les risques
de démarrage accidentel de l'outil électrique.
d) Stockez les outils électriques inutilisés hors de la portée
des enfants et ne pas laisser des personnes non
familiarisées avec l'outil ou ces instructions utiliser
l'outil électrique.
Les outils électriques sont dangereux entre les mains
d'utilisateurs non habilités.
e) Entretenir les outils électriques. Vérifier l'absence de
mauvais alignement ou d'arrêt, d'endommagement de
pièces ou toute autre condition susceptible d'affecter
l'opération de l'outil.
Si l'outil est endommagé, le faire réparer avant utilisation.
De nombreux accidents sont dus à des outils mal
entretenus.
AVERTISSEMENTS DE SÉCURITÉ GÉNÉRAUX
CONCERNANT LES OUTILS ÉLECTRIQUES
AVERTISSEMENT
Lire tous les avertissements de sécurité et toutes les
instructions.
Tout manquement à observer ces avertissements et instructions
peut engendrer des chocs électriques, des incendies et/ou des
blessures graves.
Conservez tous les avertissements et toutes les instructions
pour vous y référer ultérieurement.
Le terme "outil électrique", utilisé dans les avertissements, se réfère
aux outils électriques (câblé) ou aux outils à piles (sans fil).
1) Sécurité sur l'aire de travail
a) Maintenir l'aire de travail propre et bien éclairée.
Les endroits encombrés ou sombres sont propices aux
accidents.
b) Ne pas utiliser d'outils électriques en présence de
liquides, gaz ou poussière inflammables, au risque de
provoquer une explosion.
Les outils électriques créent des étincelles susceptibles
d'enflammer la poussière ou les vapeurs.
c) Ne pas laisser les enfants et les visiteurs s'approcher de
vous lorsque vous utiliser un outil électrique.
Les distractions peuvent faire perdre le contrôle.
2) Sécurité électrique
a) Les prises de l'outil électrique doivent correspondre à
la prise secteur.
Ne jamais modifier la prise.
Ne pas utiliser d'adaptateurs avec les outils électriques
mis à la masse.
Les prises non modifiées et les prises secteurs
correspondantes réduisent les risques de choc électrique.
b) Eviter tout contact avec les surfaces mises à la masse
telles que les tuyaux, radiateurs, bandes et
réfrigérateurs.
Le risque de choc électrique est accru en cas de mise à
la masse du corps.
c) Ne pas exposer les outils électriques à la pluie ou à des
conditions humides.
Si l'eau pénètre dans l'outil, cela augmente les risques
de choc électrique.
d) Ne pas utiliser le cordon à tort. Ne jamais utiliser le
cordon pour transporter ou débrancher l'outil
électrique.
Maintenir le cordon loin de la chaleur, de l'huile, des
bords pointus ou des pièces mobiles.
Les cordons endommagés ou usés augmentent les
risques de choc électrique.
e) En cas d'utilisation d'un outil électrique à l'extérieur,
utiliser un cordon de rallonge adapté à un usage
extérieur.
L'utilisation d'un cordon adapté à l'usage extérieur
réduit les risques de choc électrique.
f) Si vous devez utiliser un outil électrique dans un endroit
humide, utilisez une alimentation protégée contre les
courants résiduels.
L'utilisation d'un dispositif de protection contre les
courants résiduels réduit le risque de choc électrique.
3) Sécurité personnelle
a) Restez alerte, regarder ce que vous faites et usez de
votre bon sens en utilisant un outil électrique.
Ne pas utiliser d'outil électrique si vous êtes sous
l'influence de drogues, d'alcool ou de médicaments.
03Fre_VTP-16A_WE 08/10/31, 09:3212

Français
13
SPECIFICATIONS
ACCESSOIRES STANDARDS
(1) Clef pour mandrin ..................................................... 1
(2) Poignée latérale ......................................................... 1
(3) Témoin de profondeur .............................................. 1
Les accessoires standards sont sujettes à changement
sans préavis.
ACCESSOIRES EN OPTION
(vendus séparément)
䡬 Foret de perçage pour béton
Diam. ext. Longueur No. de code
6,5mm 100mm 931851
8,0 100 931852
9,5 120 931853
10,0 120 931854
12,0 160 971704
13,0 160 931855
14,3 160 931776
16,0 160 971670
19,0 160 931856
Les accessoires à option sont sujettes à changement
sans préavis.
APPLICATIONS
䡬 Action combinée de ROTATION et PERCUSSION:
Perçage de trous dans surfaces dures (béton, marbre,
granite, tuilles, etc.).
䡬 Par action de ROTATION:
Perçage de trous dans métal, bois et matières
plastiques.
AVANT LA MISE EN MARCHE
1. Source de puissance
S’assurer que la source de puissance à utiliser
correspond à la puissance indiqueée sur la plaque
signalétique du produit.
2. Interrupteur de puissance
S’assurer que l’interrupteur de puissance est en
position ARRET. Si la fiche est branchée alors que
l’interrupteur est sur MARCHE, l’outil démarre
imméciatement et peut pvovoquer un grave accident.
3. Fil de rallonge
Lorsque la zone de travail est éloignée de la source
de puissance, utiliser un fil de rallonge d’une épaisseur
suffisante et d’une capacité nominale suffisante. Le
fil de rallonge doit être aussi court que possible.
4. Fixation du foret de perçage
Fixer le foret de perçage dans le mandrin et utiliser la
clef à mandrin pour le serrer, en serrant le mandrin
par ses trois trous à tour de rôle.
*Assurez-vous de vérifier la plaque signalétique sur le produit qui peut changer suivant les régions.
f) Maintenir les outils coupants aiguisés et propres.
Des outils coupants bien entretenus avec des bords
aiguisés sont moins susceptibles de se coincer et plus
simples à contrôler.
g) Utiliser l'outil électrique, les accessoires et les mèches
de l'outil, etc. conformément à ces instructions en
tenant compte des conditions d'utilisation et du travail
à réaliser.
L'utilisation de l'outil électrique pour des opérations
différentes de celles pour lesquelles il a été conçu est
dangereuse.
5) Service
a) Faire entretenir l'outil électrique par un technicien
habilité à l'aide de pièces de rechange identiques
exclusivement.
Cela garantira le maintien de la sécurité de l'outil
électrique.
PRECAUTIONS
Maintenir les enfants et les personnes infirmes éloignés.
Lorsque les outils ne sont pas utilisés, ils doivent être rangés hors
de portée des enfants et des personnes infirmes.
AVERTISSEMENTS DE SÉCURITÉ RELATIFS À
LA PERÇEUSE PERCUSSION
1. Portez des bouchons avec les perceuses à percussion.
L’exposition au bruit peut engendrer une perte de
l’audition.
2. Utilisez les poignées auxiliaires fournies avec l’outil.
Toute perte de contrôle peut entraîner des blessures.
3. Avant de percer un mur, un plancher ou un plafond,
bien vérifier qu’il n’y a pas de câbles électriques ni de
conduites derrière.
Modèle VTP-16A VTV-16
Tension (per sone)* (110V, 115V, 120V, 127V, 220V, 230V, 240V)
Puissance 800 W*
Changement de vitesse 1212
Vitesse sans charge 700 min
-1
1400 min
-1
0-700 min
-1
0-1400 min
-1
Capacité
Acier 16 mm 10 mm 16 mm 10 mm
Béton 35 mm 16 mm 35 mm 16 mm
Poids (sans fil) 3,8 kg
03Fre_VTP-16A_WE 08/10/31, 09:3213

14
Français
5. Choix du foret de perçage correct
䡬 Pour perçage dans béton ou pierre
Utiliser les forets spécifiés à la partie “Accessoires à
option”.
䡬 Pour perçage dans métal ou plastique
Utiliser un foret de perçage ordinaire pour métal.
䡬 Pour perçage dans bois
Utiliser un foret de perçage ordinaire pour bois.
Toutefois, pour percer des trous de 6,5 mm ou plus
petits, utiliser un foret de perçage pour métal.
6. Commutation grande vitesse/faible vitesse
Avant de changer de vitesse, s'assurer que
l'interrupteur est en position ARRET et que la perceuse
est complétement arrêtée. Pour changer de vitesse,
appuyer sur la pièce de blocage coulissante et la faire
coulisser dans Ia bonne direction comme indiqué par
la fléche sur Ia Fig. 1. Le numéro “1” gravé sur le
corps de la perceuse indique la vitesse faible, Ie
numéro “2” indique la grande vitesse.
7. Commutation: fonctionnement en PERCUSSION/
fonctionnement en ROTATION: (Fig. 2)
La perceuse à percussion peut être commutée de
PERCUSSION (percussion plus rotation) à ROTATION
(rotation seulement) en tournant simplement la bague
intièrement dens Ie sens des aiguilles d'une montre.
La tête de la perceuse percute contre le matériau tout
en continuant de tourner.
Pour Ie perçage de métal, bois ou plastique, tourner
la bague complétement dans le sens contraire des
aiguilles d'une montre. La perceuse tourne alors
comme une perceuse électrique ordinaire.
ATTENTION
Ne pas utiliser la perceuse à percussion en
fonctionnement PERCUSSION si le matériau peut
être percé par simple rotation. Ce fonctionnement
réduirait d'une part l'efficacité de perçage et abîmerait
aussi la pointe de perçage. En passant d'un
fonctionnement à l'autre, s'assurer que la bague est
tournée aussi loin que possible.
8. Fixation de la poignée latérale
Desserrer la poignée de la poignée latérale et attacher
la poignée latérale au boîtier de l’engrenage dans
une position propre au perçage.
Faire coïncider la partie dépassant de la poignée
avec la rainure sur le boîtier de l’engrenage et
resserrer la poignée. Pour retirer la poignée latérale,
desserrer la poignée et faire tourner la poignée.
Pour attacher un bouchon de profondeur sur la
poignée latérale, introduite le bouchon dans le trou
hexagonal de la poignée latérale, régler la position
du bouchon en fonction de la profondeur souhaitée
pour le trou et resserrer la poignée.
FONCTIONNEMENT
1. Pression:
Le perçage n’est pas accéléré si on applique une
pression forte à la perceuse. Ceci ne peut qu’abîmer
le foret de perçage, diminuer l’efficacité de perçage,
et/ou réduire la durée de vie de la perceuse.
2. Utilisation d'un foret de large diamètre:
Plus le diamètre du foret est grand; plas la force de
réaction sur votre bras est grande. Attention de ne
pas perdre le contrôle de la perceuse à cause de cette
force de réaction. Pour avoir la perceuse bien en
main, se tenir bien d'aplomb, tenir la perceuse
fermement à deux mains, et s'assurer que la perceuse
est perpendiculaire au matériau en cours de perçage.
3. Le matériau est entièrement percé:
Lorsque le foret perce complétement le matériau, un
maniement négligent conduit souvent à la rupture
du foret ou à la détérioration du corps même de la
perceuse par suite du mouvement brusque de la
perceuse. Soyez toujours sur vos gardes et soyez
prêts à relâcher la force de pression lorsque le
matériau est percé en entier.
4. Fonctionnement de l’interrupteur:
(1) VTP-16A:
En pressant la détente et en appuyant sur le cliquet
d’arrêt, l’interrupteur se trouve maintenu en position
MARCHE pour un perçage continu. Pour mettre
l’interrupteur sur ARRET, tirer de nouveau la détente
et relâcher.
(2) VTV-16:
La vitesse de rotation du foret de perçage peut être
réglée suivant la force avec laquelle on appuie sur
l'interrupteur à détente. La vitesse est faible si on
exerce une légère pression et augmente si la pression
est plus forte. On peut obtenir un fonctionnement
continu en pressant la détente et en relâchant le
cliquet d'arrêt. Pour mettre l'interrupteur sur ARRET,
presser de nouveau la détente à sa position d'origine.
5. Précautions lors du perçage:
Le foret de perçage peut s’échauffer lors du
fonctionnement; il peut toutefois fonctionner. Ne pas
le refroidir avec eau ou huile.
6. Précaution à prendre aussitôt après usage
Si, aussitôt aprés usage, Ie foret qui tourne encore
est placé sur un endroit où sont accumulés copeaux
et poussière, Ia poussière peut être absorbée par le
mecanisme de perçage. Toujours prévoir cette
possibilité peu souhaitable.
ENTRETIEN ET CONTROLE
1. Contrôle du foret de perçage
L’utilisation continue d’un foret usé et/ou abîmé réduit
l’efficacité de perçage et peut sérieusement
surcharger le moteur de la perceuse. Contrôler
souvent le foret et le remplacer si nécessaire.
2. Contrôle du foret de perçage et du taraud
Comme l’utilisation continue d’un foret ou taraud
usé réduirait l’efficacité de fonctionnement et
provoquerait une surchage du moteur, remplacer ou
aiguiser le foret ou le taraud sans retard lorsque des
traces d’usure excessive apparaissent.
3. Contrôle des balais en carbone (Fig. 3)
Le moteur utilise des balais en carbone qui sont des
pièces qui s’usent. Quand ils sont usés ou près de la
“limite d’usure”, il pourra en résulter un mauvais
fonctionnement du moteur. Quand le moteur est
équipé d’un balai en carbone à arrêt automatique, il
s’arrêtera automatiquement. Remplacez alors les
balais en carbone par des nouveaux et ayant les
mêmes numéros que ceux montré sur la figure. En
outre, toujours tenir les balais propres et veiller à ce
qu’ils coulissent librement dans les supports.
03Fre_VTP-16A_WE 08/10/31, 09:3214

Français
15
4. Remplacement d’un balai en carbone
Démonter le capuchon du balai avec un tournevis à
petite tête. Le balai en carbone peut se retirer
facilement.
5. Entretien du moteur
Le bobinage de l’ensemble moteur est le “cœur”
même de l’outil électro-portatif. Veiller soigneusement
à ce que ce bobinage ne soit pas endommagé et/ou
mouillé par de l’huille ou de l’eau.
6. Liste des pièces de rechange
A: No. élément
B: No. code
C: No. utilisé
D: Remarques
ATTENTION
Les réparations, modifications et inspections des
outils électriques Hitachi doivent être confiées à un
service après-vente agrée.
Il sera utile de présenter cette liste de pièces au
service après-vente agréé lorsqu’on apporte un outil
électrique nécessitant des réparations ou tout autre
entretien.
Lors de l’utilisation et de l’entretien d’un outil
électrique, respecter les règlements et les normes de
sécurité en vigueur dans le pays en question.
MODIFICATIONS
Les outils électriques Hitachi sont constamment
améliorés et modifiés afin d’incorporer les tous
derniers progrès technologiques.
En conséquence, il est possible que certaines pièces
(c.-à-d. no. de code et/ou dessin) soient modifiées
sans avis préalable.
GARANTIE
Nous garantissons que l’ensemble des Outils électriques
Hitachi sont conformes aux réglementations spécifiques
statutaires/nationales. Cette garantie ne couvre pas les
défauts ni les dommages inhérents à une mauvaise
utilisation, une utilisation abusive ou l'usure et les
dommages normaux. En cas de réclamation, veuillez
envoyer l'Outil électrique, en l’état, accompagné du
CERTIFICAT DE GARANTIE qui se trouve à la fin du
Mode d’emploi, dans un service d’entretien autorisé.
NOTA
Par suite du programme permanent de recherche et de
développement HITACHI, ces spécifications peuvent faire
l’obiet de modifications sans avis préalable.
Au sujet du bruit et des vibrations
Les valeurs mesurées ont été déterminées en fonction
de la norme EN60745 et déclarées conforme à ISO 4871.
Niveau de puissance sonore pondérée A: 116 dB (A)
Niveau de pression acoustique pondérée A: 103 dB (A)
Incertitude KpA: 3 dB (A)
Porter un casque de protection.
Valeur d’accélération moyenne quadratique pondérée
type: 14 m/s
2
.
03Fre_VTP-16A_WE 08/10/31, 09:3215

16
Italiano
AVVERTIMENTI GENERALI DI SICUREZZA SUGLI
UTENSILI ELETTRICI
AVVERTENZA
Leggere tutti gli avvertimenti di sicurezza e tutte le istruzioni.
La mancata osservanza degli avvertimenti e delle istruzioni
potrebbe essere causa di scosse elettriche, incendi e/o gravi
lesioni.
Salvare tutti gli avvertimenti e le istruzioni per riferimenti
futuri.
Il termine “elettroutensili” riportato nelle avvertenze si riferisce
agli elettroutensili azionati con alimentazione di rete (via cavi) o
a batterie (senza cavi).
1) Sicurezza dell’area operativa
a) Mantenere l'area operativa pulita e ordinata.
Aree operative sporche o disordinate possono favorire
gli infortuni.
b) Non utilizzare gli elettroutensili in atmosfere esplosive,
ad es. in presenza di liquidi , gas o polveri infiammabili.
Gli elettroutensili generano delle scintille che
potrebbero accendere la polvere o i fumi.
c) Tenere lontani bambini e astanti durante l'utilizzo degli
elettroutensili.
Qualsiasi distrazione può essere causa di perdita di
controllo.
2) Sicurezza elettrica
a) Le spine degli elettroutensili devono essere idonee alle
prese disponibili.
Non modificare mai le prese.
Con gli elettroutensili a massa (messi a terra), non
utilizzare alcun adattatore.
L'utilizzo di spine intatte e corrispondenti alle prese
disponibili ridurrà il rischio di scosse elettriche.
b) Evitare qualsiasi contatto con le superfici a massa o a
terra, quali tubi, radiatori, fornelli e frigoriferi.
In caso di messa a terra o massa del corpo, sussiste
un maggior rischio di scosse elettriche.
c) Non esporre gli elettroutensili alla pioggia o all'umidità.
La penetrazione di acqua negli elettroutensili
aumenterà il rischio di scosse elettriche.
d) Non tirare il cavo. Non utilizzarlo per il trasporto, o per
tirare o scollegare l'elettroutensile.
Tenere il cavo lontano da fonti di calore, oli, bordi
appuntiti o parti in movimento.
Cavi danneggiati o attorcigliati possono aumentare il
rischio di scosse elettriche.
e) Durante l'uso degli elettroutensili all'esterno, utilizzare
una prolunga idonea per usi esterni.
L'utilizzo di cavi per esterno riduce il rischio di scosse
elettriche.
f) Se è impossibile evitare l’impiego di un utensile elettrico
in un luogo umido, utilizzare l’alimentazione protetta
da un dispositivo a corrente residua (RCD).
L’uso di un RCD riduce il rischio di scosse elettriche.
3) Sicurezza personale
a) Durante l'uso degli elettroutensili, state all'erta,
verificate ciò che state eseguendo e adottate sempre il
buon senso.
Non utilizzate gli elettroutensili qualora siate stanchi,
sotto l'influenza di farmaci, alcol o cure mediche.
Anche un attimo di disattenzione durante l'uso degli
elettroutensili potrebbe essere causa di gravi lesioni
personali.
b) Indossate l'attrezzatura di protezione personale.
Indossate sempre le protezioni oculari.
L'attrezzatura protettiva, quali maschera facciale,
calzature antiscivolo, caschi o protezioni oculari ridurrà
il rischio di lesioni personali.
c) Impedite le accensioni involontarie. Prima del
collegamento a una sorgente di alimentazione e/o
pacco batteria e prima di raccogliere o trasportare
l’utensile, verificate che l'interruttore sia posizionato
su OFF.
Il trasporto degli elettroutensili tenendo le dita
sull'interruttore o l’attivazione elettrica degli utensile
che hanno l’interruttore su ON, implica il rischio di
incidenti.
d) Prima di attivare l'elettroutensile, rimuovete qualsiasi
chiave di regolazione.
Lasciando la chiave in un componente in rotazione
dell'elettroutensile, sussiste il rischio di lesioni
personali.
e) Mantenersi in equilibrio. Mantenersi sempre su due
piedi, in equilibrio stabile.
Ciò consente di controllare al meglio l'elettroutensile
in caso di situazioni impreviste.
f) Vestirsi in modo adeguato. Non indossare abiti larghi
o gioielli. Tenere i capelli, gli abiti e i guanti lontano
dalle parti in movimento.
Abiti allentati, gioielli e capelli lunghi potrebbero
impigliarsi nelle parti in movimento.
g) In caso di dispositivi provvisti di collegamento ad
apparecchiature di rimozione e raccolta polveri,
verificare che queste siano collegate e utilizzate in
modo adeguato.
L'utilizzo della raccolta della polvere può ridurre i
rischi connessi alle polveri.
4) Utilizzo e manutenzione degli elettroutensili
a) Non utilizzare elettroutensili non idonei. Utilizzare
l'elettroutensile idoneo alla propria applicazione.
Utilizzando l'elettroutensile corretto, si garantirà
un'esecuzione migliore e più sicura del lavoro, alla
velocità di progetto.
b) Non utilizzare l'elettroutensile qualora non sia possibile
accenderlo/spegnerlo tramite l'interruttore.
É pericoloso utilizzare elettroutensili che non possano
essere azionati dall'interruttore. Provvedere alla relativa
riparazione.
c) Prima di effettuare qualsiasi regolazione, sostituire gli
accessori o depositare gli elettroutensili, scollegare la
spina dalla presa elettrica e/o il pacco batteria
dall’utensile elettrico.
Queste misure di sicurezza preventive riducono il
rischio di avvio involontario dell'elettroutensile.
d) Depositare gli elettroutensili non utilizzati lontano dalla
portata dei bambini ed evitare che persone non esperte
di elettroutensili o non a conoscenza di quanto riportato
sulle presenti istruzioni azionino l'elettroutensile.
É pericoloso consentire che utenti non esperti utilizzino
gli elettroutensili.
e) Manutenzione degli elettroutensili. Verificare che non
vi siano componenti in movimento disallineati o
bloccati, componenti rotti o altre condizioni che
potrebbero influenzare negativamente il
funzionamento dell'elettroutensile.
In caso di guasti, provvedere alla riparazione
dell'elettroutensile prima di riutilizzarlo.
Molti incidenti sono causati da una scarsa
manutenzione.
04Ita_VTP-16A_WE 08/10/31, 09:3316

Italiano
17
CARATTERISTICHE
ACCESSORI STANDARD
(1) Chiave per mandrino ................................................ 1
(2) Impugnatura laterale ................................................. 1
(3) Bacchetta d'arresto della penetrazione ................... 1
Gli accessori standard possono essere cambiamn to
senza preavviso.
ACCESSORI DISPONIBILI A RICHIESTA
(venduti separatamente)
䡬 Punta per cemento
Diametro esterno Lunghezza n. di codice
6,5mm 100mm 931851
8,0 100 931852
9,5 120 931853
10,0 120 931854
12,0 160 971704
13,0 160 931855
14,3 160 931776
16,0 160 971670
19,0 160 931856
Gli accessori dispónibili a richiesta possono essere
cambiamento senza preavviso.
*Accertatevi di aver controllato bene la piastrina perchè essa varia de zona a zona.
IMPIEGHI
䡬 Azione combinata di ROTAZIONE e BATTITO:
Per l’esecuzione di fori in superfici dure (cemento,
marmo, granito, ecc.).
䡬 Funzionamento solo a ROTAZIONE:
Per l’esecuzione di fori nel metallo, legno e plastica.
PRIMA DELL’USO
1. Alimentazione
Assicurarsi che la rete di alimentazione che si vuole
usare sia compatibile con le caratteristiche relative
all’alimentazione di corrente specificate nella piastrina
dell’apparecchio.
2. Interruttore di dorrente
Mettere l’interruttore in posizione OFF. Se la spina è
infilata in una presa mentre l’interruttore è accesso,
l’utinsile elettrico si mette immediatamente in moto,
facilitando il verificarsi di incidenti gravi.
3. Prolunga del cavo
Quando l’ambiente di lavoro è lontano da una presa
di corrente, usare una prolunga del cavo di sufficiente
spessore e di prestazione adeguata. La prolunga deve
essere piú corta possibile.
4. Montaggio della punta
Mettere la punta nel mandrino e usare la chiave per
mandrino per fissare la punta, serrando il mandrino
in ognuno dei tre fori, uno dopo l’altro.
f) Mantenere gli strumenti di taglio affilati e puliti.
Gli strumenti di taglio in condizioni di manutenzione
adeguata, con bordi affilati, sono meno soggetti al
bloccaggio e sono più facilmente controllabili.
g) Utilizzare l'elettroutensile, gli accessori, le barrette, ecc.
in conformità a quanto riportato nelle presenti istruzioni,
tenendo in debita considerazione le condizioni operative
e il tipo di lavoro da eseguire.
L’uso dell’utensile elettrico per operazioni diverse da
quelle previste potrebbe causare una situazione
pericolosa.
5) Assistenza
a) Affidate le riparazioni dell'elettroutensile a persone
qualificate che utilizzino solamente parti di ricambio
identiche.
Ciò garantirà il mantenimento della sicurezza
dell'elettroutensile.
PRECAUZIONI
Tenere lontano dalla portata di bambini e invalidi.
Quando non utilizzati, gli strumenti dovranno essere deposti
lontano dalla portata di bambini e invalidi.
AVVERTIMENTI DI SICUREZZA PER IL
TRAPANO A PERCUSSIONE
1. Indossare protezioni per le orecchie con le sonde a
percussione.
L’esposizione al rumore può causare la perdita
dell’udito.
2. Utilizzare le leve ausiliarie fornite con l’utensile.
La perdita di controllo può causare lesioni alla
persona.
3. Prima di trapanare una parete, un pavimento o un
soffito, verificare accuratamente che non siano
presenti all’interno cavi elettrici o tubazioni.
Modello VTP-16A VTV-16
Voltagio (per zona)* (110V, 115V, 120V, 127V, 220V, 230V, 240V)
Potenza assorbita 800 W*
Cambio di velocità 1212
Velocità senza cario 700 min
-1
1400 min
-1
0-700 min
-1
0-1400 min
-1
Capacitá mandrino
Acciao 16 mm 10 mm 16 mm 10 mm
Cemento 35 mm 16 mm 35 mm 16 mm
Peso (senza il cavo) 3,8 kg
04Ita_VTP-16A_WE 08/10/31, 09:3317

18
Italiano
5. Scelta della punta appropriata
䡬 Quando si fora cemento o pietra
Usare la punta indicata engli accessori disponibili a
richiesta.
䡬 Quando si fora metallo o plastica
Usare una punta normale de metallo.
䡬 Quando si fora il legno
Usare una punta normale da legno. Tuttavia, quando
si fanno fori da 6,5 mm o inferiori, usare una punta
da metallo.
6. Cambio di velocità:
Prima di cambiare velocità, assicurarsi che
l'interruttore sia spento (posizione OFF) e che il
trapano si sia arrestato del tutto. Per cambiare velocità,
premere la chiavetta a cursore e sportarla nel senso
dovuto, come indicato dalla freccia nella Fig. 1. Il
numero 1 inciso sul corpo del trapano indica la
velocità bassa ed il numero 2 indica la velocità alta.
7. Cambio da IMPATTO a ROTAZIONE: (Fig. 2)
Il trapano battente può essere commutato da
IMPATTO (impatto più rotazione) a ROTAZIONE (sola
rotazione) girando semplicemente l'anello del cambio.
Quando si fanno fori nel cemento, nella pietra, nelle
mattonelle o in materiali similari duri, girare
completamente in senso orario l'anello. La testa del
trapano batte contro il materiale mentre continua a
ruotare. Quando si fanno fori in metallo, legno o
plastica, girare l'anello del cambio interamente, in
senso antiorario. Il trapano ruoterà semplicemente,
come un ordinario trapano elettrico.
ATTENZIONE
Non usare il trapano battente nella posizione
IMPATTO se il materiale può essere forato dalla sola
rotazione. Un tale fatto non solo diminuirà l' efficacia
del trapano ma danneggerà anche la punta. Quando
si cambia, fare in modo che l'anello giri in tutta la sua
corsa.
8. Fissaggio dell'impugnatura laterale.
Allentare la presa sull’impugnatura laterale e attaccare
quest’ultima al coperchio degli ingranaggi in una
posizione che permetta di effettuare in modo
conveniente l’operazione di trapanaggio. Allineare la
parte sporgente dell’impugnatura alla scanaltura del
coperchio degli ingranaggi e quindi serrare bene la
presa.
Per staccare l’impugnatura, allentare la presa e girare
la stessa.
Per attaccare un tappo di profondità sull’impugnatura,
inserire il tappo nella scanalatura del foro esagonale
che si trova sull’impugnatura laterale, regolare quindi
la posizione del tappo di profondità in base alla
profondità richiesta del foro e serrare infine con
fermezza la presa.
PROCEDIMENTI DI IMPIEGO PRATICO
1. Pressione:
Il lavoro di foratura NON sarà accelerato se si esercita
una forte pressione sul trapano. Una tale azione avrà
conseguenze solo in un danneggiamento della punta,
in una minore efficacia di perforazione e/o in una
diminuzione della vita del trapano.
2. Quando si usa un punta a grande diametro:
Più è grande il diametro della punta, più grande sarà
la forza di reazione sul vostro braccio. Fare attenzione
a non perdere il controllo del trapano a causa di
questa forza di reazione. Per mantenere, un solido
controllo, prendere un assetto stabile su piedi, tenere
stretto il trapano con ambedue le mani e tenere il
trapano ortogonale rispetto al materiale da perforare.
3. Quando si perfora il materiale da parte a parte:
Quando la punta perfora tutto il materiale, un
maneggio non attnto ha spesso come risultato una
punta spezzata o danni al corpo stesso del trapano,
dovuti all’improvviso movimento del trapano. Restare
sempre in guardia e pronti a rilasciare la pressione
quando si perfora il materiale da parte a parte.
4. Funzionamento dell’interruttore:
(1) VTP-16A:
Tirando l’interruttore a grilletto e premendo l’arresto,
l’interruttore è tenuto acceso (posizione ON) per una
foratura continua. Per spegnere l’interruttore
(posizione OFF), premere sul grilletto, di nuovo, e poi
rilasciarlo.
(2) VTV-16:
Si può regolare la velocità di rotazione del trapano
variando la corsa del grillettointerruttore. La velocità
è bassa quando l'interruttore a grilletto è premuto
leggermente e aumenta quando si preme di più sul
(grilletto) grilletto. Il funzionamento continuo può
essere ottenuto premendo il grilletto e abbassando il
bottone d'arresto. Per spegnere l'interruttore, premere
di nuovo il grilletto in modo da svincolare il bottone
d'arresto e rilasciare il grilletto nella posizione iniziale.
5. Precauzione nel praticare fori:
La punta può surriscaldarsi durante il funzionamento;
essa resta tuttavia usabile. Non raffreddare la punta
in acqua od in olio.
6. Precauzione da prendere immediatamente dopo I'uso:
Se, immediatamente dopo l'uso, mentre è ancora in
rotazione, il trapano è posato in un luogo dove ci
siano abbondanti detriti della trapanatura e polvere,
Ia polvere può eventualmente essere risucchiata e
penetrare nei meccanismi del trapano. Fare attenzione
a questa eventualità non desiderata.
MANUTENZIONE E CONTROLLI
1. Controllo della punta
L’uso continuato di punta logore e/o danneggiate
comporta una reduxione dell a efficacia di perfora
zione e può seriamente sovraccaricare il motore.
Controllare spesso la punta e sostituirla con una
nuova quando necessario.
2. Controllo delle punte perforanti e dei maschi
Poiché l’uso continuativo di una punta perforante o
di um maschio logorati può diminuire la capacità di
funzionamento e provocare eventuali sovracarichi al
motore, sostituire o affilare la punta perforante od il
maschio, senza indugio, quando si nota una eccessiva
usura.
3. Controllo delle spazzole di carbone (Fig. 3)
Il motore impiega spazzole di carbone, materiali
soggeti a consumo. Quando una spazzola è
consumata o vicina al limite d’usura, il motore
potrebbe subire dei danni. Usando spazzole di
carbone con arresto automatico, il motore si ferma
automaticamente quando queste sono consumate.
In tal caso, bisogna sostituirle con delle nuove, dello
stesso numero come indicato nella figura. Tenere,
04Ita_VTP-16A_WE 08/10/31, 09:3318

Italiano
19
inoltre, sempre pulite le spazzole e fare in modo che
queste scorrino liberamente all’interno del
portaspazzole.
4. Sostituzione di una spazzola di carbone
Togliere la capsula della spazzola con un cacciavite a
taglio. La spazzola può così essere agevolmente
rimossa.
5. Manutenzione del motore
L’avvolgimento del motore è il vero e proprio “cuore”
dell’utensili elettrici. Fare attenzione a non
danneggiare l’avvolgimento e/o a non bagnarlo con
olio o acqua.
6. Lista dei pezzi di ricambio
A: N. voce
B: N. codice
C: N. uso
D: Note
CAUTELA
La riparazione, modifica e ispezione di utensili elettrici
Hitachi deve essere eseguita da un centro assistenza
autorizzato.
Questa lista dei pezzi di ricambio è utile se viene
presentato insieme all’utensile elettrico al centro
assistenza autorizzato quando si richiedono
riparazioni o altri interventi di manutenzione.
Nell’uso e nella manutenzione degli utensili elettrici
devono essere osservate le normative di sicurezza e i
criteri prescritti in ciascun paese.
MODIFICHE
Gli utensili elettrici Hitachi vengono continuamente
migliorati e modificati per includere le più recenti
innovazioni tecnologiche.
Di conseguenza, alcuni pezzi (p.es. numero di codice
e/o design) possono essere modificati senza
preavviso.
GARANZIA
Garantiamo gli Utensili Elettrici Hitachi in conformità alle
specifiche normative imposte dalla legge e dai paesi.
Questa garanzia non copre difetti o danni dovuti a uso
erroneo, abuso o normale usura. In caso di lamentele, si
prega di inviare l’Utensile Elettrico, non smontato,
insieme al CERTIFICATO DI GARANZIA che si trova al
termine di queste Istruzioni per l’uso, ad un Centro di
Assistenza Autorizzato Hitachi.
NOTA
A causa del continuo programma di ricerca e sviluppo
della HITACHI, le caratteristiche riportate in questo foglio
sono soggette a cambiamenti senza preventiva
comunicazione.
Informazioni riguardanti i rumori trasmessi dall’aria e
le vibrazioni
I valori misurati sono stati determinati in conformitá a
EN60745 e descritti in conformità alla normativa ISO 4871.
Livello misurato di potenza sonora pesato A: 116 dB (A)
Livello misurato di pressione sonora pesato A: 103 dB (A)
KpA incertezza: 3 dB (A)
Indossare protezioni per le orecchie.
Il valore efficace pesato tipico dell’accelerazione è di 14
m/s
2
.
04Ita_VTP-16A_WE 08/10/31, 09:3319
Seite laden ...
Seite laden ...
Seite laden ...
Seite laden ...
Seite laden ...
Seite laden ...
Seite laden ...
Seite laden ...
Seite laden ...
Seite laden ...
Seite laden ...
Seite laden ...
Seite laden ...
Seite laden ...
Seite laden ...
Seite laden ...
Seite laden ...
Seite laden ...
Seite laden ...
Seite laden ...
-
 1
1
-
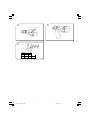 2
2
-
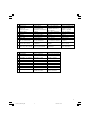 3
3
-
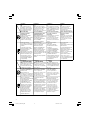 4
4
-
 5
5
-
 6
6
-
 7
7
-
 8
8
-
 9
9
-
 10
10
-
 11
11
-
 12
12
-
 13
13
-
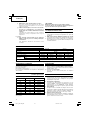 14
14
-
 15
15
-
 16
16
-
 17
17
-
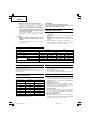 18
18
-
 19
19
-
 20
20
-
 21
21
-
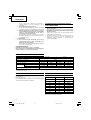 22
22
-
 23
23
-
 24
24
-
 25
25
-
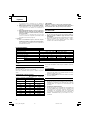 26
26
-
 27
27
-
 28
28
-
 29
29
-
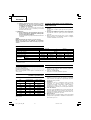 30
30
-
 31
31
-
 32
32
-
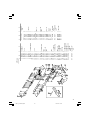 33
33
-
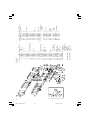 34
34
-
 35
35
-
 36
36
-
 37
37
-
 38
38
-
 39
39
-
 40
40


Hikoki VTP-16A Bedienungsanleitung
- Kategorie
- Bohrmaschinen
- Typ
- Bedienungsanleitung
in anderen Sprachen
- English: Hikoki VTP-16A Owner's manual
- français: Hikoki VTP-16A Le manuel du propriétaire
- español: Hikoki VTP-16A El manual del propietario
- italiano: Hikoki VTP-16A Manuale del proprietario
- Nederlands: Hikoki VTP-16A de handleiding
- português: Hikoki VTP-16A Manual do proprietário