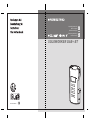
Perfectpro SOLOWORKER BT Bedienungsanleitung
- Kategorie
- Radios
- Typ
- Bedienungsanleitung
Dieses Handbuch eignet sich auch für

SOLOWORKER DAB+ BT
Operating instruction
Mode d’emploi
Gebruiksaanwijzing
Bedienungsanleitung
Bruksanvisning
GB
F
NL
D
N
3A81YQ6L0000A

1
GB
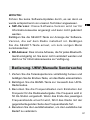
WARNING!
WARRANTY BECOMES VOID ONCE THE DEVICE
CABINET HAS BEEN OPENED OR ANY MODIFICATIONS
OR ALTERATIONS TO THE ORIGINAL DEVICE HAVE
BEEN MADE

2
Important safety instructions
1.
2.
3.
4.
5.
6.
7.
8.
9.
10.
11.
12.
Read these instructions.
Keep these instructions.
Heed all warnings.
Follow all instructions.
Do not use this apparatus near water.
Clean only with dry cloth.
Do not install near any heat sources such as radiators,
heat registers, stoves, or other apparatus (including
ampliers) that produce heat.
Do not defeat the safety purpose of the polarized or
grounding-type plug. A polarized plug has two blades
with one wider than the other. A grounding type plug
has two blades and a third grounding prong. The wide
blade or the third prong are provided for your safety. If
the provided plug does not t into your outlet. Consult an
electrician for replacement of the obsolete outlet.
Protect the power cord from being walked on or pinched
particularly at plugs, convenience receptacles, and the
point where they exit from the apparatus.
Only use attachments/accessories specified by the
manufacturer.
Use only with the cart, stand, tripod, bracket, or table
specied by the manufacturer, or sold with the apparatus.
When a cart is used, use caution when moving the cart/
apparatus combination to avoid injury from tip-over.
Unplug this apparatus during lightning storms or
when unused for long periods of time.

3
GB
Refer all servicing to qualied service personnel. Servicing
is required when the apparatus has been damaged in any
way, such as power-supply cord or plug is damaged. liquid
has been spilled or objects have fallen into the apparatus,
the apparatus has been exposed to rain or moisture, does
not operate normally, or has been dropped.
To Reduce the Risk of Fire or Electric Shock, Do not
Expose This Appliance To Rain or Moisture.
The Shock Hazard Marking and Associated Graphical
Symbol is provided on the rear of unit.
Excessive sound pressure on ear-and headphones could
impair the hearing ability. Higher setting that idle on the
equalizer leads to higher signal voltages on the output
for ear and headphones.
The power plug should be close to the radio, and easy to
be approached that during the emergency, to disconnect
the power from the radio, just unplug the power plug from
the AC power slot.
Where the MAINS plug or an appliance coupler is used
as the disconnect device, the disconnected device shall
remain readily operable.
This apparatus is provided with protection against
splashing water (IP64).
Use only the AC/DC adaptor which is provided by the
manufacturer.
The batteries shall not be exposed to excessive heat
such as sunshine, re or the like
To prevent possible hearing damage, do not listen
at high volume levels for long periods.
13.
14.
15.
16.
17.
18.
19.
20.
21.
22.

4

5
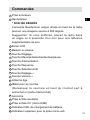
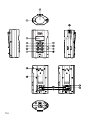
GB
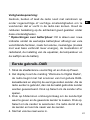
Control
Headphone socket
Loudspeaker
* 360 DEGREES SOUND
The unique Neodymium speaker located on top of the
radio provides a 360 degrees sound image.
Suggestion: If preferred, place the radio in a corner or
close to a wall for additional sound reection.
LCD display
Volume down
Tuning down button
Menu/Preset button/Play/Pause button
Power button
Band button
Select/Info button
Tuning up button
Volume up button
Rod antenna
Strap holder
(Note: the strap holder on top of the clip is intended for a
key ring/hook)
Clip
Aux in socket
DC IN socket (micro-USB)
Battery charging LED indicator
Upside indicator for the micro-USB plug
1
2
3
4
5
6
7
8
9
10
11
14
15
16
17
12
13
18

6
Charging the radio
This unit features a built in 1850mAH Lithium rechargeable
battery to power the radio.
Before operating the radio for the first time please fully
charge the battery with a supplied 5V/500 mA AC adaptor.
Carefully insert the mini-usb plug into the DC IN socket
on the rear of your radio. A red dot on the mini-usb plug
indicates the upside of the mini-usb plug. This red dot is also
indicated above the mini-usb socket. Plug the adaptor into a
standard mains outlet and the radio will begin charging the
built in battery.
The LED charging indicator next to the DC IN socket will shine
bright red showing charging in progress. This LED indicator
will shine faint when the battery is fully charged. The radio
can only be charged with radio off. Charging time is approx. 4
hours. The battery life is approx. 4-10 hours* listening through
the speaker and approx 6-15 hours* with headphones.
Reduced power, distortion, ‘stuttering’ sounds or battery power
indicator in“low” are all signs that the battery needs to
be recharged. Please note the battery power icon does not
display on the LCD when charging the battery.
IMPORTANT:
The mains adaptor is used as the means of connecting the radio
to the mains supply. The mains socket used for the radio must
remain accessible during normal use. In order to disconnect the
radio from the mains completely, the mains adaptor should be
removed from the mains socket outlet completely.

7
GB
Safety Note:
Never use charge or operate the radio on AC mains power in
rainy or moist conditions to prevent moist from entering the
radio. Always keep the rubber cover on the back well closed
under these conditions.
* Note to battery life: This is a rough indication only as
actual achieved battery life depends on many factors such as:
selected volume, music type (bass heavy music consumes
more energy), selected music source or radio band, selected
EQ settings, temperature and age of the battery.
Initial operation-DAB
1. Carefully straighten up the rod antenna and press the
Power button.
2. The display will show “Welcome to Digital Radio” and start
to scan the entire DAB channel range and stop at the rst
found station. If the radio has been used before, the last
used station will be selected. Press the Select button to
play the station.
3. Press the Tuning up/down button to display station list and
nd desired station. Press the Select button to select the
station. The radio will tune to the station and display the
station name.
4. Adjust the volume control for comfortable listening.

8
Note:
Due to the conductivity of the human body the reception of
DAB stations may not be possible or become unstable when
the antenna touches your body or is very close to your body.
Service information-DAB
The Service Information display – Technical information on
the current status of the station being broadcast.
While listening to DAB, continually press in the Select/Info
button to cycle through information on:
a. Radio text-Displays text messages such as the artist or
track name, phone in number, trafc alerts, etc.
b. Signal error/strength-Displays the signal error for the
station being listened to. A low error number indicates a
better quality of radio signal. The signal strength graph can
be used when positioning the radio or its antenna. For good
reception the graph should occupy three or more blocks.
c. Program type (PTY)-Displays the type of station being
listened to such as Pop, Classic, News etc.
d. Multiplex Name-Displays the name of the DAB multiplex
to which the current station belongs as well as its broadcast
frequency.
e. Channel and frequency-Displays the channel number
and frequency for the current DAB radio station.

9
GB
f . Bit rate and audio type-Displays the digital bit rate and
audio coding information for the station being listened to.
g. Format-Displays the format for the station being listened to.
h. Date-Displays the current date.
Menu functions-DAB
1. Repeatedly press and release the Menu button until the
radio reverts to normal display (i.e. without showing ‘MEM
Browse’ or ‘MEM Store’ at the bottom of the display).
2. Press and hold the Menu button to enter DAB menu list.
Then press the Tuning up/down button to scroll through
the following options: EQ setting/Full Scan/Manual tune/
DRC value/Station order/Prune/System. Press the Select
button to conrm your selection.
A) Full scan:
scan the whole DAB network in your area. Radio will tune to
the rst station found after the scanning is completed.
B) Manual tune:
press the Tuning up/down buttonto scroll through the whole DAB
channel. Press the Select button to select required channel.
C) EQ setting:
The sound on your radio can be adjusted to suit your
personal taste for the material that you are listening to. The
radio has ve preset equalizer modes. Alternatively, you may
set the treble and bass levels to your own preferences.

10
Press the Tuning up/down buttons to cycle through the
preset mode. Press the Select button to confirm your
selection.
a) Normal: no tone modication is applied
b) Rock
c) Soul & Jazz
d) Classical
e) Spoken word
f ) Personal: Treble-tone setting may be adjusted/Bass-tone
setting may be adjusted
● If you nd the preset equalizer functions not to your liking,
you may set up a custom treble and bass as following:
1) Follow the step above to enter ’Personal’ equalizer setting
menu.
2) Press the Tuning up/down button to select Treble or bass.
Then press the Select button to enter the adjustment mode.
3) Press the Tuning up/down button to adjust the treble or
bass level (-5 and +5). Press the Select button to conrm
the setting.
Note:
To quickly cancel the effect of Personal equalizer setting,
press the Tuning up/down button until ‘Normal’ is chosen on
the display and press the Select button. The treble and bass
settings will be memorized for the next time that you wish to
use the Personal setup.

11
GB
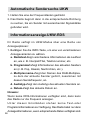
D) DRC (Dynamic Range Control):
The DRC facility can make quieter sounds easier to hear
when your radio is used in a noisy environment. Use the
Tuning up/down buttonto highlight the required DRC setting
DRC Off: DRC is switched off, broadcast
DRC will be ignored
DRC High: DRC is set as sent by broadcaster.
DRC Low: DRC level is set to 1/2 that sent by broadcaster.
Note:
Not all DAB broadcasts are able to use the DRC function. If
the broadcast does not support DRC, then the DRC setting
in the radio will have no effect.
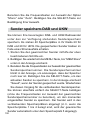
E) Station order:
your radio has 3 station order settings from which you can
choose. The station order settings are as following.
Alphanumeric: sorts the station list alpha-numerically 0…9
A…Z
Ensemble: organizes the station listed by DAB multiplex.
Valid: shows only those stations for which a signal can be
found.
The current setting is indicated by an asterisk.
F) Prune:
If you move to a different part of the country, some of the
stations which were listed may no longer be available. Also,
from time to time, some DAB services may stop broadcasting,
or may change location or frequency. Stations which cannot
be found, or which have not been received for a very long time
are shown in the station list with a question mark.

12
The Prune stations function will delete the marked DAB
stations from your station list.
1) Press the Select button to enter prune station function.
2) Press the Tuning up/down button to select YES to cause
the stations lists to be pruned, eliminating unavailable
stations. If you do not wish to prune stations, select NO
and the display will revert to the previous menu.
G) System:
press the Select button to select from the following settings
● Time
Manual setting the clock
1) Press the Tuning up/down button until ‘Set Time/Date’ is
highlighted. Then press the Select button to enter the time
setup. The hour digits will ash.
2) Press the Tuning up down/button to select correct hour.
Press the Select button to conrm the setting. The minute
digits will flash. Press the Select button to confirm the
setting. If the radio has been set to use a 12 hour format,
there will be an option for setting AM or PM for the clock time
3) Follow the same procedure above for the day/month/year
setting. When the setting is completed, ‘Time Saved’ will
be shown on the display.
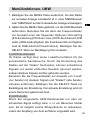
Automatically updating the clock
1) Press the Tuning up/down button until ‘Auto update’ is
highlighted. Then press the Select button to enter the
auto-update menu.

13
GB
2) Press the Tuning up/down button to choose an update
option from ‘Update from Any’, ’Update from DAB’, ‘Update
from FM’, ‘No update.’ Press the Select button to conrm
your choice. The radio will then exit to the previous menu
display.
Setting the clock format:
The clock display can be set to 12 or 24 hour format.
1) Press the Tuning up/down button until ‘Set 12/24 hour’ is
highlighted on the display. Press the Select button to enter
the clock format menu. The current clock format is marked
with asterisk.
2) Press the Tuning up/down to select either 12 or 24 format.
Press the Select button to conrm your choice.
● Contrast: the contrast of the display can be adjusted.
Press the Tuning up/down button to adjust the contrast. The
contrast level indication on the screen will change at the
same time. When you find the setting that gives the best
legibility for the location in which the radio is used, press the
Select button to save the setting.
● Language: your radio can be configured to a different
language.
Press the Tuning up/down button until your required
language is highlighted on the display. Press the Select
button to conrm your choice.
● Factory reset: by performing a factory reset, all user entered
settings will be erased.

14
Press the Tuning up/down button to select YSE or NO.
Select YES to erase all saved settings and all settings will
revert to factory default.
● Software upgrade
Software updates for your radio may be available in the
future. As software updates become available software and
information on how to update your radio can be found at
www.perfectpro.eu
IMPORTANT:
Do not perform software updates unless instructed by our
technician.
● SW version: The software display cannot be altered and
is just for your reference
Press the Select button to view the software version installed
in the radio. Press the Select button again to revert to the
previous menu.
● BD address: it is an address that unique for each Bluetooth
device. It cannot be altered and is just for your reference
Operating your radio-FM (Manual tuning)
1. Carefully straighten the rod antenna and turn on the radio
by pressing the Power button.
2. Press the Band button to select FM radio mode.
3. Press the Tuning up/down button to control the frequency
that the radio will tune to. The frequency will change in
steps of 50KHz. When the end of the waveband is reached
the radio will recommence tuning from the opposite end of
the waveband.

15
GB
4. Press the Volume buttons to adjust the sound level as needed.
Scan tuning-FM
1. Press and hold the Tuning up/down button.
2. The radio will search in an upwards or downwards direction
until it nds a station of sufcient signal strength.
Service information-FM RDS
Your radio has a range of display options when in FM mode:
1. Press the Info button cycle through the different options.
a. Radio text-Displays scrolling text messages such as
artist/track name, phone in number etc.
b. Program type-Displays the information for the station
being listened to e.g. Pop, Classic. News, etc.
c. Multiplex Name-Displays the name of the DAB multiplex
to which the current station belongs as well as its broadcast
frequency.
d. Audio type-Displays the audio type of the station being
listened to.
e. Date-Displays the current date.
Note:
If no RDS information is available, then the radio will only be
able to display the frequency.
There will be no text or program type information available
under these conditions. The radio only provides displays
when there is information available.

16
Menu functions-FM
1. Repeatedly press and release the Menu button until the
radio reverts to normal display (i.e. without showing ‘MEM
Browse’ or ‘MEM Store’ at the bottom of the display).
2. Press and hold the Menu button to enter FM menu list.
Then press the Tuning up/down button to scroll through
the following options: EQ setting/FM Scan zone/FM audio/
System (for the functions of EQ setting and System, please
refer to the above sections described in DAB mode). Press
the Select button to conrm your selection.
A) FM scan zone:
Your radio includes a local/distant option for the auto-scan
function. Bysetting the radio to the 'local' scan option, weaker
signals from more distant transmitters can be ignored by the
radio, making stronger signals easier to nd.
Press the Tuning up/down button to choose between ‘Local’
(Strong stations only) and ‘Distant’ (All stations including distant
radio stations) options. Then press the Select button to conrm
the setting. The current setting is indicated with an asterisk.
B) FM audio:
If the FM radio station being listened to has a weak signal,
some hiss may be audible. It is possible to reduce this hiss
by forcing the radio to play the station in mono rather than
auto.
Press the Tuning up/down button to select the options
between ‘Mono’ and ‘Auto’. Then press the Select button to
conrm your selection.

17
GB
Presetting stations-FM/DAB
You may store your preferred DAB and FM radio stations
to the preset station memories. There are 40 memory
presets in your radio 20 for DAB and 20 for FM. Presets are
remembered by your radio in the event of a power failure.
1. Tune to the required station following the above steps.
2. Repeatedly press and release the Menu button until ‘MEM
Store’ is shown at the bottom of the display.
3. Press the Tuning up/down button to select your required
preset number. The preset number ashes on the display
indicating the preset is still empty. Press the Select button
to store the currently tuned station. The display will show
‘Saved’ when the station is stored to the preset station
memory. Repeat this procedure for the remaining presets.
Alternatively, you can simply press the Select button (without
the use of Tuning up/down button to select your required
preset number) to preset the currently tuned station. The
station will be stored in the remaining empty preset in
sequence (i.e. if preset 1 to 4 are used, the station required
to be preset will be stored in preset 5 automatically).
Note:
Stations stored in preset memories may be overwritten by
following the above procedure.
Recalling a preset station-FM/DAB
1. Press the Band button to select the required mode.
2. Repeatedly press and release the Menu button until ‘MEM
Browse’ is shown at the bottom of the display.

18
3. Press the Tuning up/down button to select your required
station.
Note:
The display will only show the preset number which has
preset stored.
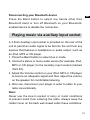
Listening music via Bluetooth streaming
You need to pair your Bluetooth device with your radio
before you can auto-link to play/stream Bluetooth music
through your radio. Paring creates a `bond' so two devices
can recognize each other.
Pairing and playing your Bluetooth device for the rst time
1. Press the Band button until Bluetooth mode is selected.
‘Discoverable’ will show on the display indicating the radio
is ready to be paired.
2. Activate Bluetooth on your device according to the device's
user manual to link to the speaker. Locate the Bluetooth
device list and select the device named ‘Soloworker BT.’
With some mobiles( which are equipped with earlier versions
than BT2.1 Bluetooth device), you may need to input the
pass code “0000”.
3. Once connected, it will show ‘BT connected’ and the name
of your Bluetooth device will appear on the display for a
few seconds. You can simply select and play any music
from your source device. Volume control can be adjusted
from your source device, or directly on your radio.

19
GB
4. Press the Menu button to play/pause tracks or use the
controls on your device.
(Note: If you press and hold the Menu button, it will enter
Bluetooth setting menu.)
Note:
1) Bluetooth connectivity performance may vary depending
on the connected Bluetooth devices. Please refer to the
Bluetooth capabilities of your device before connecting to
your radio. All features may not be supported on some
paired Bluetooth devices.
2) The effective operation range between the system and the
paired device is approximately 10 meters (30 feet). Any
obstacle between the system and the device can reduce
the operational range.
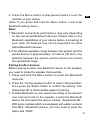
Pairing another devices
Before pairing another new Bluetooth device to the speaker,
you need to make the speaker discoverable.
1. Press and hold the Menu button to enter the Bluetooth
menu list.
2. Press the Tuning up/down button to select ‘Discoverable’.
Then press the Select button to conrm the setting. Your
Soloworker BT is discoverable again for pairing.
3. Activate Bluetooth on your device according to the device's
user manual to link to the speaker. Locate the Bluetooth
device list and select the device named ‘Soloworker BT‘.
With some mobiles which are equipped with earlier versions
than BT2.1 Bluetooth device, you may need to input the
pass code “0000”.
Seite wird geladen ...
Seite wird geladen ...
Seite wird geladen ...
Seite wird geladen ...
Seite wird geladen ...
Seite wird geladen ...
Seite wird geladen ...
Seite wird geladen ...
Seite wird geladen ...
Seite wird geladen ...
Seite wird geladen ...
Seite wird geladen ...
Seite wird geladen ...
Seite wird geladen ...
Seite wird geladen ...
Seite wird geladen ...
Seite wird geladen ...
Seite wird geladen ...
Seite wird geladen ...
Seite wird geladen ...
Seite wird geladen ...
Seite wird geladen ...
Seite wird geladen ...
Seite wird geladen ...
Seite wird geladen ...
Seite wird geladen ...
Seite wird geladen ...
Seite wird geladen ...
Seite wird geladen ...
Seite wird geladen ...
Seite wird geladen ...
Seite wird geladen ...
Seite wird geladen ...
Seite wird geladen ...
Seite wird geladen ...
Seite wird geladen ...
Seite wird geladen ...
Seite wird geladen ...
Seite wird geladen ...
Seite wird geladen ...
Seite wird geladen ...
Seite wird geladen ...
Seite wird geladen ...
Seite wird geladen ...
Seite wird geladen ...
Seite wird geladen ...
Seite wird geladen ...
Seite wird geladen ...
Seite wird geladen ...
Seite wird geladen ...
Seite wird geladen ...
Seite wird geladen ...
Seite wird geladen ...
Seite wird geladen ...
Seite wird geladen ...
Seite wird geladen ...
Seite wird geladen ...
Seite wird geladen ...
Seite wird geladen ...
Seite wird geladen ...
Seite wird geladen ...
Seite wird geladen ...
Seite wird geladen ...
Seite wird geladen ...
Seite wird geladen ...
Seite wird geladen ...
Seite wird geladen ...
Seite wird geladen ...
Seite wird geladen ...
Seite wird geladen ...
Seite wird geladen ...
Seite wird geladen ...
Seite wird geladen ...
Seite wird geladen ...
Seite wird geladen ...
Seite wird geladen ...
Seite wird geladen ...
Seite wird geladen ...
Seite wird geladen ...
Seite wird geladen ...
Seite wird geladen ...
Seite wird geladen ...
Seite wird geladen ...
Seite wird geladen ...
Seite wird geladen ...
Seite wird geladen ...
Seite wird geladen ...
Seite wird geladen ...
Seite wird geladen ...
Seite wird geladen ...
Seite wird geladen ...
Seite wird geladen ...
Seite wird geladen ...
Seite wird geladen ...
Seite wird geladen ...
Seite wird geladen ...
Seite wird geladen ...
Seite wird geladen ...
Seite wird geladen ...
Seite wird geladen ...
Seite wird geladen ...
Seite wird geladen ...
Seite wird geladen ...
Seite wird geladen ...
Seite wird geladen ...
Seite wird geladen ...
Seite wird geladen ...
Seite wird geladen ...
Seite wird geladen ...
Seite wird geladen ...
Seite wird geladen ...
Seite wird geladen ...
Seite wird geladen ...
Seite wird geladen ...
Seite wird geladen ...
Seite wird geladen ...
-
 1
1
-
 2
2
-
 3
3
-
 4
4
-
 5
5
-
 6
6
-
 7
7
-
 8
8
-
 9
9
-
 10
10
-
 11
11
-
 12
12
-
 13
13
-
 14
14
-
 15
15
-
 16
16
-
 17
17
-
 18
18
-
 19
19
-
 20
20
-
 21
21
-
 22
22
-
 23
23
-
 24
24
-
 25
25
-
 26
26
-
 27
27
-
 28
28
-
 29
29
-
 30
30
-
 31
31
-
 32
32
-
 33
33
-
 34
34
-
 35
35
-
 36
36
-
 37
37
-
 38
38
-
 39
39
-
 40
40
-
 41
41
-
 42
42
-
 43
43
-
 44
44
-
 45
45
-
 46
46
-
 47
47
-
 48
48
-
 49
49
-
 50
50
-
 51
51
-
 52
52
-
 53
53
-
 54
54
-
 55
55
-
 56
56
-
 57
57
-
 58
58
-
 59
59
-
 60
60
-
 61
61
-
 62
62
-
 63
63
-
 64
64
-
 65
65
-
 66
66
-
 67
67
-
 68
68
-
 69
69
-
 70
70
-
 71
71
-
 72
72
-
 73
73
-
 74
74
-
 75
75
-
 76
76
-
 77
77
-
 78
78
-
 79
79
-
 80
80
-
 81
81
-
 82
82
-
 83
83
-
 84
84
-
 85
85
-
 86
86
-
 87
87
-
 88
88
-
 89
89
-
 90
90
-
 91
91
-
 92
92
-
 93
93
-
 94
94
-
 95
95
-
 96
96
-
 97
97
-
 98
98
-
 99
99
-
 100
100
-
 101
101
-
 102
102
-
 103
103
-
 104
104
-
 105
105
-
 106
106
-
 107
107
-
 108
108
-
 109
109
-
 110
110
-
 111
111
-
 112
112
-
 113
113
-
 114
114
-
 115
115
-
 116
116
-
 117
117
-
 118
118
-
 119
119
-
 120
120
-
 121
121
-
 122
122
-
 123
123
-
 124
124
-
 125
125
-
 126
126
-
 127
127
-
 128
128
-
 129
129
-
 130
130
-
 131
131
-
 132
132
-
 133
133
-
 134
134
-
 135
135
-
 136
136


Perfectpro SOLOWORKER BT Bedienungsanleitung
- Kategorie
- Radios
- Typ
- Bedienungsanleitung
- Dieses Handbuch eignet sich auch für
in anderen Sprachen
Verwandte Artikel
Andere Dokumente
-
Auna Connect System S Micro System Speaker Benutzerhandbuch
-
Lenco PDR-040BAMBOOBK Bedienungsanleitung
-
PEAQ PDR350BT B Bedienungsanleitung
-
-
-
Revo Supersignal Bedienungsanleitung
-
Tangent ALIO BAZE MONO CD/DAB+/FM/BT Walnut Benutzerhandbuch
-
Sangean MMR-88 DAB Benutzerhandbuch
-
Sangean MMR-88DAB Benutzerhandbuch