
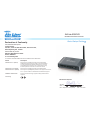
AirLive AP60-EU
Wireless-N PoE Access Point
Quick Setup Guide
Declaration of Conformity
We, Manufacturer/Importer
Declare that the product
Wireless-N PoE Access Point
AirLive AP60-EU
is in conformity with
In accordance with 2004/108/EC Directive and 1999/5 EC-R & TTE Directive
Clause
Manufacturer/Importer
Description
OvisLink Corp.
5F, No.6, Lane 130, Min-Chuan Rd., Hsin-Tien Dist.,
New Taipei City 231, Taiwan
■
■
■
■
■
CE marking
Signature:
Name:Albert Yeh
Position/ Title : Vice President
EN 300 328 V1.7.1 (2006-10)
EN 301 489-1 V1.8.1 (2008-04)
EN 301 489-17 V2.1.1 (2009-05)
EN60950-1: 2006+A11:2009
Electromagnetic compatibility and Radio spectrum matters (ERM);
Wideband transmission equipment operating in the 2.4GHz ISM band
And using spread spectrum modulation techniques; Part 1: technical
Characteristics and test conditions Part2:Harmonized EN covering
Essential requirements under article 3.2 of the R&TTE Directive
Electromagnetic compatibility and Radio spectrum Matters (ERM);
Electromagnetic compatibility(EMC) standard for radio equipment And services;
Part 17:Specific conditions for Wideband data and HIPERLAN equipment
Safety for information technology equipment including electrical business
equipment
Date:2011/07/20
Place : Republic of China (Taiwan)

Regulatory Approvals
FCC Statement
This equipment has been tested and found to comply with the limits for a Class B&C
digital device pursuant to Part 15 of the FCC Rules. These limits are designed to
provide reasonable protection against harmful interferences when the equipment is
operating in a commercial area. This equipment generates, uses and may radiate radio
frequency energy, and if not installed in accordance with the user guide, may cause
interference in the transmission of radio communications. If operating in a residential
area, it is probable this equipment will cause harmful interference, in which case the
user will be required to try to correct this interference using his own means.
CE Marking Warning
This is a Class B product. In a domestic environment this product may cause radio
interference in which case the user may be required to take adequate measures.
CE Statement
This product complies with the 99/5/EEC directives, including the following safety and
EMC standards:
EN 300 328 V1.7.1 (2006-10)
■
Electromagnetic compatibility and Radio spectrum matters (ERM); Wideband transmission
equipment operating in the 2.4GHz ISM band And using spread spectrum modulation techniques;
Part 1: technical Characteristics and test conditions Part2:Harmonized EN covering Essential
requirements under article 3.2 of the R&TTE Directive
EN 301 489-1 V1.8.1 (2008-04)
■
Electromagnetic compatibility and Radio spectrum Matters (ERM);
EN 301 489-17 V2.1.1 (2009-05)
■
Electromagnetic compatibility(EMC) standard for radio equipment And services; Part 17:Specific
conditions for Wideband data and HIPERLAN equipment
EN60950-1: 2006+A11:2009
■
Safety for information technology equipment including electrical business equipment
HR
OvisLink Corp. izjavljuje da je ovaj uređaj u
skladu sa neophodnimpreporukama i ostalim
važnim odredbama Directive 1999/5/EC.
RO
OvisLink Corporation declara ca acest
dispozitiv este în conformitate cu cerintele
esentiale si alte prevederi relevante ale
Directivei 1999/5/EC
ID
OvisLink Corporation menyatakan bahwa
perangkat ini telah sesuai dengan persyaratan
utama dan ketentuan terkait lainnya direktif
1999/5/EC.
Directive 1999 / 5 / EC
Tested To Comply
With FCC Standards.
FOR HOME OR OFFICE USE
This equipment may be used in AT, BE, CY, CZ, DK, EE, FI, FR, DE, GR, HR, HU, ID, IE, IT,
LV, LT, LU, MT, NL, PL, PT, SK, SI, ES, SE, GB, IS, LI, NO, CH, BG, RO, TR
OvisLink Corporation declares that this device is in
compliance with the essential requirements and
other relevant provisions of directive 1999/5/EC.

P1
AirLive AP60-EU
Wireless-N PoE Access Point
Quick Setup Guide
Česky
CZ
Default Settings:
Operation Mode: AP
IP: 192.168.100.252
Subnet mask: 255.255.255.0
Username: admin
Password: airlive
SSID: airlive
Please make sure to install the antenna first before power-on.
Otherwise, the radio might be damaged.
Login web management to configure AP60
1. Please install antenna into AP60.
2. Connect your PC to any LAN port by Ethernet cable.
3. Connect the power jack to the power port.
4. Wait for about 1 minute for AP60 to finish reboot
5. Please set your PC’s IP address to 192.168.100.50 (or other address in
the same subnet)
6. To get into the Web Management, simply type in the AP60’s IP address
(default IP is 192.168.100.252) into the web browser’s address field.
For more information, please read the instruction manual on the
CD.
English
EN
Español
ES
Deutsch
DE
Ελληνικός
GR
Hrvatska
HR
Důležité upozornění:
Defaultní bezdrátový mód je : "AP"
Tovární (defaultní) IP adresa je 192.168.100.252
Základní maska sítě 255.255.255.0
Tovární jméno je: admin
Tovární heslo je: airlive
Defaultní SSID je: airlive
Prosím, nejprve nainstaujte anténu a pak připojte AP60 k elektrick-
ému rozvodu. Jinak můžete poškodit zařízení.
Web management AP60
1. Nainstalujte anténu do AP60.
2. Připojte Váš počítač do AP60 pomocí Ethernet kabelu.
3. Připojte AP60 do elektrického rozvodu.
4. Počkejte asi minutu, až AP60 dokončí reboot.
5. Nastavte IP adresu vašeho počítače na 192.168.100.50.
6. Do webového prohlížeče napište tovární IP adresu AP60 :
192.168.100.252.
Více informací najdete v manuálu na přiloženém CD.
Wichtiger Hinweis:
Der voreingestellte WLAN Modus ist: "AP" Modus
Die voreingestellte IP lautet: 192.168.100.252
Das Standard-Subnet Mask ist 255.255.255.0
Der voreingestellte Benutzername lautet admin
Das voreingestellte Passwort lautet airlive
Die voreingestellte SSID lautet: airlive
Stellen Sie unbedingt sicher, dass erst die Antenne installiert wurde
BEVOR das Gerät eingeschaltet wird. Falls nicht, könnte der Sender
beschädigt werden.
Anleitung zum webbasierten Management des AP60
1. Bitte installieren Sie die Antenne am AP60.
2. Verbinden Sie Ihren PC mit einem LAN Anschluß.
3. Verbinden Sie das Netzteil mit der Netzanschluß und der Steckdose.
4. Warten Sie ca. 1 Minute bis der AP60 vollständig gestartet ist.
5. Bitte geben Sie Ihrem PC manuell die IP Adresse 192.168.100.50 (oder
eine andere Adresse aus diesem Subnetz außer der 192.168.100.252)
6. Um die Management Seite aufzurufen, geben Sie bitte die IP des
AP60’s in der Adresszeile eines Browsers ein (Voreinstellung:
192.168.100.252).
Für mehr Informationen lesen Sie bitte die Anleitung auf der
mitgelieferten CD.
Noticia importante:
Modo inalámbrico por default es : modo "AP"
Dirección IP por default es 192.168.100.252
Le masque de sous réseau par défaut est 255.255.255.0
Nombre de usuario por default es: admin
Contraseña por default es: airlive
SSID por default es: airlive
Favor de instalar la antena antes de encender la máquina, de lo
contrario se dañará el radio.
Entrar a la administración de web para configurar el AP60
1. Instalar la antena al AP60.
2. Conectar su PC a un puerto LAN por medio del cable Ethernet.
3. Conectar corriente en el puerto de corriente.
4. Esperar 1 minuto terminar la reiniciación
5. Configurar la dirección IP a 192.168.100.50 (u otra dirección en el
mismo subnet)
6. Para entrar a la administración de web, tipee la dirección IP del AP60
(default IP es 192.168.100.252) en el navegador de web
Para mayor información, lea el manual de instrucciones en el CD.
Σημαντική διευκρίνηση:
Η εργοστασιακή ρύθμιση λειτουργίας είναι: "AP"
Η εργοστασιακή διεύθυνση IP είναι 192.168.100.252
Η προκαθορισμένη Μάσκα υποδικτύου είναι 255.255.255.0
Το εργοστασιακό username είναι: "admin"
Το εργοστασιακό password είναι: "airlive"
Το εργοστασιακό SSID είναι: "airlive"
Παρακαλώ βεβαιωθείτε ότι έχετε εγκαταστήσει πρώτα την κεραία
πριν την ενεργοποίησης. Διαφορετικά, μπορεί να καταστρέψει το
δέκτη.
Για να ρυθμίσετε το AP60 συνδεθείτε από την Web διαχείριση
1. Εγκαταστήσετε την κεραία στο AP60.
2. Συνδέστε τον υπολογιστή σας σε οποιαδήποτε θύρα LAN μέσω
καλωδίου Ethernet.
3. Συνδέστε το βύσμα του ρεύματος στη θύρα τροφοδοσίας.
4. Περιμένετε για περίπου 1 λεπτό για να τελειώσει AP60 την
επανεκκίνηση
5. Παρακαλούμε να ορίσετε τη διεύθυνση IP του υπολογιστή σας
192.168.100.50 (ή άλλη διεύθυνση στο ίδιο υποδικτύου)
6. Για να μπείτε στην
Web διαχείριση, απλά πληκτρολογήστε τη
διεύθυνση IP του AP60 (η προεπιλεγμένη IP είναι 192.168.100.252 )
στο πεδίο διεύθυνσης του προγράμματος περιήγησης στο Web."
Για περισσότερες πληροφορίες, παρακαλώ διαβάστε το εγχειρίδιο
χρήσης στο CD.
Važne obavijesti:
Početni način rada je: "AP"
Početna IP adresa je 192.168.100.252
Zadani Subnet Mask je 255.255.255.0
The default user name is: admin
The default password is: airlive
Početni SSID je: airlive
Provjerite da ste instalirali antenu prije nego uključite uređaj. U
suprotnom, radio bi se mogao pokvariti.
Za konfiguraciju AP60 prijavite se preko web sučelja.
1. Instalirajte antenu na AP60, molim.
2. Spojite vaš PC na bilo koji LAN port ethernet kabelom.
3. Spojite struju na mrežni priključak.
4. Pričekajte oko 1 min. da AP60 dođe u radno stanje.
5. Molim da postavite adresu vašeg PC-a na 192.168.100.50 (ili drugu
adresu u istom subnetu)
6. Da biste došli u Web Management, jednostavno otipkajte IP adresu
AP60 uređaja (default IP je 192.168.100.252) u adresno polje web
preglednika.
Za više informacija, molim pročitajte priručnik na CD-u.

P2
Magyar
HU
Fontos információk:
Az alapértelmezett üzemmód: "AP"
Az alapértelmezett IP-cím: 192.168.100.252
Alapértelmezett alhálózati maszk: 255.255.255.0
Početno korisničko ime je: admin
Početna lozinka je: airlive
Az alapértelmezett SSID: airlive
Győződjön meg arról, hogy csak akkor csatlakoztatja az elektromos
hálózati adaptert, ha az antennát már felszerelt. Ellenkező esetben az
AP60 meghibásodhat.
Az AP60 konfigurálásához lépjen be a webes kezelőfelületre.
1. Szerelje fel az antennát a készülékre.
2. Csatlakoztassa a PC-t hálózati kábellel a LAN portok egyikére.
3. Dugja be az elektromos hálózati adaptert.
4. Várjon kb. 1 percet, amíg az AP60 bootol.
5. Számítógépe IP-címét állítsa 192.168.100.50-re (vagy bármi másra
ezen az alhálózaton).
6. A webes kezelőfelületre az AP60 IP-címe segítségével léphet be.
Böngészőjének címsorába írja be: 192.168.100.252.
További információkat a telepítő CD-n lévő kézikönyben talál.
Bahasa
ID
Informasi Penting:
Mode wireless adalah "AP" mode
IP address adalah 192.168.100.252
Subnet Mask adalah 255.255.255.0
User name adalah admin
Password adalah airlive
SSID adalah airlive
Silakan memastikan untuk memasang antena terlebih dahulu sebelum
menyalakan unit AP60 untuk mencegah kerusakan pada unit.
Login melalui Web Management untuk mengkonfigur AP60
1. Silakan memasang antenna ke unit AP60
2. Hubungkan komputer anda ke salah satu port LAN dengan menggu-
nakan kabel ethernet
3. Hubungkan colokan listrik ke port power
4. Silakan menunggu sekitar 1 menit untuk AP60 selesai proses booting
5. Silakan mengisi alamat IP komputer anda dengan 192.168.100.50 atau
alamat lain dengan subnet yang sama
6. Untuk mengakses melalui Web, masukan alamat IP unit AP60 (standar
IP adalah 192.168.100.252)
Untuk informasi lebih lanjut silakan membaca intruksi manual
yang terdapat pada CD
Polski
PL
Ważne Informacje:
Domyślny tryb pracy urządzenia : AP
The default IP address is 192.168.100.252
Standardowa maska podsieci to 255.255.255.0
Standardowa nazwa użytkownika : admin
Standardowe hasło : airlive
Standardowe SSID to : airlive
Proszę koniecznie najpierw podłączyć antenę a następnie zasilanie.
Jeżeli postąpisz odwrotnie, istnieje ryzyko uszkodzenia nadajnika
radiowego.
Logowanie do panelu zarządzania AP60
1. Zainstaluj antenę w AP60
2. Podłącz komputer PC do jednego z portów LAN kablem Ethernet.
3. Podłącz zasilanie urządzenia
4. Poczekaj około 1 minuty aż urządzenie wczyta swoje oprogramowanie
wewnętrzne
5. Ustaw adres IP komputera na 192.168.100.50 (lub inny z tą samą
maską podsieci)
6. By wejść do panelu zarządzania AP60 użyj przeglądarki Internetowej i
wpisz w niej adres 192.168.100.252
W celu zasięgnięcia dodatkowych informacji zapoznaj się z
instrukcją obsługi dostarczoną na dołączonej płycie CD
Português
PT
Noticia Importante:
O modo wireless padrão é : modo "AP"
O endereço IP padrão é 192.168.100.252
Por defeito a subnet mask é 255.255.255.0
O nome utilizador padrão é: admin
A palavra-chave padrão é: airlive
O SSID padrão é: airlive
Certifique-se por favor de instalar a antena antes do power-on (ligar
à energia). Caso contrário, o rádio pode ser danificado.
Login Gestor Web para configurar o AP60
1. Insira por favor a antena no AP60.
2. Conecte o seu PC em qualquer porta LAN usando o cabo Ethernet
3. Conecte o jack de energia na porta power
4. Aguarde cerca de 1 minuto para que o AP60 termine o reboot
5. Configure por favor o endereço IP do seu PC para 192.168.100.50 (ou
outro endereço da mesma sub rede)
6. Para entrar no Gestor Web, digite apenas o endereço IP do seu AP60
(por defeito é 192.168.100.252) no campo de endereço do gestor web
Para mais informações leia por por favor as intruções do manual
no CD.
Slovensky
SK
Dôležité upozornenie:
Predvolený pracovný režim je: "AP"
Predvolená IP adresa je 192.168.100.252
Štandardná maska podsiete je 255.255.255.0
Predvolené používateľské meno je: admin
Predvolené heslo je: airlive
Predvolené SSID je: airlive
Pred spustením zariadenia sa uistite, že je anténa pripojená. V
prípade, že nebude pripojená sa môže poškodiť vysielač.
Prihlásenie do webového manažmentu pre konfiguráciu AP60
1. Pripojte anténu k AP60.
2. Pripojte počítač ku ktorémukoľvek LAN portu pomocou sieťového
káblu.
3. Pripojte napájací adaptér k AP60.
4. Počkajte približne minútu na spustenie zariadenia.
5. Manuálne nastavte IP adresu počítača na 192.168.100.50 (alebo inú v
rovnakej podsieti).
6. Pre prístup k webovému manažmentu, zadajte do poľa na adresu IP
adresu AP60 (predvolená IP adresa je 192.168.100.252).
Viac informácií nájdete v príručke používateľa na priloženom CD.
Русский
RU
Важное примечание Notice:
Беспроводной режим по умолчанию: "AP"
IP адрес по умолчанию 192.168.100.252
Маска подсети по умолчанию 255.255.255.0
Имя пользователя по умолчанию: admin
Пароль по умолчанию: airlive
SSID по умолчанию: airlive
Пожалуйста, убедитесь, что Вы подключили антенну до
включения питания. В противном случае, устройство может
быть повреждено.
Зайдите в web менеджмент для настройки AP60
1. Пожалуйтса, установите антенну в AP60.
2. Подключите Ваш ПК к любому LAN порту через Ethernet кабель.
3. Подключите кабель питания к устройству.
4. Подождите одну минуту для перезагрузки AP60
5. Пожалуйста, настройте IP адрес Вашего ПК на 192.168.100.50 (или
другой адрес в той же подсети)
6. Для входа в Web менеджмент, введите IP адрес устройства (IP
адрес по умолчанию 192.168.100.252) в строке ввода
браузера.
Для дополнительной информации, обратитесь к
руководству пользоваетля на CD.
România
RO
Configurari implicite:
Mod operare : AP
Adresa IP implicita: 192.168.100.252
Subnet Mask implicit: 255.255.255.0
Nume utilizator implicit: admin
Parola implicita: airlive
SSID wireless implicit : ‘airlive’
Va rugam sa va asigurati ca instalati antena inainte de a alimenta
dispozitivul. In caz contrar modulul radio se poate deteriora.
Accesare management web pentru configurarea AP60
1. Conectati antena la AP60.
2. Conectati PC-ul la orice port folosind un cablu ethernet.
3. Conectati mufa de alimentare.
4. Asteptati aproximativ 1 minut ca AP60 sa termine initializarea.
5. Configurati adresa IP a PC-ului ca 192.168.100.50 (sau orice alta
adresa din aceeasi sub retea)
6. Pentru a accesa interfata de management web a AP60, tastati adresa
IP a acestuia in browser-ul web (implicit 192.168.100.252)
Pentru mai multe informatii va rugam sa consultati manualul de pe
CD.
-
 1
1
-
 2
2
-
 3
3
-
 4
4


Air Live AP60-EU Quick Setup Manual
- Typ
- Quick Setup Manual
- Dieses Handbuch eignet sich auch für
in anderen Sprachen
- slovenčina: Air Live AP60-EU
Verwandte Artikel
Andere Dokumente
-
AirLive TRAVELER 3G Bedienungsanleitung
-
-
-
AirLive WL-5470POE Quick Setup Manual
-
-
-
Simrad AP60 Bedienungsanleitung
-
Simrad FU80/NF80/QS80 Bedienungsanleitung
-
-