Genie LA 300 A4 Bedienungsanleitung
- Kategorie
- Laminatoren
- Typ
- Bedienungsanleitung

1
LA 300 A4
LAMINIERGERÄT bis DIN A4
Heißlamination
(DE) BEDIENUNGSANLEITUNG 2
(GB) OPERATING INSTRUCTION 7
(IT) ISTRUZIONI OPERATIVE 12
(FR) MODE D’EMPLOI 17
(ES) INSTRUCCIONES DE FUNCIONAMIENTO 22
V 1.15
07.2022
ID: 12469

2
(DE) Bedienungsanleitung
Sehr geehrte Kundin,
Sehr geehrter Kunde,
die Bedienungsanleitung ist Bestandteil dieses Geräts. Sie enthält wichtige Hinweise
für Sicherheit, Gebrauch und Entsorgung. Machen Sie sich vor der Benutzung des
Produkts mit allen Bedien- und Sicherheitshinweisen vertraut. Benutzen Sie das
Produkt nur wie beschrieben und für die angegebenen Einsatzbereiche. Händigen
Sie alle Unterlagen bei Weitergabe des Produkts an Dritte mit aus.
Bestimmungsgemäßer Gebrauch
Das Laminiergerät GENIE LA 300 A4 ist zum Laminieren von Dokumenten bis zu
DIN A4 geeignet. Jede andere Verwendung oder Veränderung gilt als nicht
bestimmungsgemäß und birgt erhebliche Unfallgefahren.
Wichtige Sicherheitshinweise
1. Lesen Sie vor dem ersten Gebrauch des Gerätes diese Bedienungsanleitung
aufmerksam und vollständig durch.
2. Stellen Sie das Gerät nur auf glatten und trockenen Untergrund. Es muss von
allen Seiten frei zugänglich sein. Die Verwendung eines Verlängerungskabels
wird nicht empfohlen!
3. Öffnen oder reparieren Sie das Laminiergerät nicht selbst, sondern bringen Sie
das Gerät im Fall von Schäden zu Ihrem Fachhändler oder wenden Sie sich an
unsere Service-Hotline.
4. Verwenden Sie ausschließlich Folien der richtigen Größe (bis max. DIN A4) und
Dicke (80 bis 125 Micron). Zu dünne Folien führen zu einem Folienstau im Gerät.
5. Berühren Sie nach Inbetriebnahme nicht die heiße Oberfläche des Gerätes.
6. Das Laminiergerät darf aus Sicherheitsgründen nicht von Kindern ohne Aufsicht
Erwachsener benutzt werden.
7. Benutzen Sie das Gerät nie im Freien und in der Nähe von Wasser.
8. Laminieren Sie keine hitzeempfindlichen Materialien, wie z. B. Thermo-Faxpapier.
9. Schütten Sie keinerlei Flüssigkeit in oder auf das Gerät.
10. Führen Sie keine metallischen Gegenstände ein und greifen Sie bitte nicht mit
Ihren Fingern in das Gerät.
11. Das Laminiergerät ist nicht für den gewerblichen Dauerbetrieb geeignet. Nach ca.
120 Minuten Betriebszeit wird empfohlen, es für 30 Minuten auszuschalten.
12. Die Steckdosen sollten sich nah zum Gerät befinden und leicht zugänglich sein.

3
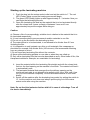
Inbetriebnahme des Laminiergerätes
Laminieren
1. Stecken Sie den Netzstecker in die Steckdose und stellen Sie den Schalter
auf „I“. Die rote LED (Power) leuchtet auf und der Heizvorgang beginnt.
2. Nach ca. 2 - 3 Minuten leuchtet die grüne LED (Ready) auf. Sie können nun
mit dem Laminiervorgang beginnen.
3. Öffnen Sie die Laminierfolie und legen Sie das zu laminierende Material direkt
an die geschlossene Seite. Lassen Sie dabei an den Kanten einen Rand von
ca. 3 bis 5 mm.
Achtung:
a) Wählen Sie jeweils eine Folie der entsprechend passenden Größe im Verhältnis
zum laminierenden Material.
b) Es wird empfohlen nicht mehrere kleinere Materialien in einer Folie zu verarbeiten.
c) Schneiden Sie die Folie nicht vor dem Laminieren zurecht.
d) Das zu laminierende Material darf nicht stärker als 0,5 mm inklusive Folie sein.
e) Sehr dünne oder weiche Materialien, wie z. B. Zeitungspapier oder Servietten
sollten unbedingt nur mit dickeren Folien (100 Micron) laminiert werden. Wir
empfehlen, komplett darauf zu verzichten!
f) Führen Sie keine Laminierfolie ohne Inhalt ein.
g) Verwenden Sie die Laminiertaschen niemals einseitig oder aufgerollt.
h) Verwenden Sie nur Laminierfolien, die auch als solche bezeichnet werden. Andere
Folienarten, wie z. B. Klarsichthüllen sind nicht zum Laminieren geeignet!
4. Führen Sie das in der Laminierfolie steckende Material gerade und mit der
geschlossenen Seite zuerst in die Eintrittsöffnung auf der Vorderseite des
Gerätes ein. Das Material wird nun automatisch eingezogen.
5. Das aus der Austrittsöffnung auf der Rückseite des Gerätes kommende
laminierte Material darf nicht gewaltsam herausgezogen werden. Warten Sie
ab, bis es vollständig aus dem Gerät gelaufen ist. Lassen Sie das laminierte
Material kurz abkühlen!
6. Nach Beendigung des Laminierens schalten Sie das Gerät aus, indem Sie den
Schalter auf „O“ stellen. Lassen Sie das Laminiergerät abkühlen und ziehen
Sie nach Gebrauch immer den Netzstecker.
HINWEIS: Lassen Sie die Laminierfolie bei einem Folien-Stau nicht weiter
einziehen! Schalten Sie bitte das Gerät sofort aus (Schalter „O“)!

4
Folienstau-Beseitigung
1. Um eventuelle Folienstaus zu lösen, ist dieses Gerät mit einer Folienstau-
Funktion ausgestattet. Für diese Funktion kommt der ABS-Knopf auf der
Rückseite des Laminiergerätes zum Einsatz.
2. Kommt es zu einem Folienstau, schalten Sie bitte sofort das Gerät aus, indem
Sie den Schalter auf „O“ setzen und den Netzstecker ziehen. Lassen Sie das
Gerät kurz abkühlen und drücken Sie dann den Anti-Folienstau-
Schiebeschalter ABS in Pfeilrichtung wie angegeben.
3. Halten Sie den ABS-Schalter mit der einen Hand fest und ziehen Sie mit der
anderen Hand die Folie vollständig aus der Eintritts- bzw. Austrittsöffnung des
Gerätes heraus.
4. Nachdem Sie den Folienstau gelöst und den ABS-Schalter losgelassen haben,
geht dieser wieder in seiner Ausgangsposition zurück. Sie können nun das
Gerät wieder vollständig nutzen.
5. Sollte es nun wiederholt zu einem Folienstau kommen, wenden Sie sich bitte
an unsere Service-Hotline.
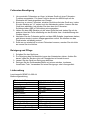
Reinigung und Pflege
1. Schalten Sie das Gerät aus.
2. Zur Reinigung des Gerätes bitte immer den Netzstecker ziehen. Achten Sie
darauf, dass der Stecker nicht mit Flüssigkeiten in Kontakt kommt.
3. Lassen Sie das Gerät zur Reinigung abkühlen.
4. Reinigen Sie die Gehäuseoberflächen mit einem weichen, trockenen,
fusselfreien Tuch. Verwenden Sie keine Reinigungs- oder Lösungsmittel.
Lieferumfang
Laminiergerät GENIE LA 300 A4
Bedienungsanleitung
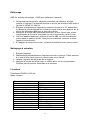
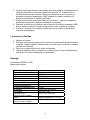
Technische Daten
Stromspannun
g
(
V
)
220-240 >V
A
C, 50 Hz, 1,3
A
Leistun
g
300 W
Laminierbreite 330 mm
Folienstärke 80 - 125 Micron
Folien
g
röße
A
4 max.
A
BS-Funktion Ja
Heizrollen 2
A
ufwärmzeit 3 Min
Laminie
r
en Heißlaminieren
Geschwindi
g
keit 400 mm / min
Maße
(
B x H x T
)
455 x 157 x 63 mm
Gewicht ca. 1,35 k
g
Verpackun
g
(
B x H x T
)
468 x 160 x 66 mm

5
Entsorgung
Informieren Sie sich über die Möglichkeiten der unentgeltlichen Rücknahme
von Altgeräten bei Ihrem Händler.
Die Verpackung besteht aus umweltfreundlichen Materialien, die Sie über
die örtlichen Recyclingstellen entsorgen können. Informieren Sie sich bei
Ihrer Kommune über die Möglichkeiten der korrekten Entsorgung.
Entsorgen Sie Verpackungsmaterialien entsprechend den lokalen
Vorschriften.
Beachten Sie die Kennzeichnung des Verpackungsmaterials bei der
Abfalltrennung, diese sind gekennzeichnet mit Abkürzungen (b) und
Nummern (a) mit folgender Bedeutung: 1–7: Kunststoffe / 20–22: Papier und
Pappe / 80–98: Verbundstoffe.
Das nebenstehende Symbol bedeutet, dass elektrische und elektronische
Altgeräte aufgrund gesetzlicher Bestimmungen getrennt vom Hausmüll zu
entsorgen sind. Entsorgen Sie Ihr Gerät bei der Sammelstelle Ihres
kommunalen Entsorgungsträgers.
Das Gerät und das Verpackungsmaterial sind recycelbar, entsorgen Sie
diese getrennt für eine bessere Abfallbehandlung. Informieren Sie sich bei
Ihrer Kommune über die Möglichkeiten der korrekten Entsorgung. Beachten
sie die folgende Kennzeichnung des Verpackungsmaterials: (a) Nummern,
(b) Abkürzungen und (c) Material mit folgender Bedeutung: 1–7:
Kunststoffe / 20–22: Papier und Pappe / 80–98: Verbundstoffe, sowie (d) Art
der Verpackung. Das Logo gilt nur für Italien.
Das Gerät und das Verpackungsmaterial sind
recycelbar. Entsorgen Sie diese getrennt für eine
bessere Abfallbehandlung. Das Triman-Logo gilt
nur für Frankreich.
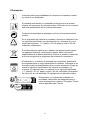
Symbole
Die folgenden Symbole finden Sie auf der Verpackung oder dem Gerät selbst. In
diesem Abschnitt erfahren Sie, was diese Symbole im Einzelnen bedeuten.
Das Siegel «Geprüfte Sicherheit» (GS-Zeichen) bescheinigt, dass das
Produkt den Anforderungen des deutschen
Produktsicherheitsgesetzes (ProdSG) entspricht. Das GS-Zeichen
zeigt an, dass bei bestimmungsgemäßer Verwendung und bei
vorhersehbarer Fehlanwendung des gekennzeichneten Produkts die
Sicherheit und Gesundheit des Nutzers nicht gefährdet sind. Es
handelt sich hierbei um ein freiwilliges. Sicherheitszeichen, das durch
ein
g
eei
g
netes Prüfinstitut aus
g
estellt wurde.

6
Verwenden Sie das Produkt nur in Innenräumen.
Das Symbol gibt an, dass die Bauart des Produkts der Schutzklasse II
entspricht (doppelte Isolierung).
Ein Sicherheitsanschluss an die elektrische Erdung (Masse) ist nicht
erforderlich.
Warnung!
Dieses Gerät ist nicht für die Verwendung durch Kinder vorgesehen.
Vermeiden Sie es, die Einzugsöffnung mit den Händen, Kleidung oder
Haaren zu berühren.
Ziehen Sie den Netzstecker, wenn Sie das Gerät über einen längeren
Zeitraum nicht benutzen. In diesem Gerät befinden sich gefährliche
bewe
g
liche Teile, halten Sie
K
örperteile von bewe
g
lichen Teilen fern.
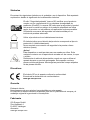
Richtlinien
Das CE-Zeichen auf dem Gerät bestätigt die Konformität.
Die Konformitätserklärung finden Sie unter www.go-europe.com.
Fragen und Service
Lieber Kunde,
wir freuen uns, dass Sie sich für dieses Gerät entschieden haben.
Bei Fragen und Problemen steht Ihnen unsere Service-Hotline unter der
Telefonnummer +49 (0)180 5 007514 (Kosten aus dem dt. Festnetz bei Drucklegung:
14ct/Min., mobil maximal 42ct/Min.) zur Verfügung.
Weitere Informationen finden Sie auch in unserem Retouren-Portal (RMA) im Bereich
Support auf unserer Internetseite rma.go-europe.com.
Eine Rücksendung erfolgt unter Beifügung des Kaufbelegs und idealerweise in der
Originalverpackung an:
WSG Wilhelmshavener Service Gesellschaft mbH
Krabbenweg 14, 26388 Wilhelmshaven, Deutschland
Hersteller
GO Europe GmbH
Zum Kraftwerk 1
D-45527 Hattingen
Deutschland
www.go-europe.com

7
(GB) Operating Instruction
Dear customer,
the operating manual represents a component part of the device. It contains
important information regarding safety, use and disposal. Familiarize yourself with all
the operating and safety information before starting to use the device. Only use the
device as described and for the purpose for which it is intended. Hand over all the
documents with the device if it is transferred to third parties.
Intended Use
The laminator is only suitable for laminating documents. Any other use or
modification shall be deemed to be improper and involves substantial risk of
accidents.
Important advice about safety
1. Read through these operating instructions carefully and completely before using
the machine for the first time.
2. Only put the machine on a flat and dry surface. It must be freely accessible from
all sides. It is not recommended to use an extension cable!
3. Do not open or repair the laminating machine yourself but take it to your
specialized dealer whenever it is damaged, or contact our service hotline.
4. Only use films of the correct size (up to DIN A4 max.) and thickness (80 to 125
microns). Films that are too thin cause a blockage of the film in the machine.
5. Do not touch the hot surface of the machine after it has started up.
6. The laminating machine is not allowed – for safety reasons – to be used by
children, unless they are supervised by an adult.
7. Never use the machine outdoor or near water.
8. Hot lamination: do not laminate in this mode any materials that are sensitive to
heat with this machine, like thermo-fax paper for example. These materials are
only suitable for cold lamination.
9. Do not pour or spill any liquid into the machine or onto it.
10. Do not insert any metal objects into the machine. Please do not grasp inside the
machine with your fingers.
11. The laminating machine is unsuitable for constant use commercially. It is
recommended to switch off „O“ the machine for 30 minutes, after it has been
operating for a period of approximately 120 minutes.
12. The socket should be near the device and easily accessible.

8
Starting up the laminating machine
1. Push the plug into the mains socket outlet and set the switch to ’I’. The red
LED (Power) lights up and the heating process will begin.
2. The green LED (Ready) lights up after approximately 2 - 3 minutes. Now you
can begin the laminating process.
3. Open the laminating film and lay the material that is to be laminated directly
onto the closed side. Leave a margin of between 3 mm and 5 mm
approximately beyond the edges while doing so.
Caution:
a) Choose a film of correspondingly suitable size in relation to the material that is to
be laminated respectively.
b) It is not recommended to process several smaller materials in one film.
c) Do not cut up the film before the laminating is done.
d) The material that is to be laminated, is not allowed to be thicker than 0.5 mm
including the film.
e) It is imperative to only laminate very thin or soft materials, like newspaper or
serviettes for example, with thicker films (100 microns). We recommend refraining
from any attempt to do so!
f) Do not insert any laminating film without the contents.
g) Never utilize laminating pockets on one side or when they are rolled up.
h) Only utilize laminating foils that are also described as such. Other kinds of film, like
transparent wallets for example, are unsuitable for laminating!
4. Insert the material within the laminating film straight and with the closed side
first into the feed opening on the machine’s front side. The material will feed it
in automatically now.
5. The laminated material that emerges from the delivery opening on the
machine’s back side is not allowed to be pulled out by force. Wait until it has
run out of the machine completely. Let the laminated material to cool down
briefly!
6. Switch off the machine after the laminating has ended, by setting the switch to
‘O’. Let the machine cool down and always pull the plug out of the mains
socket outlet after using the machine.
Note: Do not feed the laminator further with foil in case of a blockage. Turn off
the device immediately!

9
Clearing a blockage of the film
1. This machine is equipped with a film blockage function in order to resolve any
blockage of the film. Such function is featured by ABS button on BACK SIDE
of the laminator.
2. Please switch off the machine immediately by setting the switch to “O” and pull
out the plug from the mains socket outlet, let the machine to cool down briefly
(for hot laminating) and push the ‘ABS’ anti-film blockage button on back as
direction indicated by the arrow sign, whenever there is a blockage of the film.
3. Hold the ABS switch firmly with one hand and pull out the film completely from
the machine’s feed opening or delivery opening with the other hand.
4. After you have resolved the blockage of the film and released the ABS switch,
this will go back to its starting position again. Now you can use the machine
again completely.
5. Please contact our service hot line if there is a blockage of the film again.
Cleaning and care
1. Switch off the unit.
2. Please pull out the plug from the mains socket outlet always, in order to clean
the machine. Take care while doing so that the plug does not come into
contact with any liquids.
3. Allow the machine to cool down before cleaning it.
4. Clean the surface of the housing with a soft, dry, lint-free cloth. Do not use any
solvents or cleaning agents.
Delivery
Laminator GENIE LA 300 A4
Instruction manual
Technical data
Mains volta
g
e
(
V
)
220-240 >V
A
C, 50 Hz, 1.3
A
Consumption 300 W
Laminatin
g
width 330 mm
Film of utilizable thickness 80 - 125 Micron
Foil size
A
4 max.
A
BS function Yes
Heatin
g
rollers 2
Heatin
g
up time 3 Min
Laminate Hot lamination
Speed 400 mm / min
Dimensions
(
W x H x D
)
455 x 157 x 63 mm
Wei
g
ht approx. 1.35 k
g
Packin
g
(
W x H x D
)
468 x 160 x 66 mm

10
Disposal
Find out about the possibilities of taking back used appliances free of
charge from your dealer.
The packaging is made of environmentally friendly materials that you can
dispose of at local recycling points. Advice on the options with which to
dispose of your old device can be obtained from your municipal or local
administration offices.
Packaging materials must be disposed of according to local regulations.
Observe the identification on the packaging materials during the waste
sorting process; they are identified by abbreviations (b) and numbers (a)
which have the following significance: 1–7: plastic/20–22: paper and
cardboard/80–98: composite materials.
The adjacent symbol indicates laws dictate that electrical and electronic
apparatus no longer required must be disposed of separate from
domestic waste. Dispose of your device at a collection point provided by
your local public waste authority. Packaging materials must be disposed
of according to local regulations.
The device and the packaging material can be recycled, so sort them
prior to disposal for better waste management. Contact your local
authorities for information on the various options available to ensure
correct disposal. Observe the following identifications of the packaging
materials: (a) numbers, (b) abbreviations and (c) materials which have
the following significance: 1–7: plastics / 20–22: paper and cardboard /
80–98: composite materials and (d) type of packaging. The logo is only
applicable to Italy.
The device and packaging materials can be
recycled; sort them for disposal to simplify waste
management. The Triman logo is only relevant for
France.

11
Symbols
The following symbols are provided on the packaging or on the device itself. This
section explains the significance of the individual symbols.
The «Geprüfte Sicherheit» mark (GS tested safety mark) certifies
that the product satisfies the requirements defined by the German
Product Safety Act (ProdSG).
The GS tested safety mark indicates that when implemented for its
intended use and in the event of foreseeable misuse the identified
product will not endanger the safety and health of the user. It
concerns a voluntary safety mark which was issued by an authorized
testin
g
institute.
Only use the product indoors.
The symbol indicates that the design of the product complies with
Protection Class II (double insulation). A safety connection to the
electrical earthing (ground) is not necessary.
Warning!
This device is not intended to be used by children. Prevent hands,
clothes and hair coming into contact with the insertion slot.
Unplug the power plug if the device will not be used for a longer
period. This device is equipped with hazardous moving parts, so
ensure
y
ou keep limbs well awa
y
from the movin
g
parts
Guidelines
The CE Mark on the device confirms conformity.
The Declaration of Conformity can be read online at
www.go-europe.com.
Warranty
Dear customer,
We are delighted that you have chosen this equipment.
In the case of a defect, please return the device together with the receipt and original
packing material to the point of sale.
Manufacturer
GO Europe GmbH
Zum Kraftwerk 1
D-45527 Hattingen
Germany
www.go-europe.com

12
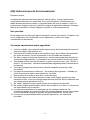
(IT) Istruzioni operative
Gentile Cliente,
le istruzioni per l'uso sono parte integrante di questo apparecchio. Contiene
informazioni importanti sulla sicurezza, l'uso e lo smaltimento. Familiarizzare con
tutte le istruzioni operative e di sicurezza prima di usare il prodotto. Usare il prodotto
solo come descritto e per le aree di impiego Consegnare tutti i documenti quando si
passa il prodotto a terzi.
Destinazione d'uso
Il laminatore è adatto solo per la plastificazione dei documenti. Qualsiasi altro utilizzo
o la modifica deve essere considerato improprio e comporta notevoli rischi d’incidenti.
Importanti consigli sulla sicurezza
1. Leggere con attenzione e fino in fondo queste istruzioni operative prima di usare
l'apparecchio per la prima volta.
2. Sistemare l'apparecchio solo su una superficie piana e asciutta. Deve essere
completamente accessibile da tutte le parti. Si raccomanda di non utilizzare
prolunghe!
3. Non aprire o riparare da soli la plastificatrice, in caso fosse danneggiata portarla
a un tecnico specializzato o contattare il nostro centro di assistenza telefonica.
4. Usare solo pellicole di dimensioni (fino a DIN A4 max.) e spessore (80 a 125
micron) corretti. Se la pellicola è troppo sottile si blocca all'interno della macchina.
5. Non toccare la superficie bollente della macchina dopo che è stata avviata.
6. Non è consentito ai bambini, a meno che ci sia la supervisione di un adulto, per
motivi di sicurezza - di utilizzare la macchina plastificatrice.
7. Non usare mai la macchina all'aperto o vicino all'acqua.
8. Non plastificare con questo sistema materiali sensibili al calore, come la carta
termica per fax. Questi materiali sono adatti solo alla plastificazione a freddo.
9. Non versare o schizzare sostanze liquide sopra la macchina o al suo interno.
10. Non inserire nella macchina oggetti di metallo. Non infilare le dita all'interno della
macchina.
11. Questo apparecchio non è adatto a un uso commerciale continuato. Si
raccomanda di spegnere l'apparecchio per 30 minuti, dopo che ha funzionato per
un periodo di circa 120 minuti.
12. La presa deve trovarsi in prossimità dell'apparecchio ed essere facilmente
accessibile.

13
Avviare la plastificatrice
1. Inserire la spina nella presa di corrente e impostare l'interruttore su ’I’.
L'indicatore LED rosso (Power) si accende e inizia il processo di
riscaldamento.
2. Il LED verde (Ready) si accende dopo circa 2 - 3 minuti. Adesso si può iniziare
la plastificazione.
3. Aprire la pellicola plastificante e sistemare direttamente sopra il lato chiuso il
materiale da plastificare. Lasciare un margine con le estremità compreso tra 3
e 5 mm.
Attenzione:
a) Scegliere una pellicola dalle dimensioni adatte al materiale che si vuole plastificare.
b) Non si raccomanda di plastificare diversi articoli di piccole dimensioni su una sola
pellicola.
c) Non tagliare la pellicola prima di aver completato la plastificazione.
d) Il materiale da plastificare non può avere uno spessore superiore a 0,5 mm,
pellicola compresa.
e) È fondamentale plastificare solo materiali molto sottili o morbidi, come carta o
tovagliolini ad esempio con pellicola più spessa (100 micron). Si raccomando di
evitare di farlo!
f) Non inserire la pellicola senza contenuto.
g) Non usare buste per la plastificazione su un lato o quando sono arrotolate.
h) Utilizzare solo pellicola adatta per la plastificazione. Altri tipi di pellicola come
buste trasparenti ad esempio non sono adatte alla plastificazione!
4. Inserire nella fessura di alimentazione il materiale all'interno della pellicola in
modo che sia dritto e con il lato chiuso davanti sul lato anteriore
dell'apparecchio. Adesso il materiale entrerà automaticamente.
5. Non si può tirare con forza il materiale plastificato che esce dalla fessura
d'uscita sul lato posteriore dell'apparecchio. Attendere fino a che si trova
completamente fuori. Lasciare raffreddare il materiale per un attimo!
6. Al termine della plastificazione spegnere l'apparecchio, spostando l'interruttore
sulla posizione ”O”. Lasciare raffreddare l'apparecchio e togliere sempre la
spina dalla presa dopo aver utilizzato la macchina.
Nota: In caso la pellicola si blocchi internamente non inserirne altra. Spegnere
immediatamente l'apparecchio!

14
Rimuovere la pellicola bloccata
ABS (for clearing blockage) = ABS (per l'eliminazione del blocco)
1. Questo apparecchio è dotato di una funzione di sblocco della pellicola per
risolvere problemi di questo tipo. Questa funzione è attivata dal tasto ABS sul
LATO POSTERIORE della plastificatrice GENIE LA 300 A4.
2. Spegnere immediatamente l'apparecchio impostando l'interruttore su “O” ed
estrarre la spina dalla presa, lasciare raffreddare brevemente l'apparecchio e
premere il tasto ‘ABS’ contro il blocco della pellicola sul retro come indicato
dalla freccia, ogni volta che la pellicola si blocca.
3. Tenere saldamente con una mano l'interruttore ABS ed estrarre
completamente la pellicola dalla fessura d'entrata o d'uscita della macchina
con l'altra mano.
4. Dopo aver eliminato il blocco e rilasciato l'interruttore ABS, questo tornerà di
nuovo sulla posizione di partenza. Adesso si può nuovamente usare
l'apparecchio.
5. Contattare il centro di assistenza telefonico se la pellicola si blocca
nuovamente.
Pulizia e manutenzione
1. Spegnere l'unità.
2. Staccare sempre la spina dalla presa prima di pulire l'apparecchio. Fare
attenzione che la spina non venga a contatto con sostanze liquide.
3. Fare raffreddare l'apparecchio prima di pulirlo.
4. Pulire le superfici dell’involucro esterno con un panno morbido, asciutto e
antipilling. Non utilizzare detergenti o solventi.
Consegna
Il laminatore GENIE LA 300 A4
Istruzioni per l’uso
Dati tecnici
Volta
g
g
io elettrico
(
V
)
220-240 >V, 50 Hz, 1,3
A
Consumo 300 W
A
mpiezza di plastificazione 330 mm
Spessore della pellicola utilizzabile 80 - 125 Micron
Dimensione della lamina
A
4 max.
Funzione ABS Sì
Rulli riscaldanti 2
Tempo di riscaldamento 3 Min
Laminato Laminazione a caldo
Velocità 400 mm / min
Dimensioni
(
L x
A
x P
)
455 x 157 x 63 mm
Peso ca. 1,35 k
g
Imballa
gg
io
(
L x A x P
)
468 x 160 x 66 mm

15
Smaltimento
Informati sulle possibilità di ritirare gratuitamente gli apparecchi usati
dal tuo rivenditore.
I materiali d’imballo sono ecocompatibili e si lasciano riciclare nei centri
di raccolta differenziata locali. Si consiglia di informarsi presso il proprio
comune circa le possibilità di uno smaltimento corretto.
Smaltire i materiali d’imballo secondo le norme locali vigenti.
Osservare in sede di raccolta differenziata i codici riportati sui materiali
d’imballo, composti da sigle (b) e cifre (a) con il seguente significato:
1–7: materiale plastico / 20–22: carta e cartone / 80–98: materiali
compositi.
Il simbolo qui accanto indica che per legge non è consentito smaltire
apparecchi elettrici ed elettronici in disuso insieme ai normali rifiuti
domestici. Smaltire l’apparecchio presso un punto di raccolta istituito
dalla propria società di smaltimento rifiuti comunale.
L’apparecchio e i materiali d’imballo sono riciclabili, smaltirli pertanto
separatamente per un migliore trattamento dei rifiuti. Si consiglia di
informarsi presso il proprio comune circa le possibilità di uno
smaltimento corretto. Osservare i seguenti codici riportati sui materiali
d’imballo: (a) cifre, (b) sigle e (c) materiale con il seguente significato:
1–7: materiale plastico / 20–22: carta e cartone / 80–98: materiali
compositi e (d) tipo di imballaggio. Il logo vale solo per l’Italia.
L’apparecchio e i materiali d’imballo sono
riciclabili, smaltirli pertanto separatamente per un
migliore trattamento dei rifiuti. Il logo Triman vale
solo per la Francia.

16
Simboli
La confezione o il dispositivo riportano dei simboli. Il seguente paragrafo illustra in
dettaglio il significato dei vari simboli.
Il marchio GS «Geprüfte Sicherheit» (Sicurezza verificata) certifica
che il prodotto soddisfa i requisiti della Legge tedesca sulla
sicurezza dei prodotti e degli apparecchi (ProdSG).
Il marchio GS indica che la sicurezza e la salute dell’utilizzatore non
sono compromessi quando il prodotto contrassegnato viene usato
secondo gli usi previsti e nei casi di uso improprio ragionevolmente
prevedibili. Si tratta di un marchio di certificazione volontario,
rilasciato da un or
g
ano di controllo idoneo.
Utilizzare il prodotto solo in ambienti interni.
Il simbolo indica che il design costruttivo del prodotto corrisponde
alla classe di protezione II. (doppio isolamento).
Non è necessario prevedere un collegamento di sicurezza con
messa a terra (massa).
Avvertenza!
L’apparecchio non è destinato all’uso da parte di bambini. Evitare il
contatto della fessura di caricamento con mani, indumenti o capelli.
Scollegare la spina dalla rete di alimentazione quando non si utilizza
l’apparecchio per un periodo prolungato. L’apparecchio contiene
componenti mobili pericolosi, tenere pertanto lontano le parti del
corpo dai componenti mobili.
Linee guida
Il marchio CE sull’apparecchio attesta la conformità.
La dichiarazione di conformità è disponibile su
www.go-europe.com.
Garanzia
Gentile cliente,
grazie per aver acquistato questo prodotto di qualità.
In caso di difetti si prega di ritornare l'apparecchio, completo di imballo originale e
scontrino di acquisto, al punto vendita dove è stato effettuato l'acquisto.
Produttore
GO Europe GmbH
Zum Kraftwerk 1, D-45527 Hattingen, Germania
www.go-europe.com

17
(FR) Mode d’emploi
Cher client,
le mode d'emploi fait partie de l'appareil. Il contient des informations importantes pour
votre sécurité, sur l'utilisation et l'élimination de l'appareil. Familiarisez-vous avec
toutes les instructions d'utilisation et les consignes de sécurité avant d'utiliser le
produit. N'utilisez celui-ci que comme décrit dans le mode d'emploi et pour les
applications prévues. Si vous le transmettez à des tiers, remettez-leur l'ensemble de
la documentation.
Utilisation prévue
La plastifieuse est seulement approprié pour la stratification des documents. Toute
autre utilisation ou modification est réputée abusive et comporte des risques
importants d'accidents.
Mises en garde importantes
1. Lisez attentivement le mode d’emploi dans son intégralité avant d’utiliser le
produit pour la première fois.
2. L’appareil doit impérativement être posé sur une surface plane et sèche. Il doit
être accessible de tous les côtés. Il est déconseillé d’utiliser une rallonge.
3. N’essayez jamais d’ouvrir ou de réparer la plastifieuse par vous-même :
Apportez-la dans un magasin spécialisé ou contactez notre service-client.
4. N’utilisez que des films de la taille (≤ DIN A4) et de l’épaisseur (80 à 125 microns)
prévues. Les films trop minces peuvent rester coincés dans l’appareil.
5. La surface de l’appareil est portée à haute température pendant le
fonctionnement ; ne la touchez pas.
6. Pour des raisons de sécurité, un enfant ne peut utiliser la plastifieuse que sous la
surveillance d’un adulte.
7. Ne jamais utiliser la plastifieuse en extérieur ou à proximité d’eau.
8. N’utilisez pas ce mode pour les matériaux ne résistant pas à la chaleur, comme
le papier fax thermique, par exemple. Ces matériaux ne supportent que la
plastification à froid.
9. Veillez à ce qu’aucun liquide ne soit versé sur ou dans l’appareil.
10. N’insérez aucun objet métallique dans l’appareil et ne mettez jamais les doigts à
l’intérieur.
11. Cette plastifieuse n’est pas conçue pour une utilisation intensive en
environnement commercial. Au bout de 30 minutes d’utilisation, il est
recommandé de la laisser éteinte pendant 120 minutes.
12. La prise de courant doit être située près de l’appareil et rester accessible en
permanence.

18
Démarrage
1. Branchez la plastifieuse, puis mettez le bouton coulissant sur ’I’. Le témoin
rouge (Power) s’allume et l’appareil se met à chauffer.
2. Le témoin verd Ready) s’allume au bout d’environ 2 - 3 minutes, indiquant que
le préchauffage est terminé. Vous pouvez maintenant utiliser l’appareil.
3. Ouvrez le film à plastifier, glissez le document à l’intérieur, jusqu’au fond, de
manière à ce qu’il touche la partie fermée. Laissez un espace de 3 à 5 mm au-
delà des bords.
Attention :
a) Choisissez un film correspondant à la taille du document à plastifier.
b) Il est déconseillé de mettre plusieurs petits documents dans la même pochette.
c) Ne coupez pas le film avant de le plastifier.
d) Le matériau à plastifier ne doit pas excéder une épaisseur de 0,5 mm, film compris.
e) Les documents très fins ou très fragiles (ex : journaux ou serviettes de table)
doivent impérativement être plastifiés dans des films plus épais (100 microns). De
manière générale, nous vous le déconseillons fortement!
f) Ne plastifiez pas de films vides.
g) N’utilisez jamais de pochettes d’un seul côté, ni de pochettes enroulées.
h) N’utilisez que les pochettes explicitement destinées à la plastification ; les autres
types de pochettes (ex : chemises transparentes) ne peuvent pas être plastifiées !
4. Insérez le document dans sa pochette tout droit dans la fente avant de
l’appareil, le côté fermé en premier. La pochette est ensuite avalée
automatiquement.
5. Lorsque la pochette ressort par l’autre côté, ne tirez surtout pas dessus,
laissez-la sortir d’elle-même. Puis laissez l’appareil refroidir brièvement.
6. Une fois la plastification terminée, éteignez l’appareil en mettant le bouton sur
ARRÊT (‘„O“’). Débranchez-le, puis laissez-le refroidir impérativement.
Remarque : En cas de blocage, ne mettez pas d’autre film dans l’appareil !
Éteignez-le immédiatement !

19
Déblocage
ABS (for clearing a blockage) = ABS (pour débloquer l’appareil)
1. Cet appareil est équipé d’un dispositif permettant de débloquer les films
coincés à l’intérieur. Ce dispositif s’active au moyen de la touche ABS située à
l’arrière du GENIE LA 300 A4.
2. Éteignez immédiatement l’appareil en mettant le bouton sur “O”, débranchez-
le, laissez-le refroidir brièvement s’il était en mode chaud, puis appuyez sur la
touche de déblocage ABS dans le sens de la flèche.
3. Maintenez la touche ABS fermement enfoncée, et avec l’autre main, sortez
complètement le film de la fente avant (ou de la fente arrière, selon le cas).
4. Une fois l’appareil débloqué, relâchez la touche ABS, qui doit normalement
revenir dans sa position initiale. Vous pouvez maintenez continuer à utiliser
l’appareil comme avant.
5. Si l’appareil se bloque à nouveau, contactez la hotline de notre service client.
Nettoyage et entretien
1. Éteignez l'appareil.
2. Débranchez systématiquement l’appareil avant de le nettoyer. Faites attention
à ce que la fiche mâle n’entre en contact avec aucun liquide.
3. Laissez l’appareil refroidir avant de le nettoyer.
4. Nettoyez la surface du boîtier avec un chiffon doux, sec et non pelucheux.
N'utilisez pas de produits d'entretien et de solvants.
Livraison
Plastifieuse GENIE LA 300 A4
Mode d´emploi
Données techniques
Tension secteur
(
V
)
220-240 >V
A
C, 50 Hz, 1,3
A
Consommation 300 W
Lar
g
eur de plastification 330 mm
É
paisseur de film 80 - 125 Micron
Taille de la feuille
A
4 max.
Fonction ABS Oui
Rouleaux chauffants 2
Temps de préchauffa
g
e 3 Min
Laminé Pellicula
g
e à chaud
Vitesse 400 mm / min
Dimensions
(
L x H x P
)
455 x 157 x 63 mm
Poids environ. 1,35 k
g
Emballa
g
e
(
L x H x P
)
468 x 160 x 66 mm

20
Élimination
Informez-vous sur les possibilités de reprise gratuite des appareils
usagés chez de votre revendeur.
L'emballage est constitué de matériaux recyclables que vous pouvez
apporter à des centres de collecte locaux qui se chargent de son
recyclage. Renseignez-vous sur les possibilités d'élimination des
déchets auprès de l’administration locale.
Les matériaux d'emballage doivent être éliminés conformément aux
réglementations locales.
Tenez compte du marquage sur les emballages lorsque vous triez les
déchets ; ceux-ci sont dotés d'abréviations (b) et de numéros (a)
signifiant ce qui suit : 1–7 : plastiques / 20–22 : papiers et cartons / 80–
98 : composites.
Les piles défectueuses ou usagées doivent être recyclées
conformément à la directive 2006/66/CE et à ses avenants. Apportez
les piles et / ou l'appareil aux centres de collecte qui vous auront été
proposés.
L'appareil et les emballages sont recyclables. Éliminez-les séparément
pour une meilleure gestion des déchets. Informez-vous auprès de votre
commune sur les possibilités d'une élimination adéquate. Tenez
compte du marquage suivant sur les emballages : (a) numéros, (b)
abréviations et (c) matériau signifiant ce qui suit :
1–7 : plastiques / 20–22 : papiers et cartons / 80–98 : composites, ainsi
que (d) genre d'emballage. Ce logo n'est valable que pour l'Italie.
L'appareil et les matériaux d'emballage sont
recyclables, éliminez-les séparément pour une
meilleure gestion des déchets. Le logo Triman est
valable en France uniquement.
Points de collecte sur
www.quefairedemesdechets.fr
Privilégiez la réparation ou le don de votre
appareil !
Seite wird geladen ...
Seite wird geladen ...
Seite wird geladen ...
Seite wird geladen ...
Seite wird geladen ...
Seite wird geladen ...
Seite wird geladen ...
Seite wird geladen ...
-
 1
1
-
 2
2
-
 3
3
-
 4
4
-
 5
5
-
 6
6
-
 7
7
-
 8
8
-
 9
9
-
 10
10
-
 11
11
-
 12
12
-
 13
13
-
 14
14
-
 15
15
-
 16
16
-
 17
17
-
 18
18
-
 19
19
-
 20
20
-
 21
21
-
 22
22
-
 23
23
-
 24
24
-
 25
25
-
 26
26
-
 27
27
-
 28
28


Genie LA 300 A4 Bedienungsanleitung
- Kategorie
- Laminatoren
- Typ
- Bedienungsanleitung
in anderen Sprachen
- English: Genie LA 300 A4 Owner's manual
- français: Genie LA 300 A4 Le manuel du propriétaire
- español: Genie LA 300 A4 El manual del propietario
- italiano: Genie LA 300 A4 Manuale del proprietario
Verwandte Artikel
Andere Dokumente
-
Olympia A 296 PLUS Bedienungsanleitung
-
Olympia A 245 Combo Benutzerhandbuch
-
-
Olympia A 6040 Bedienungsanleitung
-
-
-
Olympia A 350 Combo Bedienungsanleitung
-
Olympia A 230 Plus Bedienungsanleitung
-