
HP JetAdvantage Security Manager -
User Guide
ZUSAMMENFASSUNG
HP JetAdvantage Security Manager is a security compliance solution to create a security policy that assesses and monitors
the security settings for a eet of HP products.


Inhaltsverzeichnis
1 Introduction .................................................................................................................................................................................................1
2 Getting started with Security Manager....................................................................................................................................................3
Access the Security Manager application ...........................................................................................................................................3
Features of the Security Manager .......................................................................................................................................................3
Allgemeine Steuerungselemente und Benachrichtigungen............................................................................................................5
Was Sie zur Verfügung stellen müssen ..............................................................................................................................................6
3 Einrichten von Security Manager..............................................................................................................................................................7
Kongurieren der Einstellung von Security Manager .......................................................................................................................7
Congure General settings ...................................................................................................................................................................7
Install licenses.........................................................................................................................................................................................8
Set up Instant On Security ................................................................................................................................................................. 10
Congure the email server settings................................................................................................................................................. 13
Set up global credentials.................................................................................................................................................................... 14
4 Create a security policy........................................................................................................................................................................... 17
Policies page navigation..................................................................................................................................................................... 17
Create a policy ..................................................................................................................................................................................... 17
Edit a policy .......................................................................................................................................................................................... 18
Symbole im Richtlinien-Editor.................................................................................................................................................. 18
Set severity, remediation, and unsupported behavior to policy items in Quick Settings ............................................... 19
Set policy options for a single item ................................................................................................................................ 20
Set policy options for all the items or for a category .................................................................................................. 21
Set policy options for Firmware Security Assessment Reporting ............................................................................ 21
Export and Import policies................................................................................................................................................................. 21
Export a policy ............................................................................................................................................................................ 22
Import a policy............................................................................................................................................................................ 22
5 Using Security Manager .......................................................................................................................................................................... 23
Add and edit device information....................................................................................................................................................... 23
Erstellen einer Gruppe............................................................................................................................................................... 23
Erstellen einer manuellen Gruppe .................................................................................................................................. 23
Create an Automatic Group.............................................................................................................................................. 24
Discover devices ......................................................................................................................................................................... 25
Use Automatic Discovery to add or modify devices to a group ................................................................................. 25
Hinzufügen oder Ändern von Geräten zu einer Gruppe über die manuelle Erkennung......................................... 26
Edit a discovery task ......................................................................................................................................................... 27
Devices page navigation............................................................................................................................................................ 28
Export device details.................................................................................................................................................................. 29
Edit device and group information .......................................................................................................................................... 29
iii

Manage Groups.................................................................................................................................................................. 29
Add, remove, or delete a device from a group.............................................................................................................. 31
Assign a license manually ................................................................................................................................................ 31
Set device credentials....................................................................................................................................................... 32
Festlegen der SSL/TLS-Erzwingung............................................................................................................................... 34
Bewertung und Korrektur .................................................................................................................................................................. 34
Ausführen oder Planen einer Bewertung oder Korrektur.................................................................................................... 34
Task page navigation................................................................................................................................................................. 36
Modify a task............................................................................................................................................................................... 37
Starten einer Aufgabe....................................................................................................................................................... 37
Edit a task ........................................................................................................................................................................... 37
Delete a task....................................................................................................................................................................... 37
Anzeigen von Bewertungsergebnissen .................................................................................................................................. 38
View results from the Devices page ............................................................................................................................... 38
View results from the Reports page............................................................................................................................... 38
Setup alert subscriptions ................................................................................................................................................................... 38
Alert (subscriptions) page navigation...................................................................................................................................... 38
Create an alert subscription...................................................................................................................................................... 39
Edit, rename, or delete an alert subscription......................................................................................................................... 39
Run reports .......................................................................................................................................................................................... 40
Export and Schedule reports............................................................................................................................................................. 41
Generate reports and instantly export the reports .............................................................................................................. 41
Erstellen eines Zeitplans zum Exportieren von Berichten................................................................................................... 42
Edit or delete a created schedule............................................................................................................................................. 43
Export reports to customized locations ................................................................................................................................. 43
6 Use the HP Security Manager certicate management solution ..................................................................................................... 45
7 Position des Netzwerkports................................................................................................................................................................... 47
8 Rechtliche Hinweise................................................................................................................................................................................. 49
End User License Agreement ............................................................................................................................................................ 49
Copyrights ............................................................................................................................................................................................ 52
log4net license............................................................................................................................................................................ 52
nhibernate license...................................................................................................................................................................... 54
Anhang A Use the HP Security Manager certicate management solution....................................................................................... 61
Anhang B Position des Netzwerkports.................................................................................................................................................... 63
Anhang C Rechtliche Hinweise.................................................................................................................................................................. 65
End User License Agreement ............................................................................................................................................................ 65
Copyrights ............................................................................................................................................................................................ 68
log4net license............................................................................................................................................................................ 68
nhibernate license...................................................................................................................................................................... 70
iv

Introduction1
HP JetAdvantage Security Manager (HP Security Manager) is a security compliance solution for a eet of HP
products. It enables administrators to create a security policy to reduce network risks and monitor security for a
eet of printers.
The key benets of using Security Manager are the following:
● Easily and quickly create device security policies. Intelligent prompts guide you through the process by
providing advice and recommendations as you congure the policy.
● Add device IP addresses or hostnames using the following methods:
– Import a text or XML le that contains the device information.
– Automatically or manually discover devices.
● Automatically assess/remediate devices when they are rst connected to the network using the Security
Manager Instant-On Security feature and allowing automatic remediation.
● Create a schedule to run assessments or assess/remediate devices at preset intervals.
To learn more about HP Security Manager see the following topics:
● Getting started with Security Manager auf Seite 3
● Einrichten von Security Manager auf Seite 7
● Using Security Manager auf Seite 23
Introduction
1

2 Kapitel 1 Introduction

Getting started with Security Manager2
Security Manager version 3.4 is a web-based application supported by the following browsers:
● Internet Explorer (IE) 11 or newer
● Edge 79 or newer (Chromium based)
● Chrome 60 or newer versions.
To view the main topics in HP Security Manager Home page, see Introduction auf Seite 1
The following sections will help you to get started with HP Security Manager:
Access the Security Manager application
Follow these steps to log into Security Manager:
1. Install HP Security Manager.
HINWEIS: For HP Security Manager installation instructions, see the HP JetAdvantage Security Manager
Installation and Setup Guide.
2. Make sure you have a supported web browser, and then open HP JetAdvantage Security Manager.
3. Make sure to add the user name to any of the following HPIPSC group for remote access to the web service:
● HPIPSC
● HPIPSC_Guest
● HPIPSC_Analyst
4. Type your username (Domain\username), password, and then click Login.
HINWEIS: If the login operation fails, HP Security Manager displays an error notication message. A
maximum of 5 invalid password attempts will lock the account for 30 minutes.
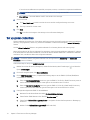
Features of the Security Manager
The HP Security Manager features are always present on the top menu tabs, providing a user to easily access
each function.
The top menu tabs include:
● Dashboard
The Dashboard tab is the default page that displays after a successful login. It provides a graphical overview
of the device eet in the following tabs:
– Current Fleet Status: Displays the current devices in the eet and provides the following information:
Getting started with Security Manager
3

○ Number of devices: The total number of devices in the eet and the number of licensed and
unlicensed devices.
○ The number of licenses for the devices.
○ Assessment status of the devices.
○ Not assessed status of the devices.
○ The number of days remaining for license to Expire.
– Historical Fleet Status: Displays the history of the devices in the eet depending on the number of
days selected in the Last Day(s) edit box. The Show data percentage option displays the percentage or
number in the report.
HINWEIS: The maximum selection for the number of days in the Last Day(s) edit box is “90”.
Depending on the range selected, it provides a comparative study of the rst and last date on the range
for the total number of devices, the assessment status, and not assessed status of devices.
HINWEIS: To select the rst date of the range, click on the bar graph. The last day of the range is
usually the current date.
● Policies
The Policies tab displays information of the number of policies and the status for each policy (valid, invalid,
or new). It allows you to create, edit, and import policies.
● Devices
The Devices tab displays information of the number of devices on the network, device identity information
(IP address, hostname, and model name), whether a device is supported, whether a license is assigned, date
assessed, most recent policy name used, and a group name associated with a device. Icons indicate whether
the device passed the assessment and the device status.
Use the Devices tab to perform the following tasks:
– Create a group to associate devices to the group and manage these groups.
– Discover devices connected to the network and add them to a group.
– Create a task to assess or assess and remediate a group of devices.
– Assign licenses, set credentials and verify devices.
● Tasks
The Tasks tab displays information of the status of tasks (completed, in progress, or scheduled), name and
type of a task, associated policy, group name, and the schedule of the tasks (the task last ran and the task
schedule to run). It provides options to create and schedule new assessment /remediation tasks. You can
schedule a task to run once or to repeat as necessary, such as daily, weekly, or monthly.
Use the New Task icon from the Policies, Devices, or Tasks tabs to create a new task, and then view the
assessments /remediations of devices in the Task tab.
● Alerts
The Alerts tab allows a user to create alerts based on set conditions for device groups and receive
notications.
4
Kapitel 2 Getting started with Security Manager

Use the Alert icon to create alerts from the Devices or Alerts tabs to receive notication.
HINWEIS: To receive alert notications, make sure to set the SMTP Server in the Automated Email
settings.
● Reports
The Reports tab provides options to run reports that display information about devices, policies, and
assessments.
Use the Executive Summary report in the Reports tab to review recommendations and device status. For
more information about the various reports (Devices assessed, Devices not assessed, Policy items assessed,
Recommendations, and Remediations), see,
Run reports auf Seite 40.
● Settings icon ( )
Displays the following options:
– Settings: Allows you to congure global settings.
– About HPSM: Displays a graphical overview of the software.
– Help: Provides information and instructions for HP Security Manager.
– Help (whitepapers): Displays list of Whitepaper links with additional Help information.
● Prole icon ( )
Displays the username (role assigned to a user), and a Logout button.
Security Manager assigns the following roles to users:
– Administrator: Enables a user to access all features and perform all operations in Security Manager.
– Analyst: Enables a user to access all features but perform limited operations in Security Manager. This
includes disabling the My Preferences and General options in Settings.
– Guest: Enables a user to only view the Dashboard and Reports tabs, it does not allow any interactive
operation.
HINWEIS: By default, the domain user account used for installing HP Security Manager is the administrator. To
add additional users, the administrator will add the domain user to an appropriate group based on a specic
role.
Allgemeine Steuerungselemente und Benachrichtigungen
Dieser Abschnitt enthält die Steuerelemente und Benachrichtigungen, die sich auf allen Registerkarten in HP
Security Manager wiedernden.
Allgemeine Steuerelemente im Listenfenster Geräte, Richtlinien und Aufgaben
●
– Filter - Sortiert oder ltert den Inhalt, der in einem Listenfenster basierend auf Filterkriterien angezeigt
wird. Die verfügbaren Filteroptionen hängen von den aktiven Spalten ab. Filteroptionen werden nur
angezeigt, wenn die entsprechenden Spalten (IP-Adresse, Bewertungsstatus, Unterstützte, Lizenzierte,
Gruppenmitgliedschaft oder Gerätestatus) angezeigt werden.
Allgemeine Steuerungselemente und Benachrichtigungen
5

– Suchen - Sucht nach Zeichenfolgen im Listenfenster.
– Sortieren – Ermöglicht die Sortierung jeder Spalte im Listenfenster Geräte. Klicken Sie auf den Pfeil
neben einer Spaltenüberschrift, um die Spalte zu sortieren. Um die Reihenfolge der Spalten zu ändern,
können Sie die Spalten per Drag-and-Drop bewegen.
Häuge Benachrichtigungsarten
HINWEIS: Alle Benachrichtigungen werden nach fünf Sekunden verworfen.
●
– Erfolgsmeldung: Eine Meldung auf grünem Untergrund zeigt einen erfolgreich ausgeführten Vorgang
an.
– Informationsmeldung: Eine Meldung auf blauem Untergrund zeigt die Bereitstellung von Informationen
über das System an.
– Fehlermeldung: Eine Meldung auf rotem Untergrund zeigt einen fehlgeschlagenen Vorgang an.
Was Sie zur Verfügung stellen müssen
Im Folgenden sind die Basisanforderungen zur Verwendung von HP Security Manager aufgeführt:
● Ein unterstützter Microsoft Windows Computer.
Folgende Microsoft Windows 64-Bit-Betriebssysteme werden unterstützt:
– Windows Server 2019, 2016, 2012, 2012 R2 und 2008 R2.
– Windows 10, 8.1 und 8.
● HP Security Manager wird in einer VMware-Umgebung unterstützt.
Anforderungen: Microsoft Windows Server 2012 R2 oder höher (64-Bit-Versionen) ist ein kompatibles
Gastbetriebssystem in VMware ESX und ESXi Versionen 4.0 Update 4 oder höher.
● Ein unterstütztes HP Gerät (Drucker, MFP, digitaler Absender oder ein unterstütztes Zebra-Gerät).
Die aktuelle Liste der unterstützten HP Geräte nden Sie unter www.hp.com/go/SecurityManager.
● Die neueste Version der HP Gerätermware.
HP empehlt, die neueste Version der Firmware zu installieren, um sicherzustellen, dass die Geräte die
neuesten Sicherheitsupdates und -funktionen enthalten. Anweisungen zum Firmware-Upgrade nden Sie in
den mit dem Gerät bereitgestellten Installations- oder Benutzeranleitungen.
● Die neueste Version der Firmware für HP JetDirect.
HP JetDirect-Karten erfordern Firmware-Version 40.xx oder neuer. Anweisungen zum Firmware-Upgrade
nden Sie in den mit HP JetDirect bereitgestellten Installations- oder Benutzeranleitungen. Für Produkte mit
integrierten NIC wird immer empfohlen, die neueste Firmware zu verwenden.
6
Kapitel 2 Getting started with Security Manager

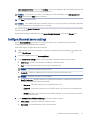
Einrichten von Security Manager3
Legen Sie mithilfe der Anweisungen in diesem Abschnitt die Einstellung für Security Manager fest.
Kongurieren der Einstellung von Security Manager
Erfahren Sie, wie Sie die Einstellung von HP Security Manager.
1. Melden Sie sich bei HP Security Manager an, wählen Sie das Menüsymbol Einstellungen ( ) und dann die
Option Einstellungen.
2. Wählen Sie zum kongurieren der Einstellungen im linken Navigationsbereich eines der folgenden Menüs:
● Meine Einstellungen - So wählen Sie das Zeitformat (12 oder 24 Stunden)
● Allgemein – So kongurieren Sie die Einstellungen für die Gerätekorrektur und die Auösung des
Hostnamen.
● Lizenzen – So installieren Sie Lizenzen von Security Manager.
● Instant-On Security – So ermitteln und kongurieren Sie Geräte, wenn diese erstmalig mit dem
Netzwerk verbunden werden.
● Automatisierte E-Mail- – So richten Sie E-Mail-Einstellungen ein und benachrichtigen Empfänger.
● Globale Anmeldedaten – So richten Sie globale Anmeldedaten zur Überprüfungen von Anmeldedaten
für das Gerät ein.
● Serviceintegration - So richten Sie die Integration mit Qualys ein.
Mehr zu den Hauptthemen auf der Startseite HP Security Manager nden Sie unter Introduction auf Seite 1
Congure
General settings
HP recommends verifying the global remediation setting that controls whether an out-of-compliance device is
remediated (corrected) during the assessment process.
HINWEIS: To control how individual out-of-compliance policy items are processed during remediation, use the
policy's Quick Settings (Policy). For more information, see Set severity, remediation, and unsupported behavior
to policy items in Quick Settings auf Seite 19.
HINWEIS: HP Security Manager resolves IP addresses to hostnames only during the initial discovery. To resolve
IP addresses to hostnames at a later time, delete the device, and then add the device again.
Follow these steps to set the device remediation and hostname resolution option:
1. Melden Sie sich bei HP Security Manager an, wählen Sie das Menüsymbol Einstellungen ( ) und dann die
Option Einstellungen.
Einrichten von Security Manager
7

2. On the left navigation pane, in the General menu, select the appropriate remediation option for devices:
● Enable device remediation (Remediate and Report) - This is the default option selected and enables to
remediate out-of-compliance devices.
● Disable device remediation (Report Only) - Select this option to disable remediation.
HINWEIS: To prevent accidental changes to devices on the network, disable device remediation. When
this option is selected, the setting applies to all policies and takes precedence over an individual policy's
advanced remediation settings (Quick Settings (Policy)).
3. In the Hostname Resolution section, enable or disable the Resolve IP addresses to hostnames when devices
are added option.
HINWEIS: This option is enabled by default and allows HP Security Manager to resolve IP addresses to
hostnames when devices are added. When set to enabled, this option requires that the DNS entry functions
in both directions. Otherwise, the device import fails, and the hostname will not be added during discovery.
To disable the option, select to clear the check box.
4. In the Repetitive Remediation Report section, enable or disable the Enable Reporting option.
By default, this option is disabled. When enabled, it reports devices that are continually out-of-compliance
and has the following reporting features:
● Remediation Threshold: Type the number of remediation attempts for devices that are reported
continually out-of-compliance.
● Renew Reporting: Select the time period (month, start date, and type in a start time) to reset the
remediation attempts count for devices.
HINWEIS: Repetitive Remediation Report is renewed instantly for an elapsed start date and time.
5. In the Device Assessment History section, enable or disable the Enable Reporting option. By default, this
option is set to enabled and allows to set Save Assessment data.
6. Select an option under the Remove historical data section to remove Recommendation and Remediation
data older than specied days to free up disk space.
HINWEIS: The latest report will not be removed.
7. Click Save.
HINWEIS: If the default selections have not been changed, the Save button will remain disabled.
Install licenses
Licenses are provided using a license
le. To create a policy, or to assess and remediate the devices on the
network, install a HP Security Manager device license. Without a device license, all other actions are available,
such as sorting, ltering, and verifying.
HINWEIS: HP Security Manager is installed with a demonstration license that allows a limited assessment for
up to 50 devices. Only a demonstration policy is available for use and the Policy Editor is limited to a few items.
This license is overridden when a trial or full license is installed. Contact your HP representative for more
information.
8
Kapitel 3 Einrichten von Security Manager

HINWEIS: If HP JetAdvantage Security Manager service is not running, an error message will display on the HP
Security Manager application.
The purchase of HP Security Manager should include device licenses.
● Licenses are node locked using the HPSM's server MAC address.
● After licenses are installed, devices are automatically licensed when the following actions occur:
– when adding devices using a text or xml le. For more information, see Hinzufügen oder Ändern von
Geräten zu einer Gruppe über die manuelle Erkennung auf Seite 26.
– when discovering devices using the Instant-On Security feature. For more information, see Set up
Instant On Security auf Seite 10.
● If there are insuicient licenses available during an import, the devices are added but not licensed. For
devices that are not licensed, add licenses in the Settings page, and then use the Assign Licenses icon
located in the device toolbar in the Devices page.
HINWEIS: To reduce the risk of depleting all the licenses, make sure that there are enough licenses before
importing.
● To return licenses to the license pool, delete the licensed device.
HINWEIS: Deleting a licensed device removes that device's historical data.
License Settings
The License Expiry Threshold text box is for temporary licenses and allows a user to set up a notication of the
number of days before a license expires.
Follow these steps to install licenses or add additional licenses:
1. Melden Sie sich bei HP Security Manager an, wählen Sie das Menüsymbol Einstellungen ( ) und dann die
Option Einstellungen.
2. On the left navigation pane, click Licenses.
3. Click Add Licenses.
4. Locate where the license le (.lic) is stored in the le browser and double-click to open the le.
HP Security Manager reads the license le and updates the Settings page with the available licenses and
expiration information.
This includes the number of days remaining before the license expires. A license warning message will
display before the license expires.
If an error displays, the causes are:
● HP Security Manager cannot connect to the license server.
● HP Security Manager tried to update a demonstration license. A new demonstration license will not
override an existing demonstration license.
● HP Security Manager tried to install a demonstration license when a normal license is currently
installed.
● HP Security Manager tried to install the same license le.
Install licenses
9

● HP Security Manager tried to install a corrupted or invalid license le.
5. Click View License Details to open the Individual License Details window. It contains details about the
Individual license.
HINWEIS: If there is mismatch in the license reported via dierent Flexera APIs then an extra Note is
shown in Individual License Details window reporting this inaccuracy in license count.
6. In the License Expiry Threshold text box, type a number from 7 to 60.
HINWEIS: Depending on the number of days congured, the application will display a license warning
message after a user logs into the application. This message will provide information of the number of days
remaining when the license expires.
Set up Instant On Security
HP Enterprise printers running the latest rmware version use the Instant-On Security and the HP Device
Announcement Agent features to automatically announce their presence to HP Security Manager when they are
rst connected to the network.
To discover and congure devices across applications like HP Security Manager, HP Web Jetadmin and HP
JetAdvantage Connector (JAMC), congure the Primary Listener and the Secondary Listener options. The “Device
Announcement Agent (DAA) server” is called the Primary Listener. The work of the Primary Listener is to route
devices to the Secondary Listener. HP Security Manager is a primary or secondary listener and HP Web Jetadmin
can only be a secondary listener.
HINWEIS: Automatic assessment/ remediation of newly discovered devices requires a device license and a
valid initial assessment policy.
HINWEIS: To implement Instant-On Security, the device must support HP Device Announcement Agent.
For a list of devices that include HP Device Announcement Agent, go to www.hp.com/go/SecurityManager.
Automatic discovery requires that the Accept Device Announcements feature is enabled (disabled by default) and
the device's HP Device Announcement Agent feature is enabled (enabled by default). In addition, the corporate
DNS server must be congured with an entry that points the hostname hp-print-mgmt to the IP address of the
HP Security Manager server, when HP Security Manager is the Primary Listener.
When the device announcement agent is activated on a compatible printer, the HP device announcement agent
looks for a host with the DNS hostname of hp-print-mgmt. If found, the device announces itself directly
to HP Security Manager. If Accept Device Announcements is enabled and the device passes the minimum
authentication requirements, the device is automatically added to HP Security Manager.
HINWEIS: A device is not added to HP Security Manager if it fails the minimum authentication required for the
assessment.
When the device announcement agent is enabled, it announces itself to the HP Security Manager server in the
following situations:
● When the device is turned on.
● When a cold reset is performed on the device.
● When the IP stack comes up (for example, after a network conguration change).
● When the conguration server IP address changes (use this if a DNS entry cannot be used).
10
Kapitel 3 Einrichten von Security Manager

● When the HP Device Announcement Agent feature is enabled using the check box in the device
HP Embedded Web Server or the device control panel.
● FutureSmart 4 devices announce their presence every 48 hours.
When Accept Device Announcements is enabled, each device that passes the authentication is assigned a device
license from the license pool.
Follow these steps to set up Instant-On Security:
HINWEIS: The Instant-On Security feature might fail, if IPsec, Windows rewall, or other rewalls does not
allow communication with HP Security Manager using port 3329.
1. To activate Instant-On Security and automatic remediation, request the site administrator to add an entry in
the corporate DNS server that points hp-print-mgmt to the IP address of the HP Security Manager server.
2. Enable communication with port 3329.
a. Click the Settings menu icon ( ), and then select the Settings option.
b. In the left navigation pane, select Instant-On Security.
c. Select the Accept Device Announcements check box, and then click OK in the conrmation dialog box
to enable communication with port 3329.
3. Determine if Security Manager should be the Primary Listener or Secondary Listener.
● If HP Security Manager is set as the Primary Listener, follow these steps to add information of the
Secondary Listener:
HINWEIS: Only ve Secondary Listeners are allowed. This value can be altered in the conguration
le “maxSecondaryListeners”. After updating the conguration, it is required to restart the Service and
IIS.
HINWEIS: HP Web Jetadmin can only be set as a Secondary Listener. Security Manager and HP
JetAdvantage Connector can be set as a Primary or Secondary Listener.
a. Click New, and then type the IP Address or Hostname and Description.
b. If required , select the Validate the Identity Certicate before sending Device announcement
message to the Listener check box.
c. To modify a Secondary Listener, select the row in the Secondary Listeners table, and click Edit.
d. To delete a Secondary Listener, select the row in the Secondary Listeners table, and click Delete.
● If HP Security Manager is set as the Secondary Listener, follow these steps to select one of the
following server certicates to use for authentication and validation by the Primary Listener:
– Self-Signed
– CA-Signed
Set up Instant On Security
11

4. Select an Authentication method for the Primary and Secondary Listener. The default option is No
Authentication (Out of the Box).
● If authentication is not required, select No Authentication (Out of the Box).
HINWEIS: This is the simplest authentication method because HP Security Manager automatically
congures devices to be compliant with the security policy when they are taken out of the box and
connected to the network. This method also works on devices when a cold reset is performed because
no authentication is required for auto discovery, assessment, and remediation.
● For the highest authentication level, select Mutual Authentication, click Select Certicate, select a
certicate from the list of certicates found on the HP Security Manager server, and then click Select.
HINWEIS: Optionally, you can use HP Security Manager to manage the identity certicates on the HP
Security Manager server and the devices.
HINWEIS: This authentication method is most secure as it requires certicates to be congured on the
device and in HP Security Manager. This enables the HP Security Manager server and the device to
verify that the certicate for the other is valid. When the IP address of a device changes or a cold reset
is performed, the device and the HP Security Manager server communicate using the secure socket
layer (SSL) to validate certicates before an automatic remediation occurs. The certicates must be
valid identity certicates signed by a trusted certicate authority and installed on the HP Security
Manager server and each device. Each device must be set to require mutual authentication using
certicates during a pre-staging process.
5. To restrict and control the devices entering HP Security Manager, select the Use Device Serial Number List
check box, and then click Add Device Serial Number(s).
6. Select one of the following methods to add serial numbers on the Add Device Serial Number(s) window:
HINWEIS: Security Manager uses the list of serial numbers to accept a device the rst time, and then
automatically removes the serial number from the list. It recognizes all future announcements by that
device as a valid device.
● Type the printer’s serial number in the Device Serial Number text box, and then click Add to list.
● Click Add from le, locate the xml or text le from your le browser, open the le in Security Manager,
and then click Add.
7. Create a valid policy from the Policies page.
For instructions, see Create a policy auf Seite 17
HINWEIS: You must create a valid initial policy to use with Automatic Remediation.
8. Select the Allow Automatic Remediation check box to activate automatic remediation.
HINWEIS: If Allow Automatic Remediation is enabled, an automatic assessment/ remediation of the
device occurs.
9. Select a policy from the Initial Assessment Policy drop-down list to ensure new devices are compatible with
the requirement.
HINWEIS: The valid policies are sorted in the list from the oldest to newest policy. This policy is used for
newly announced devices and ensures that the device is fully compliant with the requirements. The selected
12
Kapitel 3 Einrichten von Security Manager

Initial Assessment Policy is always used one time for the initial remediation. After the initial assessment, HP
Security Manager uses the most recently applied policy.
HINWEIS: If the policies are not valid, a “No valid policies” message displays in the Initial Assessment
Policy text box and the Save button is disabled.
10. Click Save to save the entries.
HINWEIS: If HP JetAdvantage Security Manager service is not running, the HP Security Manager application
will not save the entries, and display an error message.
After conguring the Instant-On Security settings, devices powered on will automatically populate and remediate
in HP Security Manager.
Devices automatically discovered display in the Instant-On Auto Discovered column in the Devices page.
Congure
the email server settings
Use the Automated Email setting option to congure the email server to authenticate and send email
notications when scheduled tasks are completed.
Follow these steps to congure email server settings:
1. Melden Sie sich bei HP Security Manager an, wählen Sie das Menüsymbol Einstellungen ( ) und dann die
Option Einstellungen.
2. On the left navigation pane, click Automated Email.
3. In the E-mail Server Settings section, type the information required to identify the email server.
● SMTP Server – Contains the hostname or IP address of the email server.
● Port – Contains the network port to use to contact the email server.
HINWEIS: By default, the network port is set to 25.
● Enable SSL – Enables or disables the use of SSL when working with the email server.
HINWEIS: By default, this option is set to enabled.
● Specify Credentials – Species whether user credentials are required. If enabled, then the Username,
Password, and Domain text boxes are available.
– Username – The name used to log in to the SMTP (email) server.
– Password – The password used to log in to the SMTP server. The characters are encrypted when
typed.
– Domain (Optional) – The username is often related to a domain. If so, then the domain is required
to qualify the username.
4. In the Automatic Email Notication Settings, type the information required.
● Email Subject – The subject used in the email that is sent.
● Recipient(s) – An email addresses of one or more recipient.
Congure
the email server settings
13

If more than one addresses are specied, use a space, comma, or semicolon to separate the addresses.
HINWEIS: If an email address is incorrect, tasks will run for a longer time and fail.
● From Address – The email address used for the sender in the message.
5. Send a test email.
a. Click Send Test E-mail to make sure that the server and the congured settings are correct.
b. Check your email for the test email.
6. Click Save.
Click Yes to conrm the changes to the settings in the conrmation dialog box.
Set up global credentials
Global credentials are used as part of the device verication process when performing tasks which include device
discovery, verifying devices, assess only, assess and remediate of a device and setting the Instant-On Security
feature.
Use the Global Credentials feature to set global credentials for all existing devices and custom groups.
When verifying devices, HP Security Manager rst attempts to check the assigned device credentials for a device.
If the verication fails with device credentials, it checks the device’s default credentials. If the default credentials
verication fails, it veries the device with the global credentials.
HINWEIS: The device, default, and global credentials are also applicable for Assess Only and Assess and
Remediate policies on a device.
Follow these steps to set up the Global Credentials:
1. Melden Sie sich bei HP Security Manager an, wählen Sie das Menüsymbol Einstellungen ( ) und dann die
Option Einstellungen.
2. On the left navigation pane, click Global Credentials.
3. On the SNMP Credentials section, complete the following steps to set the SNMPv1/v2 Read, Read/Write
or/and SNMPv3 credentials:
a. Select the Get Community Name check box, type the SNMP v1/v2 Get (e.g. Read) Community name in
the rst text box, and then type the name again in the second text box to conrm.
b. Select the Set Community Name check box, type the SNMP v1/v2 Set (e.g. Read/ Write) Community
name in the rst text box, and then type the name again in the second text box to conrm.
4. Festlegen der allgemeinen SNMP v3-Anmeldedaten:
a. Markieren Sie das Kontrollkästchen neben v3-Anmeldedaten festlegen.
b. Geben Sie den SNMP-Namen in das Textfeld Benutzername ein.
c. Geben Sie die Authentizierungspassphrase ein und geben Sie dann die Passphrase zur Bestätigung
erneut ein.
d. Wählen Sie das Authentizierungsprotokoll (MD5 oder SHA).
14
Kapitel 3 Einrichten von Security Manager

e. Geben Sie die Datenschutzpassphrase ein und geben Sie dann die Passphrase zur Bestätigung erneut
ein.
HINWEIS: Wenn das Gerät Schlüsselanmeldedaten benötigt, konvertiert Security Manager die
Passphrase automatisch.
f. Wählen Sie das Datenschutzprotokoll (DES oder AES).
5. On the Other Credentials section, complete the tasks to set up the credentials.
a. Select Set Admin (EWS) Password, type the administrative password set in the HP Embedded Web
Server, and then type the password again to conrm.
b. Select Set Domain Credentials, type the Windows domain username, password, and then type the
password again to conrm.
For the Windows domain user name, use the following format: Fully Qualified Domain
Name\Username.
HINWEIS: If the Domain Credentials is set, it will be used for authentication and authorization with
the device instead of the HP EWS password which will be used only for remediating admin (EWS)
Password policy item.
c. Select the Set File System Password check box, type the password for the le system on the device,
and then type the password again to conrm.
d. Select the Set PJL Password check box, type the password for the Printer Job Language on the device,
and then type the password again to conrm.
e. Select the Set Bootloader Password check box, type the password for the bootloader on the device,
and then type the password again to conrm.
6. Click Save.
Set up global credentials
15

16 Kapitel 3 Einrichten von Security Manager
Seite wird geladen ...
Seite wird geladen ...
Seite wird geladen ...
Seite wird geladen ...
Seite wird geladen ...
Seite wird geladen ...
Seite wird geladen ...
Seite wird geladen ...
Seite wird geladen ...
Seite wird geladen ...
Seite wird geladen ...
Seite wird geladen ...
Seite wird geladen ...
Seite wird geladen ...
Seite wird geladen ...
Seite wird geladen ...
Seite wird geladen ...
Seite wird geladen ...
Seite wird geladen ...
Seite wird geladen ...
Seite wird geladen ...
Seite wird geladen ...
Seite wird geladen ...
Seite wird geladen ...
Seite wird geladen ...
Seite wird geladen ...
Seite wird geladen ...
Seite wird geladen ...
Seite wird geladen ...
Seite wird geladen ...
Seite wird geladen ...
Seite wird geladen ...
Seite wird geladen ...
Seite wird geladen ...
Seite wird geladen ...
Seite wird geladen ...
Seite wird geladen ...
Seite wird geladen ...
Seite wird geladen ...
Seite wird geladen ...
Seite wird geladen ...
Seite wird geladen ...
Seite wird geladen ...
Seite wird geladen ...
Seite wird geladen ...
Seite wird geladen ...
Seite wird geladen ...
Seite wird geladen ...
Seite wird geladen ...
Seite wird geladen ...
Seite wird geladen ...
Seite wird geladen ...
Seite wird geladen ...
Seite wird geladen ...
Seite wird geladen ...
Seite wird geladen ...
Seite wird geladen ...
Seite wird geladen ...
Seite wird geladen ...
Seite wird geladen ...
-
 1
1
-
 2
2
-
 3
3
-
 4
4
-
 5
5
-
 6
6
-
 7
7
-
 8
8
-
 9
9
-
 10
10
-
 11
11
-
 12
12
-
 13
13
-
 14
14
-
 15
15
-
 16
16
-
 17
17
-
 18
18
-
 19
19
-
 20
20
-
 21
21
-
 22
22
-
 23
23
-
 24
24
-
 25
25
-
 26
26
-
 27
27
-
 28
28
-
 29
29
-
 30
30
-
 31
31
-
 32
32
-
 33
33
-
 34
34
-
 35
35
-
 36
36
-
 37
37
-
 38
38
-
 39
39
-
 40
40
-
 41
41
-
 42
42
-
 43
43
-
 44
44
-
 45
45
-
 46
46
-
 47
47
-
 48
48
-
 49
49
-
 50
50
-
 51
51
-
 52
52
-
 53
53
-
 54
54
-
 55
55
-
 56
56
-
 57
57
-
 58
58
-
 59
59
-
 60
60
-
 61
61
-
 62
62
-
 63
63
-
 64
64
-
 65
65
-
 66
66
-
 67
67
-
 68
68
-
 69
69
-
 70
70
-
 71
71
-
 72
72
-
 73
73
-
 74
74
-
 75
75
-
 76
76
-
 77
77
-
 78
78
-
 79
79
-
 80
80


HP JetAdvantage Security Manager 10 Device E-LTU Benutzerhandbuch
- Typ
- Benutzerhandbuch
- Dieses Handbuch eignet sich auch für
in anderen Sprachen
Verwandte Artikel
Andere Dokumente
-
Sharp MXC310 Bedienungsanleitung
-
-
Xerox 700i/700 Benutzerhandbuch
-
-
Xerox Color 800/1000/i Benutzerhandbuch
-
Copystar 4003i/5003i/6003i Schnellstartanleitung
-
Copystar 3253ci Schnellstartanleitung
-
Apex Digital Agent Installer/User Manual
-
Dell DR2000v Benutzerhandbuch
-
Yamaha CS-700 Benutzerhandbuch