Vango Force Ten Ion 2 Pitching Instructions
- Typ
- Pitching Instructions

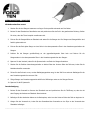
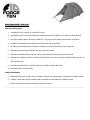
TENT PITCHING INSTRUCTIONS – ION 2 (UK)
Flysheet First Pitching
1. Assemble the three poles and lay them parallel on the ground.
2. Open flysheet on ground and position tent in desired direction. Make sure the doors are completely closed.
3. Locate pole sleeves on the flysheet and insert poles. The poles are colour coded to the pole sleeves.
4. On one side, locate the end of each pole into the corresponding eyelets on pole anchor straps.
5. On opposite side, push poles into an arch and locate pole ends into the corresponding eyelets on pole anchor
straps.
6. Tighten the flysheet by adjusting the tension straps at the base of the poles.
7. Peg out adjustable anchor straps at both corners of the rear of the tent, using alloy pin pegs.
8. Pull the tent forwards, away from pegging points, until tent takes shape,. Peg the two anchor straps at the front
of the tent.
9. Peg out the remaining poles and pegging points using pin pegs at the base of poles
10. Peg out ALL guy lines.
Inner Attachment
1. Open out inner tent inside flysheet and position doorway to correspond with the porch entrance of the flysheet.
2. Starting from the rear corners of the tent, attach the elasticated hooks on the groundsheet to corresponding rings
on the flysheet
3. Suspend the inner by attaching elastic of inner tent to the clips on the inside of the flysheet
…………………………………………………………………………………………………………………………………………………………….

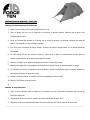
AUFBAUANLEITUNG – ION 2 (DE)
Mit Außenzeltaufbau zuerst
1. Stecken Sie die drei Stangen zusammen und legen Sie sie parallel zueinander auf den Boden.
2. Breiten Sie das Überdach auf dem Boden aus und positionieren Sie das Zelt in der gewünschten Richtung. Stellen
Sie sicher, dass die Türen komplett verschlossen sind.
3. Fixieren Sie die Stangenhüllen am Überdach und setzen Sie die Stangen ein. Die Stangen und Stangenhüllen sind
farblich gekennzeichnet.
4. Fixieren Sie das Ende jeder Stange an einer Seite in den dazu passenden Ösen in den Verankerungsschnüren der
Stangen.
5. Drücken Sie die Stangen gewölbeförmig an der gegenüberliegenden Seite hoch und fixieren Sie die
Stangenenden in den dazu passenden Ösen in den Verankerungsschnüren der Stangen.
6. Spannen Sie das Vordach, indem Sie die Spannschnüre am Ende der Stangen festziehen.
7. Stecken Sie die flexiblen Verankerungsschnüre an beiden Ecken der hinteren Seite des Zelts aus, indem Sie die
Metallarretierstifte verwenden.
8. Ziehen Sie das Zelt nach vorne, von den Befestigungspunkten weg, bis das Zelt Form annimmt. Befestigen Sie die
zwei Verankerungsschnüre vorne am Zelt.
9. Übrige Stangen und Verankerungspunkte mithilfe der Stiftheringe unten an den Stangen fixieren.
10. Spannen Sie ALLE Spannseile.
Innenbefestigung
1. Breiten Sie das Innenzelt im Inneren des Überdachs aus und positionieren Sie die Türöffnung so, dass sie mit
dem Eingang des Vorbaus am Überdach übereinstimmt.
2. Befestigen Sie die elastischen Haken an der Bodenplane, wobei von den hinteren Ecken des Zelts zu beginnen ist.
3. Hängen Sie das Innenzelt ein, indem Sie das Gummiband des Innenzelts an den Clips an der Innenseite des
Überdachs befestigen
…………………………………………………………………………………………………………………………………………………………….

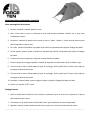
INSTRUCTIONS DE MONTAGE – ION 2 (FR)
Montage en commençant par le double toit
1. Réunir les trois arceaux et les poser parallèlement sur le sol.
2. Ouvrir le double toit sur le sol et positionner la tente dans la direction désirée. S'assurer que les portes sont
complètement fermées.
3. Placer les fourreaux des arceaux sur le double toit et insérer les arceaux. Les arceaux possèdent des codes de
couleur, correspondant à leurs fourreaux respectifs.
4. D'un côté, placer l'extrémité de chaque arceau à l'intérieur des oeillets correspondants, sur les bandes d'ancrage
des arceaux.
5. Du côté opposé, pousser les arceaux à l'intérieur d'une arche et placer les extrémités des arceaux dans les
oeillets correspondants, sur les bandes d'ancrage des arceaux.
6. Resserrer le double toit en ajustant les sangles de tension à la base des arceaux.
7. Attacher les bandes d'ancrage ajustables aux deux coins arrière de la tente, à l'aide des piquets en alliage.
8. Tirer la tente vers l'avant, à l'opposé des points de fixation, jusqu'à ce que la tente prenne sa forme. Attacher les
deux bandes d'ancrage à l'avant de la tente.
9. Planter le reste des piquets, en utilisant les points de piquetage en bas des mâts
10. Attacher TOUTES les cordes de tension.
11.
Attacher la tente antérieure
1. Ouvrir la tente intérieure, dans le double toit et positionner la porte, afin qu'elle corresponde avec l'entrée du
porche du double toit.
2. Commençant par les coins arrière, attacher les crochets élastiques du tapis de sol
3. Suspendre l'intérieur en attachant l'élastique de la tente intérieure aux clips, à l'intérieur du double toit
…………………………………………………………………………………………………………………………………………………………….

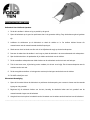
ISTRUZIONI PER IL MONTAGGIO – ION 2 (IT)
Primo montaggio del telo esterno
1. Montare i tre paletti e stenderli paralleli al suolo.
2. Aprire il telo esterno al suolo e posizionare la tenda nella direzione desiderata. Verificare che le porte siano
completamente chiuse.
3. individuare i manicotti dei paletti sul telo esterno e inserirvi i paletti. I paletti e i relativi manicotti devono essere
fatti corrispondere in base ai colori.
4. Su un lato, collocare l'estremità di ogni paletto negli occhielli corrispondenti delle cinghie di fissaggio dei paletti.
5. Sul lato opposto, arcuare i paletti e collocarne le estremità negli occhielli corrispondenti delle cinghie di fissaggio
dei paletti.
6. Tendere il telo esterno regolando le cinghie di tensione alla base dei paletti.
7. Fissare le cinghie di ancoraggio regolabili a entrambi gli angoli del retro della tenda usando i picchetti in lega.
8. Tirare la tenda in avanti, allontanandola dai punti di ancoraggio, finché prende forma. Fissare le due cinghie di
ancoraggio sul davanti della tenda.
9. Tirare la tenda in avanti, allontanandola dai punti di ancoraggio, finché prende forma. Fissare le due cinghie di
ancoraggio sul davanti della tenda.
10. Picchettare i rimanenti paletti e punti di aggancio usando i picchetti di fissaggio alla base dei paletti
11. Fissare con i picchetti TUTTI i tiranti.
Fissaggio interno
1. Aprire la camera interna all'interno del telo esterno e posizionare la porta in modo che corrisponda con l'ingresso
della veranda del telo esterno.
2. Cominciando con gli angoli posteriori della tenda, fissare i ganci elasticizzati sul telone impermeabile
3. Appendere l'interno fissando l'elastico del telo interno ai ganci che si trovano all'interno del telo esterno
…………………………………………………………………………………………………………………………………………………………….

OPZETINSTRUCTIE – ION 2 (NL)
Buitentent Voor Het Eerst Opzetten
1. Zet de drie stokken in elkaar en leg ze parallel op de grond.
2. Open de buitentent op de grond en positioneer deze in de gewenste richting. Zorg dat de deuren geheel gesloten
zijn.
3. Lokaliseer de stoksleuven op de buitentent en steek de stokken er in. De stokken hebben kleuren die
overeenkomen met de overeenkomende stoksleuf openingen.
4. Steek aan een kant het einde van elke stok in het bijbehorende oogje op de stok ankerpunten.
5. Duw aan de andere kant de stokken in een boog en plaats de uiteinden in de overeenkomende stok ankerpunten.
6. Span de buitentent door de spanbanden bij te stellen aan de basis van de stokken.
7. Zet de verstelbare ankerpunten aan beide hoeken van de achterkant van de tent vast met haringen.
8. Trek de tent naar voren, bij de haring punten vandaan, tot de tent vorm krijgt. Zet de twee ankerpunten aan de
voorkant van de tent vast.
9. Zet de overgebleven stokken en haringpunten vast met pin haringen aan de basis van de stokken
10. Zet ALLE scheerlijnen vast.
Binnentent Bevestiging
1. Open de binnentent binnen de buitentent en positioneer de deuropening om overeen te komen met de veranda
ingang van het grondzeil.
2. Beginnend bij de achterste hoeken van de tent, bevestig de elastische haken aan het grondzeil aan de
overeenkomende ringen aan de buitentent
3. Hang de binnen tent op door het elastiek van de binnentent vast te maken aan de binnenkant van de buitentent
…………………………………………………………………………………………………………………………………………………………….

NÁVOD KE STAVBĚ – ION 2 (CZ)
Stavění tropika poprvé
1. Poskládejte tři tyče a položte je rovnoběžně na zem.
2. Roztáhněte tropiko na zemi a umístěte stan v požadovaném směru. Ujistěte se, že dveře jsou úplně zavřené.
3. Na tropiku najděte rukávky do kterých vsuňte tyče. Tyče jsou barevně odlišeny podle značení na rukávcích
4. Na jedné straně umístěte konec každé tyče do příslušných oček na popruzích
5. Na opačné straně zatlačte tyče do oblouku a umístěte konce tyčí do příslušných oček na popruzích
6. Zatáhněte popruhy na spodní části tyčí tak, aby tropiko bylo utáhlé
7. Zakolíkujte nastavitelné fixační popruhy v obou rozích zadní části stanu pomocí slitinových kolíků
8. Vytáhněte stan dopředu, směrem od kolíkovacích bodů tak, až se stan vytvaruje. Zakolíkujte fixační popruhy na
přední straně stanu.
9. Zakolíkujte zbývající tyčky do fixačních bodů pomocí kolíků na spodní části tyček
10. Přikolíkujte všechny napínací šňůry
Vnitřní příslušenství
1. Roztáhněte vnitřní stan vevnitř tropika a umístěte vchod tak, aby korespondoval s vchodem do předsíňky tropika.
2. V zadních rozích stanu připojte elastické háčky na podlážce do odpovídajících kroužků na tropiku.
3. Zavěste vnitřní ložnici připojením elastických klipsů uvnitř stanu
…………………………………………………………………………………………………………………………………………………………….
-
 1
1
-
 2
2
-
 3
3
-
 4
4
-
 5
5
-
 6
6


Vango Force Ten Ion 2 Pitching Instructions
- Typ
- Pitching Instructions
in anderen Sprachen
- français: Vango Force Ten Ion 2
- italiano: Vango Force Ten Ion 2
- Nederlands: Vango Force Ten Ion 2
Verwandte Artikel
-
Vango MIRAGE 200 Pitching Instructions
-
-
-
-
-
-
-
-
-