West Control Solutions DO 4/230 Benutzerhandbuch
- Typ
- Benutzerhandbuch

PMA 11/2004 TNR 90 24 26 6 - 00 710800
E-Mail: mailbox@pma-online.de • Internet: http://www.pma-online.de
PMA Prozeß- und Maschinen-Automation GmbH
Tel.: +49 - 561 - 505 1307 • Fax: +49 - 561 - 505 1710
P.O. Box 31 02 29 • D-34058 Kassel
VARIO DO 4/230 Art.-Nr. KSVC-102-01231
DE Einbauanweisung für den Elektroinstallateur
EN Installation notes for electrical personnel
FR Instruction d’installation pour l’électricien
IT Istruzione di installazione per l’elettricista
ES Instrucción de montaje para el ingeniero eléctrico
2
5
1
3
4
4 x
4 x
Español
Con un módulo de relé es posible
conectar tensiones diferentes a las
existentes en el segmento en que se
aplica el módulo. Disponga en dicho
caso el módulo distanciador
IB IL DOR LV SET (-PAC) antes y
detrás del módulo de relé, a fin de
delimitar el módulo de relé (ver hoja
de características).
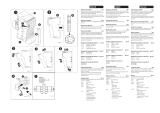
Encajado del portante
Antes de encajar el portante, retire
del módulo los conectores macho
que están conectado, y también el
conector macho lindante del módulo
contiguo de la izquierda .
Encaje el portante sobre el carril (A).
Preste atención a que las chavetas y
ranuras de módulos adyacentes
enganchen firmemente unas en las
otras (B).
Montaje del conector macho
Monte el conector macho según la
secuencia indicada (1, 2).
Desmontaje del conector macho
Libere el conector macho presionando el
encastrado en cuña posterior (1) y
extráigalo (2).
Desmontaje del portante
Antes de quitar el portante, retire los
conectores macho del módulo y el
conector macho lindante respectivo
de los módulos contiguos (a
derecha e izquierda).
Libere el portante presionando los
mecanismos de encaje delantero y trasero
(1) y extráigalo perpendicularmente
respecto al carril (2).
Asignación de los puntos de embornado
1.1, 2.1 –
1.2, 2.2 Contacto del relé N/C
1.3, 2.3 Contacto principal del relé
1.4, 2.4 Contacto del relé N/A
Embornado de los cables
Pele los cables unos 8 mm. Abra los
resortes presionando con el destornillador
(1). Introduzca el cable en el punto de
embornado (2). Retire el destornillador
para fijar así el cable en su posición.
Elementos de visualización
Si el LED verde está iluminado, el
módulo funciona correctamente.
D verde Diagnóstico
- encendido Bus activado
- parpadea 0,5 Hz Hay tensión lógica UL,
bus no activado
- parpadea 2 Hz Error en periferia
- parpadea 4 Hz Error de bus local
1, 2,
3, 4 amarillo Estado de las salidas
1
3
2
3
4
5
6
7
Deutsch
Klemme mit 4 digitalen Relaisausgängen
Sicherheits- und Warnhinweise
Beachten Sie die notwendigen Vorsichtsmaßnahmen bei der Handhabung
elektrostatisch gefährdeter Bauelemente (EN 61340-5-1, EN 61340-5-2)!
- Gefährliche Berührungsspannung beim Schalten von Stromkreisen, die
nicht den Anforderungen der Schutzkleinspannung entsprechen! Zie-
hen und Stecken der Klemme ist nur im spannungsfreien Zustand
erlaubt!
- Die Klemme unterbricht die Querrangierung von Haupt- und Segmentkreis!
- Die Versorgung und Erdung der Klemme erfolgt automatisch durch das
Anrasten an die vorhergehende Klemme.
-Überprüfen Sie bei vorverdrahteten Klemmen den korrekten Sitz der
Elektroniksockel, der Stecker und der Anschlussleitungen.
Lesen Sie vor dem Einsatz der Klemme unbedingt das klemmenspezifische
Datenblatt und das Systemhandbuch.
Elektroniksockel Diagnose- und Status-Anzeigen
Peripheriestecker Klemmpunkte
Beschriftungsfeld
English
Terminal with 4 digital relay outputs
Safety and warning instructions
Observe the necessary safety precautions when handling components that
are vulnerable to electrostatic discharge (IEC 61340-5-1,
IEC 61340-5-2, EN 61340-5-1, EN 61340-5-2)!
- Dangerous voltage is present when switching circuits that do not meet
safety extra-low voltage requirements! Connecting and disconnecting
the terminal is only permitted if the power supply is disconnected!
- The terminal interrupts diagonal routing between the main and segment
circuit.
- The terminal is automatically grounded and powered when snapped onto the
preconnected terminal.
- For prewired terminals check that electronics base, connectors and
connecting cables are securely locked.
You must read the terminal-specific data sheet and the System Manual before
using the terminal.
Electronics base Diagnostic and status indicators
I/O connector Terminal points
Labeling field
1 2
3 4
5
1 2
3 4
5
Français
Module à 4 sorties TOR à relais
Consignes de sécurité et avertissements
Observer les mesures de précaution nécessaires lors du maniement des
composants sensibles aux décharges électrostatiques (CEI 61340-5-1,
CEI 61340-5-2, EN 61340-5-1, EN 61340-5-2) !
- Une tension dangereuse est présente lors la mise sous tension de
circuits qui ne respectent pas les exigences de très basse tension !
Le raccordement et débranchement du module n’est possible que si
l’alimentation est hors tension !
- Le module interrompt l’acheminement diagonal entre le circuit principal et le
circuit segment.
- L'alimentation et la mise à la terre du module se font automatiquement en
l'encliquetant sur le module précédent.
- Pour les modules précâblées s’assurer que l’embase électronique, les
connecteurs et les câbles de raccordement sont bien verrouillés.
Avant d’utiliser le module, veuillez lire la fiche technique spécifique au module et
le manuel du système.
Embase électronique Voyants de diagnostic et d’état
Connecteur pour E/S Bornes
Plaque de repérage
Italiano
Modulo con 4 uscite digitali relè
Avvertenze sulla sicurezza e sui pericoli
Osservare le misure di sicurezza necessarie per l'uso di componenti a
rischio di scariche elettrostatiche (IEC 61340-5-1, IEC 61340-5-2,
EN 61340-5-1, EN 61340-5-2)!
- Livelli pericolosi di tensione in fase di attivazione dei circuiti che non
soddisfano i requisiti di sicurezza di bassissima tensione. È permesso
collegare e scollegare il modulo solo dopo aver disinserito l'alimenta-
zione.
- Il modulo interrompe l'instradamento diagonale tra la rete e il circuito del
segmento.
- L'alimentazione e il collegamento a terra del modulo avvengono
automaticamente mediante innesto sul modulo a monte.
- In caso di moduli precablati controllare che i collegamenti dello zoccolo
elettronico, dei connettori e dei cavi siano ben saldi.
Prima di utilizzare il modulo, leggere attentamente i dati tecnici specifici del
modulo e il manuale di sistema.
Zoccolo elettronico LED di diagnosi e di stato
Connettore I/O Punti di connessione
Cartellino
Español
Módulo con 4 salidas digitales por rélé
Indicaciones y advertencias de seguridad
Observe las medidas preventivas necesarias al manipular elementos
expuestos a peligro de descarga electrostática (IEC 61340-5-1,
IEC 61340-5-2, EN 61340-5-1, EN 61340-5-2)!
- ¡Existe tensión peligrosa cuando se conectan circuitos que no cum-
plen los requisitos de seguridad sobre bajas tensiones! Sólo se per-
mite conectar y desconectar el terminal si se ha desconectado la
alimentación!
-El módulo interrumpe el trazado diagonal entre el circuito principal y el de
segmento.
- La alimentación y toma de tierra del módulo se realiza automáticamente
mediante el encajado en el módulo previo.
- En los módulos precableados, asegúrese de que el portante de los
componentes electrónicos, los conectores macho y los cables de conexión
estén bien afianzados.
Debe leer la hoja de características específicas del módulo y el manual del
sistema antes de utilizar el módulo.
Portante de componentes Indicaciones de diagnóstico
electrónicos y estado
Conector E/S Puntos de embornado
Casilla de inscripción
1 2
3 4
5
1 2
3 4
5
1 2
3 4
5
BDhex (189dec)
41hex
4 Bit
0 Bit
4 Bit
0 Bit
4 Bit
Español
Código de ID
Código de longitud
Canal de datos de proceso
Mapa de direcciones de entrada
Mapa de direcciones de salida
Canal de parámetros (PCP)
Longitud de registro
Italiano
ID code
Codice lunghezza
Canale dei dati di processo
Area di indirizzamento di ingresso
Area di indirizzamento di uscite
Canale dei parametri (PCP)
Lunghezza registro
Français
Code d’identification
Code de longueur
Canal de données de process
Espace d’adressage des entrées
Espace d’adressage des sorties
Canal de paramètres (PCP)
Longueur de la trame
English
ID code
Length code
Process data channel
Input address area
Output address area
Parameter channel (PCP)
Register length
Deutsch
ID-Code
Längen-Code
Prozessdatenkanal
Eingabe-Adressraum
Ausgabe-Adressraum
Parameterkanal (PCP)
Registerlänge

Deutsch English Français Italiano
Es ist möglich, mit einer Relais-
klemme Spannungen zu schalten,
die in dem Segment, in dem die
Klemme eingesetzt ist, nicht vor-
kommen. Setzen Sie in diesem
Fall vor und nach der Relais-
klemme die Distanzklemme
IB IL DOR LV SET (-PAC) ein,
siehe Datenblatt.
Aufrasten des Sockels
Entfernen Sie vor dem Aufrasten
des Sockels die aufgesetzten
Stecker von der Klemme sowie
den angrenzenden Stecker von
der linken benachbarten Klemme
.
Rasten Sie den Sockel auf die
Schiene (A).
Achten Sie darauf, dass die
Federn und Nuten benachbarter
Klemmen sicher ineinander
greifen (B).
Aufsetzen des Steckers
Setzen Sie den Stecker in der
angegebenen Reihenfolge (1, 2) auf.
With a relay terminal it is possible
to switch to voltages which are not
present in the segment in which
the terminal is inserted. To sepa-
rate the relay terminal here, insert
the distance terminal
IB IL DOR LV SET (-PAC) before
and after the relay terminal (see
data sheet).
Snapping on the base
Before snapping on the base,
remove the mounted connectors
from the terminal and the adjacent
connector from the neighboring
terminal on the left .
Mount the base onto the rail (A).
Ensure that the featherkeys and
keyways of adjacent terminals
interlock securely (B).
Installing the connector
Install the connector in the order given
(1, 2).
Grâce à un module de relais, il est
possible de connecter des ten-
sions n'existant pas dans le seg-
ment dans lequel le module est
inséré. Dans ce cas, pour délimiter
le module de relais, placer le
module intermédiaire
IB IL DOR LV SET (-PAC) avant et
après celui-ci (cf. fiche technique).
Encliquetage de l’embase
Avant d'encliqueter l'embase,
enlever les connecteurs enfichés
sur le module ainsi que le
connecteur avoisinant du module
gauche adjacent .
Encliqueter l’embase sur le profilé
(A).
Veiller à ce que les languettes et
rainures de connexion des
modules voisins s'engagent bien
les unes dans les autres (B).
Mise en place du connecteur
Installer le connecteur dans l'ordre
indiqué (1, 2).
Mediante un modulo relè, è possi-
bile collegare delle tensioni non
presenti nel segmento dove è inse-
rito il modulo. In questo caso, inse-
rire a monte e a valle del modulo
relè il modulo distanziatore
IB IL DOR LV SET (-PAC) per la
limitazione del modulo relè (vedasi
scheda tecnica).
Innesto dello zoccolo
Prima dell'innesto dello zoccolo,
rimuovere i connettori montati sul
modulo, nonché il connettore
adiacente sul modulo contiguo di
sinistra .
Innestare lo zoccolo sulla guida (A).
Accertarsi che le chiavette e le
scanalature dei moduli adiacenti si
innestino saldamente le une nelle
altre (B).
Applicazione del connettore
Applicare il connettore secondo la
sequenza indicata (1, 2).
Entfernen des Steckers
Hebeln Sie den Stecker durch Druck auf
die hintere Keilverrastung aus (1) und
entnehmen Sie ihn (2).
Entfernen des Sockels
Entnehmen Sie vor dem Entfernen
des Sockels die Stecker der
Klemme und den jeweils
angrenzenden Stecker der
benachbarten Klemmen (links und
rechts).
Lösen Sie den Sockel durch Druck auf
den vorderen und hinteren
Ausrastmechanismus (1) und entnehmen
Sie ihn senkrecht zur Schiene (2).
Removing the connector
Lift the connector by pressing on the
back shaft latch (1) and remove it (2).
Removing the base
Before removing the base, remove
the terminal connectors and each
connector adjacent to the
neighboring terminal (left and
right).
Release the base by pressing on the
front and back snap-on mechanisms (1)
and pull it off perpendicular to the rail (2).
Retrait du connecteur
Soulever le connecteur en appuyant sur
l’arrière du verrouillage (1) et enlever le
connecteur (2).
Retrait de l'embase
Avant d'enlever l'embase, retirer
les connecteurs du module et
chacun des connecteurs
avoisinants des modules
adjacents (à gauche et à droite).
Desserrer l'embase en appuyant sur les
mécanismes de déverrouillage avant et
arrière (1) et la retirer
perpendiculairement au profilé (2).
Rimozione del connettore
Sganciare il connettore premendo la
linguetta di bloccaggio posteriore (1) e
rimuoverlo (2).
Rimozione dello zoccolo
Prima di rimuovere lo zoccolo,
staccare i connettori del modulo ed
i connettori adiacenti dei moduli
contigui (di sinistra e di destra).
Allentare lo zoccolo esercitando una
pressione sui meccanismi di disinnesto
anteriore e posteriore (1) ed estrarlo
perpendicolarmente rispetto alla guida
(2).
Klemmpunktbelegung
1.1, 2.1 –
1.2, 2.2 Relais-Öffnerkontakt
1.3, 2.3 Relais-Hauptkontakt
1.4, 2.4 Relais-Schließerkontakt
Leitungen festklemmen
Isolieren Sie die Leitungen 8 mm ab.
Lösen Sie die Feder durch Druck mit dem
Schraubendreher (1). Stecken Sie die
Leitung in den Klemmpunkt (2).
Befestigen Sie die Leitung durch
Entfernen des Schraubendrehers.
Terminal point assignment
1.1, 2.1 –
1.2, 2.2 Relay N/C contact
1.3, 2.3 Relay main contact
1.4, 2.4 Relay N/O contact
Connecting the cables
Strip 8 mm (0.31") off the cables.
Release the spring by pressing it with the
screwdriver (1). Insert the cable end into
the terminal point (2). Fasten the cable by
removing the screwdriver.
Affectation des bornes
1.1, 2.1 –
1.2, 2.2 Contact du relais à ouverture
1.3, 2.3 Contact principal du relais
1.4, 2.4 Contact du relais à fermeture
Raccordement des câbles
Dénuder les câbles sur 8 mm. Débloquer
le ressort en appuyant dessus avec un
tournevis (1). Insérer le câble dans la
borne (2). Bloquer le câble en retirant le
tournevis.
Assegnazione dei punti di connessione
1.1, 2.1 –
1.2, 2.2 Contatto a relè normalmente chiuso
1.3, 2.3 Contatto di rete a relè
1.4, 2.4 Contatto a relè normalmente aperto
Collegamento dei cavi
Spelare i cavi di 8 mm. Allentare la molla
facendo pressione con il cacciavite (1).
Inserire il cavo nel punto di connessione
(2). Bloccare il cavo rimuovendo il
cacciavite.
Anzeigeelemente
Die Klemme arbeitet einwandfrei,
wenn die grüne LED leuchtet.
Dgrün Busdiagnose
- ein Bus aktiv
- blinkt 0,5 Hz Logikspannung UL
vorhanden, Bus nicht
aktiv
- blinkt 2 Hz Peripheriefehler
- blinkt 4 Hz Lokalbus-Fehler
1, 2,
3, 4 gelb Status des Ausgangs
Indicator elements
The terminal is working correctly
when the green LED lights up.
D green Diagnostics
- on Bus active
- flashing 0.5 Hz Communications power
UL available, bus not
active
- flashing 2 Hz Peripheral fault
- flashing 4 Hz Local bus error
1, 2,
3, 4 yellow Status of the output
Voyants
Le module fonctionne correctement
quand la DEL verte est allumée.
D verte Diagnostic
- allumée Bus actif
- clignote 0,5 Hz Tension logique UL
présente, bus inactif
- clignote 2 Hz Erreur périphérique
- clignote 4 Hz Erreur sur bus local
1, 2,
3, 4 jaune Etat des sorties
Elementi di visualizzazione
Il modulo funziona perfettamente
quando il LED verde è acceso.
D verde Diagnostica
- acceso Bus attivo
- freq. 0,5 Hz Tensione di
alimentazione UL
presente, bus non attivo
- freq. 2 Hz Errore I/O
- freq. 4 Hz Errore del bus locale
1, 2,
3, 4 giallo Stato delle uscite
1
1A 1B
2
11
2
1
3
2
1
3
2
1
3
2
1
3
2
3
11
2
4
11
2
11
3
4
3
4
3
4
3
4
5
1 2
1
2
3
4
1
2
3
4
1 . 1
1 . 2
1 . 3
1 . 4
2 . 1
2 . 2
2 . 3
2 . 4
6
2
11
igitalInp
1
5
6
5
6
5
6
5
6
7
12
D
D O R 4 / W
34
777 7
710800
-
 1
1
-
 2
2
West Control Solutions DO 4/230 Benutzerhandbuch
- Typ
- Benutzerhandbuch
in anderen Sprachen
Verwandte Artikel
-
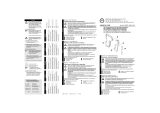 West Control Solutions DO 1/230 Benutzerhandbuch
-
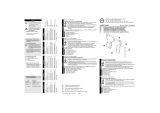 West Control Solutions DI 2/24 Benutzerhandbuch
-
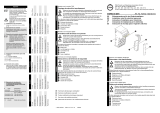 West Control Solutions DI 8/24 Benutzerhandbuch
-
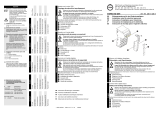 West Control Solutions DO 8/24 Benutzerhandbuch
-
 West Control Solutions DI 16/24 Benutzerhandbuch
-
 West Control Solutions DO 16/24 Benutzerhandbuch
-
 West Control Solutions AI 8/SF Benutzerhandbuch
-
 West Control Solutions UTH 8-DO8 Benutzerhandbuch
-
 West Control Solutions T4/RTD Benutzerhandbuch
-
 West Control Solutions AO 1/SF Benutzerhandbuch


