Samsung UE32D5800VW Schnellstartanleitung

Kategorie
LCD-Fernseher
Typ
Schnellstartanleitung

Dieses Handbuch ist auch geeignet für

LED TV
User Manual
imagine the possibilities
Thank you for purchasing this Samsung product.
To receive more complete service, please register
your product at
www.samsung.com/register
Model _____________ Serial No. _____________
E-MANUAL
© 2011 Samsung Electronics Co., Ltd. All rights reserved.
Contact SAMSUNG WORLDWIDE
If you have any questions or comments relating to Samsung products, please contact the SAMSUNG customer care centre.
Country
Customer Care Centre
Web Site
ALBANIA 42 27 5755 -
AUSTRIA 0810 - SAMSUNG (7267864, € 0.07/min) www.samsung.com
BELGIUM 02-201-24-18 www.samsung.com/be (Dutch)
www.samsung.com/be_fr (French)
BOSNIA 05 133 1999 -
BULGARIA 07001 33 11 www.samsung.com
CROATIA 062 SAMSUNG (062 726 7864) www.samsung.com
CZECH 800 - SAMSUNG (800-726786) www.samsung.com
Samsung Zrt., česká organizační složka, Oasis Florenc, Sokolovská394/17, 180 00, Praha 8
DENMARK 70 70 19 70 www.samsung.com
FINLAND 030 - 6227 515 www.samsung.com
FRANCE 01 48 63 00 00 www.samsung.com
GERMANY 01805 - SAMSUNG(726-7864 € 0,14/Min) www.samsung.com
GREECE
"1. Για προϊόντα πληροφορικής και κινητής τηλεφωνίας
Από σταθερό 80111-SAMSUNG (80111 7267864), αστική χρέωση
Από κινητό 210 6897691
2. Για φωτογραφικές μηχανές, βιντεοκάμερες, τηλεοράσεις & οικιακές συσκευές
Από κινητό και σταθερό 2106293100"
www.samsung.com
HUNGARY 06-80-SAMSUNG(726-7864) www.samsung.com
ITALIA 800-SAMSUNG(726-7864) www.samsung.com
KOSOVO +381 0113216899 -
LUXEMBURG 261 03 710 www.samsung.com
MACEDONIA 023 207 777 -
MONTENEGRO 020 405 888 -
NETHERLANDS 0900-SAMSUNG (0900-7267864) (€ 0,10/Min) www.samsung.com
NORWAY 815-56 480 www.samsung.com
POLAND 0 801 1SAMSUNG(172678) / 022-607-93-33 www.samsung.com
PORTUGAL 80820-SAMSUNG(726-7864) www.samsung.com
RUMANIA "1. 08010 SAMSUNG (72678) – doar din reţeaua Romtelecom, tarif local;
2. 021.206.01.10 – din orice reţea, tarif normal "
www.samsung.com
SERBIA 0700 Samsung (0700 726 7864) www.samsung.com
SLOVAKIA 0800 - SAMSUNG(0800-726 786) www.samsung.com/sk
SPAIN 902 - 1 - SAMSUNG (902 172 678) www.samsung.com
SWEDEN 0771 726 7864 (SAMSUNG) www.samsung.com
SWITZERLAND 0848 - SAMSUNG(7267864, CHF 0.08/min) www.samsung.com/ch
www.samsung.com/ch_fr/(French)
U.K 0330 SAMSUNG (7267864) www.samsung.com
EIRE 0818 717100 www.samsung.com
LITHUANIA 8-800-77777 www.samsung.com
LATVIA 8000-7267 www.samsung.com
ESTONIA 800-7267 www.samsung.com
TURKEY 444 77 11 www.samsung.com
BN68-03729C
BN68-03729C-00
English - 2
For more information on how to use the e-Manual (P. 13)
Figures and illustrations in this User Manual are provided for reference only and may differ from actual product appearance.
Product design and specifications may be changed without notice.
Important Warranty Information Regarding Television Format Viewing
1. Functionalities related to Digital TV (DVB) are only available in countries/areas where DVB-T (MPEG2 and MPEG4 AVC) digital terrestrial
signals are broadcasted or where you are able to access to a compatible DVB-C (MPEG2 and MPEG4 AAC) cable-TV service. Please check
with your local dealer the possibility to receive DVB-T or DVB-C signal.
2. DVB-T is the DVB European consortium standard for the broadcast transmission of digital terrestrial television and DVB-C is that for the broadcast
transmission of digital TV over cable. However, some differentiated features like EPG (Electric Programme Guide), VOD (Video On Demand) and so
on, are not included in this specification. So, they cannot be workable at this moment.
3. Although this TV set meets the latest DVB-T and DVB-C standards, as of [August, 2008], the compatibility with future DVB-T digital terrestrial
and DVB-C digital cable broadcasts cannot be guaranteed.
4. Depending on the countries/areas where this TV set is used some cable-TV providers may charge an additional fee for such a service and
you may be required to agree to terms and conditions of their business.
5. Some Digital TV functions might be unavailable in some countries or regions and DVB-C might not work correctly with some cable service
providers.
6. For more information, please contact your local Samsung customer care centre.
The reception quality of TV may be affected due to differences in broadcasting method between the countries. Please check the TV
performance in the local SAMSUNG Authorized Dealer, or the Samsung Call Centre whether it can be improved by reconfiguring TV
setting or not.
Still image warning
Avoid displaying still images (like jpeg picture files) or still image element (like TV programme logo, panorama or 4:3 image format, stock or news
bar at screen bottom etc.) on the screen. Constant displaying of still picture can cause ghosting of LED screen, which will affect image quality. To
reduce risk of this effect, please follow below recommendations:
• Avoid displaying the same TV channel for long periods.
• Always try do display any image on full screen, use TV set picture format menu for best possible match.
• Reduce brightness and contrast values to minimum required to achieve desired picture quality, exceeded values may speed up the burnout
process.
• Frequently use all TV features designed to reduce image retention and screen burnout, refer to proper user manual section for details.
Securing the Installation Space
Keep the required distances between the product and other objects (e.g. walls) to ensure proper ventilation.
Failing to do so may result in fire or a problem with the product due to an increase in the internal temperature of the product.
When using a stand or wall-mount, use parts provided by Samsung Electronics only.
• If you use parts provided by another manufacturer, it may result in a problem with the product or an injury due to the product falling.
The appearance may differ depending on the product.
Be careful when you contact the TV because some parts can be somewhat hot.
Installation with a stand. Installation with a wall-mount.
10 cm10 cm
10 cm
10 cm
10 cm
10 cm
10 cm
Correct Disposal of This Product (Waste Electrical & Electronic Equipment)
(Applicable in the European Union and other European countries with separate collection systems)
This marking on the product, accessories or literature indicates that the product and its electronic accessories (e.g. charger, headset,
USB cable) should not be disposed of with other household waste at the end of their working life. To prevent possible harm to
the environment or human health from uncontrolled waste disposal, please separate these items from other types of waste and
recycle them responsibly to promote the sustainable reuse of material resources. Household users should contact either the retailer
where they purchased this product, or their local government office, for details of where and how they can take these items for
environmentally safe recycling. Business users should contact their supplier and check the terms and conditions of the purchase
contract. This product and its electronic accessories should not be mixed with other commercial wastes for disposal.
Correct disposal of batteries in this product
(Applicable in the European Union and other European countries with separate battery return systems)
This marking on the battery, manual or packaging indicates that the batteries in this product should not be disposed of with other
household waste at the end of their working life. Where marked, the chemical symbols Hg, Cd or Pb indicate that the battery contains
mercury, cadmium or lead above the reference levels in EC Directive 2006/66. If batteries are not properly disposed of, these
substances can cause harm to human health or the environment. To protect natural resources and to promote material reuse, please
separate batteries from other types of waste and recycle them through your local, free battery return system.
English - 3
Accessories
Please make sure the following items are included with your TV. If any items are missing, contact your dealer.
The items’ colours and shapes may vary depending on the models.
Cables not included in the package contents can be purchased separately.
CAUTION: INSERT SECURELY LEST SHOULD BE DETACHED IN SET
y Remote Control & Batteries (AAA x 2)
y Owner’s Instructions
y Warranty Card / Safety Guide (Not available in some locations)
y Power Cord
y Cleaning Cloth
y Holder Ring (4EA) y Holder-Wire Stand y CI Card Adapter
y Component / AV Adapter y Scart Adapter
An administration fee may be charged if either
(a) an engineer is called out at your request and there is no defect in the product
(i.e. where you have failed to read this user manual)
(b) you bring the unit to a repair centre and there is no defect in the product
(i.e. where you have failed to read this user manual).
The amount of such administration charge will be advised to you before any work or home visit is carried out.
Assembling the Holder-Wire stand
English - 4
Viewing the Control Panel
The product colour and shape may vary depending on the model.
Control Panel (TV Rear)
Remote control sensor It is operating when pressing the buttons on remote control in the direction of the
remote control sensor of TV.
Power Indicator Blinks and turns off when the power is on and lights up in standby mode.
E
(Source)
Toggles between all the available input sources. In the on-screen menu, use this
button as you would use the ENTERE button on the remote control.
MENU Displays an on-screen menu, the OSD (on screen display) of your TV’s features.
Y
Adjusts the volume. In the OSD, use the Y buttons as you would use the
and buttons on the remote control.
z
Changes the channels. In the OSD, use the z buttons as you would use
the and buttons on the remote control.
P
(Power)
Turns the TV on or off.
Standby mode
Do not leave your TV in standby mode for long periods of time (when you are away on a holiday, for example). A small amount
of electric power is still consumed even when the power button is turned off. It is best to unplug the power cord.
English - 5
Viewing the Remote Control
This is a special remote control for the visually impaired persons and has Braille points on the Power, Channel, and
Volume buttons.
Installing batteries (Battery size: AAA)
A B C D
P.MODE SRS
E-MANUAL AD/SUBT.
CONTENT
DUAL I-II
HDMI
Turns the TV on and off.
Displays and selects the available video
sources.
Selects the HDMI mode directly.
Returns to the previous channel.
Cuts off the sound temporarily.
Changes channels.
Displays channel lists on the screen.
Displays the EPG (Electronic Programme
Guide).
Displays information on the TV screen.
Exits the menu.
Press to directly access to channels.
Adjusts the volume.
Alternately select Teletext ON, Double,
Mix or OFF.
Displays the main on-screen menu.
Quickly select frequently used functions.
Displays the My Downloads, Watch TV
and Source.
Returns to the previous menu.
Selects the on-screen menu items and
changes the values seen on the menu.
Buttons used in the Channel List,
Channel Manager, My Downloads,
Network, Allshare™ menu, etc.
Use these buttons in a specific feature.
For details, refer to the e-Manual.
P.MODE: Selects picture mode.
SRS: Selects the TruSurround HD mode.
DUAL I-II: Select Dual sound mode.
E-MANUAL: Displays the e-Manual
guide.
P.SIZE: Selects the picture size.
AD: Audio Description selection. (Not
available in some locations)
SUBT.: Displays digital subtitles.
English - 6
Connecting to an Antenna
When the TV is initially powered on, basic settings proceed automatically.
Preset: Connecting the mains and antenna.
Plug & Play (Initial Setup)
When the TV is initially powered on, a sequence of on-screen prompts will assist in configuring basic settings. Press the
POWER
P
button. Plug & Play is available only when the Input source is set to TV.
To return to the previous step, press the Red button.
1
Selecting a language
Press the or button, then press the ENTER
E
button.
Select the desired OSD (On Screen Display) language.
P
POWER
2
Selecting Store Demo or
Home Use
Press the or button, then press the ENTER
E
button.
Select the Home Use mode. Store Demo mode is for retail environments.
To return the unit’s settings from Store Demo to Home Use (standard):
Press the volume button on the TV. When the OSD volume is displayed,
press and hold MENU for 5 sec.
Store Demo is only for shop display. If you select it, several functions are not
able to use. Please select Home Use when you watch at home.
3
Selecting a country
Press the or button, then press the ENTER
E
button.
Select the appropriate country.
After selecting the country in the Country menu, some models may proceed with an
additional option to setup the pin number.
When you input the PIN number, 0-0-0-0 is not available.
The option may differ depending on country.
4
Setting the Clock Mode Set the Clock Mode automatically or manually.
Auto: Select the time zone (depending on the country) where you are located.
Manual: Allows you to manually set the current date and time.
5
Selecting an antenna
Press the or button, then press the ENTER
E
button.
Select the desired broadcasting signal.
6
Selecting a channel
Press the or button, then press the ENTER
E
button.
Select the channel source to memorise. When setting the antenna source to Cable, a step
appears allowing you to assign numerical values (channel frequencies) to the channels. For more
information, refer to Channel Auto Tuning.
Press the ENTER
E
button at any time to interrupt the memorisation process.
7
Enjoy your TV.
Select the Watch TV. Press the ENTER
E
button.
If you select the Network Settings, set the network. For more information, refer to
“Network menu” in the e-Manual.
If You Want to Reset This Feature...
Select System - Plug & Play (Initial Setup). Enter your 4 digit PIN number. The default PIN number is “0-0-0-0”. If you want to
change the PIN number, use the Change PIN function.
You should do Plug & Play (MENU System) again at home although you did in shop.
If you forget the PIN code, press the remote control buttons in the following sequence in Standby mode, which resets
the PIN to “0-0-0-0”: MUTE 8 2 4 POWER (on).
VHF/UHF Antenna Cable
or
TV Rear Panel
English - 7
Connecting to an AV devices
¦ Available devices: DVD, Blu-ray player, HD cable box, HD STB (Set-Top-Box) satellite
receiver, VCR, Digital Audio System, Amplifier, DVD Home Theatre, PC
HDMI OUT
DVI OUT
AUDIO OUT
R-AUDIO-L
HDMI, HDMI/DVI connection
Using an HDMI cable or HDMI to DVI Cable (up to 1080p)
HDMI IN 1(DVI), 2, 3, 4, PC/DVI AUDIO IN
x
For better picture and audio quality, connect to a digital device using an HDMI cable.
x
An HDMI cable supports digital video and audio signals, and does not require an audio cable.
To connect the TV to a digital device that does not support HDMI output, use an HDMI/DVI and audio cables.
x
The picture may not display normally (if at all) or the audio may not work if an external device that uses an older
version of HDMI mode is connected to the TV. If such a problem occurs, ask the manufacturer of the external
device about the HDMI version and, if out of date, request an upgrade.
x
Be sure to use an HDMI cable with a thickness of 14 mm or less.
x
Be sure to purchase a certified HDMI cable. Otherwise, the picture may not display or a connection error may
occur.
x
A basic high-speed HDMI cable or one with ethernet is recommended. This product does not support the
ethernet function via HDMI.
English - 8
AUDIO OUT
R-AUDIO-L
VIDEO OUT
AUDIO OUT
R-AUDIO-L
P
R
P
B
Y
COMPONENT OUT
W
R
G
R
B
W
R
G
R
B
R
W
R
W
EXT
Y
Y
Component connection
AV connection
SCART connection
Using a Component (up to 1080p) or Audio/Video (480i only) and Scart Cable
In Ext. mode, DTV Out supports MPEG SD Video and Audio only.
To obtain the best picture quality, the Component connection is recommended over the A/V connection.
English - 9
Connecting to a PC and Audio device
¦ Available devices: Digital Audio System, Amplifier, DVD Home Theatre
OPTICAL
Audio connection
Headphones connection
Using an Optical (Digital) Cable or Headphone Connection
DIGITAL AUDIO OUT (OPTICAL)
x
When a digital audio system is connected to the DIGITAL AUDIO OUT (OPTICAL) jack, decrease the volume of
both the TV and the system.
x
5.1 CH (channel) audio is available when the TV is connected to an external device supporting 5.1 CH.
x
When the receiver (home theatre) is set to on, you can hear sound output from the TV’s optical jack. When the TV
is receiving a DTV signal, the TV will send 5.1 CH sound to the home theatre receiver. When the source is a digital
component such as a DVD / Blu-ray player / cable box / STB (Set-Top-Box) satellite receiver and is connected to
the TV via HDMI, only 2 CH audio will be heard from the home theatre receiver. If you want to hear 5.1 CH audio,
connect the digital audio out jack from your DVD / Blu-ray player / cable box / STB satellite receiver directly to an
amplifier or home theatre.
Headphones
H
: You can connect your headphones to the headphones output on your set. While the headphones
are connected, the sound from the built-in speakers will be disabled.
x
Sound function may be restricted when connecting headphones to the TV.
x
Headphone volume and TV volume are adjusted separately.
English - 10
Display Modes (D-Sub and HDMI/DVI Input)
Optimal resolution is 1920 X 1080 @ 60 Hz.
Mode Resolution
Horizontal Frequency
(KHz)
Vertical Frequency (Hz) Pixel Clock Frequency (MHz) Sync Polarity (H / V)
IBM
640 x 350 31.469 70.086 25.175 +/-
720 x 400 31.469 70.087 28.322 -/+
MAC
640 x 480 35.000 66.667 30.240 -/-
832 x 624 49.726 74.551 57.284 -/-
1152 x 870 68.681 75.062 100.000 -/-
VESA DMT
640 x 480 31.469 59.940 25.175 -/-
640 x 480 37.861 72.809 31.500 -/-
640 x 480 37.500 75.000 31.500 -/-
800 x 600 37.879 60.317 40.000 +/+
800 x 600 48.077 72.188 50.000 +/+
800 x 600 46.875 75.000 49.500 +/+
1024 x 768 48.363 60.004 65.000 -/-
1024 x 768 56.476 70.069 75.000 -/-
1024 x 768 60.023 75.029 78.750 +/+
1152 x 864 67.500 75.000 108.000 +/+
1280 x 1024 63.981 60.020 108.000 +/+
1280 x 1024 79.976 75.025 135.000 +/+
1280 x 800 49.702 59.810 83.500 -/+
1280 x 800 62.795 74.934 106.500 -/+
1280 x 960 60.000 60.000 108.000 +/+
1360 x 768 47.712 60.015 85.500 +/+
1440 x 900 55.935 59.887 106.500 -/+
1440 x 900 70.635 74.984 136.750 -/+
1680 x 1050 65.290 59.954 146.250 -/+
VESA DMT / DTV
CEA
1920 x 1080p 67.500 60.000 148.500 +/+
NOTE
x
For HDMI/DVI cable connection, you must use the HDMI IN 1(DVI) jack.
x
The interlace mode is not supported.
x
The set might operate abnormally if a non-standard video format is selected.
x
Separate and Composite modes are supported. SOG(Sync On Green) is not supported.
¦ Using an HDMI cable or HDMI to DVI Cable / a D-sub Cable
Connecting through the HDMI cable may not be supported depending on the PC.
An HDMI cable supports digital video and audio signals, and does not require an audio cable.
AUDIO OUT
AUDIO OUT
DVI OUT
PC OUT
HDMI OUT
PC connection
English - 11
Changing the Input Source
¦ Source List
Use to select TV or other external input sources such as DVD / Blu-ray players / cable box / STB satellite receiver
connected to the TV.
TV / Ext. / PC / AV / Component / HDMI1/DVI / HDMI2 / HDMI3 / HDMI4 / USB / AllShare
In the Source List, connected inputs will be highlighted.
If you want to see connected devices only, move to Connected using or button.
Ext. and PC always stay activated.
If the connected external devices are not highlighted, press the red button. The TV will search for connected
devices.
How to use Edit Name
In the Source, press the TOOLS button, and then you can set an external input sources name you want.
VCR / DVD / Cable STB / Satellite STB / PVR STB / AV Receiver / Game / Camcorder / PC / DVI PC / DVI Devices / TV / IPTV / Blu-ray /
HD DVD / DMA: Name the device connected to the input jacks to make your input source selection easier.
When connecting a PC to the HDMI IN 1(DVI) port with HDMI cable, you should set the TV to PC mode under Edit Name.
When connecting a PC to the HDMI IN 1(DVI) port with HDMI to DVI cable, you should set the TV to DVI PC mode under Edit Name.
When connecting an AV devices to the HDMI IN 1(DVI) port with HDMI to DVI cable, you should set the TV to DVI Devices mode under
Edit Name.
Information
You can see detailed information about the selected external device.
For best cable connection to this product, be sure to use cables with a maximum thickness as below:
x
Maximum thickness - 0.55 inches (14mm)
Connecting to a COMMON INTERFACE slot
Attaching the CI Card Adaptor
Attach the adapter as shown in the right.
To connect the CI CARD Adapter, follow these steps.
Make sure that you attach the adaptor before you mount the TV on a wall.
1. Insert the CI CARD Adapter into the two holes on the product 1.
Please find the two holes on the rear of the TV. The two holes are beside the COMMON
INTERFACE port.
Press it firmly at center of adapter to ensure it is fully lock.
2. Connect the CI CARD Adapter into the COMMON INTERFACE port.
3. Insert the “CI or CI+ CARD”.
Using the “CI or CI+ CARD”
To watch paid channels, the “CI or CI+ CARD” must be inserted.
y If you do not insert the “CI or CI+ CARD,” some channels will display the message “Scrambled
Signal”.
y The pairing information containing a telephone number, the “CI or CI+ CARD” ID the Host ID and other
information will be displayed in about 2~3 minutes. If an error message is displayed, please contact
your service provider.
y When the configuration of channel information has finished, the message “Updating Completed” is
displayed, indicating the channel list is updated.
NOTE
x
You must obtain a “CI or CI+ CARD” from a local cable service provider.
x
When removing the “CI or CI+ CARD”, carefully pull it out with your hands since dropping the “CI or CI+ CARD” may cause damage
to it.
x
Insert the “CI or CI+ CARD” in the direction marked on the card.
x
The location of the COMMON INTERFACE slot may be different depending on the model.
x
“CI or CI+ CARD” is not supported in some countries and regions; check with your authorized dealer.
x
If you have any problems, please contact a service provider.
x
Insert the “CI or CI+ CARD” that supports the current antenna settings. The screen will be distorted or will not be seen.
English - 12
Network Connection
Network Connection - Wireless
You can connect your TV to your LAN through a standard wireless router or modem. To connect wirelessly, you must first
attach a “Samsung Wireless LAN Adapter” (WIS09ABGN, WIS09ABGN2, WIS10ABGN - sold separately) to either the USB 1
(HDD) or USB 2 port on the back of your TV. See the illustration below.
The LAN Port on the Wall
LAN Cable
Wireless IP sharer
(wireless router having
DHCP server)
Samsung Wireless
LAN Adapter
TV Side Panel
Samsung’s Wireless LAN adapter is sold separately and is offered by select retailers and Ecommerce sites. Samsung’s
Wireless LAN adapter supports the IEEE 802.11a/b/g and n communication protocols. Samsung recommends using IEEE
802.11n. When you play video over a network connection, the video may not be played smoothly.
Most wireless network systems incorporate a security system that requires devices that access the network through an access
point or wireless router (typically a wireless IP Sharer) to transmit an encrypted security code called an access key.
If Pure High-throughput (Greenfield) 802.11n mode is selected and the Encryption type is set to WEP, TKIP or TKIP AES
(WPS2Mixed) for your wireless router, Samsung TVs will not support a connection in compliance with new Wi-Fi certification
specifications.
Network Connection - Wired
There are two main ways to connect your TV to your network using cable, depending on your network setup. They are
illustrated below:
The Modem Port on the Wall
TV Rear Panel
LAN CableModem Cable
External Modem
(ADSL / VDSL / Cable TV)
The LAN Port on the Wall
TV Rear Panel
LAN Cable
A network speed of lower than 10 Mbps is not supported.
English - 13
How to use the e-Manual
Screen Display
1
4 5 6
2
3
Basic Features
Picture Menu
Sound Menu
}
Index
E
Enter
e
Exit
1 Currently displayed video, TV programme, etc.
2 The category list. Press or button to select
category you want.
3 Displays the sub-menu list. Use the arrow
buttons on your remote to move the cursor. Press
ENTER
E
button to select the sub-menu you
want.
4 } Blue (Index): Displays the index screen.
5 E Enter: Selects a category or sub-menu.
6 e Exit: Exit the e-Manual.
How to toggle between an e-Manual topic and the corresponding OSD menu(s).
Picture
Picture Mode : Standard
Backlight : 7
Contrast : 95
Brightness : 45
Sharpness : 50
Colour : 50
Tint (G/R) : G50/R50
Screen Adjustment
E-MANUAL
a
Try Now
Basic Features > Picture Menu (3/17)
a
Try Now
b
Home
{
Zoom
}
Index
L
Page
e
Exit
This function is not enabled in some menus.
Method 1 Method 2
1. If you want to use the menu that corresponds to an
e-Manual topic, press the red button to select Try Now.
2. To return to the e-Manual screen, press the E-MANUAL
button.
1. Press the ENTER
E
button when a topic is displayed.
Are you sure?” appears. Select Yes, and then press the
ENTER
E
button. The OSD window appears.
2. To return to the e-Manual screen, press the E-MANUAL
button.
E-MANUAL
You can find instructions about your TV’s features in the e-Manual in your TV. To
use, press the E-MANUAL button on your remote. Move the cursor using the up/
down/right/left buttons to highlight a category, then a topic, and then press the
ENTER
E
button. The e-Manual displays the page you want to see.
You can also access it through the menu:
O
MENU
m
Support e-Manual ENTER
E
To return to the e-Manual main menu, press the E-MANUAL button on the remote.
You cannot use Try Now directly if the TV is set to an external input source.
English - 14
Viewing the Contents
Basic Features > Picture Menu (3/17)
2 3 4 5
a
Try Now
b
Home
{
Zoom
}
Index
L
Page
e
Exit
1
1 Contents Area: Contains the topic contents, if you
selected a sub-menu. To move previous or next
page, press the / button.
2 Try Now: Displays the OSD menu that corresponds
to the topic. To return to the e-Manual screen,
press the E-MANUAL button.
3 Home: Moves to the e-Manual home screen.
4 Zoom: Magnifies a screen. You can scroll through
the magnified screen by using / buttons.
5 L (Page): Moves to previous or next page.
Using the Zoom mode
U
Move
R
Return
Select the Zoom, and then press ENTER
E
to magnify
the screen. You can scroll through the magnified screen
by using the or buttons.
To return to the screen to normal size, press the
RETURN button.
How to search for a topic on the index page
This function may not be supported depending on the language.
1. If you want to search a keyword, press the blue button to select Index.
2. Press the or button to select a character order you want.
3. Press the or button to select a keyword you want to see, and then press the ENTER
E
button.
4. You can view the corresponding e-Manual instruction screen.
To close the Index screen, press the RETURN button.
English - 15
Installing the Wall Mount
The wall mount kit (sold separately) allows you to mount the TV on the wall.
For detailed information on installing the wall mount, see the instructions provided with the wall mount. Contact a technician for
assistance when installing the wall mount bracket.
Samsung Electronics is not responsible for any damage to the product or injury to yourself or others if you elect to install the
TV on your own.
Wall Mount Kit Specifications (VESA)
Case A. Installing the SAMSUNG Wall-Mount Case B. Installing another company’s Wall-Mount
1
1
1
1
Wall mount kit is not supplied but sold separately.
Install your wall mount on a solid wall perpendicular to the floor. When attaching to other building materials, please contact
your nearest dealer. If installed on a ceiling or slanted wall, it may fall and result in severe personal injury.
NOTE
x
Standard dimensions for wall mount kits are shown in the table below.
x
When purchasing our wall mount kit, a detailed installation manual and all parts necessary for assembly are provided.
x
Do not use screws that do not comply with the VESA standard screw specifications.
x
Do not use screws longer than the standard dimension, as they may cause damage to the inside of the TV set.
x
For wall mounts that do not comply with the VESA standard screw specifications, the length of the screws may differ
depending on their specifications.
x
Do not fasten the screws too strongly, this may damage the product or cause the product to fall, leading to personal
injury. Samsung is not liable for these kinds of accidents.
x
Samsung is not liable for product damage or personal injury when a non-VESA or non-specified wall mount is used or
the consumer fails to follow the product installation instructions.
x
Do not exceed 15 degrees tilt when mounting this TV.
Product
Family
inches VESA Spec. (A * B)
Standard
Screw
Quantity
LED-TV
19~22 75 X 75
M4
4
27 200 X 100
32~40 200 X 200
M846~60 400 X 400
65~75 600 X 400
Do not install your Wall Mount Kit while your TV is turned on. It may result in personal injury due to electric
shock.
English - 16
Troubleshooting
If the TV seems to have a problem, first try this list of possible problems and solutions. If none of these troubleshooting tips
apply, visit “www.samsung.com”, then click on Support, or call Samsung customer service centre.
Issues Solutions and Explanations
The TV will not turn on. • Make sure the AC power cord is securely plugged in to the wall outlet and the TV.
• Make sure the wall outlet is working.
• Try pressing the POWER button on the TV to make sure the problem is not the remote. If
the TV turns on, refer to “Remote control does not work” below.
There is no picture/video. • Check cable connections (remove and reconnect all cables connected to the TV and
external devices).
• Set your external device’s (Cable/Set top Box, DVD, Blu-ray etc) video outputs to match
the connections to the TV input. For example, if an external device’s output is HDMI, it
should be connected to an HDMI input on the TV.
• Make sure your connected devices are powered on.
• Be sure to select the TV’s correct source by pressing the SOURCE button on the remote
control.
• Reboot the connected device by reconnecting the device’s power cable.
The remote control does not work. • Replace the remote control batteries with the poles (+/–) in the right direction.
• Clean the sensor’s transmission window on the remote.
• Try pointing the remote directly at the TV from 5~6 feet away.
The cable/set top box remote control
doesn’t turn the TV on or off, or
adjust the volume.
• Program the Cable/Set top box remote control to operate the TV. Refer to the Cable/Set
user manual for the SAMSUNG TV code.
You can keep your TV as optimum condition to upgrade the latest firmware on web site (samsung.com -> Support ->
Downloads) by USB.
This TFT LED panel uses a panel consisting of sub pixels which require sophisticated technology to produce. However,
there may be a few bright or dark pixels on the screen. These pixels will have no impact on the performance of the
product.
Licence
List of Features
Excellent Digital Interface & Networking: With a built-in HD digital tuner, nonsubscription HD broadcasts can be viewed without
a cable box / STB (Set-Top-Box) satellite receiver.
My Downloads
Allows you to play music files, pictures, and movies saved on a USB device.
AllShare™
AllShare™ connects your TV and compatible Samsung mobile phones/devices through a network.
Anynet+(HDMI-CEC)
Allows you to control all connected Samsung devices that support Anynet+ with your Samsung TV’s remote.
English - 17
Securing the TV to the Wall
Caution: Pulling, pushing, or climbing onto the TV may cause the TV to fall. In particular, ensure that your
children do not hang over or destabilize the TV; doing so may cause the TV to tip over, resulting in serious
injuries or death. Follow all safety precautions provided on the included Safety Flyer. For added stability, install
the anti-fall device for safety purposes, as follows.
To avoid the TV from falling
1. Put the screws into the clamps and firmly fasten them onto the
wall. Confirm that the screws have been firmly installed onto the
wall.
You may need additional material such as an anchor
depending on the type of wall.
Since the necessary clamps, screws, and string are not
supplied, please purchase these additionally.
2. Remove the screws from the centre back of the TV, put the
screws into the clamps, and then fasten the screws onto the TV
again.
Screws may not be supplied with the product. In this case,
please purchase the screws of the following specifications.
Screw Specifications
x
For a 32 ~ 75 inch LED TV: M8
3. Connect the clamps fixed onto the TV and the clamps fixed onto
the wall with a strong string and then tie the string tightly.
NOTE
x
Install the TV near to the wall so that it does not fall backwards.
x
It is safe to connect the string so that the clamps fixed on the wall are equal to or lower than the clamps fixed on
the TV.
x
Untie the string before moving the TV.
4. Verify all connections are properly secured. Periodically check connections for any sign of fatigue for failure. If you have any
doubt about the security of your connections, contact a professional installer.
Storage and Maintenance
If you remove the attached sticker on the TV screen, clean the residues and then watch TV.
Do not spray water or a cleaning agent directly onto the
product. Any liquid that goes into the product may cause a
failure, fire, or electric shock.
Clean the product with a soft cloth dapped in a small amount
of water.
Wall
English - 18
Specifications
Display Resolution 1920 x 1080
Environmental
Considerations
Operating Temperature
Operating Humidity
Storage Temperature
Storage Humidity
10°C to 40°C (50°F to 104°F)
10% to 80%, non-condensing
-20°C to 45°C (-4°F to 113°F)
5% to 95%, non-condensing
TV System Analogue: B/G, D/K, L, I (Depending on your country selection)
Digital: DVB-T/DVB-C
Colour/Video System Analogue: PAL, SECAM, NTSC-4.43, NTSC-3.58, PAL60
Digital: MPEG-2 MP@ML, MPEG-4, H.264/AVC MP@L3, [email protected], [email protected]
Sound System BG, DK, L, NICAM, MPEG1, DD, DD+, HEAAC
HDMI IN Video: 1080 24p, 1080p, 1080i, 720p, 576p, 480p
Audio: 2Ch Linear PCM 32/44.1/48kHz, 16/20/24bits.
Stand Swivel (Left / Right) -20˚ ~ 20˚
Model Name UE32D5800 UE40D5800
Screen Size 32 inches 40 inches
Sound
(Output) 10 W X 2
Dimensions (WxDxH)
Body
With stand
745.8 X 29.9 X 443.4 (mm)
745.8 X 241.3 X 518.0 (mm)
933.0 X 29.9 X 548.8 (mm)
933.0 X 241.3 X 622.2 (mm)
Weight
Without Stand
With Stand
6.7 kg
7.9 kg
10.7 kg
12.1 kg
Design and specifications are subject to change without prior notice.
For information about power supply, and more about power consumption, refer to the label attached to the product.
This page is intentionally
left blank.
Deutsch - 2
Weitere Informationen zur Verwendung des e-Manuals (S. 13)
Die Abbildungen und Illustrationen in diesem Handbuch dienen nur zur Information und können vom tatsächlichen Aussehen
des Geräts abweichen. Änderungen an Ausführung und technischen Daten vorbehalten.
Wichtige Garantieinformationen zum Bildschirmformat des Fernsehers
1.
Die Funktionalitäten für Digitalfernsehen (DVB) stehen nur in Ländern/Regionen zur Verfügung, in denen digitale terrestrische DVB-T-Signale (MPEG2
und MPEG4 AVC) gesendet werden oder in denen Sie Zugang zu einem kompatiblen Kabelfernsehdienst mit DVB-C (MPEG2 und MPEG4 AAC)
haben können. Fragen Sie Ihren örtlichen Händler, wenn Sie Informationen über die Verfügbarkeit von DVB-T oder DVB-C in Ihrer Gegend benötigen.
2. DVB-T ist der Standard des europäischen DVB-Konsortiums für die terrestrische Versorgung mit digitalem terrestrischem Fernsehen, und DVB-C
ist das Konsortium für die Versorgung mit digitalem Kabelfernsehen. Allerdings werden manche Unterscheidungsmerkmale wie EPG (elektrische
Programmzeitschrift), VOD (Video on Demand) usw. in dieser Spezifikation nicht berücksichtigt. Deshalb können sie zum jetzigen Zeitpunkt noch nicht
eingesetzt werden.
3. Zwar hält dieses Fernsehgerät die aktuellen Standards der DVB-T- und DVB-C-Spezifikationen [Version August 2008] ein, aber es kann nicht
garantiert werden, dass die Kompatibilität mit zukünftigen digitalen terrestrischen DVB-T und DBV-C-Signalen gewahrt bleibt.
4.
In Abhängigkeit von den Ländern/Regionen, in denen dieses Fernsehgerät eingesetzt wird, verlangen manche Kabelfernsehanbieter zusätzliche
Gebühren für solch einen Dienst, und möglicherweise wird verlangt, dass Sie den Vertragsbedingungen des Unternehmens zustimmen.
5. Manche Digitalfernsehfunktionen sind in einigen Ländern oder Regionen möglicherweise nicht verfügbar, und DVB-C-Signale kann das Gerät
bei manchen Kabelfernsehanbietern möglicherweise nicht fehlerfrei verarbeiten.
6. Für weitere Informationen setzen Sie sich bitte mit dem Samsung-Kundendienstzentrum in Verbindung.
Die Empfangsqualität des Fernsehgeräts kann durch Unterschiede bei den Sendeverfahren in verschiedenen Ländern beeinträchtigt
werden. Kontrollieren Sie die Leistung des Fernsehgeräts bei Ihrem örtlichen SAMSUNG-Händler oder wenden Sie sich an das
Samsung-Callcenter um festzustellen, ob sich die Empfangsqualität durch Ändern der Fernseheinstellungen verbessern lässt.
Warnung bei Standbildern
Vermeiden Sie die Anzeige von Standbildern (wie z.B. JPEG-Bilddateien) oder Standbildelementen (wie z.B. Senderlogos, Panorama- oder
4:3-Bilder, Aktien- oder Laufschriften mit Nachrichten am unteren Bildschirmrand usw.) auf dem Bildschirm. Durch lang anhaltende Anzeige von
Standbildern kann es zu Schattenbildern auf dem LED-Bildschirm kommen, wodurch die Bildqualität beeinträchtigt wird. Um die Gefahr dieses
Effekts zu vermindern, befolgen Sie bitte die nachfolgenden Empfehlungen:
• Vermeiden Sie es, für lange Zeit denselben Fernsehsender anzuzeigen.
• Versuchen Sie, Abbildungen immer als Vollbild anzuzeigen. Verwenden Sie das Bildformatmenü des Fernsehgeräts, um die beste
Anzeigemöglichkeit zu finden.
• Reduzieren Sie die Helligkeits- und Kontrastwerte soweit wie möglich, um immer noch die gewünschte Bildqualität zu erreichen. Zu hohe
Werte können das Ausbrennen beschleunigen.
• Verwenden Sie regelmäßig alle Funktionen Ihres Fernsehgeräts, die dazu dienen, das Einbrennen von Bildern und das Ausbrennen des
Bildschirms zu reduzieren. Weitere Informationen hierzu finden Sie in den entsprechenden Abschnitten des Benutzerhandbuchs.
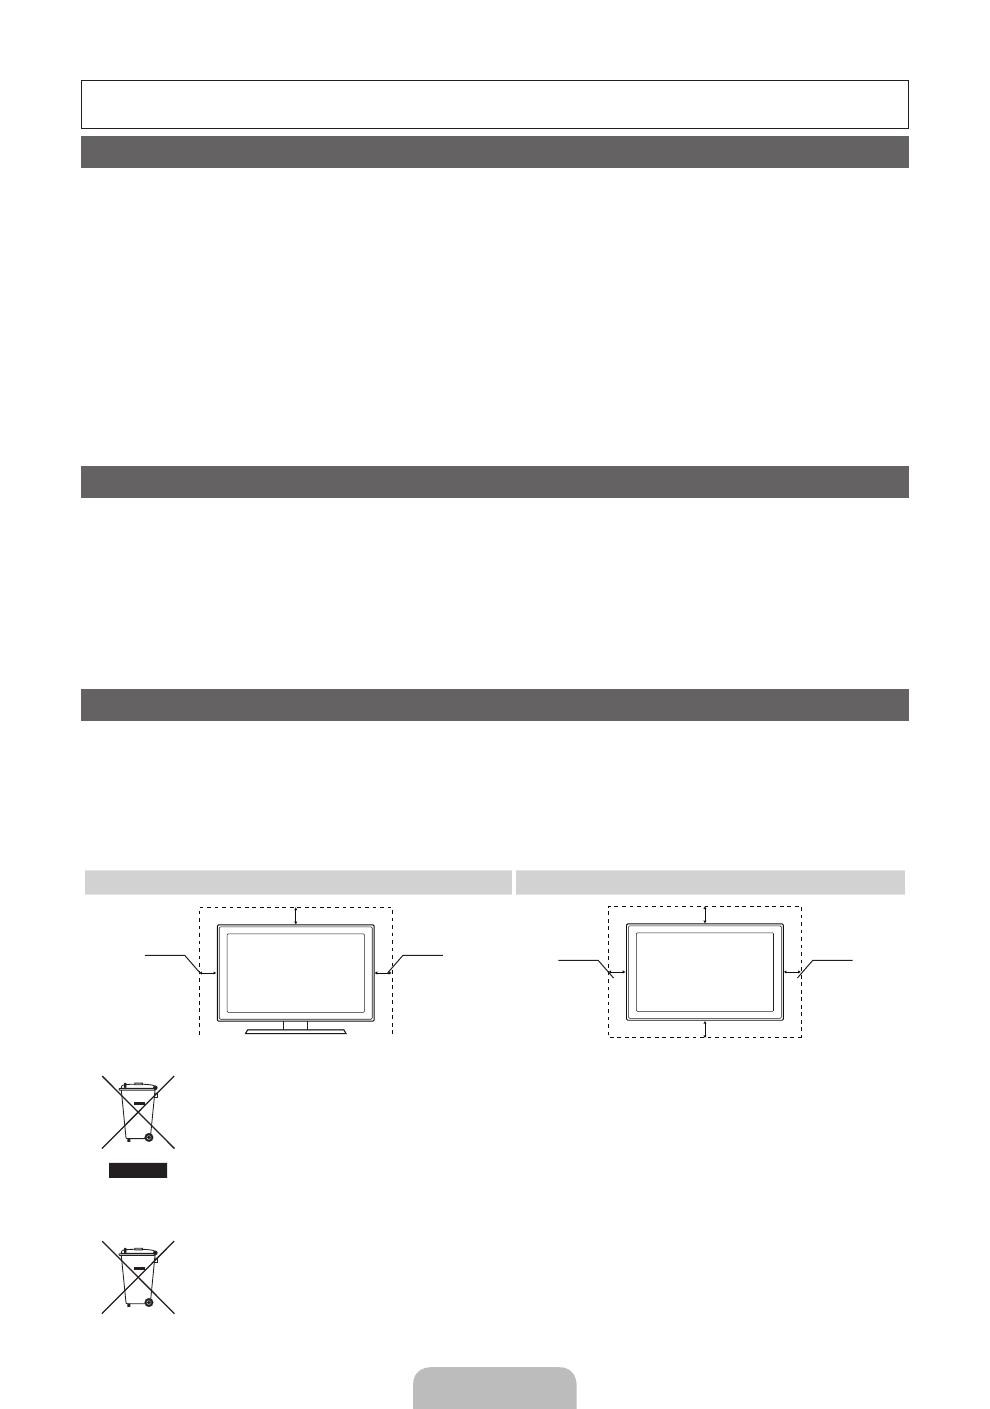
Absichern des Aufstellbereichs
Halten Sie die erforderlichen Abstände zwischen dem Gerät und anderen Objekten (z.B. Wänden) ein, um eine ausreichende Lüftung
sicherzustellen. Wenn Sie dies nicht tun, besteht die Gefahr, dass aufgrund eines Anstiegs der Temperatur im Innern des Geräts ein Brand
ausbricht oder andere Probleme mit dem Gerät auftreten.
Wenn Sie einen Standfuß oder eine Wandhalterung einsetzen, verwenden Sie ausschließlich Teile von Samsung Electronics.
• Wenn Sie Teile eines anderen Herstellers verwenden, kann es zu Problemen mit dem Gerät oder zu Verletzungen kommen, weil das Gerät
herunterllt.
Das Aussehen kann sich je nach Gerät unterscheiden.
Gehen Sie beim Anschließen des Fernsehgeräts vorsichtig vor, da einige Teile warm werden können.
Aufstellen des Geräts mit dem Standfuß Installation des Geräts mit der Wandhalterung
10 cm10 cm
10 cm
10 cm
10 cm
10 cm
10 cm
Ordnungsgeße Entsorgung dieses Geräts (Elektro- und Elektronik-Altgeräte)
(Anwendbar in der Euroischen Union und anderen euroischen Staaten mit Systemen zur getrennten Sammlung von Wertstoffen)
Diese Kennzeichnung auf dem Gerät, dem Zuber oder der Dokumentation bedeutet, dass das Gerät sowie das elektronische Zuber (z.B.
Ladegerät, Headset, USB-Kabel) am Ende ihrer Lebensdauer nicht im normalen Hausmüll entsorgt werden dürfen. Entsorgen Sie diese Geräte bitte
getrennt von anderen Abllen, um der Umwelt bzw. der menschlichen Gesundheit nicht durch unkontrollierte Müllbeseitigung zu schaden. Recyceln
Sie das Gerät, um die nachhaltige Wiederverwertung von stofflichen Ressourcen zu rdern. Private Nutzer sollten den ndler, bei dem das
Produkt gekauft wurde, oder die zuständigen Berden kontaktieren, um in Erfahrung zu bringen, wie sie das Gerät auf umweltfreundliche Weise
recyceln können. Gewerbliche Benutzer wenden sich an ihren Lieferanten und überpfen die Konditionen Ihres Kaufvertrags. Dieses Get und
seine elektronischen Zuberteile rfen nicht zusammen mit anderem Gewerbemüll entsorgt werden.
Ordnungsgeße Entsorgung der Batterien dieses Produkts
(Anzuwenden in den ndern der Europäischen Union und anderen europäischen Ländern mit einem separaten Sammelsystem r
Batterien)
Diese Kennzeichnung auf der Batterie, dem Handbuch oder der Verpackung bedeutet, dass die Batterie am Ende ihrer Lebensdauer nicht
im normalen Hausll entsorgt werden darf. Die Kennzeichnung mit den chemischen Symbolen r Hg, Cd oder Pb bedeutet, dass die
Batterie Quecksilber, Cadmium oder Blei in Mengen enthält, die die Grenzwerte der EU-Direktive 2006/66 übersteigen. Wenn Batterien nicht
ordnungsgeß entsorgt werden, können diese Substanzen die Gesundheit von Menschen oder die Umwelt gefährden. Zum Schutz der
narlichen Ressourcen und zur Förderung der Wiederverwertung von Materialien trennen Sie die Batterien von anderem Müll und hren Sie sie
Ihrem örtlichen Recyclingsystem zu.
  • Page 1 1
  • Page 2 2
  • Page 3 3
  • Page 4 4
  • Page 5 5
  • Page 6 6
  • Page 7 7
  • Page 8 8
  • Page 9 9
  • Page 10 10
  • Page 11 11
  • Page 12 12
  • Page 13 13
  • Page 14 14
  • Page 15 15
  • Page 16 16
  • Page 17 17
  • Page 18 18
  • Page 19 19
  • Page 20 20
  • Page 21 21
  • Page 22 22
  • Page 23 23
  • Page 24 24
  • Page 25 25
  • Page 26 26
  • Page 27 27
  • Page 28 28
  • Page 29 29
  • Page 30 30
  • Page 31 31
  • Page 32 32
  • Page 33 33
  • Page 34 34
  • Page 35 35
  • Page 36 36
  • Page 37 37
  • Page 38 38
  • Page 39 39
  • Page 40 40
  • Page 41 41
  • Page 42 42
  • Page 43 43
  • Page 44 44
  • Page 45 45
  • Page 46 46
  • Page 47 47
  • Page 48 48
  • Page 49 49
  • Page 50 50
  • Page 51 51
  • Page 52 52
  • Page 53 53
  • Page 54 54
  • Page 55 55
  • Page 56 56
  • Page 57 57
  • Page 58 58
  • Page 59 59
  • Page 60 60
  • Page 61 61
  • Page 62 62
  • Page 63 63
  • Page 64 64
  • Page 65 65
  • Page 66 66
  • Page 67 67
  • Page 68 68
  • Page 69 69
  • Page 70 70
  • Page 71 71
  • Page 72 72
  • Page 73 73
  • Page 74 74

Samsung UE32D5800VW Schnellstartanleitung

Kategorie
LCD-Fernseher
Typ
Schnellstartanleitung
Dieses Handbuch ist auch geeignet für